Loading ...
Loading ...
Loading ...
49-7000174 Rev. 5 9
ENGLISH
INSTALLATION
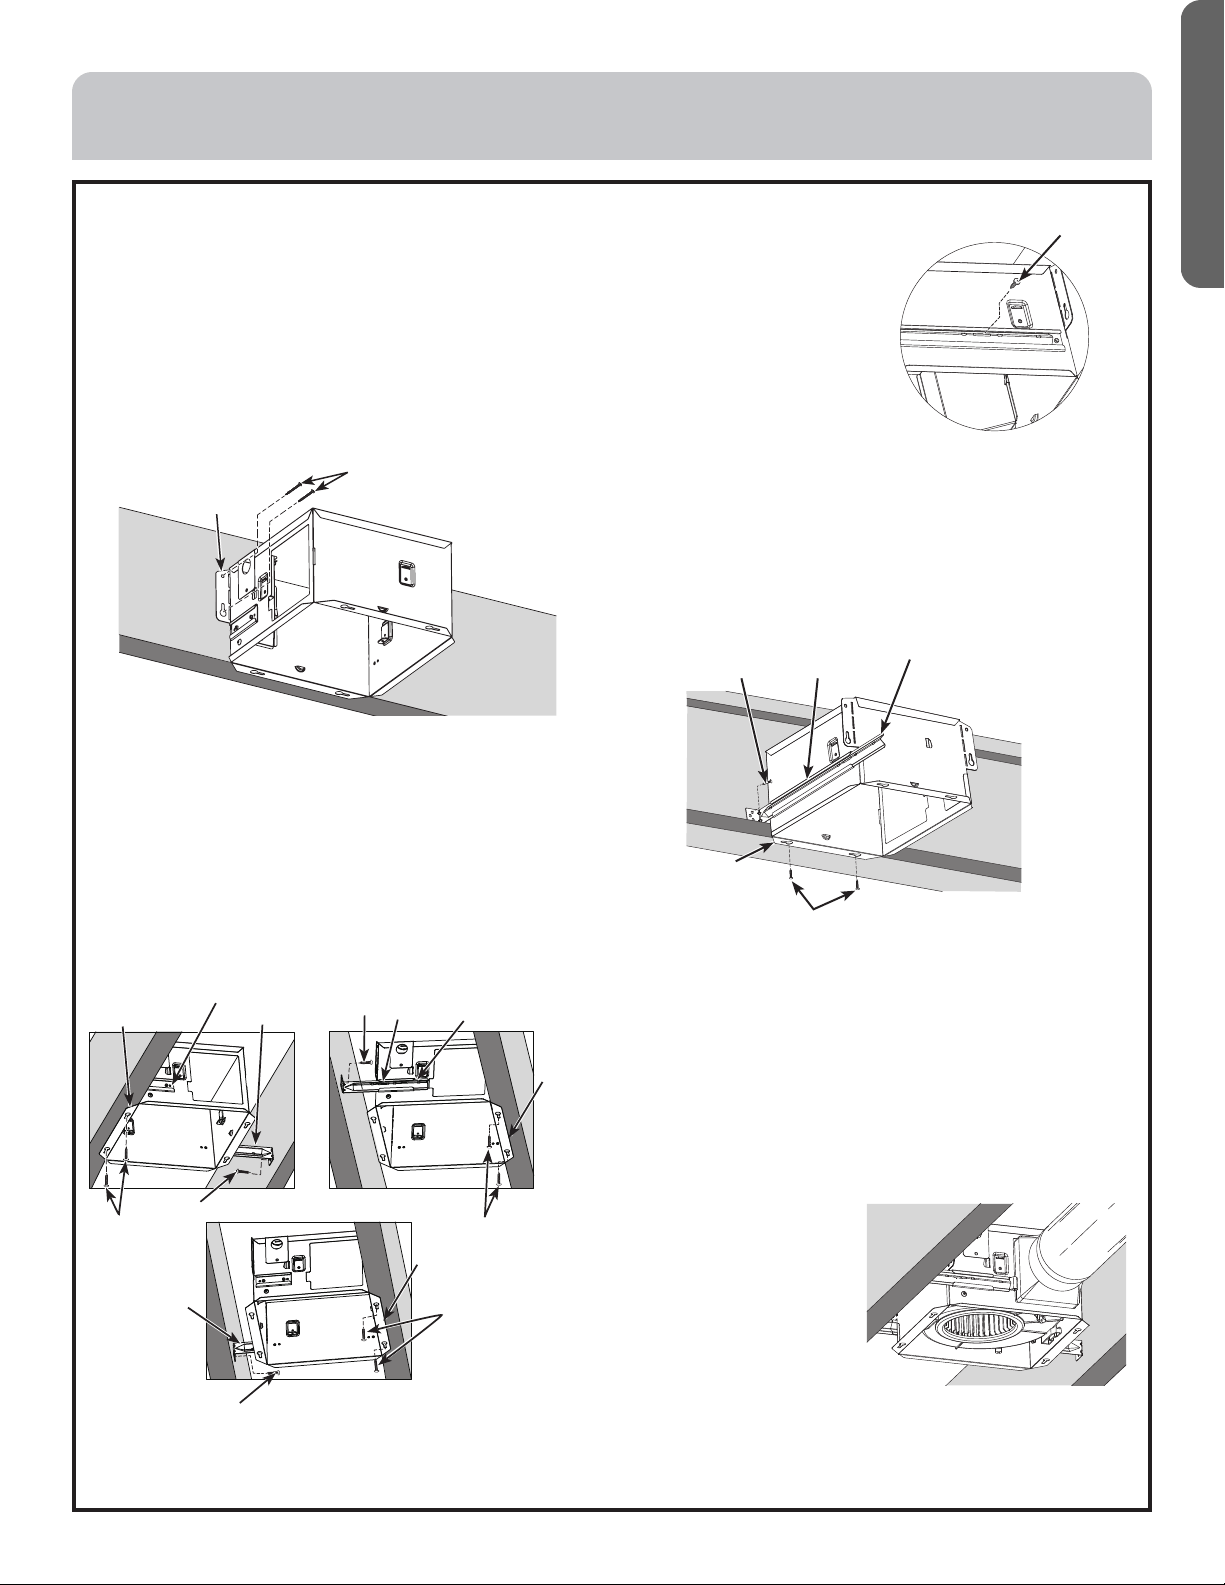
STEP 1. INSTALL HOUSING
IMPORTANT: This product can only be mounted to a
ceiling.
A. NEW CONSTRUCTION INSTALLATION: The housing
can be mounted directly to the joist or i-joist using the
side flange or mounted using hanger bars provided and
the bottom flange
I. Mounting Joist: Make sure that the bottom edge of
the housing is in contact with the bottom of the joist.
Screw the housing assembly to the joist using the
side flanges and the 4 screws (A) provided.
II. Hanger bar and bottom flange between framing
mounting: To mount, slide hanger bar into the
housing channel, adjusting it to fit between the
framing. If the spacing between the joists is 16 to
17", the housing channel on the side opposite to the
damper should be used.
Place the housing so the bottom flange of the
housing is in contact with the bottom of the joist.
Using screws (A) provided, secure the bottom flange
to the joist and screw the hanger bar to the opposite
joist.
Using screw (B) provided,
attach hanger bar to
housing.
NOTE: If the housing
needs to be mounted in
a specific orientation to
accommodate for duct
routing or electrical, 2X4
framing can be used for
housing installation.
III. Hanger bar and bottom flange mounting: Slide
hanger bar into the housing channel. Place the
housing so the bottom flange of the housing is in
contact with the bottom of the joist. Using screws
(A) provided, attach the flange to the joist. Screw
the hanger bar to joist using screws (A) provided
and attach hanger bar to housing using screws (B)
provided.
IV. Mount with hanger bars provided: The hanger bars
span up to 24" and are compatible with all types of
framing.
Slide hanger bars into the housing channels,
extending it to fit between the framing. Place the
housing so that the hanger bar tabs are in contact
with the bottom of the joist framing. Screw the
hanger bars to the joist using an screw (A) through
one of the holes on each end tab of the hanger bars.
Secure the hanger bars together using screw (B)
through one of the available slots on the hanger
bars.
NOTE: To avoid
motor bearing
damage and noisy
and/or unbalanced
impellers, keep
drywall spray,
construction dust,
etc. off of unit. A
cardboard dust cover is provided with exhaust fan
that can be used to protect the motor assembly
during construction.
Screws
Side Flange
Bottom Flange
Bottom
Flange
Bottom
Flange
Hanger
Bar
Channel on Housing
Channel on Housing
Hanger Bar
Hanger Bar
Screws
Screws
Screws
Screw
Screw
Screw
Screw
Bottom
Flange
Screws
Screw
Channel on
Housing
Hanger Bar
Loading ...
Loading ...
Loading ...