Oven Toast Grill
www.philips.co.in
Please read guidelines provided in this DFU on important instructions,
appliance usage and warranty before using the product.
1. Introduction
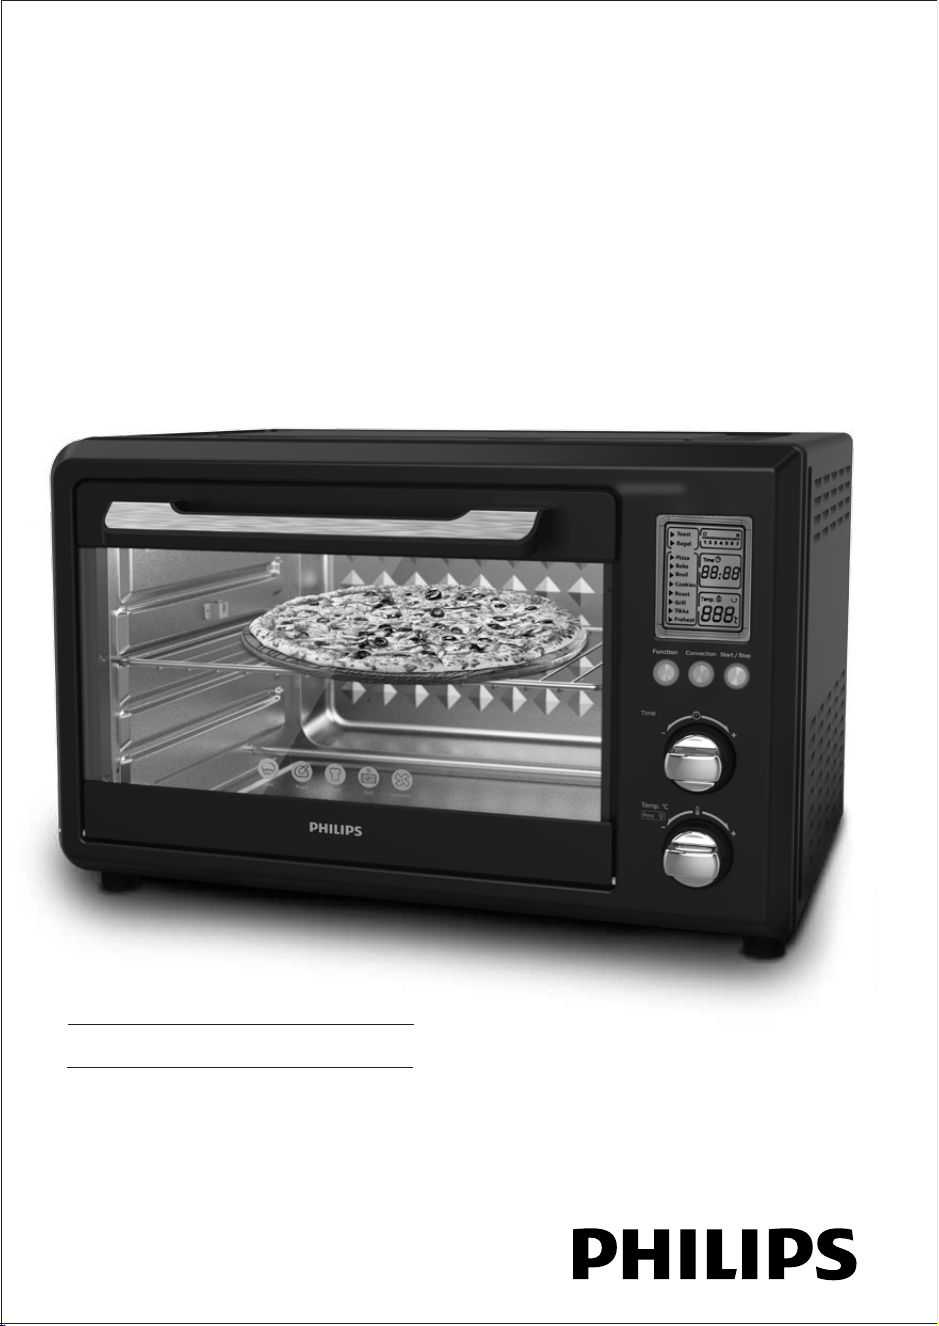
Philips brings to you an OTG powered with LCD panel
Technical specication
Model No. HD6976/00
Voltage 220-240V~, 50/60Hz
Watts 2000W
Capacity 36L
Timer Up to 90 mins
Temperature 230 degree Celsius
Power cord length 1m
Net Weight 9.0kg
Product size (approx) 525x441x332 mm
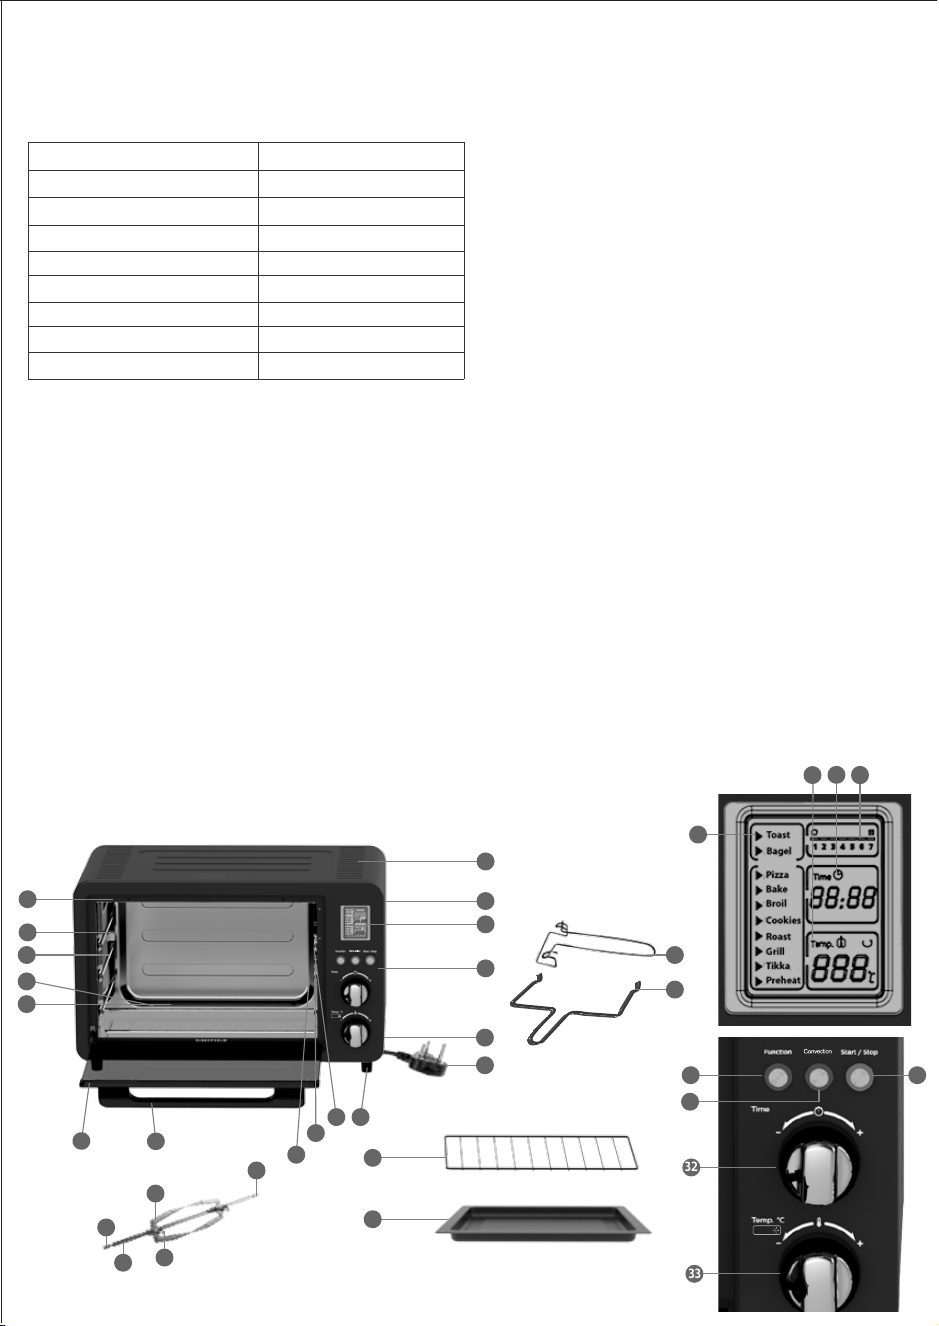
2. General description
1. Air vents
2. Housing
3. Display
4. Cord storage
5. Power cord with plug
6. Control panel
7. Feet
8. Rotisserie drive mount
9. Fan
10. Light
11. Glass door
12. Handle
13. Crumb Tray
14. Lower heating elements (x2)
15. Wire rack
16. Baking tray
17. Rails
18. Rotisserie support mount
19. Upper heating elements (x2)
20.Spit
21. Rotisserie notch
22. Skewer screw (x2)
23. Skewer (x2)
24. Spit holder
25. Baking tray tong
26. Rotisserie tong
27. Display browning level 1-7.
28. Display time
29. Display temperature
30. Start/stop button with indicator
31. Convection button with indicator
32. Time control knob
33. Temp and light control knob
34. Function button with indicator
35. Preset menu
3. Important
Read this user manual carefully before you use the
appliance, and save the user manual for future reference.
Danger
Warning
• This appliance is not intended for use by person
(children) with reduced physical, sensory, mental
capabilities, lack of experience & knowledge unless
they have been given supervision on instruction
concerning use of the appliance by a person
responsible for their safety.
• Children should be supervised to ensure that they
don’t play with the appliance.
• Keep the appliance and its cord out of reach of
children. Do not let the mains cord hang over the edge
of the table or worktop on which the appliance stands.
• The appliance is not intended to be operated by means
of an external timer or a separate remote control system.
• The accessible surfaces may become hot during the
use.
• Check if the voltage indicated on the appliance
corresponds to the local mains voltage before you
connect the appliance.
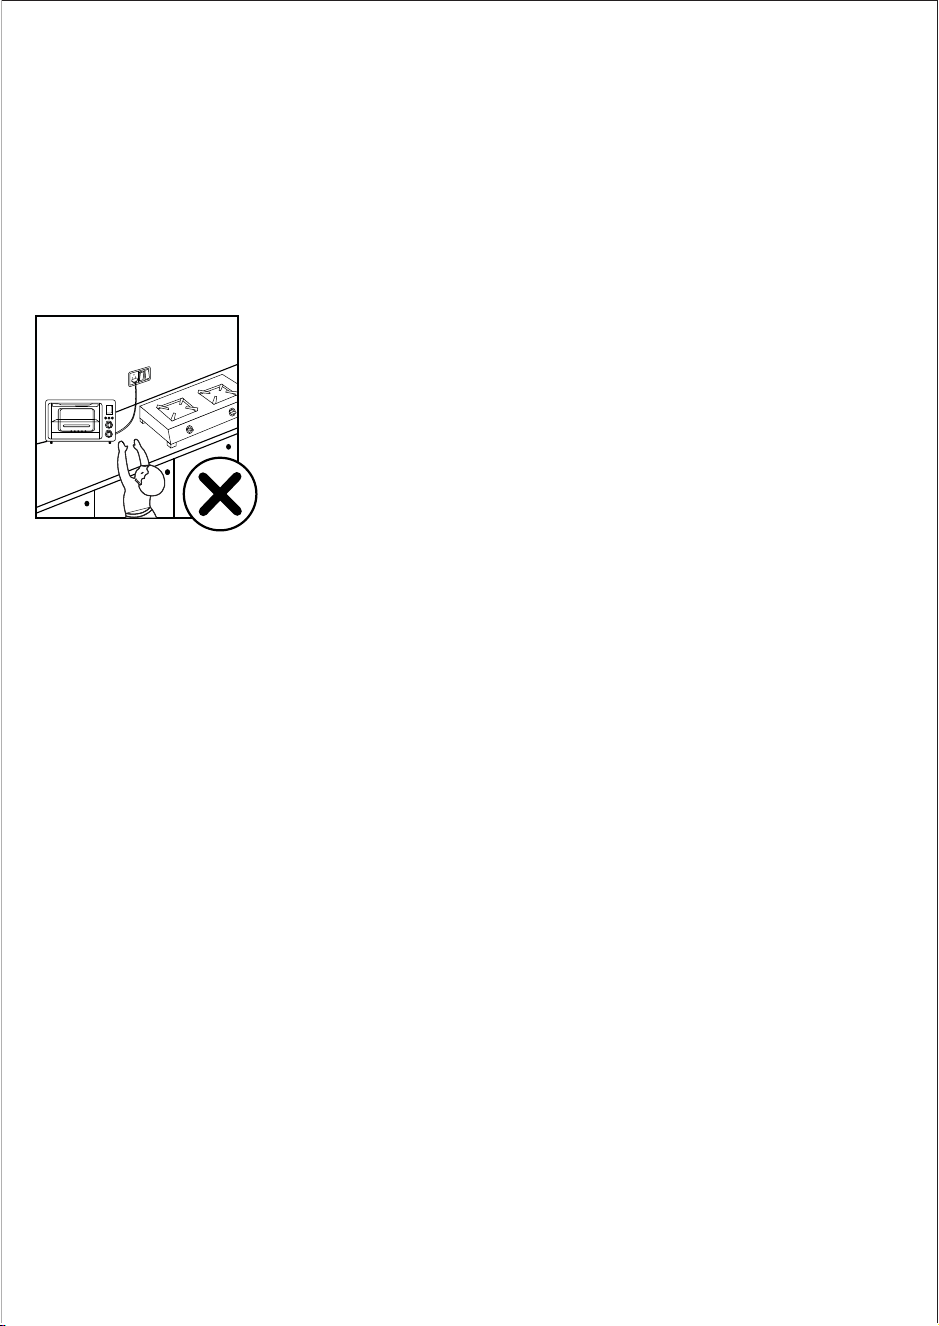
• Only connect the appliance to an earthed wall socket.
Always make sure that the plug is inserted rmly into
the wall socket.
• Do not use the appliance when the mains cord, the plug
or other components are damaged. Only the company
or a service center authorized by Philips must replace it.
• Do not use the appliance for any other purpose than
described in this manual
• Do not plug in the appliance or operate the control
panel with wet hands.
• Don’t cook acidic food directly in this product for longer
coating life of accessories
Caution
This appliance is intended for household use only.
If the appliance is used improperly or for
professional or semi-professional purposes or if it
is not used according to the instructions in the user
manual, the guarantee becomes invalid and Philips
refuses any liability for damage caused.
• It is acceptable to have water droplets formed
due to condensation from the moisture escaping
from food while cooking, in the cool parts of
product i.e. handles & LCD panel. In such case
either wipe with cloth or run machine after
preheating it.
• Never use any accessories or parts from other
manufacturers or that Philips does not specically
recommend. If you use such accessories or parts,
your guarantee becomes invalid.
• Baking trays and cup cake mould made up of any
metal or good quality silicone which hold higher
temperature can be used.
• Don’t place it on a working or still hot stove or
cooker
• Always place the appliance on a stable level and
horizontal surface.
• Always unplug the appliance after use.
• Always let the appliance cool down before you
clean or move it.
• Don’t sprinkle or pour water on front glass when
it is hot.
• The accessible surfaces become hot when the
appliance is operating. Always use oven
gloves/tongs.
• Do not lift and move the appliance while it is
in use.
• Do not touch moving parts.
• Do not expose the appliance to direct sunlight.
• Do not insert metallic objects or alien substances
into the air vents.
• Don’t place anything which catches re near OTG
while it is in use.
• Always clean the appliance after use.
• Leave a free space of at least 10cm above, behind
and on both sides of the appliance to prevent
damage due to radiated heat.
11. Warranty and Service
For any information or problem, contact your local Philips dealer or authorized service center. For a list of authorized
Philips service centers visit:www.philips.co.in or contact our consumer care at 1800 102 2929 (Toll free) or 1860 180
1111 (standard call rates apply)
11.1 Warranty Card
This apparatus is covered under warranty against any defect due to defective material or workmanship for TWO
YEARS from the date of purchase. Should a defect develop during the period of warranty, Philips Domestic
Appliances India Ltd. undertakes to repair the apparatus FREE OF CHARGE through the dealer from whom it has
been purchased or at any of the Philips authorized service centres.
The warranty is not valid in case:
1. Apparatus is not used according to user manual.
2. Defects caused by improper or reckless use.
3. Repairs done by persons other than Philips authorized service center.
4. Modications of any nature made in the apparatus.
5. Tampered serial number
6. Incomplete warranty card after purchase
7. Product if used for commercial purpose (i.e. other than domestic use).
8. Usage of parts not recommended by Philips or those made by other manufacturers.
9. Damage to the door glass due to mishandling, negligence, breakage or cracking
All consumable and parts susceptible to normal wear and tear are not covered under warranty.
Week/S.No.
Date of Purchase
Dealer’s name
Dealer’s stamp
Customers name and address
Model No.
Dealer’s signature
www.philips.co.in
100% recycled paper
1
2
3
5
4
6
6
12
1
14
12
16
18
2729
30
31
19
17
15
11
8
10
13
28
5
17
35
7
20
22
21
23
24
26
25
32
33
34
HD6976/00
Press
Press
9
300005415463
Oven Toast Grill
www.philips.co.in
Please read guidelines provided in this DFU on important instructions,
appliance usage and warranty before using the product.
1. Introduction
Philips brings to you an OTG powered with LCD panel
Technical specication
Model No. HD6976/00
Voltage 220-240V~, 50/60Hz
Watts 2000W
Capacity 36L
Timer Up to 90 mins
Temperature 230 degree Celsius
Power cord length 1m
Net Weight 9.0kg
Product size (approx) 525x441x332 mm
2. General description
1. Air vents
2. Housing
3. Display
4. Cord storage
5. Power cord with plug
6. Control panel
7. Feet
8. Rotisserie drive mount
9. Fan
10. Light
11. Glass door
12. Handle
13. Crumb Tray
14. Lower heating elements (x2)
15. Wire rack
16. Baking tray
17. Rails
18. Rotisserie support mount
19. Upper heating elements (x2)
20.Spit
21. Rotisserie notch
22. Skewer screw (x2)
23. Skewer (x2)
24. Spit holder
25. Baking tray tong
26. Rotisserie tong
27. Display browning level 1-7.
28. Display time
29. Display temperature
30. Start/stop button with indicator
31. Convection button with indicator
32. Time control knob
33. Temp and light control knob
34. Function button with indicator
35. Preset menu
3. Important
Read this user manual carefully before you use the
appliance, and save the user manual for future reference.
Danger
Warning
• This appliance is not intended for use by person
(children) with reduced physical, sensory, mental
capabilities, lack of experience & knowledge unless
they have been given supervision on instruction
concerning use of the appliance by a person
responsible for their safety.
• Children should be supervised to ensure that they
don’t play with the appliance.
• Keep the appliance and its cord out of reach of
children. Do not let the mains cord hang over the edge
of the table or worktop on which the appliance stands.
• The appliance is not intended to be operated by means
of an external timer or a separate remote control system.
• The accessible surfaces may become hot during the
use.
• Check if the voltage indicated on the appliance
corresponds to the local mains voltage before you
connect the appliance.
• Only connect the appliance to an earthed wall socket.
Always make sure that the plug is inserted rmly into
the wall socket.
• Do not use the appliance when the mains cord, the plug
or other components are damaged. Only the company
or a service center authorized by Philips must replace it.
• Do not use the appliance for any other purpose than
described in this manual
• Do not plug in the appliance or operate the control
panel with wet hands.
• Don’t cook acidic food directly in this product for longer
coating life of accessories
Caution
This appliance is intended for household use only.
If the appliance is used improperly or for
professional or semi-professional purposes or if it
is not used according to the instructions in the user
manual, the guarantee becomes invalid and Philips
refuses any liability for damage caused.
• It is acceptable to have water droplets formed
due to condensation from the moisture escaping
from food while cooking, in the cool parts of
product i.e. handles & LCD panel. In such case
either wipe with cloth or run machine after
preheating it.
• Never use any accessories or parts from other
manufacturers or that Philips does not specically
recommend. If you use such accessories or parts,
your guarantee becomes invalid.
• Baking trays and cup cake mould made up of any
metal or good quality silicone which hold higher
temperature can be used.
• Don’t place it on a working or still hot stove or
cooker
• Always place the appliance on a stable level and
horizontal surface.
• Always unplug the appliance after use.
• Always let the appliance cool down before you
clean or move it.
• Don’t sprinkle or pour water on front glass when
it is hot.
• The accessible surfaces become hot when the
appliance is operating. Always use oven
gloves/tongs.
• Do not lift and move the appliance while it is
in use.
• Do not touch moving parts.
• Do not expose the appliance to direct sunlight.
• Do not insert metallic objects or alien substances
into the air vents.
• Don’t place anything which catches re near OTG
while it is in use.
• Always clean the appliance after use.
• Leave a free space of at least 10cm above, behind
and on both sides of the appliance to prevent
damage due to radiated heat.
11. Warranty and Service
For any information or problem, contact your local Philips dealer or authorized service center. For a list of authorized
Philips service centers visit:www.philips.co.in or contact our consumer care at 1800 102 2929 (Toll free) or 1860 180
1111 (standard call rates apply)
11.1 Warranty Card
This apparatus is covered under warranty against any defect due to defective material or workmanship for TWO
YEARS from the date of purchase. Should a defect develop during the period of warranty, Philips Domestic
Appliances India Ltd. undertakes to repair the apparatus FREE OF CHARGE through the dealer from whom it has
been purchased or at any of the Philips authorized service centres.
The warranty is not valid in case:
1. Apparatus is not used according to user manual.
2. Defects caused by improper or reckless use.
3. Repairs done by persons other than Philips authorized service center.
4. Modications of any nature made in the apparatus.
5. Tampered serial number
6. Incomplete warranty card after purchase
7. Product if used for commercial purpose (i.e. other than domestic use).
8. Usage of parts not recommended by Philips or those made by other manufacturers.
9. Damage to the door glass due to mishandling, negligence, breakage or cracking
All consumable and parts susceptible to normal wear and tear are not covered under warranty.
Week/S.No.
Date of Purchase
Dealer’s name
Dealer’s stamp
Customers name and address
Model No.
Dealer’s signature
www.philips.co.in
100% recycled paper
1
2
3
5
4
6
6
12
1
14
12
16
18
2729
30
31
19
17
15
11
8
10
13
28
5
17
35
7
20
22
21
23
24
26
25
32
33
34
HD6976/00
Press
Press
9
300005415463
5. Operation
Step 1
1. After plugging, the screen is lit for 2 seconds & device
is ready to use post 3 buzzer sounds. The function
button(Blue) & start/stop button (Red button) will
blink.
1.a. By default, the “Bake” function is displayed (the
pointer points the bake function) & default time
and temperature is displayed
Step 2
2. Press the function button to select between separate
menus
2.a. If you select “Toast” or “Bagel” menu, the default
browning level “4” and only time is displayed.
You can adjust the browning level. But not the
temperature.
2.b. If you select “Roast” or “Broil” menu, the default time
& temperature and rotation icon(rotisserie) is
displayed
2.c. If you select other menu, the default time &
temperature is displayed.
Step 3
3. The time & temperature can be adjusted according to
recipes by rotating the respective knobs (refer to
recipe booklet)
Step 4
4. After the setting is completed, press the “Start/Stop”
button to initiate the cooking.
Step 5
5a. Press convection button to turn on/o the inbuilt fan
in particular modes (Broil, Cookie, Roast, Grill and
Tikka). Fan icon appears in the LCD screen when the
convection function is ON.
5b. Press the temperature knob to turn on/o the light
*Once the cooking time is over, buzzer beeps 3 times
and the pointer goes to Bake mode which is default
function
* In case power goes o in between, the appliance will
turn to default menu. Then set the time & temperature
based on the level of cooked food and press the
"Start/Stop" button
8. Tips
• It is recommended to defrost food to normal
temperature before cooking for optimum results
• It is recommended to use a food thermometer to
check the roasting progress.
• The appliance can roast up to 2kg of chicken in
rotiserrie rod
• In the event of food are-ups, keep the door closed,
press the START/STOP button and unplug the
appliance.
• Do not keep smaller food pieces than the gap of wire
rack
10. Cleaning & Maintenance
• Proper maintenance will ensure many years of service
from your appliance. Clean the appliance after every
use. The appliance contains no user serviceable parts
and requires little maintenance. Leave any servicing or
repairs to qualied personnel.
• CAUTION: -- Always press the START/STOP button (30)
and ensure the appliance is switched o. Disconnect the
plug (5) from the wall outlet. Allow all parts of the
appliance to cool down completely.
• NOTE:Do not immerse the power cord and plug (5) or
appliance into water or any other liquid. Do not use
abrasive cleaners, steel wool or scouring pads
• Dry all parts thoroughly after cleaning, before using or
storing the appliance. Ensure that no water enters the
appliance housing (2).
• Remove any accessory placed in the appliance.
• Wipe the walls with a damp sponge, cloth or nylon
scouring pad and some mild detergent if needed.
• Take extra care when cleaning near the lower (13) and
upper heating elements (19) in order not to damage them.
11. Trouble shooting
The appliance is not working
Appliance not plugged in
Wall outlet not energized
Insert the plug into the wall outlet
Check fuses and circuit breaker
The appliance does not reach set
temperature
The door is not closed properly
Ensure the door is closed properly
Food not fully cooked
Cooking time too short
Cooking temperature too low
Extend cooking time
Increase set temperature
Food overcooked or burnt
Cooking time too long
Cooking temperature too high
Reduce cooking time
Reduce set temperature
Smoke escaping from OTG
Overcooked food
Food residue in heating element
Reduce the temperature of time
Clean the heating element with cloth
when its cool
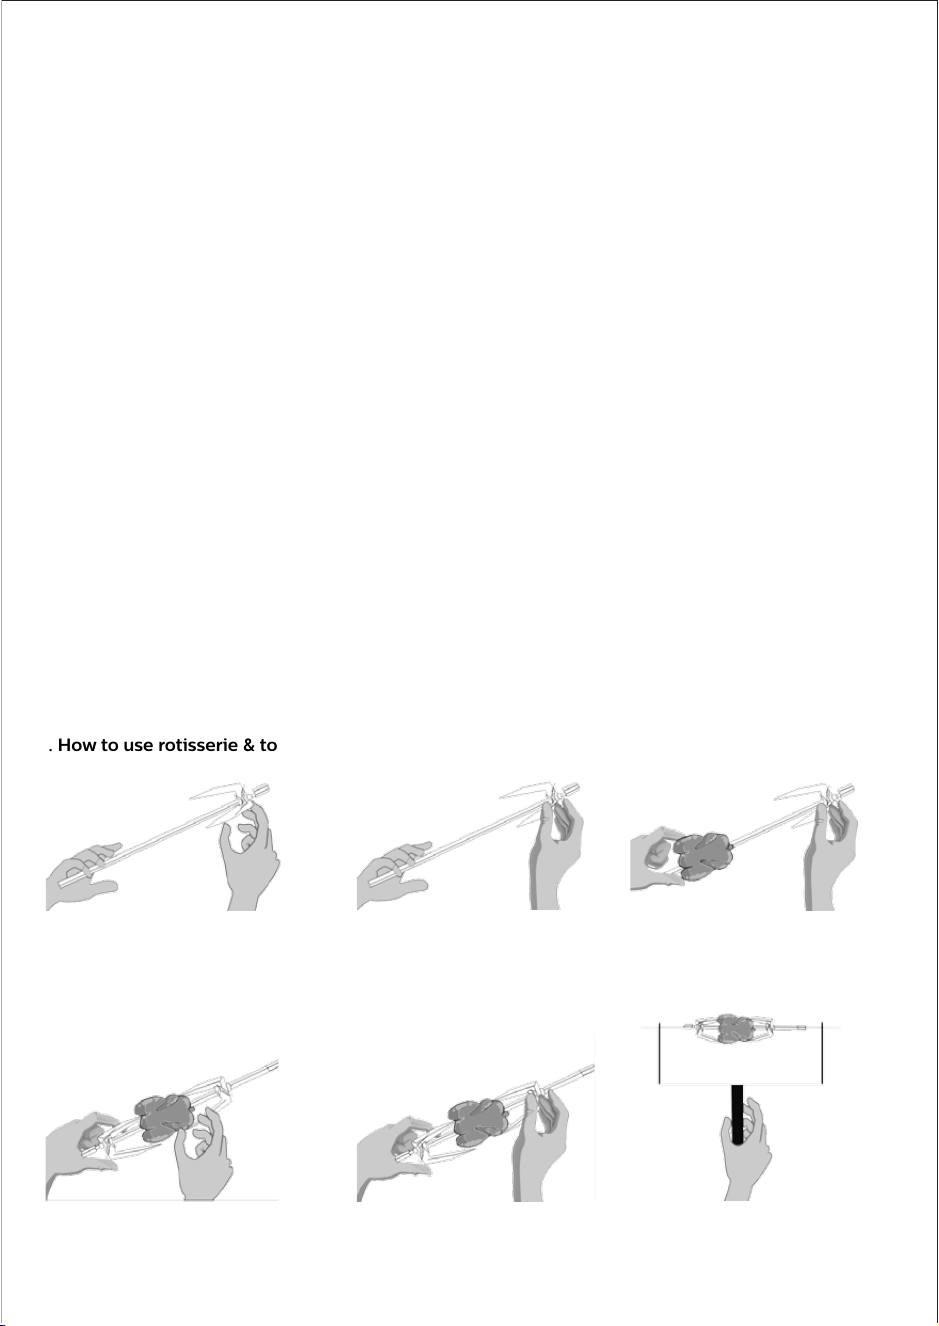
9. How to use rotisserie & tongs?
1. Insert the spit rod into skewer and
select proper position of skewer
2. Rotate the skewer screw to x the
spit rod at the proper position
3. Use the Spit rod to penetrate
through the middle of food & x
the food with the skewer on 1 side
4. Insert the spit into another skewer
& compress the food tightly
5. Rotate the skewer screw to x the
skewer
6. Use the rotisserie tongs to place
the rotisserie in the appliance
6. Know your appliance
Buttons
1. Function
Function button is used to select dierent menus in
preset Menu (After powering on, Button keeps blinking
till we select any preset menu and Start cooking)
2. Convection
Convection button can be pressed to turn on/o the
fan inside the chamber for particular modes. (Broil,
Cookie,Roast,Grill,Tikka). Button will glow in blue when
the fan is on and fan icon is displayed.
3. Start/Stop
This button can be used to start or stop process
(After powering on, Button glows red & keeps blinking
till we select any preset menu and Start cooking)
Knobs switches
1) Time Control Knob
a) The time ranges from 0-90 mins
b) Rotate the knob to adjust the time
c) Stepless rotary knob jump at 1 min every interval
d) The screen displays the selected time then press
‘Start/Stop’ to start cooking in the appliance
2) Temperature and light control Knob
a) Temperature control range is 65°C-230°C
b) Rotate the knob to adjust the temperature
c) Press the knob to illuminate the chamber
light for easy viewing. Light will turn On for
60 sec and automatically turns o
d) The screen displays the selected
temperature then press ‘Start/Stop’ to start
cooking in the appliance
• All accessories can be washed in hot soapy water or in
a dishwasher.
• Clean all accessories after each use, including the
crumb tray (12) and baking/drip tray (15).
• Clean the appliance housing (2) with a damp sponge
or cloth.
• Dry all parts and surfaces thoroughly before use. Make
sure that all parts and surfaces are completely dry
before connecting the appliance to a wall outlet.
Storage
• Before storage, always make sure the appliance is
completely cool, clean and dry.
• It is recommended to store the appliance in a dry place.
• Store the power cord (5) on the cord storage (4) of the
appliance.
• Store the appliance on a stable shelf or in a cupboard.
To avoid accidents, ensure that both the appliance and
its power cord (5) are beyond reach of children or pets.
4. Quick start guide
1. Unbox the product and remove all the accessories from
the packaging box
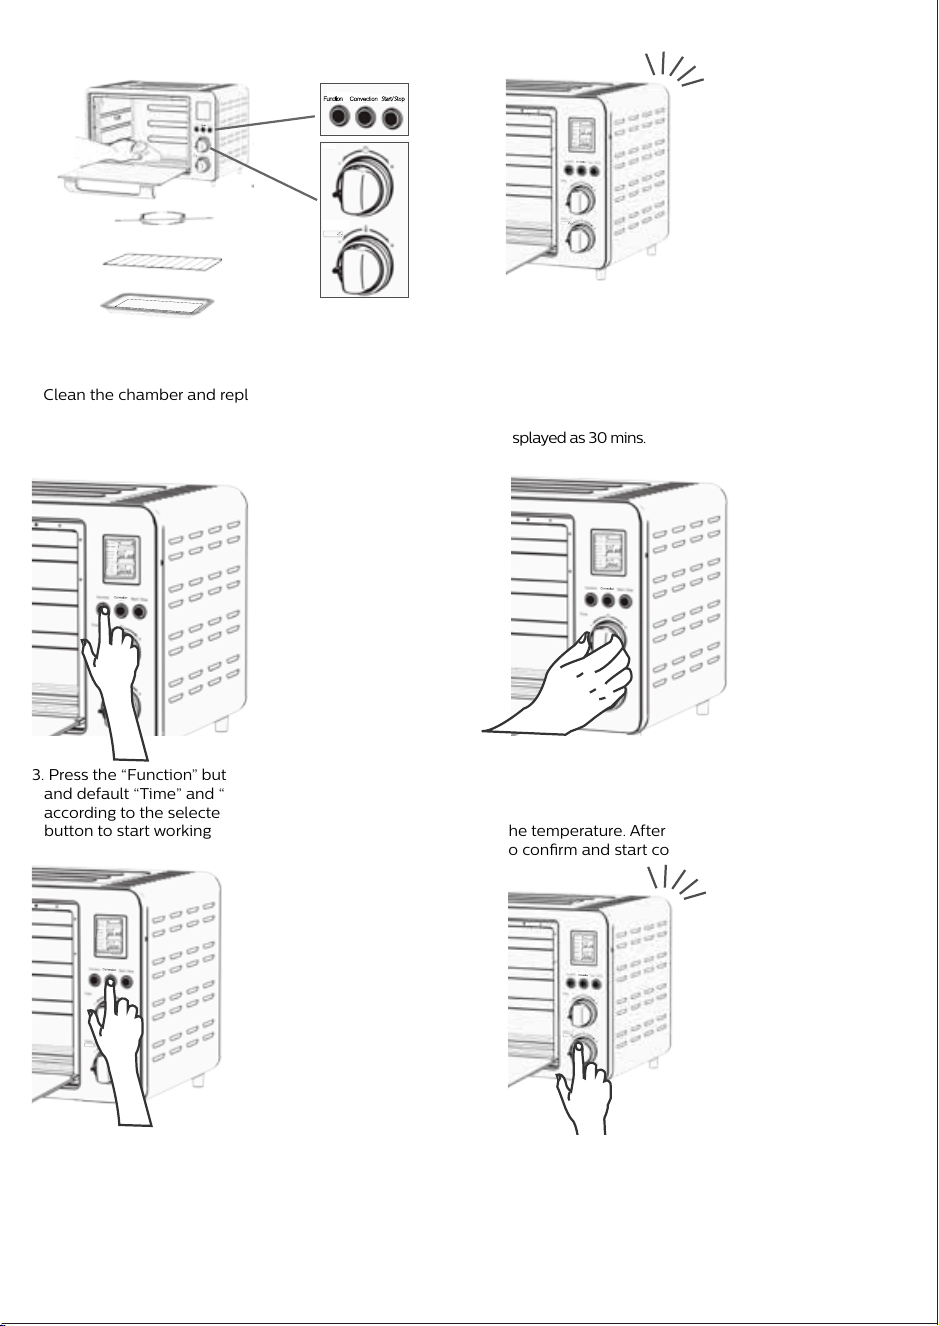
Clean the chamber and replace the required accessories
2. Before plugging in the power, please check if the power
is 220-240V/50/60Hz. After plugging, the screen is lit for
2 seconds and device is ready to use post 3 buzzer
sounds. The default selection is “bake”, the default
temperature is displayed as 180°C, and the default time is
displayed as 30 mins.
3. Press the “Function” button to select the required menu,
and default “Time” and “Temperature” are displayed
according to the selected menu. Press the “Start/Stop”
button to start working
4. If you need to adjust “Time” and “Temp”, after “Preset
Menu” is selected using function button, turn the “Time”
knob to set the time, and turn the “Temp” knob to set
the temperature. After this press the “Start/Stop” button
to conrm and start cooking
5. Whenever convection is needed , press the "Convection"
button to turn on the inbuilt fan and press again to o
6. You can press Temp knob to turn on the light whenever
needed to monitor the cooking process. Same knob to
be pressed again to switch o the light.
* Size of chicken is depicted small to make illustration clear
Time
(Mins)
Temp
(℃)
1 2
2 3
3 4
4 5
5 6
6 7
7 8
1
2 7:00
3 9:00
4 12:00
5 14:00
6 16:00
7 18:00
3 Pizza / Upper+Lower 15 200 1-30 minutes
4 Bake / Upper+Lower 30 180
65-230 °C
1-90 minutes
5 Broil / Upper+Motor 45 190 1-90 minutes
6 Cookies / Upper+Lower 15 160 1-30 minutes
7 Roast / Upper+Lower+ Motor
45
200 1-90 minutes
8 Grill / Lower 50 200 1-90 minutes
9 Tikka / Upper+Lower 30 180 1-60 minutes
10 Preheat / Upper+Lower 10 180 1-15 minutes
Not
adjustable
2
Bagel
Browning level can
be varied by rotating
Time knob from 1 to 7
(Displayed as bars in
menu)
Upper+Lower
No
display
Not
adjustable
Preset
sequence
(LCD)
Preset Menu
(LCD Display)
Brown-
ing level
Heating coil and
synchronous
motor work
situation
Program
default
1
Toast
Browning level can
be varied by rotating
Time knob from 1 to 7
(Displayed as bars in
menu)
Upper+Lower
No
display
7. Standby
• After the appliance is plugged in and if it is not
operated for more than 1minute then the appliance
goes in standby mode. The LCD screen & button
lights are turned O.
• In the standby state, press the button or turn the knob
to return to the power-on state, which is equivalent to
waking up. In the above operation, there will be 1 beep
every time.
Time
Temp. °C
PROBLEM CAUSE
SOLUTION
150-220 °C
100-200 °C
65-230 °C
150-220 °C
150-200 °C
160-200 °C
150-220 °C
Temp
adjustment
range
Time
adjustment
range
Optional
browning
level 1-7
(Default
setting is 4)
Optional
browning
level 1-7
(Default
setting is 4)
Convection
No
No
No
Yes (optional)
Yes (optional)
Yes (optional)
Yes (optional)
Yes (optional)
No
Temp
(℃)
Time
* Default time and temperature are optimum to the given preset menus. However it may vary slightly based on the quantity, Ingredients
quality and room temperature. Time and temperature can be adjusted to get the desired level of output after selection of any preset menu.
Press
Press
Press
Press
Press
7. After the work is completed, the buzzer sounds three
times, and the display goes to default "bake mode".
5:00
No

5. Operation
Step 1
1. After plugging, the screen is lit for 2 seconds & device
is ready to use post 3 buzzer sounds. The function
button(Blue) & start/stop button (Red button) will
blink.
1.a. By default, the “Bake” function is displayed (the
pointer points the bake function) & default time
and temperature is displayed
Step 2
2. Press the function button to select between separate
menus
2.a. If you select “Toast” or “Bagel” menu, the default
browning level “4” and only time is displayed.
You can adjust the browning level. But not the
temperature.
2.b. If you select “Roast” or “Broil” menu, the default time
& temperature and rotation icon(rotisserie) is
displayed
2.c. If you select other menu, the default time &
temperature is displayed.
Step 3
3. The time & temperature can be adjusted according to
recipes by rotating the respective knobs (refer to
recipe booklet)
Step 4
4. After the setting is completed, press the “Start/Stop”
button to initiate the cooking.
Step 5
5a. Press convection button to turn on/o the inbuilt fan
in particular modes (Broil, Cookie, Roast, Grill and
Tikka). Fan icon appears in the LCD screen when the
convection function is ON.
5b. Press the temperature knob to turn on/o the light
*Once the cooking time is over, buzzer beeps 3 times
and the pointer goes to Bake mode which is default
function
* In case power goes o in between, the appliance will
turn to default menu. Then set the time & temperature
based on the level of cooked food and press the
"Start/Stop" button
8. Tips
• It is recommended to defrost food to normal
temperature before cooking for optimum results
• It is recommended to use a food thermometer to
check the roasting progress.
• The appliance can roast up to 2kg of chicken in
rotiserrie rod
• In the event of food are-ups, keep the door closed,
press the START/STOP button and unplug the
appliance.
• Do not keep smaller food pieces than the gap of wire
rack
10. Cleaning & Maintenance
• Proper maintenance will ensure many years of service
from your appliance. Clean the appliance after every
use. The appliance contains no user serviceable parts
and requires little maintenance. Leave any servicing or
repairs to qualied personnel.
• CAUTION: -- Always press the START/STOP button (30)
and ensure the appliance is switched o. Disconnect the
plug (5) from the wall outlet. Allow all parts of the
appliance to cool down completely.
• NOTE:Do not immerse the power cord and plug (5) or
appliance into water or any other liquid. Do not use
abrasive cleaners, steel wool or scouring pads
• Dry all parts thoroughly after cleaning, before using or
storing the appliance. Ensure that no water enters the
appliance housing (2).
• Remove any accessory placed in the appliance.
• Wipe the walls with a damp sponge, cloth or nylon
scouring pad and some mild detergent if needed.
• Take extra care when cleaning near the lower (13) and
upper heating elements (19) in order not to damage them.
11. Trouble shooting
The appliance is not working
Appliance not plugged in
Wall outlet not energized
Insert the plug into the wall outlet
Check fuses and circuit breaker
The appliance does not reach set
temperature
The door is not closed properly
Ensure the door is closed properly
Food not fully cooked
Cooking time too short
Cooking temperature too low
Extend cooking time
Increase set temperature
Food overcooked or burnt
Cooking time too long
Cooking temperature too high
Reduce cooking time
Reduce set temperature
Smoke escaping from OTG
Overcooked food
Food residue in heating element
Reduce the temperature of time
Clean the heating element with cloth
when its cool
9. How to use rotisserie & tongs?
1. Insert the spit rod into skewer and
select proper position of skewer
2. Rotate the skewer screw to x the
spit rod at the proper position
3. Use the Spit rod to penetrate
through the middle of food & x
the food with the skewer on 1 side
4. Insert the spit into another skewer
& compress the food tightly
5. Rotate the skewer screw to x the
skewer
6. Use the rotisserie tongs to place
the rotisserie in the appliance
6. Know your appliance
Buttons
1. Function
Function button is used to select dierent menus in
preset Menu (After powering on, Button keeps blinking
till we select any preset menu and Start cooking)
2. Convection
Convection button can be pressed to turn on/o the
fan inside the chamber for particular modes. (Broil,
Cookie,Roast,Grill,Tikka). Button will glow in blue when
the fan is on and fan icon is displayed.
3. Start/Stop
This button can be used to start or stop process
(After powering on, Button glows red & keeps blinking
till we select any preset menu and Start cooking)
Knobs switches
1) Time Control Knob
a) The time ranges from 0-90 mins
b) Rotate the knob to adjust the time
c) Stepless rotary knob jump at 1 min every interval
d) The screen displays the selected time then press
‘Start/Stop’ to start cooking in the appliance
2) Temperature and light control Knob
a) Temperature control range is 65°C-230°C
b) Rotate the knob to adjust the temperature
c) Press the knob to illuminate the chamber
light for easy viewing. Light will turn On for
60 sec and automatically turns o
d) The screen displays the selected
temperature then press ‘Start/Stop’ to start
cooking in the appliance
• All accessories can be washed in hot soapy water or in
a dishwasher.
• Clean all accessories after each use, including the
crumb tray (12) and baking/drip tray (15).
• Clean the appliance housing (2) with a damp sponge
or cloth.
• Dry all parts and surfaces thoroughly before use. Make
sure that all parts and surfaces are completely dry
before connecting the appliance to a wall outlet.
Storage
• Before storage, always make sure the appliance is
completely cool, clean and dry.
• It is recommended to store the appliance in a dry place.
• Store the power cord (5) on the cord storage (4) of the
appliance.
• Store the appliance on a stable shelf or in a cupboard.
To avoid accidents, ensure that both the appliance and
its power cord (5) are beyond reach of children or pets.
4. Quick start guide
1. Unbox the product and remove all the accessories from
the packaging box
Clean the chamber and replace the required accessories
2. Before plugging in the power, please check if the power
is 220-240V/50/60Hz. After plugging, the screen is lit for
2 seconds and device is ready to use post 3 buzzer
sounds. The default selection is “bake”, the default
temperature is displayed as 180°C, and the default time is
displayed as 30 mins.
3. Press the “Function” button to select the required menu,
and default “Time” and “Temperature” are displayed
according to the selected menu. Press the “Start/Stop”
button to start working
4. If you need to adjust “Time” and “Temp”, after “Preset
Menu” is selected using function button, turn the “Time”
knob to set the time, and turn the “Temp” knob to set
the temperature. After this press the “Start/Stop” button
to conrm and start cooking
5. Whenever convection is needed , press the "Convection"
button to turn on the inbuilt fan and press again to o
6. You can press Temp knob to turn on the light whenever
needed to monitor the cooking process. Same knob to
be pressed again to switch o the light.
* Size of chicken is depicted small to make illustration clear
Time
(Mins)
Temp
(℃)
1 2
2 3
3 4
4 5
5 6
6 7
7 8
1
2 7:00
3 9:00
4 12:00
5 14:00
6 16:00
7 18:00
3 Pizza / Upper+Lower 15 200 1-30 minutes
4 Bake / Upper+Lower 30 180
65-230 °C
1-90 minutes
5 Broil / Upper+Motor 45 190 1-90 minutes
6 Cookies / Upper+Lower 15 160 1-30 minutes
7 Roast / Upper+Lower+ Motor
45
200 1-90 minutes
8 Grill / Lower 50 200 1-90 minutes
9 Tikka / Upper+Lower 30 180 1-60 minutes
10 Preheat / Upper+Lower 10 180 1-15 minutes
Not
adjustable
2
Bagel
Browning level can
be varied by rotating
Time knob from 1 to 7
(Displayed as bars in
menu)
Upper+Lower
No
display
Not
adjustable
Preset
sequence
(LCD)
Preset Menu
(LCD Display)
Brown-
ing level
Heating coil and
synchronous
motor work
situation
Program
default
1
Toast
Browning level can
be varied by rotating
Time knob from 1 to 7
(Displayed as bars in
menu)
Upper+Lower
No
display
7. Standby
• After the appliance is plugged in and if it is not
operated for more than 1minute then the appliance
goes in standby mode. The LCD screen & button
lights are turned O.
• In the standby state, press the button or turn the knob
to return to the power-on state, which is equivalent to
waking up. In the above operation, there will be 1 beep
every time.
Time
Temp. °C
PROBLEM CAUSE
SOLUTION
150-220 °C
100-200 °C
65-230 °C
150-220 °C
150-200 °C
160-200 °C
150-220 °C
Temp
adjustment
range
Time
adjustment
range
Optional
browning
level 1-7
(Default
setting is 4)
Optional
browning
level 1-7
(Default
setting is 4)
Convection
No
No
No
Yes (optional)
Yes (optional)
Yes (optional)
Yes (optional)
Yes (optional)
No
Temp
(℃)
Time
* Default time and temperature are optimum to the given preset menus. However it may vary slightly based on the quantity, Ingredients
quality and room temperature. Time and temperature can be adjusted to get the desired level of output after selection of any preset menu.
Press
Press
Press
Press
Press
7. After the work is completed, the buzzer sounds three
times, and the display goes to default "bake mode".
5:00
No

Oven Toast Grill
www.philips.co.in
Please read guidelines provided in this DFU on important instructions,
appliance usage and warranty before using the product.
1. Introduction
Philips brings to you an OTG powered with LCD panel
Technical specication
Model No. HD6976/00
Voltage 220-240V~, 50/60Hz
Watts 2000W
Capacity 36L
Timer Up to 90 mins
Temperature 230 degree Celsius
Power cord length 1m
Net Weight 9.0kg
Product size (approx) 525x441x332 mm
2. General description
1. Air vents
2. Housing
3. Display
4. Cord storage
5. Power cord with plug
6. Control panel
7. Feet
8. Rotisserie drive mount
9. Fan
10. Light
11. Glass door
12. Handle
13. Crumb Tray
14. Lower heating elements (x2)
15. Wire rack
16. Baking tray
17. Rails
18. Rotisserie support mount
19. Upper heating elements (x2)
20.Spit
21. Rotisserie notch
22. Skewer screw (x2)
23. Skewer (x2)
24. Spit holder
25. Baking tray tong
26. Rotisserie tong
27. Display browning level 1-7.
28. Display time
29. Display temperature
30. Start/stop button with indicator
31. Convection button with indicator
32. Time control knob
33. Temp and light control knob
34. Function button with indicator
35. Preset menu
3. Important
Read this user manual carefully before you use the
appliance, and save the user manual for future reference.
Danger
Warning
• This appliance is not intended for use by person
(children) with reduced physical, sensory, mental
capabilities, lack of experience & knowledge unless
they have been given supervision on instruction
concerning use of the appliance by a person
responsible for their safety.
• Children should be supervised to ensure that they
don’t play with the appliance.
• Keep the appliance and its cord out of reach of
children. Do not let the mains cord hang over the edge
of the table or worktop on which the appliance stands.
• The appliance is not intended to be operated by means
of an external timer or a separate remote control system.
• The accessible surfaces may become hot during the
use.
• Check if the voltage indicated on the appliance
corresponds to the local mains voltage before you
connect the appliance.
• Only connect the appliance to an earthed wall socket.
Always make sure that the plug is inserted rmly into
the wall socket.
• Do not use the appliance when the mains cord, the plug
or other components are damaged. Only the company
or a service center authorized by Philips must replace it.
• Do not use the appliance for any other purpose than
described in this manual
• Do not plug in the appliance or operate the control
panel with wet hands.
• Don’t cook acidic food directly in this product for longer
coating life of accessories
Caution
This appliance is intended for household use only.
If the appliance is used improperly or for
professional or semi-professional purposes or if it
is not used according to the instructions in the user
manual, the guarantee becomes invalid and Philips
refuses any liability for damage caused.
• It is acceptable to have water droplets formed
due to condensation from the moisture escaping
from food while cooking, in the cool parts of
product i.e. handles & LCD panel. In such case
either wipe with cloth or run machine after
preheating it.
• Never use any accessories or parts from other
manufacturers or that Philips does not specically
recommend. If you use such accessories or parts,
your guarantee becomes invalid.
• Baking trays and cup cake mould made up of any
metal or good quality silicone which hold higher
temperature can be used.
• Don’t place it on a working or still hot stove or
cooker
• Always place the appliance on a stable level and
horizontal surface.
• Always unplug the appliance after use.
• Always let the appliance cool down before you
clean or move it.
• Don’t sprinkle or pour water on front glass when
it is hot.
• The accessible surfaces become hot when the
appliance is operating. Always use oven
gloves/tongs.
• Do not lift and move the appliance while it is
in use.
• Do not touch moving parts.
• Do not expose the appliance to direct sunlight.
• Do not insert metallic objects or alien substances
into the air vents.
• Don’t place anything which catches re near OTG
while it is in use.
• Always clean the appliance after use.
• Leave a free space of at least 10cm above, behind
and on both sides of the appliance to prevent
damage due to radiated heat.
11. Warranty and Service
For any information or problem, contact your local Philips dealer or authorized service center. For a list of authorized
Philips service centers visit:www.philips.co.in or contact our consumer care at 1800 102 2929 (Toll free) or 1860 180
1111 (standard call rates apply)
11.1 Warranty Card
This apparatus is covered under warranty against any defect due to defective material or workmanship for TWO
YEARS from the date of purchase. Should a defect develop during the period of warranty, Philips Domestic
Appliances India Ltd. undertakes to repair the apparatus FREE OF CHARGE through the dealer from whom it has
been purchased or at any of the Philips authorized service centres.
The warranty is not valid in case:
1. Apparatus is not used according to user manual.
2. Defects caused by improper or reckless use.
3. Repairs done by persons other than Philips authorized service center.
4. Modications of any nature made in the apparatus.
5. Tampered serial number
6. Incomplete warranty card after purchase
7. Product if used for commercial purpose (i.e. other than domestic use).
8. Usage of parts not recommended by Philips or those made by other manufacturers.
9. Damage to the door glass due to mishandling, negligence, breakage or cracking
All consumable and parts susceptible to normal wear and tear are not covered under warranty.
Week/S.No.
Date of Purchase
Dealer’s name
Dealer’s stamp
Customers name and address
Model No.
Dealer’s signature
www.philips.co.in
100% recycled paper
1
2
3
5
4
6
6
12
1
14
12
16
18
2729
30
31
19
17
15
11
8
10
13
28
5
17
35
7
20
22
21
23
24
26
25
32
33
34
HD6976/00
Press
Press
9
300005415463