Loading ...
Loading ...
Loading ...
5
Preparing for use
en
ELECTRICAL CONNECTIONS
Beforepluggingtheapplianceintothetheelectricalreceptacle,
check that:
• The outlet’s power supply corresponds to the value
indicated on the rating label on the back of the appliance;
• The outlet and electrical circuit are adequate for the
appliance;
• Theoutletisa3-holegroundedoutlet.Ifthisisnot
the case, you must choose another outlet.
Failure to follow these important safety instructions
absolves the manufacturer of all liability.
The power cable must be replaced by a qualied
professional only.
The instructions below will enable you to prepare your air
conditioner for operation as eciently as possible.
Before use, make sure the air intake and outlet grilles
are unobstructed.
NOTE:
This appliance is provided with an auto-evaporation
feature for condensate removal during cooling and
dehumiding modes.
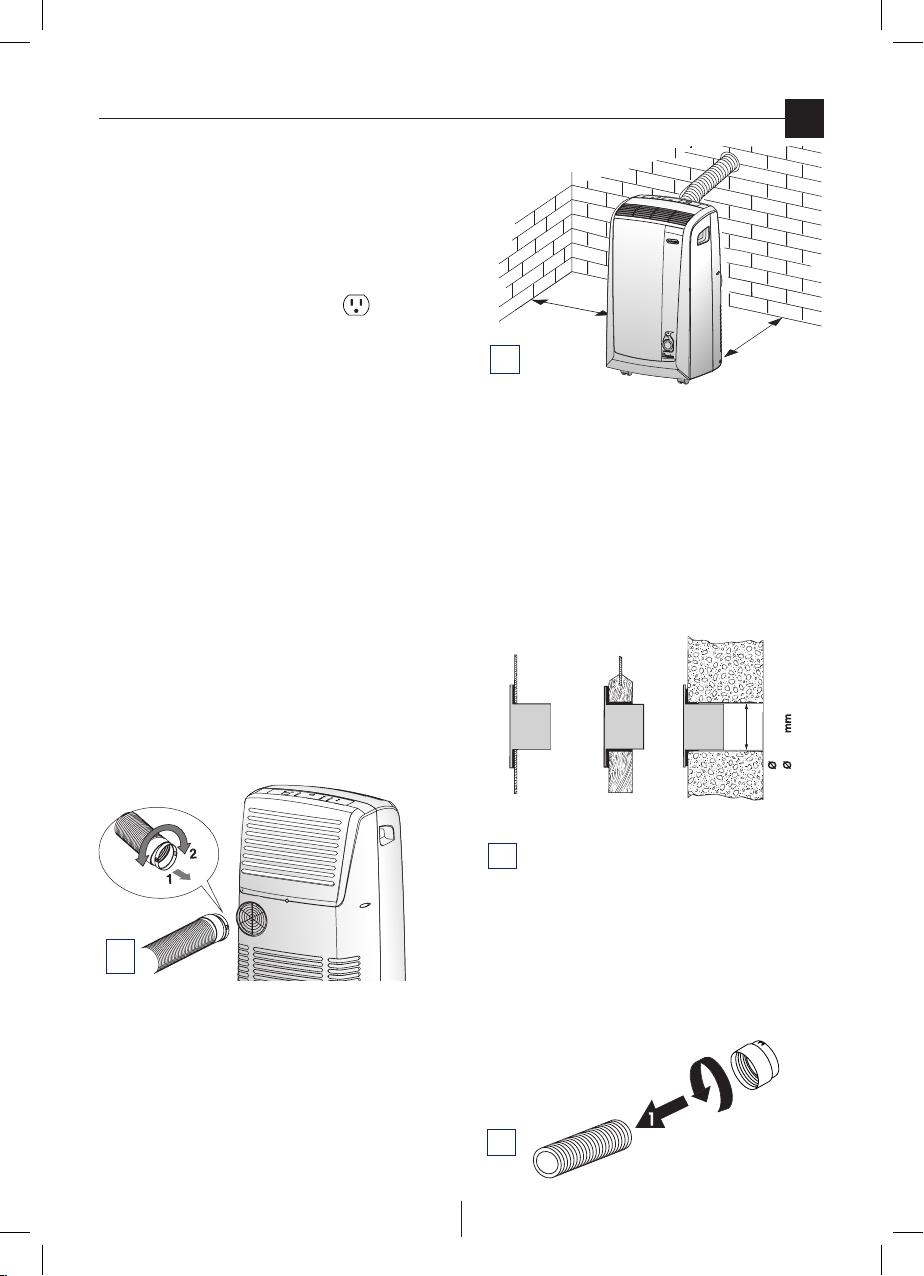
SEMIPERMANENT INSTALLATION
Just a few simple steps and your comfort is ensured with your
air conditioner:
• Screwthehoseadaptor13tothehose’send 12.
• Fittheairexhausthoseinthehousingatthebackofthe
appliance. Insert it as shown in gure A.
A
If required, your appliance can also be installed semi-
permanently (Fig. B).
12 inches
30 cm
30 cm
12 inches
B
Proceed as follows:
• Drill a hole (ø134mm / 5.27 in.) in an outside wall or
through a window pane.
Respect the height and dimensions of the hole given in
gures B and C.
NOTE: As special tools are required for installation, we suggest
you have the appliance installed by specialized personnel.
KEEP THE AIR HOSES AS SHORT AND FREE OF CURVES AS
POSSIBLE TO AVOID CONSTRICTIONS.
134
5.27 inches
C
in the window pane
in the wooden
kickboard of a
French window
in the wall: you are
recommended to insulate
the section of wall using
suitable insulation.
• Fitthewallange11 into the hole.
• Screwthehoseadaptor 13 tothehose’send12.
• Fittheairexhausthoseinthehousingatthebackofthe
appliance as shown in gure A.
• Screwthewallmountingaccessory 14 into the hose 12
(g. D) and t it into the wall ange 11 as shown in g. E.
2
D
Loading ...
Loading ...
Loading ...