Loading ...
Nozzle/Venturi Replacement and Cleaning
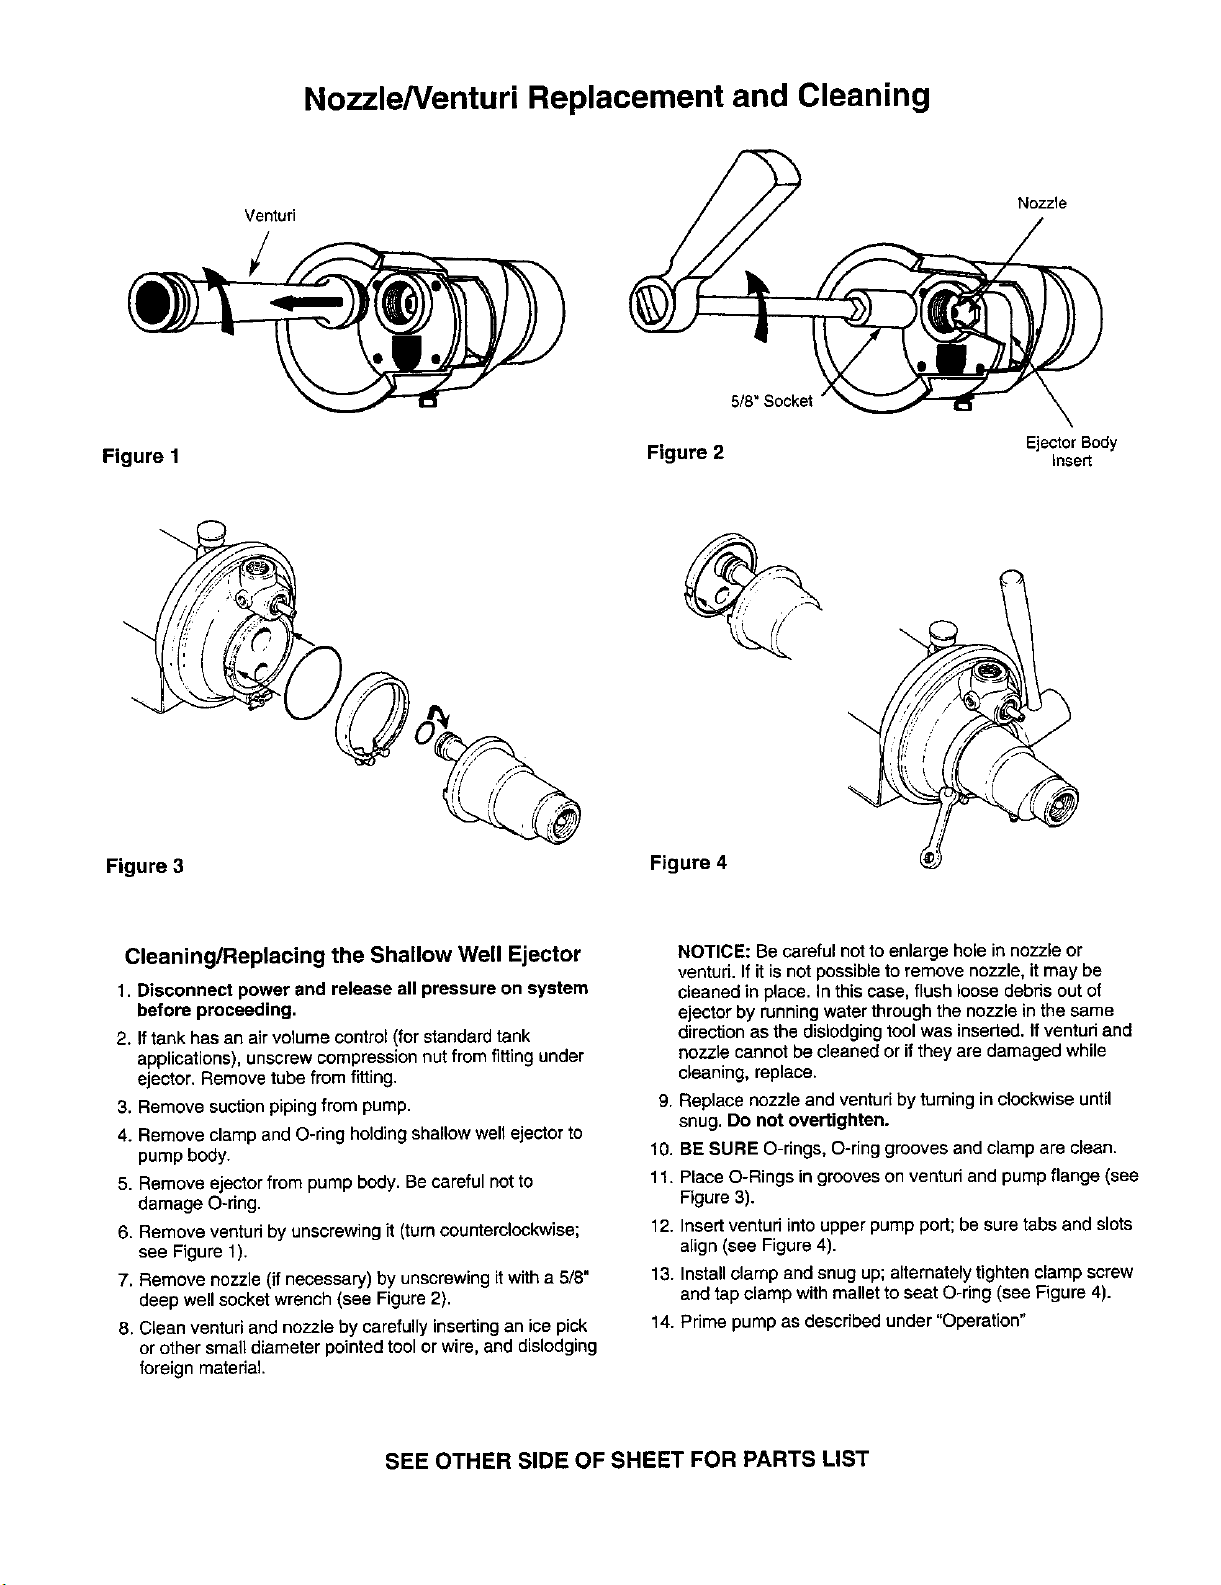
Venturi
5/8" Socket
Nozzle
Figure 1
Ejector Body
Figure 2 insert
Figure 3
Figure 4
Cleaning/Replacing the Shallow Well Ejector
1. Disconnect power and release all pressure on system
before proceeding.
2. Iftank has an air volume control (for standard tank
applications), unscrew compression nut from fitting under
ejector. Remove tube from fitting.
3, Remove suction pipingfrom pump.
4. Remove clamp and O-ring holdingshallow well ejector to
pump body.
5. Remove ejector from pump body. Be careful not to
damage O-ring.
6. Remove ventud by unscrewing it (turnoountemlockwise;
see Figure 1).
7, Remove nozzle (ifnecessary) by unscrewing it with a 5/8"
deep well socket wrench (see Figure 2).
8, Clean venturi and nozzle by carefully inserting an ice pick
or other small diameter pointed tool or wire, and dislodging
foreign material
NOTICE: Be careful not to enlarge hole in nozzle or
venturi. If itis not possible to remove nozzle, it may be
cleaned in place. In this case, flush loose debris out of
ejector by running water through the nozzle in the same
direction as the dislodging tool was inserted. If venturi and
nozzle cannot be cleaned or if they are damaged while
cleaning, replace.
9. Replace nozzle and venturi by turning in clockwise until
snug. Do not overtighten.
10. BE SURE O-rings, O-ring grooves and clamp are clean.
11. Place O-Rings in grooves on venturi and pump flange (see
Figure 3).
12. Insert venturi into upper pump port; be sure tabs and slots
align (see Figure 4).
13. Install clamp and snug up; alternately tighten clamp screw
and tap clamp with mallet to seat O-ring (see Figure 4).
14. Prime pump as described under "Operation"
SEE OTHER SIDE OF SHEET FOR PARTS LIST
Loading ...