Loading ...
Loading ...
Loading ...

6
newair.com
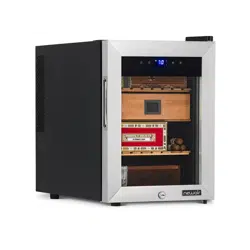
ASSEMBLY & INSTALLATION
Before using your cigar humidor, complete the following steps:
• Remove all exterior and interior packaging
• Make sure the following parts are included:
o 3 wood shelves
o 2 keys
o 1 moisture container
o 1 instruction manual
Before operating your cigar humidor for the first time, follow these steps:
1. Clean the interior surface with lukewarm water using a soft cloth.
2. Place your appliance on a flat surface strong enough to support the
appliance when it is fully loaded. To level your humidor, adjust the front
legs at the bottom of the appliance.
3. Ensure the cabinet is located away from direct sunlight and sources of heat
(i.e.: stove, heater, radiator, etc.). Direct sunlight may affect its acrylic
coating. Extreme cold or hot ambient room temperatures may also cause
the appliance to not perform properly and/or increase electrical
consumption.
4. The appliance is intended for indoor use only.
CAUTION: Please keep the cabinet away from combustible materials or
substances.
FACTORY ODOR REMOVAL
Wash the interior of the humidor with a mild detergent and warm water. Make
sure to not get the wood wet. Leave the door open and allow it to air
dry thoroughly. If a “plastic” smell persists, place a dish of baking soda in the
unit or stuff the humidor with newspapers overnight. When finished, let the
unit run a full day to complete the airing out process.
DRAWER SET-UP
The drawers and shelves included with this humidor are designed to sit flush
with the front edge of the cabinet. This will allow air to circulate freely through
the unit. When inserting the drawers and shelves, avoid pushing them all the
way against the rear wall of the cabinet.
Loading ...
Loading ...
Loading ...