Loading ...
Loading ...
Loading ...

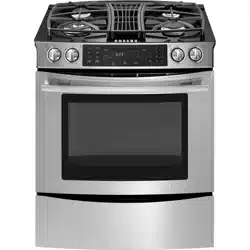
ELECTRONICOVEN CONTROL
A B C D
Bake Favorites
On/Off
Timero.o. I1 I
........................................Broil Setup
o,,/off
c...... C,oon+
++
Rapid More
Preheat Options Vent
Fan
@,/Off
i
J KL M N
E F G
Timer 2
4
J+
Back
CANCEL L
Oven
Light
O P M
5 6
8 9
uv wxvz
0 Enter
Space
io_ J
Q
A. Bake F. Timer 2 J. Rapid preheat N. Vent fan
B. Favorites G. Number pads K. More options O. Oven light
C. Setup H. Broil L. Clean P. Cancel
D. Timer 1 I. Convect M. Quickset pads Q. Lock
E. Display
E c}nc
When pressing any control pad function on the Electronic Oven
Control, use the pad of your finger to press the desired function.
Hold down the pad a few seconds, or until the desired function
appears in the display.
Ores D s+scsy
When power is supplied to the range or after a power
interruption, "12:00" and "POWER LOSS" will be displayed.
Press CANCEL to clear "POWER LOSS."
When the oven is in use, the display shows the time of day,
temperature, and oven setting.
When the oven is not in use, the display shows the time of day.
When using the Timer, for settings of 1 to 59 minutes, the display
will count down in minutes and seconds. For settings of 1 hour or
more, the display will count down hours and minutes.
@uck
Quickset pads are located on each side of the display window
and are used to select the desired function or option in the
display window. To select the option or function, press the
Quickset pad next to the word.
If you need to back out of a function or option in the display,
press the BACK pad. When your programming is complete, press
the ENTER pad or wait 4 seconds and the function will start
automatically.
Up arrows indicate additional screens with additional options.
Press the QUICKSET pads next to the arrows to scroll through
the display.
IMPORTANT: Four seconds after entering the function, option,
number or letter, the function will automatically be entered. If
more than 30 seconds elapse between steps in programming,
the function will be canceled and the display will return to the
previous display.
The CANCEL button stops any function except the Clock, Timer
and Control Lock. When you press the CANCEL button, the
display will show the time of day, or the time remaining if the
TIMER is being used.
To Set Clock:
1. Press SETUR
2. Select CLOCK using the left Quickset pad.
3. Select TIME using the left Quickset pad.
4. Enter the time using the number pads.
5. Press ENTER on the number pads.
6. Select AM or PM in 12-hour mode. (For 24-hour clock, see
following.)
7. To exit the Setup mode, press SETUR
Entering the Day of the Week:
1. Press SETUR
2. Select CLOCK using the left Quickset pad.
3. Press the right Quickset pad to scroll until DAY is displayed.
4. Select DAY using the left Quickset pad.
5. Use right Quickset pad to scroll through the days.
6. Select the day desired using the left Quickset pad.
7. To exit the Setup mode, press SETUR
To Set the Clock for a 12 or 24 Hour Format:
The clock can be set to display time in either a 12-hour or 24-
hour format.
1. Press SETUR
2. Select CLOCK using the left Quickset pad.
3. Use right Quickset pad to scroll to 12/24 HOUR.
4. Press the left Quickset pad to select 12/24 HOUR.
5. Select 12 HR or 24 HR using the right or left Quickset pad.
6. To exit Setup mode, press SETUR
8
Loading ...
Loading ...
Loading ...