
Loading ...
Loading ...
Loading ...
8
! Should the gas pressure used be different (or vary
slightly) from the recommended pressure, a suitable
pressure regulator must be fitted to the inlet hose in
accordance with current standards EN 88-1 and EN
88-2 relating to “regulators for channelled gas”.
Adapting the oven
Replacing the oven burner nozzle:
1. Remove the oven compartment.
2. Slide out the protection
panel A
(
see diagram
).
3. Remove the oven burner
after unscrewing the screws V
(
see figure
).
The whole operation will be
made easier if the oven door
is removed.
4. Unscrew the nozzle using a
special nozzle socket spanner
(
see figure
) or with a 7 mm
socket spanner, and replace it
with a new nozzle that is
suited to the new type of gas
(
see Burner and nozzle
specifications table
).
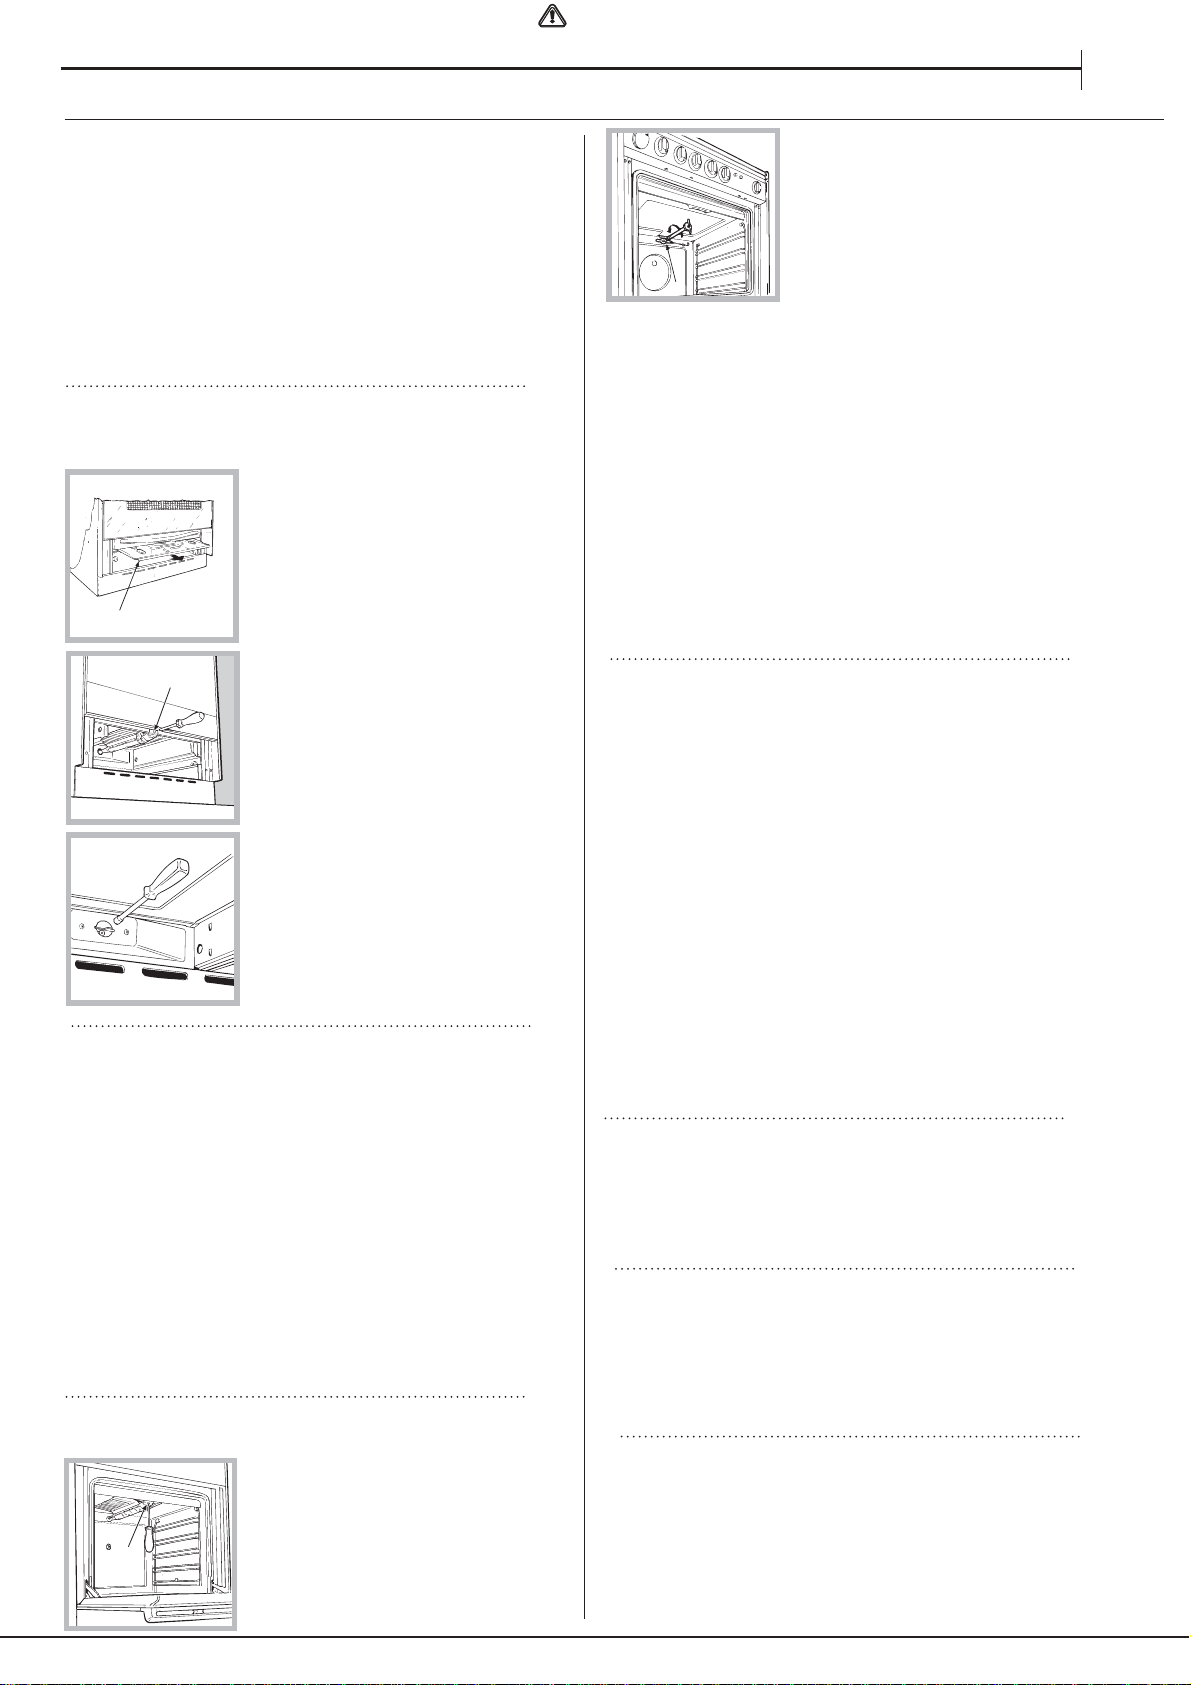
Adjusting the gas oven burner’s minimum setting:
1. Light the burner (
see Start-up and Use
).
2. Turn the knob to the minimum position (MIN) after
it has been in the maximum position (MAX) for
approximately 10 minutes.
3. Remove the knob.
4. Tighten or loosen the adjustment screws on the
outside of the thermostat pin (
see figure
) until the
flame is small but steady.
! If the appliance is connected to liquid gas, the
bypass screw must be adjusted to minimum.
A
V
5. Turn the knob from the MAX position to the MIN
position quickly or open and shut the oven door,
making sure that the burner is not extinguished.
Adapting the grill
Replacing the grill burner nozzle:
1. Remove the oven burner
after loosening screw V (
see
figure
).
2. Unscrew the grill burner
nozzle using a special nozzle
socket spanner (
see figure
) or
preferably with a 7 mm socket
spanner, and replace it with a
new nozzle that is suited to the
new type of gas (
see Burner
and nozzle specifications table
V
I
! Be careful of the spark plug wires and the
thermocouple tubes.
! The oven and grill burners do not require primary
air adjustment.
! After adjusting the appliance so it may be used
with a different type of gas, replace the old rating
label with a new one that corresponds to the new
type of gas (these labels are available from
Authorised Technical Assistance Centres).
EN
WARNING : This operation must be perfomed
by a qualified technician
INSTALLATION TIPSINSTALLATION TIPSINSTALLATION TIPSINSTALLATION TIPSINSTALLATION TIPSINSTALLATION TIPS
! After adjusting the appliance so it may be used with a
different type of gas, replace the old rating label with a
new one which corresponds to the new type of gas (these
labels are available from Authorised Technical Assistance
Centres).
! Should the gas pressure used be different (or vary
slightly) from the recommended pressure, a suitable
pressure regulator must be fitted to the inlet hose in
accordance with current national regulations relating
to “regulators for channelled gas”.
Electrial connection
Power supply voltage and frequency: 230-240V a.c.
50/60 Hz.
! The supply cable must be positioned so that it never
reaches at any point a temperature 50°C higher than
the room temperature. The cable must be routed away
from the rear vents. Should you require it, you may
use a longer cable, however, you must ensure that the
cable supplied with the appliance is replaced by one
of the same specifications in accordance with current
standards and legislation.
Your appliance is supplied with a 13 amp fused
plug that can be plugged into a 13 amp socket for
immediate use. Before using the appliance please read
the instructions below.
WARNING - THIS APPLIANCE MUST BE EARTHED.
THE FOLLOWING OPERATIONS SHOULD BE
CARRIED OUT BY A QUALIFIED ELECTRICIAN.
Replacing the fuse:
When replacing a faulty fuse, a 13 amp ASTA
approved fuse to BS 1362 should always be used, and
the fuse cover re-fitted. If the fuse cover is lost, the
plug must not be used until a replacement is obtained.
Removing the plug:
If your appliance has a non-rewireable moulded plug
and you should wish to remove it to add a cable
extension or to re-route the mains cable through
partitions, units etc., please ensure that either:
• the plug is replaced by a fused 13 amp re-wireable
plug bearing the BSI mark of approval.
Replacement fuse covers:
If a replacement fuse cover is fitted, it must be of the
correct colour as indicated by the coloured marking
or the colour that is embossed in words on the base of
the plug. Replacements can be obtained directly from
your nearest Service Depot.
Loading ...
Loading ...
Loading ...