Loading ...
Loading ...
Loading ...
MAINTENANCE
HOWTOREMOVETHEDRIVEBELT S. Removethe beltfromtheIdlerbracket
4_ WARNING: Before you remove
the belt, disconnect the wire
from the spark plug.
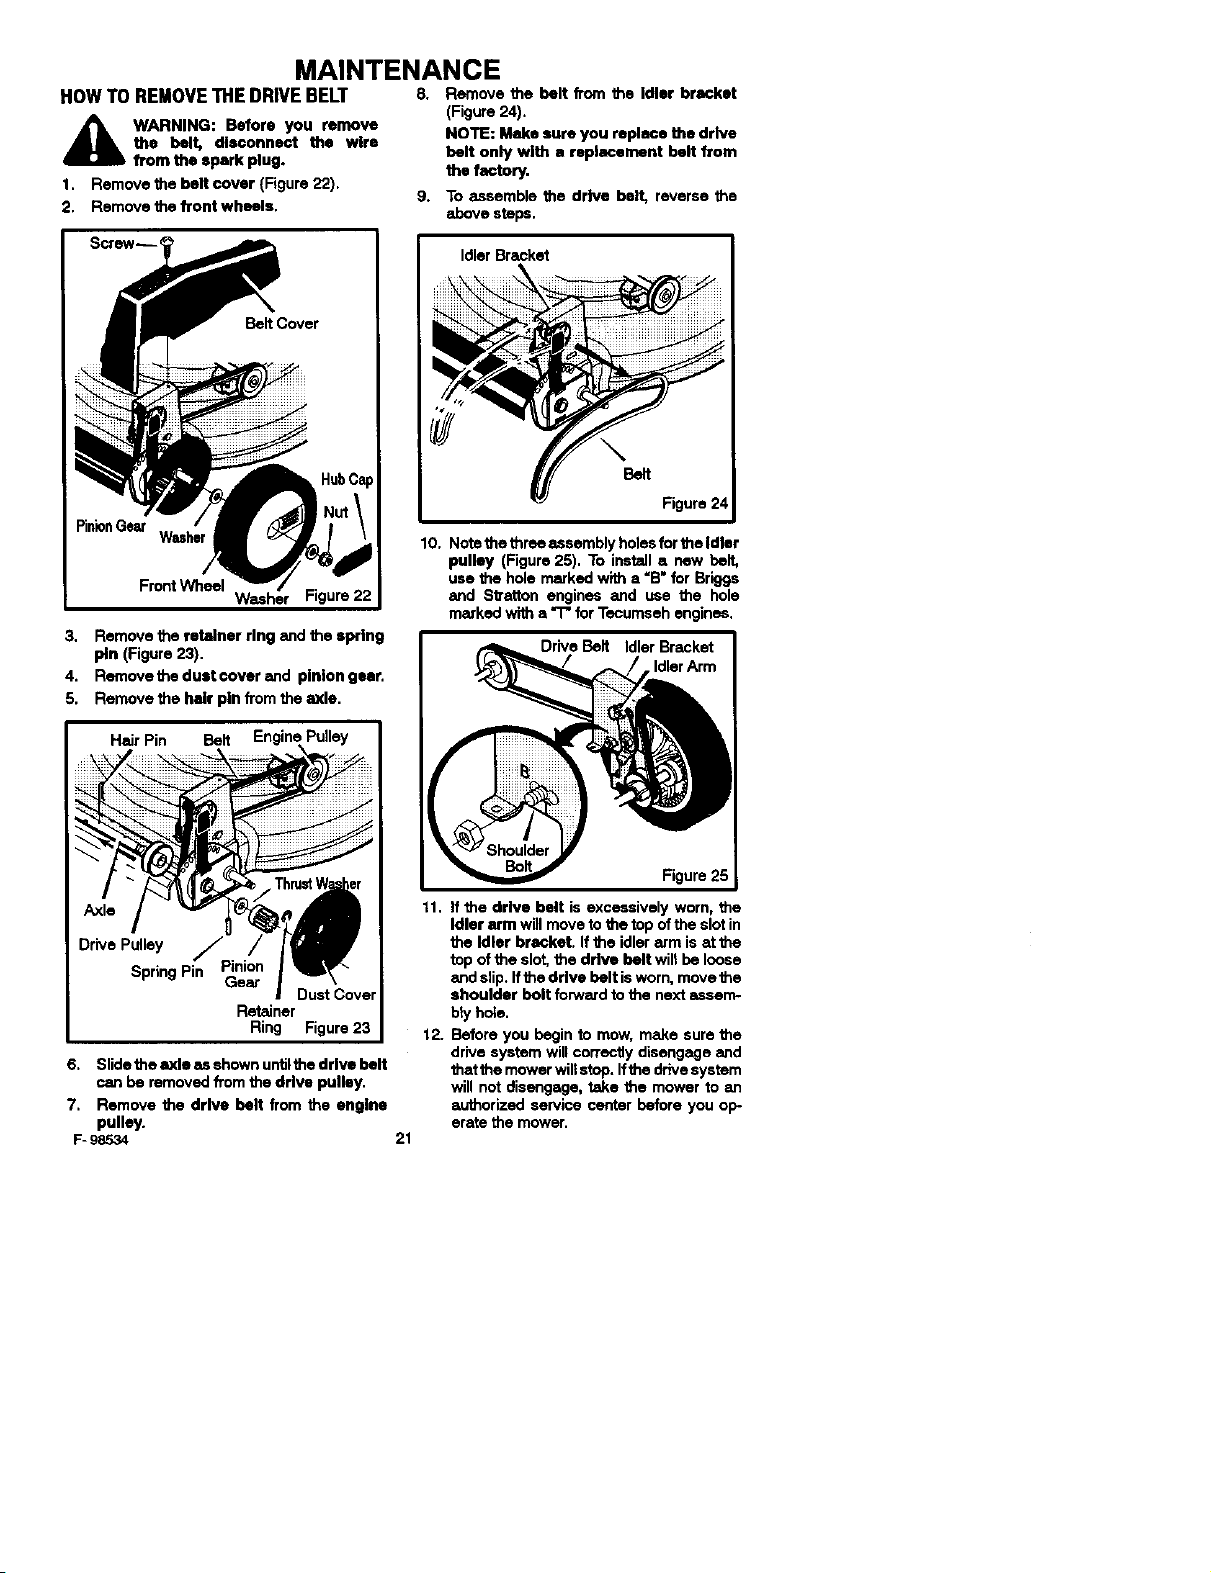
1. Remove the belt cover (Figure 22),
2. Remove the front wheels.
PinionGear
Front Wheel
Washer Figure 22
3. Remove the refainer ring and the spring
pin (Figure 23).
4. Removetheduetcoverand plnlongner.
5. Remove the hair pin from the axle.
Drive
Dust Cover
Retainer
Ring Figure 23
6. Slidethe axle as shown untilthe drive belt
can be removed from the drive pulley.
7. Remove the drive belt from the engine
pulley.
F- 98534 21
(Figure 24).
NOTE: Make sure you replace the drive
belt only with a replacement belt from
the factory.
9. To assemble the drive belt, reverse the
above stops.
Idler Bracket
\
Belt
Figure 24
10. Notothe three assembly holas forthe Idler
pulley (Figure 25). To install a new belt,
use the hole marked wi_ a "B" for Briggs
and S_'_'ton engines and use the hole
marked with a"r" for Tasumseh engines.
DriveBelt IdlerBracket
IdlerArm
Figure 25
11. If the drive belt is excessively worn, the
Idler arm will move to the top ofthe slot in
the Idler bracket. If the idler arm is at the
top of the slot, the drive belt wiltbe loose
and slip, If the drive belt isworn, move the
shoulder belt forward to the next assem-
bty hole.
12. Before you begin to mow, make sure the
drive system will corTecltydisengage and
that the mower wiltstop. Ifthe drive system
will not disengage, take the mower to an
authorized service center before you op-
erate the mower.
Loading ...
Loading ...
Loading ...