Loading ...
Loading ...
Loading ...
Installation Instructions
INSTALLING THE WASHER (cont.)
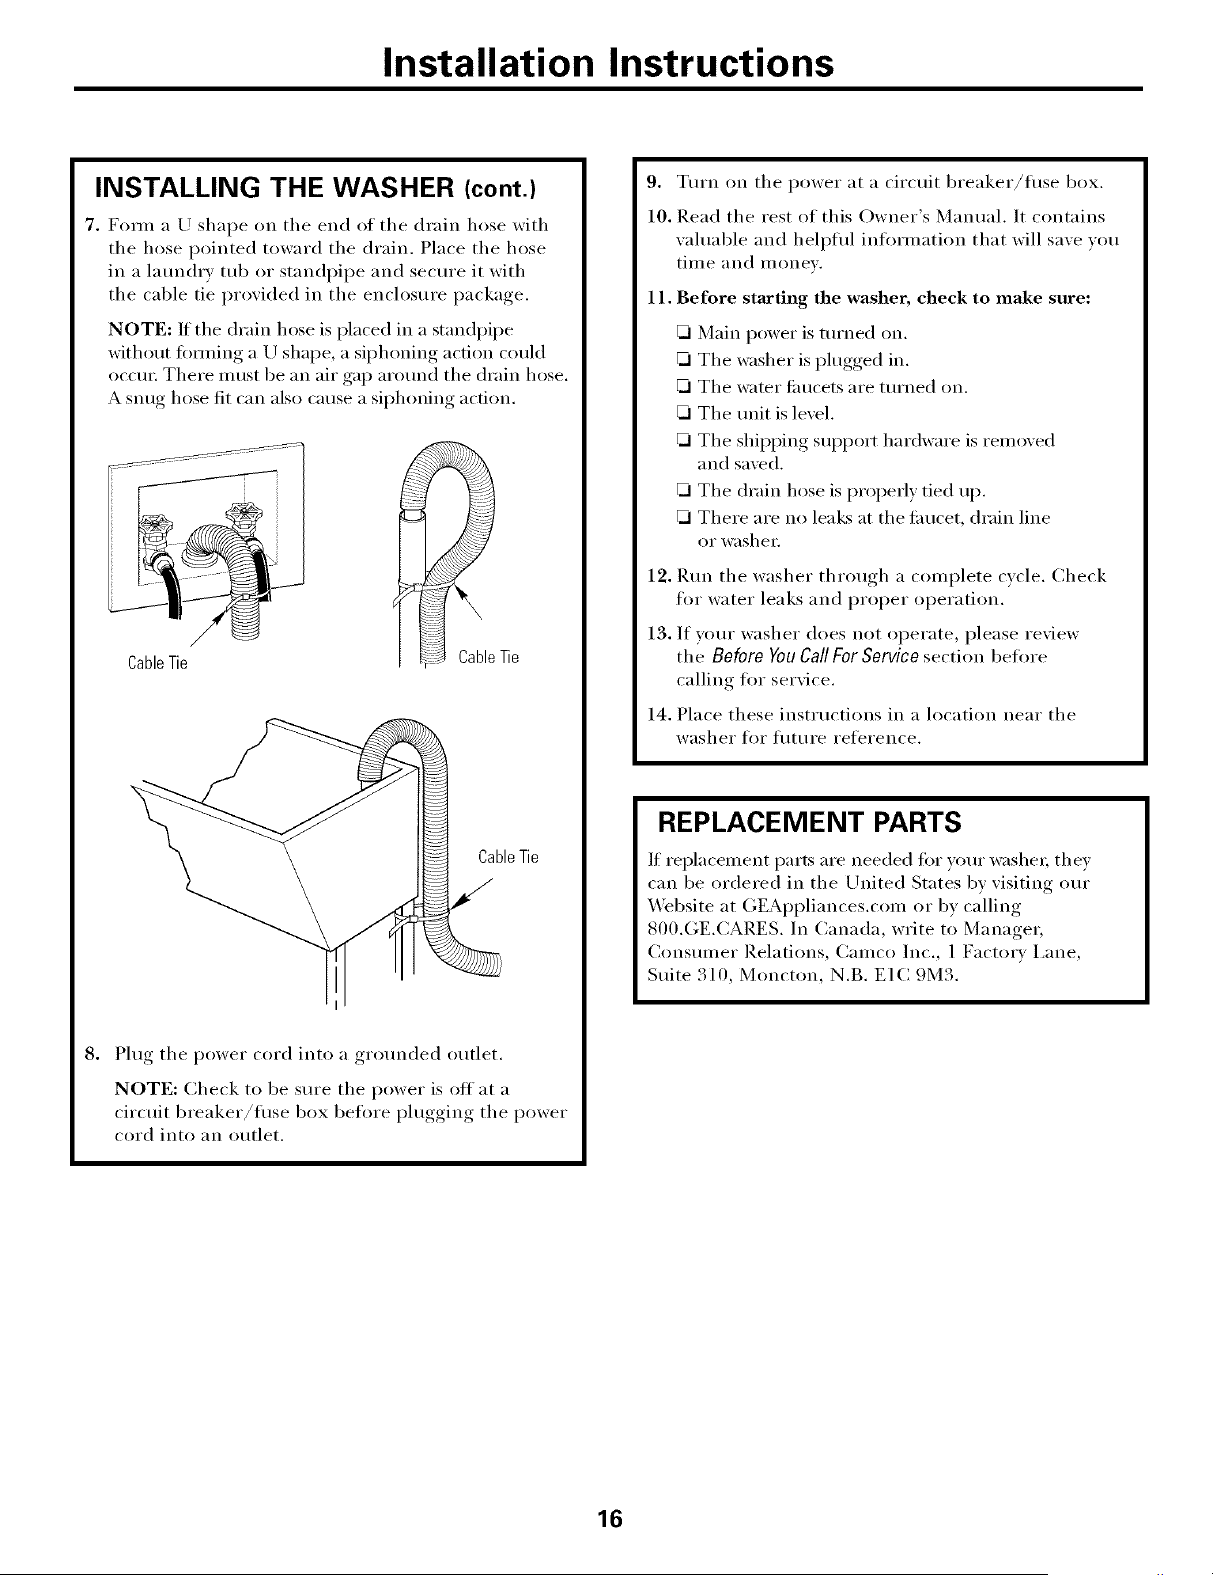
7. FoIm a U shape on tile end of tile drain hose with
tile hose pointed toward tile drain. Place tile hose
ill a latmdrv tub or standpipe and secure it with
the cable tie provided ill the enclosure package.
NOTE: If the drain hose is placed ill a standpipe
without fimning a U shape, a siphoning action could
occur. There must be an air gap around tile drain hose.
A snug hose fit can also cause a siphoning action.
CableTie
Cable Tie
CableTie
8.
Plug tile power cord into a grounded outlet.
NOTE: Check to be sure the power is off at a
circuit breaker/flBe box before plugging tile power
cord into an outlet.
9. Turn on tile power at a circuit breaker/flBe box.
10. Read the rest of this Owner's Manual. It contains
wduable and hell)rift inf'ornmtion that will save vou
time and monev.
11. Before strutting the washer, check to make sure:
Main power is turned on.
Tile washer is plugged ill.
F_ITile water tilucets are ttlrned on.
F_IThe unit is level.
Tile shiI)I)ing suI)port hardware is relnoved
and saved.
F_IThe drain hose is propeity tied ill).
F_IThere are no leal<s at the timcet, drain lille
or washei:
12. Run tile washer through a comi)lete cycle. Check
for water leaks and prol)er ol)eration.
13. If your washer does not operate, please review
the Before YouCallForService section before
calling fin" service.
14. Place these instiuctions ill a location near the
washer for fllture reference.
REPLACEMENT PARTS
If replacement parts are needed fin" your washei; they
can be ordered ill the United States by visiting our
_4'ebsite at (;EAi)pliances.con_ or by calling
800.GE.(:ARES. Ill Canada, write to Manager,
(]onsulner Relations, Canlco Inc., 1 Factory i,ane,
Suite 310, Moncton, N.B. El(: 9M3.
16
Loading ...
Loading ...
Loading ...