
Loading ...
Loading ...
Loading ...
• 6 •
6.7 Using the quick-connect connector, plug
the clips into the solar panel.
6.8 When disconnecting the solar panel, unplug
the clips from the solar panel, remove the
clip from the vehicle chassis, then remove
the clip from the battery terminal.
7. FOLLOW THESE STEPS WHEN BATTERY IS OUTSIDE VEHICLE
WARNING: A SPARK NEAR THE
BATTERY MAY CAUSE A BATTERY
EXPLOSION. TO REDUCE THE RISK
OF A SPARK NEAR THE BATTERY:
7.1 Check the polarity of the battery posts.
The POSITIVE (POS, P, +) battery post
usually has a larger diameter than the
NEGATIVE (NEG, N, -) post.
7.2 Attach at least a 24-inch (61 cm) long
6-gauge (AWG) (13 mm
2
) insulated
battery cable to the NEGATIVE (NEG, N, -)
battery post.
7.3 Connect the POSITIVE (RED) solar panel
clip to the POSITIVE (POS, P, +) post of
the battery.
7.4 Position yourself and the free end of
the cable you previously attached to the
NEGATIVE (NEG, N, -) battery post as far
away from the battery as possible – then
connect the NEGATIVE (BLACK) solar
panel clip to the free end of the cable.
7.5 Do not face the battery when making the
nal connection.
7.6 Using the quick-connect connector, plug
the clips into the solar panel.
7.7 When disconnecting the solar panel,
always do so in the reverse order of the
connecting procedure and break the rst
connection while as far away from the
battery as practical.
7.8 A marine (boat) battery must be removed
and maintained or charged on shore.
To maintain or charge it onboard
requires equipment specially designed
for marine use.
8. ASSEMBLY AND MOUNTING INSTRUCTIONS
8.1 Remove all cord wraps and uncoil the
cables prior to using the solar panel.
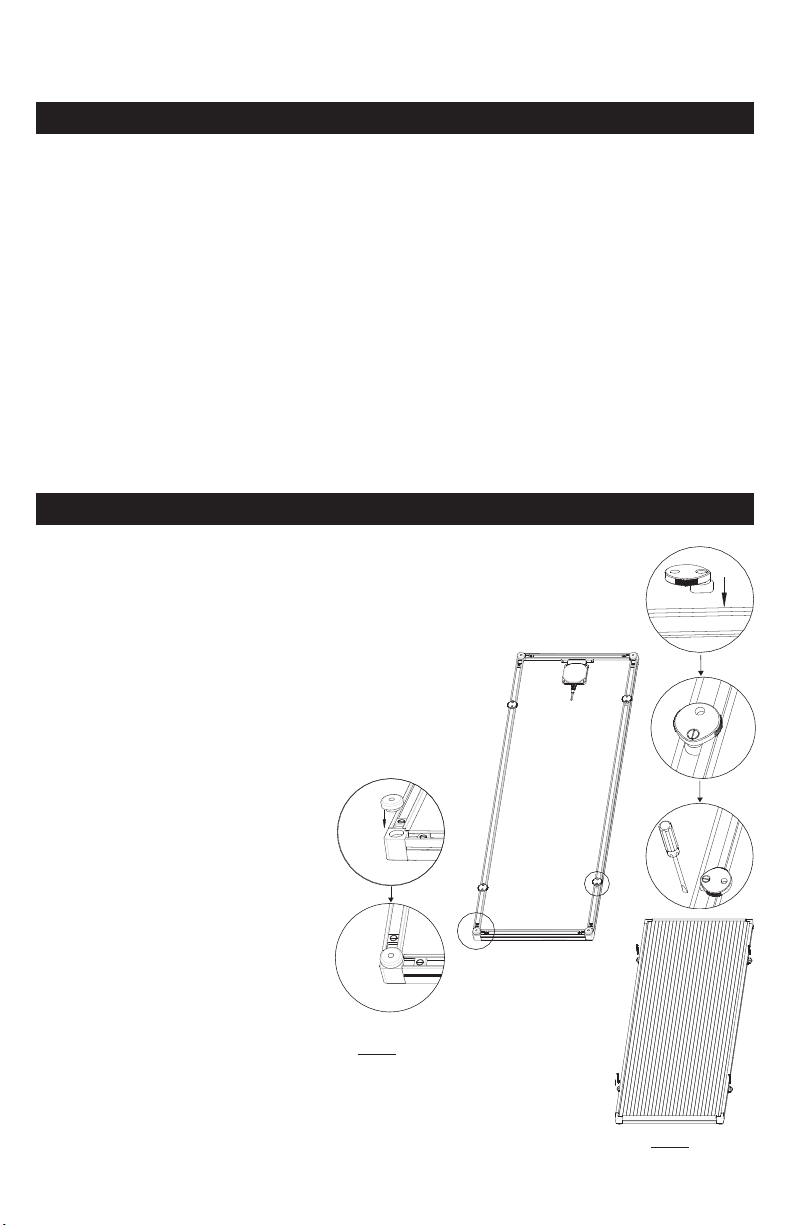
8.2 The included four foot pads can be
mounted to the corners of the solar
panel to help increase heat dissipation
(see gure 1).
8.3 To mount the solar panel (in a dry
location off the ground):
1. Place the solar panel face down
on a clean at surface.
2. Place the four plastic mounting
brackets in the desired location
and rotate each one 90°.
Tighten the mounting
brackets, using a at blade
screwdriver (see gure 2).
3. Turn the solar panel right
side up, and using the
mounting brackets as a guide,
mark and drill four mounting
holes on a secure, at
surface and mount the solar
panel with the four stainless
steel screws provided.
NOTE: Do not over tighten the
screws, or you will break the
plastic frame of the solar panel.
Fig. 1
Fig. 2
Loading ...
Loading ...
Loading ...