Loading ...
Loading ...
Loading ...
WARNING – SERVICING TO BE CARRIED OUT ONLY BY AN AUTHORISED PERSON
Disconnect from electricity before servicing. Check appliance is safe when you have nished.
41
5 Doors
5.1 To Replace an Oven Door
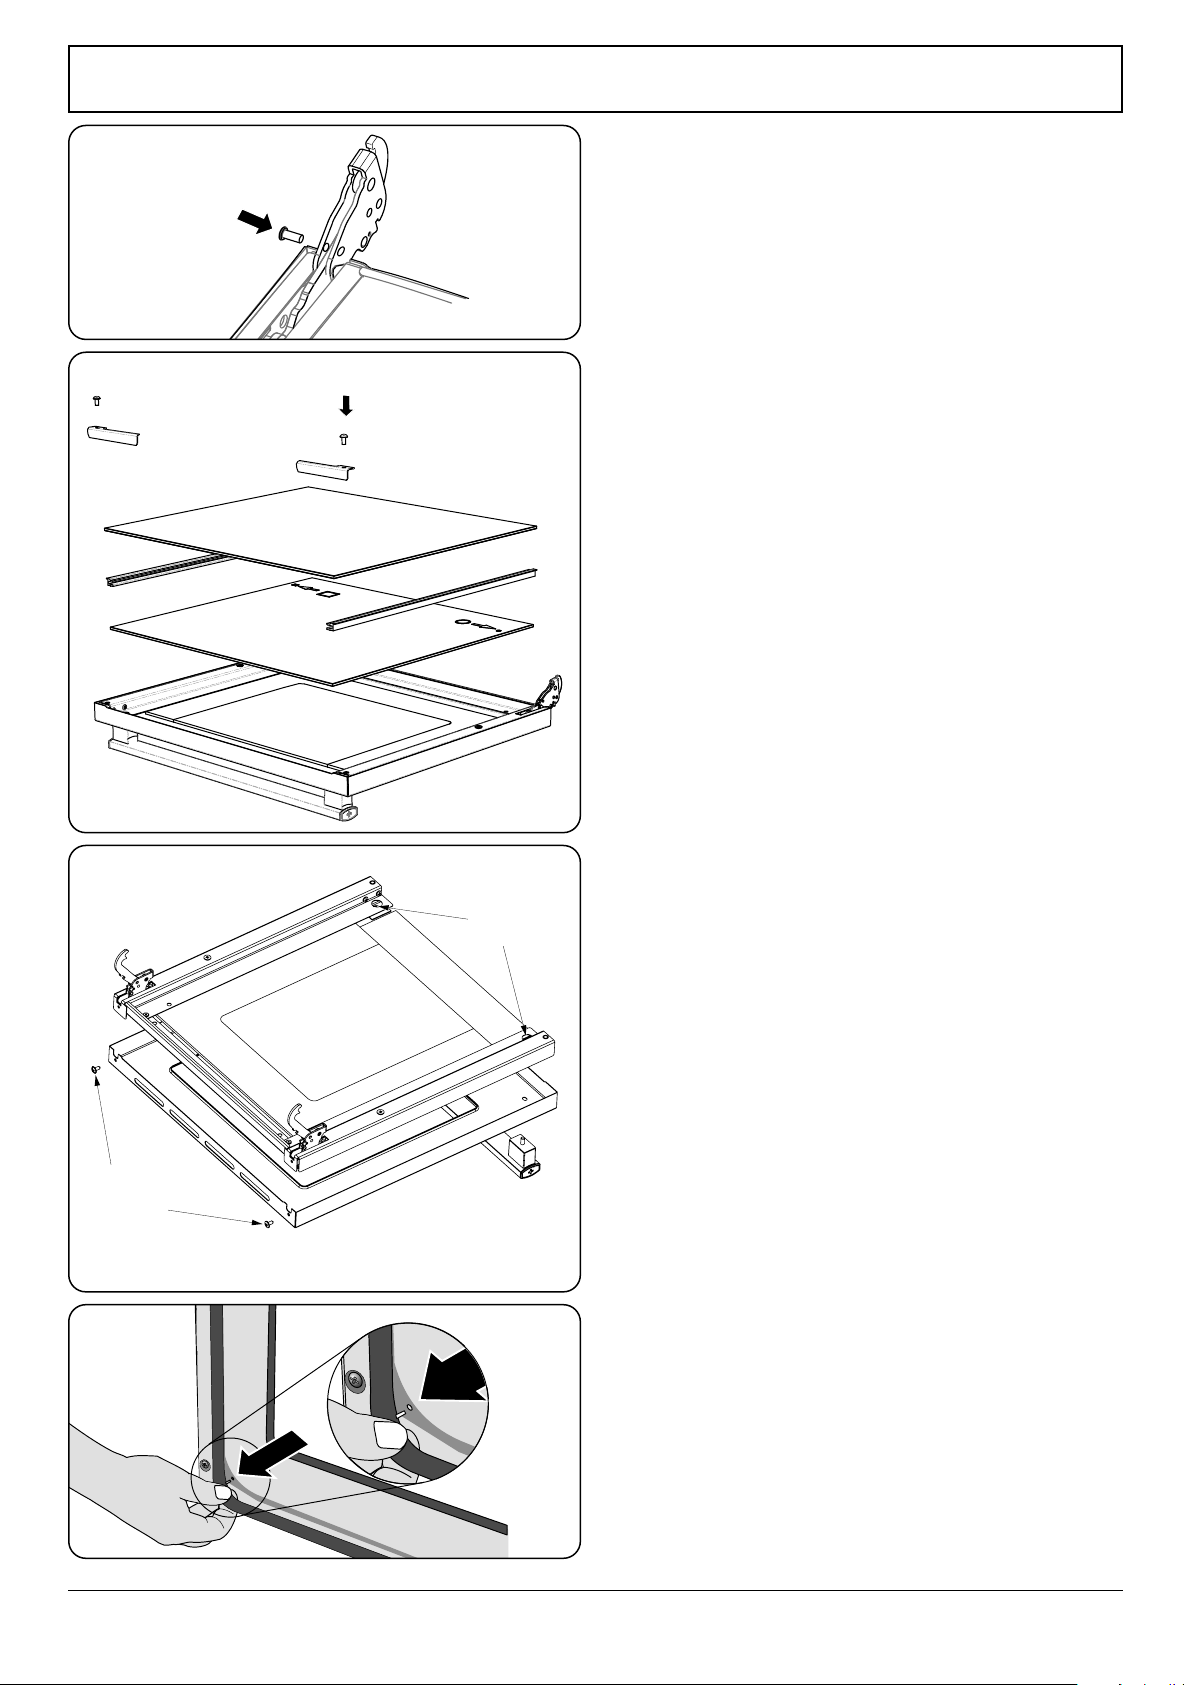
Open the oven door fully and place the supplied
holding pins in the drop down hinges (Fig. 11.10).
Lift the door panel up and out.
Carefully t the new door panel and push down gently
to release the holding pins.
n
THE DOORS ARE HEAVY, SO TAKE CARE.
5.2 Oven Door Glass
The inner glass on both oven doors is replaceable.
Open the oven door fully and place the supplied
holding pins in the drop down hinges (Fig. 11.10).
Lift the door panel up and out.
Remove the top 2 xing screws using the Allen key
supplied and the door top strip (Fig. 11.11). Then lift
the 2 glass panels out.
To ret the door glass correctly, make sure that the
printed circle and square on the glass, match up to the
pressed holes of the same shape. This will ensure the
heat reective side is in the correct position, facing
towards the oven.
Make sure that the rubber strips are all attached.
Carefully ret the door panel and push down gently to
release the holding pins.
n
ENSURE THAT ALL PIECES OF BROKEN GLASS ARE
REMOVED
5.3 To Replace an Oven Door Outer Panel
Open the oven door fully and place the supplied
holding pins in the drop down hinges (Fig. 11.10).
Lift the door panel up and out.
Remove the top 2 xing screws using the Allen key
supplied and the door top strip (Fig. 11.11). Then lift
the 2 glass panels out.
Remove the two nuts located on the inside of the door
panel, to release the handle (Fig. 11.12).
Remove the two xing screws located at the base of
the oven door and remove the outer door panel (Fig.
11.12).
Reassemble in reverse order.
5.4 To Change an Oven Door Seal
Open the oven door. The seal is held in place by small
hooks on the rear face. At the corner, pull the seal
diagonally away from the door centre until that hook
is released (Fig. 11.13). Proceed to the next hook and
release it in a similar way, and so on. Use force if the
hooks are sti, as the old seal will be discarded.
When tting the new seal, position the seal join at the
bottom. Hook the new seal in one of the corner holes of
the door, and proceed round the door, snapping in each
hook in turn.
Fig. 11.10
Fig. 11.11
Fig. 11.12
Fig. 11.13
Handle
xings x 2
Outer
door panel
screws x 2
Loading ...
Loading ...
Loading ...