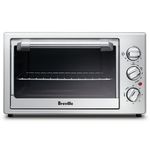
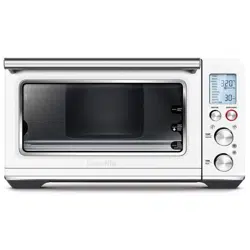
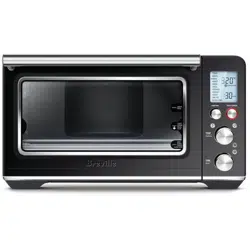
Breville LOV560SIL Oven
Product's Documents
Below are documents related to this product, you can read online or download:
- Owner's manual - (English) Read Online | Download pdf
At Breville we are very safety conscious. We design and manufacture consumer products with the safety of you. our valued customer. foremost in mind. In addition we ask that you exercise a degree of care and adhere to the following precautions.
READ ALL INSTRUCTIONS BEFORE USE AND SAVE FOR FUTURE REFERENCE
• Carefully read all instructions before operating the oven for the first time and save for future reference.
• Remove and safely discard any packing material. and promotional labels before using the oven for the first time.
• To eliminate a choking hazard for young children. remove and safely discard the protective cover fitted to the power plug of this appliance.
• Do not place the oven near the edge of a bench or table during operation.
• Ensure the surface is level. clean and free of water and other substances.
• Do not use the oven on a sink drain board.
• Do not place the oven on or near a hot gas or electric burner. or where it could touch another heated oven.
• When operating the oven. keep a minimum distance of 10cm of space on both sides of the oven and 15cm above.
• The rear surface of the oven can be placed against a wall.
• Position the oven at a minimum distance of 20cm away from curtains. cloths and other heat sensitive materials when in use. This will allow for adequate air circulation and also help prevent the possibility of curtains. and cloths discoloration due to radiated heat.
• A fire may occur if the oven is covered or touches flammable material. including curtains. draperies. walls. and the like when in operation.
• Caution should be taken when grilling high oil content foods. such as pine nuts and walnuts.
They may catch fire. If this occurs. please keep the oven door closed and switch off and unplug oven until flame has extinguished.
• Always operate the oven on a stable. heat resistant surface. Do not use on a cloth-covered surface. near curtains or other flammable materials.
• Do not place cardboard. plastic. paper. or other flammable materials in the oven.
• Do not place anything on top of the oven.
• Do not cover the crumb tray or other any part of the oven with metal foil. This will cause overheating of the oven.
• Regularly clean the crumb tray to discard crumbs. Ensure to turn OFF the oven. remove the power plug from the wall outlet and allow the oven to cool before pulling the crumb tray out.
• Always ensure the crumb tray is thoroughly dried after cleaning. Ensure to re-insert the crumb tray before operating the oven.
• Always use extreme caution when using containers constructed of anything other than metal or glass. Do not use see-through glass containers in the oven.
Oven-proof ware such as Pyrex‰ or CorningWare‰ without the lid may be used.
• Do not use lids in the oven. as pressure build up in a covered pan or dish which may cause hot ingredients to expel or the dish to crack.
• Do not place any part of the oven in the dishwasher.
• The temperature of accessible surfaces will be high when the appliance is in operation and also for some time after use. Always wear protective. insulated oven mitts when inserting. removing or handling items from the oven when hot. Alternatively. allow the oven to cool down before handling.
• Always use extreme caution when removing any of the accessories or disposing of hot grease or other hot liquids.
• Do not place hands inside the oven during operation.
• Do not leave the door standing open for extended periods of time when the oven is turned ON.
• The glass of the oven door has been specially treated to make it stronger. more durable and safer than ordinary glass. however it is not unbreakable.
• If struck extremely hard. it may break or weaken. and could at a later time. shatter into many small pieces without apparent cause.
• Do not insert oversized foods into the oven as they create risk of fire or electric shock.
• It is recommended to use only the accessories supplied with this oven.
• When grilling. always insert the enamel tray into the oven to act as a drip tray.
• When using the rotisserie function. it is essential that the oven is turned off at the power outlet and the cord unplugged before assembling the rotisserie rod in position in the oven.
• After using the rotisserie function. it is important to clean the rotisserie rod. spikes and thumbscrews to avoid bacterial contamination. Follow cleaning instructions provided in this book.
• Do not clean the interior with metal scouring pads as pieces can break off the pad and touch electrical parts of the oven. creating risk of electric shock.
• Do not store any materials other than the supplied accessories in the oven when not in use.
• Do not attempt to operate the oven by any method other than those described in this booklet
• Always ensure the oven is properly assembled before use. Follow the instructions provided in this book.
• The oven is not intended to be operated by means of an external timer or separate remote control system.
• The top of the oven is very hot during and after operation. Do not store any item on top of the oven when in use and when stored.
• Do not leave the oven unattended at any time when in use.
• Caution should be exercised when using pans and dishes constructed of materials other than metal. If using ceramic or glass pans or dishes it is important that they are oven safe to prevent cracking.
• Do not touch hot surfaces. Oven surfaces. including the door and outer surface of the oven are hot during and after operation. To prevent burns or personal injury. always use protective hot pads or insulated oven mitts. or use handles and knobs where available. when inserting. removing or handling items from the oven. Alternatively. allow the oven to cool down before handling.
• Always turn the appliance to the OFF position. ensure the oven has cooled. is turned off at the power outlet and the cord is unplugged from the power outlet before attempting to move the appliance. when not in use. if left unattended and before disassembling. cleaning or storing.
• The use of any accessory attachments not recommended by Breville may cause injuries.
• Keep the oven clean. Follow the cleaning instructions provided in this book.
• Fully unwind the power cord before use.
• Do not let the power cord hang over the edge of a table or counter. or touch hot surfaces. or become knotted.
• To protect against electric shock do not immerse the oven. power cord or power plug in water or any other liquid.
• This appliance is not intended for use by persons (including children) with reduced physical. sensory or mental capabilities. or lack of experience and knowledge. unless they have been given supervision or instruction concerning use of the appliance by a person responsible for their safety.
• Children should be supervised to ensure that they do not play with the appliance.
• This appliance is recommended for household use only. To avoid a hazard do not use this appliance for anything other than its intended use. Do not use in moving vehicles or boats. Do not use outdoors. Misuse may cause injury.
• It is recommended to regularly inspect the appliance. Do not use the appliance if power cord. power plug or appliance becomes damaged in any way. Return the entire appliance to the nearest authorised Breville service centre for examination and/or repair.
• Any maintenance. other than cleaning. should be performed at an authorised Breville Service Centre.
• The installation of a residual current device (safety switch) is recommended to provide additional safety protection when using electrical appliances. It is advisable that a safety switch with a rated residual operating current not exceeding 30mA be installed in the electrical circuit supplying the appliance. See your electrician for professional advice.
CAUTION Hot surfaces during and after use.
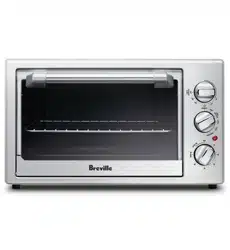
OPERATING YOUR BREVILLE THE TOAST & ROAST PRO
TEMPERATURE CONTROL
Variable temperature control allows you to select the perfect temperature for each cooking task. The temperature range is from 80°C – 220°C.
NOTE
When using the Rotisserie or Grill functions. turn the temperature control dial to 220°C for best performance.
OVEN SETTINGS
Select from bake. grill with fan. grill. toast and rotisserie.
Bake
For heating food evenly throughout. Ideal for pizza. meats and poultry. biscuits. cakes and muffins.
Grill with Fan
For an even heat distribution when grilling. Particularly suited to whole fish or pieces of fish where the appearance could be spoilt by turning during cooking.
Grill
For browning/grilling the top of food. Ideal for open sandwiches. sausages and vegetables.
Toast
For browning bread. Ideal for toasting all different types of bread.
NOTE
Toasting times will vary depending on the type of bread used. Sweet and fruit breads generally take less time than white or wholemeal breads.
Rotisserie
For cooking food with the rotisserie accessories. Ideal for cooking meats and poultry for a tender and juicy result on the inside and roasted to perfection on the outside.
POWER 'ON' LIGHT
The Power On’ light will illuminate whenever the Time Control is set to a particular time or set to 'Stay On'.
TIME / STAY ON CONTROL DIAL
To activate the timer. turn the dial clockwise to the right to a specified time up to 60 minutes. A bell will sound to signify when the selected time has finished and will turn the oven off automatically.
To select the 'Stay On' feature. turn the dial counter-clockwise to the left. The oven will stay on until it is manually shut off.
ACCESSORIES
Chrome plated wire rack
Use for baking. grilling and toasting functions. Sits in any of the three rack heights within the oven.
Enamel baking pan
Use when grilling. roasting or baking. Sits in any of the rack heights within the oven.
Crumb tray
Insert the tray into the bottom of the oven (sits under the bottom element) for easy removal of crumbs and food drippings.
NOTE
Always ensure to insert the crumb tray into the oven before use and after cleaning.
Rotisserie rod. spikes and thumbscrews
The spikes (See A) position the poultry / meat to the rotisserie rod (See B) and are secured in place by firmly screwing the thumbscrews (See C).
Rotisserie handle Used for safely inserting and removing the assembled rotisserie rod from the oven (See D).
BEFORE FIRST USE
1. Before using your oven for the first time. remove any packaging material and promotional labels. Ensure the appliance is switched off at the power outlet and the power cord is unplugged.
2. Remove the oven accessories and wash them in warm. soapy water with a soft cloth.
Rinse and dry thoroughly. Wipe the floor and roof of the oven chamber with a soft. damp cloth. Dry thoroughly.
3. Insert the power plug into the power outlet and switch on. Set the Temperature Control to 220°C and the Time Control to 15 minutes. This will eliminate any oil residue that may have been used for packing and shipping.
4. Allow the oven to cool. Insert the accessories. The oven is now ready to use.
NOTE
When turned on for the first time. the oven may give off vapours for up to 15 minutes. This is due to the protective substances on the heating elements. It is safe. not detrimental to the performance of the oven and will dissipate with use.
WARNING
Do not force open the oven door beyond its limits or let the door drop open as this may cause damage to the door and its ability to maintain a proper seal.
NOTE
• Condensation may build up on the inside of the glass door. This is normal and should evaporate.
• The door can be opened at any time during operation.
• After the Temperature Control and cooking function have been selected. the time and temperature can be changed at any time during operation.
• For easier cleaning. ensure the crumb tray is in position at the bottom of the oven before cooking any food. Clean after each use and always re-insert the crumb tray before operating the oven.
PREHEATING
Some recipes benefit from the oven being preheated.
For the Grill with Fan. Grill & Bake functions. best results are normally achieved by preheating the oven for 10 minutes.
To preheat. select a temperature on the Temperature Dial. turn the middle dial to 'Bake' and choose a preheat time on the Time Control (usually 10 – 15 minutes) and wait for the time to countdown. When the bell sounds. the oven is preheated and ready. Place food in the oven.
Adjust the Temperature Dial and cooking function if required and re-set the Time Control or turn to 'Stay On' to begin cooking.
Some recipes recommend that the preheat temperature be higher than the actual cooking temperature. For example. placing meat into a hot. preheated oven will help sear the outside. then the cooking temperature can be reduced for tender. juicy results.
When baking scones. cakes etc. the preheat temperature may be the same or slightly higher than the actual cooking temperature.
NOTE
Turning the cooking function dial to 'Standby' will turn off all cooking functions (Bake. Grill with Fan. Grill. Toast. Rotisserie) however the Power 'On' light will remain illuminated as long as the Time Control is active or in the 'Stay On' position.
Turning the Time Control to OFF’ at any time will stop operation of the oven and turn the Power 'On' light off.
BAKE FUNCTION
For cooking food evenly throughout. Ideal for meats and poultry. biscuits. cakes and muffins.
The top two and bottom two elements will heat and the fan will operate when the 'Bake' Function setting is selected.
1. Turn the Temperature Control to Bake’ and preheat the oven at 220°C for 10 minutes.
2. Once preheated. reduce the temperature down to 180°C and place food in the baking pan or place food in other oven safe bakeware onto the wire rack and insert in the medium height position in the oven and close the door.
3. Using the baking times in the chart on page 13 as a guide. turn the Time Control to the desired time or to the Stay On’ setting.
4. When finished. a bell will sound and the oven will switch off immediately if a time on the Time Control has been selected. If the Stay On’ setting has been selected. the oven will remain on until the Time Control has been turned off manually.
BAKING A PIZZA
The Baking Function can be used to bake fresh or frozen pizza.
1. Place wire rack in the lower height position in the oven and close the door.
1. Turn the Temperature Control to Bake’ and preheat the oven at 220°C for 10 minutes.
2. Place pizza on pizza crisper pan (not included) onto the wire rack.
3. Turn the Time Control to the desired time (see chart below for suggested times).
4. Pizza is ready when cheese has melted and is golden on the top and the base is crisp and brown.
GRILL WITH FAN FUNCTION
The top two elements will heat and the fan will operate when the 'Grill with fan' function is selected.
It is recommended to set the Temperature Control to 220°C for 'Grill with fan'
1. Turn the Temperature Control to Bake’ and preheat the oven at 220°C for 10 minutes.
2. Place food into the enamel baking pan.
3. Turn the Temperature Control to Grill with fan’ and place the baking pan in the medium or upper height position in the oven.
4. Turn the Time Control to the desired time or to the Stay On’ setting.
5. When finished grilling with fan. a bell will sound and the oven will switch off immediately if a time on the Time Control has been selected. If the Stay On’ setting has been selected. the oven will remain on until the Time Control has been turned off manually.
GRILL FUNCTION
For browning/grilling the top of food. Ideal for open sandwiches. small cuts of meat. poultry. fish. sausages and vegetables.
The top two elements will heat when the 'Grill' function is selected.
It is recommended to set the Temperature Control to 220°C for 'Grill'.
1. Turn the Temperature Control to Bake’ and preheat the oven at 220°C for 10 minutes.
2. Place food into the enamel baking pan.
3. Turn the oven setting to Grill’ and place the baking pan in the medium or upper height position in the oven.
4. Turn the Time Control to the desired time or to the Stay On’ setting.
5. When finished. a bell will sound and the oven will switch off immediately if a time on the Time Control has been selected. If the Stay On’ setting has been selected. the oven will remain on until the Time Control has been turned off manually.
TOAST FUNCTION
The 'Toast' function browns and crisps the outside of your bread while keeping the inside soft and moist.
The top two and bottom two elements will heat when the 'Toast' function is selected.
1. Insert the wire rack in the medium height position in the oven.
2. If toasting 1–2 slices. centre the slices on the wire rack. If toasting 3 – 4 slices. evenly space them with 1–2 slices at the front of the wire rack and 1–2 slices at the back of the rack.
3. Close the oven door.
4. Turn the oven setting to the 'Toast' function 5. Turn the Time Control to the Stay On’ setting and brown to your liking.
ROTISSERIE FUNCTION
For even-cooking of food using the rotisserie accessory. Ideal for a variety of meats and poultry that are tender on the inside and roasted to perfection on the outside.
The top two elements and the fan and rotisserie will operate when the Rotisserie function is selected.
NOTE
It is recommended to limit weight of meats and poultry to be cooked to 1.5kg as larger size will not fit/rotate.
Always ensure that the enamel baking pan is inserted in the lowest height position in the oven to catch food drippings.
1. Insert one end of the rotisserie rod through one of the spikes. making sure the points of the spike are facing inwards and secure in place by turning the thumbscrew in a clockwise direction.
2. Place food to be cooked on the rotisserie rod by running the rod directly through the centre of the food to be cooked. Continue to slide the food until the spike is securely imbedded in the food.
3. Slide the second spike facing inwards onto the rotisserie rod at the other end of the food to be cooked. Continue to slide the spike until it is securely imbedded in the food and secure spike by turning the thumbscrew in a clockwise direction.
4. Check that the food is centred on the rotisserie rod.
5. Position enamel baking pan into the lowest height position to catch food drippings.
6. Turn the Temperature Control to 'Rotisserie' and preheat the oven at 220°C for 10 minutes.
7. Use the rotisserie handle to lift the rotisserie rod. ensuring to place the hooks of the rotisserie handle under the grooves on both sides of the rotisserie rod.
8. Insert the long rectangular end of the rotisserie rod into the drive socket. located on the right-hand side of the oven wall. Position the square end of the rotisserie rod onto the rotisserie rod support. located on the left-hand side of the oven wall.
9. Turn the Time Control to the desired time or to the Stay On’ setting.
10. When finished. a bell will sound and the oven will switch off immediately if a time on the Time Control has been selected. If the Stay On’ setting has been selected. the oven will remain on until the Time Control has been turned off manually.
NOTE
Use the Baking/Rotisserie Guide on page 13 for suggested roast times. however. it is recommended to check doneness with a reliable meat thermometer. Use an independent timer to remind you to check the meat temperature.
11. Remove the rotisserie rod by placing the hooks of the rotisserie handle under the grooves on both sides of the rotisserie rod.
12. Lift out the left side of the rotisserie rod first. by lifting it up and out. Then remove the rotisserie rod from the drive socket on the right-hand side of the oven wall using oven mitts and carefully remove the food from the oven.
13. Unscrew the spikes from the rotisserie rod and remove the food.
NOTE
Use insulated oven mitts when disassembling the rotisserie rod and removing food as the rotisserie accessories will be hot.
• Always ensure the oven is turned off by switching Time Control to OFF’. Then switch the appliance off at the power outlet and unplug the cord.
• Allow the oven and all accessories to cool completely.
• Remove all accessories.
CLEANING THE OUTER BODY. DOOR AND CRUMB TRAY
• After each use. wipe the outer body and crumb tray with a soft. damp cloth then dry thoroughly. A nonabrasive liquid cleanser may be used to avoid build-up of stains.
• Always ensure to re-insert the crumb tray into the oven after cleaning and before use.
• To clean the glass door. use a glass cleaner or mild detergent and a damp cloth or soft plastic scouring pad. Do not use an abrasive cleaner or pad as these might scratch the surface.
• Let all parts and surfaces dry thoroughly prior to plugging the oven in and using.
CLEANING THE INTERIOR
To clean any spattering that may occur while cooking. wipe the walls with a soft cloth dampened with warm water. Dry thoroughly.
NOTE
• Do not use abrasive cleansers. metal scouring pads or metal utensils on any of the interior or exterior surfaces of the oven. including the crumb tray.
• After each use. wipe the floor and roof of the interior with a soft. non-abrasive. damp cloth or soft plastic scouring pad to avoid residue build-up. Dry thoroughly.
CLEANING THE ACCESSORIES
Wash all accessories in warm soapy water with a soft cloth or soft plastic scouring pad. Rinse and dry thoroughly.
NOTE
• Do not use abrasive cleansers. metal scouring pads or metal utensils to clean any of the accessories as they may damage the enamel finish of the baking tray and grilling rack.
• It is important to thoroughly wash the rotisserie rod. spikes and thumbscrews in hot soapy water to avoid bacterial contamination with a soft cloth after use. Rinse and dry thoroughly.
• Do not place any part of the oven in the dishwasher.
STORAGE
When storing the oven. switch off and then remove the power supply plug from the power outlet. Ensure the appliance is completely cool. clean and dry. Insert the accessories into the oven. Ensure the door is closed and do not place heavy objects on top. Store the appliance standing on its support legs.
WARNING
Do not immerse cord. plug. or appliance into water or any other liquid. Do not use metal scouring pads to clean the oven. Pieces can break off the pad and touch electrical parts of the oven. creating risk of electric shock.
CAUTION
To prevent damage to the appliance do not use alkaline cleaning agents when cleaning. use a soft cloth and