Loading ...
Loading ...
Loading ...
ImmtmYourrmmmmr,cont.
To reducethe risk of injury or
death, follow basic precautions,
includingthe following:
> Read all instructionsbefore
installingdevice. ........
:_. DO NOT attemptinsta}lationif
instructions are not understoodor
ifthey are beyondpersonal skill
level;
ObserveaiiiOcaic0de a"d
: ordinances.............
._- DO NOT servicedeviceUnless
specifically recommendedin
owner+smanua!or published
user-repairinstructions, ....
_--Disconnectpowerto refrigerator
prior to installingdevice.
To avoid property damageor
possible injury,follow basic
precautions,includingthe
following:
>- Consult a plumberto connect
copper tubing to household
plumbingto assure compliance
with local codes andordinances.
>- Confirm water pressureto water
valve is between20 and 1co
pounds persquare inch,If water
filter is installed,water pressure to
water vaive must be a m_nimumof
35 poundsper squareinch.
_- DO NOT use a self+piercing,or _,_"
saddle valve! Both reducewater
flow, becomeclogged with time,
and may cause leaksif repair is
attempted,
>. Tighten nutsby handto prevent
cross threading. Finishtightening
nutswith pliers and wrenches. DO
NOT overtighten°
> Wait 24 hours before plating
refrigeratorintofinal position to
check andcorrect any water leaks.
MATERIALS NEEDED
>. ¼"outer diameterftexible copper
tubing
_--Brasscompressionnut and sleeve for
¼"outer diametercopper tubing
>. Shut-off valve (requires a Y+"hole to
be drilled intowater supplybefore
valve attachment)
._.Adjustable:wrench
_- '/+"hex nut driver
NOTE: Add 8' to tubing length needed to
reach water supplyfor creationof
service loop
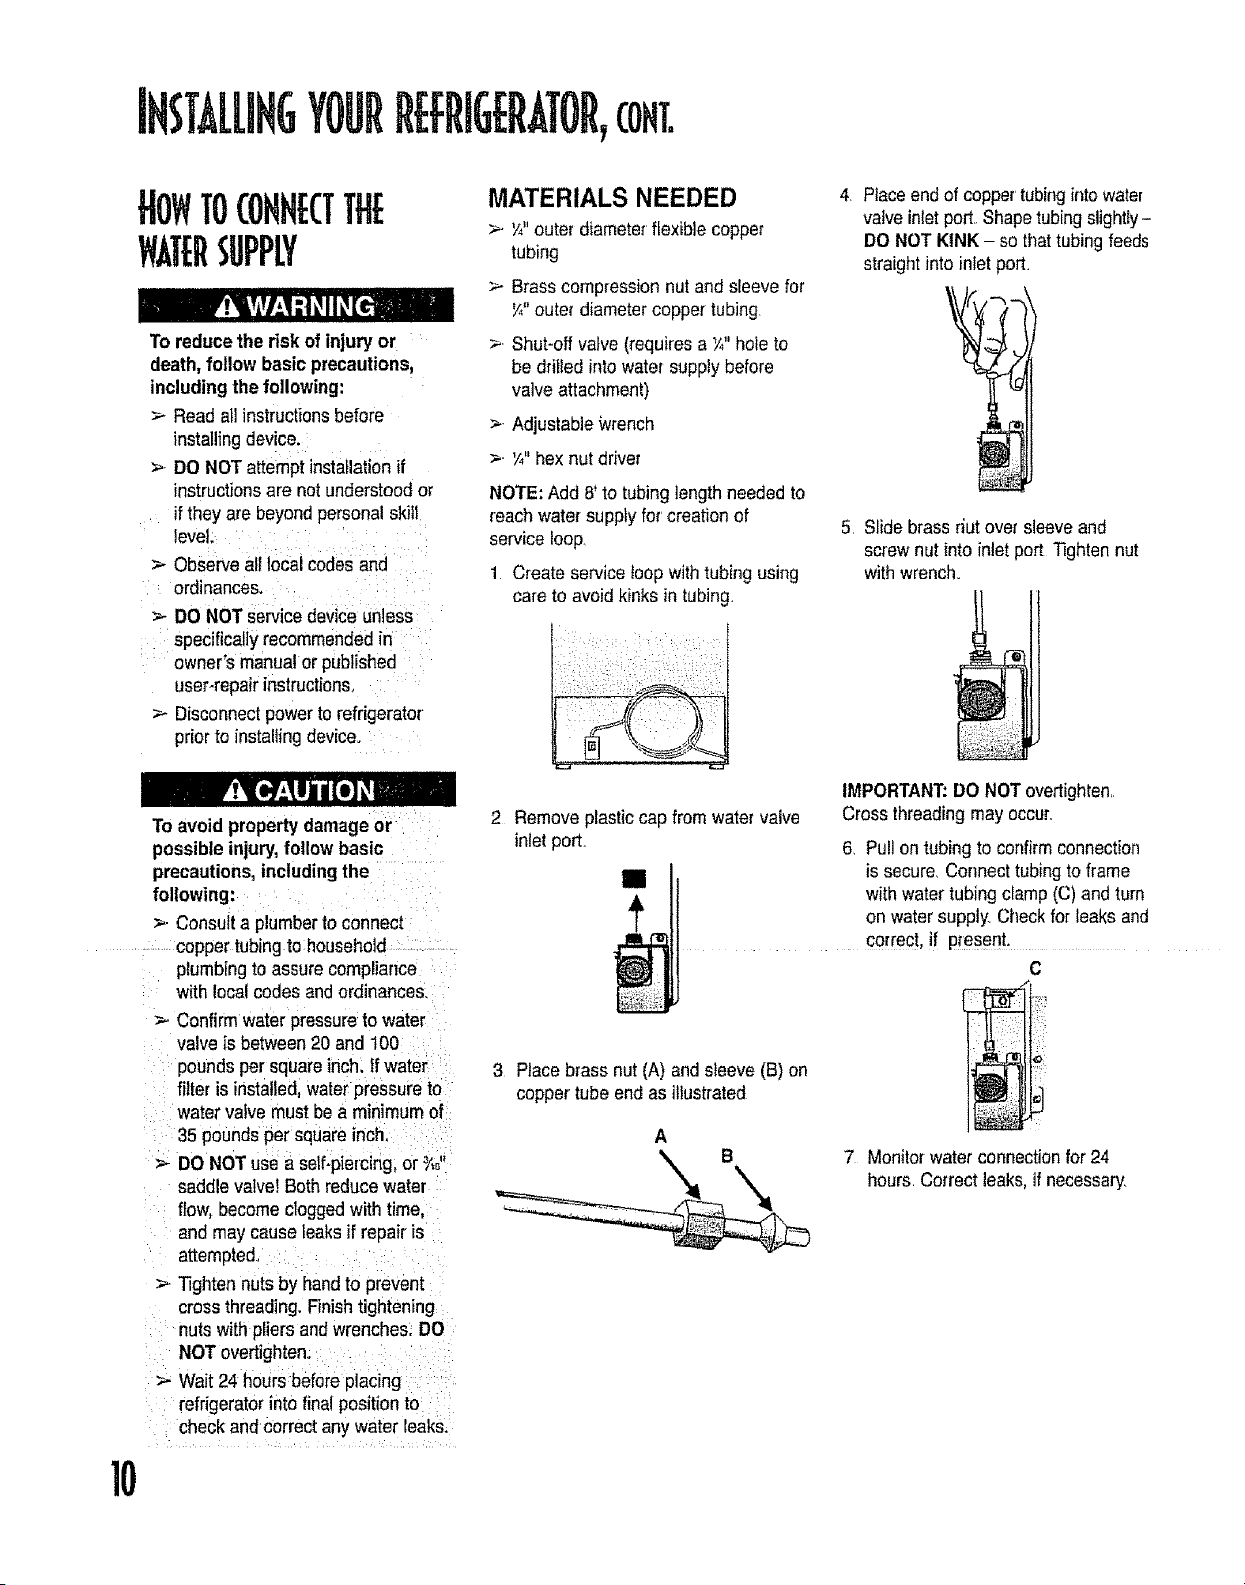
1 Create service loopwith tubing using
care to avoid kinks in tubing,
2 Remove plastic cap from watervalve
inlet port+
II
3 Place brass nut (A) andsleeve (B) on
copper tube end as illustrated
4, Placeendof copper'tubinginto water
valveinlet port,.Shapetubing slightly-
DO NOT KINK - so thattubing feeds
straight intoinlet port.
5, Slide brassr_utover sleeveand
screw nut intoinlet port Tightennut
with wrench,,
I
IMPORTANT:DO NOTovertighten,
Cross threadingmay OCOU_r,
6, Pull ontubing to confirm connection
is secure. Connect tubingto frame
with water tubing clamp (C) and turn
on watersupply. Checkfor leaks and
correct, if present.
C
7 Monitorwaterconnectionfor 24
hours Correct leaks,if necessary.
10
Loading ...
Loading ...
Loading ...