9
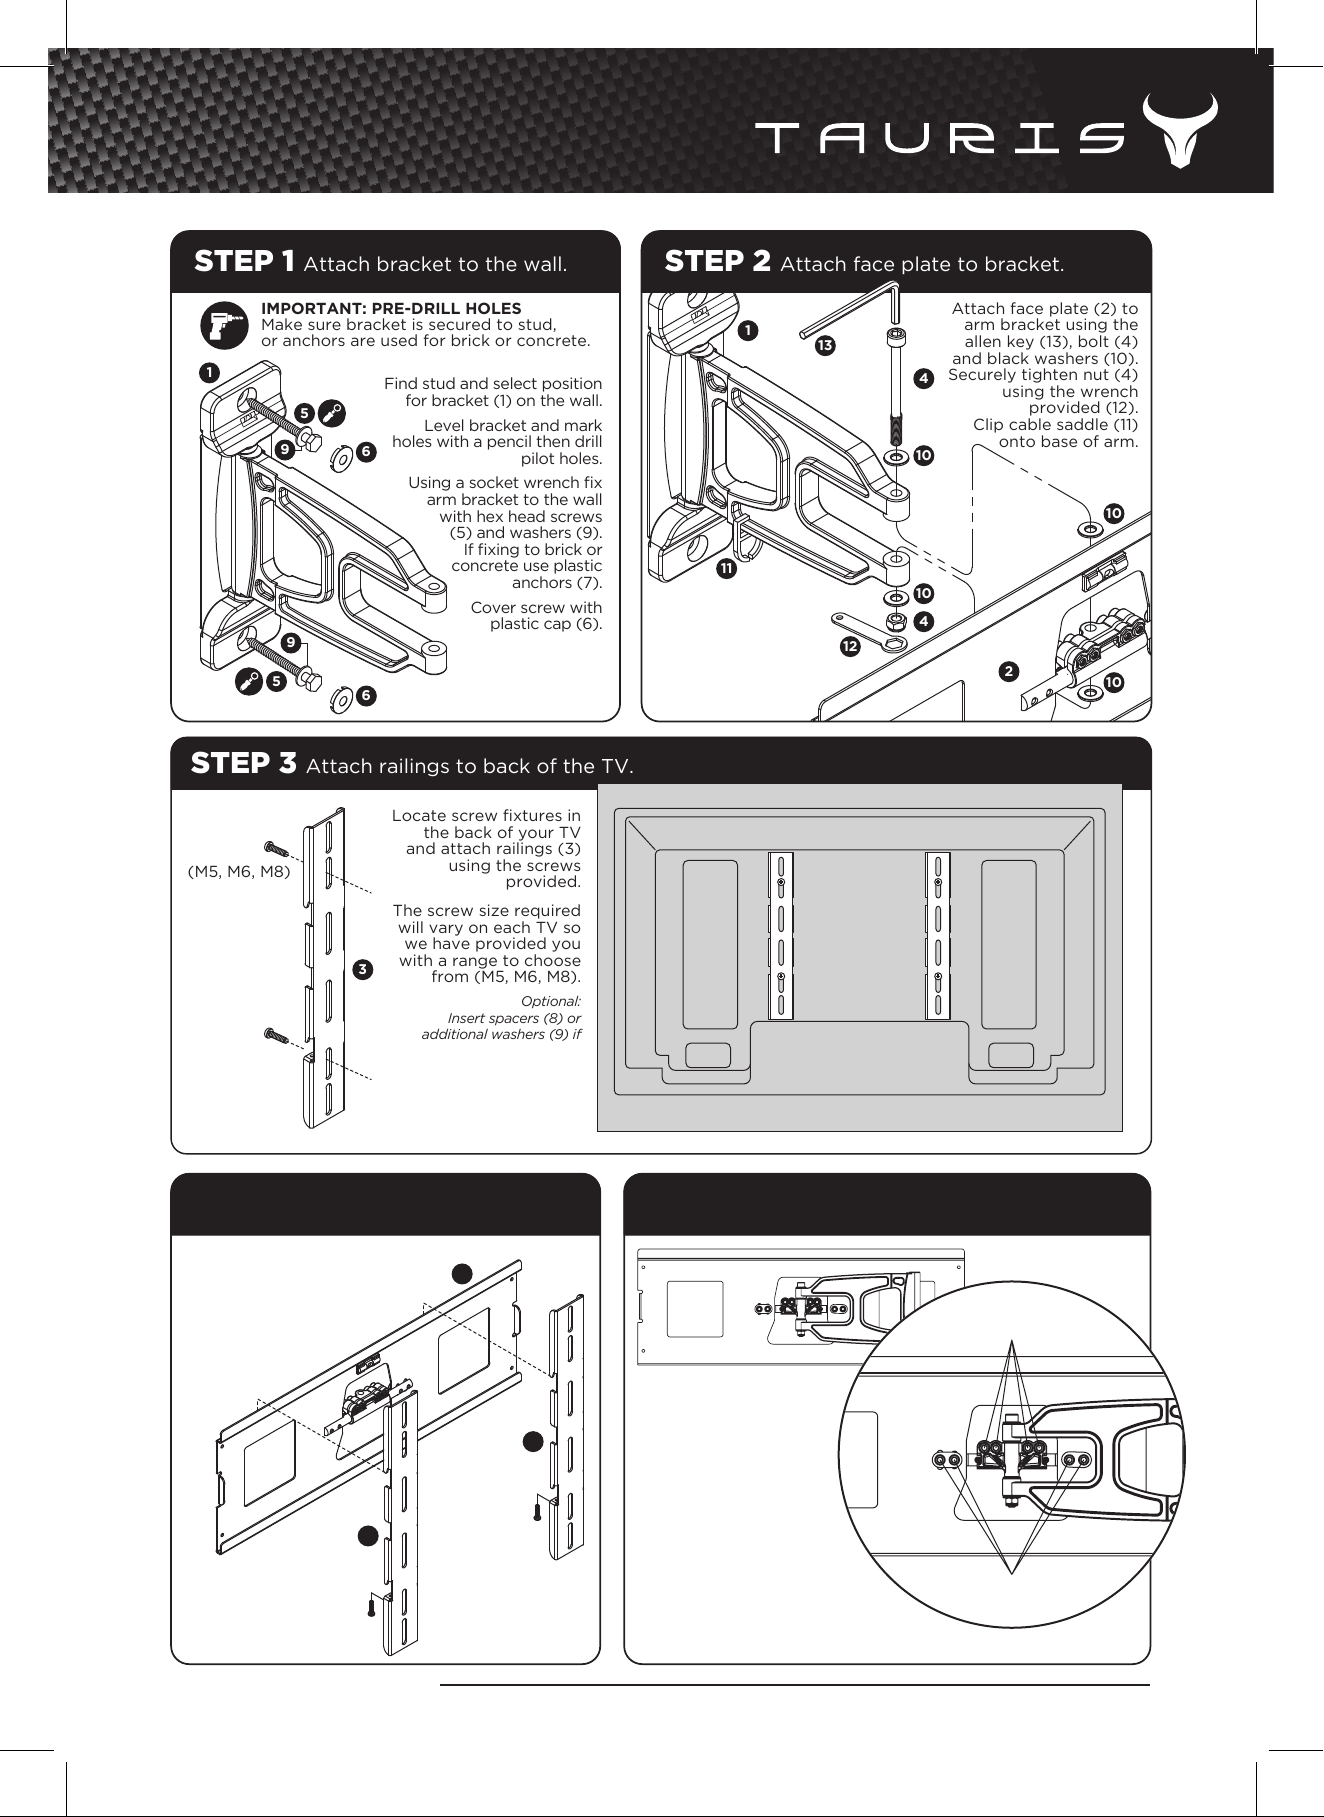
STEP 1 Attach bracket to the wall.
Find stud and select position
for bracket (1) on the wall.
Level bracket and mark
holes with a pencil then drill
pilot holes.
Using a socket wrench fix
arm bracket to the wall
with hex head screws
(5) and washers (9).
If fixing to brick or
concrete use plastic
anchors (7).
Cover screw with
plastic cap (6).
STEP 3 Attach railings to back of the TV.
Locate screw fixtures in
the back of your TV
and attach railings (3)
using the screws
provided.
The screw size required
will vary on each TV so
we have provided you
with a range to choose
from (M5, M6, M8).
Optional:
Insert spacers (8) or
additional washers (9) if
back of TV is not a flat.
Attach face plate (2) to
arm bracket using the
allen key (13), bolt (4)
and black washers (10).
Securely tighten nut (4)
using the wrench
provided (12).
Clip cable saddle (11)
onto base of arm.
STEP 2 Attach face plate to bracket.
STEP 4 Hook TV onto face plate STEP 5 Adjusting tilt and roll.
Once the railings (3) are firmly
attached to the TV, hook
the railings onto the face
plate (2) and secure
into place using
locking screws
provided.
Note: Make sure all screws are firmly tightened after adjusting tilt and roll.
You can easily adjust
the tilt and roll of the TV
by simply loosening the
bolts in the centre of
the face plate with the
allen key provided (14).
Secure bolts tightly for
a fixed position or leave
slightly loosened for an
adjustable platform.
ADJUST TILT HERE
ADJUST ROLL HERE
Mar 2012
1
2
2
3
3
3
4
4
10
10
13
12
11
10
10
1
5
5
9
6
6
(M5, M6, M8)
(M5, M6, M8)
www.tauris.com.au
IMPORTANT: PRE-DRILL HOLES
Make sure bracket is secured to stud,
or anchors are used for brick or concrete.
CMW - 297
Professional Installer Highly Recommended - The bracket manufacturer will not warrant any faulty installations, and damage to panels or any other fixtures / fittings as a result of incorrect installation.
CMW - 297
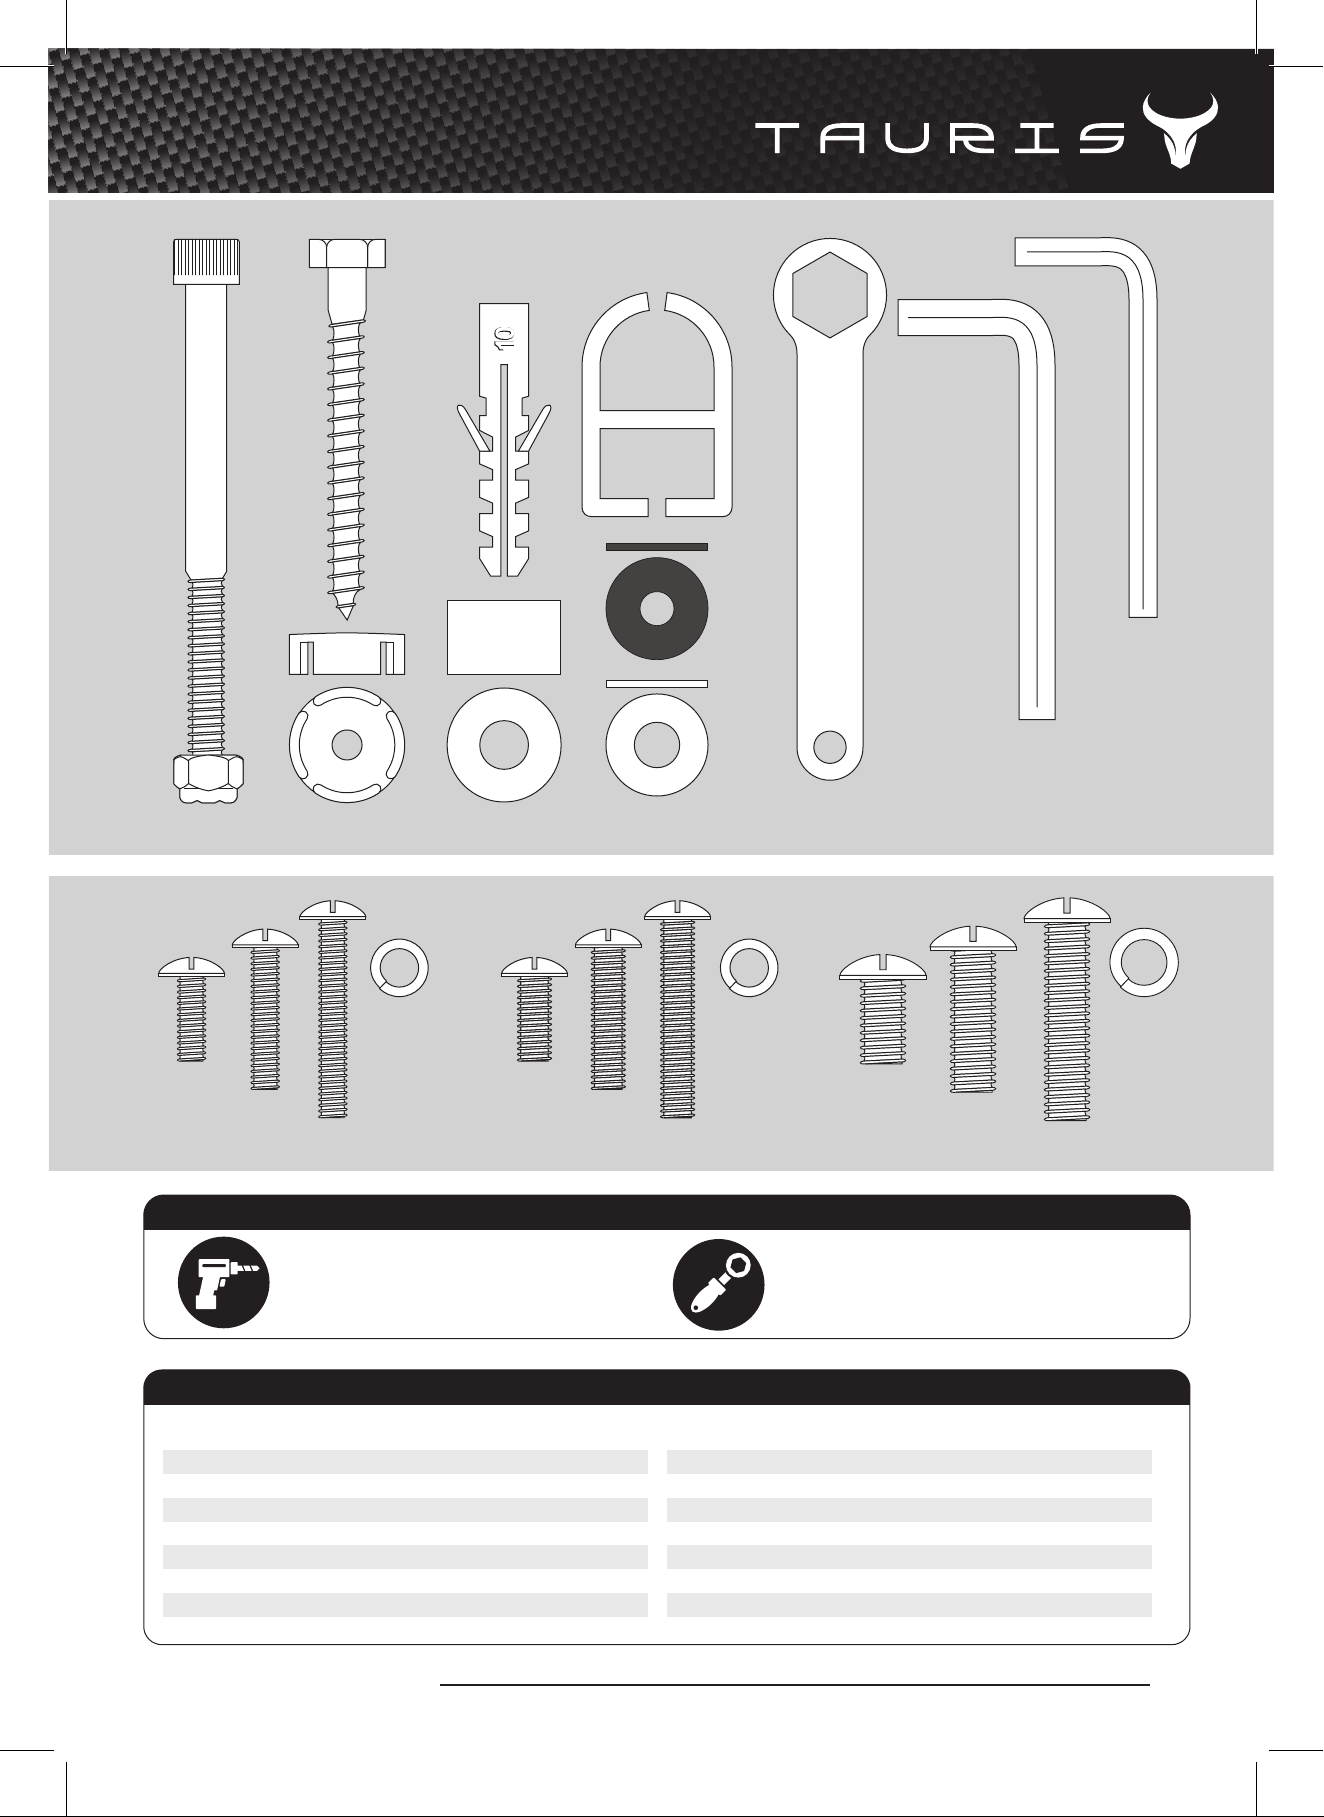
No. Part Qty
1 Wall Bracket With Arm 1
2 Face Plate 1
3 Railings 2
4 Pivot Bolt & Nut 1
5 Hex Screw 2
6 Plastic Cap 2
7 Masonry Anchors 2
No. Part Qty
8 Plastic Spacer L12.5 4
9 Washer Silver ø8 ø18 10
10 Washer Black ø6 ø18 4
11 Cable Saddle 2
12 Wrench 1
13 Allen No. 6 1
14 Allen No. 5 1
4. 12.5. 7. 11.
13. 14.
9.
10.
8.6.
M8M5
PARTS DRAWN TO SCALE 1:1
NOTE: Use spring washers when securing bolts. This will reduce the risk of bolts coming loose.
Spring
Washer
Spring
Washer
Spring
Washer
x4 x4 x4
M6
A drill will be required to drill pilot holes
for the arm bracket.
Masonry Wall - 9mm bit
Studded Wall - 5mm bit
A socket wrench will be required wherever
you see this icon.
Hex Socket - 13mm or 1/2”��
ADDITIONAL TOOLS REQUIRED
PARTS LIST
Mar 2012
www.tauris.com.au