Loading ...
Loading ...
Loading ...
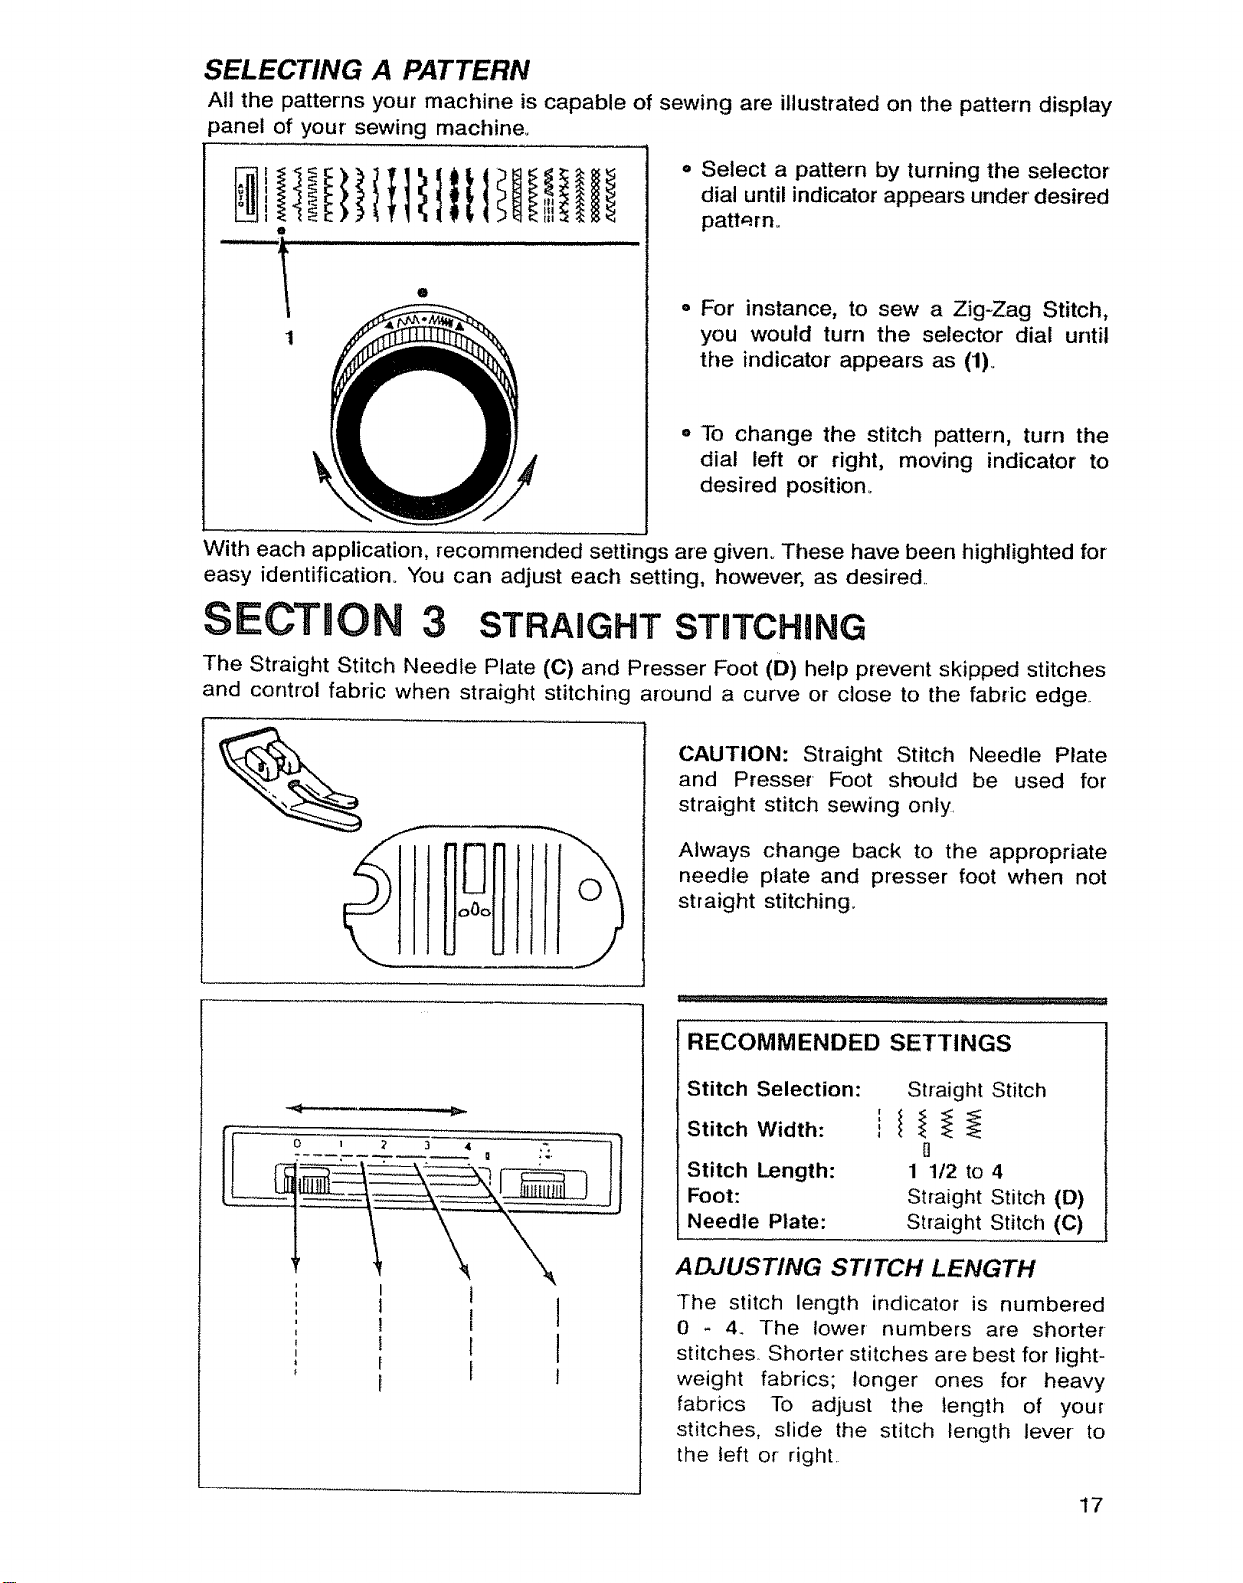
SELECTING A PATTERN
All the patterns your machine is capable of sewing are illustrated on the pattern display
3anel of your sewing machine.
e
1
o
,, Select a pattern by turning the selector
dial until indicator appears under desired
pattarn.
¢ For instance, to sew a Zig-Zag Stitch,
you would turn the selector dial until
the indicator appears as (1)_
,, To change the stitch pattern, turn the
dial left or right, moving indicator to
desired position_
With each application, recommended settings are given_ These have been highlighted for
easy identification. You can adjust each setting, however, as desired..
SECTmON 3 STRAHGHT STUTCHING
The Straight Stitch Needle Plate (C) and Presser Foot (D) help prevent skipped stitches
and control fabric when straight stitching around a curve or close to the fabric edge.
CAUTION: Straight Stitch Needle Plate
and Presser Foot should be used for
straight stitch sewing only.
Always change back to the appropriate
needle plate and presser foot when not
straight stitching..
i
I
J
RECOMMENDED SETTINGS
Stitch Selection:
Stitch Width:
Stitch Length:
Foot:
Needle Plate:
Straight Stitch
0
1 1t2 to 4
Straight Stitch (D)
Straight Stitch (C)
ADJUSTING STITCH LENGTH
The stitch length indicator is numbered
0 - 4. The lower numbers are shorter
stitches. Shorter stitches are best for light-
weight fabrics; longer ones for heavy
fabrics To adjust the length of your
stitches, slide the stitch length lever to
the left or right.
17
Loading ...
Loading ...
Loading ...