Loading ...
Loading ...
Loading ...
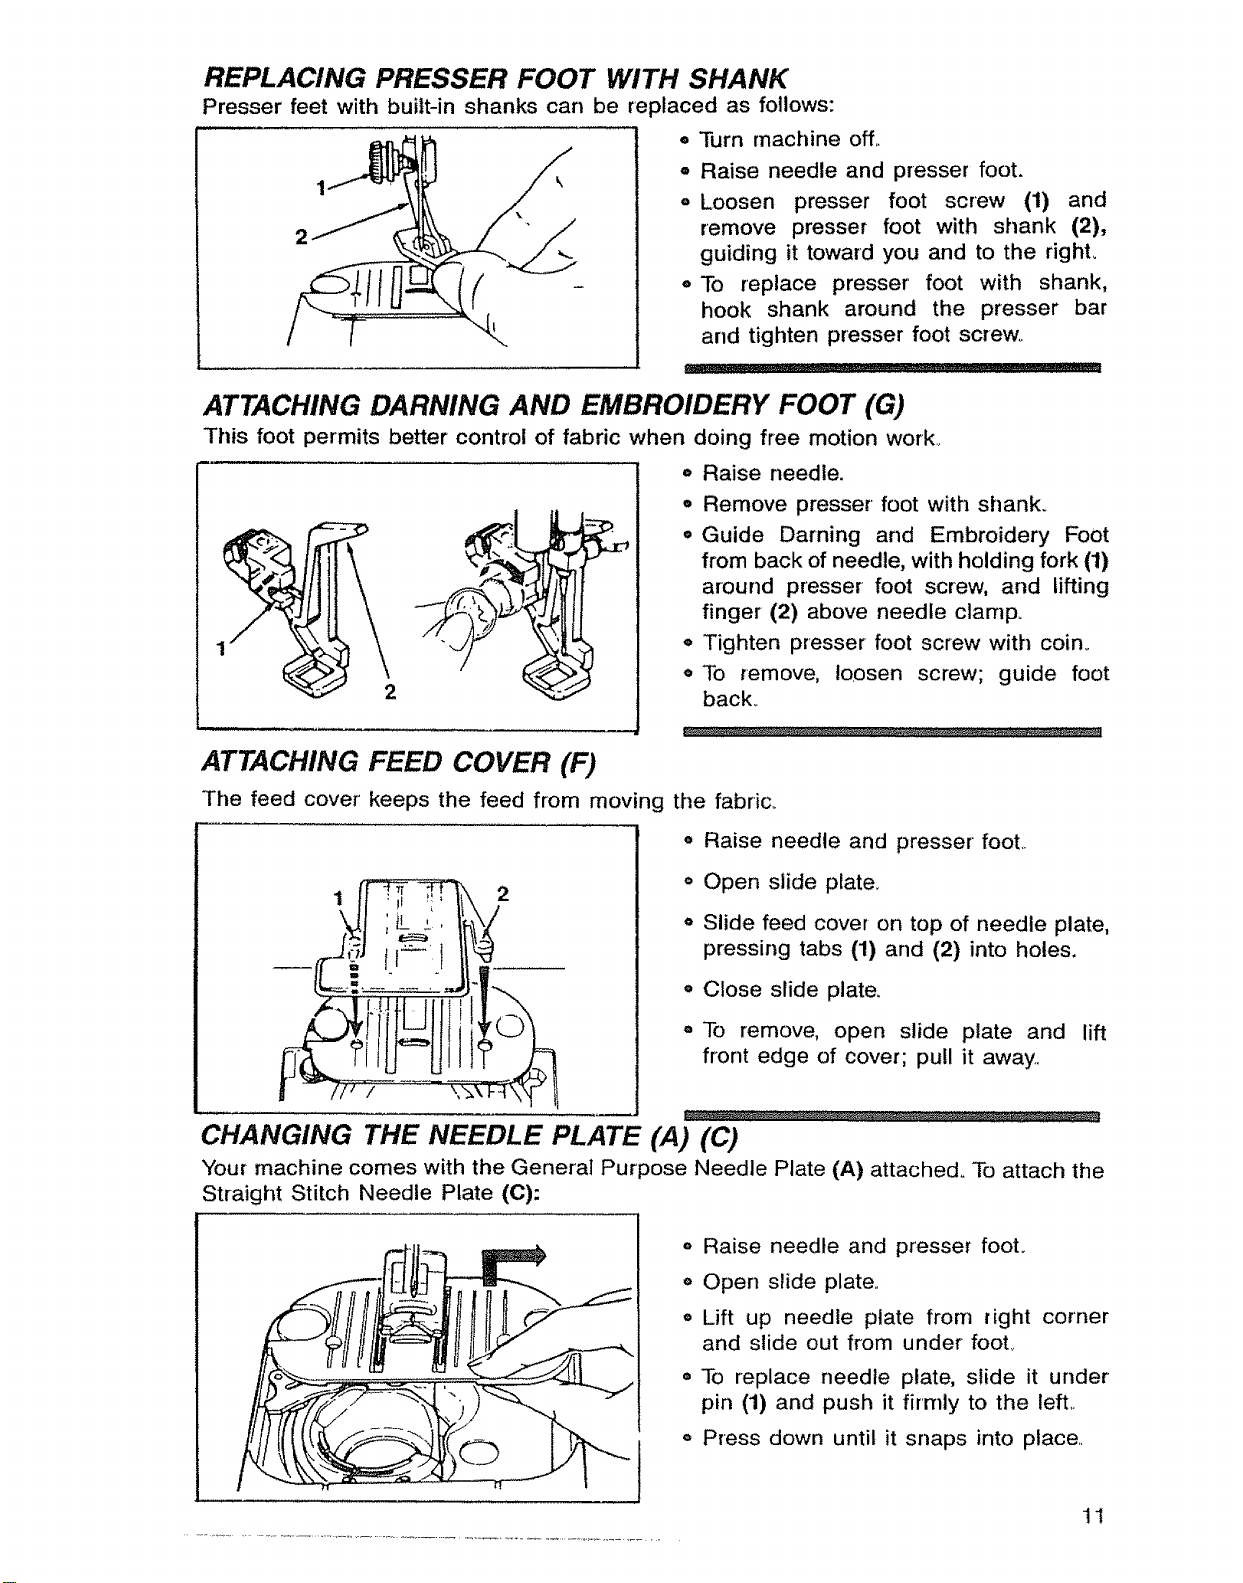
REPLACING PRESSER FOOT WITH SHANK
Presser feet with built-in shanks can be replaced as follows:
1 ' k
,, Turn machine off,.
o Raise needle and presser foot.
o Loosen presser foot screw (1) and
remove presser foot with shank (2),
guiding it toward you and to the righL
o To replace presser foot with shank,
hook shank around the presser bar
and tighten presser foot screw°
ATTACHING DARNING AND EMBROIDERY FOOT (G)
This foot permits better contro! of fabric when doing free motion work.,
2
o Raise needle.
o Remove presser' foot with shank.
• Guide Darning and Embroidery Foot
from back of needle, with holding fork (1)
around presser foot screw, and lifting
finger (2) above needle clamp.
o Tighten presser foot screw with coin°
o To remove, loosen screw; guide foot
back._
ATTACHING FEED COVER (F)
The feed cover' keeps the feed from moving the fabric.
o Raise needle and presser foot..
o Open slide plate.,
o Slide feed cover on top of needle plate,
pressing tabs (1) and (2) into holes.
• Close slide plate.
o To remove, open slide plate and lift
front edge of cover; pull it away,
CHANGING THE NEEDLE PLATE (,4) (C)
Your machine comes with the General Purpose Needle Plate (A) attached° To attach the
Straight Stitch Needle Plate (C):
o Raise needle and presser foot.
,, Open slide plate..
,, Lift up needle plate from right corner
and slide out from under foot,.
o To replace needle plate, slide it under
pin (1) and push it firmly to the left,.
o Press down until it snaps into place..
11
Loading ...
Loading ...
Loading ...