Loading ...
Loading ...
Loading ...
7
English
5. Installation
• Check your WiFi signal strength and make sure that the WiFi signal is strong at
the location of your camera. For best performance, the smartphone needs to be
connected to a Wi-Fi network.
• Note: We recommend taking a picture of the label at the back of the camera. In case you
need to check the serial number, MAC address or QR-Code at a later stage.
Step 1:
5.1. Micro SD installation (optional)
• Locate the Micro SD-Card compartment of the D40. (refer to chapter 2 point )
• Slide the Micro-SD card slot to the OPEN position as displayed on the Micro-SD
card slot. After the Micro-SD card slot is in the open position open it and place the
Micro-SD card inside. Close the Micro-SD card slot and move it to the LOCK position
as displayed on the Micro-SD card slot.
8
NOTE: The Micro SD-Card is mandatory for local recording. Please make sure the
Micro SD-Card is CLASS10 rated. Supported are Micro SD-Cards from 8GB to 256GB .
Use the included hex wrench to open the dome cover by unfastening three
inner hex screws. (see below picture).
Take out the mounting map sticker and stick it on the ceiling or the wall.
Step 2:
Step 3:
5.2. Installation without mounting bracket
Find the desired installation location for the camera. Position the camera
where a power socket is in sucient proximity. Turn the camera ON and use the live
view image from the app to position the camera where everything to monitor is well in
view.
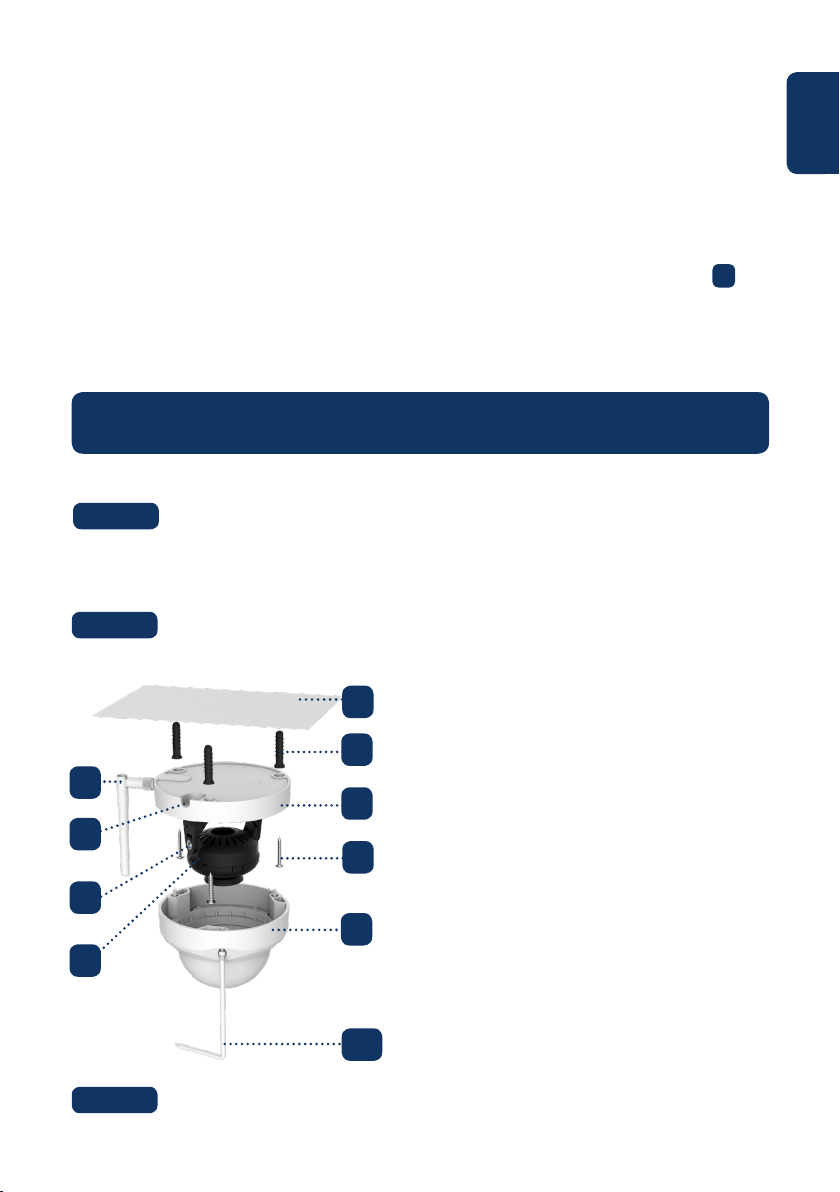
1. Antenna
2. U-shaped side exit
3. Rotational Bracket
4. LED Ring
5. Ceiling or Wall
6. Plastick Anchor
7. Dome Pedestal
8. Installation Screw
9. Dome Cover
10. Inner Hex Wrench
10
4
5
6
7
8
9
3
2
1
Loading ...
Loading ...
Loading ...