Loading ...
Loading ...
Loading ...
English - 15
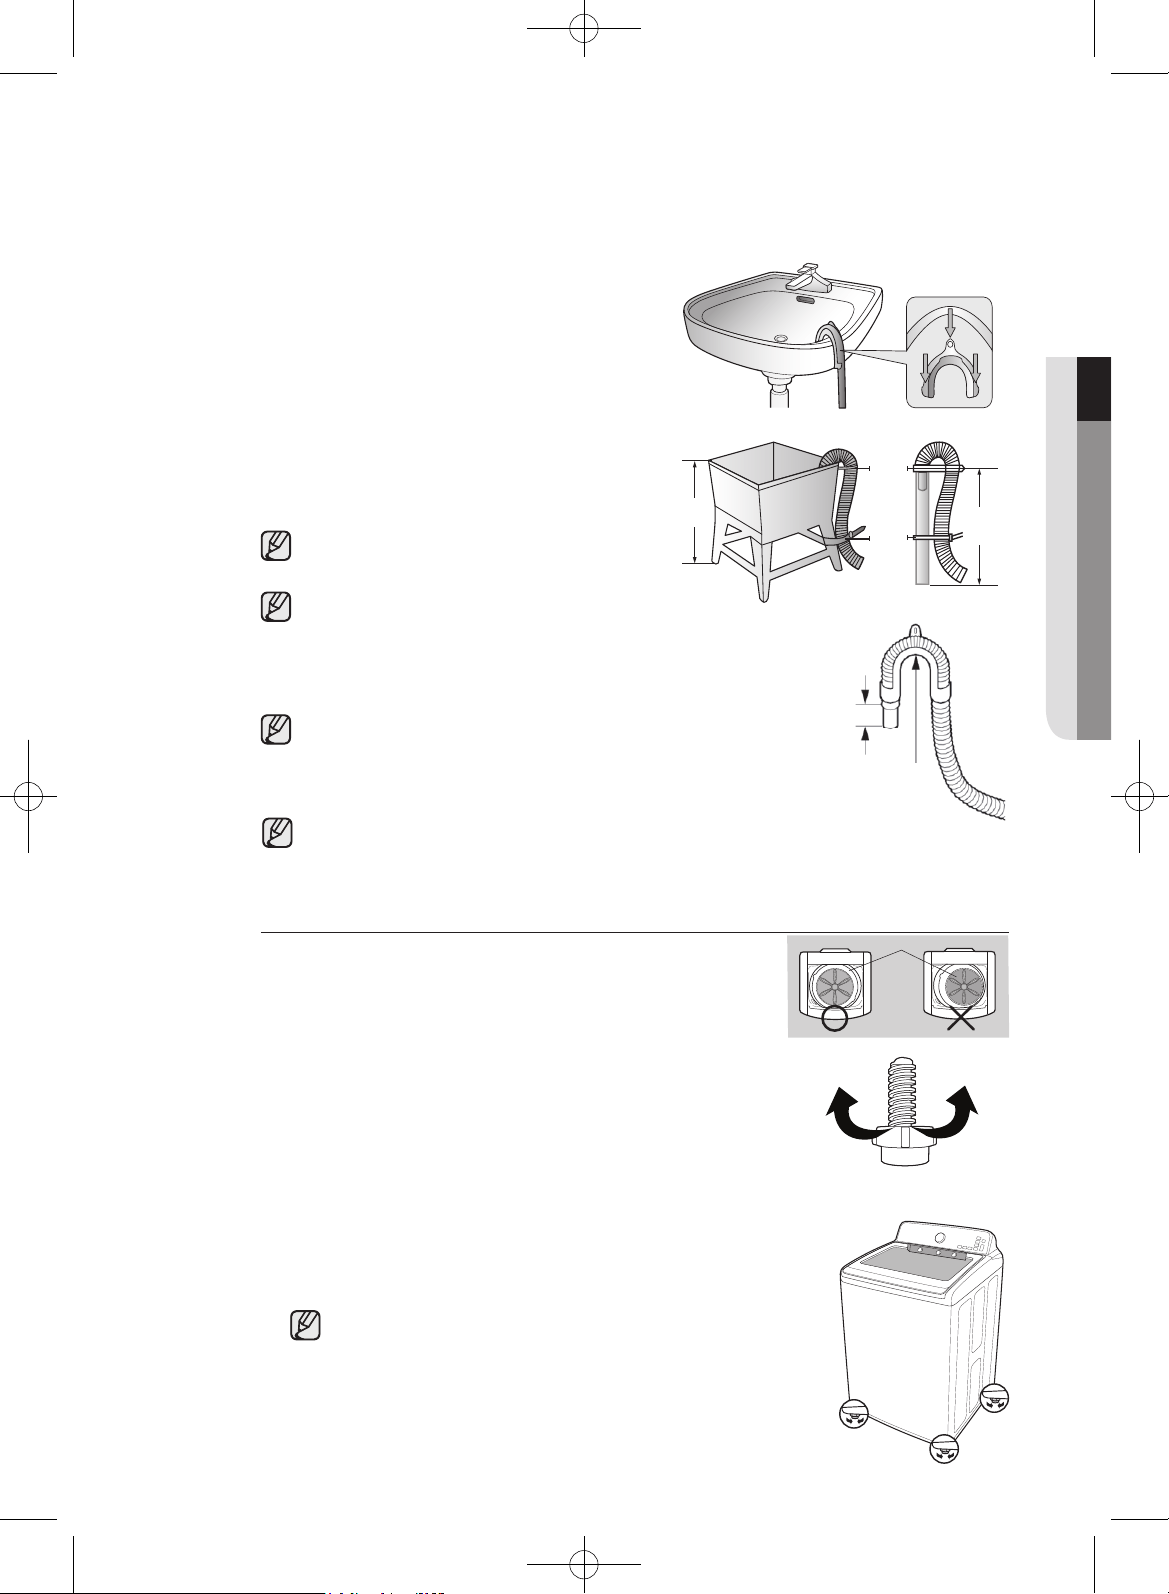
Connecting the drain hose
The end of the drain hose can be positioned in
three ways:
Over the edge of a wash basin
Secure the guide to the side of the basin wall
with a hook or to the tap with a piece of string to
prevent the drain hose from moving.
In a standpipe or laundry tub
The standpipe must be no shorter than 39 in (99
cm) and no longer than 96 in (245cm).
Make sure that the connection between the
drain hose and the standpipe is not airtight.
Connect the hose guide within 4 in (10cm)
from the end of the drain hose. If the drain hose is
extended more than 4 in (10cm) beyond the end of the
hose guide, mold or microorganisms could spread to the
inside of the washer.
The Drain Hose can be installed to a 96 in (245cm)
maximum, but the draining capability can be reduced
at this height. It can cause the washer to have an odor
because of remaining water in the drain system.
If the drain hose is installed below 39 in (99cm), water
can be drained in cycles due to a siphon phenomenon. It
causes the washer to display a “4E” error code.
STEP 3
Leveling your washer
See if the washer is level by checking the position of the tub:
1. Slide the washer into position.
2. Open the lid of the washer, and pour the water into the tub to
just below the pulsator level.
3. If the washer is level, the pulsator is positioned at the center of the
water as shown in the figure. If not, level your washer by turning the
front leveling feet clockwise or counterclockwise as necessary.
Turn the front leveling feet clockwise to raise the washer, and
counterclockwise to lower the washer.
01 installing your washer
Laundry tub Standpipe
Hose
retainer
Tie
strap
39” Min
(99 cm)
96” Max
39” Min
Loosen Lock
Pulsator
Adjustable legs
(three)
1RPRUHWKDQ
LQFP
+RVH*XLGH
9000HA WASH_WA56H_USER MANUAL_DC68-03133R-09_EN.indd 15 2015/12/22 16:36:10
Loading ...
Loading ...
Loading ...