Loading ...
Loading ...
Loading ...
OPERATION
TO START ENGINE (See Fig. 9)
When starting engine for the first time or'if engine has run
out of fuel, itwill take extra cranking time to move fue! from
the tank to the engine.
• Depress clutch/brake pedal and set parking brake.
• Place gearshift lever in neutral (N) position,
• Move attachment clutch to "DISENGAGED" position°
• Move throttle control lever to choke (t".]) positionfor
cold engine start. Forwarm engine start, move throttle
control to fast ('_e) position.,
• Insert key intoignition and turn keyclockwise to"START"
position and release key as soon as engine starts. Do
not run starter continuously for more than fifteen
seconds per minute. If engine does not start after
several attempts, move throttle control to fast ('_i_)
position, wait a few minutes and try again.
• When engine starts, move throttle control to desired
position..
• Allow engine to warm up for a few minutes before
engaging drive or' attachments.
NOTE: If at a high altitude (above 3000 feet) or in cold
temperatures (below 32°F), the carburetor' fuel mixture
may need to be adjusted for best engine performance. See
"TO ADJUST CARBURETOR" in the Service and Adjust-
ments section of this manual.
MOWING TIPS
• Tire chains cannot be used when the mower housing
is attached to tractor.
° Mower should be properly leveled for best mowing
performance. See'q'O LEVEL MOWER HOUSING"in
the Service and Adjustments section of this manual.
• The left hand side of mower should be used for trim-
rning
• Drive so that clippings are discharged onto the area
that has been cut. Have the cut area to the right of the
machine_ This will result in a more even distribution of
clippings and more uniform cutting.,
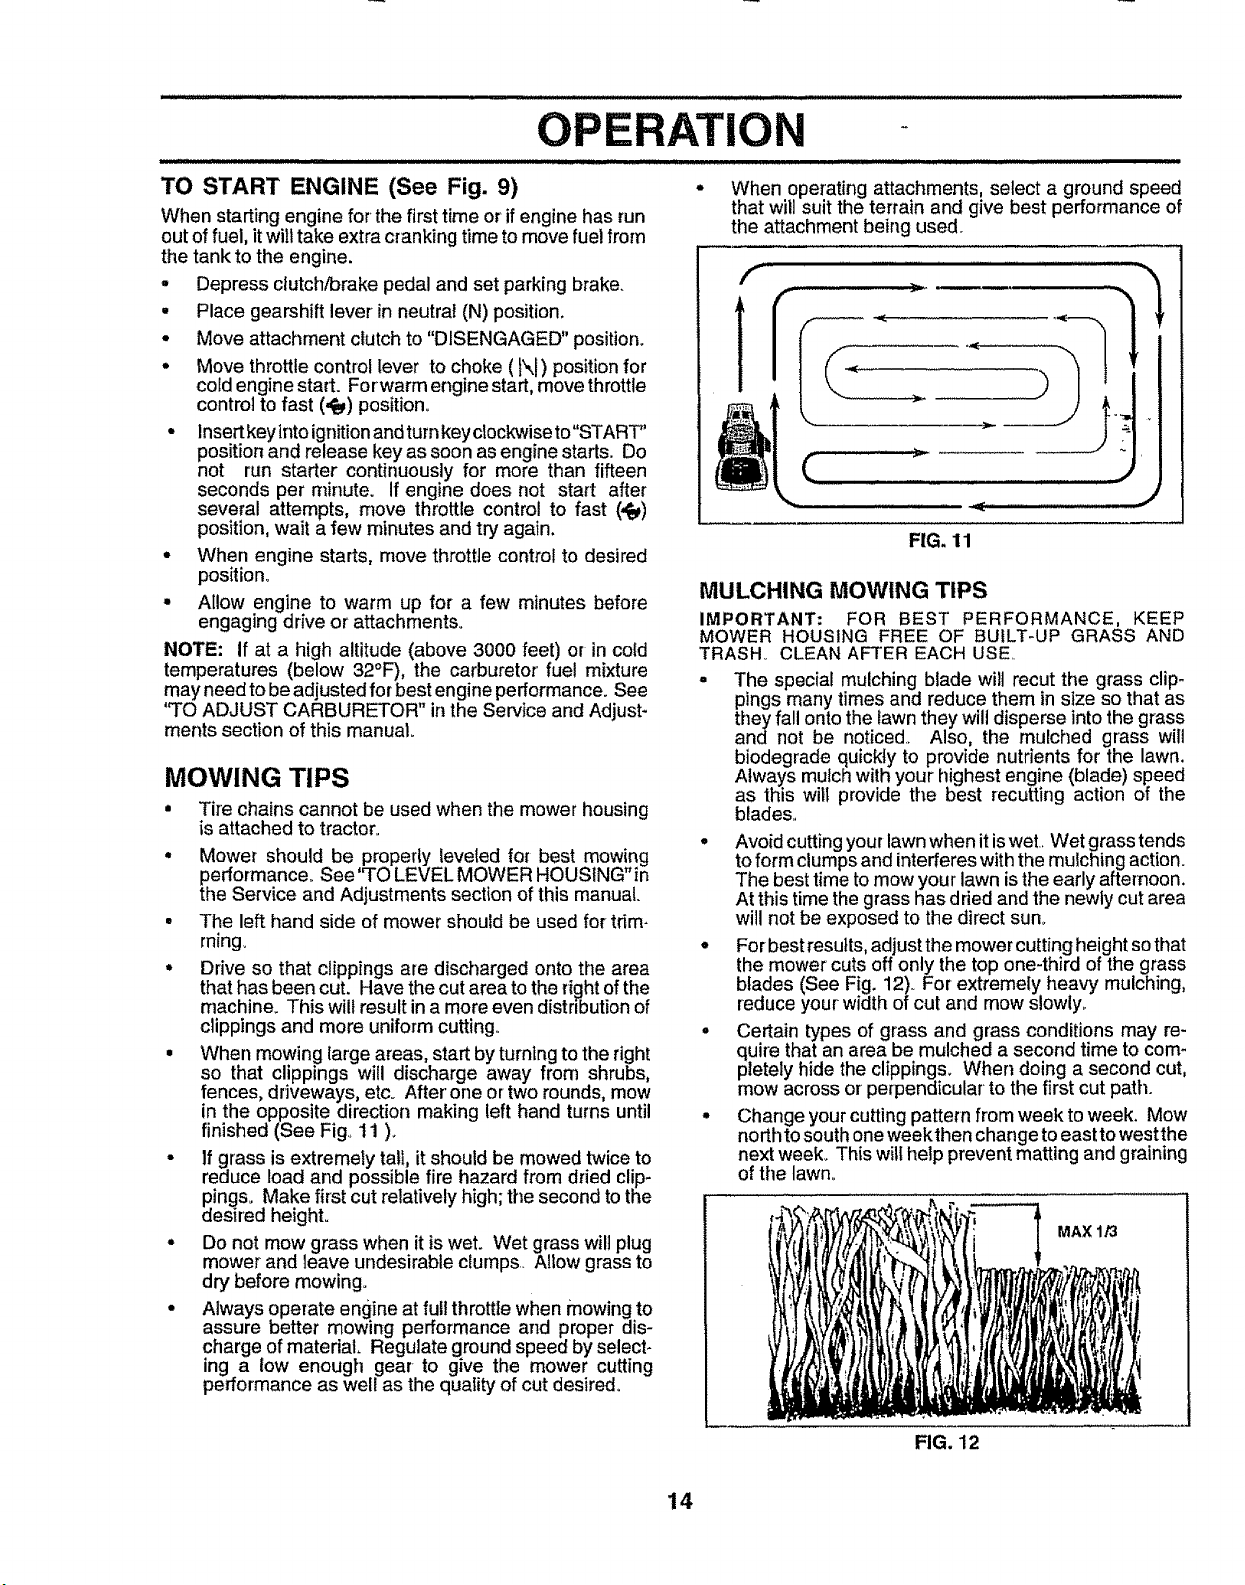
• When mowing large areas, start by turntng to the right
so that clippings will discharge away from shrubs,
fences, driveways, etc. Afterone or two rounds, mow
in the opposite direction making left hand turns until
finished (See Fig° 11 )_
• If grass is extremely tall, it should be mowed twice to
reduce load and possible fire hazard from dried clip-
pings. Make first cut relatively high; the second to the
desired heighL
- Do not mow grass when it is wet. Wet grass will plug
mower and leave undesirable clumps. Allow grass to
dry"before mowing.
• Always operate engine at full throttle when mowing to
assure better mowing performance and proper dis-
charge of material. Regulate ground speed by select-
ing a low enough gear-to give the mower cutting
performance as well as the quaIity of cut desired,
• When operating attachments, select a ground speed
that will suit the terrain and give best performance of
the attachment being used.
FIG. 11
MULCHING MOWING TIPS
IMPORTANT: FOR BEST PERFORMANCE, KEEP
MOWER HOUSING FREE OF BUILT-UP GRASS AND
TRASH_ CLEAN AFTER EACH USE.
• The special mulching blade will recut the grass clip-
pings many times and reduce them in size so that as
they fall onto the lawn they will disperse into the grass
and not be noticed,. Also, the mulched grass will
biodegrade quickly to provide nutrients for the lawn.
Always mulch with your highest engine (blade) speed
as this wilt provide the best recutting action of the
blades.,
° Avoid cutting your lawn when it isweL Wet grass tends
to form clumps and interferes with the mulching action.
The best time to mow your lawn is the early afternoon,
At this time the grass has dried and the newly cut area
will not be exposed to the direct sun°
= For best results, adjust the mower cutting height so that
the mower cuts off only the top one-third of the grass
blades (See Fig. 12)o For extremely heavy mulching,
reduce your width of cut and mow slowly°
= Certain types of grass and grass conditions may re-
quire that an area be mulched a second time to com-
pletely hide the clippings. When doing a second cut,
mow across or perpendicular to the first cut path.
o Change your cutting pattern from week to week. Mow
north to south one weekthen change to east to west the
next week_ This will help prevent matting and graining
of the lawno
FIG. 12
MAX 1/3
14
Loading ...
Loading ...
Loading ...