Loading ...
Loading ...
Loading ...
49-5000525 Rev. 0 13
INSTALLATION INSTRUCTIONS
Installation Instructions
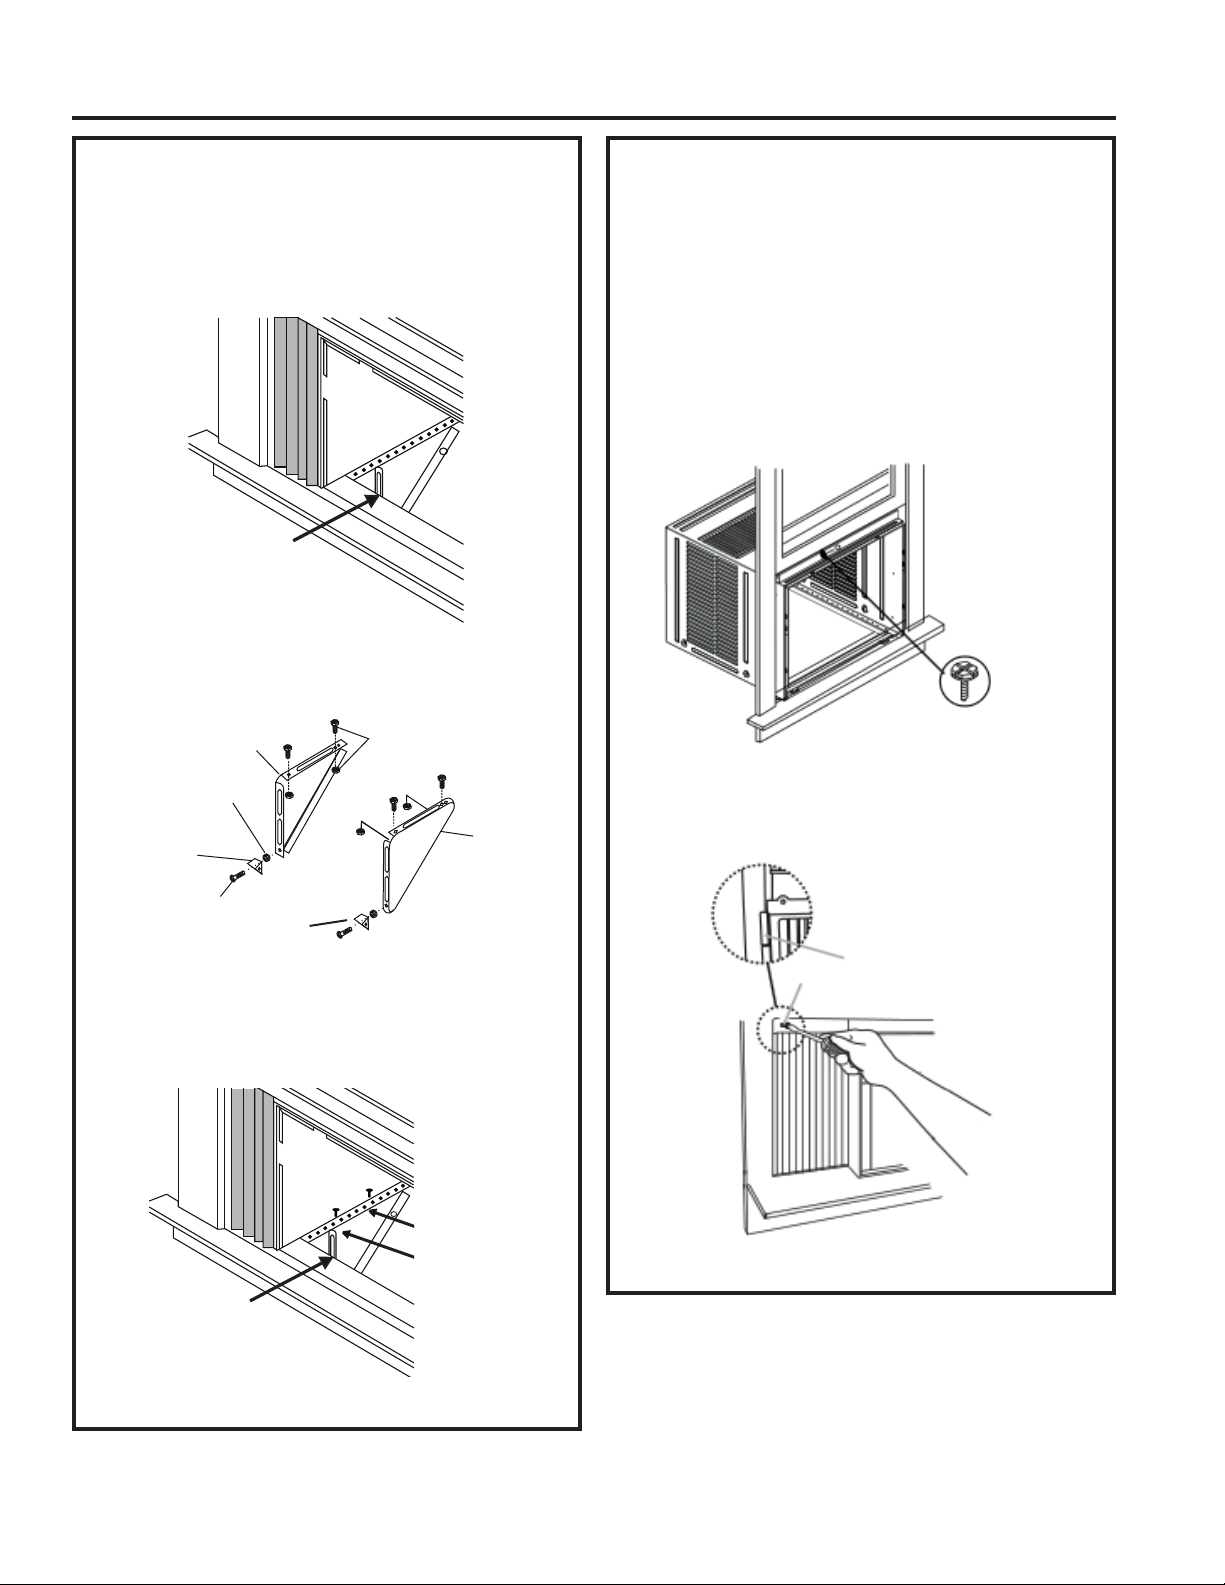
8. INSTALL OUTER CASE
SUPPORT BRACKETS
A. Hold each support bracket flush against the
outside of the sill, and tight to the bottom of the
outer case. Mark the brackets at the top level of
the sill and then remove.
B. Install the sill angle bracket to the support
brackets in the marked position. Do not fully
tighten so that adjustments can be made later.
C. Install the support brackets (with sill angle
bracket) to the correct hole locations in the
bottom of the outer case. Tighten six screws, 3
per support bracket.
Mark
Left
Right
´/RQJ
Screws and
Locknuts
´ORQJ)ODWKHDG
Bolt and locknut
Required for each support bracket
Sill Angle
Bracket
Locknut
´/RQJ
Screws and
Locknuts
9. EXTEND WINDOW
ACCORDIONS
A. Carefully raise window to access the accordion
panel locking screws. Loosen screws so the
accordion panels slide easily.
B. Extend panels to fill window opening completely.
Tighten locking screws on top.
C. Close window behind top rail.
D. $WWDFKWRSUDLOWRZLQGRZZLWKHLWKHUDô´RUò´
hex head locking screw. Pre-drill the hole in the
ZLQGRZIUDPHXVLQJD´GULOOELW
E. 8VHD´GULOOWRSUHGULOOKROHVWRKROGWKH
window accordions in place. Then connect with
HLWKHUDô´RUò´ORQJKH[KHDGVFUHZ
´RU´ORQJ
Hex-head screw
Weather Seals
A
$´RU´ORQJKH[KHDGVFUHZ
´ORQJ
Flathead Bolt
and locknut
Loading ...
Loading ...
Loading ...