Loading ...
Loading ...
Loading ...
5
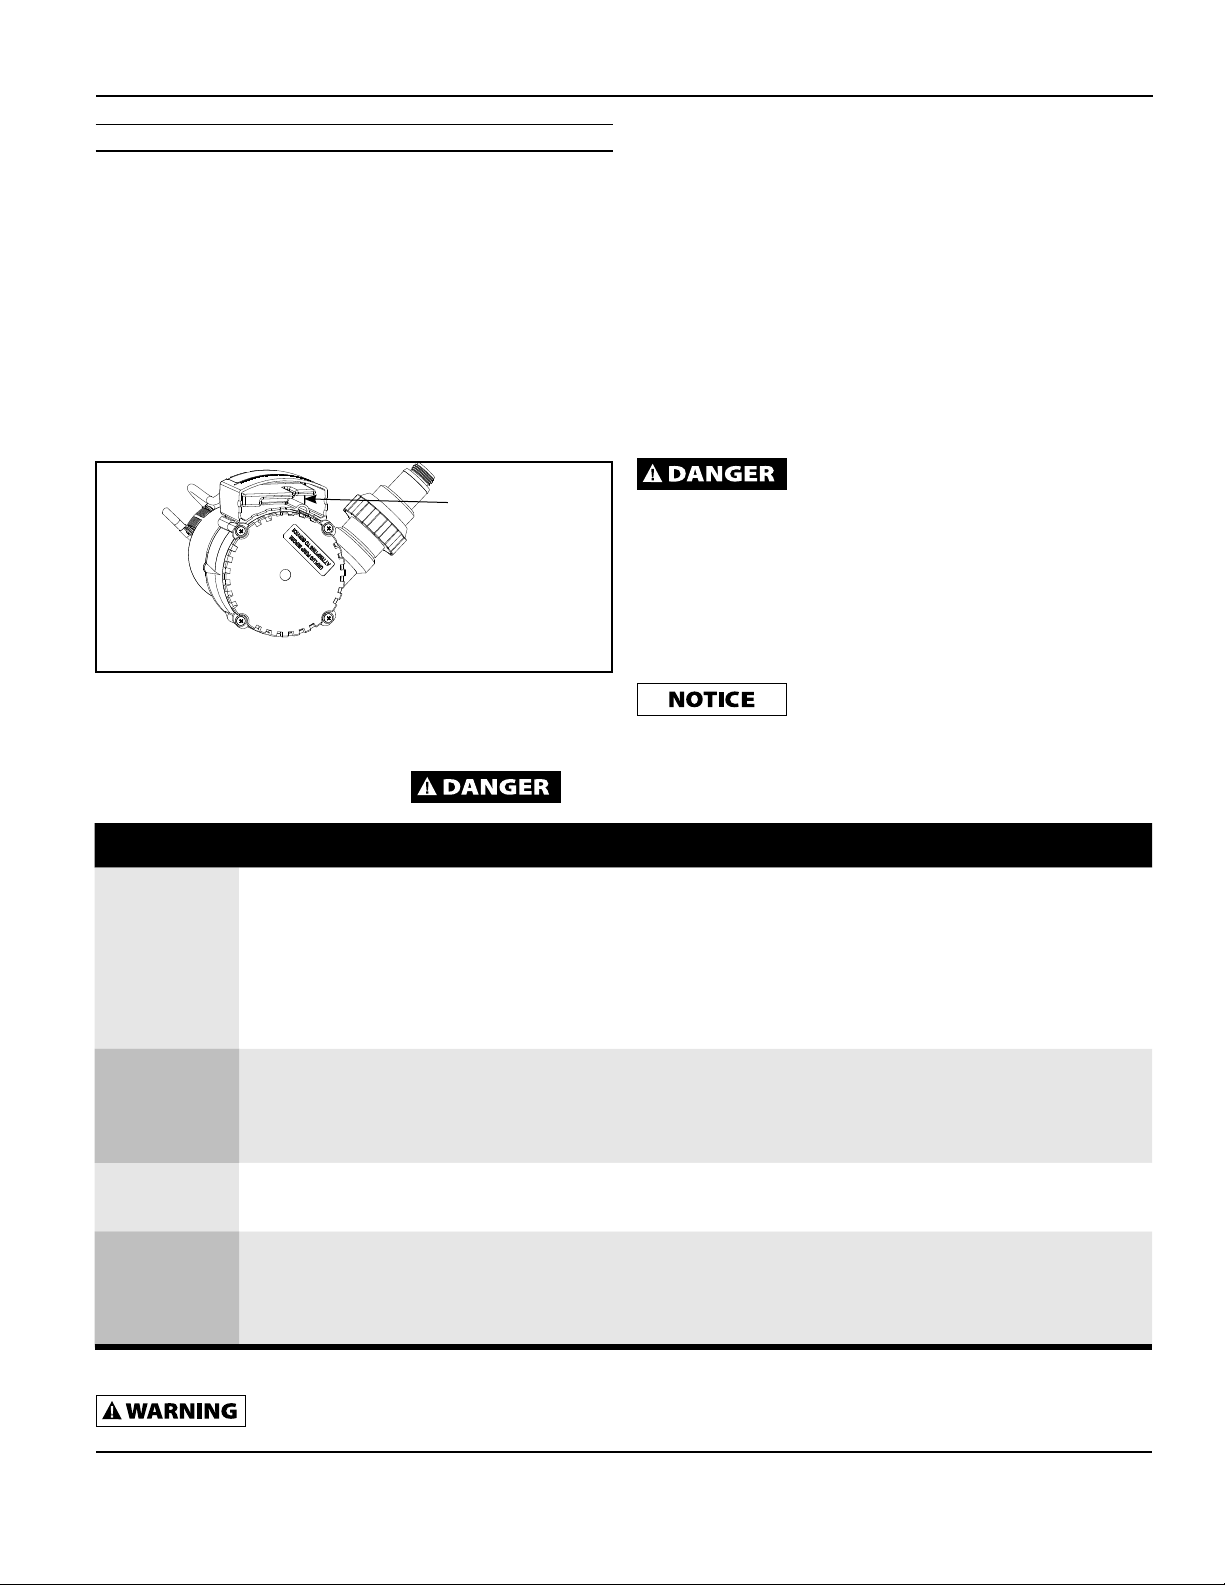
6. Check the priming hole for obstruction. (Figure 1).
Follow the cleaning steps listed below:
a. Disconnect pump from power source.
b. Remove the strainer.
c. Remove the four (4) base screws (Figure 1).
d. Remove the base and impeller plate.
e. Use a pin or paperclip to clean the priming hole and air
escape channel.
f. Reinstall impeller plate, base, screws and strainer.
7. If pump runs continuously, unplug the unit. Once unplugged,
remove the strainer and check for debris stuck inside the
sensor body (Figure 2). Remove any trapped leaves, debris
or dirt.
Figure 2 - Remove Debris From Sensor
CLEAN DEBRIS
INSIDE SENSOR
8. If the pump cycles on and off too often the electronic switch may need
cleaning. Disconnect pump from power source, remove the strainer
and turn the pump upside down. The sensor probe will be visible inside
Do NOT use pump if any part of the switch
housing or probe is cracked, broken or missing.
PUMPING HEIGHT
When water is pumped to an elevated position, any volume that
has not reached the discharge outlet can flow back through the
pump when the pump shuts off. This back-flow can cause the
water level in small areas to rise enough to re-start the pump. The
check valve/hose adapter included is required in this situation.
For proper operation, make certain the check valve is oriented as
instructed on check valve body.
In small areas a check valve is required to prevent
backflow. Without a check valve the pump may
cycle continuously and potentially wear out the pump components.
the switch housing. Clean inside the housing gently scrubbing with a
small brush using soapy water. Then rinse thoroughly with clean water.
9. When temperatures drop below freezing remove pump from service
and store indoors to protect pump from damage due to ice. The
pump has a unique protection circuit to protect the motor from a
locked impeller condition possibly caused by debris buildup or
from a “frozen” impeller situation caused by ice formation. When
the pump is activated and a locked impeller condition is detected
the unit will automatically shutdown to protect the motor from
overheating. The pump will continue this on/off cycle for a period
of time to attempt to “free” the impeller until eventually the unit
will remain off for a period of 12 hours checking twice a day for a
“freed” impeller. Once the pump is able to operate correctly the
pump will resume normal operation. To reset this delay without
waiting 12 hours momentarily unplug the pump.
Troubleshooting
Chart
Electrocution Hazard! Pump starts automatically. Disconnect the power before
attempting any repairs. Failure to follow WILL result in serious injury or death.
Symptom Possible Cause(s) Corrective Action
Pump will not
start or run
1. Tripped home electrical breaker
2. GFCI tripped
3. Low line voltage
4. Defective motor
5. Dirty switch
6. Impeller obstructed
7. Inlet screen or strainer clogged
8. Priming hole plugged
1. Reset breaker
2. Check for damaged wiring or moisture
3. Contact electrician
4. Replace pump
5. Rinse out switch with clean water (Figure 2)
6. Remove strainer, base, and impeller plate (Figure1) check for debris; clean
7. Clean inlet screen and debris strainer (Figure 1)
8. Clean hole, inside volute housing, with a pin or paper clip (Figure 1)
Pump starts and
stops too often
1. Backflow of water from piping
2. Dirty switch
3. Priming hole plugged
4. Pump is sitting uneven on pool or spa
cover
1. Install or replace check valve
2. Rinse out switch with clean water (Figure 2)
3. Clean hole, inside volute housing, with a pin or paper clip (Figure 1)
4. Reposition pump so pump sits level on cover
Pump will not
shut off or runs
continuously
1. Debris in switch
2. Discharge height exceeds capability
1. Rinse out switch with clean water (Figure 2)
2. Reduce discharge height
Pump operates
but delivers little
or no water
1. Impeller obstructed
2. Priming hole plugged
3. Obstructed hose
4. Discharge height exceeds capability
5. Strainer clogged
1. Remove strainer, base, and impeller plate (Figure 1), check for debris; clean
2. Clean hole, inside volute housing, with a pin or paper clip (Figure 1)
3. Check for kinks, reposition hose or check for debris
4. Reduce discharge height
5. Unplug pump. Remove strainer and rinse with clean water to remove debris
MAINTENANCE (CON'T)
This product or its power cord may contain chemicals, including lead, known to the State of California to cause
cancer and birth defects or other reproductive harm. Wash hands after handling.
CALIFORNIA PROPOSITION 65
WAPC250
www.waynepumps.com
Loading ...
Loading ...
Loading ...