Loading ...
Loading ...
Loading ...
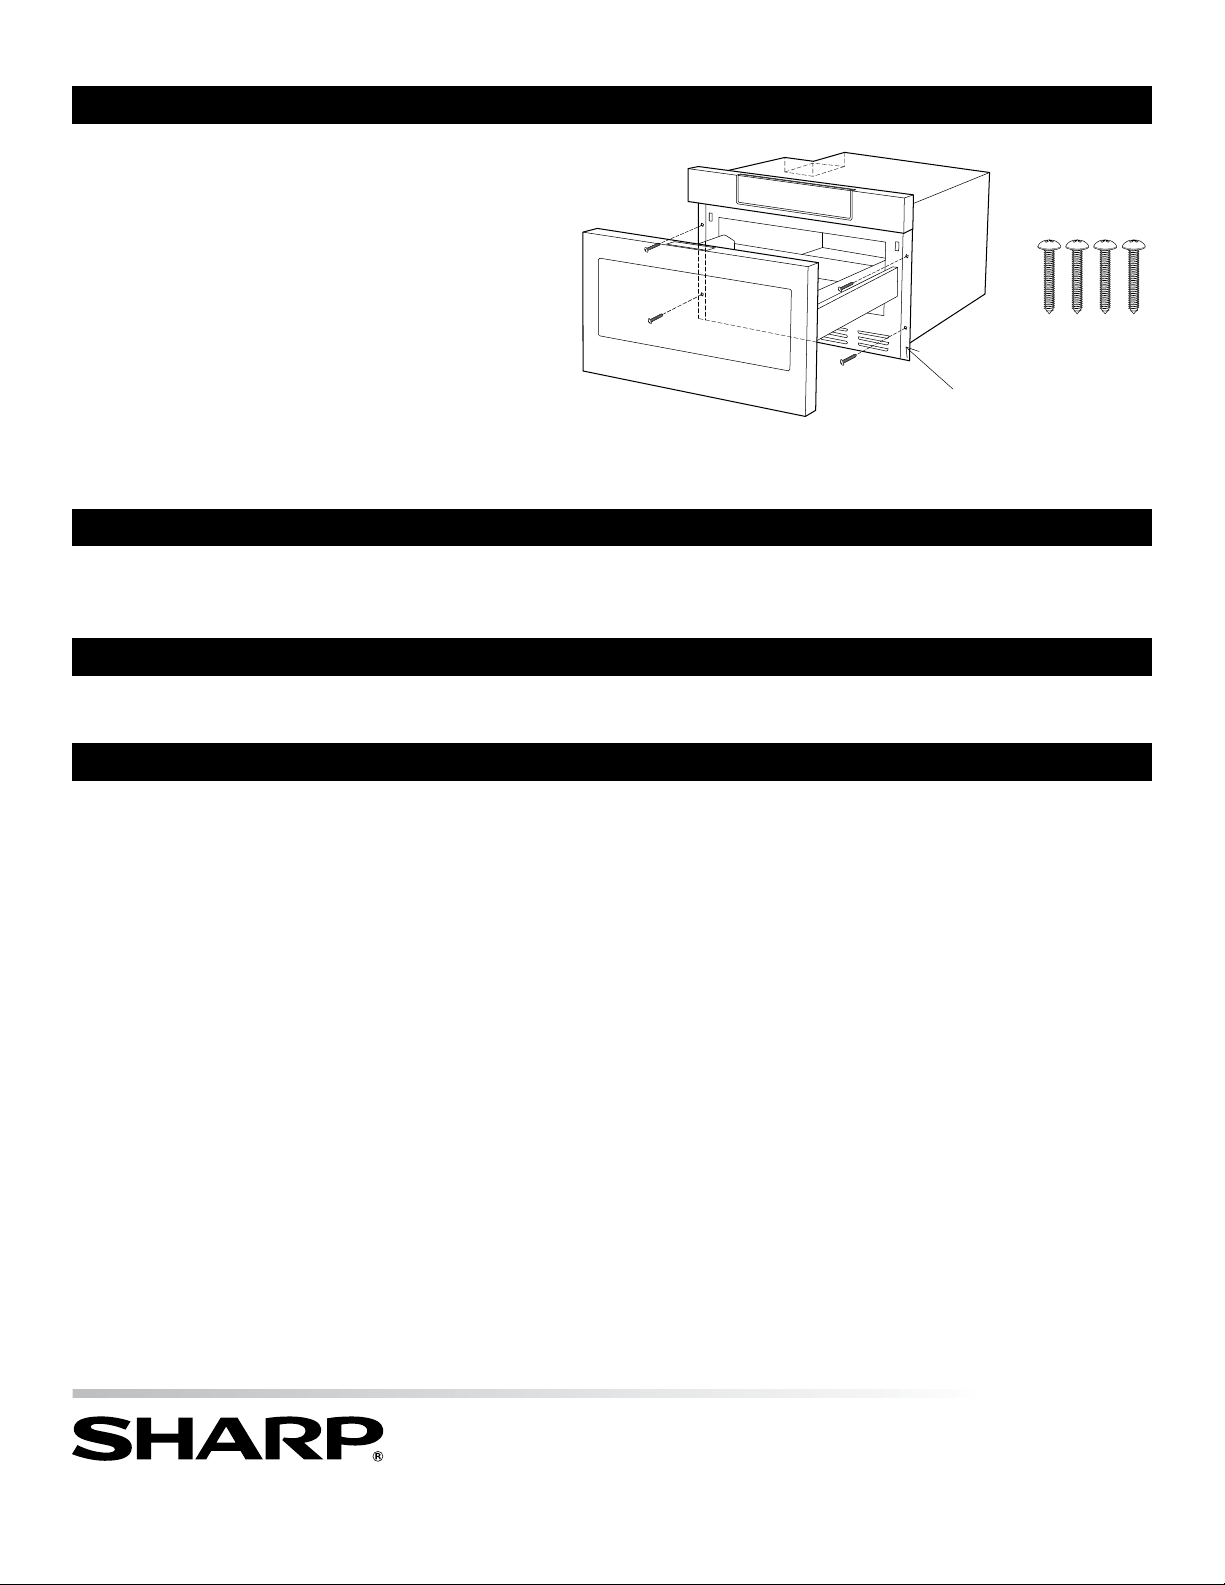
1. Place the drawer adjacent to the wall or cabinet opening.
Plug the power supply cord into the electrical outlet.
2. Carefully guide the drawer into the prepared opening.
Avoid pinching the cord between the oven and the wall.
3. Slide the drawer all the way until the mounting ange is
ush with the face of the cabinet. See Figure 10A.
4. Open the drawer. Using the 4 holes on the drawer as a
template, pre drill the cabinet using a
1
/16" bit. See Figure
10A.
5. Secure the drawer with the 4 screws supplied. See Figure
10B.
dRAWER INStALLAtIoN
Mounting
flange
modEL ANd SERIAL NUmBER LoCAtIoN
The name plate includes model and serial number. Open the Microwave Drawer fully. The label is beyond the back wall of the microwave
cavity facing up from the at surface.
CARE, CLEANING ANd mAINtENANCE
Refer to the Operation Manual for cleaning instructions.
BEfoRE yoU CALL foR SERvICE
Read the BEFORE YOU CALL and operating instruction sections in your Operation Manual. It may save you time and expense. The
list includes common occurrences that are not the result of defective workmanship or materials in this range.
Refer to the warranty in your Operation Manual for Sharp’s toll-free service number and address. Please call or write if you have inquiries
about your microwave product and/or need to order parts.
4 Screws
Parts supplied
TINSEB539MRR1
1 Sharp Plaza, Suite 1 • Mahwah, New Jersey 07495-1123
1-800-BE-SHARP (237-4277)