Loading ...
Loading ...
Loading ...
4
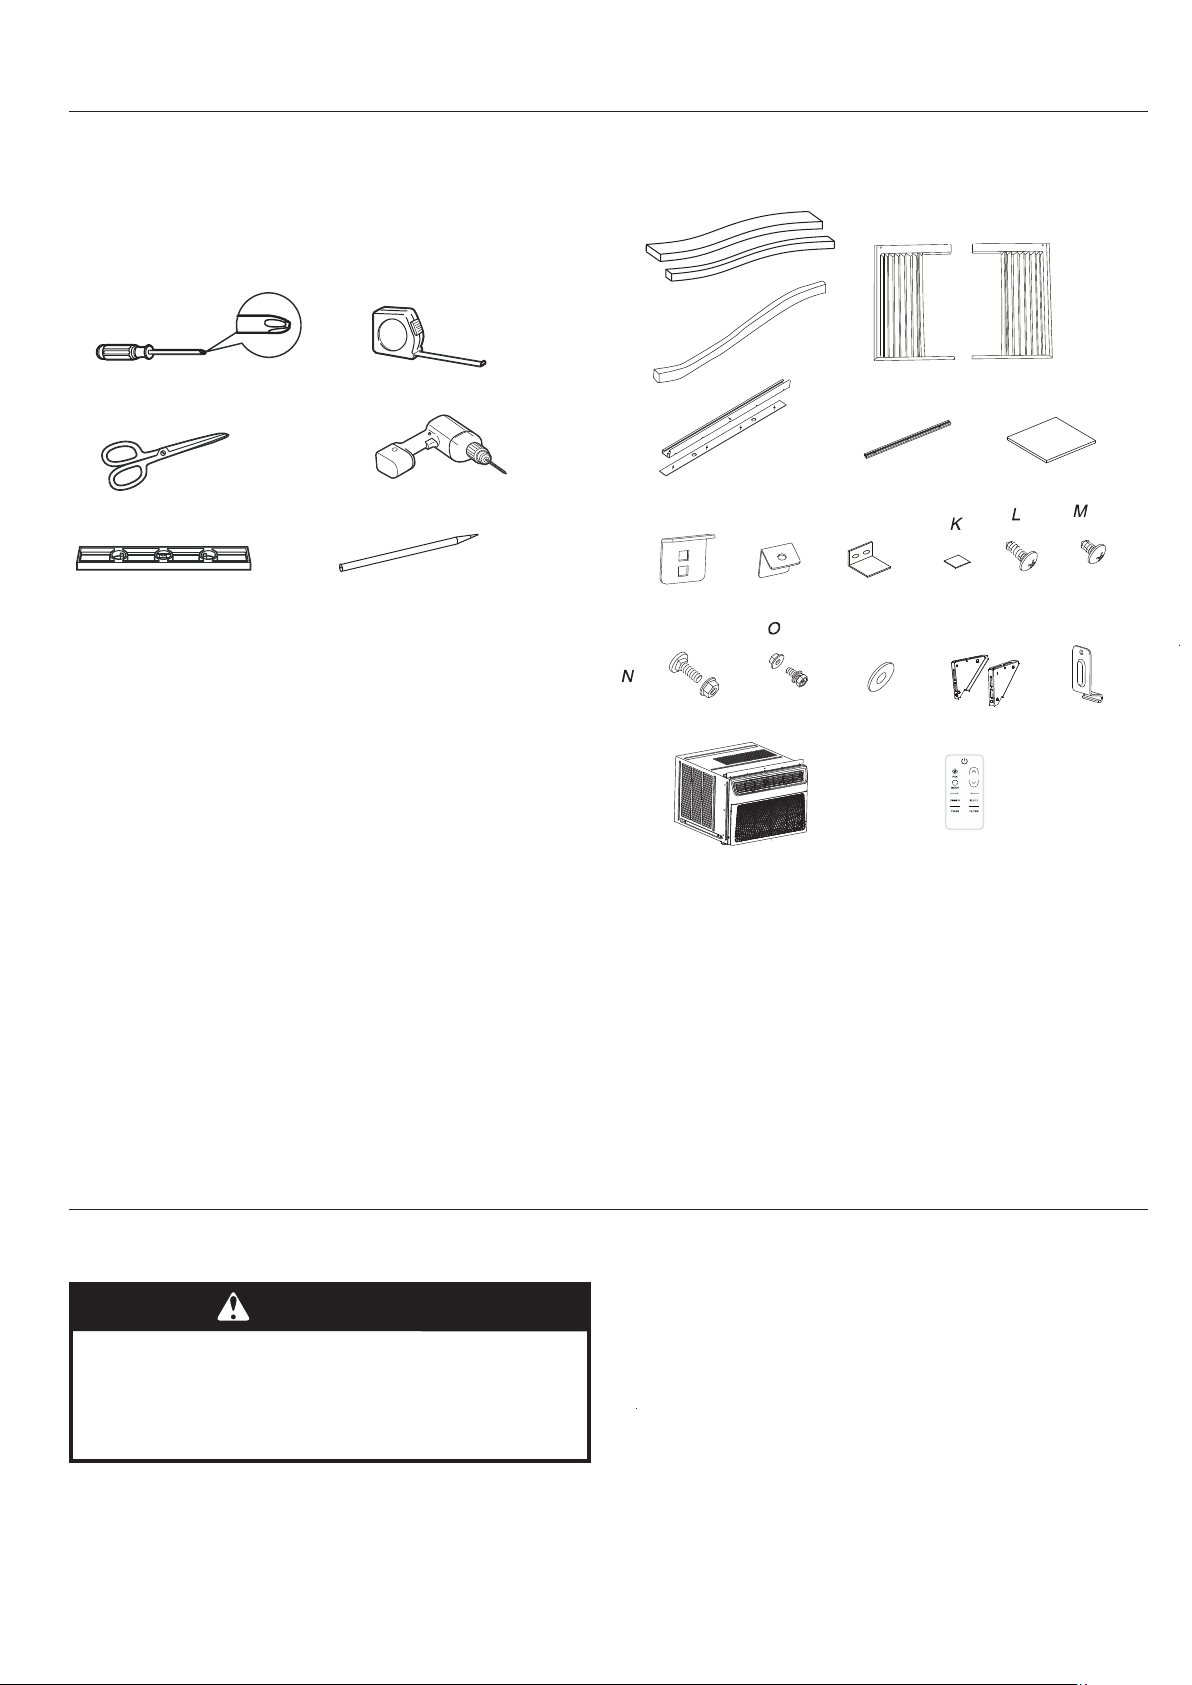
Tools and Parts
Gather the required tools and parts before starting installation.
Read and follow the instructions provided with any tools listed
here.
Tools needed
■Phillips screwdriver
■Scissors
■Level
■Tape measure
■Cordless drill and bit
■Pencil
1 /8"
Parts supplied
Check that all parts are included in parts package.
AAdhesive
seal
.
BFoam seal.
H.
Angle Brackets (2)
B
C
D
H
G
I
J
Q
F
P
R
Remove packaging materials
■
Remove and dispose of/recycle packaging materials.
Remove tape and glue residue from surfaces before turning
on the air conditioner. Rub a small amount of liquid dish soap
over the adhesive with your fingers. Wipe with warm water
and dry.
Unpack the Air Conditioner
■Do not use sharp instruments, rubbing alcohol, flammable
fluids, or abrasive cleaners to remove tape or glue. These
products can damage the surface of your air conditioner.
■
■
Handle the air conditioner gently.
WARNING
Excessive Weight Hazard
Use twoor morepeople tomove andinstall
air conditioner .
Failure todo socan resultin backor otherinjury .
Remove top rail from the packaging material.
S
T
NOTE:
The
F.
Baffle (2)
is not provided for
12K BTU cooling and heating model.
The
R.Lock frame
is only provided for
12K BTU cooling and heating model.
The G.EVA Foam(2) is only provided for E-star models,with
E-star LOGO on the control panel.
PE
foam
seal
E.Adhesive
seal
F.
Baffle (2)
G.
EVA Foam(2)
I. Lock
frame(2)
(for
Vinyl-Clad
windows)
J.
Sash lock
K.
EPDM
foam sesl(2)
L.
3/4"
screws
(8)
M. 1/4
"
screws
(10)
N. 3/4"
Long
Flat
Head
Bolt
and
Locknut
(2)
C
.
Side
curtains
(2)
D.Top
rail
and
O. 1/2"
Long
Bolt
and
Locknut
(4)
P. Washer(2)
Q. Left and Right Support
Brackets (2)
R.
Lock frame
S. Air conditioner
T.Remote control
A
E
Loading ...
Loading ...
Loading ...