Loading ...
Loading ...
Loading ...
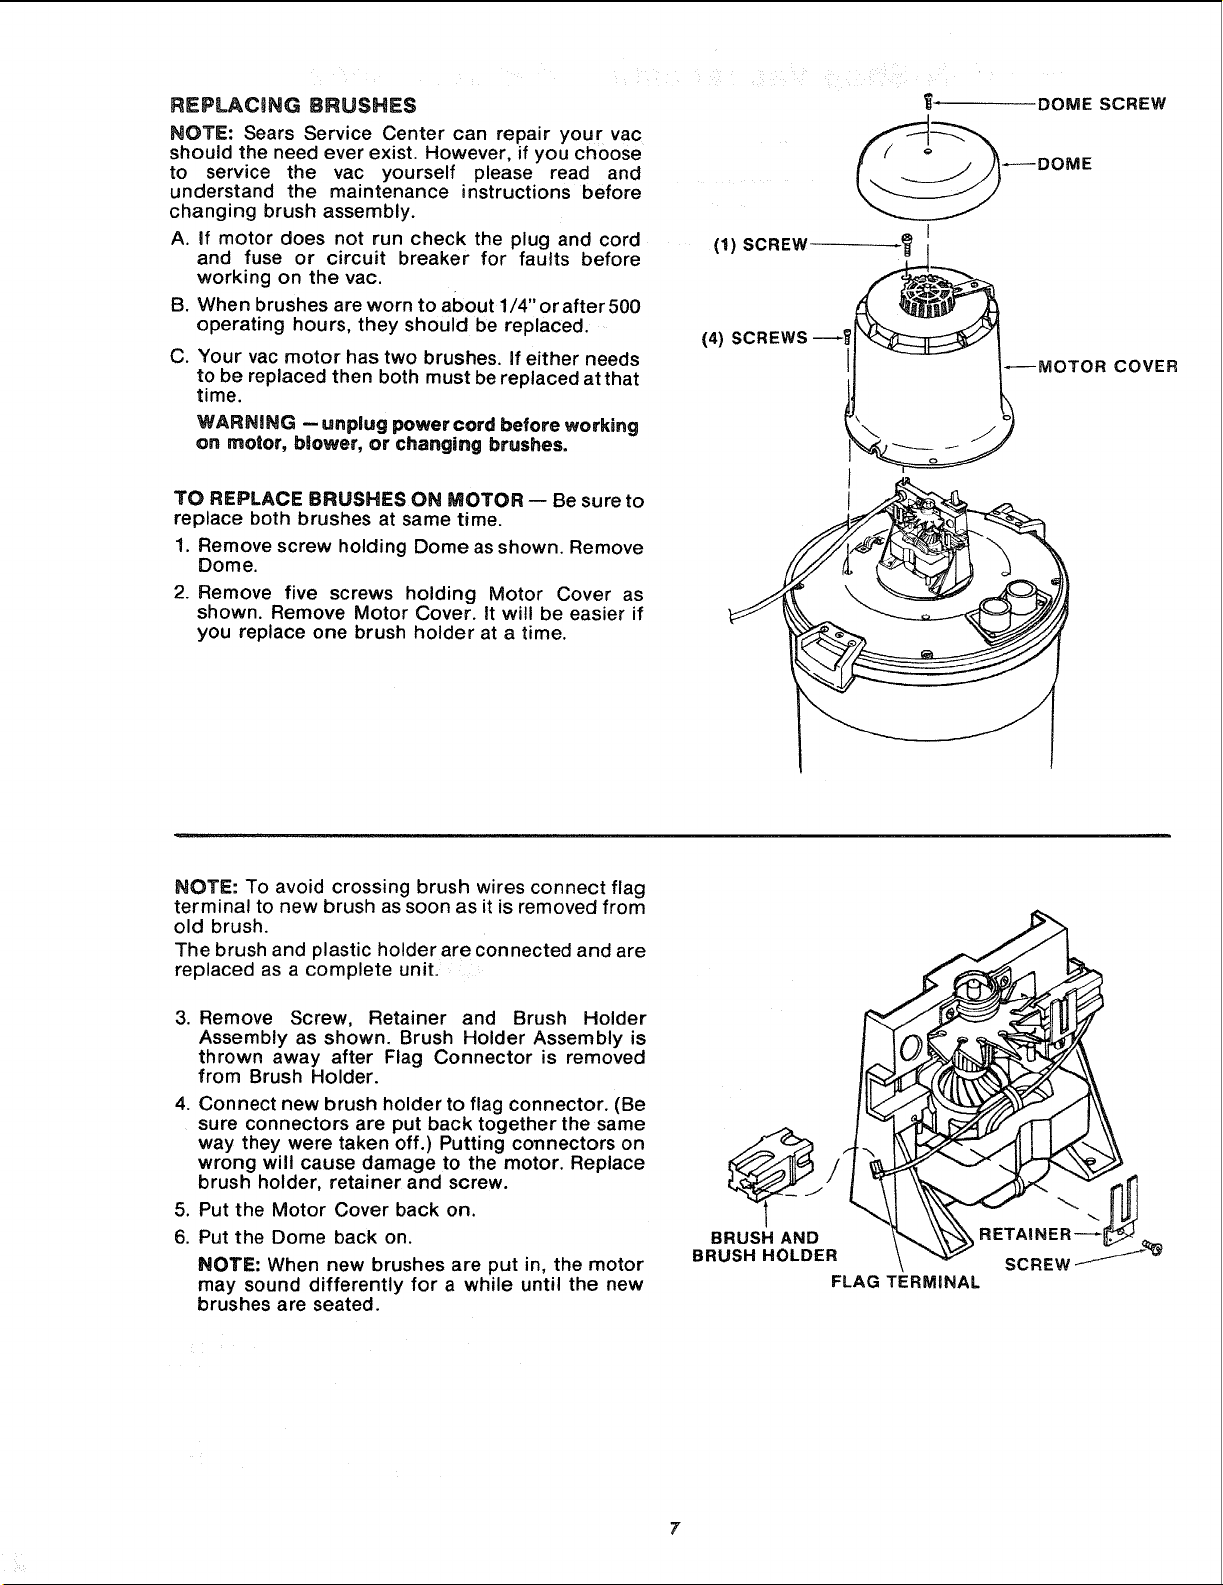
REPLACING BRUSHES
NOTE: Sears Service Center can repair your vac
should the need ever exist. However, if you choose
to service the vac yourself please read and
understand the maintenance instructions before
changing brush assembly.
A. if motor does not run check the plug and cord
and fuse or circuit breaker for faults before
working on the vac.
B. When brushes are worn to about 1/4" orafter500
operating hours, they should be replaced.
C. Your vac motor has two brushes, if either needs
to be replaced then both must be replaced atthat
time.
WARNING -- unplug power cord before working
on motor, blower, or changing brushes.
TO REPLACE BRUSHES ON MOTOR -- Be sure to
replace both brushes at same time.
1. Remove screw holding Dome as shown. Remove
Dome.
2. Remove five screws holding Motor Cover as
shown. Remove Motor Cover. It will be easier if
you replace one brush holder at a time.
(1) SCREW
(4) SCREWS _
_MOTOR COVER
\
I
I
NOTE: To avoid crossing brush wires connect flag
terminal to new brush as soon as it is removed from
old brush.
The brush and plastic holder are connected and are
replaced as a complete unit.
3. Remove Screw, Retainer and Brush Holder
Assembly as shown. Brush Holder Assembly is
thrown away after Flag Connector is removed
from Brush Holder.
4. Connect new brush holder to flag connector. (Be
sure connectors are put back together the same
way they were taken off.) Putting connectors on
wrong will cause damage to the motor. Replace
brush holder, retainer and screw.
5. Put the Motor Cover back on.
6. Put the Dome back on.
NOTE: When new brushes are put in, the motor
may sound differently for a while until the new
brushes are seated.
BRUSH AND
BRUSH HOLDER
FLAG TERMINAL
SCREW
Loading ...
Loading ...
Loading ...