Loading ...
Loading ...
Loading ...
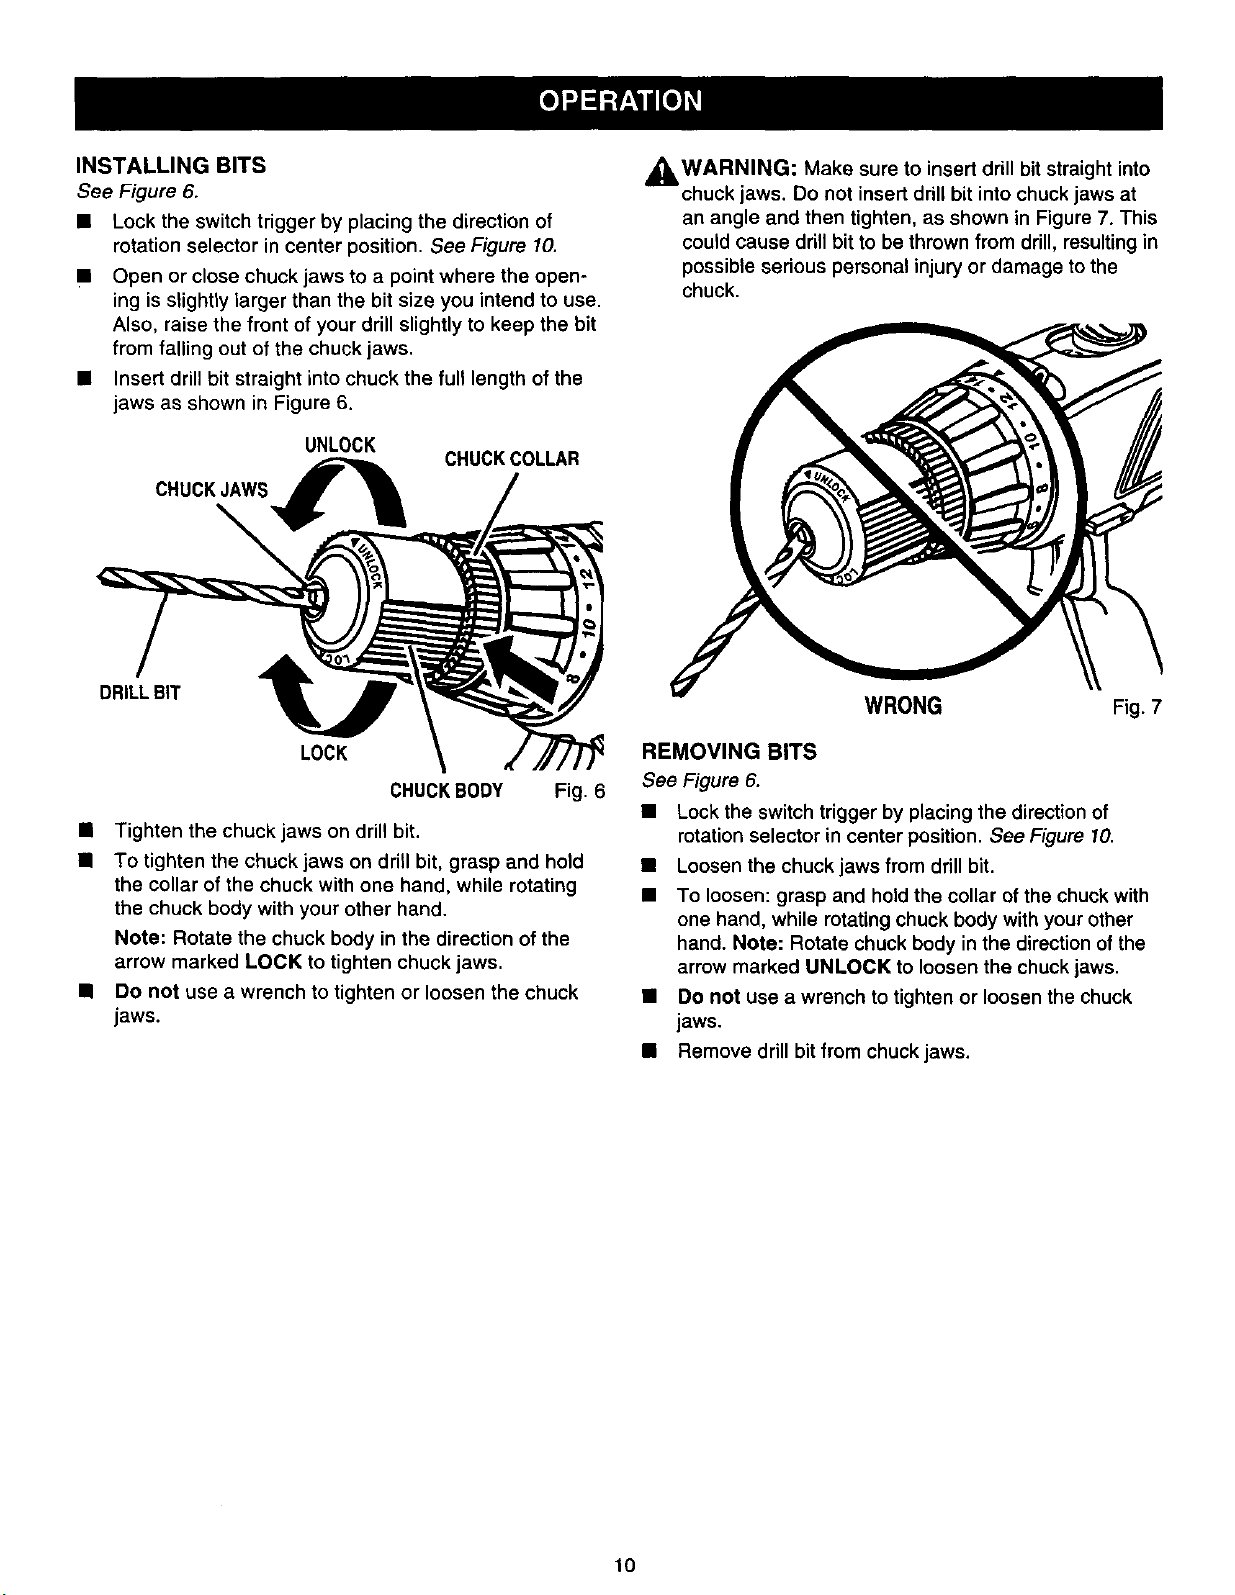
INSTALLINGBITS
See Figure 6.
• Lock the switch trigger by placing the direction of
rotation selector in center position. See Figure 10.
• Open or close chuck jaws to a point where the open-
ing is slightly larger than the bit size you intend to use.
Also, raise the front of your drill slightly to keep the bit
from falling out of the chuck jaws.
• Insert drill bit straight into chuck the full length of the
jaws as shown in Figure 6.
UNLOCK
CHUCKJAWS__
CHUCKCOLLAR
WARNING: Make insert drill bit straight into
,_ sure to
chuck Jaws."Do not insert drill bit into chuck jaws at
an angle and then tighten, as shown in Figure 7. This
could cause drill bit to be thrown from drill, resulting in
possible sedous personal injury or damage to the
chuck.
DRILLBIT
LOCK
CHUCKBODY Fig. 6
• Tighten the chuck jaws on drill bit.
• To tighten the chuck jaws on drill bit, grasp and hold
the collar of the chuck with one hand, while rotating
the chuck body with your other hand.
Note: Rotate the chuck body in the direction of the
arrow marked LOCK to tighten chuck jaws.
• Do not use a wrench to tighten or loosen the chuck
jaws.
WRONG Fig. 7
REMOVING BITS
See Figure 6.
• Lock the switch trigger by placing the direction of
rotation selector in center position. See Figure 10.
• Loosen the chuck jaws from drill bit.
To loosen: grasp and hold the collar ofthe chuck with
one hand, while rotating chuck body with your other
hand. Note: Rotate chuck body in the direction of the
arrow marked UNLOCK to loosen the chuck jaws.
• Do not use a wrench to tighten or loosen the chuck
jaws.
• Remove drill bit from chuck jaws.
10
Loading ...
Loading ...
Loading ...