Loading ...
Loading ...
Loading ...
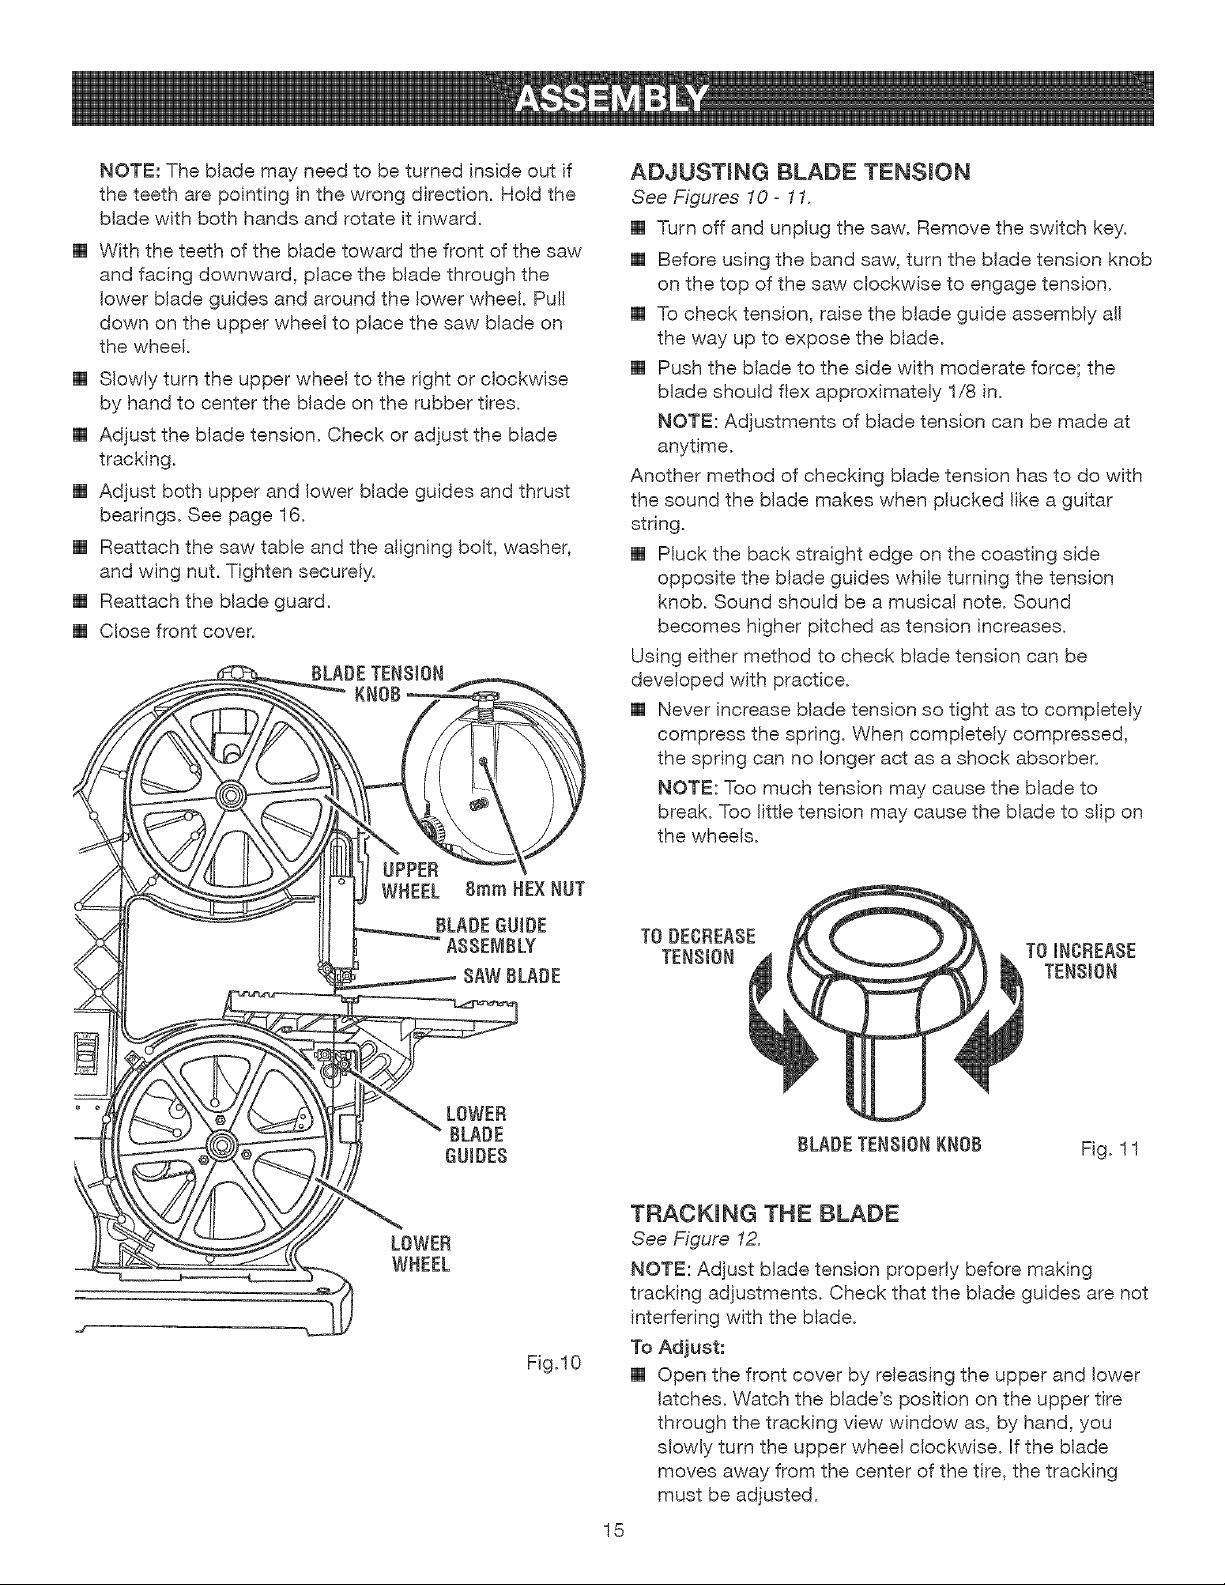
NOTE:Theblademayneedto beturnedinsideout if
theteetharepointinginthewrongdirection.Holdthe
bladewithbothhandsandrotateit inward.
[] Withtheteethof thebladetowardthefrontof thesaw
andfacingdownward,placethebladethroughthe
lowerbladeguidesandaroundthelowerwheel.Pull
downontheupperwheelto placethesawbladeon
thewheel.
[] Slowlyturnthe upperwheelto therightorclockwise
byhandto centerthebladeontherubbertires.
[] Adjustthebladetension.Checkor adjustthe blade
tracking.
[] Adjustbothupperandlowerbladeguidesandthrust
bearings.Seepage16.
[] Reattachthesawtableandthealigningbolt,washer,
andwingnut.T(ghtensecurely.
[] Reattachthebladeguard.
[] Closefrontcover.
WHEEL 8mm NEXNUT
BLADE GU)DE
ABBEMBL¥
BAW BLADE
LOWEB
BLADE
GU(DEB
Fig.10
ADJUST(NG BLADE TENS(ON
See Figures 10- 11.
[] Turn off and unplug the saw. Remove the switch key.
[] Before using the band saw, turn the blade tension knob
on the top of the saw clockwise to engage tension.
[] To check tension, raise the blade guide assembly a(l
the way up to expose the blade.
[] Push the blade to the side w(th moderate force; the
blade should flex approx(mately 1,/8 in.
NOTE: Adjustments of blade tension can be made at
anytime.
Another method of checking blade tension has to do with
the sound the blade makes when plucked like a guitar
str(ng.
[] Pluck the back straight edge on the coasting side
opposite the blade guides while turning the tension
knob. Sound should be a musical note. Sound
becomes h(gher pitched as tension increases.
Using either method to check blade tension can be
developed with practice.
[] Never increase blade tension so tight as to completely
compress the spring. When completely compressed,
the spr(ng can no longer act as a shock absorber.
NOTE: Too much tension may cause the Made to
break. Too little tens(on may cause the blade to sl(p on
the wheels.
TO iNCFtEABE
TENBION
BLADETENB(0NKNOB
F(g. 11
TRACK(NG THE BLADE
See Figure 12.
NOTE: Adjust blade tension properly before making
tracking adjustments. Check that the blade guides are not
interfering with the blade.
To Adjust:
[] Open the front cover by releasing the upper and lower
latches. Watch the b(ade's position on the upper tire
through the tracking view window as, by hand, you
slowly turn the upper whee( clockwise. (f the Made
moves away from the center of the tire, the tracking
must be adjusted.
15
Loading ...
Loading ...
Loading ...