Loading ...
Loading ...
Loading ...
UNPACKING
Thisproductrequiresassembly.
[] Carefullylift sawfromthecartonandplaceit on alevel
worksurface.
NOTE:Thistoolis heavy.Toavoidbackinjury,lift with
yourlegs,notyourback,andgethelpwhenneeded.
[] hspectthetoolcarefullyto makesurenobreakageor
damageoccurredduringshipping.
[] Donotdiscardthepackingmaterialuntilyouhave
carefullyinspectedandsatisfactorilyoperatedthetool.
[] Thesawisfactorysetforaccuratecutting.After
assemblingit, checkforaccuracy,ffshippinghas
influencedthesettings,refertospecificprocedures
explainedinthismanual.
[] ffanypartsaredamagedormissing,pleasecall
1-800-932-3188forassistance.
_ WARNING:Ifanypartsaremissing,do notoperate
thistooluntilthemissingpartsarereplaced.Failure
to do socouldresultin possibleseriouspersonal
injury.
TABLE
ALIGNING
BOLT
TABLE
LOCK
HANDLE
WARNING:Donotattemptto modifythistool
orcreateaccessoriesnotrecommendedforuse
withthistool.Anysuchalterationormodificationis
misuseandcouldresultina hazardouscondition
leadingto possibleseriouspersonalinjury.
Fig.5
_ll WARNING:Donotconnectto powersupplyuntil
assemblyiscomplete.Failureto complycouldresult
inaccidentalstartingandpossibleseriouspersonal
injury.
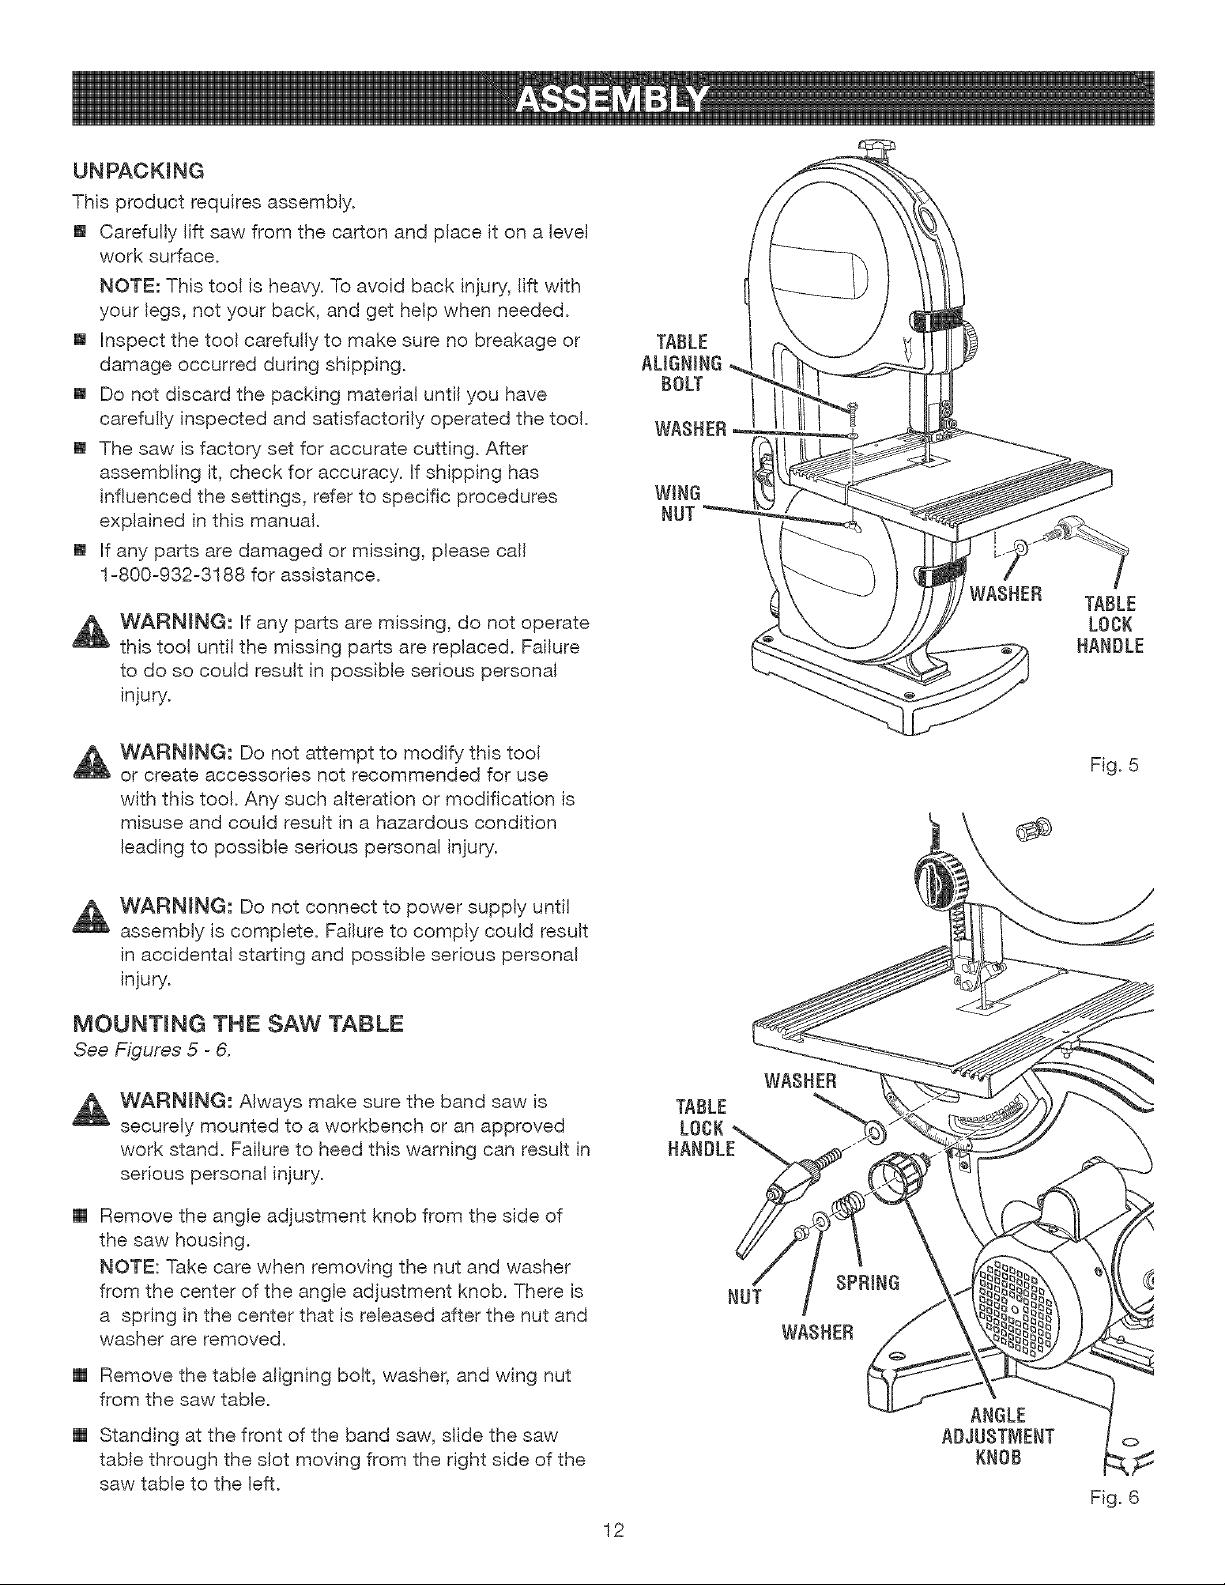
MOUNTING THE SAW TABLE
See Figures 5 - 6.
_ WARNING: Always make sure the band saw is
securely mounted to a workbench or an approved
work stand. Failure to heed this warning can result in
serious personal injury.
[] Remove the angle adjustment knob from the side of
the saw housing.
NOTE: Take care when removing the nut and washer
from the center of the angle adjustment knob. There is
a spring in the center that is released after the nut and
washer are removed.
[] Remove the table aligning bolt, washer, and wing nut
from the saw table.
[] Standing at the front of the band saw, slide the saw
table through the slot moving from the right side of the
saw table to the left.
12
TABLE
LOCK
HANDLE
ANGLE
ADJUSTMENT
KNOB
Loading ...
Loading ...
Loading ...