Loading ...
Loading ...
Loading ...
Page 21
Operating
Instructions
(With Remote)
Changing The Batteries On The Remote
Battery replacement:
• Slide the rear cover on the remote in the directions
of the arrow. Continue pulling (gently) until the cover
separates completely from the unit.
• Insert (2) batteries (AAA) following the same
orientation (polarity) depicted inside the battery
chamber (+/-).
• Re-install the real cover.
• If the remote control will not be used for extend
periods of time (vacations, etc.), batteries should be
removed.
To operate the hand-held remote control will require two “AAA” alkaline batteries
(inclueded). Batteries should be replaced when:
a) No signal (beep) is heard when attemptting to program the main unit.
b) The main unit does not respond to a command issue by the remote control.
Eletronic
Display
• Protect the remote control from high temperatures, and keep away from radiation
exposure.
• Keep the control panel receiver out of direct sunlight.
• Do not mix old and new batteries.
NOTE
The clock feature is only avaliable on the remote, the
unit does not have a clock. The remote clock is a 24
hour clock only.
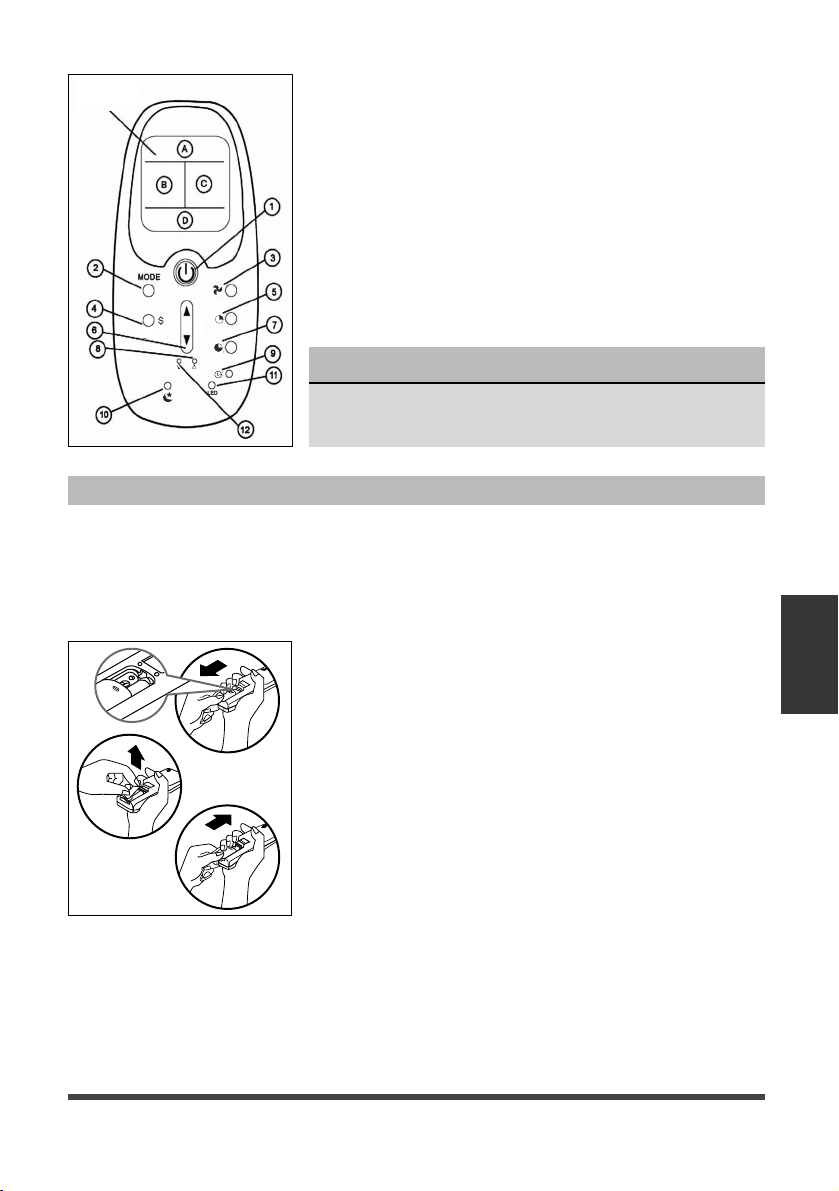
6. Used to increase or decrease temperature settings in
1° increments on the Celsius or Fahrenheit scale.
7. Cancels current Timer ON/OFF settings.
8. Lock prevents the remote control settings from
inadvertently being changed.
9. Clock: Press button for 3 seconds in order to set the
clock. Press the up or down arrow to adjust the time
in 10 minute intervals.
10. Used to activate the SLEEP program.
11. Toggle the LED backlight on/off.
12. Restore remote control default settings.
Loading ...
Loading ...
Loading ...