Loading ...
Loading ...
Loading ...
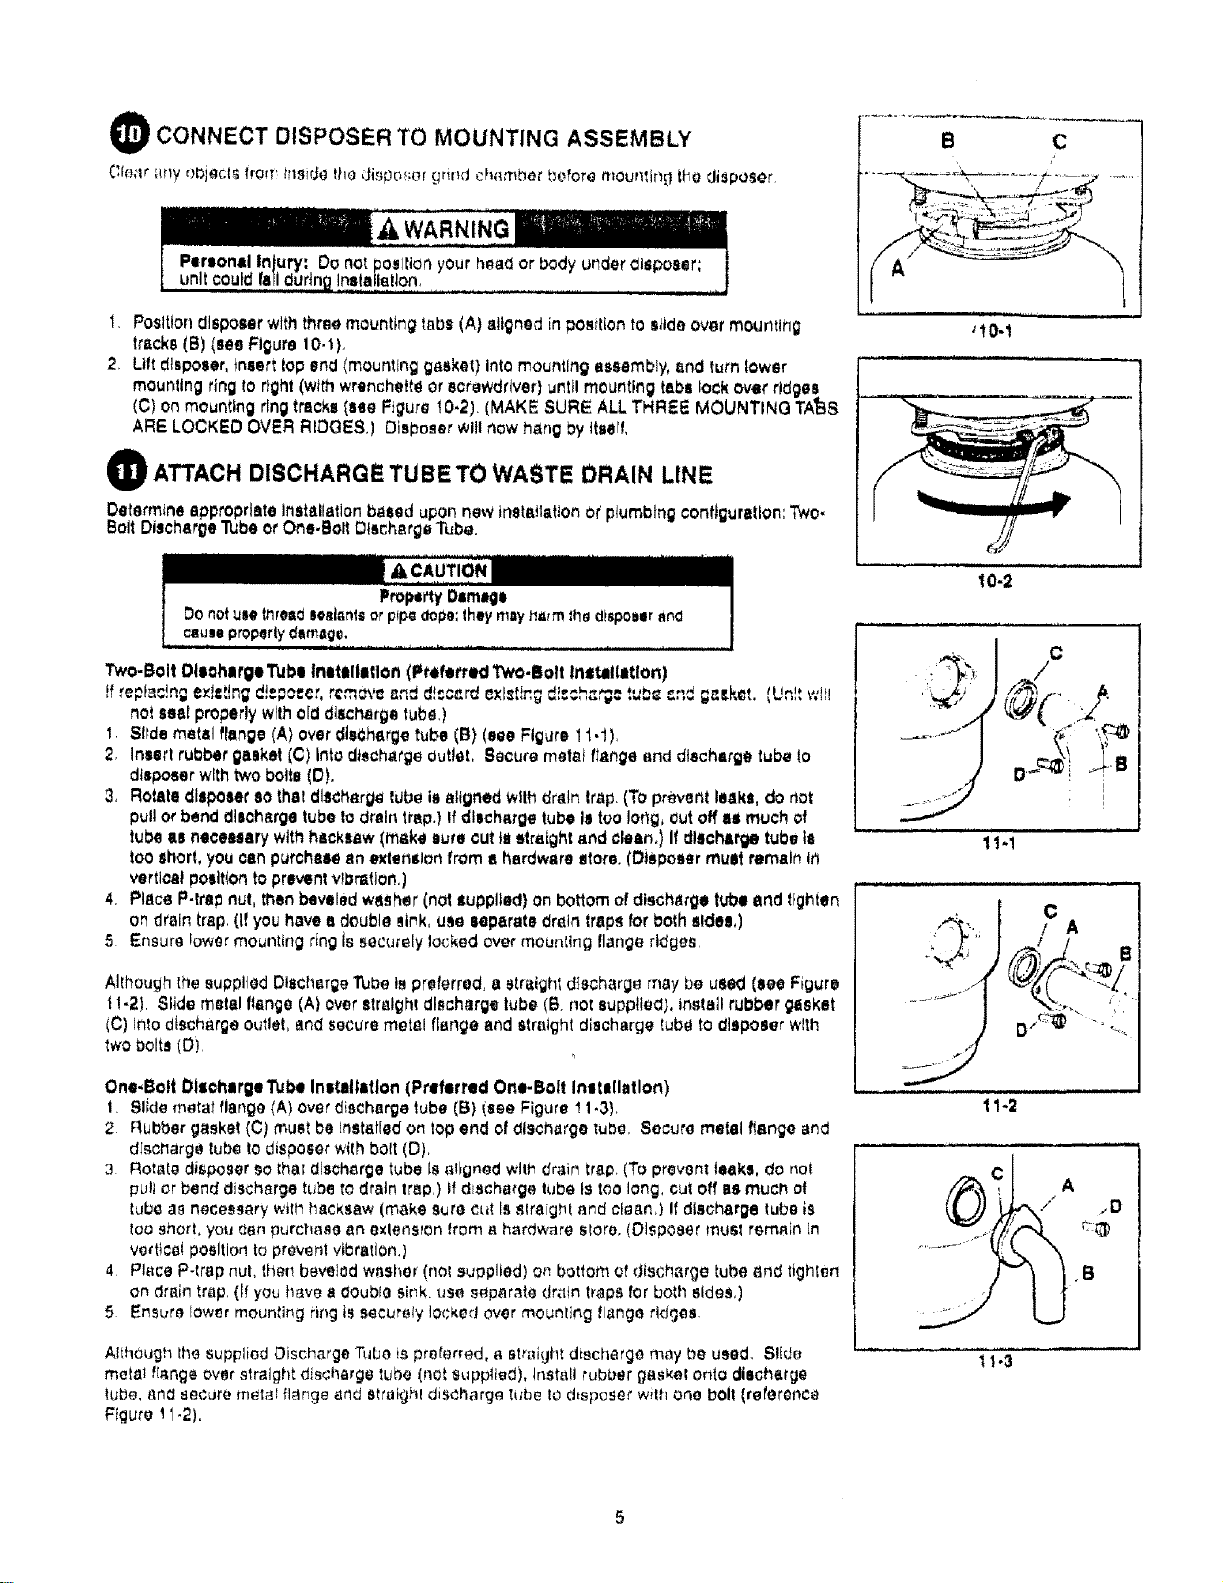
e CONNECT DISPOSER TO MOUNTING ASSEMBLY B C
/
1, Posltlon disposer with threemounting tabs (A) aligned inposition to s_ideover mounting
tracks[B) {see Figure tO.i),
2. Liftdisposer, Insert lop end (mounting gasket) Intomounting assembly,and turn tower
mounting ring to right(with wrenchetteor screwdriver] -hill mounting tabs iock over ridges
(C) on mounting ring tracks (see Figure t0-2). (MAKE SURE ALL THREE MOUNTING TABS
ARE LOOKED OVER RIDGES.] Disposer will now h_ng by ttserf,
O ATTACH DISCHARGE TU BE TO WASTE DRAIN LINE
Determine appropriate Installation based upon new tr'retallation or plumbing configuration: Two.
Bolt DischargeTube or One.Bolt Discharge Tube.
Two-Bolt Ola¢harge Tuba Instillation (Preferred Two.Bolt Instillation)
q I is,
,f ,e.L_,ng ex,=.,ng _,.,.._€,, ,¢m.'_e _n_ d,,.._rd _xlst,nu d....... =,.,_"_' "'_'_
not seal properly withold discharge tube.)
1, Sllde metal flange (A) overdteChe,rge tube (B) (see Figure 11.1),
2, Insert rubber gasket (C) intodischarge Outlet, Secure mota_ fl=tnge and discharge tube to
disposerwithtwo bolts (C),
3, Rotate disposer so thai discharge_gbeis aligned Withdrain trap, (To prever_tleaks, do not
pull or bend discharge tube todrain Imp,} If discharge tube is too Ior_g,out off e= much of
tubo u necessary wttt_hacksaw (frisks sure cut testraight and clean,} If dl_lchirgo tube is
too short, you can purchasesn exler_slon from e hardware store. (Disposer must remain It_
vertical position to preventv!_r=_tlon,)
4 Place P-treI_nut,then beveled washer (noI supplied) on bottom of disch_trgeWoe end tfghten
on drain trap,(If you have adouble nit,k, u._eseparate draintraps forboth sides,)
5 Ensure Iowsr mounting ring is securely locked over mounting flange ridges,
Although the euppltedDischarge Tube is preferred, a straighI discharge may be used (see Figure
1-2), Slide metal flange (A) over straightdischarge tube (B. not supplied}, install rubber gasket
(C) Into discharge outlet,and secure metal flange and straight discharge fube to_leposer with
two bolts CO)
One.Bolt Dtiottarge Tube Installation (Preferred One-Bolt Initslletlon)
t. Slide m_tai flange (A) over discharge tube (B) (see Figure ! 1.3),
2 RUbber gasket tO) must be installedon top end of discharge tu_g. Secure metal ftango and
discharge tube todisposer withbolt (D),
3 Rot_!e dif_poser so the=discharge tube J,_aflgned with drain trap,(To preventteaks, do not
putJ_r bend discharge tube to drain trap,) if d_acharge kJbeis too long, cut oft aSmuch of
tubea_ necessary wltt_hacksaw (make sure cut Isslraighl and clean,) If discharge tube is
too short, you _an purchase an exlenslon lram a hardware store, (Disposer musl remain in
vedtcef posltlorl to preventvibration.)
4 Piece P-trap nut, then bevelod washor (nol supplied) on bottom of discharge tube _lnd tighten
on drain trap. (I! you have s double sir_k,use sgpar;_te dr_tn traps for both Bides,)
5 Ensure lower mounting ring is securetylocked over mounling flange ridges.
AIthOugh _he suppfied Discharge Tube is preterred, a Straigh_ discharge may be use_, Slide
metal flange over straight discharge tube (not suppfled), install rubt_er gaskel onto discharge
rude, an_ secure metal flange and strafghl discharge tube to d_sposer with one bolt (reference
Figure t 1-2).
_I0-I
l 1
t0"2
11-1
C
.... / A
1%2
/
D
t !-3
Loading ...
Loading ...
Loading ...