Loading ...
Loading ...
Loading ...
14 ENGLISH
Connecting to a faucet
CAUTION: Always use a pressure-resistant
water hose with ø 13 mm or larger diameter and
connect to the faucet using a proper ttings.
Otherwise, the water hose and/or the tting may
break and cause personal injury.
NOTICE: Use a pressure-resistant water hose
as short as possible. The amount of intake water
should be higher than the max feed volume of the
pump.
NOTICE: If you connect to the mains for drink-
ing water, use a backow preventer valve which
meets the regulations in your region.
Prepare a pressure-resistant water hose. Attach the
coupling sleeve to one end and connect the other end
to the faucet as follows.
1. Remove the nut on the coupling sleeve and pass
the pressure-resistant water hose through the nut.
Insert the end of the hose into the coupling sleeve and
then tighten the nut.
1
2
3
► 1. Pressure-resistant water hose 2. Nut of the cou-
pling sleeve 3. Coupling sleeve
NOTE: If you want to connect the pressure-resistant
water hose to the faucet using a coupling sleeve,
prepare another coupling sleeve and attach it to the
other end of the hose.
2. Connect the pressure-resistant water hose to the
faucet. Apply a suitable tting such as hose band or
water tap joint to secure the hose end with the faucet.
1
2
3
► 1. Hose band 2. Water tap joint 3. Pressure-
resistant water hose
NOTE: The tting depends on the shape of the faucet
to which you connect. Prepare a suitable commercial-
ly-bought tting.
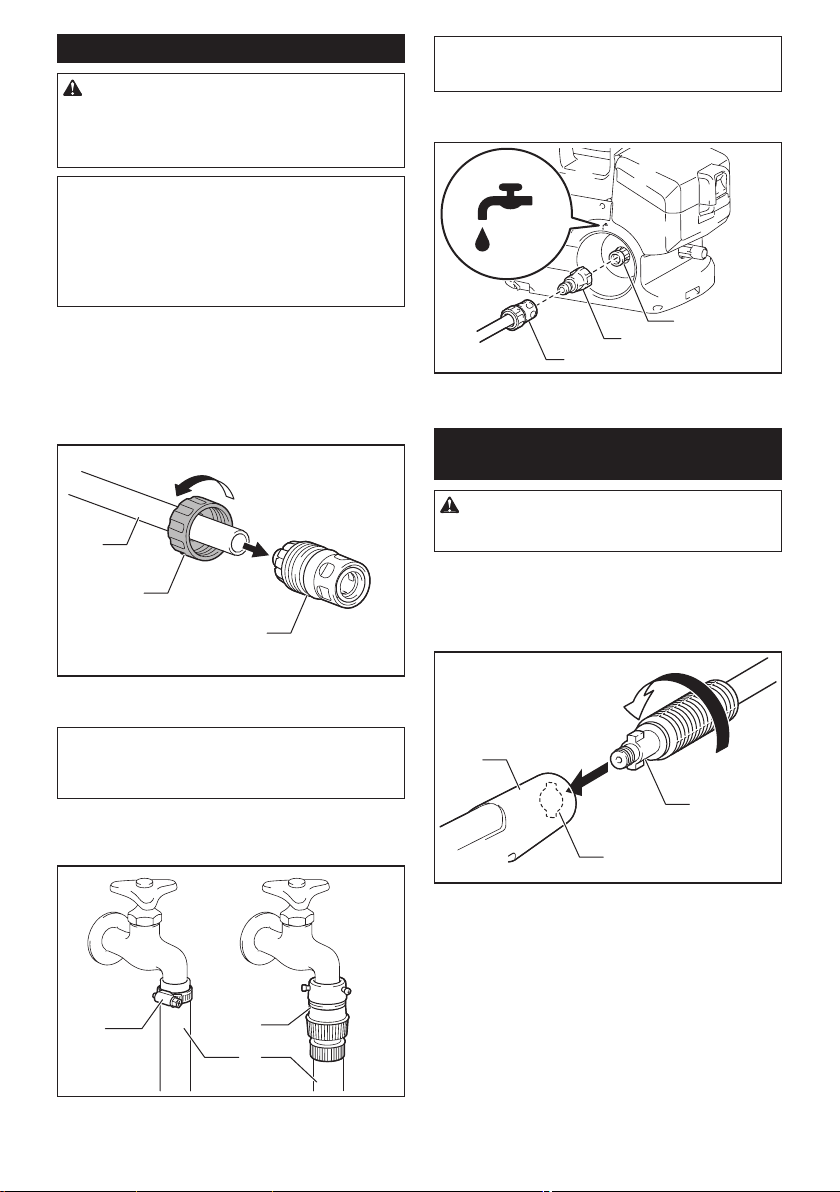
3. Attach the water hose connector to the inlet (with
the faucet marking) and then insert the coupling sleeve.
1
2
3
► 1. Coupling sleeve 2. Water hose connector 3. Inlet
on the high pressure washer
Connecting/disconnecting the
nozzle
CAUTION: Always lock the trigger of the
trigger gun when connecting/disconnecting the
nozzle.
Insert the end of the nozzle into the slot on the trigger
gun and turn it in the direction of the arrow as shown in
the gure. To disconnect the nozzle, turn the nozzle in
the reverse direction while pressing it toward the trigger
gun.
2
1
3
► 1. Trigger gun 2. Slot 3. End of the nozzle
Loading ...
Loading ...
Loading ...