Loading ...
Loading ...
Loading ...
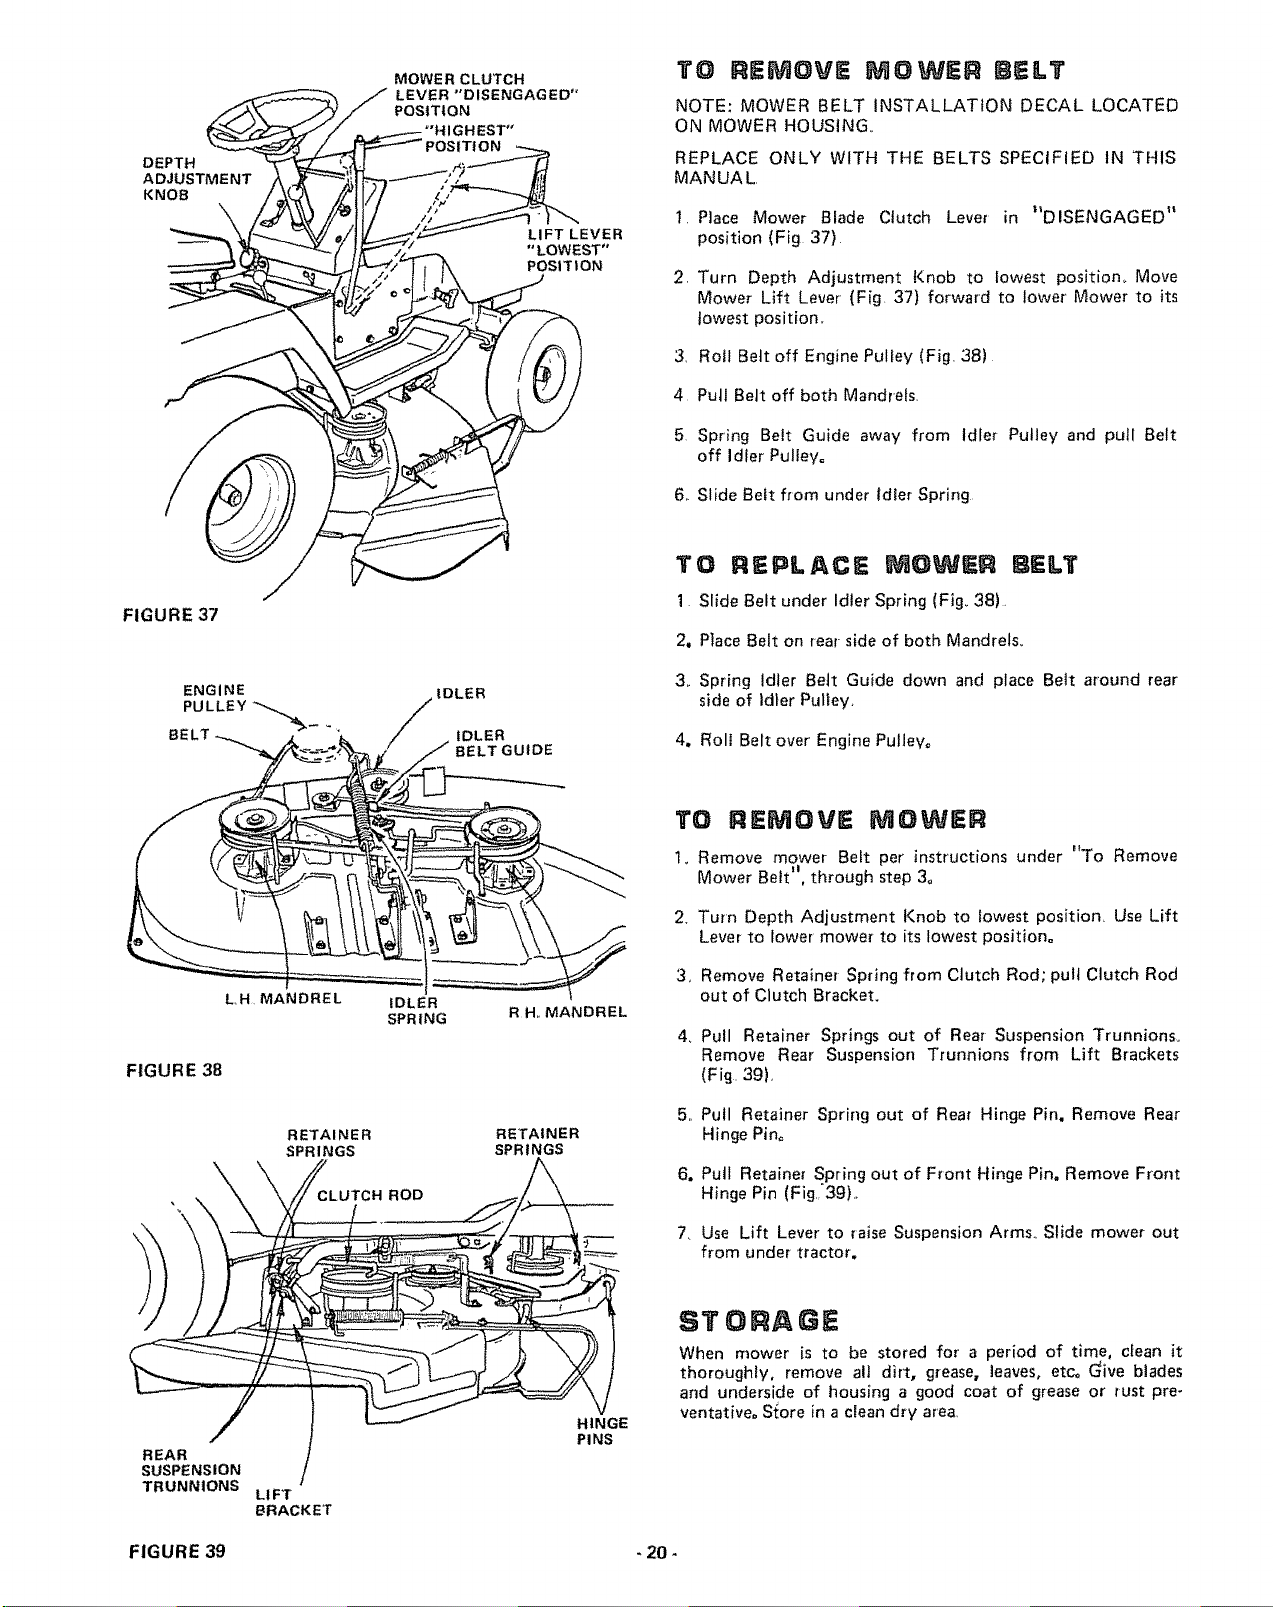
DEPTH
ADJUSTME NT
KNOB
\
MOWER CLUTCH
LEVER "'DISENGAGED"
POSITION
"'HIGHEST"
ITION
LIFT LEVER
"LOWEST"
POSI T tON
TO REMOVE MOWER BELT
NOTE: MOWER BELT INSTALLATION DECAL LOCATED
ON MOWER HOUSING.
REPLACE ONLY WITH THE BELTS SPECIFIED IN THIS
MANUAL,
,
3,
4
Place Mower Blade Clutch Lever in _DISENGAGED _t
position (Fig 37)
Turn Depth Adjustment Knob to Lowest position,. Move
Mower Lift Lever (Fig. 37) forward to lower' Mower to its
lowest position,,
Rotl Belt off Engine Pulley (Fig. 38)
Pull Belt off both Mandrels,
5 Spring Belt Guide away from Idler Pulley and pull Belt
off Idler Pulley°
6. Slide Belt from under Idler Spring
FIGURE 37
ENGINE
PULLEY
IDLER
IDLER
BELT GUlDE
TO REPLACE MOWER BELT
1 Slide Belt under Idler Spring (Fig_ 38)_
2, Place Belt on rear side of both Mandrels.
3. Spring Idler Belt Guide down and place Bett around rear
side of Idler Pulley.
4. Roll Belt over Engine Pulley,
FIGURE 38
L,H, MANDREL
IDLER
SPRING
RETAINER
SPRINGS
RH,, MANDREL
RETAINER
SPRINGS
TO REMOVE MOWER
1. Remove mower Belt per' instruct{ons under "To Remove
Mower Belt j', through step 3=
2. Turn Depth Adjustment Knob to lowest position, Use Lift
Lever to lower' mower to its lowest position°
3, Remove Retainer Spring from Clutch Rod; putt Clutch Rod
out of Clutch Bracket.
4 Pull Retainer Springs out of Rear Suspension Trunnionso
Remove Rear Suspension Trunnions from Lift Brackets
(Fig. 39),
5. Putl Retainer Spring out of Rear Hinge Pin. Remove Rear
Hinge Pin°
6. Pull Retainer Spring out of Front Hinge Pin, Remove Front
Hinge Pin (Fig,'39L
7. Use Lift Lever to raise Suspension Arms_ Slide mower out
from under tractor.
/
REAR
SUSPENSION
TRUNNtONS
LIFT
BRACKET
HINGE
PINS
STORAGE
When mower is to be stored for a period of time. cfean it
thoroughly, remove all dirt, grease, leaves, etc, Give blades
and underside of housing a good coat of grease or rust pre-
ventat{veo S_ore in a clean dry area.
FIGURE 39 - 20 -
Loading ...
Loading ...
Loading ...