Loading ...
Loading ...
Loading ...
10
■ To avoid scratches, do not slide cookware or bakeware across
the cooktop. Aluminum or copper bottoms and rough finishes
on cookware or bakeware could leave scratches or marks on
the cooktop.
■ Do not cook popcorn in prepackaged aluminum containers on
the cooktop. They could leave aluminum marks that cannot be
removed completely.
■ To avoid damage to the cooktop, do not allow objects that
could melt, such as plastic or aluminum foil, to touch any part
of the entire cooktop.
■ To avoid damage to the cooktop, do not use the cooktop as a
cutting board.
■ Use cookware about the same size as the surface cooking
area. Cookware should not extend more than
1
/
2
" (1.3 cm)
outside the area.
■ Use flat-bottomed cookware for best heat conduction and
energy efficiency. Cookware with rounded, warped, ribbed or
dented bottoms could cause uneven heating and poor cooking
results.
■ Determine flatness by placing the straight edge of a ruler
across the bottom of the cookware. While you rotate the
ruler, no space or light should be visible between it and the
cookware.
■ Cookware designed with slightly indented bottoms or small
expansion channels can be used.
■ Make sure the bottoms of pots and pans are clean and dry
before using them. Residue and water can leave deposits
when heated.
■ To avoid damage to the cooktop, do not cook foods directly
on the cooktop.
Cooktop On Indicator Light
The Cooktop On indicator light is located on the console panel.
When any control knob on the console panel is turned on, the
Cooktop On indicator light will glow.
Hot Surface Indicator Light
On ceramic glass models, the Hot Surface indicator light is located
on the console panel.
The Hot Surface indicator light will glow as long as any surface
cooking area is too hot to touch, even after the surface cooking
area is turned off.
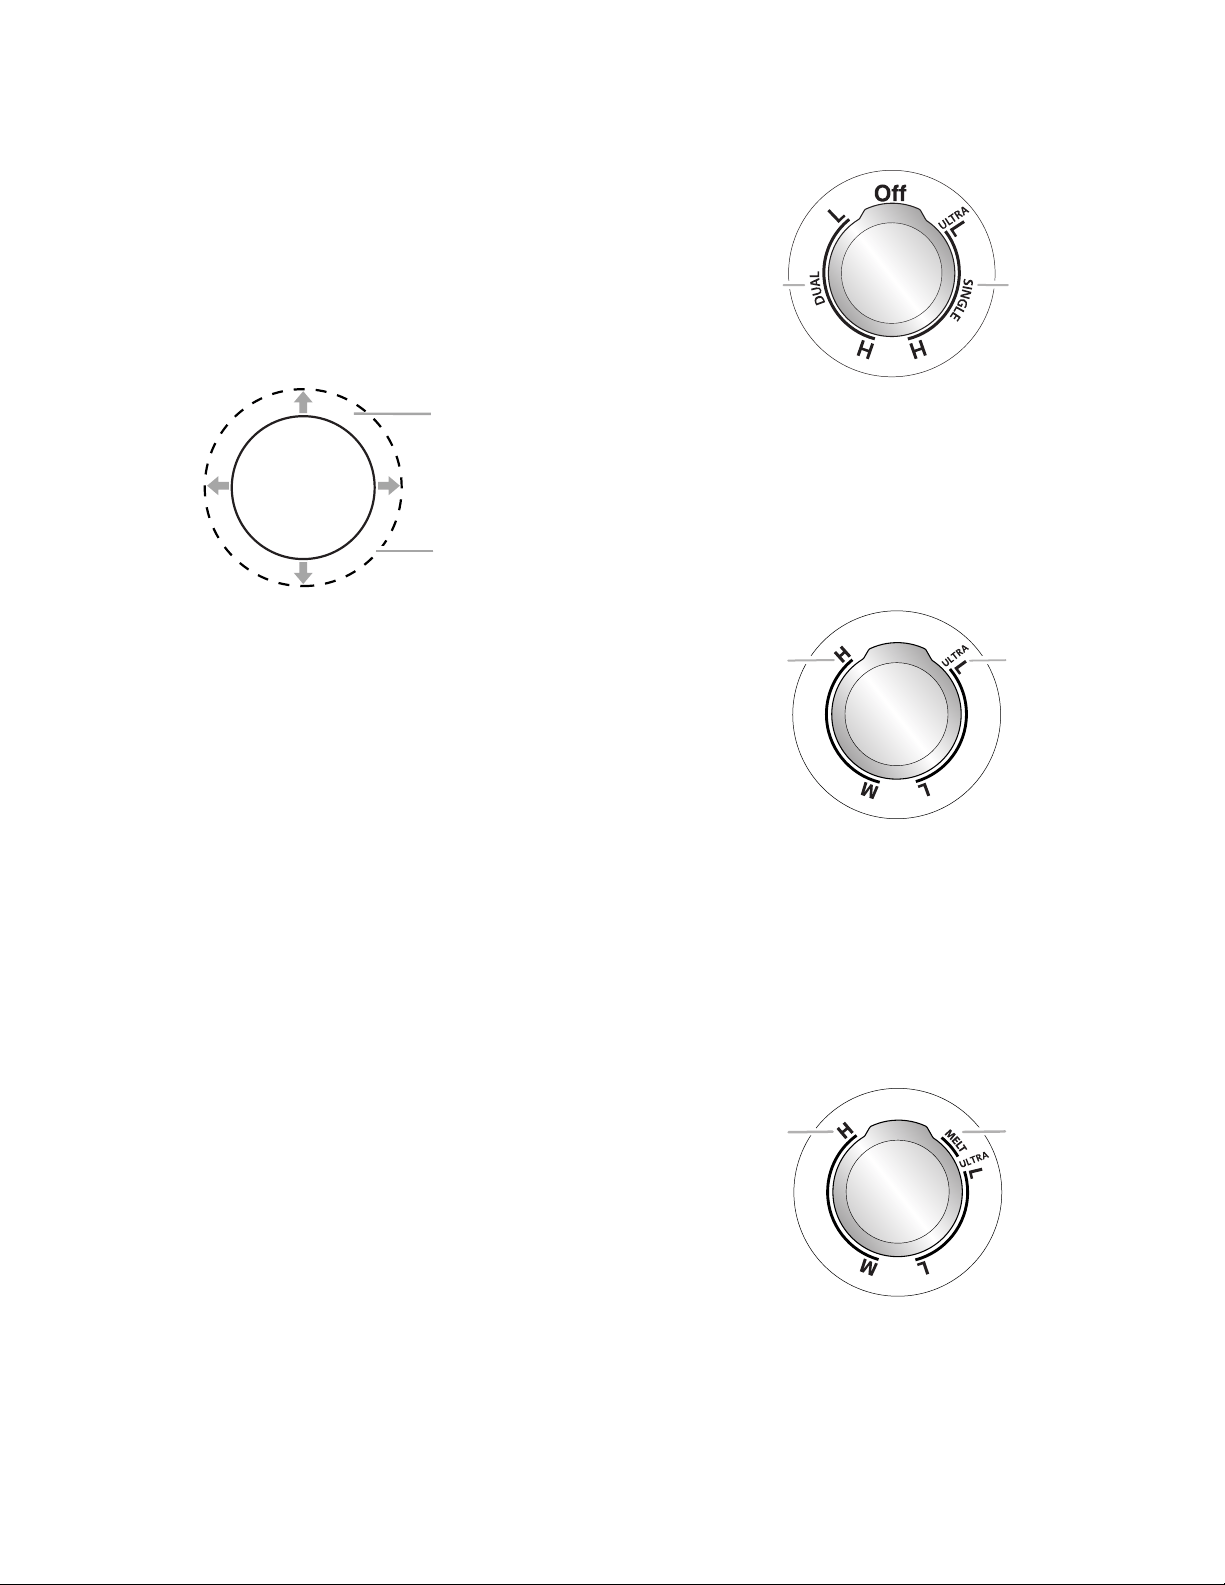
Dual Zone Cooking Element
The Dual Zone cooking element offers flexibility depending on the
size of the cookware. Single size can be used in the same way as
a regular element. The dual size combines both the single and
outer element and is recommended for larger size cookware.
NOTE: Settings are marked on the control knob.
Rapid Boil Element (Right Front Element)
The Rapid Boil cooking element offers additional cooking flexibility.
The Rapid Boil cooking element can be used to boil liquids faster.
The lowest melt setting can be used to prepare sauces, to brown
or sauté foods and to keep foods at a low temperature. Use
cookware appropriate in size for the Rapid Boil cooking element.
NOTE: Settings are marked on the control knob.
Melt Element (Left Rear Element)
The Melt cooking element offers flexibility due to a wide range
of settings between High and Melt. The High heat option can be
used to boil small amounts of liquid quickly. To reduce the power
setting, turn the knob clockwise. The Melt setting is designed for
delicate foods, that require low heat, such as when melting
chocolate or holding sauces. Use cookware appropriate in size
for the Melt cooking element.
NOTE: Settings are marked on the control knob.
A
B
C
A. Surface cooking area
B. Cookware/canner
C
1
/
2
" (1.3 cm) maximum overhang
A
B
A. Dual
B. Single
A
B
Off
A. Rapid boil option
B. Lower heat option
A
B
Off
A. High heat option
B. Melt option
Loading ...
Loading ...
Loading ...