Loading ...
Loading ...
Loading ...

18
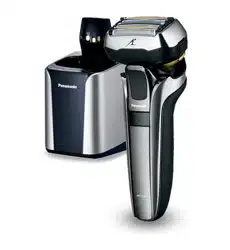
►Self-cleaning recharger
Problem Action
The blade has not been
thoroughly washed.
If the shaver is not cleaned for
more than 2 weeks, rst clean
with the cleaning brush to remove
beard trimmings.
(See page 14.)
Do not add detergent and water
except when replacing the
cleaning liquid.
Doing so may deteriorate the
cleaning function.
(See page 16.)
After cleaning, oil‑like droplets may
remain on the outside of the foil
frame. This is the lubricating
component of the cleaning liquid
and does not indicate a problem.
You may wipe it off with a soft cloth.
The blades are not dry or
are sticky.
The blades may not dry quickly
due to temperature conditions.
Run the “Dry/Charge” mode again or
wipe with a soft cloth before shaving.
The blades crack or
deform during cleaning.
Do not insert any foreign objects
into the recharger.
Replace the system outer foil and/
or inner blades. (See page 14.)
Problem Action
The cleaning liquid has
foamed.
If you mix soapy water or hand
soap with the detergent or use
another detergent, the cleaning
liquid will foam. Use the self‑
cleaning recharger after
thoroughly washing and drying
the shaver.
Replace the cleaning liquid.
(See page 15.)
Cleaning liquid has
accumulated in the
cleaning tray.
Remove any waste, etc. that has
accumulated in the drain at the
bottom of the cleaning tray.
(See page 16.)
If you use the self‑cleaning
recharger when the shaver is wet
or when soap or shaving gel is on
the shaver, cleaning liquid may
accumulate in the cleaning tray.
Cleaning liquid leaked from
the cleaning liquid unit.
Do not press the cleaning liquid unit
removal button during any mode.
Place the self‑cleaning recharger
horizontally.
If you use the self‑cleaning
recharger when the shaver is wet
or when soap or shaving gel is on
the shaver, cleaning liquid may
leak.
The cleaning liquid unit
cannot be removed.
Place the self‑cleaning recharger
on a hard, at surface.
(See page 9.)
Loading ...
Loading ...
Loading ...