Instruction Manual
DIGITAL CAMERA
Model No. : IM027
Table of Contents
1. Preparation
2. Shooting
3. Using the Menus
4. Shooting Settings
5. Playback
6. Customizing the Camera
7. Setting Up the Camera
8.
Connecting the Camera to
External Devices
9. Cautions
10. Information
11. SAFETY PRECAUTIONS
Thank you for purchasing our digital camera. Before you start to use your new camera, please
read these instructions carefully to enjoy optimum performance and a longer service life.
Be sure you have read and understood the contents of “11. SAFETY PRECAUTIONS”, before
using this product. Keep these instructions available for future reference.
We recommend that you take test shots to get accustomed to your camera before taking important
photographs.
The screen and camera illustrations shown in this manual were produced during the development
stages and may differ from the actual product.
If there are additions and/or modifications of functions due to firmware update for the camera, the
contents will differ. For the latest information, please visit our website.

2
EN
Before You Begin
Before You Begin
Read and Follow Safety Precautions
yourself or to others, read “11. SAFETY PRECAUTIONS” (P. 332) in its entirety before
using the camera.
While using the camera, consult this manual to ensure safe and correct operation. Be
sure to keep the manual in a safe place once it is read.
Our company will not be held liable for violations of local regulations arising from use of
this product outside the country or region of purchase.
Wireless LAN and Bluetooth
®
The camera features built-in wireless LAN and Bluetooth
®
. Use of these features
outside the country or region of purchase may violate local wireless regulations; be
sure to check with local authorities before use. Our company will not be held liable for
the user’s failure to comply with local regulations.
Disable wireless LAN and Bluetooth
®
in areas where their use is prohibited.
g “Disabling the camera’s wireless communication (Airplane Mode)” (P. 260)
User Re gist rat ion
Visit our website for information on registering your products.
Inst a lling PC Soft w a re/Apps
OM Workspace
This computer application is used to download and view photos and movies recorded
downloaded from our website. Be prepared to provide the camera serial number when
downloading the software.
OM Image Share
You can load images in the camera that have been marked for sharing (P. 195) to a
smartphone.
You can also operate the camera remotely and take pictures from a smartphone.
Visit our website for information about the application.

3
EN
Product Manuals
Product Manuals
Instruction Manual (this pdf)
A how-to guide to the camera and its features. The Instruction
Manual can be downloaded from our website or directly using the
“OM Image Share” smartphone app.
4
EN
About This Manual
About This Manual
How to nd what you want to know
Search method Where to look
g
Search based on what you want to do
Table of Contents P. 6
Search based on names of buttons
and parts of the camera
Names of parts P. 15
Search based on menus and terms
displayed on the monitor
Default Settings P. 311
Search based on words
Index P. 337
How to read this manual
Shooting mode s in w hich t he funct ion is a va ila ble
In each explanation of a shooting function, the shooting modes in which the function
can be used are shown at the beginning. The shooting modes in which the function can
be used are shown in black. The shooting modes in which the function cannot be used
are shown in gray.
Shooting
2
Taking Pictures Using the Shooting Modes
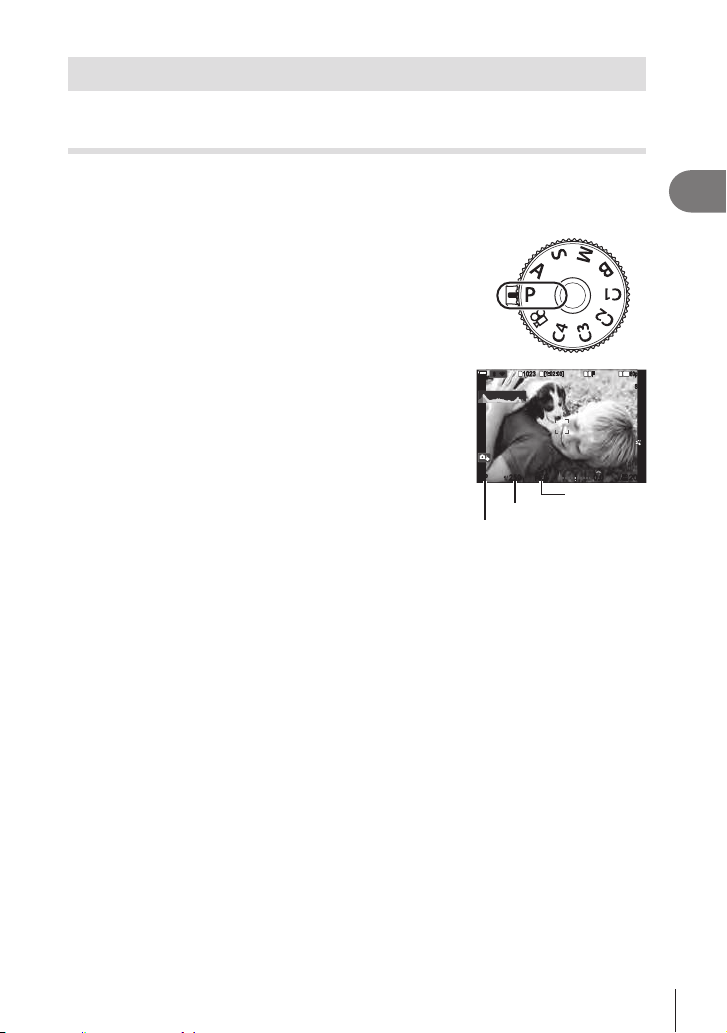
Letting the camera choose aperture and shutter speed
(P: Program AE)
P
ASM B
n
The camera chooses the optimal aperture and shutter speed according to subject
brightness.
1
Rotate the mode dial to P.
Availability
of the
function
in each
shooting
mode
How to se t t he func t ion
The procedures for setting each function is described at the beginning of the
explanation of the function. For details, see “How to operate the menus” (P. 63) and
“How to change the shooting settings (Direct buttons/Super Control Panel)” (P. 66).
Shooting Settings
4
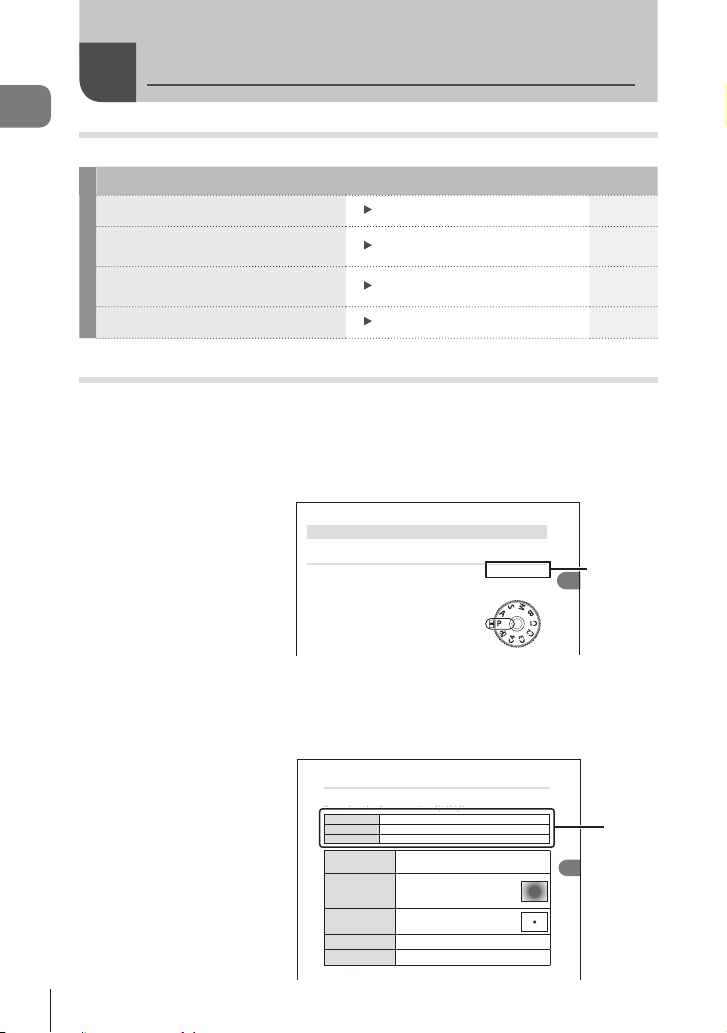
Choosing how the camera measures brightness (Metering)
PASMB
n
You can choose how the camera meters subject brightness.
Button
AF m button n FGk
Super Control Panel
Q n Metering
Menu
MENU n
_
n5. Metering n Metering
p
Digital ESP
metering
Suited to most scenes, including back-lit subjects. The
camera meters 324 areas of the frame and calculates optimal
exposure taking into consideration the nature of the scene.
B
Center weighted
averaging
metering
Suited to compositions that place the main
subject at the center of the frame. The camera
sets exposure based on the average light level
for the entire frame while assigning the greatest
weight to the area in the center.
C
Spot metering
exposure. The camera meters a small portion
(approximately 2%) of the frame.
CHi
Spot metering
(highlight)
Increases spot metering exposure. Ensures bright subjects
appear bright.
CSh
Spot metering
(shadow)
Lowers spot metering exposure. Ensures dark subjects
appear dark.
%The spot metering position can be set at the selected AF target. g “"Metering the Focus
Target (NSpot Metering)" (P. 112)
How to
set the
function
5
EN
About This Manual
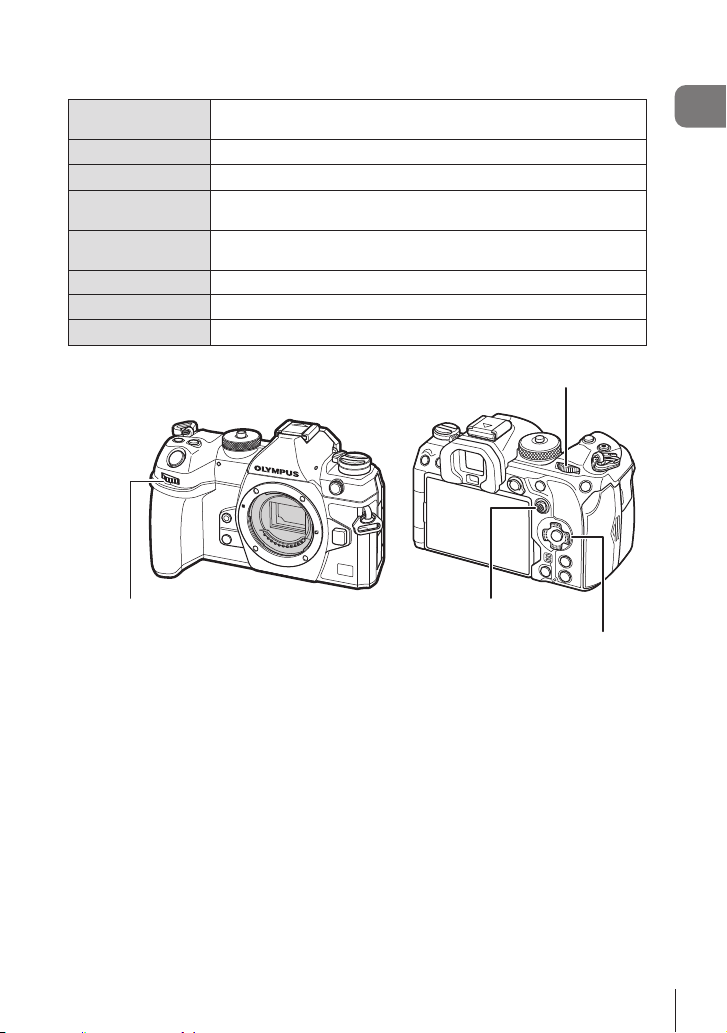
Sym bols in t his m a nual
The following symbols are used throughout this manual.
FGHI
Symbols designating the buttons (respectively the up, down, left,
and right arrow buttons) to press on the arrow pad.
k
Represents operation of the front dial.
j
Represents operation of the rear dial.
T
it in the desired direction.
S
Represents pressing down on the center of the multi selector much
as you would a button.
#
Cautions and limitations.
!
Tips and other helpful information for using the camera.
g
References to other pages in this manual.
Rear dial
Arrow pad
Multi selector
Front dial
About t he sc re e n illustra tions in t his m anua l
The camera monitor displays the super control panel (P. 69) by default. The screen
illustrations in this manual, however, show the live view display.
See “Switching between displays” (P. 37) for how to display the shooting screen on
the monitor.

6
EN
Table of Contents
Table of Contents
Before You Begin 2
Product Manuals 3
About This Manual 4
know ...............................................4
How to read this manual.................4
Names of parts 15
1. Preparation 17
Unpacking the box contents .....17
Attaching the Strap ....................18
Attaching Cable Protectors .......19
Inserting and removing the
battery .........................................20
Inserting the battery......................20
Removing the battery ...................21
Charging the Battery using the
supplied USB-AC adapter ..........22
Charging the Battery using a
USB Device .................................23
Inserting and removing the
card .............................................. 24
Inserting the card ..........................24
Removing the card .......................25
Using Two Memory Cards ............25
Usable cards ................................25
Attaching and removing
lenses ..........................................26
Attaching a lens to the camera ..... 26
Removing Lenses .........................28
Using the monitor .......................29
Turning the camera on ............... 30
Sleep Mode ..................................30
Initial setup .................................31
What to Do If You Can’t Read
the Display ..................................33
2. Shooting 34
Information displays while
shooting ......................................34
Switching between displays ......37
Switching the information
display ..........................................38
Shooting still pictures ................39
Types of shooting modes .............39
Shooting with touch screen
operations .....................................41
Photo Review (Image Review) .....42
Taking Pictures Using the
Shooting Modes .........................43
Letting the camera choose
aperture and shutter speed
(P: Program AE) ...........................43
Choosing aperture
(A: Aperture-Priority AE) .............. 45
Choosing shutter speed
(S: Shutter-Priority AE) ................47
Choosing aperture and shutter
speed (M: Manual Exposure) .......49
Long Exposures (
B
: Bulb/Time) ...51
Lighten Blending (
B
: Live
Composite Photography)..............54
Saving Custom Settings to
the Mode Dial (C1 /C2 /C3 /C4
Custom Modes) ..........................56
Saving Settings (Assign to
Custom Mode) .............................. 56
Using Custom Modes
(C1 /C2 /C3 /C4 ) ...........................57
Recording Movies ......................59
Recording movies in movie mode
(n) ..............................................59

7
EN
Table of Contents
Recording movies in photo
shooting modes ............................61
Touch Controls (Silent Controls) ...62
3. Using the Menus 63
What you can do with menus .... 63
How to operate the menus ........63
4. Shooting Settings 66
How to change the shooting
settings (Direct buttons/Super
Control Panel) ............................. 66
Direct Buttons ............................... 66
The Super Control Panel/LV
Super Control Panel .....................69
Basic functions for focusing ..... 72
Choosing a focus mode
(KAF Mode / nAF Mode) .........72
Choosing a Focus Target
(AF Target Point) ..........................76
Choosing an AF Target Mode
(AF Target Mode) .........................77
Setting the options for AF target
modes
(KAF Target Mode Settings) ......79
Zoom frame AF/Zoom AF
(Super Spot AF) ............................80
Functions for conguring how
to focus .......................................82
Combined Auto and Manual
Focus (K AF+MF) ......................82
when the shutter button is
pressed
(KAF by half-pressing a) ..........83
Autofocus using the AF-ON
button ...........................................83
Using Autofocus in Manual Focus
Mode (e in MF mode) .............. 84
when it cannot focus on the
subject (Release Priority) .............84
Changing the settings of Starry
Sky AF (Starry Sky AF Setting) ....85
Functions for customizing AF
operation to t the subject ........86
C-AF Center Target Priority
(KC-AF Center Priority) .............86
C-AF Tracking Sensitivity
(KC-AF Sensitivity / nC-AF
Sensitivity) ....................................87
C-AF Focus Speed
(nC-AF Speed) ........................... 87
Face priority AF/Eye priority AF
(Face & Eye Detection) ................88
Tracking Focus on Selected
Subjects (Subject Detection) ........90
for detected eyes
(Eye Detection Frame) .................91
Functions for changing camera
operation regarding focus ......... 92
Lens Focus Range
(KAF Limiter) .............................92
C-AF Lens Scanning
(KAF Scanner) ........................... 94
Fine-Tuning Autofocus
(KAF Focus Adjustment) ...........95
AF Illuminator Autofocus Assist
(AF Illuminator) ............................. 96
AF Target Display Mode
(AF Area Pointer) ..........................96
Functions for setting the
focusing position .......................97
Matching AF Target Selection
to Camera Orientation
(KOrientation Linked N)..........97
Choosing the AF Home Position
(KN Set Home) ....................... 98
AF Target Selection
(NSelect Screen Settings) .........99
Enabling AF Target Selection
Wrap (N Loop Settings) ..........100
Touch AF Target Selection for
(AF Targeting Pad) .....................101

8
EN
Table of Contents
Other functions that are useful
when focusing ..........................102
Manual Focus Assist
(MF Assist) .................................102
Focus Peaking Options
(Peaking Settings) ......................103
Choosing a Focus Distance for
Preset MF
(Preset MF distance) ..................104
Disabling the MF Clutch
(MF Clutch) .................................104
Lens Focus Direction
(Focus Ring) ............................... 104
Resetting the Lens Position at
Shutdown (Reset Lens) .............. 105
Metering and Exposure ............106
Controlling exposure
(Exposure Compensation)..........106
EV Steps for Exposure Control
(EV Step) .................................... 107
Fine-Tuning Exposure
(Exposure Shift) ..........................107
Reducing Flicker Under LED
Lighting (KFlicker Scan /
nFlicker Scan) ..........................108
Choosing how the camera
measures brightness
(Metering) ...................................109
Locking the exposure
(AE Lock) ....................................109
AE Lock Exposure Metering
(Metering during B) ................ 110
Releasing AE Lock after shooting
(B Auto Reset) ....................... 11 0
Locking exposure when the
shutter button is pressed halfway
(AEL by half-pressing a) ........... 111
Setting metering options for
sequential shooting
(Metering during j) ................. 112
Metering the Focus Target
(NSpot Metering) ..................... 112
Changing ISO sensitivity
(ISO) ........................................... 113
EV Steps for ISO Sensitivity
Control (ISO Step) ...................... 114
Setting the range of ISO
sensitivity values selected in
[Auto] mode
(KISO-A Upper/Default /
bISO-A Upper/Default)........... 114
Setting the shutter speed at
which the camera automatically
raises ISO sensitivity
(KISO-A Lowest S/S) ............... 115
Choosing the modes in which
[Auto] can be used for ISO
sensitivity
(KISO-Auto / bISO-Auto) .... 11 5
High ISO Noise Reduction
Options (KNoise Filter /
nNoise Filter) ........................... 116
Image Processing Options
(Low ISO Processing) ................ 116
Long Exposure Noise Reduction
Options (Noise Reduction) ......... 11 7
Flash photography ................... 11 8
(Flash photography) ................... 11 8
Choosing a Flash Mode
(Flash Mode) ..............................120
(Flash Mode Settings) ................123
(Flash Exposure Comp.) ............123
Wireless Remote Flash Control
(# RC Mode) .............................124
Choosing a Flash Sync Speed
(# X-Sync.) ................................ 124
Choosing the Minimum Shutter
Speed (# Slow Limit) .................124
Flash and Exposure
Compensation (
x
+F) ............. 124
Setting the exposure balance for
TTL metering
(Balanced Flash Metering) .........125
Sequential Shooting/
Self-Timer ..................................126
Performing the sequential/
self-timer shooting ......................126

9
EN
Table of Contents
shooting functions
(Sequential Shooting Settings) ... 128
functions (Self-timer Settings) ....130
Shooting without the vibration
caused by shutter button
operations
(Anti-Shockr Settings) ............. 131
Shooting without shutter sound
(Silents Settings) .....................132
Shooting without a release time
lag (Pro Capture shooting) .........133
Reducing Flicker in Photographs
(Anti-Flicker Shooting) ................ 135
Image Stabilization ................... 136
Reducing camera shake
(KImage Stabilizer / nImage
Stabilizer) ...................................136
Image stabilization options
(nIS Level) ...............................137
Half-press image stabilization
(aImage Stabilizer) ...................138
Burst mode image stabilization
(jImage Stabilizer)..................138
Displaying camera motion on the
monitor (Handheld Assist) ..........139
Image Stabilization for IS Lenses
(Lens I.S. Priority) .......................139
Color and Quality .....................140
Setting the Quality of Photos and
Movies (KK / nK) ........... 140
Combinations of JPEG image
sizes and compression rates
(KK Detailed Settings) .......... 143
Choosing the codec for
recording movies
(nVideo Codec) ........................144
Setting the image aspect
(Image Aspect) ...........................144
Peripheral illumination
(Shading Comp.) ........................144
Processing options (KPicture
Mode / nPicture Mode) ............145
Choosing which options are
displayed when selecting a
picture mode
(KPicture Mode Settings) ........149
Adjusting color
(WB (white balance)) .................. 150
Locking the white balance in
movie mode
(nButton Function: WLock) ....153
balance
(KAll x/nAll x) .......153
Preserving the warm tones of
incandescent lighting when in
WB Auto mode
(KW Keep Warm Color/nW
Keep Warm Color) ......................154
Flash White Balance (#+WB) ...154
Setting the color reproduction
format (Color Space) ..................155
Preview Options for Movie
Picture Modes
(
nView Assist) ......................155
Special shooting modes
(Computational Modes) ..........156
Shooting still pictures in a higher
resolution (High Res Shot) .........156
Slowing the Shutter in Bright
Light (Live ND Shooting) ............158
Increasing Depth of Field
(Focus Stacking) ........................160
Taking HDR (High Dynamic
Range) images (HDR) ................ 162
Recording multiple exposures in
a single image
(Multiple Exposure) ....................163
Digital Zoom
(KDigital Tele-converter /
nDigital Tele-converter) ............166
Shooting automatically with a
(Interval Shooting) ......................167
Keystone correction and
perspective control
(Keystone Comp.) ......................170
Correcting Fisheye Distortion
(Fisheye Compensation) ............171

10
EN
Table of Contents
Settings
(BULB/TIME/COMP Settings) ....173
Recording a series of shots with
varied exposure (AE BKT) ..........174
Recording pictures with varied
white balance (WB BKT) ............175
Recording pictures with varied
.................... 175
Recording pictures with varied
ISO sensitivity (ISO BKT) ...........176
Recording copies of one picture
(ART BKT) .................................. 177
focus positions (Focus BKT) ......178
Functions that are only
available in movie mode ..........180
Sound Recording Options
(Sound Recording Settings) .......180
Adjusting the headphone volume
(Headphone Volume) .................181
Time Codes
(Time Code Settings) .................181
HDMI Output
(nHDMI Output) .......................182
Displaying a + mark in the center
of the screen while recording
movies (Center Marker) ..............183
Displaying zebra patterns over
high luminance areas while
recording movies
(Zebra Pattern Settings) .............184
Displaying a red frame while
recording movies
(Red Frame during RREC) .......185
5. Playback 186
Information display during
playback ....................................186
Playback image information .......186
Switching the information
display ........................................187
Viewing photographs and
movies .......................................188
Viewing photographs ..................188
Watching movies ........................189
Finding Pictures Quickly
(Index and Calendar Playback) ..189
Zooming In (Playback Zoom) .....190
Playback Using Touch
Controls .....................................191
Full-frame playback ....................191
Index/Calendar playback ............ 191
Other functions ...........................192
Setting playback functions ......193
Rotating Pictures (Rotate) ..........193
Protecting Pictures (0) ...........193
Copying an image (Copy)...........193
Copying all images on a card
(Copy All) .................................... 194
Deleting Pictures (Erase) ...........194
Deleting All Pictures (Erase All) .. 194
(Quick Erase) .............................195
RAW+JPEG Deletion Options
(RAW+JPEG Erase) ................... 195
Selecting Pictures for Sharing
(Share Order) .............................195
Selecting RAW+JPEG Pictures
for Sharing (RAW+JPEG h) ......196
Rating Pictures (Rating) .............196
Selecting the numbers of stars to
be used for rating
(Rating Settings) .........................197
Selecting Multiple Pictures
(Share Order Selected, Rating
Selected, 0, Copy Select,
Erase Selected) .......................... 197
Print order (DPOF) .....................198
Resetting all protection/share
orders/print orders/ratings
(Reset All Images) ......................198
Adding Audio to Pictures (R) ...... 199
Retouching Pictures (Edit) ..........200

11
EN
Table of Contents
Power Zoom Lenses
(Electronic Zoom Settings) .........222
Locking the v Button
(vLock) ..223
Choosing What Happens When
the Shutter Button Is Pressed
During Live View Zoom
(LV Close Up Mode) ...................223
Choosing the Behavior of the
Control Used for Depth-of-Field
Preview (zLock) ........................ 224
Button Hold Options
(Press-and-hold Time) ................ 224
Functions for adjusting the live
view display ..............................225
Changing the look of the display
(KLV Mode) ..............................225
Making the display easier to see
in dark places
(KNight Vision) .........................225
(Frame Rate) ..............................225
Art Filter Preview
(Art LV Mode) .............................226
Reducing Flicker in Live View
(Anti-Flicker LV) ..........................226
.........227
Functions for Conguring
Information Display .................. 228
Selecting the display style of the
................ 228
Shooting Indicators (KInfo
Settings / nInfo Settings) .......... 230
the shutter button is pressed
halfway
(Info by half-pressing a) ............ 231
(VKInfo Settings) ...................232
Displaying the Level Gauge when
the shutter button is pressed
halfway (Va Level Gauge) ...... 233
Framing Guide Options
(KGrid Settings / nGrid
Settings) .....................................234
Combining Pictures
(Image Overlay) ..........................203
Trimming movies
(Movie Trimming) ........................204
Creating Movie Stills
(In-Movie Image Capture) ..........204
Changing the role of the R (H)
button during playback
(qRFunction) ..........................205
Changing the roles of the front
and rear dials during playback
(qDial Function) ....................... 205
Choosing the Playback Zoom
Ratio (qaDefault Setting) .......205
Automatically rotating portrait-
orientation pictures for playback
(R) ............................................ 205
Choosing the information
displayed during playback
(qInfo Settings) ........................ 206
Choosing the information
playback
(qaInfo Settings) ....................206
(G Settings) .............................. 207
6. Customizing the Camera
208
Functions for Conguring
Camera Controls ......................208
Changing the roles of buttons
(Button Settings) .........................208
Assigning Roles to the Front and
Rear Dials
(KDial Function / nDial
Function) ....................................216
Changing the Dial Direction
(Dial Direction) ............................218
Changing the Functions of the
Multi Selector
(Multi Selector Settings) .............218
Customizing the Fn Lever
(Fn Lever Settings) ..................... 219

12
EN
Table of Contents
Disabling Touch Controls
(Touchscreen Settings) ...............249
Monitor Brightness and Hue
(Monitor Adjust) ..........................249
(EVF Adjust) ...............................250
(Eye Sensor Settings) ................250
Disabling the Focus Beep (8) ..251
External Monitor Display Options
(HDMI Settings) .......................... 251
Choosing a USB Connection
Mode (USB Settings) ..................252
Battery/Sleep Settings .............253
Displaying Battery Status
(NBattery Status).....................253
Setting which Battery Is Used
First (NBattery Priority) ............253
Changing the battery level
display during movie recording
(nNDisplay Pattern) ..............253
Dimming the Backlight
(Backlit LCD) ..............................254
Setting Sleep (Power Saving)
Options (Sleep) ..........................254
......................... 254
Reducing Power Consumption
(Quick Sleep Mode) ....................255
Reset/Clock/Language/Others
Settings .....................................257
Restoring Default Settings
(Reset/Initialize Settings) ............257
Setting the Camera Clock
(X Settings) ...............................257
Choosing a Language
(W)...........................................257
Calibrating the Level Gauge
(Level Adjust) ..............................258
Image Processing Check
(Pixel Mapping) ..........................258
Viewing the Firmware Version
(Firmware Version) .....................258
(VKGrid Settings) ..................235
Choosing the Settings Available
via Multi-Fn
(Multi Function Settings) .............236
Histogram Exposure Warning
(Histogram Settings) ...................236
Settings related to operation
and display of menus ...............237
menu screen
(Menu Cursor Settings) ..............237
Choosing how to move between
pages with the rear dial
(g Loop in Menu Tab) ...............238
[Yes]/[No] Default
(Priority Set) ...............................238
“My Menu” Settings .................239
Using “My Menu” ........................239
7. Setting Up the Camera 241
Card/Folder/File Settings ......... 241
Formatting the card
(Card Formatting) .......................241
Setting the card to record to
(KCard Slot Settings / nCard
Slot Settings) ..............................242
Specifying a folder to save
images in
(Assign Save Folder) .................. 244
File Naming Options
(File Name) .................................244
Naming Files (Edit Filename) .....245
User information .......................246
Saving lens info
(Lens Info Settings) ....................246
Output Resolution
(dpi Settings) ..............................247
Adding Copyright Information
(Copyright Info.) ..........................247
Monitor/Sound/Connection
Settings .....................................249

13
EN
Table of Contents
..............................258
8. Connecting the Camera
to External Devices 259
Precautions for Using Wi-Fi
and Bluetooth
®
.........................259
Disabling the camera’s wireless
communication
(Airplane Mode) .......................... 260
Connecting the camera to a
smartphone ............................... 260
Pairing the Camera and
Smartphone
(Wi-Fi Connection) .....................261
Wireless Connection Standby
Setting for When the Camera Is
On (Bluetooth) ............................262
Wireless Settings for When the
...................263
Transferring images to a
smartphone ................................264
Automatically uploading images
................264
Shooting remotely with a
smartphone (Live View) .............. 265
Shooting remotely with a
smartphone (Remote Shutter) .... 265
Adding position information to
images ........................................ 266
Resetting smartphone connection
settings (Reset d Settings) .........266
Changing the password
(d Connection Password) ..........267
Connecting to Computers via
Wi-Fi ........................................... 267
Installing Software ......................267
Readying the Computer
(Windows) ..................................268
Pairing the Computer with the
Camera (New Link) ....................269
Adjusting Wi-Fi Settings
(Wi-Fi Connection) .....................271
Uploading Pictures as They Are
Taken .......................................... 276
Ending the Connection ...............278
Using the Remote Control .......279
Names of parts ...........................279
Connection .................................279
Shooting from the remote
control .........................................281
MAC address of the remote
control .........................................282
Precautions for using the remote
control .........................................282
Connecting to Computers via
USB ............................................ 283
Installing Software ......................283
Uploading Pictures as They Are
Taken (0RAW/Control) ........284
Connecting the Camera for High-
Speed RAW Processing
(0RAW/Control) ................... 285
Copying Pictures to the
Computer (Storage/MTP) ...........286
Powering the Camera via USB
(USB Power Delivery) ...............287
Connecting to TVs or External
Displays via HDMI ....................288
Viewing Pictures on a TV
(HDMI) ........................................ 288
9. Cautions 289
Information about Dust and
Water Resistant Features ........289
Battery and charger .................290
Using your charger abroad .....290
10. Information 291
Interchangeable lenses ............291
MF Clutch Lenses .....................292
Camera Displays for Lens SET
and CALL Functions ................293
Optional Accessories ............... 294

14
EN
Table of Contents
Using the charger (BCX-1) .........294
HLD-10 Power Battery Holder .... 295
Notes on using this product ........ 296
Designated External Flash
Units ...........................................297
photography ...............................298
...........300
Principal Accessories .................301
System chart ............................. 302
Cleaning and storing the
camera ....................................... 304
Cleaning the camera ..................304
Storage ....................................... 304
Cleaning and checking the image
pickup device ..............................305
Pixel Mapping - Checking the
image processing functions ........ 305
Shooting tips and information 306
Error codes ...............................309
Default Settings ........................ 3 11
Super Control Panel ................... 311
_
Tab........................................313
‘ Tab........................................316
AF Ta b .......................................317
n
Tab ........................................319
q
Tab........................................320
G Tab ......................................... 321
e
Tab...........................................325
Memory Card Capacity ............327
Specications ...........................329
11. SAFETY PRECAUTIONS
332
SAFETY PRECAUTIONS ..........332
Index 337
15
EN
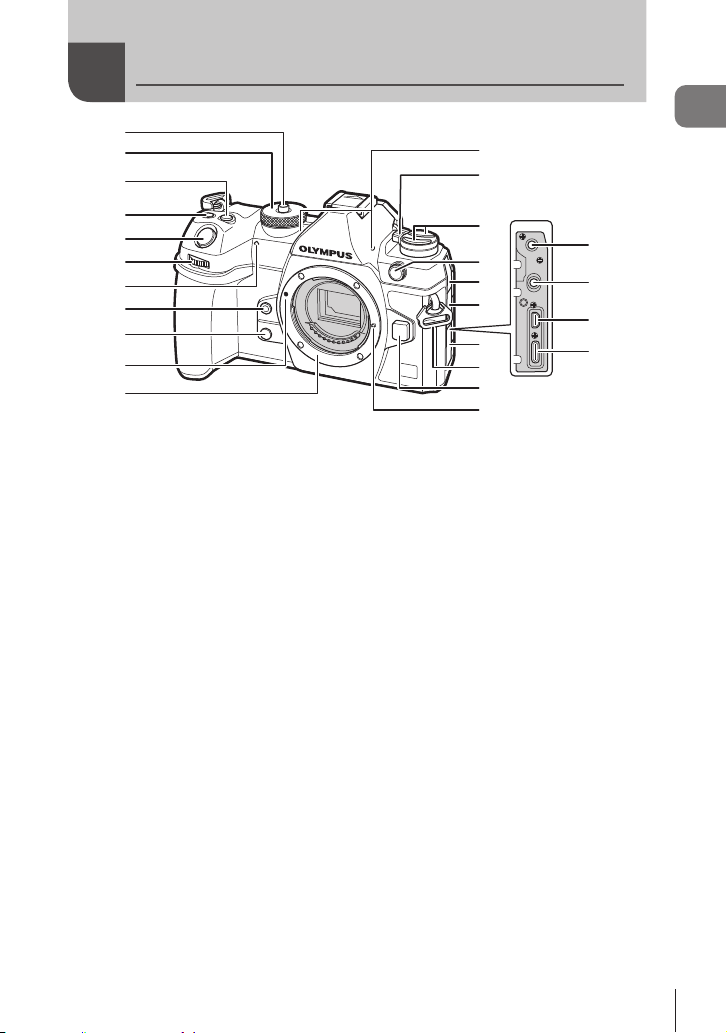
Names of parts
Names of parts
1
2
3
4
5
6
9
8
7
0
a
n
o
m
l
e
f
g
h
i
j
k
b
c
d
1 Mode dial lock .................................P. 39
2 Mode dial ........................................P. 39
3 F (Exposure compensation) button
..............................P. 43, 45, 47, 50, 106
4 R (Movie)/ h (High Res Shot)/
H (selection) button
..................................P. 59/P. 156/P. 197
5 Shutter button .................................P. 39
6 Front dial (k)
.................. P. 43 – 50, 63, 188, 205, 216, 218
7 Self-timer lamp/AF illuminator
.............................................P. 126/P. 96
8 Y (One-touch white balance) button
......................................................P. 152
9 Z (Preview) button .......................P. 224
0 Lens attachment mark ....................P. 26
a Mount (Remove the body cap before
attaching the lens.)
b Stereo microphone ...............P. 180, 199
c ON/OFF lever ................................P. 30
d v button .......................................P. 223
AFm (AF/metering mode) button
......................................................P. 109
jY# (Sequential shooting/self-timer/
..........................P. 120, 126
e External flash terminal ..................P. 119
f Microphone jack cover
g Cover for headphone jack.............P. 181
h Connector cover
i Strap eyelet.....................................P. 18
j Lens release button ........................P. 28
k Lens lock pin
l
Microphone jack (ø3.5 mm stereo mini-
jack for third-party microphones)
...P. 180
m Headphone jack (ø3.5 mm stereo mini-
jack for third-party headphones) ...P. 181
n HDMI connector (Type D)
..........................................P. 182, P. 288
o USB connector (Type C)
..................................P. 22, 23, 283, 287
16
EN
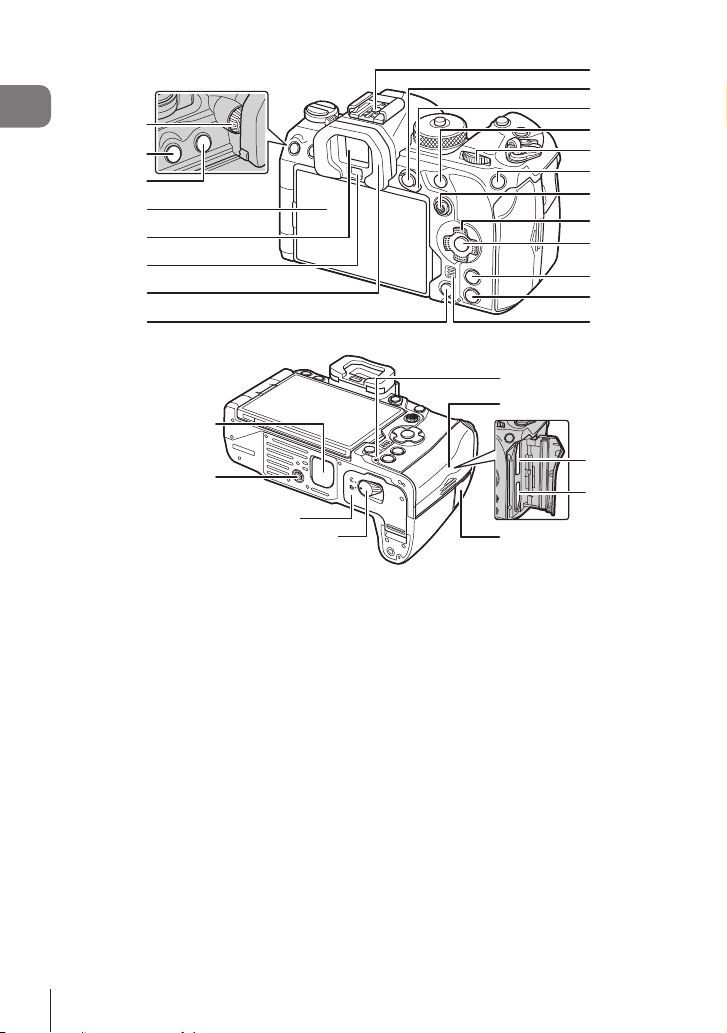
Names of parts
6
5
7
8
4
1
2
3
9
0
a
d
c
b
h
i
j
f
e
g
k
l
m
n
p
o
s
q
r
1 Diopter adjustment dial ...................P. 37
2 M EN U button .................................P. 63
3 u (LV ) button ..............................P. 37
4 Monitor (Touch screen)
............................P. 34, 37, 41, 101, 191
5 ...............................P. 37, 228
6 Eye sensor
7 Eyecup ..........................................P. 301
8 D (Erase) button ..........................P. 194
9 Hot shoe ...............................P. 119, 300
0 AEL / 0 (Protect) button
...........................................P. 109/P. 193
a Fn lever ...........................P. 43 – 49, 219
b AF-ON button ......................P. 83, P. 84
c Rear dial (j)
................
P. 43 – 50, 63, 188, 205, 216, 218
d I SO / f (Rating) button
...........................................P. 113/P. 196
e Multi selector (S/T) .............P. 76, 218
f Arrow pad (FGHI) ..................P. 188
g Q button ..........................P. 63, 69, 188
h I N FO button .................P. 38, P. 65, 187
i q (Playback) button ....................P. 188
j Speaker
k Power battery holder (PBH) cover
......................................................P. 295
l Tripod socket
m Battery compartment cover.............P. 20
n Battery compartment lock ...............P. 20
o Battery charge lamp........................P. 23
p Card compartment cover ................P. 24
q Card slot 1 ......................................P. 24
r Card slot 2 ......................................P. 24
s Remote cable terminal cover
(Remote cable terminal) ...............P. 279
17
EN
Preparation
1
1
Preparation
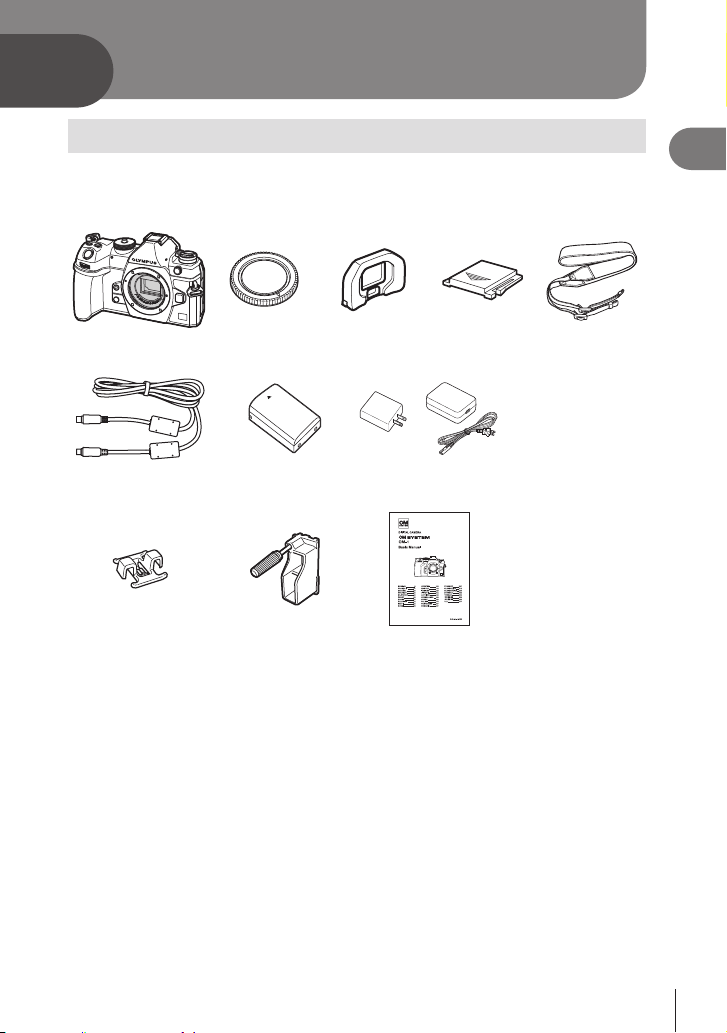
Unpacking the box contents
At purchase, the package contains the camera and the following accessories.
If anything is missing or damaged, contact the dealer from whom you purchased the
camera.
Camera Body cap * EP-18 eyecup * Hot shoe cover * Strap
CB-USB13 USB cable BLX-1 rechargeable
lithium-ion battery
USB-AC adapter
F-7AC
• Warranty Card
CC-1 cable clip CP-2 cable protector Basic Manual
* The body cap, eyecup, and hot shoe cover attached to or inserted in the camera.
# Contents may vary depending on purchase location.
# The battery will not be fully charged at the time of purchase. Charge the battery before
use (P. 22).
or
18
EN
Preparation
1
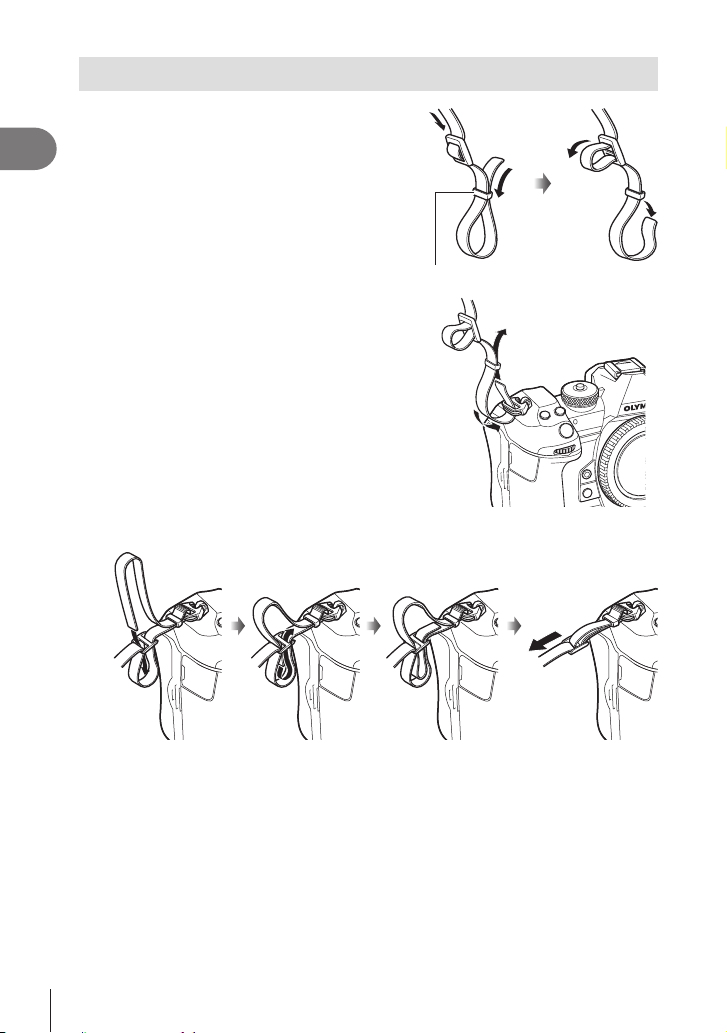
Attaching the Strap
1
Before attaching the strap, remove the end
from the keeper loop and loosen the strap
as shown.
Keeper loop
2
Pass the end of the strap through the strap
eyelet and back through the keeper loop.
3
Pass the end of the strap through the buckle and tighten as shown.
• Attach the other end of the strap to the other eyelet.
•
19
EN
Preparation
1
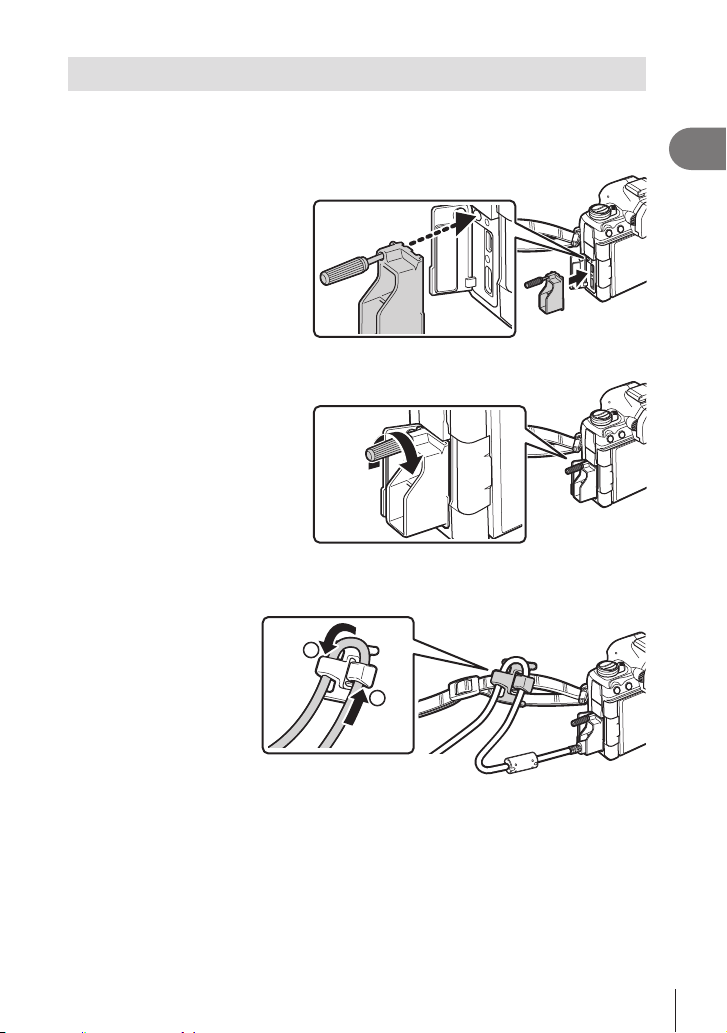
Attaching Cable Protectors
Attach the supplied cable protectors when connecting the supplied USB and HDMI
cables. This prevents accidental disconnection and damage to the connectors.
1
Mount the cable protector on the camera.
2
Tighten the screw.
3
Clip the cable clip to the cable and attach the clip to the strap.
• The clip attaches to the buckle.
1
2
20
EN
Preparation
1
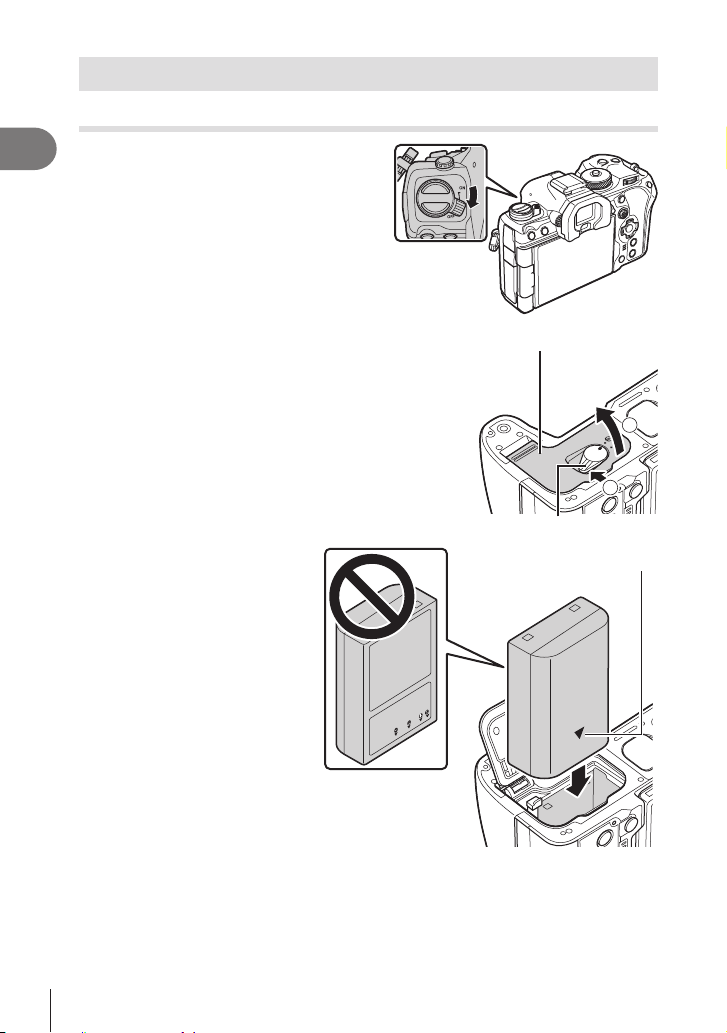
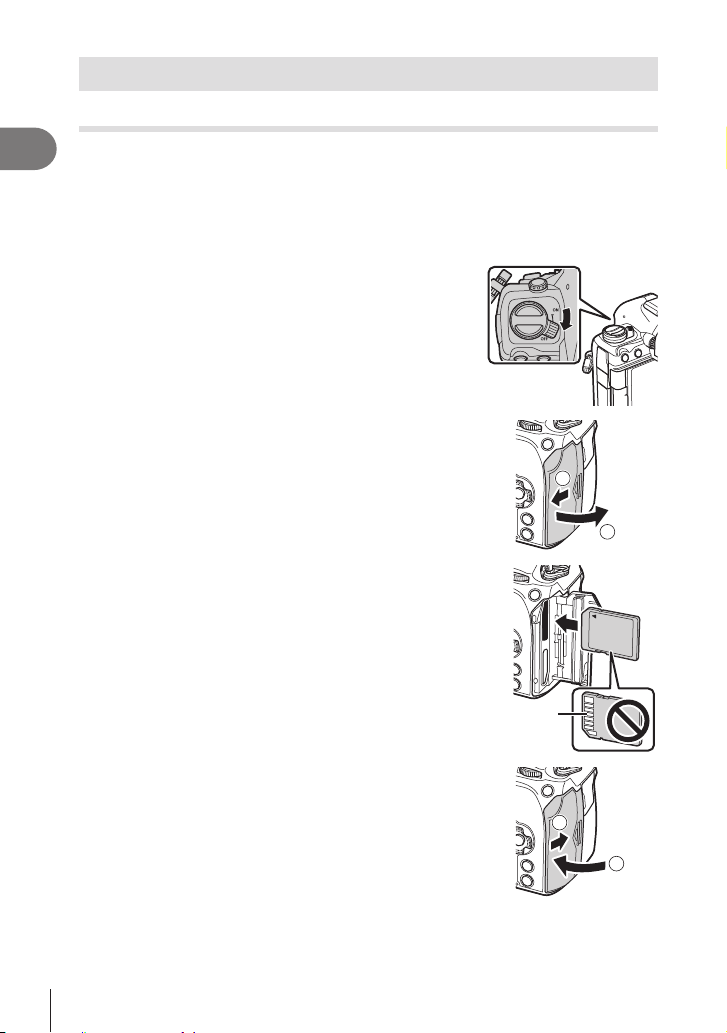
Inserting and removing the battery
Inserting the battery
1
ON /OFF lever is in
the OFF position.
2
Open the battery compartment cover.
Battery compartment cover
1
2
Battery compartment lock
3
Loading the battery.
# Use only BLX-1 batteries
(P. 17, 331).
Direction indicating mark
21
EN
Preparation
1
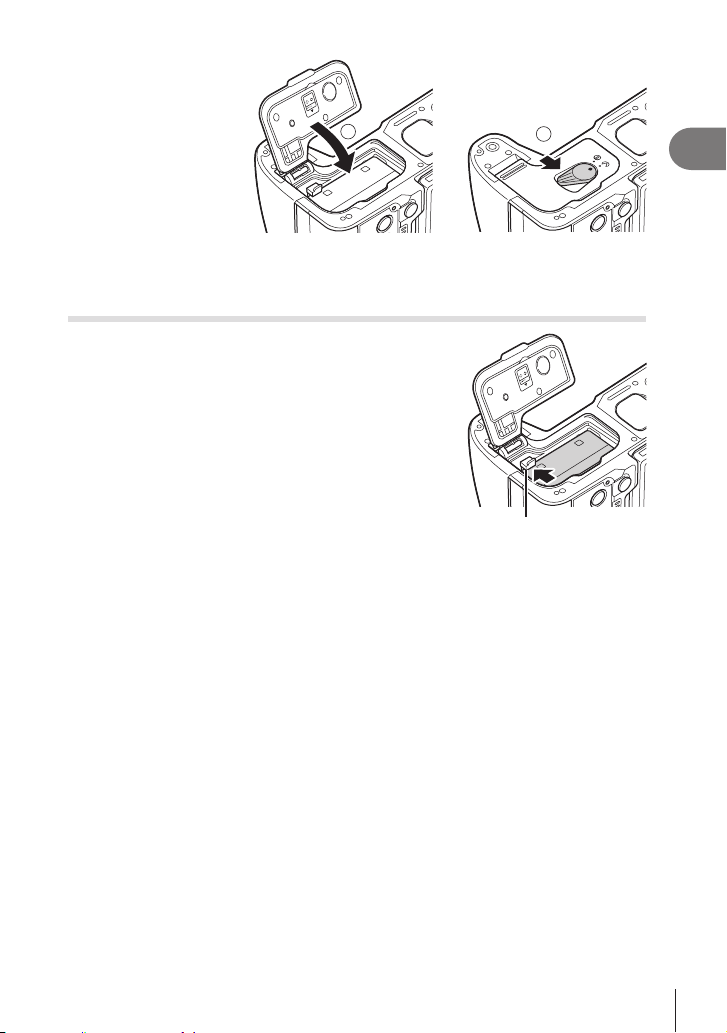
4
Close the battery
compartment cover.
# Be sure the battery
compartment cover
is closed before
using the camera.
1
2
%It is recommended to set aside a backup battery for prolonged shooting in case the
battery in use drains.
%Also read “Battery and charger” (P. 290).
Removing the battery
battery lock knob in the direction of the arrow and then
remove.
# Never remove batteries or memory cards while the
memory card access indicator (P. 34) is displayed.
# Contact an authorized distributor or service center if you
are unable to remove the battery. Do not use force.
Battery lock knob
22
EN
Preparation
1
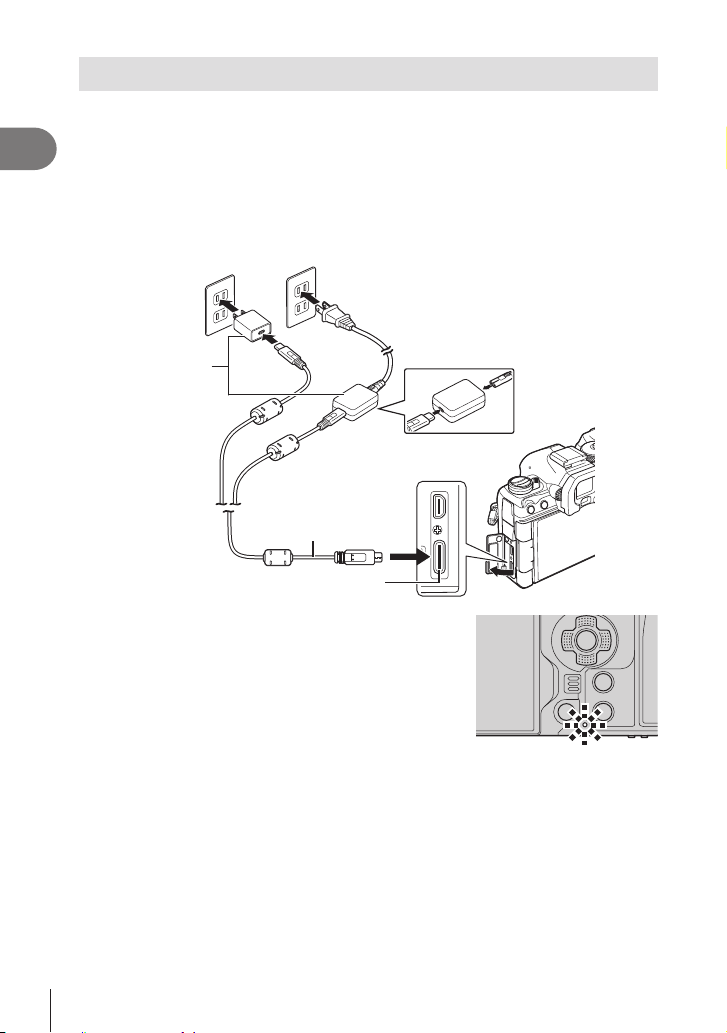
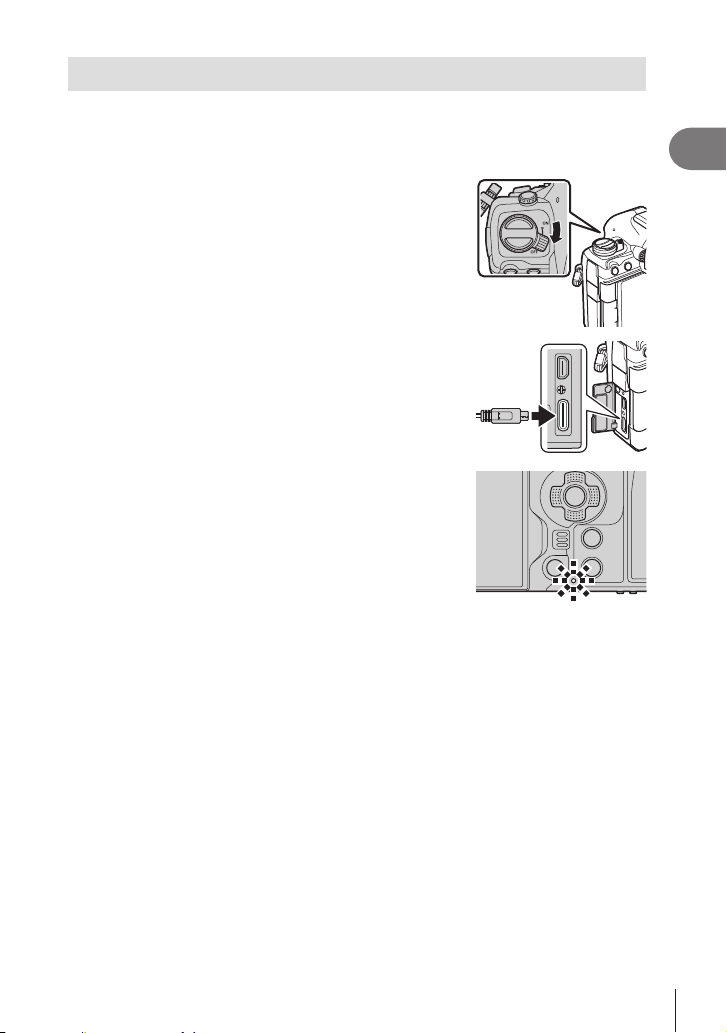
Charging the Battery using the supplied USB-AC adapter
# The battery will not be fully charged at the time of purchase. Charge the battery before
use.
1
Check that the battery is in the camera, and connect the USB cable and
USB-AC adapter.
• When attaching the USB cable, use the supplied cable protector and cable clip to
prevent damage to the connectors. g “Attaching Cable Protectors” (P. 19)
%Refrain from using anything other than the USB cable (CB-USB13) supplied with the
camera or sold separately.
AC outlet
USB-AC adapter
(supplied)
USB cable
(supplied)
USB connector
• The battery charge lamp lights during charging.
hours 30 minutes. The lamp goes out as the batteries
reach full charge. Remove the USB cable from the
camera.
# If a charging error occurs, the battery charge lamp will
blink. Disconnect and reconnect the USB cable.
%
The charging time will be longer if the camera is on.
%Charging stops when the battery temperature is too high. It will resume after the battery
temperature falls.
%A charger (BCX-1: sold separately) can be used to charge the battery (P. 294).
%For safety reasons, charging may take longer, or the battery may not reach full charge,
when the battery is charged in a high-temperature environment.
# T he USB-AC Ada pt e r
• Be sure to unplug the USB-AC adapter for cleaning. Leaving the USB-AC adapter
plugged in during cleaning could result in injury or electric shock.
23
EN
Preparation
1
Charging the Battery using a USB Device
The battery inserted in the camera will charge when the camera is connected via a
USB cable to a USB PD-compliant USB device.
Cha rging via U SB
1
ON /OFF lever is in the OFF
position.
2
Connect the camera to the USB device using a
USB cable.
• When attaching the USB cable, use the supplied cable
protector and cable clip to prevent damage to the
connectors. g “Attaching Cable Protectors” (P. 19)
• The battery charge lamp lights during charging.
Charging times vary with the output of the USB device.
The lamp goes out as the batteries reach full charge.
# If a charging error occurs, the battery charge lamp will blink. Disconnect and reconnect
the USB cable.
%The supply of power ends when the battery is charged. Disconnect and reconnect the
USB cable to resume charging.
%The camera can be powered using mobile batteries or similar devices connected via USB.
For more information, see “Powering the Camera via USB (USB Power Delivery)”
(P. 287).
24
EN
Preparation
1
Inserting and removing the card
Inserting the card
In this manual, all storage devices are referred to as “cards.”
The camera uses third-party SD, SDHC, or SDXC memory cards conforming to the SD
(Secure Digital) standard.
other cameras or computers. g “Formatting the card (Card Formatting)” (P. 241)
• The camera has two card slots.
1
ON /OFF lever is in the OFF
position.
2
Open the card compartment cover.
2
1
3
Insert the card.
• Slide the card in until it locks into place.
# Do not forcibly insert a damaged or deformed card.
Doing so may damage the card slot.
Terminal area
4
Close the card compartment cover.
• Close it securely until you hear it click.
2
1
25
EN
Preparation
1
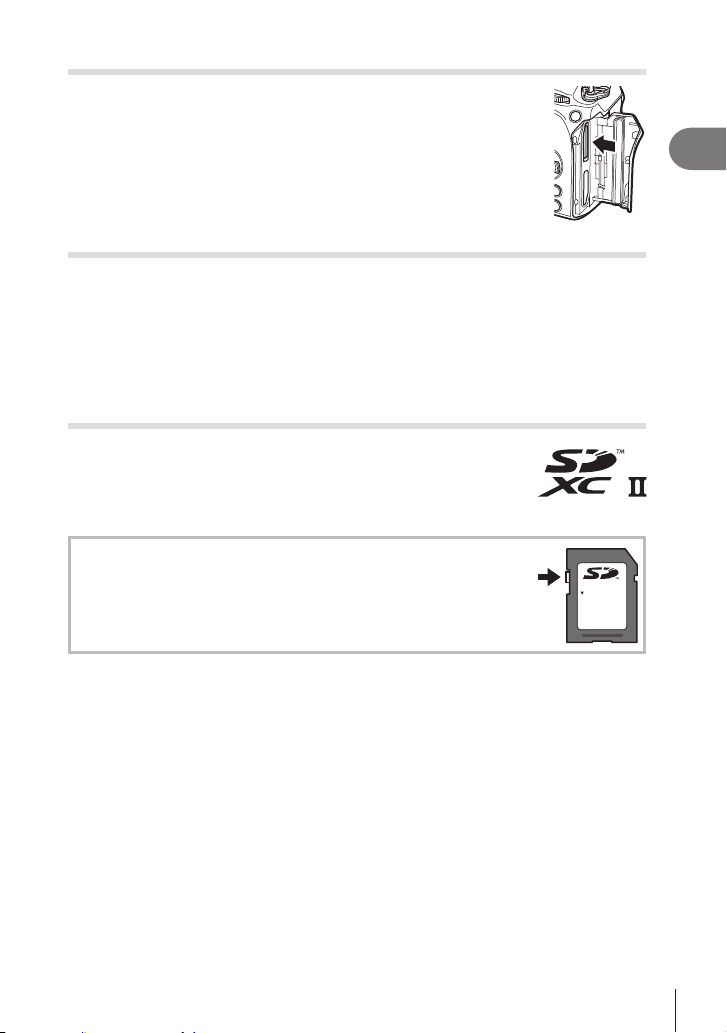
Removing the card
Press the card in to eject it. Pull out the card.
# Never remove batteries or memory cards while the memory card
access indicator (P. 34) is displayed.
Using Two Memory Cards
When two memory cards are inserted, you can choose how each card is used
according to your goals. g “Setting the card to record to (KCard Slot Settings /
nCard Slot Settings)” (P. 242)
• Record only to a selected card
• Record to a selected card until it is full, then record to the second card
•
• Record copies of each picture to both cards
Usable cards
In this manual, all storage devices are referred to as “cards”. The
following types of SD memory card (commercially available) can
be used with this camera: SD, SDHC, and SDXC. For the latest
information, please visit our website.
SD card write protect switch
The SD card body has a write protect switch. Setting the switch to
“LOCK” prevents data being written to the card. Return the switch to
the unlock position enable writing.
LOCK
# When recording movies, use an SD card that supports an SD speed class of 10 or higher.
# A UHS-II or UHS-I card with a UHS speed class of 3 or better is required when:
a movie resolution of [4K] or [C4K] is selected in the [nK] menu or a Motion
Compensation of [A-I] (All-Intra) is selected in the [nK] menu
%The data in the card will not be erased completely even after formatting the card or
deleting the data. When discarding, destroy the card to prevent leakage of personal
information.
%Access to some playback functions and the like may be restricted when the write-protect
switch is in the “LOCK” position.
26
EN
Preparation
1
Attaching and removing lenses
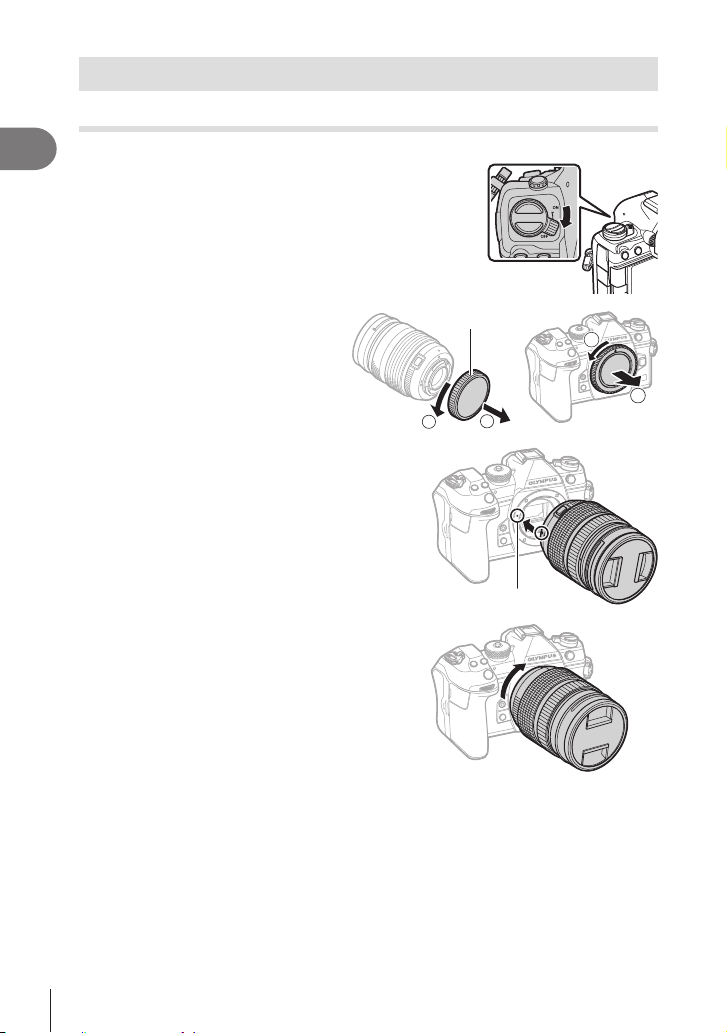
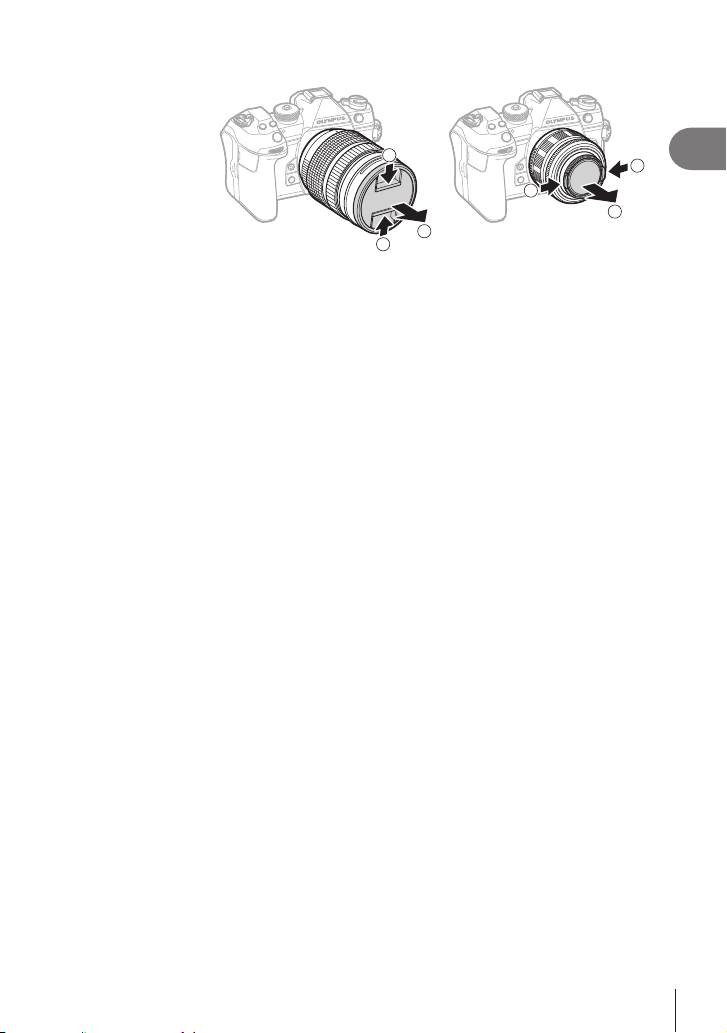
Attaching a lens to the camera
• See page 291 for information on compatible lenses.
1
ON /OFF lever is in the OFF
position.
2
Remove the rear cap of the lens
and the body cap of the camera.
1
2
Rear cap
2
1
3
Align the lens attachment mark (red) on
the camera with the alignment mark (red)
on the lens, then insert the lens into the
camera’s body.
Lens attachment mark
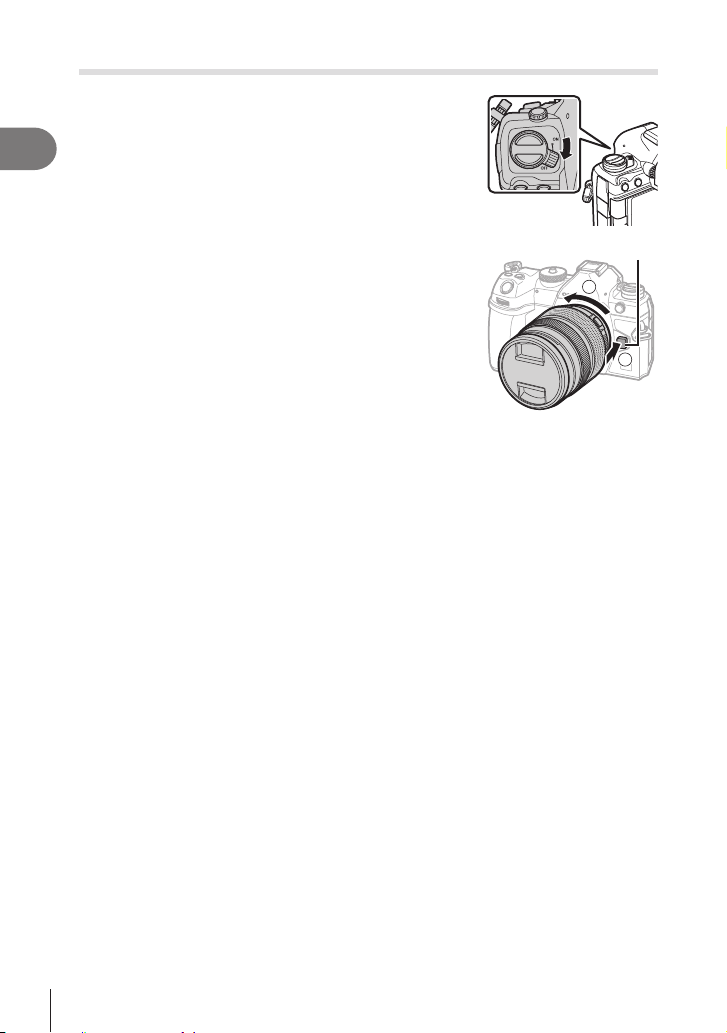
4
Rotate the lens clockwise until you hear it
click.
# Do not press the lens release button.
# Do not touch internal portions of the camera.
27
EN
Preparation
1
5
Remove the front lens cap.
2
1
1
1
1
2
28
EN
Preparation
1
Removing Lenses
1
ON /OFF lever is in the OFF
position.
2
Hold the lens release button and rotate the lens as
shown.
Lens release button
1
2
29
EN
Preparation
1
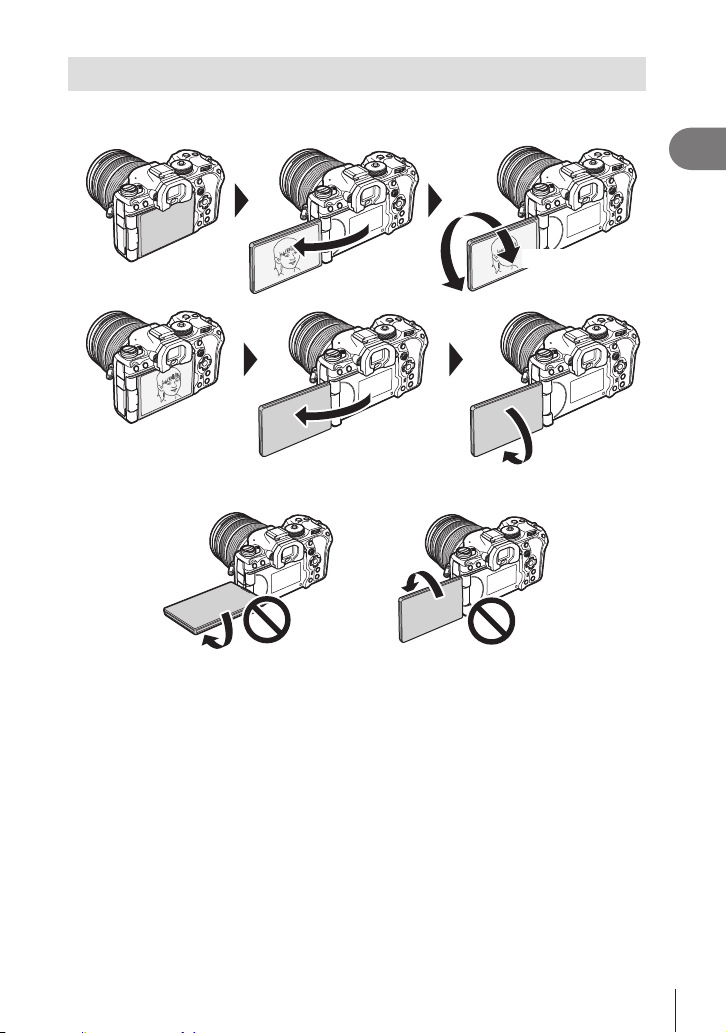
Using the monitor
Rotate the monitor for ease of viewing. The angle of the monitor can be adjusted
according to conditions at the time of shooting.
Up to 180°
Up to 90°
Up to 270°
• Gently rotate the monitor within its range of motion. Attempting to rotate the monitor
beyond the limits shown below could damage the connectors.
•
automatically zoom power zoom lenses all the way out when the monitor is rotated for self
portraits. g
30
EN
Preparation
1
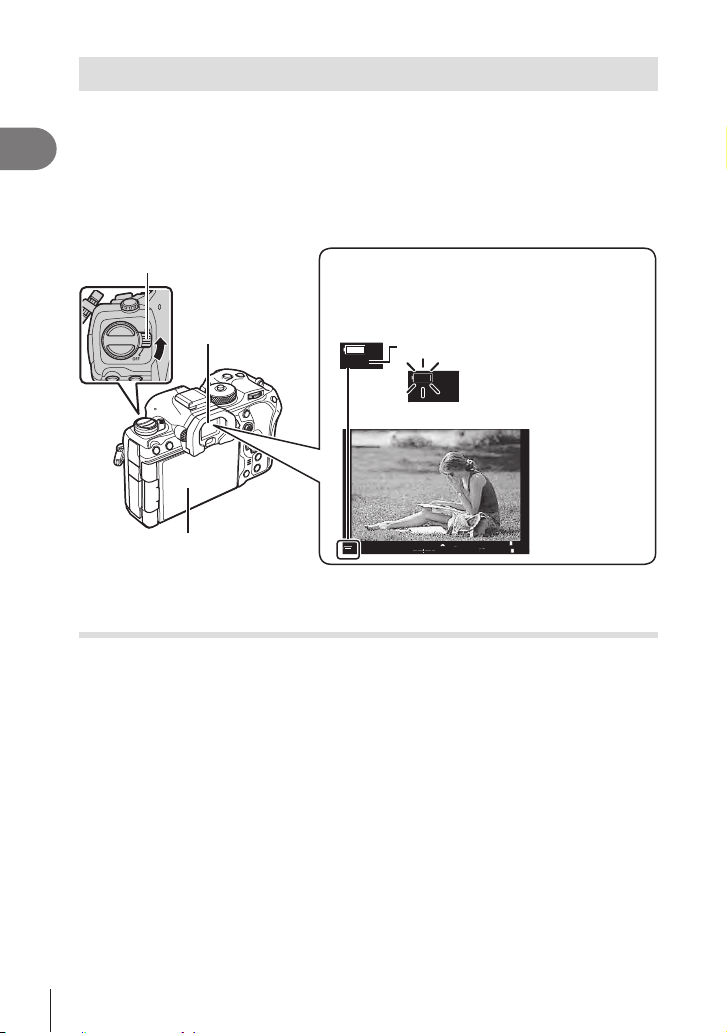
Turning the camera on
1
Set the ON /OFF lever to the ON position.
• When the camera is turned on, the monitor will turn on and display the super control
panel (P. 69).
• OFF position.
ON/OFF lever
Monitor
200200
ISO
Auto
ISO
Auto
WB
Auto
WB
Auto
1
1
[
1
:
02
:
03
]
[
1
:
02
:
03
]
10231023
PP
100
%
100
%
0.00.0
00
+
-
1
/
250
1
/
F
250
5.65.6
F
Battery level
The camera displays the level of the battery
currently in use. The battery level is shown as
percentages.
100
%
100
%
Level of current battery (%)
when the level reaches 10%.
%The Fn
Lever] option. g
Sleep Mode
If no controls are used for a set period, the camera will automatically enter suspend
operation to reduce the drain on the batteries. This is referred to as “sleep mode”.
•
suspended. Pressing the shutter or q button reactivates the camera.
• If no operations are performed for a set period after the camera enters sleep mode, the
# The camera may require additional time to recover from sleep mode when [On] (enabled)
is selected for [dg “Wireless Settings for When the
#
the menu. g “Setting Sleep (Power Saving) Options (Sleep)” (P. 254), “Setting Auto
31
EN
Preparation
1
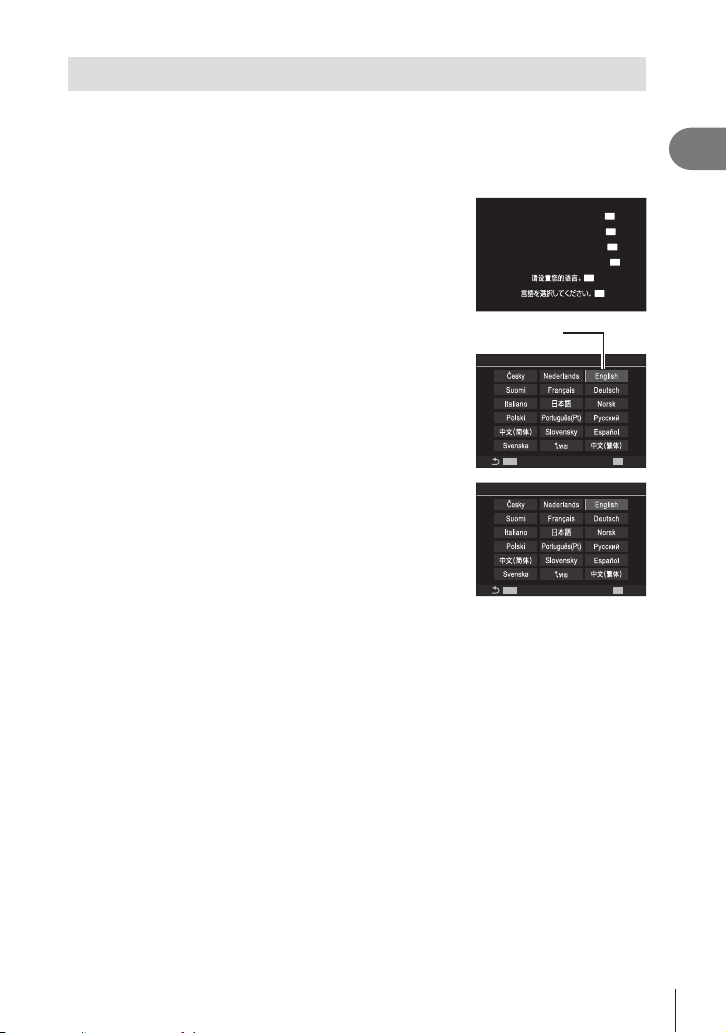
Initial setup
language and setting the camera clock.
#
correct date and time before using the camera. Some functions cannot be used if the date
and time have not been set.
1
Press the Q button when the initial setup dialog is
displaying prompting you to choose a language.
Please select your language.
Por favor, selecciona tu idioma.
Veuillez choisir votre langue.
Bitte wählen Sie Ihre Sprache.
OK
OK
OK
OK
OK
OK
2
Highlight the desired language using the front or
rear dial or the FGHI buttons.
MENU
W
OK
Cursor
3
Press the Q button when the desired language is
highlighted.
• If you press the shutter button before pressing the Q
button, the camera will exit to shooting mode and no
language will be selected. You can perform the initial
display the initial setup dialog and repeating the process
from Step 1.
MENU
W
OK
• The language can be changed at any time from the menu. g “What to Do If You
Can’t Read the Display” (P. 33)

32
EN
Preparation
1
4
Set the date, time, and date format.
• Use the HI buttons to highlight items.
• Use the FG buttons to change the highlighted item.
• The clock can be adjusted at any time from the menu.
g “Setting the Camera Clock (X Settings)” (P. 257)
5
Press the Q button.
MENU
––––
.
– –
.
– – – – : – –:– –
DM
Time
Y
Y/M/D
The time is displayed using a
24-hour clock.
6
Highlight a time zone using the FG buttons and press the Q button.
• Press the IN FO button to enable or disable daylight saving time.
7
Press the Q button to set the clock.
%Date and time information is recorded on the card together with the images.
%If the battery is removed from the camera and the camera is left for a while, the date and
time may be reset. If this happens, set the date and time using the menu. g “Setting the
Camera Clock (X Settings)” (P. 257)
%You may also need to adjust the frame rate before shooting movies. g “Setting the
Quality of Photos and Movies (KK / nK)” (P. 140)
33
EN
Preparation
1
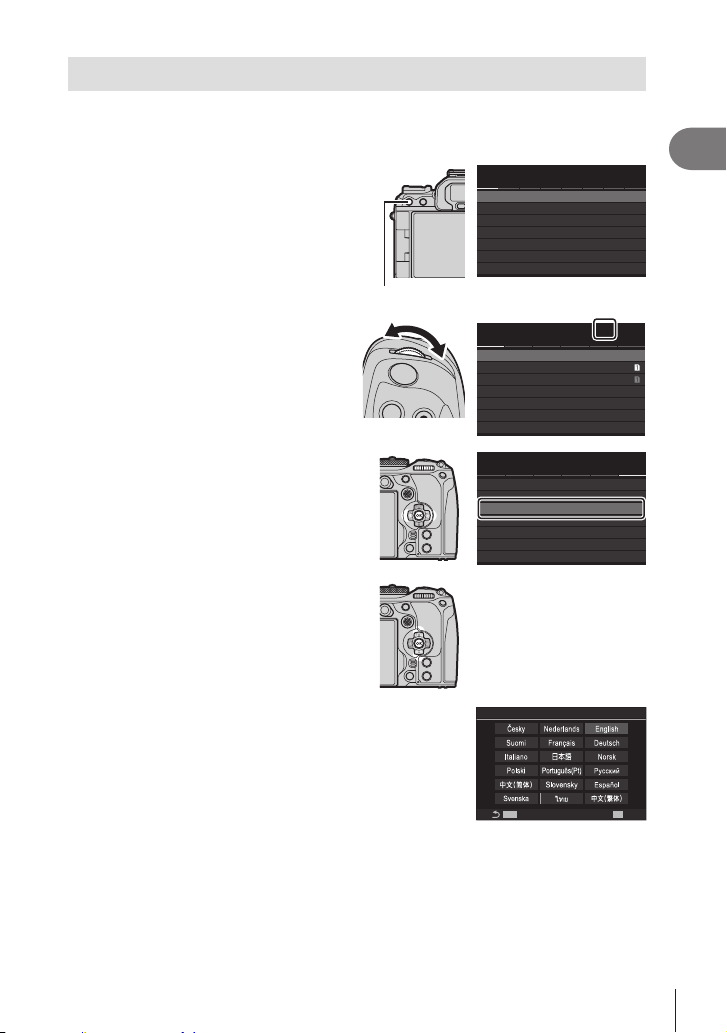
What to Do If You Can’t Read the Display
If you see unfamiliar characters or words in other languages, you may not have
selected the language you intended. Follow the steps below to choose another
language.
1
Press the MEN U button to view the
menus.
K
2
K
1
AF
My
n
q
G
e
K
1
Y
F
4:3
1.
K
K
การตั้งค่าพื้นฐาน/คุณภาพของภาพ
โหมดกำหนดเอง
สัดส่วนภาพ
ตรวจดูภาพ
ชดเชยเงาแสง
ปิด
ปิด
K
K
การตั้งค่าโดยละเอียด
MEN U button
2
Highlight the e (setup) tab using
the front dial.
K
2
K
1
AF
My
n
q
G
e
e
การ์ด/โฟลเดอร์/ไฟล์
การฟอร์แมตการ์ด
กำหนดโฟลเดอร์บันทึก
ชื่อไฟล์
แก้ไขชื่อไฟล์
รีเซ็ต
ไม่กำหนด
K
การตั้งค่าช่องเสียบการ์ด
n
การตั้งค่าช่องเสียบการ์ด
1.
3
Select a screen on which [W]
appears using the HI buttons or
the rear dial.
K
2
K
1
AF
My
n
q
G
e
e
รีเซ็ต/
X
/
W
/อื่นๆ
รีเซ็ต/เริ่มต้นการตั้งค่า
ปรับตั้งระดับ
พิกเซลแมบปิ้ง
เวอร์ชันเฟิร์มแวร์
การรับรอง
1.0
ไทย
X
การตั้งค่า
W
4
Highlight [W] using the FG
buttons and press the Q button.
5
Highlight the desired language using the FGHI
buttons and press the Q button.
MENU
W
OK
34
EN
Shooting
2
2
Shooting
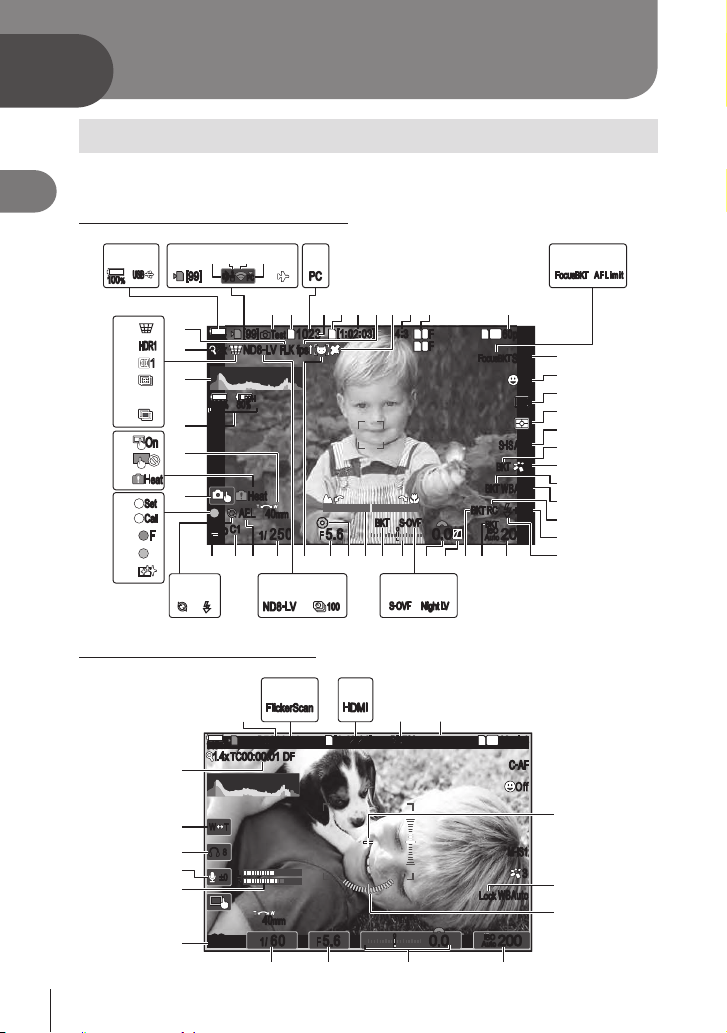
Information displays while shooting
%For information on the super control panel, which appears on the monitor by default, see
P. 71.
Monitor display during still photography
100
%
100
%
100
%
100
%
2x2x ND8
-
LV
FLK
fps
[
99
][
99
]
1
10231023
K
Test
P
C1
1
/
250
P
C1
1
/
F
250 5.65.6
1
1
[
1
:
02
:
03
][
1
:
02
:
03
]
4
:
34
:
3
FF
60p60p L
-
8L
-
8
S
-
AFS
-
AF
S
-
IS AutoS
-
IS
HeatHeat
33
200200
+0.3+0.3
Auto
AELAEL
40mm40mm
OffOff
2
FF
L
1
4K
L
80
%
80
%
S
-
OVFS
-
OVF
RC
RC
ISO
Auto
fps
##
ISO
Auto
F
00
+
-
0.00.0
K
Test
100
%
100
%
A
F LimitAF Limit
S
-
OVFS
-
OVF
Night LVNight LV
[
99
][
99
]
s<s<
PCPC
PCPC
##
HDR1HDR1
11
ND8
-
LV
100
FF
SetSet
CallCall
OnOn
HeatHeat
h
s
m
t
u
v
n
o
p
q
r
x
w
ba d gfc hi je
C yGH FJNPOQ I AzBK
X
^
#
$
]
\
2 341
!
|
}
{
>
<
U
V
W
/
T
5678 09 k l
RS M L E D
Y
Z
[
Monitor display during movie mode
145
min
145
min
1.4x
REC
00:01
n
P
1
/
60
P
1
/
LL
R
F
60 5.65.6
1
[
1
:
42
:
21
][
1
:
42
:
21
]
60p60p L
-
8L
-
8
C
-
AFC
-
AF
M
-
IS1M
-
IS1
33
200200
40mm40mm
WBAutoWBAuto
OffOff
1
4K
ISO
Auto
ISO
Auto
F
00
+
-
0.00.0
(
REC
00:01
(
n
±0±0
8
8
W TW T
PP
R
1.4x
TC
00:00:01
TC
00:00:01
DFDF
BT.709BT.709
LockLock
FlickerScanFlickerScan
HDMIHDMI
(
;
-
:
+
) =
yJN F
*
/
,
% &
_
.

35
EN
Shooting
2
1 Battery level ....................................P. 30
2 USB PD ........................................P. 287
3 Card write indicator ...................P. 21, 25
4 Maximum number of continuous shots
......................................................P. 128
5 Active Bluetooth
®
connection
..............................................P. 260, 280
6 Remote control .............................P. 280
7 Wireless LAN connection......P. 261, 267
8 Active connection to computer (Wi-Fi)
......................................................P. 267
9 Airplane Mode...............................P. 260
0 Active connection to computer (USB)
*1
......................................................P. 284
a Test Picture ...................................P. 210
b K Save settings ..........................P. 243
c Number of storable still pictures ...P. 327
d n Save slot .................................P. 243
e Available recording time ...............P. 327
f Frame rate ....................................P. 225
g Bluetooth position information ......P. 266
h Aspect ratio ...................................P. 144
i K Image quality ..........................P. 140
j n Image quality ...........................P. 141
k Focus BKT ....................................P. 178
l AF Limiter .......................................P. 92
m AF mode .........................................P. 72
n Face priority/Eye priority .................P. 88
o Drive mode (single-frame/sequential
shooting/self-timer/vibration reduction/
silent photography/Pro Capture)
......................................................P. 126
p Metering mode ..............................P. 109
q Image stabilizer.............................P. 136
r ART BKT .......................................P. 177
s Picture mode.................................P. 145
t WB BKT ........................................P. 175
u White balance ...............................P. 150
v RC mode.......................................P. 124
w Flash intensity control ...................P. 123
x Flash mode ...................................P. 120
y ISO sensitivity ............................... P. 113
z ISO BKT ........................................P. 176
A FL BKT ..........................................P. 175
B Highlight & shadow control ...........P. 215
C Exposure compensation value......P. 106
D Night Vision ...................................P. 225
E LV Mode ........................................P. 225
F Exposure compensation ...............P. 106
G AE BKT .........................................P. 174
H Focus Indicator .............................P. 102
I Preview .........................................P. 224
J Aperture value ..........................P. 43, 45
K Subject Detection............................P. 90
L Time lapse shooting ......................P. 167
M ............P. 158
N Shutter speed ...........................P. 43, 47
O AE lock..........................................P. 109
P Custom mode .................................P. 56
Q Shooting mode................................P. 43
R Flash ............................................. P. 118
(blinks: charging in progress, lights up:
charging completed)
S Pro Capture active ........................P. 133
T Dust reduction...............................P. 305
U ......................P. 40
VjSH2 Aperture warning ...........P. 126
W SET function/CALL function ..........P. 293
X Touch operation ..............................P. 41
Y Internal temperature warning ........ P. 309
Z Disable touch operation ................P. 101
[ Touch operation ..............................P. 41
\ Zoom operation direction/Focal length
] All Battery Information ............P. 30, 295
^ Histogram .......................................P. 38
< Multiple exposure..........................P. 163
> High Res Shot...............................P. 156
{ Focus Stacking .............................P. 160
} Fisheye compensation ..................P. 171
| HDR ..............................................P. 162
! D Keystone compensation .........P. 170
# Digital Tele-converter ....................P. 166
$ ......................P. 135
% Flicker scan...................................P. 108
& nHDMI Output ............................P. 182
( Recording time (displayed during
recording)........................................P. 59
) a View assist .............................P. 155
= Red frame during movie recording
......................................................P. 185
/ Center marker ...............................P. 183
* WLock ........................................P. 153
, Level gauge ....................................P. 38
; n mode (movie exposure mode)
........................................................P. 60
: Recording level meter .....................P. 62

36
EN
Shooting
2
+ Audio recording level ......................P. 62
- Headphone volume ........................P. 62
_ Electronic Zoom ..............................P. 62
. Time code .....................................P. 181
*1 Displayed when the camera is connected to OM Capture in [0RAW/Control] mode
and the computer is the sole save location of images (P. 284).
37
EN
Shooting
2
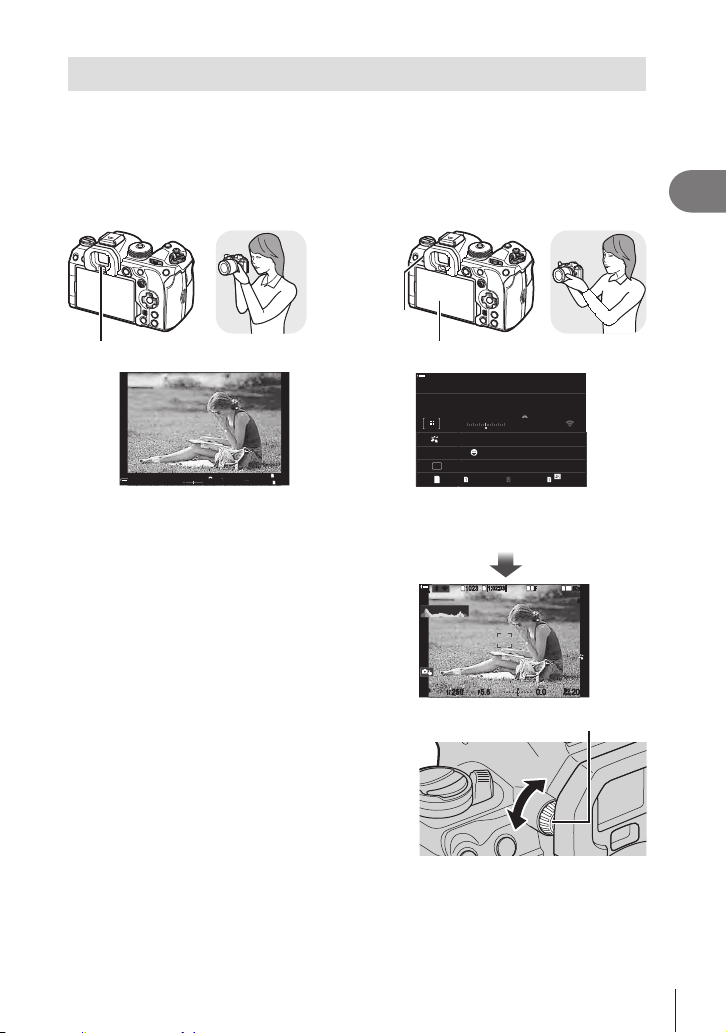
Switching between displays
also show information on camera settings. Options are available for controlling display
switching and choosing the information shown.
The camera monitor displays the super control panel (P. 69) by default.
Framing photos in the viewnder Framing photos in the monitor
Monitor
u (LV )
button
200200
ISO
Auto
ISO
Auto
WB
Auto
WB
Auto
1
1
[
1
:
02
:
03
]
[
1
:
02
:
03
]
10231023
PP
100
%
100
%
0.00.0
00
+
-
1
/
250
1
/
F
250
5.65.6
F
p
YF
1023 1:02:03
S-IS Auto
±
0.3
2022.02.01 16:30:43
0.0
5.6 200250P
Small
S-AF
4 : 3
1/
Auto
ISO
YF
0
60p L
-
8
Off
#
x
G
3
0
+
-
r
100
%
100
%
±
F
WB Auto
The monitor shows the super control panel.
It changes to live view when you press the
u (LV ) button.
u (LV ) button
1
10231023
P
1
/
250
P
1
/
F
250 5.65.6
1
1
[
1
:
02
:
03
][
1
:
02
:
03
]
FF
60p60p L
-
8L
-
8
S
-
AFS
-
AF
33
200200
L
1
4K
ISO
Auto
ISO
Auto
F
00
+
-
0.00.0
100
%
100
%
rr
O
O
•
diopter adjustment dial.
Diopter adjustment dial
%
g
eye sensor (Eye Sensor Settings)” (P. 250)
38
EN
Shooting
2
Switching the information display
PASMB
n
You can switch the information displayed in the monitor during
shooting using the IN FO button.
IN FO button
1
10231023
P
1
/
250
P
1
/
F
250 5.65.6
1
1
[
1
:
02
:
03
][
1
:
02
:
03
]
FF
60p60p L
-
8L
-
8
S
-
AFS
-
AF
33
200200
L
1
4K
ISO
Auto
ISO
Auto
F
00
+
-
0.00.0
10
0
%
10
0
%
rr
O
O
1
10231023
P
1
/
250
P
1
/
F
250 5.65.6
1
1
[
1
:
02
:
03
][
1
:
02
:
03
]
FF
60p60p L
-
8L
-
8
S
-
AFS
-
AF
33
200200
L
1
4K
ISO
Auto
ISO
Auto
F
00
+
-
0.00.0
100
%
100
%
rr
O
O
Information 2
(still photography mode only)
Image Only
Information 1
IN FO
IN FOIN FO
• The information display screens can be switched in either direction by rotating the dial
while pressing the IN FO button.
• The information shown in still photography mode and the information shown in movie mode
can be set individually. g “Shooting Indicators (
K
Info Settings /
n
Info Settings)” (P. 230)
• You can choose whether or not to display information when the shutter button is pressed
halfway.g
by half-pressing a)” (P. 231)
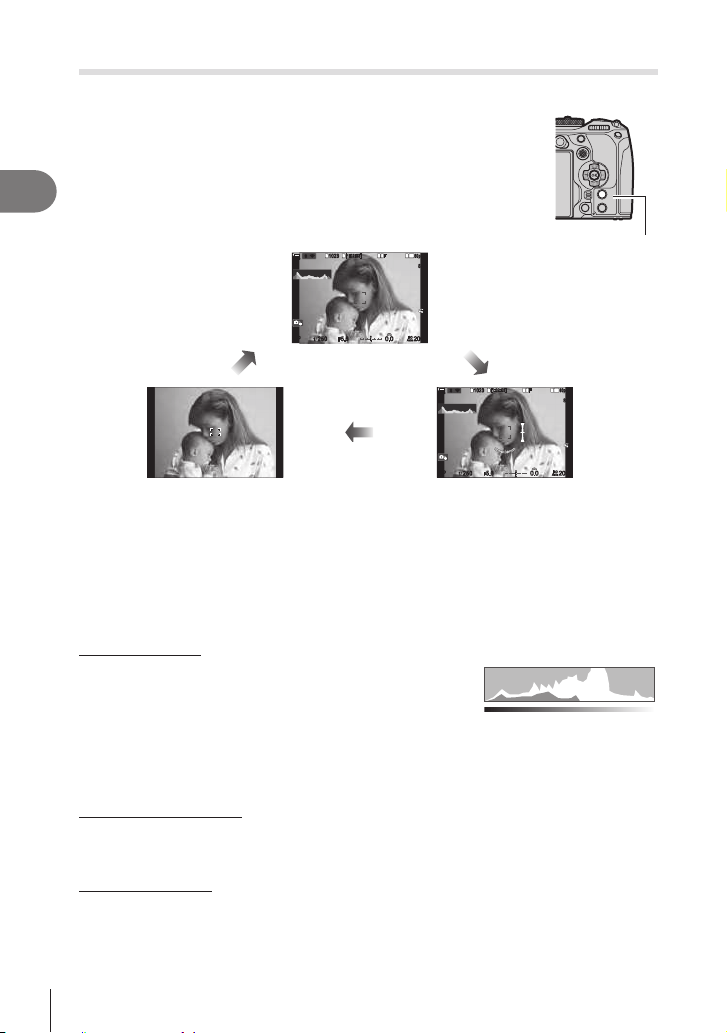
Histogram display
A histogram showing the distribution of brightness
in the image is displayed. The horizontal axis
gives the brightness, the vertical axis the number
of pixels of each brightness in the image. Areas
above the upper limit at shooting are displayed in
red, those below the lower limit in blue, and those within the spot metering range in green.
You can choose the upper and lower limits. g “Histogram Exposure Warning (Histogram
Settings)” (P. 236)
Highlights and Shadows
histogram display, are shown in red and blue. You can choose the upper and lower limits.
g “Histogram Exposure Warning (Histogram Settings)” (P. 236)
Level gauge display
The orientation of the camera is indicated. The “tilt” direction is indicated on the vertical bar
and the “horizon” direction on the horizontal bar.
• The level gauge is intended as a guide only.
• g “Calibrating the
Level Gauge (Level Adjust)” (P. 258)
More
Less
Dark Bright

39
EN
Shooting
2
Shooting still pictures
PASMB
n
Use the mode dial to select the shooting mode, and then shoot
the image.
Indicator
Mode icon
Types of shooting modes
For how to use the various shooting modes, see the following.
P
Program AE (P. 43)
A
Aperture-priority AE (P. 45)
S
Shutter-priority AE (P. 47)
M
Manual exposure (P. 49)
B
Bulb/time (P. 51)
Live composite (P. 54)
C1/C2/C3 /C4 Custom (P. 57)
%For information on n on the mode dial, see P. 59.
1
Press the mode dial lock to unlock it, and then turn to set the mode you wish
to use.
• When the mode dial lock has been pressed down, the mode dial is locked. Each time
you press the mode dial lock, it switches between locked/released.
2
Frame the shot.
#
camera strap do not obstruct the
lens or AF illuminator.
Landscape position Portrait position
40
EN
Shooting
2
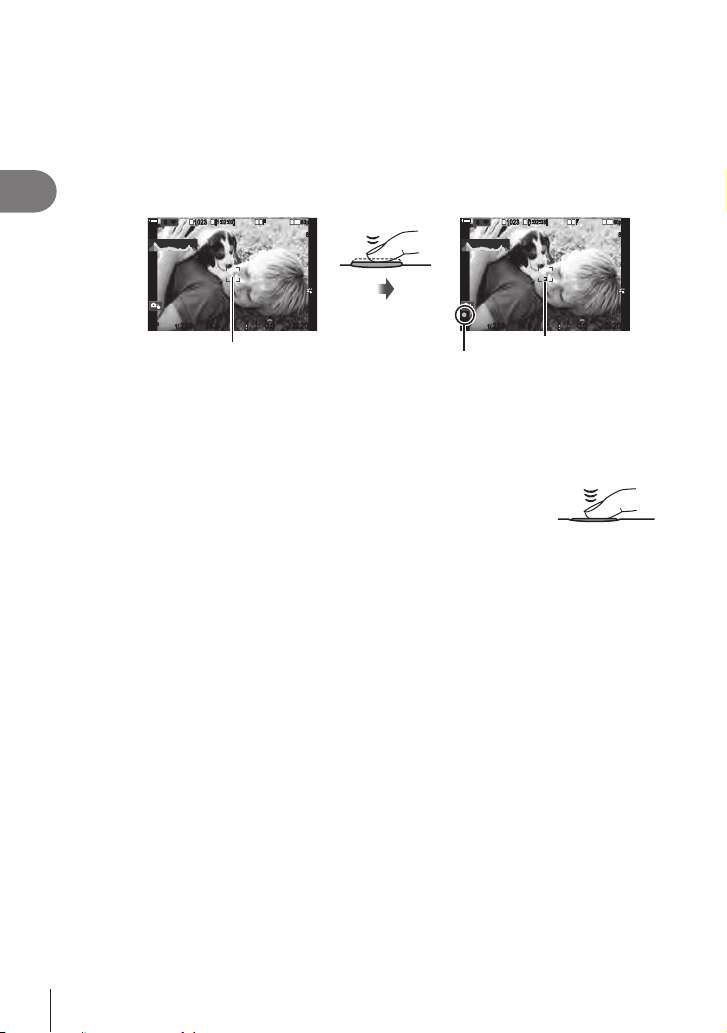
3
Adjust the focus.
•
halfway).
() will be displayed, and a green frame (AF target) will
be displayed in the focus location.
%You can also focus by pressing the AF-ON button. (P. 83)
Press the shutter
button halfway
1
10231023
P
1
/
250
P
1
/
F
250 5.65.6
1
1
[
1
:
02
:
03
][
1
:
02
:
03
]
FF
60p60p L
-
8L
-
8
S
-
AF
S
-
AF
33
200200
L
1
4K
ISO
Auto
ISO
Auto
F
00
+
-
0.00.0
100
%
100
%
rr
O
O
1
10231023
P
1
/
250
P
1
/
F
250 5.65.6
1
1
[
1
:
02
:
03
][
1
:
02
:
03
]
FF
60p60p L
-
8L
-
8
S
-
AF
S
-
AF
33
L
1
4K
ISO
Auto
ISO
Auto
F
00
+
-
0.00.0
100
%
100
%
rr
O
O
200200
AF target
AF frame
#
# The AF frame varies with the option chosen for AF-target mode. Change the area
(P. 77) and position (P. 76) of the AF target as required.
# The AF frame is not displayed when [oAll] is chosen for AF-target mode (P. 77).
4
Release the shutter.
• Press the shutter button all the way (fully).
• The camera will release the shutter and take a picture.
Press the rest of
the way down
%You can focus and take pictures using touch controls. g “Shooting with touch screen
operations” (P. 41)
41
EN
Shooting
2
Shooting with touch screen operations
PASMB
n
You can tap the subject to focus and take a
photograph.
1
10231023
P
1
/
250
P
1
/
F
250 5.65.6
1
1
[
1
:
02
:
03
][
1
:
02
:
03
]
FF
60p60p L
-
8L
-
8
S
-
AFS
-
AF
33
200200
L
1
4K
ISO
Auto
ISO
Auto
F
00
+
-
0.00.0
100
%
100
%
rr
O
O
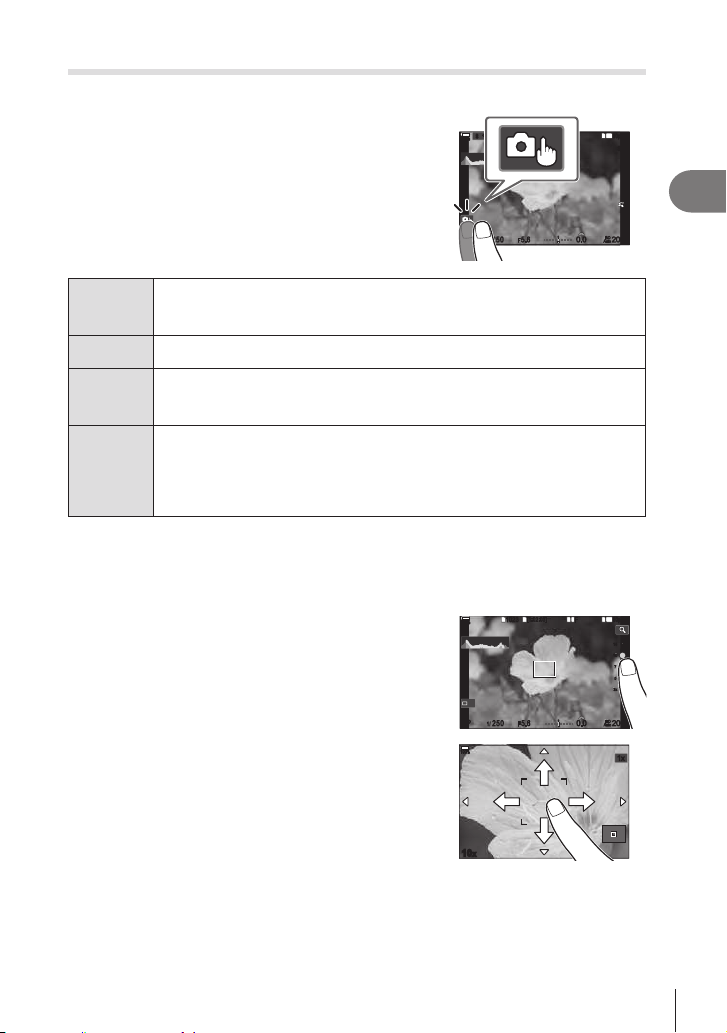
Q
Tap a subject to focus and automatically release the shutter. This option
is not available in mode
B
(bulb), in n (movie) mode, or when [FAF] or
[FAFb] is selected for AF mode (P. 72).
R
Shooting with touch screen operations is disabled.
S
Tap to display an AF target and focus on the subject in the selected area. You
can use the touch screen to choose the position and size of the focus frame.
Photographs can be taken by pressing the shutter button.
T
Tap to choose the subject used for focus when multiple portrait subjects are
detected. T
[Face & Eye Detection] (P. 88). Subject selection is not available when a
frame rate of [FHD 120/60p L-8] (high-speed movie recording) is selected in
n (movie) mode (P. 141).
• Tapping an icon switches the settings.
#
# Gloves or monitor covers may interfere with touch screen operation.
Previe w ing the subje ct (S)
1
Tap the subject in the display.
• An AF target will be displayed.
• Use the slider to choose the size of the frame.
• Tap S
1
10231023
P
1
/
250
P
1
/
F
250 5.65.6
1
1
[
1
:
02
:
03
][
1
:
02
:
03
]
FF
60p60p L
-
8L
-
8
200200
L
1
4K
ISO
Auto
ISO
Auto
F
00
+
-
0.00.0
100
%
100
%
Off
14
10
7
5
14
10
7
5
3x
3x
2
Use the slider to adjust the size of the AF
target, and then tap Y to zoom in at the frame
position.
•
picture is zoomed in.
• Tap Z to cancel the zoom display.
10
x
100
%
100
%
1x1x
• The situations in which touch screen operations are not available include the following.
When buttons or dials are in use
• You can disable the touch screen operation. g “Disabling Touch Controls (Touchscreen
Settings)” (P. 249)
42
EN
Shooting
2
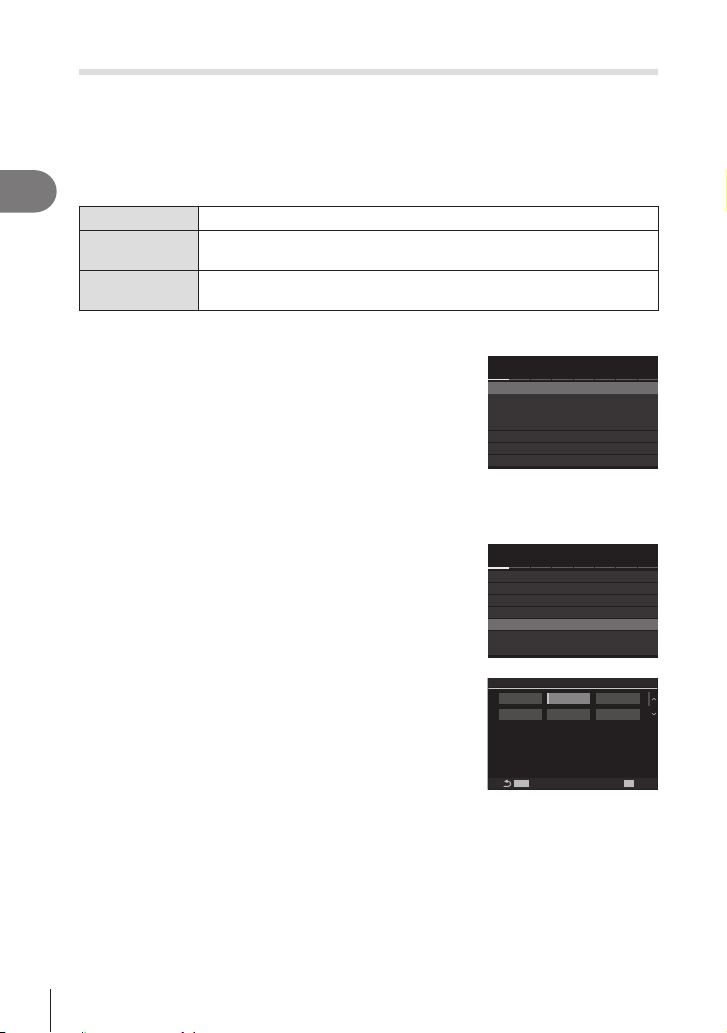
Photo Review (Image Review)
PASMB
n
Pictures are displayed immediately after shooting. This gives you a chance to quickly
review the shot. You can choose how long pictures are displayed or disable photo
review altogether.
To end photo review and resume shooting at any time, press the shutter button
halfway.
0.3–20sec Choose how long photos are displayed.
O
Photo review disabled. The camera continues to display the view
through the lens after shooting.
Auto q
Switch to playback after shooting. You can delete images and perform
other playback operations.
1
Press the MEN U button to display the menus.
2
Highlight the _ tab using the front dial.
K
2
K
1
AF
My
n
q
G
e
K
1
Y
F
4:3
1.
K
K
Basic Settings/Image Quality
Custom Mode
Image Aspect
Image Review
Shading Comp.
Off
Off
K
K
Detailed Settings
3
Highlight [1. Basic Settings/Image Quality] using
the HI buttons or the rear dial.
4
Highlight [Image Review] using the FG buttons
and press the Q button.
K
2
K
1
AF
My
n
q
G
e
K
1
Y
F
4:3
1.
K
K
Basic Settings/Image Quality
Custom Mode
Image Aspect
Image Review
Shading Comp.
Off
Off
K
K
Detailed Settings
5
Change the setting using the FG buttons and
press the Q button.
MENU
OK
Auto
q
Image Review
Off
0.3sec
0.5sec 1sec 2sec
Images are not displayed
after shooting.
6
Press the MEN U button to exit the menus.
43
EN
Shooting
2
Taking Pictures Using the Shooting Modes
Letting the camera choose aperture and shutter speed
(P: Program AE)
P
ASM B
n
The camera chooses the optimal aperture and shutter speed according to subject
brightness.
1
Rotate the mode dial to P.
2
Focus and check the display.
• Use the front and rear dials to adjust the following
settings.
Front dial: Exposure compensation (P. 106)
Rear dial: Program shift (P. 44)
• The shutter speed and aperture chosen by the camera
are displayed.
• Exposure compensation can also be adjusted using the
F button. Press the F button and then rotate the front
or rear dial.
3
Take pictures.
1
10231023
P
1
/
250
P
1
/
F
250 5.65.6
1
1
[
1
:
02
:
03
][
1
:
02
:
03
]
FF
60p60p L
-
8L
-
8
S
-
AFS
-
AF
33
200200
L
1
4K
ISO
Auto
ISO
Auto
F
00
+
-
0.00.0
10
0
%
10
0
%
rr
O
O
Shooting mode
Shutter speed
Aperture
%You can choose the functions performed by the front and rear dials. g “Assigning Roles
to the Front and Rear Dials (KDial Function / nDial Function)” (P. 216)
%You can use the Fn lever to reverse the roles of the front and rear dials. The lever
can also be assigned other roles. g “Customizing the Fn Lever (Fn Lever Settings)”
(P. 219)
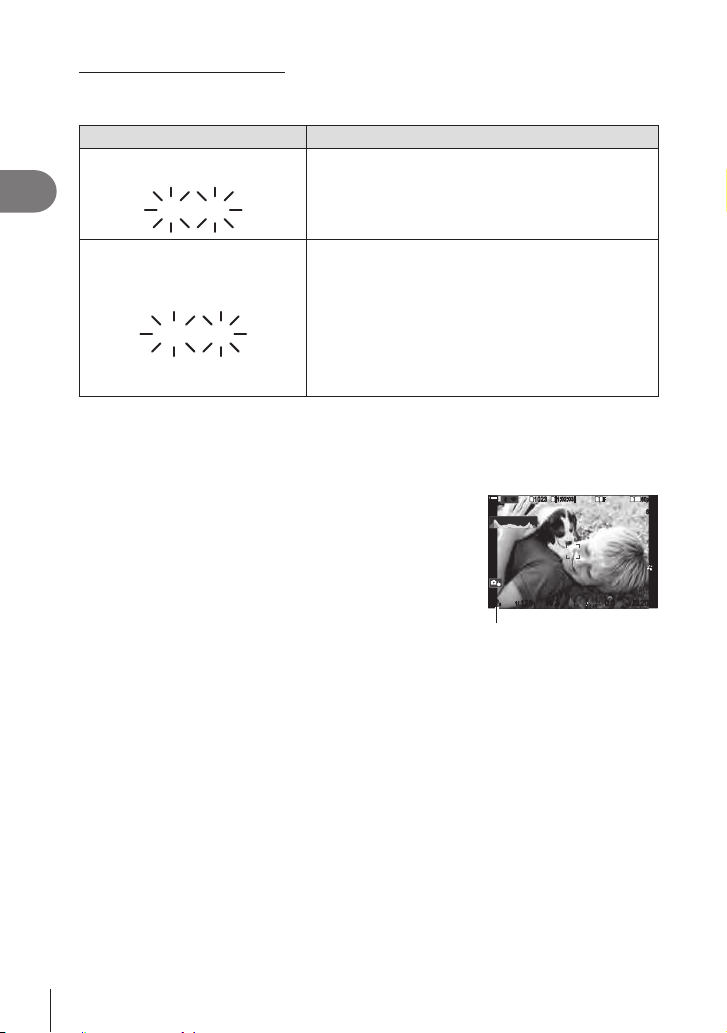
44
EN
Shooting
2
Subject Too Dark or Too Bright
If the camera is unable to achieve optimal exposure, the shutter-speed and aperture
Display Problem/solution
Large aperture (low f/-number)/
slow shutter speed
60"60" F2.8F2.8
The subject is too dark.
•
Small aperture (high f/-number)/
fast shutter speed
F22F22
80008000
Subject is too bright.
• The limits of the camera metering system have been
exceeded. Use a third-party ND (Neutral Density)
camera.
• Shutter speeds as fast as 1/32000 s are available
in s (silent) mode. g “Shooting without shutter
sound (Silents Settings)” (P. 132), “Performing the
sequential/self-timer shooting” (P. 126)
%When [KISO] is not set to [Auto], optimal exposure may be achieved by changing the
setting. g “Changing ISO sensitivity (ISO)” (P. 113)
%
Progra m Shift
combinations of aperture and shutter speed selected
automatically by the camera. This is known as program
shift.
1
Rotate the rear dial until the camera displays the
desired combination of aperture and shutter speed.
• The shooting mode indicator in the display changes
from P to
Ps
program shift, rotate the rear dial in the opposite
direction until
Ps
is no longer displayed.
PsPs
1
10231023
1
/
125
1
/
F
125 6.36.3
1
1
[
1
:
02
:
03
][
1
:
02
:
03
]
FF
60p60p L
-
8L
-
8
S
-
AF
S
-
AF
33
200200
L
1
4K
ISO
Auto
ISO
Auto
F
00
+
-
0.00.0
100
%
100
%
rr
O
O
Program shift
%
maintains a constant brightness for ease of viewing. g “Changing the look of the
display (KLV Mode)” (P. 225)
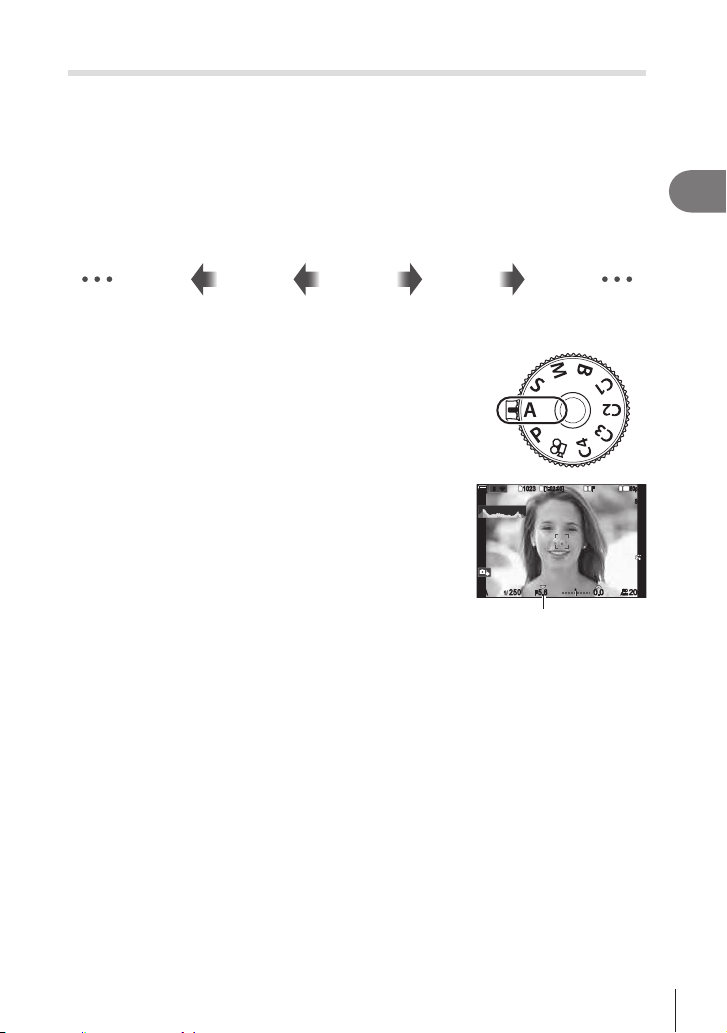
45
EN
Shooting
2
Choosing aperture (A: Aperture-Priority AE)
P A SM B
n
In this mode, you choose the aperture (f/-number) and the camera automatically sets
the shutter speed for optimal exposure according to subject brightness. Lower aperture
values (larger apertures) reduce the depth of the area that appears to be in focus
increase the depth of the area that appears to be in focus in front of and behind the
subject.
Lower aperture values… Higher aperture values…
F5.6F4.0F2.8 F8.0 F11
blur.
1
Rotate the mode dial to A.
2
Choose an aperture.
• Use the front and rear dials to adjust the following
settings.
Front dial: Exposure compensation (P. 106)
Rear dial: Aperture
• The shutter speed selected automatically by the camera
will appear in the display.
• Exposure compensation can also be adjusted using the
F button. Press the F button and then rotate the front
or rear dial.
3
Take pictures.
AA
1
10231023
1
/
2501
/
F
250 5.65.6
1
1
[
1
:
02
:
03
][
1
:
02
:
03
]
FF
60p60p L
-
8L
-
8
S
-
AFS
-
AF
33
200200
L
1
4K
ISO
Auto
ISO
Auto
F
00
+
-
0.00.0
10
0
%
10
0
%
rr
OO
Aperture value
%You can choose the functions performed by the front and rear dials. g “Assigning Roles
to the Front and Rear Dials (KDial Function / nDial Function)” (P. 216)
%You can use the Fn lever to reverse the roles of the front and rear dials. The lever
can also be assigned other roles. g “Customizing the Fn Lever (Fn Lever Settings)”
(P. 219)
%
maintains a constant brightness for ease of viewing. g “Changing the look of the
display (KLV Mode)” (P. 225)
%
g “Changing the roles of buttons (Button Settings)” (P. 208)

46
EN
Shooting
2
Subject Too Dark or Too Bright
If the camera is unable to achieve optimal exposure, the shutter-speed display will
Display Problem/solution
Slow shutter speed
60"60" F5.6F5.6
Underexposure.
• Choose a lower aperture value.
Fast shutter speed
80008000 F5.6F5.6
Overexposure.
• Choose a higher aperture value.
• If the subject is still overexposed at the higher value, the limits
of the camera metering system have been exceeded. Use a
light entering the camera.
• Shutter speeds as fast as 1/32000 s are available in s
(silent) mode. g “Shooting without shutter sound (Silents
Settings)” (P. 132), “Performing the sequential/self-timer
shooting” (P. 126)
%When [KISO] is not set to [Auto], optimal exposure may be achieved by changing the
setting. g “Changing ISO sensitivity (ISO)” (P. 113)
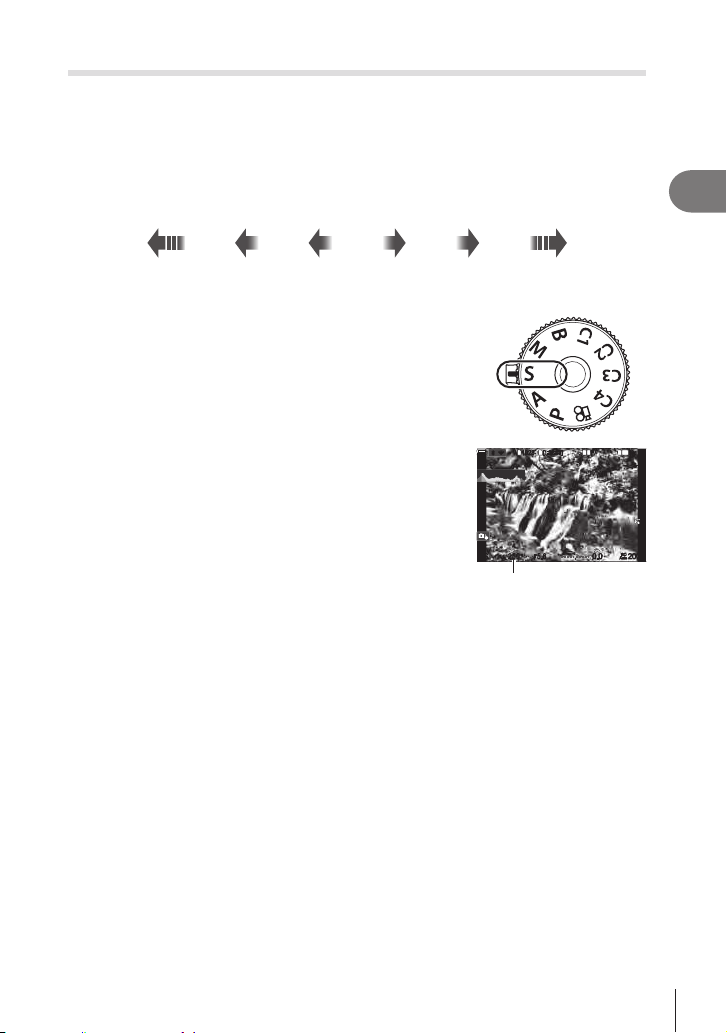
47
EN
Shooting
2
Choosing shutter speed (S: Shutter-Priority AE)
PA S M B
n
In this mode, you choose the shutter speed and the camera automatically sets aperture
for optimal exposure according to subject brightness. Faster shutter speeds appear
to “freeze” fast-moving subjects. Slower shutter speeds add blur to moving objects,
Slower shutter speeds… Faster shutter speeds…
125 250 800060301560”
…produce dynamic shots with a sense
of motion.
…“freeze” the motion of fast-moving
subjects.
1
Rotate the mode dial to S.
2
Choose a shutter speed.
• Use the front and rear dials to adjust the following settings.
Front dial: Exposure compensation (P. 106)
Rear dial: Shutter speed
• Shutter speed can be set to values between 1/8000 and
60 s.
• Shutter speeds as fast as 1/32000 s are available
in s (silent) mode.
g “Shooting without shutter
sound (Silents Settings)” (P. 132), “Performing the
sequential/self-timer shooting” (P. 126)
SS
1
10231023
1
/
2501
/
F
250 5.65.6
1
1
[
1
:
02
:
03
][
1
:
02
:
03
]
FF
60p60p L
-
8L
-
8
S
-
AFS
-
AF
33
200200
L
1
4K
ISO
Auto
ISO
Auto
F
00
+
-
0.00.0
10
0
%
10
0
%
rr
OO
Shutter speed
• The aperture selected automatically by the camera will appear in the display.
• Exposure compensation can also be adjusted using the F button. Press the F
button and then rotate the front or rear dial.
3
Take pictures.
%You can choose the functions performed by the front and rear dials. g “Assigning Roles
to the Front and Rear Dials (KDial Function / nDial Function)” (P. 216)
%You can use the Fn lever to reverse the roles of the front and rear dials. The lever can also
be assigned other roles. g “Customizing the Fn Lever (Fn Lever Settings)” (P. 219)
%
maintains a constant brightness for ease of viewing. g “Changing the look of the
display (KLV Mode)” (P. 225)
%
g “Slowing the Shutter in Bright Light
(Live ND Shooting)” (P. 158)
%Depending on the shutter speed selected, you may notice banding in the display caused
g “Reducing Flicker
in Photographs (Anti-Flicker Shooting)” (P. 135), “Reducing Flicker Under LED Lighting
(KFlicker Scan / nFlicker Scan)” (P. 108)

48
EN
Shooting
2
Subject Too Dark or Too Bright
shown.
Display Problem/solution
Low aperture value
20002000 F2.8F2.8
Underexposure.
• Choose a slower shutter speed.
High aperture value
125125 F22F22
Overexposure.
• Choose a faster shutter speed. Shutter speeds as fast as
1/32000 s are available in silent mode.
• If the subject is still overexposed at the higher speed, the
limits of the camera metering system have been exceeded.
amount of light entering the camera.
%When [KISO] is not set to [Auto], optimal exposure may be achieved by changing the
setting. g “Changing ISO sensitivity (ISO)” (P. 113)
%

49
EN
Shooting
2
Choosing aperture and shutter speed (M: Manual Exposure)
PA S M B
n
In this mode, you choose the aperture and shutter speed. You can adjust settings
according to your goals, for example by combining fast shutter speeds with small
1
Rotate the mode dial to M.
2
Adjust aperture and shutter speed.
• Use the front and rear dials to adjust the following
settings.
Front dial: Aperture
Rear dial: Shutter speed
• Choose from shutter speeds of 1/8000–60 s.
• Shutter speeds as fast as 1/32000 s are available in
silent mode. g
“Shooting without shutter sound
(Silents Settings)” (P. 132)
•
produced by the selected aperture and shutter speed
and the optimal exposure metered by the camera. The
BKT S
-
OVF
00
+
-
-2.0-2.0
MM
1
10231023
1
/
2501
/
F
250 5.65.6
1
1
[
1
:
02
:
03
][
1
:
02
:
03
]
FF
60p60p L
-
8L
-
8
S
-
AFS
-
AF
33
L
1
4K
F
10
0
%
10
0
%
rr
O
O
200200
ISO
exposure
• When [Auto] is selected for [K ISO], ISO sensitivity will automatically be adjusted
for optimal exposure at the selected exposure settings. [K ISO] defaults to [Auto].
g “Changing ISO sensitivity (ISO)” (P. 113)
3
Take pictures.
%You can choose the functions performed by the front and rear dials. g “Assigning Roles
to the Front and Rear Dials (KDial Function / nDial Function)” (P. 216)
%You can use the Fn lever to reverse the roles of the front and rear dials. The lever
can also be assigned other roles. g “Customizing the Fn Lever (Fn Lever Settings)”
(P. 219)
%Depending on the shutter speed selected, you may notice banding in the display caused
g “Reducing Flicker
in Photographs (Anti-Flicker Shooting)” (P. 135), “Reducing Flicker Under LED Lighting
(KFlicker Scan / nFlicker Scan)” (P. 108)
%
maintains a constant brightness for ease of viewing. g “Changing the look of the
display (KLV Mode)” (P. 225)
50
EN
Shooting
2
Subject Too Dark or Too Bright
If the camera is unable to achieve optimal exposure with [Auto] selected for [K ISO],
Display Problem/solution
L80L80
ISO ISO
AutoAuto
Overexposure.
• Choose a higher aperture value or faster shutter speed.
ISO ISO
AutoAuto
2560025600
Underexposure.
• Choose a lower aperture value or slower shutter speed.
• If the warning does not clear from the display, choose a higher
value for ISO sensitivity. g
“Changing ISO sensitivity (ISO)”
(P. 113), “Setting the range of ISO sensitivity values selected
in [Auto] mode (KISO-A Upper/Default / bISO-A Upper/
Default)” (P. 114)
Using Ex posure Compensat ion in M ode M
In mode M, exposure compensation is available when [Auto] is selected for [K ISO].
Because exposure compensation is performed by adjusting ISO sensitivity, aperture
g “Changing ISO sensitivity (ISO)” (P. 113),
“Setting the range of ISO sensitivity values selected in [Auto] mode (KISO-A Upper/Default
/ bISO-A Upper/Default)” (P. 114)
1
Hold the F button and rotate the front or rear dial.
• Exposure compensation is added to the exposure
BKTBKT S
-
OVFS
-
OVF
00
+
-
0.00.0
MM
1
10231023
1
/
2501
/
F
250 5.65.6
1
1
[
1
:
02
:
03
][
1
:
02
:
03
]
FF
60p60p L
-
8L
-
8
S
-
AF
S
-
AF
33
L
1
4K
F
100
%
100
%
rr
OO
200200
ISO
Auto
ISO
Auto
Exposure
compensation
Exposure
compensation plus
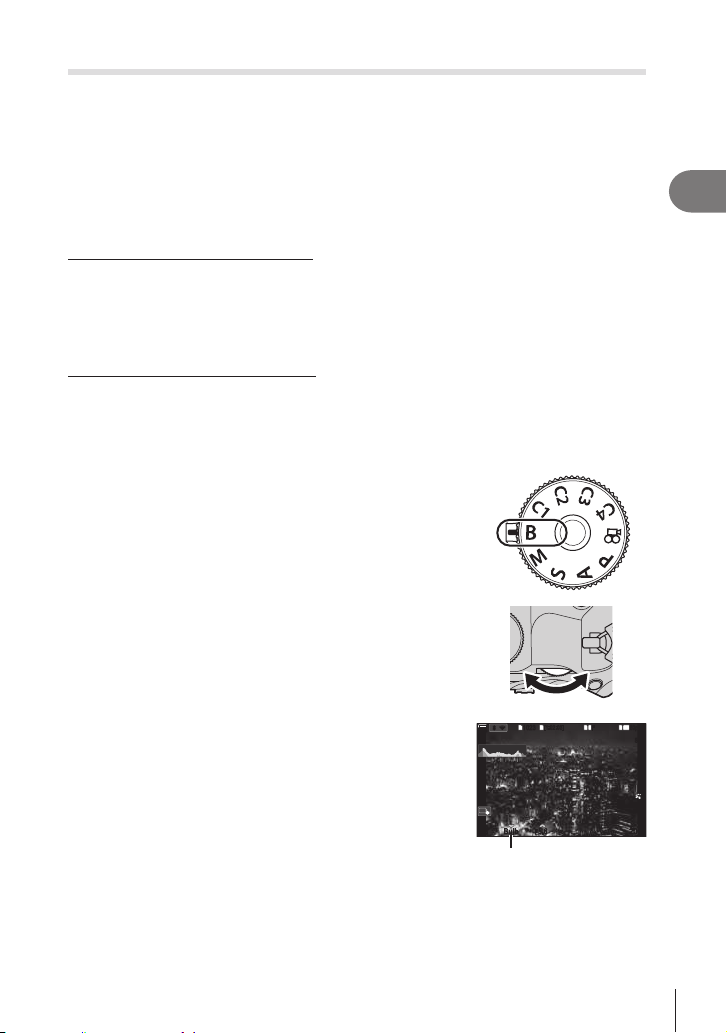
51
EN
Shooting
2
Long Exposures (
B
: Bulb/Time)
PASMB
n
Select this mode to leave the shutter open for a long exposure. You can preview the
photo in live view and end the exposure when the desired results have been achieved.
Use when long exposures are required, for example when photographing night scenes
#
tripod and set [K
“Bulb” and “Live Bulb” Photography
The shutter remains open while the shutter button is pressed. Releasing the button ends the
exposure.
• The amount of light entering the camera increases the longer the shutter is open.
• When live bulb photography is selected, you can check the results in the live view display
and end exposure when you want to.
“Time” and “Live Time” Photography
The exposure begins when the shutter button is pressed all the way down. To end the
exposure, press the shutter button all the way down a second time.
• The amount of light entering the camera increases the longer the shutter is open.
• When live time photography is selected, you can check the results in the live view display
and end exposure when you want to.
1
Rotate the mode dial to
B
.
2
Select [Bulb] (for bulb photography) or [Time] (time
photography).
• At default settings, the selection is made with the rear
dial.
1
10231023
1
1
[
1
:
02
:
03
][
1
:
02
:
03
]
FF
60p60p L
-
8L
-
8
S
-
AFS
-
AF
33
L
1
4K
10
0
%
10
0
%
rr
O
O
F
5.65.6
F
200200
ISO
BB
BulbBulb
Bulb or time photography

52
EN
Shooting
2
3
Press the MEN U button.
• You will be prompted to choose the interval at which the
preview is updated.
MENU
OK
24
L80~ 400~ 800~
1600~
19 14 9
ISO
Live Bulb
Off
Display Counts of each ISO sensitivity
times
4
Highlight an interval using FG.
5
Press the
Q
button to select the highlighted option.
• The menus will be displayed.
6
Press the MEN U button repeatedly to exit the menus.
•
7
Adjust aperture.
• At default settings, aperture can be adjusted using the
front dial.
1
10231023
1
1
[
1
:
02
:
03
][
1
:
02
:
03
]
FF
60p60p L
-
8L
-
8
S
-
AF
S
-
AF
33
L
1
4K
100
%
100
%
rr
O
O
F
5.65.6
F
200200
ISO
BB
BulbBulb
Aperture
8
Take pictures.
• In bulb and live bulb modes, keep the shutter button pressed. The exposure ends
when the button is released.
• During live time photography, you can refresh the preview by pressing the shutter
button halfway.
• In time and live time modes, press the shutter button all the way down once to start
the exposure and again to end it.
• The exposure ends automatically when the time selected for [Bulb/Time Timer]
is reached.
g
Settings)” (P. 173)
• [Noise Reduction] is applied after shooting. The display shows the time remaining
until the process is complete. You can choose the conditions under which noise
reduction is performed (P. 117).
# Some limitations apply to the choice of ISO sensitivity settings available.
# Bulb photography is used in place of live bulb photography when multiple exposure,
# Time photography is used in place of live time photography when multiple exposure,
# During shooting, there are limits on the settings for the following functions.
bracketing, focus bracketing, Focus Stacking, etc.
# Depending on camera settings, the temperature, and the situation, you may notice noise
or bright spots in the monitor. These may sometimes appear in pictures even when [Noise
Reduction] (P. 117) is enabled.
%Starry sky AF can be used for shots of the night sky. g “Choosing a focus mode (KAF
Mode / nAF Mode)” (P. 72), “Changing the settings of Starry Sky AF (Starry Sky AF
Setting)” (P. 85)

53
EN
Shooting
2
%Display brightness can be adjusted during bulb/time photography. g
BULB/TIME/COMP Settings (BULB/TIME/COMP Settings)” (P. 173)
%In mode
B
(bulb), you can adjust focus manually while the exposure is in progress.
This allows you to defocus during the exposure or focus at the end of the exposure.
g
! N oise
While shooting at slow shutter speeds, noise may appear on screen. These phenomena
occur when the temperature rises in the image pickup device or image pickup device internal
drive circuit, causing current to be generated in those sections of the image pickup device
that are not normally exposed to light. This can also occur when shooting with a high ISO
setting in a high-temperature environment. To reduce this noise, the camera activates the
noise reduction function. g “Long Exposure Noise Reduction Options (Noise Reduction)”
(P. 117)
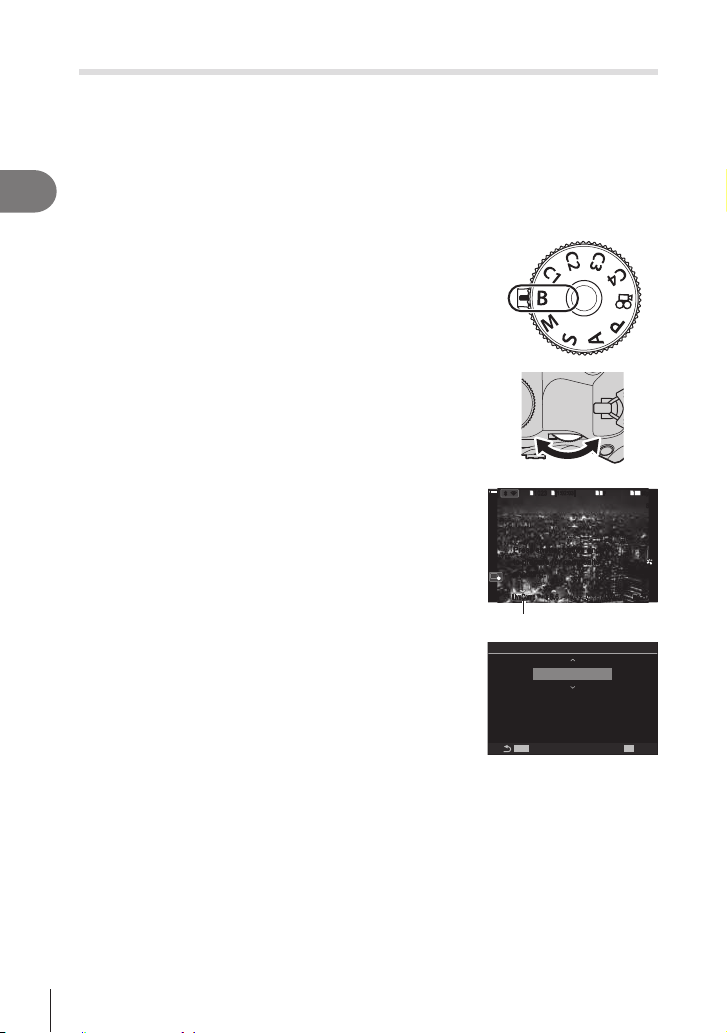
54
EN
Shooting
2
Lighten Blending (
B
: Live Composite Photography)
PASMB
n
Leave the shutter open for a long exposure. You can view the light trails left by
background. The camera combines multiple shots and records them as a single
photograph.
#
tripod and set [K
1
Rotate the mode dial to
B
.
2
Select [Live Comp].
• At default settings, the selection is made with the rear
dial.
1
10231023
1
1
[
1
:
02
:
03
][
1
:
02
:
03
]
FF
60p60p L
-
8L
-
8
S
-
AF
S
-
AF
33
L
1
4K
100
%
100
%
rr
O
O
F
5.65.6
F
200200
ISOISO
BB
LiveCompLiveComp
00
+
-
0.00.0
Press shutter button once
to prepare for composite
shooting.
Press shutter button once
to prepare for composite
shooting.
Live composite photography
3
Press the MEN U button.
• The [Composite Settings] menu will be displayed.
MENU
OK
Exposure time per image.
Exposure time and aperture
will determine your base exposure.
Composite Settings
1/2sec
4
Highlight an exposure time using FG.
• Choose an exposure time of from 1/2 to 60 s.
5
Press the Q button to select the highlighted option.
• The menus will be displayed.
6
Press the MEN U button repeatedly to exit the menus.
7
Adjust aperture.
• At default settings, aperture can be adjusted using the front dial.

55
EN
Shooting
2
8
Press the shutter button all the way down to ready
the camera.
• The camera is ready to shoot when [Ready for
composite shooting] is displayed.
1
10231023
1
1
[
1
:
02
:
03
][
1
:
02
:
03
]
FF
60p60p L
-
8L
-
8
S
-
AFS
-
AF
33
L
1
4K
10
0
%
10
0
%
rr
O
O
F
5.65.6
F
200200
ISO
BB
LiveCompLiveComp
00
+
-
0.00.0
ISO
Ready for composite shootingReady for composite shooting
9
Press the shutter button to start shooting.
• Live composite photography will start. The display will be updated after each
exposure.
10
Press the shutter button again to end shooting.
• Shooting ends automatically after the time selected for [Live Composite Timer]
(P. 173). Other options can be selected.
• The maximum recording time available varies with battery level and shooting
conditions.
# Some limitations apply to the choice of ISO sensitivity settings available.
# Limitations apply to some features during shooting, including:
bracketing, focus bracketing, High Res Shot, HDR photography, Focus Stacking,
%Starry sky AF can be used for shots of the night sky. g “Choosing a focus mode (KAF
Mode / nAF Mode)” (P. 72), “Changing the settings of Starry Sky AF (Starry Sky AF
Setting)” (P. 85)
%Display brightness can be adjusted during live composite photography. g
BULB/TIME/COMP Settings (BULB/TIME/COMP Settings)” (P. 173)
%The exposure time for each exposure made during live composite photography can be
chosen in advance using the menus. g
(BULB/TIME/COMP Settings)” (P. 173)
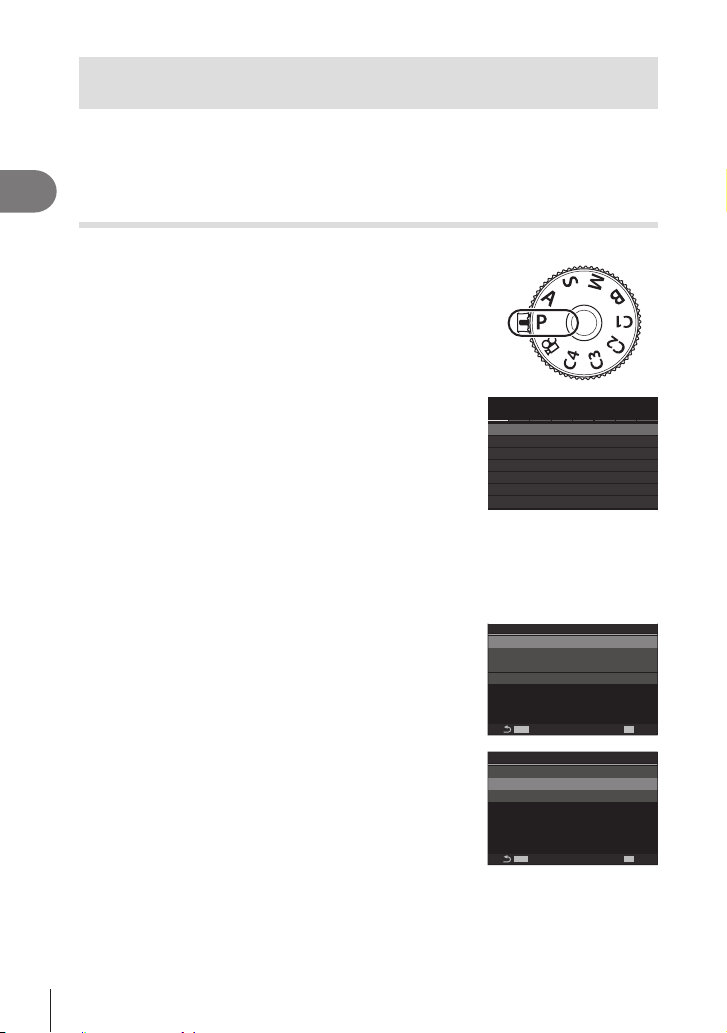
56
EN
Shooting
2
Saving Custom Settings to the Mode Dial
(C1 /C2 /C3/C4 Custom Modes)
Frequently-used settings and shooting modes can be saved as custom modes and
recalled as needed simply by rotating the mode dial. Saved settings can also be
recalled from the menus.
• Save settings to positions C1 through C4.
Saving Settings (Assign to Custom Mode)
PASMB
n
1
Choose a mode other than n and adjust settings
as desired.
• For information on the settings that can be saved, see
the menu list (P. 311).
2
Press the MEN U button to display the menus.
3
Highlight the _ tab using the front dial.
K
2
K
1
AF
My
n
q
G
e
K
1
Y
F
4:3
1.
K
K
Basic Settings/Image Quality
Custom Mode
Image Aspect
Image Review
Shading Comp.
Off
Off
K
K
Detailed Settings
4
Highlight [1. Basic Settings/Image Quality] using the
HI buttons or the rear dial.
5
Highlight [Custom Mode] using the FG buttons
and press the Q button.
6
Highlight the desired custom mode ([C1]–[C4])
using FG buttons and press the Q button.
• The menu for the selected custom mode will be
displayed.
MENU
OK
C2
C1
C3
C4
--
--
--
--
Custom Mode
7
Highlight [Assign] using the FG buttons and press
the Q button.
MENU
OK
C1
--
Assign
Recall
Save Settings Reset

57
EN
Shooting
2
8
Highlight [Set] using the FG buttons and press
the Q button.
• Any existing settings will be overwritten.
• To restore default settings for the selected custom
mode, highlight [Reset] and press the Q button.
MENU
OK
C1
Set
Set current shooting
mode and settings.
Reset
9
Press the MEN U button to exit the menus.
%
(C1, C2, C3 , or C4 ) during shooting. g “Saving the Changes Made to Settings while
in Custom Modes” (P. 57)
Using Custom Modes (C1 /C2 /C3 /C4 )
PASMB
n
To recall all saved settings, including the shooting mode:
1
Rotate the mode dial to the desired custom mode
(C1 , C2 , C3 , or C4 ).
• The camera will be set to the settings for the selected
mode.
%By default, changes made after recall will not be applied to the stored settings. The saved
settings will be restored when next you select the custom mode with the mode dial.
Saving the Cha nge s M a de to Se t t ings w hile in Cust om Mode s
You can save the changes made to settings while in custom modes in the camera.
The changed settings remain even if you rotate the mode dial. You can use the custom
modes just like the P/A/S/M /B modes.
1
Press the MEN U button to display the menus.
2
Highlight the _ tab using the front dial.
3
Highlight [1. Basic Settings/Image Quality] using the HI buttons or the rear
dial.
4
Highlight [Custom Mode] using the FG buttons and press the Q button.
5
Highlight the desired custom mode ([C1]–[C4]) using FG buttons and press
the Q button.
6
Highlight [Save Settings] using the FG buttons and press the Q button.
7
Highlight [Hold] using the HI buttons and press the Q button.
8
Press the M EN U button to exit the menus.

58
EN
Shooting
2
Re c a lling Save d Set t ings
In modes other than n, you can recall the settings stored in custom modes [C1]
through [C4].
1
Press the MEN U button to display the menus.
2
Highlight the _ tab using the front dial.
K
2
K
1
AF
My
n
q
G
e
K
1
Y
F
4:3
1.
K
K
Basic Settings/Image Quality
Custom Mode
Image Aspect
Image Review
Shading Comp.
Off
Off
K
K
Detailed Settings
3
Highlight [1. Basic Settings/Image Quality] using the
HI buttons or the rear dial.
4
Highlight [Custom Mode] using the FG buttons
and press the Q button.
5
Highlight the desired custom mode ([C1]–[C4])
using FG buttons and press the Q button.
MENU
OK
C2
C1
C3
C4
--
--
Custom Mode
Set
Set
6
Highlight [Recall] using the FG buttons and press
the Q button.
MENU
OK
C1
Assign
Recall
Save Settings Reset
Set
7
Highlight [Yes] using the HI buttons and press the
Q button.
MENU
OK
C1
Yes
Apply C1 settings? Current camera
settings will be overwritten.
No
8
Press the MEN U button to exit the menus.
%When you recall a setting while the mode dial is set to C1 , C2 , C3 , or C4, the shooting
mode also changes to the saved mode.
%Settings recalled by pressing a button to which [C1] - [C4] (Custom Mode C1 - 4) has
been assigned in [KButton Function] (P. 208) cease to apply when you:
-
- Rotate the mode dial to another setting
- Press the M EN U button during shooting
- Perform a reset
- Save or recall custom settings

59
EN
Shooting
2
Recording Movies
# When recording movies, use an SD card that supports an SD speed class of 10 or higher.
# A UHS-II or UHS-I card with a UHS speed class of 3 or better is required when:
a movie resolution of [4K] or [C4K] is selected in the [nK] menu or a Motion
Compensation of [A-I] (All-Intra) is selected in the [nK] menu
Recording movies in movie mode (n)
PASMB
n
Rotate the mode dial to n
in P, A, S, and M modes (P. 60).
1
Rotate the mode dial to n.
2
Press the R button to begin recording.
• A beep does not sound when the camera focuses in
movie mode.
• Movie you are recording will be displayed on the
monitor.
•
• A red frame is displayed during movie recording (P. 185).
• You can change the focus location by tapping the screen while recording.
• The camera will start the recording count and display the recording time.
3
Press the R button again to end recording.
# When the camera is used continuously for extended periods, the temperature of the
image sensor will rise and noise and color splotches may be visible in the display.
are particularly likely to occur at high ISO sensitivities. If the temperature of the sensor
# When using a Four Thirds system lens, the AF will not operate while recording movies.
# When high-speed movie recording is selected for [nK], movies shot with [i-Enhance] or
# The sound of touch operations and button operations may be recorded.
# CMOS image sensors of the type used in the camera generate a so-called “rolling
a phenomenon that occurs in pictures of fast-moving subjects or if the camera is moved
during shooting. It is particularly noticeable in pictures taken at long focal lengths.
# When an SDXC card is used, movies up to 3 hours long can be recorded. Movies over 3
# When an SD/SDHC card is used, movies over 4 GB in size are recorded over multiple
before the 4 GB limit is reached).
%You can also begin recording movies by pressing the shutter button. g “Recording a
movie by pressing the shutter button (nShutter Function)” (P. 216)
%g “Playing back separated
movies” (P. 189)

60
EN
Shooting
2
Choosing a n Ex posure Mode (n M ode (Movie Ex posure M odes))
PASMB
n
P, A, S, and M
modes.
1
Press the M EN U button to display the menus.
2
Highlight the n tab using the front dial.
3
Highlight [1. Basic Settings/Image Quality] using the HI buttons or the rear
dial.
4
Highlight [nMode] using the FG buttons and press the Q button.
5
Highlight the desired mode using FG buttons and press the Q button.
P
Optimal aperture is set automatically according to the brightness of the subject.
Use the front dial or rear dial to adjust exposure compensation.
A
Depiction of background is changed by setting the aperture.
Use the front dial to adjust exposure compensation and rear dial to adjust aperture.
S
compensation and rear dial to adjust shutter speed.
Shutter speed can be set to values between 1/24 s and 1/32000 s.
M
Freely adjust both aperture and shutter speed.
Use the front dial to select aperture value and the rear dial to select shutter speed.
• Choose from shutter speeds of 1/24–1/32000 s. Values of ISO 200–12800 are
available using the [n ISO] manual sensitivity control options.
•
aperture and shutter speed and the optimal exposure metered by the camera. The
• The option chosen for [b
%The low end of the shutter speed changes according to the frame rate of the movie record
mode.
6
Press the MEN U button to exit the menus.
%[nMode] can also be set from the super control panel. g “The Super Control Panel/LV
Super Control Panel” (P. 69)

61
EN
Shooting
2
Recording movies in photo shooting modes
Movies can be recorded in program AE mode even when the mode dial is not in the n
position.
# [RREC] must be assigned to a button using [KButton Function] (P. 208).
# The AF target takes on the shape selected for movie mode (P. 59). Rotate the mode
dial to n (movie mode) and choose target shape in the AF target selection display
(P. 77).
1
Press the button, to which [RREC] has been assigned, to begin recording.
• During recording, “(REC”, recording time, and a red frame (P. 185) will be
displayed on the monitor.
•
• You can change the focus location by tapping the screen while recording.
145
min
145
min
REC
n
P
1
/
250
P
1
/
F
250 5.65.6
1
[
1
:
02
:
03
][
1
:
02
:
03
]
60p60p L
-
8L
-
8
C
-
AFC
-
AF
M
-
IS2M
-
IS2
33
WBAutoWBAuto
OffOff
1
4K
ISO
Auto
ISO
Auto
F
00
+
-
0.00.0
(
REC
00:1200:12
(
n
±0±0
TC
00:00:01
TC
00:00:01
DFDF
200200
LL
RR
Recording time
2
Press the button again to end recording.
• “(REC”, recording time, and the red frame (P. 185) disappear when you end
recording.
# Even if you press a button to which [RREC] has been assigned, you cannot record
movies in the following instances:
During a multiple exposure (still photography also ends), while the shutter button
is pressed halfway, during sequential shooting, time-lapse photography, keystone

62
EN
Shooting
2
Touch Controls (Silent Controls)
PASMB
n
You can prevent the camera from recording operating
sounds that occur due to camera operations while
shooting. After tapping an item, tap the displayed arrows
to select the settings.
LL
R
88
W TW T
PP
R
145
min
145
min
REC
n
P
1
/
250
P
1
/
F
250 5.65.6
1
[
1
:
02
:
03
][
1
:
02
:
03
]
60p60p L
-
8L
-
8
C
-
AFC
-
AF
M
-
IS2M
-
IS2
33
WBAutoWBAuto
OffOff
1
4K
ISO
Auto
ISO
Auto
F
00
+
-
0.00.0
(
REC
00:1200:12
(
n
±0±0
TC
00:00:01
TC
00:00:01
DFDF
200200
1
2
3
4 5 6 7
1 power zoom
Zoom power zoom lenses in or out.
2 headphone volume
Adjust volume when using headphones.
3 recording level
Choose the recording level.
4 shutter speed
Adjust shutter speed when [S] (shutter-priority AE) or [M]
(manual) is selected for [nMode] (movie exposure mode)
(P. 60).
5 aperture
Adjust aperture when [A] (aperture-priority AE) or [M] (manual) is
selected for [nMode] (movie exposure mode) (P. 60).
6 exposure
compensation
Adjust exposure compensation. If [M] is selected for [nMode]
(movie exposure mode) (P. 60), exposure compensation is
available when [Auto] is selected for [n ISO] (P. 113).
7 n ISO sensitivity
Adjust [n ISO] (P. 113). This option is available when [M] is
selected for [nMode] (movie exposure mode) (P. 60).
# Silent controls are not available during high-speed movie recording (P. 142).
%
used during still photography. gnInfo Settings” (P. 231)
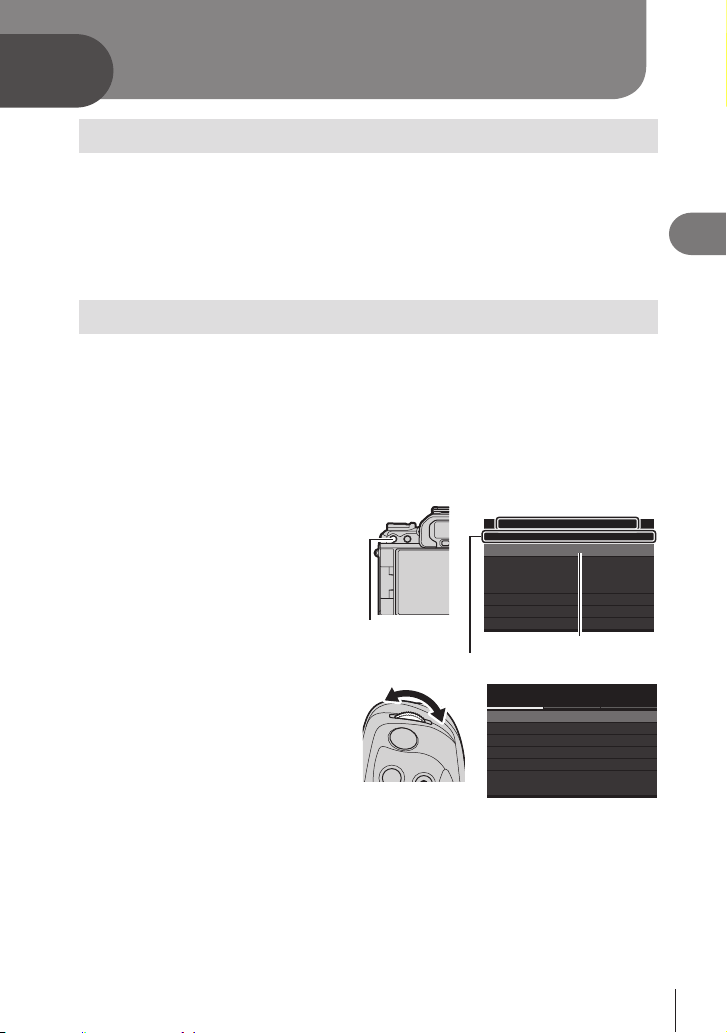
63
EN
Using the Menus
3
3
What you can do with menus
In addition to shooting and playback options, the menus contain options that let you
customize the operation and display of the camera, and set up the camera.
There are several tabs which represent function categories, and related functions are
contained in each page.
For information on tab categories and functions on each page, see “Default Settings”
(P. 311).
How to operate the menus
Front dial : Select a tab.
HI/Rear dial : Select a page.
FG : Move the cursor.
Q
MENU button : Cancel operation/return to previous screen.
The following explanation uses [AE BKT] as an example.
1
Press the MEN U button to
display the menus.
MEN U button
K
2
K
1
AF
My
n
q
G
e
K
1
Y
F
4:3
1.
K
K
Basic Settings/Image Quality
Custom Mode
Image Aspect
Image Review
Shading Comp.
Off
Off
K
K
Detailed Settings
Cursor
Tabs
Page title, page guide
2
Use the front dial to select the
desired tab.
• [AE BKT] is on the ‘ tab.
Rotate the front dial until the
‘ tab is highlighted.
K
2
K
1
AF
My
n
q
G
e
K
2
1.
HDR
Computational Modes
High Res Shot
Multiple Exposure Off
Live ND Shooting
Focus Stacking
Off
Off
Off
Off
Using the Menus
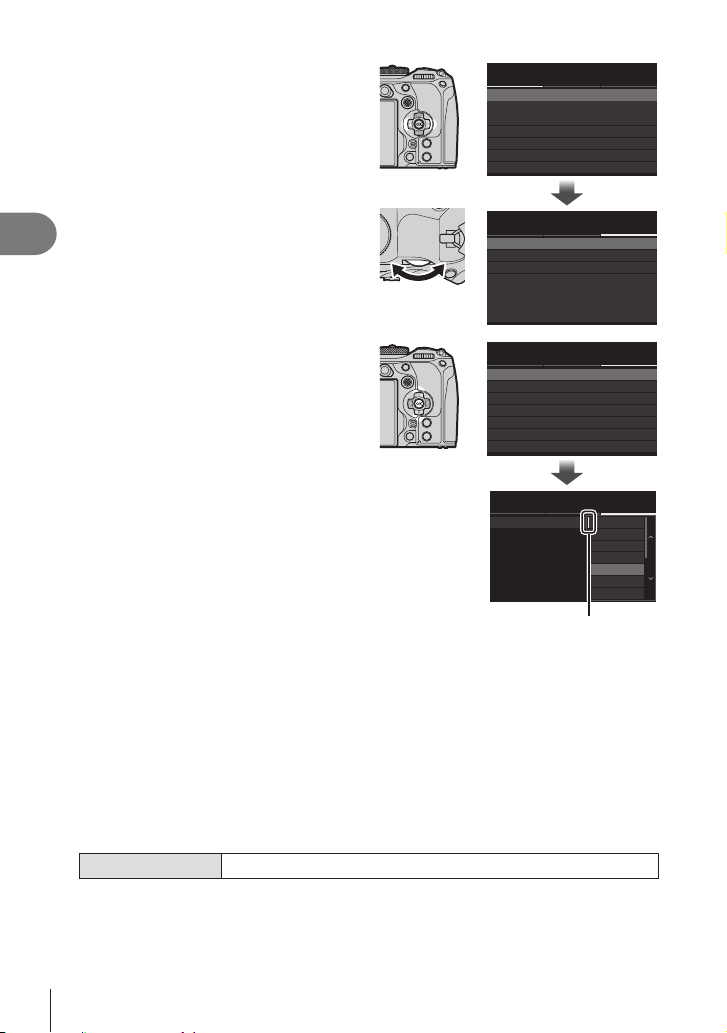
64
EN
Using the Menus
3
3
Use HI or the rear dial to select
the desired page.
• [AE BKT] is on the 3rd page: [3.
Bracketing]. Operate the HI
buttons or the rear dial until the [3.
Bracketing] page is highlighted.
K
2
K
1
AF
My
n
q
G
e
K
2
1.
HDR
Computational Modes
High Res Shot
Multiple Exposure
Off
Live ND Shooting
Focus Stacking
Off
Off
Off
Off
K
2
K
1
AF
My
n
q
G
e
K
2
AE BKT
ISO BKT
ART BKT
WB BKT
FL BKT
3.
Focus BKT
Bracketing
Off
Off
Off
Off
Off
Off
4
Use FG to select [AE BKT] and
press the Q button.
K
2
K
1
AF
My
n
q
G
e
K
2
AE BKT
ISO BKT
ART BKT
WB BKT
FL BKT
3.
Focus BKT
Bracketing
Off
Off
Off
Off
Off
Off
K
2
K
1
AF
My
n
q
G
e
K
2
AE BKT
ISO BKT
ART BKT
5f 0.3EV
WB BKT
FL BKT
3.
3f 1.0EV
3f 0.7EV
3f 0.3EV
Focus BKT
5f 0.7EV
5f 1.0EV
Bracketing
Off
This appears next to the
currently selected option.
5
Use FG to highlight an option and press the Q button to select.
•
• Pressing the MEN U button closes the menu.
• The procedure after selecting an item and pressing the Q button varies
depending on the menu item.
• Some menu items require further settings after you select an option in step
5. For operation, see the explanation of each function.
In this manual, the procedure for selecting a menu items is shown as follows.
Menu
MEN U n ‘ n3. Bracketing n AE BKT
%You can use the multi selector in place of FGHI when operating menus.
%To cancel menu operation, press the M EN U button.
%For information on each menu function and default settings, see
“Default Settings”
(P. 311).
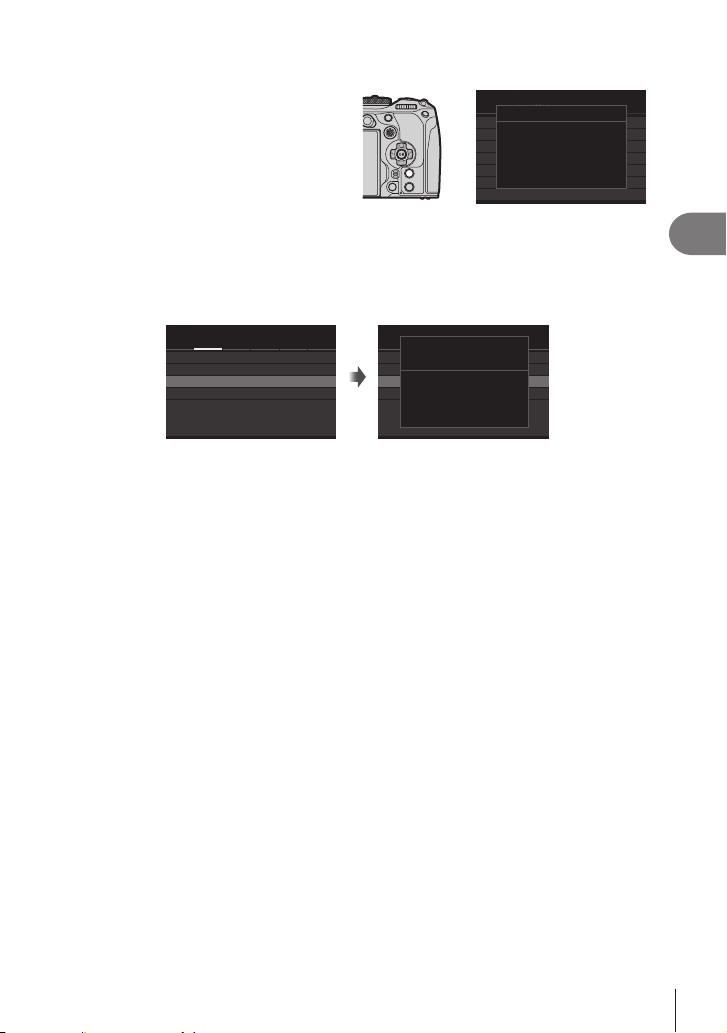
65
EN
Using the Menus
3
Displa ying t he de sc ription of a m e nu it e m
When you press the IN FO button while
a menu item is selected, the description
of the menu is displayed.
K
2
K
1
AF
My
n
q
G
e
K
2
HDR
1.
Computational Modes
High Res Shot
Multiple Exposure
Off
Live ND Shooting
Focus Stacking
Off
Off
Off
Off
Takes and combines multiple
pictures to create a super high
resolution image.
High Res Shot
It e m s show n in gra y
If an item is currently unavailable due to the condition of the camera or other settings, it
is shown in gray.
When you press the Q button while a gray item is highlighted, the reason it is not
available is displayed.
K
2
K
1
AF
My
n
q
G
e
AF
2.
AF
AF Illuminator
K
Face & Eye AF Button
Subject Detection
Eye Detection Frame
On
Off
AF Area Pointer
Face & Eye Detection
Off
On1
On
Q
K
2
K
1
AF
My
n
q
G
e
AF
2.
AF
AF Illuminator
K
Face & Eye AF Button
Subject Detection
Eye Detection Frame
On
Off
AF Area Pointer
Face & Eye Detection
Off
On1
On
This item cannot be selected
for the following reason.
K
AF Mode

66
EN
Shooting Settings
4
4
Shooting Settings
How to change the shooting settings (Direct buttons/
Super Control Panel)
use them, you can access settings via buttons or icons in the display.
Direct Buttons
Frequently-used photographic functions are assigned to buttons. These are referred to
as “direct buttons”. The buttons to which functions can be assigned are listed below.
4
3
6
5
9
8
7
0
a
b
c
2
1
%Buttons excluding 0 (jY# button) and a (AF m
roles. g “Changing the roles of buttons (Button Settings)” (P. 208)
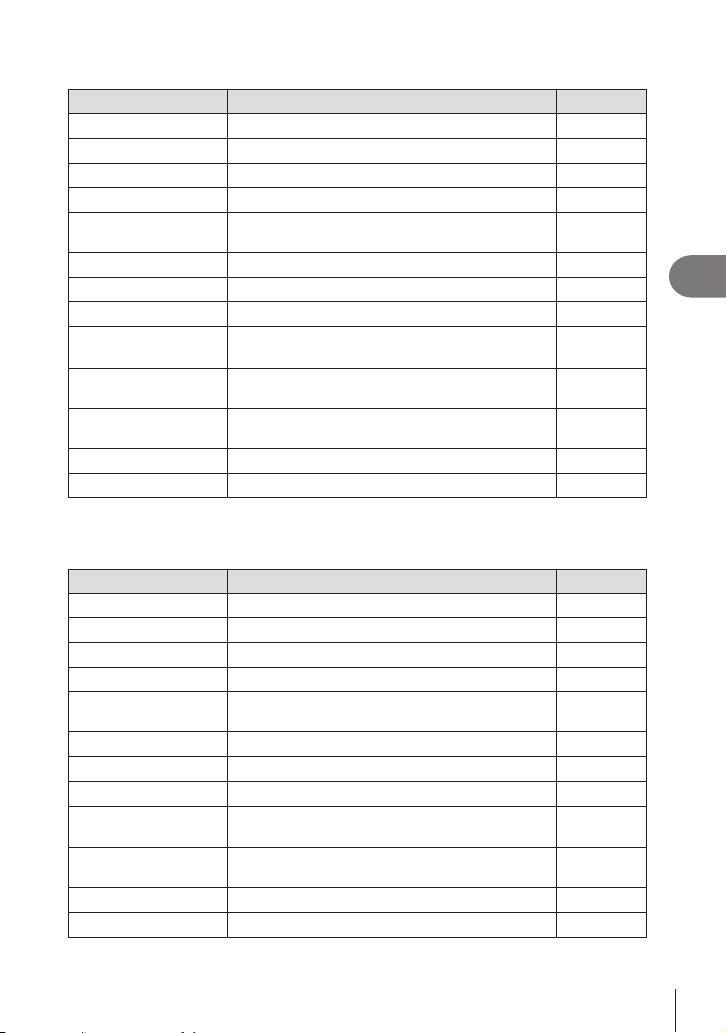
67
EN
Shooting Settings
4
Dire ct but t ons during phot o shooting
Direct button Assigned function
g
1 Y button
One-touch white balance P. 152
2 Z button
Preview P. 224
3 u (LV ) button
P. 37
4 AEL button
AEL P. 109
5
AF-ON button
AF-ON
P. 83,
84
6 ISO button
ISO sensitivity P. 113
7 Multi selector (T)
N
(AF target position)
P. 76
8 Multi selector (S)
-
9 Arrow pad
(FGHI)
-
0 jY# button
P. 120,
126
a AFm button
AF/metering mode
P. 72,
109
b F button
Exposure compensation P. 106
c R(h) button
High Res Shot P. 156
* No function is assigned by default.
Dire ct but t ons during m ovie recording
Direct button Assigned function
g
1 Y button
Peaking P. 152
2 Z button
Magnify
P. 80
3 u (LV ) button
P. 37
4 AEL button
AEL P. 109
5
AF-ON button
AF-ON
P. 83,
84
6 ISO button
ISO sensitivity P. 113
7 Multi selector (T)
N
(AF target position)
P. 76
8 Multi selector (S)
-
9 Arrow pad
(FGHI)
-
a AFm button
AF/metering mode
P. 72,
109
b F button
Exposure compensation P. 106
c R(h) button
Movie recording P. 59
* No function is assigned by default.

68
EN
Shooting Settings
4
For information on how each direct button function works, see the explanation page of
each function.
This section explains how to operate when a selection menu is displayed, using [AF
Mode] as an example.
1
Press the button of the function you want to use.
• Press the AF m button
• A selection menu appears.
ESP
S-AF C-AF
C-AF+TR
F
AF
b
Pre
b
C
C
Hi
C
Sh
B
p
ESP
S-AF C-AF
C-AF+TR
F
AF
b
Pre
b
C
C
Hi
C
Sh
B
p
Single AFSingle AF
Selection menu
2
Rotate the front/rear dial so select a setting.
• You can also use the FGHI buttons.
If setting values appear at the top and bottom of the
display when you press the button in step 1, use the
following buttons.
FG: Selects items displayed at the top.
HI: Selects items displayed at the bottom.
• In this example, rotate the rear dial to set [AF Mode].
• Pressing the shutter button halfway to exit to the
shooting display.
• You can also return to the shooting display by pressing the button you pressed in step 1.
• With some functions, further detailed settings are available after selecting the setting in
step 2. For information on how to operate, see the explanation of each function.
In this manual, the procedure for changing a setting using a direct button is shown as
follows.
Button
AF m button n j
Quickly changing the setting while keeping the button pressed
Some settings can be changed by rotating the front/rear dial while keeping the button
of the function pressed.
The setting screen closes when you release the button.
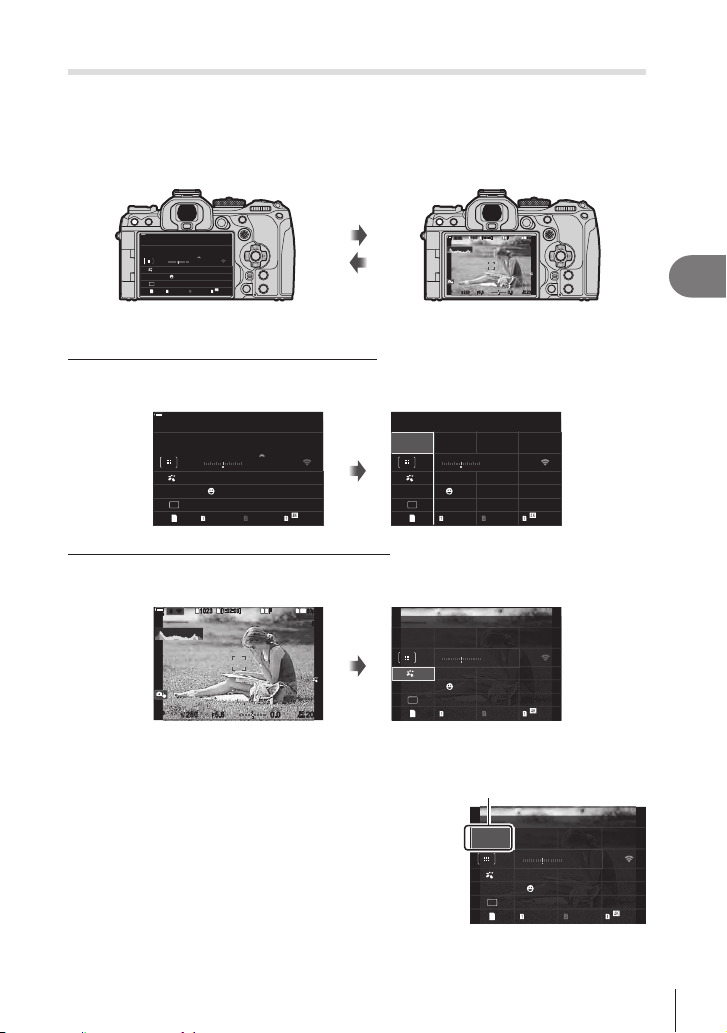
69
EN
Shooting Settings
4
The Super Control Panel/LV Super Control Panel
The super control panel/LV super control panel lists shooting settings and their current
control panel when framing shots in the monitor (“live view”).
• In photo shooting mode, pressing the u (LV
photography and live view photography.
p
YF
1023 1:02:03
S-IS Auto
±
0.3
2022.02.01 16:30:43
0.0
5.6 200250P
Small
S-AF
4 : 3
1/
Auto
ISO
YF
0
60p L
-
8
Off
#
x
G
3
0
+
-
r
100
%
100
%
±
F
WB Auto
u
(LV button)
1
10231023
P
1
/
250
P
1
/
F
250 5.65.6
1
1
[
1
:
02
:
03
][
1
:
02
:
03
]
FF
60p60p L
-
8L
-
8
S
-
AFS
-
AF
33
200200
L
1
4K
ISO
Auto
ISO
Auto
F
00
+
-
0.00.0
100
%
100
%
rr
O
O
Live view photography
Super Control Panel (Viewnder Photography)
in the monitor at all times. Press the Q button to activate the cursor.
p
YF
1023 1:02:03
S-IS Auto
±
0.3
2022.02.01 16:30:43
0.0
5.6 200250P
Small
S-AF
4 : 3
1/
Auto
ISO
YF
0
60p L
-
8
Off
#
x
G
3
0
+
-
r
100
%
100
%
±
F
WB Auto
Q
p
YF
1023 1:02:03
±
S-IS Auto
±
0.3
0.0
5.6250P
Small
S-AF
4 : 3
1/
Auto
ISO
YF
60p L
-
8
Off
#
x
G
3
0
+
-
r
F
200
WB Auto
0
Shooting Mode
LV Super Control Panel (Live View Photography)
To display the LV super control panel in the monitor, press the Q button during live
view.
1
10231023
P
1
/
250
P
1
/
F
250 5.65.6
1
1
[
1
:
02
:
03
][
1
:
02
:
03
]
FF
60p60p L
-
8L
-
8
S
-
AFS
-
AF
33
200200
L
1
4K
ISO
Auto
ISO
Auto
F
00
+
-
0.00.0
100
%
100
%
rr
O
O
Q
p
YF
1023 1:02:03
S-IS Auto
±
0.3
Natural
0.0
5.6250P
Small
S-AF
4 : 3
1/
Auto
ISO
YF
60p L
-
8
Off
#
x
±
G
3
0
+
-
r
F
200
WB Auto
0
This section explains how to operate super control panel/LV super control panel using
[Face & Eye Detection] as an example.
1
Press the Q button.
• If you press the button during live view, the LV super
control panel will be displayed in the monitor.
• The last setting used will be highlighted.
Cursor
p
YF
4567 1:42:22
S-IS Auto
±
0.3
0.0
5.6250P
Small
S-AF
4 : 3
1/
Auto
ISO
YF
60p L
-
8
Off
#
x
G
3
0
+
-
s
200
WB Auto
0
Shooting Mode
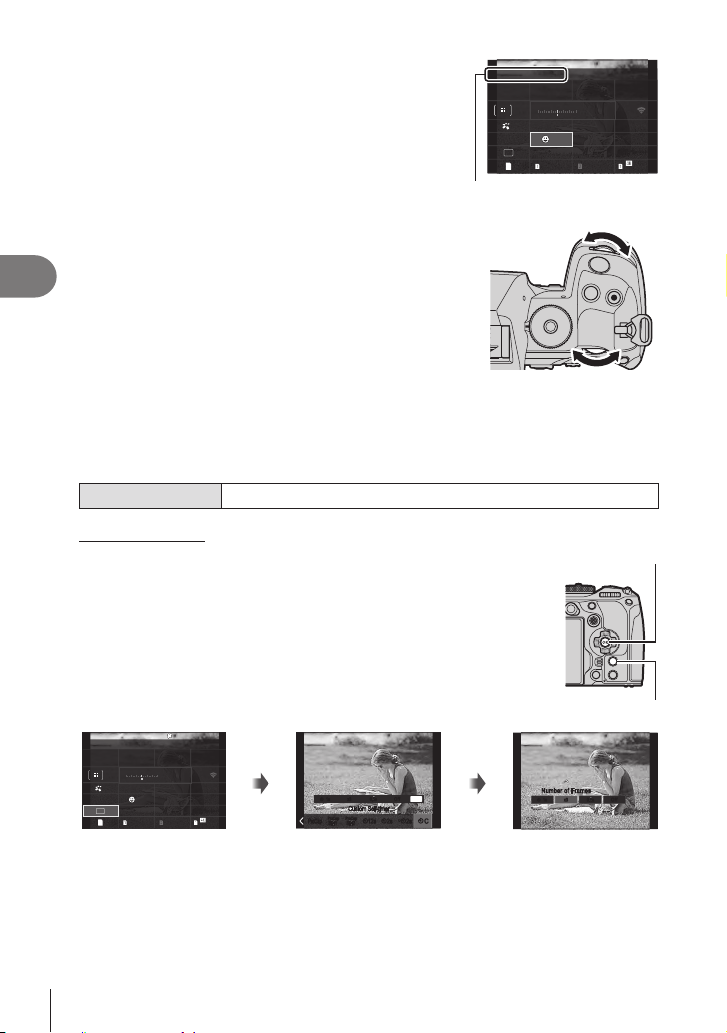
70
EN
Shooting Settings
4
2
Highlight an item using FGHI.
• The selected setting will be highlighted.
• You can also highlight items by tapping them in the
display.
p
YF
1023 1:02:03
±
F
S-IS Auto
±
0.3
0.0
5.6250P
Small
S-AF
4 : 3
1/
Auto
ISO
YF
60p L
-
8
Off
#
x
G
3
0
+
-
r
200
WB Auto
0
Face & Eye Detection
The name of the selected
function appears.
3
Rotate the front/rear dial to change the
highlighted setting.
• Press the shutter button halfway to save the current setting and exit to the shooting
display.
In this manual, the procedure for changing a setting using a direct button is shown as
follows.
Super Control Panel
Q n Face & Eye Detection
Additional Options
Pressing the Q button in Step 2 displays options for the highlighted
Q button
IN FO button
p
YF
1023 1:02:03
S-IS Auto
±
0.3
0.0
5.6 200250P
Small
S-AF
4 : 3
1/
Auto
ISO
YF
60p L
-
8
Off
#
x
±
G
3
0
+
-
r
F
WB Auto
0
Single
Q
0.5s1s x3
INFO
C
Y
0.5s1s x3
Y
Y
2s
Y
2s
Y
12s
SH2
ProCap
SH1
ProCap
ProCap
Y
2s
Y
2s
Y
12s
SH2
ProCap
SH1
ProCap
ProCap
Y
C
Y
Custom Self-timerCustom Self-timer
OffOff
IN FO
1s
Y
1s 0.5s0.5sx3x3
Y
Number of FramesNumber of Frames
OffOff
LV Super Control Panel/
Super Control Panel
display
Selection menu display Detailed setting display
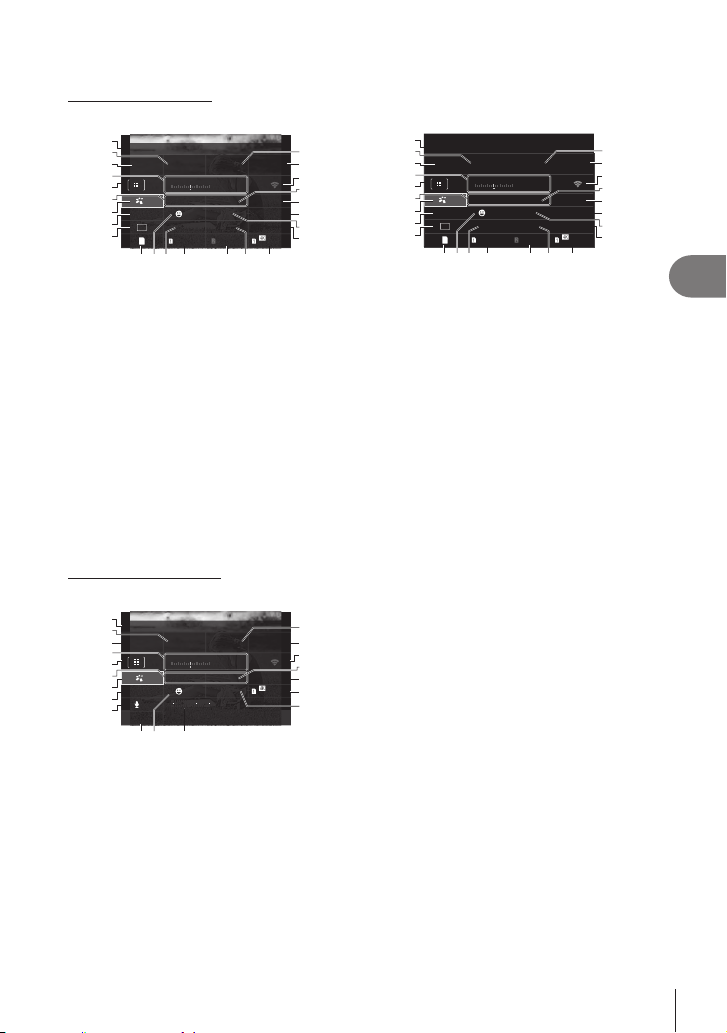
71
EN
Shooting Settings
4
Se ttings Ava ila ble in t he Supe r Cont rol/LV Super Cont rol Pane l
Photo shooting mode
LV super control panel
p
YF
1023 1:02:03
S-IS Auto
±
0.3
5400
Natural
0.0
5.6250P
CWB
Small
S-AF
4 : 3
1/
Auto
ISO
YF
60p L
-
8
Off
#
x
±
G
3
0
+
-
r
F
200
0
1
3
5
7
9
8
4
6
2
a
b
d
g
e
c
f
0
h k l nji m
Super control panel
p
YF
1023 1:02:03
±
S-IS Auto
±
0.3
Natural
0.0
5.6250P
Small
S-AF
4 : 3
1/
Auto
ISO
YF
60p L
-
8
Off
#
x
G
3
0
+
-
r
F
200
5400
CWB
0
1
3
5
7
9
8
4
6
2
a
b
d
g
e
c
f
0
h k l nji m
1 Name of the currently selected option
2 Shutter speed ...........................P. 43, 47
3 Shooting mode................................P. 43
4 Exposure compensation ...............P. 106
5 K AF target ...................................P. 77
6 K White balance .........................P. 150
7 K Picture mode ..........................P. 145
8 K AF mode ...................................P. 72
9 Drive mode (sequential shooting/
self-timer) ......................................P. 126
0 Aperture value ..........................P. 43, 45
a K ISO sensitivity .........................P. 113
b Wi-Fi/Bluetooth .............................P. 261
c K Color temperature ..................P. 150
d K Button function assignment ....P. 208
e ......................P. 123
f Flash mode ...................................P. 120
g K Image stabilizer ......................P. 136
h K Storage options ......................P. 243
i Face & Eye Detection .....................P. 88
j Metering mode ..............................P. 109
k Slot 1: K Image quality, number of
storable still pictures .....................P. 140
l Slot 2: K Image quality, number of
storable still pictures .....................P. 140
m Aspect ratio ...................................P. 144
n n Image quality, Available recording
time ...............................................P. 141
Movie recording mode
LV Super control panel
1:42:22
5400
Natural
0.0
5.6 800250
n
CWB
Mid
C-AF M-IS 1
1/
FP Auto
ISO
60p L
-
8
Off
G
3
0
01240-dB
R
+
-
P
±
0
8
L
r
1
3
5
7
9
8
4
6
2
a
b
d
e
c
f
0
g ih
1 Name of the currently selected option
2 Shutter speed .................................P. 60
3 n mode (movie exposure mode)
........................................................P. 60
4 Exposure compensation ...............P. 106
5 n AF target ....................................P. 77
6 n White balance .........................P. 150
7 n Picture mode ...........................P. 145
8 n AF mode ....................................P. 72
9 Sound Recording Level ..................P. 62
0 Aperture value ................................P. 60
a n ISO sensitivity .........................P. 113
b Wi-Fi/Bluetooth .............................P. 261
c n Color temperature ...................P. 150
d n Button function assignment ..... P. 208
e n Image quality, Available recording
time ...............................................P. 141
f nImage stabilizer ........................P. 136
g Headphone Volume ........................P. 62
h Face & Eye Detection .....................P. 88
i Recording level meter .....................P. 62
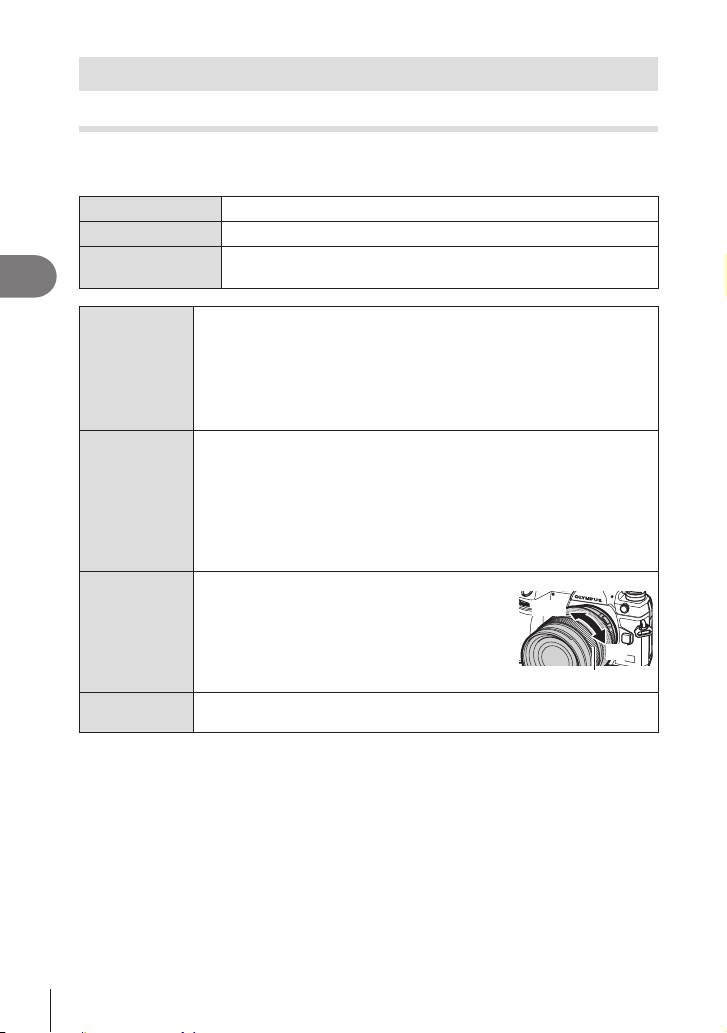
72
EN
Shooting Settings
4
Basic functions for focusing
Choosing a focus mode (KAF Mode / nAF Mode)
PASMB
n
You can select a focusing method (focus mode).
Button
AF m button n HIj
Super Control Panel
Q n KAF Mode / nAF Mode
Menu
MEN U n AF n1. AF n KAF Mode
MEN U n AF n4. Movie AF n nAF Mode
S-AF
(Single AF)
The camera focuses once when the shutter button is pressed halfway
or the AF-ON button is pressed. When the focus is locked in still
the AF target mark light up. When the focus is locked in movie recording
mode is suitable for taking pictures of still subjects or subjects with
limited movement.
C-AF
(Continuous AF)
In photo shooting mode, the camera repeats measuring the distance
between the subject and the camera and focusing while the shutter
button remains pressed halfway or while the AF-ON button is pressed.
In movie recording mode, the camera repeats focusing both before and
during recording.
This mode is suitable when the distance to the subject keeps changing.
MF
(Manual focus)
This function allows you to manually focus on
any position by operating the focus ring on the
lens.
Near
Focus ring
)
S-AF
b
The camera focuses in S-AF mode. You can adjust the focus position by
operating the focus ring on the lens.

73
EN
Shooting Settings
4
C-AF+TR
(AF tracking)
Press the shutter button halfway or press the AF-ON button to focus; the
camera then tracks and maintains focus on the current subject while the
button is held in position.
In movie recording mode, the camera keeps continues AF tracking even
if you release the button before you start recording. To stop it, press the
Q button.
When you start recording a movie while the camera is tracking the
subject, it will continue tracking.
• The AF target is displayed in red if the camera can no longer track
the subject. Release the button and then frame the subject again and
press the shutter button halfway or press the AF-ON button.
• Autofocus does not work while the AF target is displayed in red even if
the camera is tracking the subject.
• Tracking AF cannot be used with:
keystone compensation, High Res Shot, focus bracketing, focus
stacking, interval-timer photography, HDR photography, the live ND
Pre
b
(Preset MF)
The camera automatically focuses on the preset focus point when
shooting.
F
AF
(Starry Sky AF)
(only during
photo shooting)
Choose this mode for pictures of stars in the night sky. Press the AF-ON
button to focus on the stars. g “Using Starry Sky AF” (P. 74)
# [S-AFb] only appears in [nAF Mode]. To focus manually during autofocus when
taking pictures, use [KAF+MF]. g “Combined Auto and Manual Focus (K AF+MF)”
(P. 82)
# The camera may be unable to focus if the subject is poorly lit, obscured by mist or smoke,
or lacks contrast.
# When using a Four Thirds system lens, AF will not be available during movie recording.
# [AF Mode] selection is not available (P. 292) when the lens focus ring is in the MF
position and [Operative] is selected for [MF Clutch] (P. 104).
%The Fn lever can be used to quickly switch the AF mode. g “Customizing the Fn Lever
(Fn Lever Settings)” (P. 219)
%You can choose whether to focus when the shutter button is pressed halfway.
gKAF by half-
pressing a)” (P. 83)

74
EN
Shooting Settings
4
Using Starry Sky AF
1
Select [FAF] for AF mode.
2
Press the AF-ON button to initiate starry sky AF.
• To interrupt starry sky AF, press the AF-ON button again.
•
is pressed halfway.g “Changing the settings of Starry Sky AF (Starry Sky AF
Setting)” (P. 85)
• The camera displays [Starry Sky AF is Running] during starry sky AF. The in-focus
indicator (() is displayed for about two seconds after the camera focuses; if the
seconds.
3
Press the shutter button all the way down to take the picture.
# The camera will not be able to focus in bright locations.
# Starry sky AF cannot be used with Pro Capture.
# [KOrientation Linked N] (P. 97), [N Loop Settings] (P. 100), [KAF Limiter]
(P. 92), [AF Illuminator] (P. 96), [Face & Eye Detection] (P. 88), and [KAF
# Manual focus is selected when a Four Thirds lens is attached.
# Starry sky AF is available with Micro Four Thirds lenses made by OM Digital Solutions or
OLYMPUS. It cannot, however, be used with lenses with a maximum aperture over f/5.6.
For more information, visit our website.
%
Mount the camera on a tripod before taking photographs with [Accuracy] selected.
%Your choice of AF target modes (P. 77) is restricted to ySmall, AMid, and
BLarge.
%
%When [On] is selected for [Release Priority], the shutter can be released even when the
subject is not in focus.

75
EN
Shooting Settings
4
Setting a focus position for Preb
1
Select [Preb] with the AFm button, and press I N FO button.
2
Press the shutter button halfway to focus.
• Focus can be adjusted by rotating the focus ring.
3
Press the Q button.
%The distance for the preset focus point can be set with [Preset MF distance] (P. 104).
%The camera also focuses at the preset distance:
- when turned on and
- when you exit the menus to the shooting display.
Adjusting Focus Manually During Autofocus
• Before proceeding, select [On] for [K AF+MF] (P. 82). b will be displayed in [S-AF],
[C-AF], [C-AF+TR], and [FAF] modes.
1
Choose a focus mode marked with an b icon (P. 72).
• When recording movies, choose [S-AFb].
2
Press the shutter button halfway to focus using autofocus.
• In [FAFb] mode, press the AF-ON button to initiate starry sky AF.
3
Keeping the shutter button pressed halfway, rotate the focus ring to adjust
focus manually.
• To refocus using autofocus, release the shutter button and press it halfway again.
• Manual focus adjustment during autofocus is not available in [FAFb] mode.
• Manual focus adjustment during autofocus is available via the focus ring on M.ZUIKO
PRO (Micro Four Thirds PRO) lenses. For information on other lenses, see our
website.
4
Press the shutter button the rest of the way down to take the picture.

76
EN
Shooting Settings
4
Choosing a Focus Target (AF Target Point)
PASMB
n
The frame showing the location of the focus point is referred to as the “AF target”. You
can position the target over your subject. At default settings, the multi selector is used
to position the AF target.
1
Use the multi selector to position the AF target.
Multi selector
• The AF target is displayed at the start of the operation.
• To select the center AF target, press the multi selector
or press and hold the Q button.
• You can choose whether AF target selection “wraps
around” the edges of the display (P. 100).
f
SmallSmall
AF target
2
Take pictures.
• The AF target selection display will clear from the monitor when the shutter button is
pressed halfway.
• The AF frame is displayed in place of the selected AF target.
%You can reposition the AF target during focusing when [C-AF] or [C-AFb] is selected in
still photography mode.
%You can also reposition the AF target during movie recording.
%The size and number of the AF target changes depending on shooting settings.
%When [On] is selected for [AF Targeting Pad] (P. 101), you can reposition the AF target
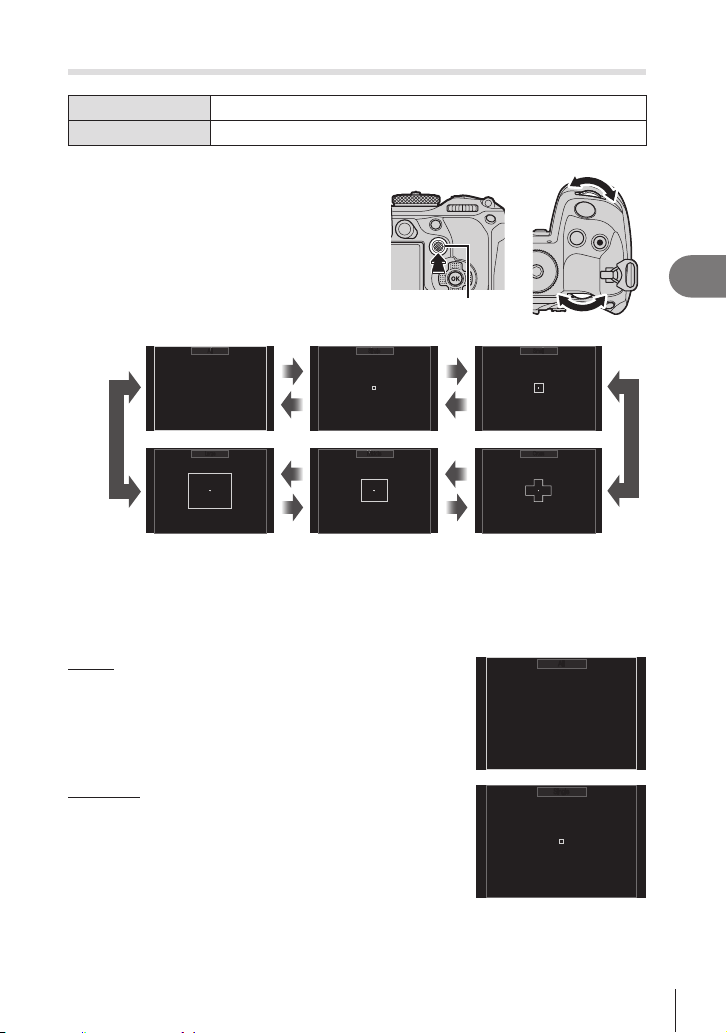
77
EN
Shooting Settings
4
Choosing an AF Target Mode (AF Target Mode)
Button
S (kept pressed) and k
Super Control Panel
Q n AF Target Mode
1
Keep the multi selector pressed while
rotating the front or rear dial.
+
Multi selector
• The camera cycles through AF target modes as shown.
f
AllAll
f
Sin
g
leSin
g
le
f
SmallSmall
f
CrossCross
f
MiddleMiddle
f
Lar
g
eLar
g
e
• The only options available when FAF is selected are ySmall, AMiddle, and
BLarge.
• The only options available during movie recording are ySmall, AMiddle, BLarge,
and oAll.
• The AF target modes to be displayed can be selected in [KAF Target Mode Settings]
(P. 79).
o All
The camera chooses the target used for focus from all
available targets.
• The camera chooses from 1053 (39 × 27) targets during still
photography and from 741 (39 × 19) targets in movie mode.
f
AllAll
M Single
Select a single focus target.
f
Sin
g
leSin
g
le
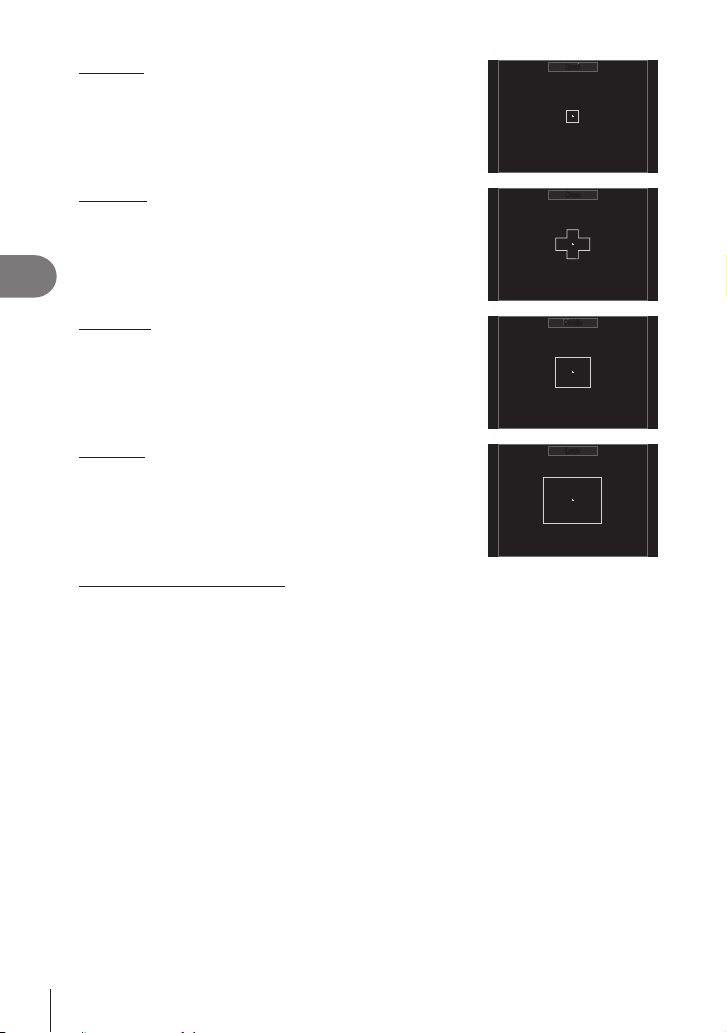
78
EN
Shooting Settings
4
y Small
Select a small-sized group of targets. The camera chooses
the target used for focus from within the selected group.
f
SmallSmall
z Cross
Select a group of targets arranged in a cross. The camera
chooses the target used for focus from within the selected
group.
f
CrossCross
A Middle
Select a middle-sized group of targets. The camera
chooses the target used for focus from within the selected
group.
f
MiddleMiddle
B Large
Select a large-sized group of targets. The camera chooses
the target used for focus from within the selected group.
f
Lar
g
eLar
g
e
C C1 - C C4 Custom Target
You can change the size of the AF target and the step (the distance it moves at one
time). Custom target modes can be selected when there is a check (v) next to a
custom target in [KAF Target Mode Settings] (P. 79).
2
Release the multi selector when the desired mode is displayed.
• AF target mode options will no longer be displayed.
%The number of AF targets available may be reduced depending on shooting settings.
%The AF target display can be accessed by pressing the multi selector. The multi selector
SCenter Button] (P. 218).
%Separate AF target modes can be selected according to camera orientation.
g “Matching AF Target Selection to Camera Orientation (KOrientation Linked N)”
(P. 97)
%The following focus settings can be recalled simultaneously using the Fn lever. Separate
settings can be assigned to Positions 1 and 2. Use this option to quickly adjust settings
according to shooting conditions.
[AF Mode] (P. 72), [AF Target Mode] (P. 77), and [AF Target Point] (P. 76)
The FnKFn Lever Function] item (P. 220) or the
[nFn Lever Function] item (P. 220).
%You can adjust AF target settings for [C-AF]. g [KC-AF Center Priority] (P. 86)
%Separate options can be selected for still photography and movie mode.
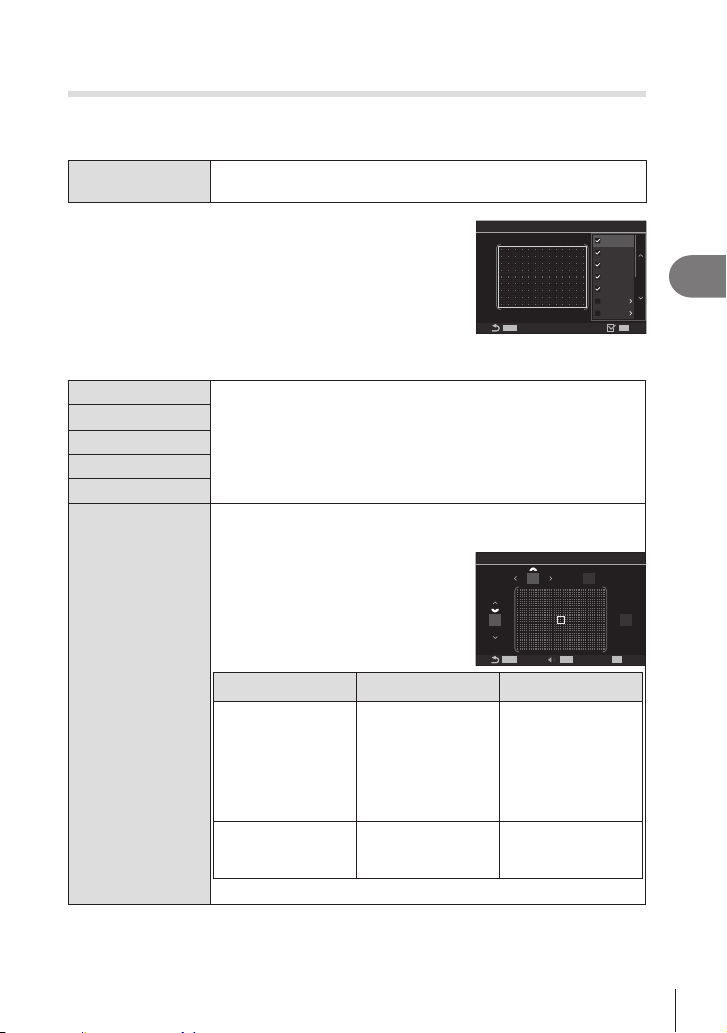
79
EN
Shooting Settings
4
Setting the options for AF target modes
(KAF Target Mode Settings)
PASMB
n
Specify which options are displayed when setting the KAF Target Mode.
Menu
MEN U n AF n5. AF Target Settings & Operations n KAF Target
Mode Settings
1
Select the AF target modes that you want to have
displayed as options and put a check (v) next to
each of them.
• Select an option using FG and press the Q button to
put a check (v) next to it. To remove the check, press
the Q button again.
MENU
o
All
M
Single
z
Cross
A
Mid
C
C1
C
C2
B
Large
MENU
OK
K
AF Target Mode Settings
KAF Target Mode Settings
screen
oAll
If you put a check (v) next to an option, it will be displayed as the
option when selecting the AF target.
ISingle
zCross
AMid
BLarge
C C1 - C C4
If you put a check (v) next to an option, it will be displayed as the
option when selecting the AF target mode.
Press I
AF target and the step (the distance it
moves at one time).
MENU
C
C1
13
13
MENU
INFO
OK
Size Step
Item Horizontal Vertical
Size
12 types (1 / 3 / 5 / 7
/ 9 / 11 / 15 / 19 / 23 /
27 / 33 / 39)
Switch using HI or
the front dial.
10 types (1 / 3 / 5 /
7 / 9 / 11 / 15 / 19 /
23 / 27)
Switch using FG
or the rear dial.
Step
8 types (1 to 8)
Switch using HI or
the front dial.
5 types (1 to 5)
Switch using FG
or the rear dial.
Press the IN FO button to switch between Size and Step.
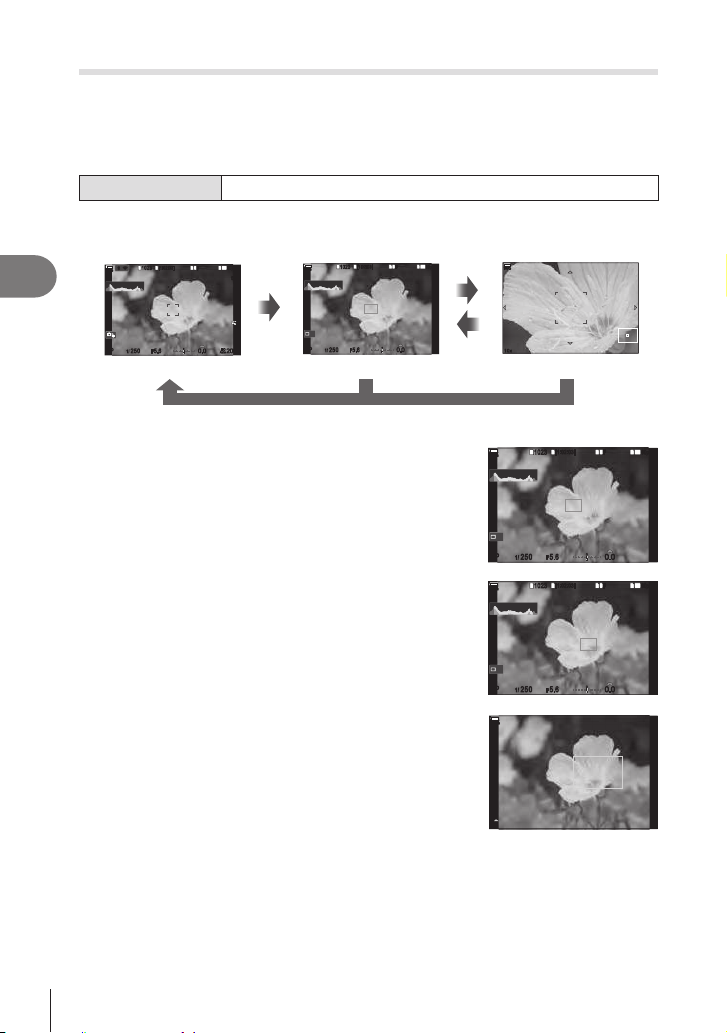
80
EN
Shooting Settings
4
Zoom frame AF/Zoom AF (Super Spot AF)
PASMB
n
You can zoom in on the display during shooting. For greater precision during focusing,
zoom in on the focus area. At higher zoom ratios, you can focus on areas smaller than
the standard focus target. You can reposition the focus area as desired during zoom.
Button
A button to which a has been assigned
# Before you will be able to use Super Spot AF, you must use [Button Settings] (P. 208) to
assign [a] (P. 210) to a camera control.
1
10231023
P
1
/
250
P
1
/
F
250 5.65.6
1
1
[
1
:
02
:
03
][
1
:
02
:
03
]
FF
60p60p L
-
8L
-
8
S
-
AFS
-
AF
33
200200
L
1
4K
ISO
Auto
ISO
Auto
F
00
+
-
0.00.0
100
%
100
%
rr
O
O
Shooting display
1
10231023
P
1
/
250
P
1
/
F
250 5.65.6
1
1
[
1
:
02
:
03
][
1
:
02
:
03
]
FF
60p60p L
-
8L
-
8
L
1
4K
F
00
+
-
0.00.0
100
%
100
%
Off
Zoom frame AF display
10x10x
100
%
100
%
Zoom AF display
a
a
a
a
(Press and hold) / Q
1
Press the button to which [a] (magnify) is
assigned.
• The zoom frame will be displayed.
1
10231023
P
1
/
250
P
1
/
F
250 5.65.6
1
1
[
1
:
02
:
03
][
1
:
02
:
03
]
FF
60p60p L
-
8L
-
8
L
1
4K
F
00
+
-
0.00.0
100
%
100
%
Off
2
Position the frame using the multi selector.
• To re-center the frame, press the multi selector or press
and hold the Q button.
• The frame can also be positioned using the arrow pad
(FGHI).
1
10231023
P
1
/
250
P
1
/
F
250 5.65.6
1
1
[
1
:
02
:
03
][
1
:
02
:
03
]
FF
60p60p L
-
8L
-
8
L
1
4K
F
00
+
-
0.00.0
100
%
100
%
Off
3
Adjust the size of the zoom frame to choose the
zoom ratio.
• Press the IN FO button and then use the FG buttons
or the front or rear dial to adjust the size of the zoom
frame.
• Press the Q button to accept and exit.
3 x
100
%
100
%

81
EN
Shooting Settings
4
4
Press the button to which [a] is assigned once
more.
•
display.
• Use the front or rear dial to zoom in or out.
• Use the multi selector to scroll the display.
• Use FGHI to scroll the display.
3x3x
100
%
100
%
• If the shooting mode is M (manual) or B (bulb) and [ISO
Auto] is not selected, you can press the IN FO button
during zoom to choose aperture or shutter speed.
• Press the a button to return to the zoom frame.
• Press the Q button to end focus zoom.
• You can also end focus zoom by pressing and holding
the a button.
Bulb
F
5.6Bulb 5.6
F
100
%
100
%
Exposure adjustment display
for modes
M
and
B
#
# Zoom AF does not work during zoom display and when using a Four Thirds system lens.
# When [nDigital Tele-converter] is [On] in movie recording mode, camera cannot zoom.
%Pictures can also be taken during zoom frame AF display and zoom AF display.
%Touch controls can be used for focus zoom. g “Shooting with touch screen operations”
(P. 41)
%
halfway to focus. g “Choosing What Happens When the Shutter Button Is Pressed
During Live View Zoom (LV Close Up Mode)” (P. 223)

82
EN
Shooting Settings
4
Functions for conguring how to focus
Combined Auto and Manual Focus (K AF+MF)
PASMB
n
After focusing using autofocus, you can adjust focus manually by keeping the shutter
button pressed halfway and rotating the focus ring. Switch from auto to manual focus at
%The procedure varies with the AF mode selected.
Menu
MENU n AF n1. AF n KAF+MF
On
Enable manual focus adjustment in autofocus mode. b is displayed next to
[S-AF], [C-AF], [C-AF+TR], or [FAF].
• When [S-AFb] is selected, you can keep the shutter button pressed halfway or
keep the AF-ON button pressed after focusing using single AF and adjust focus
manually. Alternatively, you can switch to manual focus by rotating the focus ring
while the camera is focusing. Focus can also be adjusted manually while the
shutter is open and during burst photography.
• When [C-AFb] or [C-AF+TRb] is selected, you can switch to manual focus
by rotating the focus ring while the camera is focusing in continuous AF and
continuous tracking AF modes. Press the shutter button halfway or press the AF-
ON button a second time to refocus using autofocus. Focus can also be adjusted
manually while the shutter is open and during burst photography.
• When [FAFb] is selected, you can focus manually after focusing or before
initiating focus using autofocus.
O Manual focus adjustment disabled during autofocus.
# jSH1] or [ProCap SH1]
mode.
%Autofocus with manual focus is also available when autofocus is assigned to other camera
controls. g “Changing the roles of buttons (Button Settings)” (P. 208)
%The lens focus ring can be used to interrupt autofocus only when M.ZUIKO PRO (Micro
Four Thirds PRO) lenses are used. For information on other lenses, visit our website.
%In
B
(bulb) mode, manual focus is controlled by the option selected for [Bulb/Time
Focusing] (P. 173).

83
EN
Shooting Settings
4
Conguring the AF operation when the shutter button is pressed
(KAF by half-pressing a)
PASMB
n
You can choose whether the camera focuses when the shutter button is pressed
halfway.
Menu
MENU n AF n1. AF n KAF by half-pressing a
S-AF
Set the AF operation for when the AF mode is [S-AF].
[No]: The camera does not start AF operation when the shutter
button is pressed halfway.
[Yes]: The camera starts AF operation when the shutter button
is pressed halfway. If you press the shutter button halfway while
pressing the AF-ON button, autofocus will be continued.
C-AF/C-AF+TR
Set the AF operation for when the AF mode is [C-AF] or [C-AF+TR].
[No]: The camera does not start AF operation when the shutter
button is pressed halfway.
[Yes]: The camera starts AF operation when the shutter button
is pressed halfway. If you press the shutter button halfway while
pressing the AF-ON button, autofocus will be continued.
Autofocus using the AF-ON button
PASMB
n
The camera starts AF operation when you press the AF-ON button. Autofocus ends
when you release the AF-ON button. When you press the AF-ON button while the
camera is performing autofocus because the shutter button has been pressed halfway,
autofocus will be continued.
Button AF-ON button
%If [C-AF] is selected for [nAF Mode], the camera operates in S-AF mode when the
AF-ON button is pressed during movie recording. If [C-AF+TR] is selected, the camera
performs AF tracking when the AF-ON button is pressed.

84
EN
Shooting Settings
4
Using Autofocus in Manual Focus Mode (e in MF mode)
PASMB
n
AF-ON button, even if the AF mode is [MF] or [Preb].
Menu
MENU n AF n1. AF n e in MF mode
No
If the AF mode is [MF] or [Preb], the camera does not focus with
autofocus even when the AF-ON button is pressed.
Yes
If the AF mode is [MF] or [Preb], the camera focuses with
autofocus in [S-AF] mode when the AF-ON button is pressed.
Conguring camera operation when it cannot focus on the subject
(Release Priority)
PASMB
n
You can choose whether the camera takes a picture when it cannot focus on the
subject with autofocus.
Menu
MENU n AF n1. AF n Release Priority
S-AF
Set the camera operation for when the AF mode is [S-AF] and it
cannot focus on the subject with autofocus.
[O]: If the camera cannot focus on the subject with autofocus, the
shutter cannot be released even when the shutter button is pressed
[On]: The shutter is released when the shutter button is pressed
fully, even if the camera cannot focus on the subject with autofocus.
C-AF/C-AF+TR
Set the camera operation for when the AF mode is [C-AF] or
[C-AF+TR] and it cannot focus on the subject with autofocus.
[O]: If the camera cannot focus on the subject with autofocus, the
shutter cannot be released even when the shutter button is pressed
[On]: The shutter is released when the shutter button is pressed
fully, even if the camera cannot focus on the subject with autofocus.

85
EN
Shooting Settings
4
Changing the settings of Starry Sky AF (Starry Sky AF Setting)
PASMB
n
Menu
MENU n AF n1. AF n Starry Sky AF Setting
AF Priority
[Accuracy]: Prioritize focus accuracy over speed. Use a tripod.
[Speed]: Prioritize focus speed over accuracy.
AF Operation
[a]: Focuses with autofocus while the shutter button is pressed
halfway.
[e]: Focuses with autofocus while the AF-ON button is pressed.
[eStart/Stop]: Focusing starts when the AF-ON button is
pressed. Press again to stop focusing.
Release Priority
[O]:
If [AF Operation] is set to [a], the shutter cannot be released even
when the shutter button is pressed fully, unless the camera is in
focus.
If [AF Operation] is set to [e] and the AF-ON button is pressed,
the shutter cannot be released even when the shutter button is
pressed fully, unless the camera is in focus. If the AF-ON button
is not pressed, you can start shooting at any time by pressing the
shutter button fully.
If [AF Operation] is set to [eStart/Stop] and Starry Sky AF is
being executed, shooting does not start even when the shutter
button is pressed fully. If Starry Sky AF is not being executed, you
can start shooting at any time by pressing the shutter button fully.
[On]:
Shooting starts when the shutter button is pressed fully, regardless
of the setting of [AF Operation].
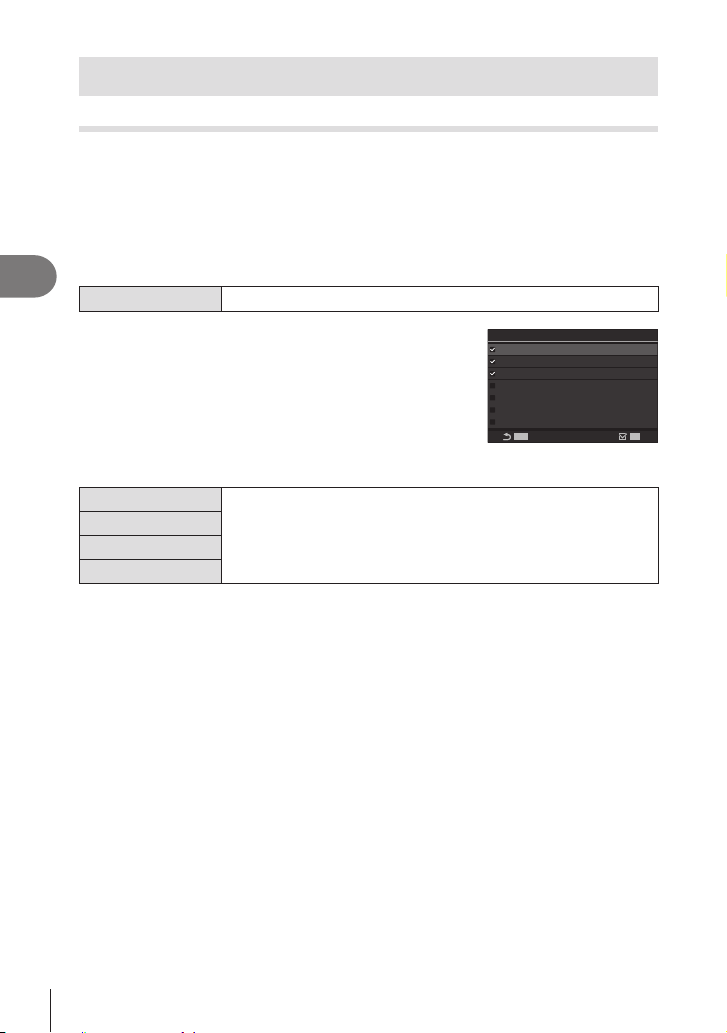
86
EN
Shooting Settings
4
Functions for customizing AF operation to t the subject
C-AF Center Target Priority (KC-AF Center Priority)
PASMB
n
When focusing using group-target AF in [C-AF] and [C-AFb] modes, the camera
always assigns priority to the center target in the selected group for a repeated series
of focus operations. Only if the camera is unable to focus using the center focus target
will it focus using the surrounding targets in the selected focus group. This helps
you track subjects that are moving quickly but relatively predictably. Center priority is
recommended in most situations.
Menu
MENU n AF n3. AF n KC-AF Center Priority
1
Select an AF target mode for which the camera
always assigns priority to the center target for a
repeated series of focus operations and put a check
(v) next to it.
• Select an option using FG and press the Q button to
put a check (v) next to it.
To remove the check, press the Q button again.
MENU
C
C3
C
C4
MENU
OK
z
Cross
A
Mid
B
Large
C
C1
C
C2
K
C-AF Center Priority
KC-AF Center Priority
setting screen
z Cross
If you put a check (v) next to an option, the camera always assigns
priority to the center target for a repeated series of focus operations
when the AF target mode is used.
A Mid
B Large
C C1 - C C4
# C
C1 -
C
C4 can only be checked (
v
) when either the horizontal or vertical [Size]
KAF Target Mode Settings] (P. 79) is 5 or larger.

87
EN
Shooting Settings
4
C-AF Tracking Sensitivity (KC-AF Sensitivity / nC-AF Sensitivity)
PASMB
n
Choose how rapidly the camera responds to changes in the distance to the subject
while focusing with [C-AF], [C-AFb], [C-AF+TR] or [C-AF+TRb] selected for
[KAF Mode], or with [C-AF] or [C-AF+TR] selected for [nAF Mode]. This can help
autofocus track a quickly-moving subject or prevent the camera refocusing when an
object passes between the subject and the camera.
Menu
MENU n AF n1. AF n KC-AF Sensitivity
MENU n AF n4. Movie AF n nC-AF Sensitivity
• KC-AF Sensitivity]) / three levels ([nC-AF Sensitivity]) of
tracking sensitivity.
• The higher the value, the higher the sensitivity. Choose positive values for subjects that
suddenly enter the frame, that are moving rapidly away from the camera, or that change
speed or stop suddenly while moving toward or away from the camera.
• The lower the value, the lower the sensitivity. Choose negative values to prevent the
camera focusing on the background when you are unable to keep the subject in the AF
target.
C-AF Focus Speed (nC-AF Speed)
PASMB
n
Choose how quickly the camera responds to changes to the distance to subject when
[C-AF] or [C-AF+TR] is selected for focus mode. This can be used to adjust the time
the camera takes to refocus when, for example, you switch subjects.
Menu
MENU n AF n4. Movie AF n nC-AF Speed
• Choose from three focus speed levels.
•
to a new subject.
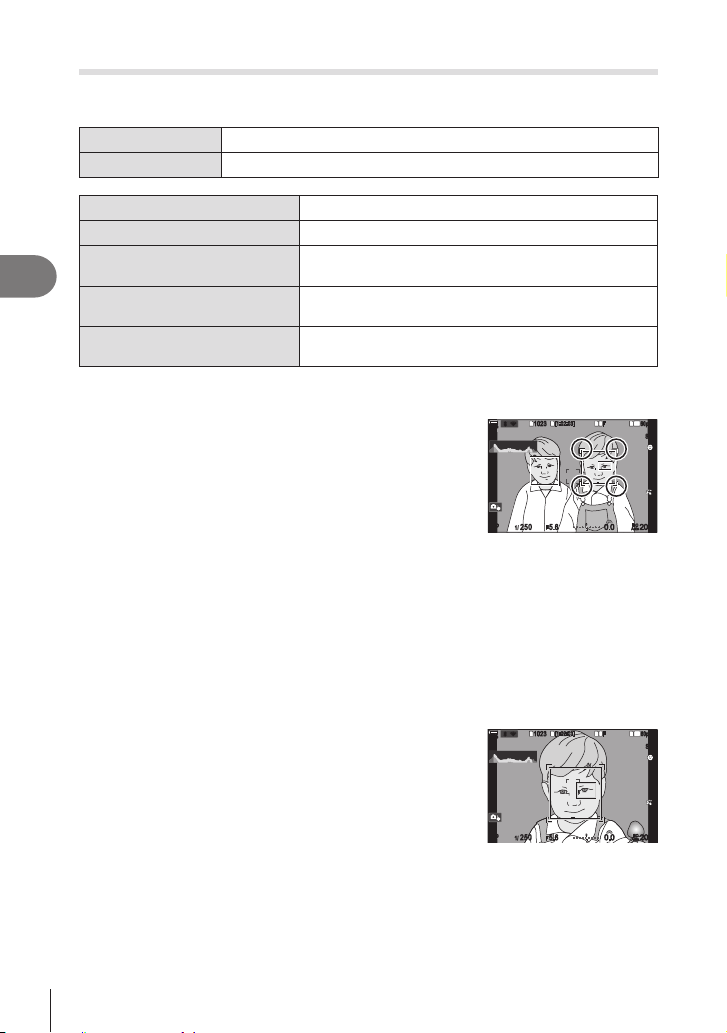
88
EN
Shooting Settings
4
Face priority AF/Eye priority AF (Face & Eye Detection)
The camera automatically detects and focuses on the faces or eyes of portrait
subjects.
Super Control Panel
Q n Face & Eye Detection
Menu
MEN U n AF n2. AF n Face & Eye Detection
I
Face Detection On The camera detects and focuses on faces.
O
Ii
Face & Eye Detection On
The camera detects faces and focuses on the eye
closest to the camera.
IiL
Face & Left Eye
Detection On
The camera detects faces and focuses on the left eye.
IiR
Face & Right Eye
Detection On
The camera detects faces and focuses on the right eye.
Se le c ting a fa ce t o foc us on
1
Point the camera at your subject.
• When the camera detects faces, a white frame appears
on the face which is focused on. Gray frames appear
on other faces. On the face which is focused on, an
additional frame appears surrounding the white frame.
• When eye priority is on, white frames also appear on
the eyes of the face which is focused on. The frames on
the eyes can be hidden from the menu (P. 91).
• When faces/eyes of multiple persons are detected,
choose the face to focus on by pressing the button to
which [IFace Selection] (P. 212) has been assigned
in [Button Settings] (P. 208). When you press the
button, a face that is closest to the AF target is selected.
Switch faces by rotating the front or rear dial while
holding the button pressed. Release the button to
ii
1
10231023
P
1
/
250
P
1
/
F
250 5.65.6
1
1
[
1
:
02
:
03
][
1
:
02
:
03
]
FF
60p60p L
-
8L
-
8
S
-
AFS
-
AF
33
L
1
4K
F
00
+
-
0.00.0
100
%
100
%
rr
O
O
200200
ISO
Auto
ISO
Auto
The face chosen for focus
is indicated by white double
brackets.
• The face used for focus can also be selected via touch controls (P. 41).
2
Press the shutter button halfway to focus.
%You can also press the AF-ON button to focus
(P. 83).
• The area of the subject used for focus is indicated by a
green border.
• If the camera detects the subject’s eyes, it will focus on
an eye.
• Face and eye priority are also available in [MF]
(P. 72). Faces and eyes detected by the camera
are indicated by white frames. Exposure will be set
according to the value metered for the center of the
face.
ii
1
10231023
P
1
/
250
P
1
/
F
250 5.65.6
1
1
[
1
:
02
:
03
][
1
:
02
:
03
]
FF
60p60p L
-
8L
-
8
S
-
AFS
-
AF
33
L
1
4K
F
00
+
-
0.00.0
100
%
100
%
rr
O
O
200200
ISO
Auto
ISO
Auto

89
EN
Shooting Settings
4
3
Press the shutter button the rest of the way down to shoot.
• When set to [p] (Digital ESP metering) (P. 109), metering is performed with priority
given to faces.
# You may be unable to use [Face & Eye Detection] depending on the setting of [Subject
#
detect the face.
# This function is disabled when the AF target mode (P. 77) is ISingle or ySmall, the
metering mode (P. 109) is C and [NSpot Metering] (P. 112)is being used.
# This function is disabled when the [KAF Mode] (P. 72) is set to [FAF] or [FAFb].
%
[C-AFb] in still photography mode.
Assigning foc us priorit y t o but t ons (KFa c e & Eye AF But t on)
PASMB
n
the AF-ON button does not make the camera focus on faces and eyes even when
[K
Menu
MEN U n AF n2. AF n KFace & Eye AF Button
a
Select the AF operation for when the shutter button is pressed
halfway.
[I Priority]: When the camera detects faces and/or eyes, it
focuses on faces and/or eyes.
[N Priority]: Even when the camera detects faces and/or
eyes, the camera focuses giving priority to the selected AF target
positions.
e
Select the AF operation for when the AF-ON button is pressed.
[I Priority]: When the camera detects faces and/or eyes, it
focuses on faces and/or eyes.
[N Priority]: Even when the camera detects faces and/or
eyes, the camera focuses giving priority to the selected AF target
positions.

90
EN
Shooting Settings
4
Tracking Focus on Selected Subjects (Subject Detection)
PASMB
n
to focus on the driver or cockpit of a fast-moving subject such as a race car or airplane.
Menu
MEN U n AF n2. AF n Subject Detection
D
The camera detects cars or motorcycles. It tracks focus on such
driver.
E
The camera detects planes and helicopters. It tracks focus on such
elements as the fuselage or cockpit.
F
The camera detects trains. It tracks focus on such elements as the
cars or driver’s compartment.
G
The camera detects birds. It tracks focus on such elements as the
head or eyes.
H
The camera detects cats, dogs and similar animals. It tracks focus
on such elements as the head or eyes.
O Tracking subject selection disabled.
#
# During photo shooting, this function is disabled when [KAF Mode] is set to [FAF] or
[FAFb].
During movie recording, this function is available only when [nAF Mode] is set to
[C-AF+TR].

91
EN
Shooting Settings
4
Ta k ing Pic t ure s Using [Subje c t De t e c t ion]
1
Select the [KAF Mode] or the [nAF Mode].
• For photo shooting, select a setting other than [FAF] or [FAFb].
• For movie recording, select [C-AF+TR].
2
Point the camera at your subject.
• When the camera detects subjects, a white frame
appears on the subject which is focused on. Gray
frames appear on other subjects. On the subject which
is focused on, an additional frame appears surrounding
the white frame.
• If the white frame indicating a subject to be focused on
does not appear, change the size and/or position of the
AF target so that it covers the subject.
When the AF target mode is o All, the subject
closest to the center of the display is focused on.
•
such as the driver or the cockpit, smaller white frames
also appears on them. These frames can be hidden
from the menu (P. 91).
AF Limit AF Limit
1
10231023
P
1
/
250
P
1
/
F
250 5.65.6
1
1
[
1
:
02
:
03
][
1
:
02
:
03
]
FF
60p60p L
-
8L
-
8
S
-
AFS
-
AF
33
200200
L
1
4K
ISO
Auto
ISO
Auto
F
00
+
-
0.00.0
100
%
100
%
rr
O
O
DD
3
Press the shutter button halfway to focus.
• You can also press the AF-ON button to focus (P. 83).
• When the camera focuses on a subject, a green frame appears on the focus position.
•
focuses on them.
4
Press the shutter button the rest of the way down to take the picture.
#
# The camera may fail to detect the subject depending on its type or on shooting conditions.
Conguring the frame displays for detected eyes
(Eye Detection Frame)
PASMB
n
You can choose whether to display small frames when the camera detects small parts
such as the eyes and cockpits.
Menu
MEN U n AF n2. AF n Eye Detection Frame
O
Frames are not displayed on small parts such as the eyes or
cockpits.
On Frames are displayed on small parts such as the eyes or cockpits.
•
elements such as the cockpit when they are detected.
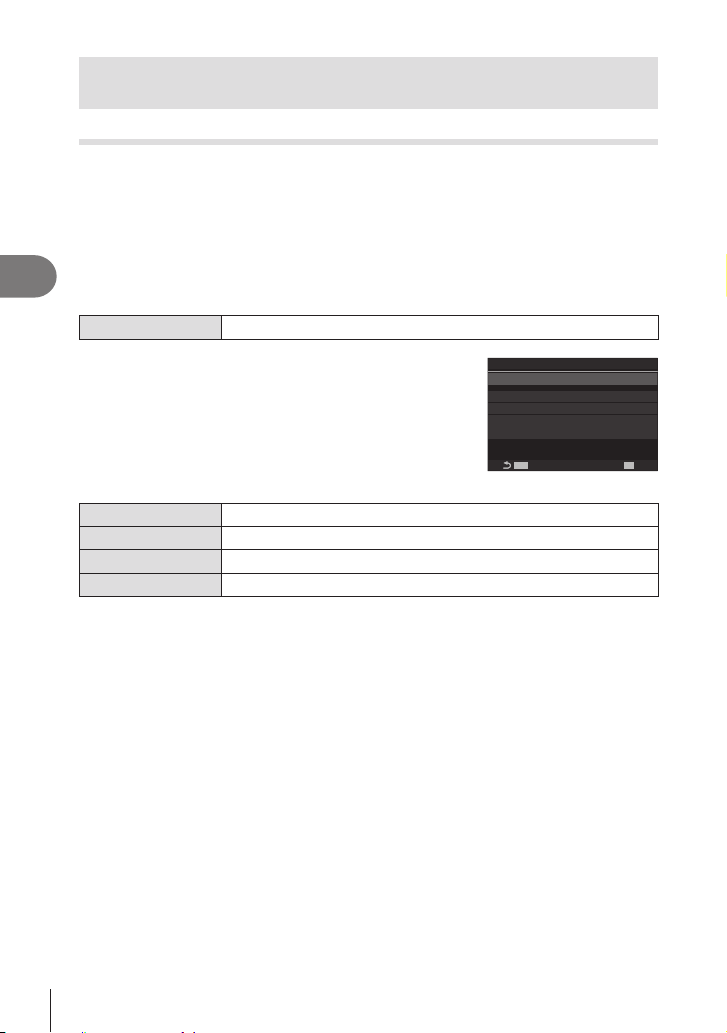
92
EN
Shooting Settings
4
Functions for changing camera operation regarding
focus
Lens Focus Range (KAF Limiter)
PASMB
n
situations in which an obstacle presents itself between the subject and the camera
during the focus operation, causing drastic changes in focus. You can also use it to
prevent the camera focusing on foreground objects when shooting through a fence,
window, or the like.
Using the se t t ings saved in [AF Lim ite r]
Menu
MEN U n AF n3. AF n KAF Limiter
1
Select [AF Limiter] using FG and press the Q
button.
2
Select [On1] / [On2] / [On3] using FG and press
the Q button.
MENUMENU
OK
50.0~999.9m
10.0~999.9m
5.0~999.9m
K
AF Limiter
Distance for On1
Distance for On2
Distance for On3
Release Priority On
OffAF Limiter
KAF Limiter setting screen
O The camera does not use the saved range of focusing distances.
On1 The camera uses the range saved in [Distance for On1].
On2 The camera uses the range saved in [Distance for On2].
On3 The camera uses the range saved in [Distance for On3].
3
Return to the KAF Limiter setting screen.
# AF Limiter is not available in the following cases.
- When the focus limiter is enabled on the lens
- When using focus bracketing
- While in the movie mode or recording a movie
- When [FAF] or [FAFb] is selected for focus mode

93
EN
Shooting Settings
4
Conguring [AF Limiter]
1
• Select an option using FG and press the Q button to
display the setting menu.
• Press the Q button again to return to the KAF Limiter
setting screen.
MENUMENU
OK
50.0~999.9m
10.0~999.9m
5.0~999.9m
K
AF Limiter
Distance for On1
Distance for On2
Distance for On3
Release Priority On
On1AF Limiter
Distance for On1
Set the range of focusing distances to be used when [On1] is
selected.
Change the number with FG. Use HI to move between digits.
[000.0] – [999.9 m/ft]
Distance for On2
Set the range of focusing distances to be used when [On2] is
selected.
Change the number with FG. Use HI to move between digits.
[000.0] – [999.9 m/ft]
Distance for On3
Set the range of focusing distances to be used when [On3] is
selected.
Change the number with FG. Use HI to move between digits.
[000.0] – [999.9 m/ft]
Release Priority
[O]: Complies to the [Release Priority] (P. 84) setting.
[On]: The shutter can still be released if the camera is unable to
#
only.

94
EN
Shooting Settings
4
C-AF Lens Scanning (KAF Scanner)
PASMB
n
Choose whether the camera performs a focus scan. If the camera is unable to focus,
it will scan for the focus position by cycling the lens from the minimum focus distance
when [C-AF], [C-AF+TR], [C-AFb], or [C-AF+TRb] is selected for [KAF Mode]
(P. 72).
Menu
MEN U n AF n3. AF n KAF Scanner
O
The camera will not scan if unable to focus. This prevents focus
changing to such an extent that you lose sight of your subject when
attempting to track small objects and the like.
On
When unable to focus, the camera scans only once. The camera will
not scan again as long as the focus operation continues.
• Regardless of the option selected, the camera will scan once if unable to focus when [S-
AF] or [S-AFb] is selected for [KAF Mode].

95
EN
Shooting Settings
4
Fine-Tuning Autofocus (KAF Focus Adjustment)
PASMB
n
Menu
MEN U n AF n3. AF n KAF Focus Adjustment
#
prevent the camera focusing normally.
# b] modes.
Using the sa ved focus adjust m e nt value
1
Select [AF Focus Adjustment] using FG and
press the Q button.
2
Select [On] using FG and press the Q button.
MENUMENU
OK
±0
K
AF Focus Adjustment
AF Focus Adjustment
Fine-tuning Value
Off
KAF Focus Adjustment
setting screen
O The camera does not use the saved focus adjustment value.
On The camera uses the saved focus adjustment value.
3
Return to the KAF Focus Adjustment setting screen.
Conguring [AF Focus Adjustment]
1
• Select an option using FG and press the Q button to
display the setting menu.
• Press the Q button again to return to the KAF Focus
Adjustment setting screen.
MENUMENU
OK
±0
K
AF Focus Adjustment
AF Focus Adjustment
Fine-tuning Value
On
Fine-tuning Value
steps.
[-20] – [±0] – [+20]
%You can zoom in on the display by using the front dial or R button to check the results.
%You can take a test picture to check the results by pressing the shutter button before
pressing the Q button.

96
EN
Shooting Settings
4
AF Illuminator Autofocus Assist (AF Illuminator)
PASMB
n
The AF illuminator lights to assist the focus operation when lighting is poor.
Menu
MEN U n AF n2. AF n AF Illuminator
On The illuminator lights during autofocus if the subject is poorly lit.
O The illuminator does not light even if the subject is poorly lit.
# To use the AF illuminator during silent photography, you will need to change the option
selected for [Silents Settings] (P. 132).
AF Target Display Mode (AF Area Pointer)
PASMB
n
In autofocus mode, the position of the subject on which the camera has focused is
shown by a green focus target. This item controls the display of the focus target.
Menu
MEN U n AF n2. AF n AF Area Pointer
O The focus target is not displayed.
On1
On2
After the camera focuses, cluster AF targeting is enabled and the
camera will display AF targets for all areas that are in focus while the
shutter button is pressed halfway or the AF-ON button is pressed.
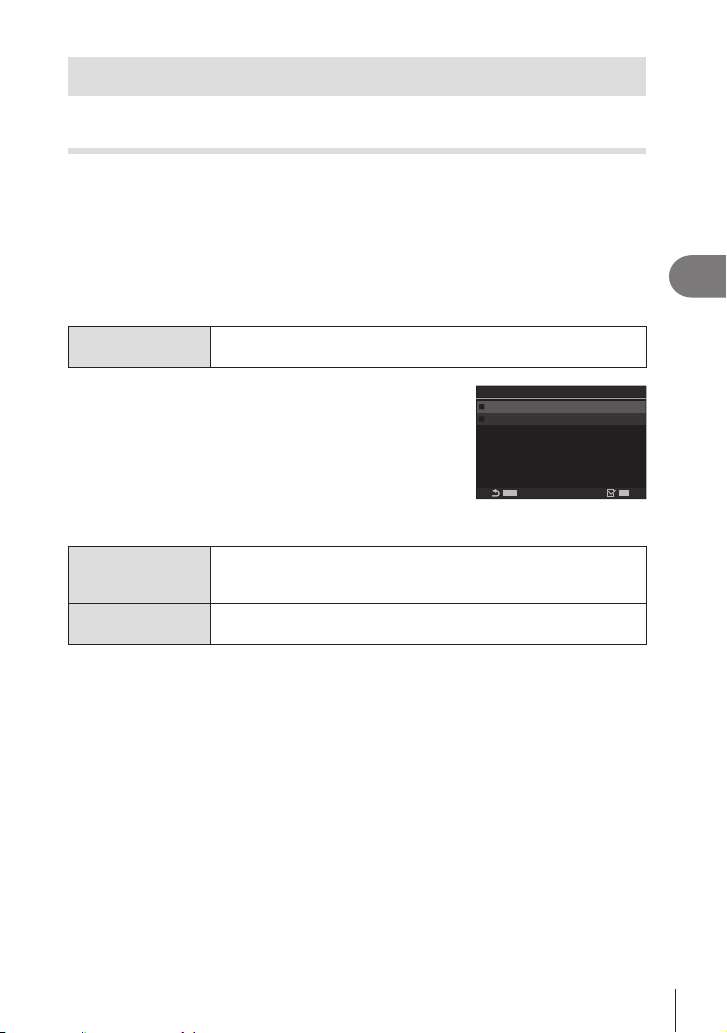
97
EN
Shooting Settings
4
Functions for setting the focusing position
Matching AF Target Selection to Camera Orientation
(KOrientation Linked N)
PASMB
n
automatically when it detects that it has been rotated between landscape (wide)
or portrait (tall) orientations. Rotating the camera changes the composition and
consequently also the position of the subject in the frame. The camera can store the
AF target mode and AF target position separately according to camera orientation.
When this option is active, [KN Set Home] (P. 98) can be used to store separate
home positions for landscape and portrait orientations.
Menu
MEN U n AF n5. AF Target Settings & Operations n
KOrientation Linked N
1
Select a function with which you want to save
orientations, and put a check (v) next to it.
• Select an option using FG and press the Q button to
put a check (v) next to it.
To remove the check, press the Q button again.
MENUMENU
OK
K
Orientation Linked
N
AF Target Mode
AF Target Point
KOrientation Linked N
setting screen
AF Target Mode
When you put a check (v) next to this, the camera saves separate
AF target modes (e.g., oAll, ySmall) for landscape and portrait
orientations.
AF Target Point
When you put a check (v) next to this, the camera saves separate
AF target positions for landscape and portrait orientations.
2
The display returns to the KOrientation Linked N setting screen.
3
Press the MEN U button to return to shooting screen.
4
orientation and then the other.
• Separate settings are stored for landscape orientation, portrait orientation with the
camera rotated to the right, and portrait orientation with the camera rotated to the left.
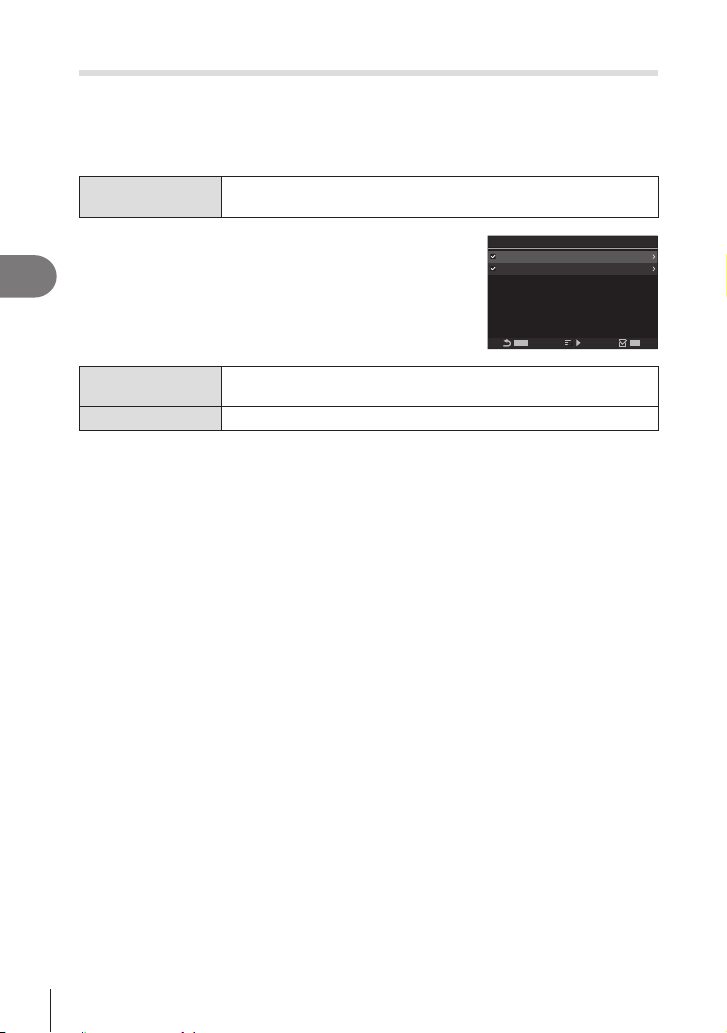
98
EN
Shooting Settings
4
Choosing the AF Home Position (KN Set Home)
PASMB
n
Choose the home position for the [NHome] feature. The [NHome] feature lets you
recall a previously-saved “home position” for AF target at the touch of a button. This
item is used to choose the home position.
Menu
MEN U n AF n5. AF Target Settings & Operations n KN Set
Home
1
Select a setting you wish to store with the home
position and put a check (v) next to it.
• Select an option using FG and press the Q button to
put a check (v) next to it. To remove the check, press
the Q button again.
MENUMENU
o
All
OK
HH
K
N
Set Home
AF Target Mode
AF Target Point
AF Target Mode
Choose the home position AF target mode. Only options selected for
[KAF Target Mode Settings] (P. 79) are available.
AF Target Point Choose the home position focus target position.
2
Press I
• Choose settings for the home position
• When [KOrientation Linked N] is active, you will be prompted to select landscape
or portrait (camera rotated left/camera rotated right) orientation before pressing the
Q button to display options.
Using the [NH ome ] function
The [NHome] function can be used in the following ways.
• In [KButton Function] (P. 208), assign [NHome] to a button. The AF target moves to
the saved home position when you press the button.
• Select [
N
HP] for [SCenter Button] (P. 218). The AF target moves to the saved home
position when you press the multi selector.

99
EN
Shooting Settings
4
AF Target Selection (NSelect Screen Settings)
PASMB
n
Choose the roles played by the front and rear dials or arrow pad during AF target
selection. The controls used can be selected according to how the camera is used or
personal taste.
Menu
MEN U n AF n5. AF Target Settings & Operations n NSelect
Screen Settings
f dial
Assign roles to the front and rear dials.
[O]: None.
[6Pos]: Position the AF target (P. 76).
[
N
Mode]: Choose the AF target mode (e.g., oAll, ySmall)
(P. 77).
d button
Assign roles to FGHI.
[O]: None.
[6Pos]: Position the AF target (P. 76).
[
N
Mode]: Choose the AF target mode (e.g., oAll, ySmall)
(P. 77).
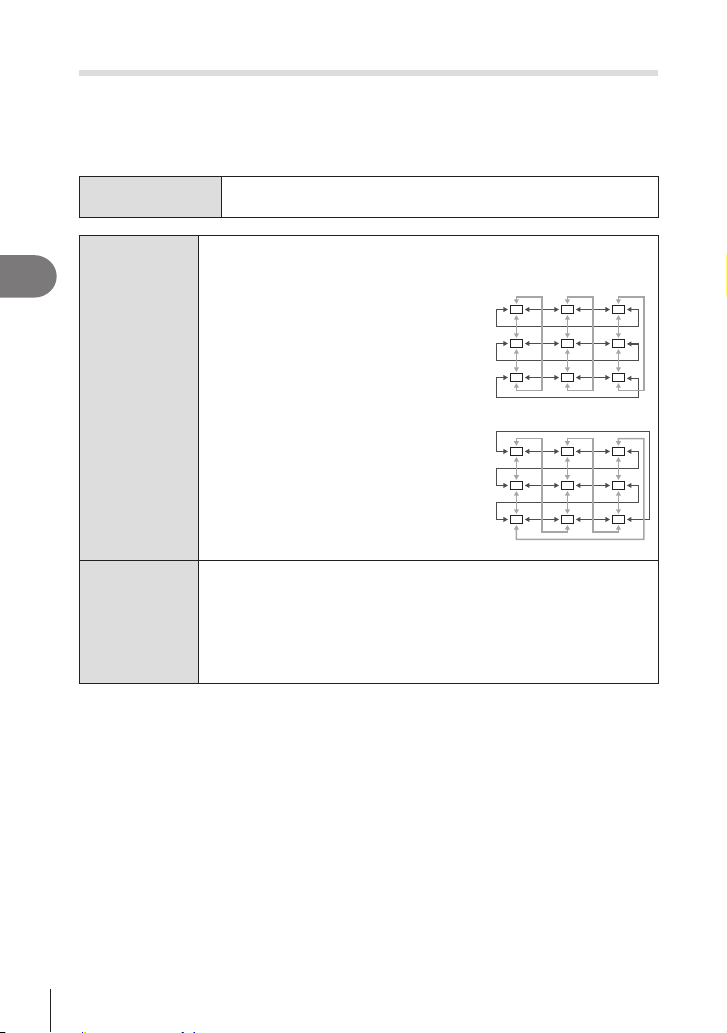
100
EN
Shooting Settings
4
Enabling AF Target Selection Wrap (N Loop Settings)
PASMB
n
You can choose whether AF target selection “wraps around” the edges of the display.
You can also choose whether you have the option of selecting oAll (all targets)
before AF target selection “wraps around” to the opposite border of the display.
Menu
MEN U n AF n5. AF Target Settings & Operations n N Loop
Settings
N Loop
Selection
display.
[Loop 1]: If you continue to press the
multi selector in the same direction after
reaching the border of the display, the
target in the same row or column on the
opposite border will be selected.
“Loop 1”
[Loop 2]: If you continue to press the
multi selector in the same direction after
reaching the border of the display, the
target in the next row or column on the
opposite border will be selected.
“Loop 2”
Via oAll
[No]: Target selection does not pass through oAll (all targets) before
wrapping around.
[Yes]: If [Loop 1] or [Loop 2] is chosen for [N Loop Selection], target
selection will pass through oAll (all targets) before wrapping around
to the opposite border.
• Hiding oAll (all targets) in [K
oAll] at [No].
# [NFAF] or [FAFb]
is selected for focus mode.

101
EN
Shooting Settings
4
Touch AF Target Selection for Viewnder Photography
(AF Targeting Pad)
PASMB
n
Menu
MEN U n AF n5. AF Target Settings & Operations n AF Targeting
Pad
O
Monitor touch controls cannot be used for AF target selection during
On
Monitor touch controls can be used for AF target selection during
disable touch AF target selection. When the target reaches the
target moves to the other side or becomes oAll (all target) mode
depending on the [N Loop Selection] setting (P. 100).
%When [On] is selected, touch controls can also be used to position the zoom frame
(P. 80).

102
EN
Shooting Settings
4
Other functions that are useful when focusing
Manual Focus Assist (MF Assist)
PASMB
n
This is a focus assist function for MF. When the focus ring is rotated, the edge of the
operating the focus ring, the screen returns to the original display.
Menu
MEN U n AF n6. MF n MF Assist
Magnify
[O]: Normal display.
[On]
g “Choosing a Focus Target (AF Target Point)” (P. 76)
Peaking
[O]: Normal display.
[On]
You can select the enhancement color and intensity. g “Focus
Peaking Options (Peaking Settings)” (P. 103)
Focus Indicator
Rotating the focus ring during manual focus displays an indicator
showing the direction and approximate amount of rotation required
to bring the subject into focus.
[O]: Normal display.
[On]: Rotating the focus ring during manual focus displays an
indicator showing the direction and approximate amount of rotation
required to bring the subject into focus.
# When Peaking is in use, the edges of small subjects tend to be enhanced more strongly.
This is no guarantee of accurate focusing.
# Focus zoom is not available in the following instances:
During movie recording / when [C-AFb] or [C-AF+TRb] is selected for focus mode
/ during a multiple exposure / when [nDigital Tele-converter] is set to [On] in movie
recording mode
# When using third-party lenses with focus clutch mechanism, the direction of focus and the
display of Focus Indicator may be reversed. If this happens, change the setting of [Focus
Ring] (P. 104).
# Focus Indicator cannot be displayed when using a Four-Thirds system lens.
%Rotate the front or rear dial to zoom in or out during focus zoom.
%Press the I N FO button to change the color and intensity when Peaking is displayed.

103
EN
Shooting Settings
4
Focus Peaking Options (Peaking Settings)
PASMB
n
Highlight objects using color outlines. This makes objects that are in focus easier to
see during manual focus and the like.
Button
A button to which [Peaking] has been assigned n I NFO button
Menu
MEN U n AF n6. MF n Peaking Settings
Peaking Color
Choose the focus peaking color.
[White] / [Black] / [Red] / [Yellow]
Highlight Intensity
Choose the focus peaking level.
[Low] / [Normal] / [High]
Image Brightness
Adj.
Adjust background brightness to make focus peaking easier to see.
[O]: Normal display.
[On]: Adjusts background brightness.
• When [On] is selected for [Image Brightness Adj.], the live view display may be brighter or
Using Focus Pe a king
The following options are available for using focus peaking.
• Assigning [Peaking Settings] to a control using [KButton Function] or [nButton
Function]: Focus peaking can be assigned to a control by selecting [Peaking] for
[KButton Function] (P. 208) or [nButton Function] (P. 208). Pressing the button
enables focus peaking. [Peaking] can also be selected for [Multi Function] (P. 215).
• Using [Peaking] for [MF Assist]:
If [Peaking] is selected for [MF Assist], focus peaking will activate automatically when the
lens focus ring is rotated.
%Press the I N FO button to view peaking options.

104
EN
Shooting Settings
4
Choosing a Focus Distance for Preset MF (Preset MF distance)
PASMB
n
Set the focusing position for Preset MF.
Specify the number and unit (m or ft).
Menu
MEN U n AF n6. MF n Preset MF distance
# If the lens is equipped with a focus limiter, disable it before proceeding.
#
Disabling the MF Clutch (MF Clutch)
PASMB
n
Disable the manual focus clutch, which is found on some lenses. This can prevent
autofocus being disabled by the focus ring being rotated accidentally.
Menu
MEN U n AF n6. MF n MF Clutch
Operative The camera responds to the position of the lens focus ring.
Inoperative
The camera focuses according to the option selected for [KAF
Mode] / [nAF Mode], regardless of the position of the lens focus
ring.
# Manual focus using the lens focus ring is not available when [Inoperative] is selected for
[MF Clutch], even if the lens focus ring is in the manual focus position.
%For details about lenses equipped with MF clutch, see P. 292.
Lens Focus Direction (Focus Ring)
PASMB
n
Choose the direction in which the focus ring is rotated to adjust focus.
Menu
MEN U n AF n6. MF n Focus Ring
V
Rotate the ring counterclockwise to increase the focus distance.
U
Rotate the ring clockwise to increase the focus distance.

105
EN
Shooting Settings
4
Resetting the Lens Position at Shutdown (Reset Lens)
PASMB
n
You have the option of not restoring the lens to the reset focus position when the
position.
Menu
MEN U n AF n6. MF n Reset Lens
O
Power zoom lenses also return to the zoom position they were in
On
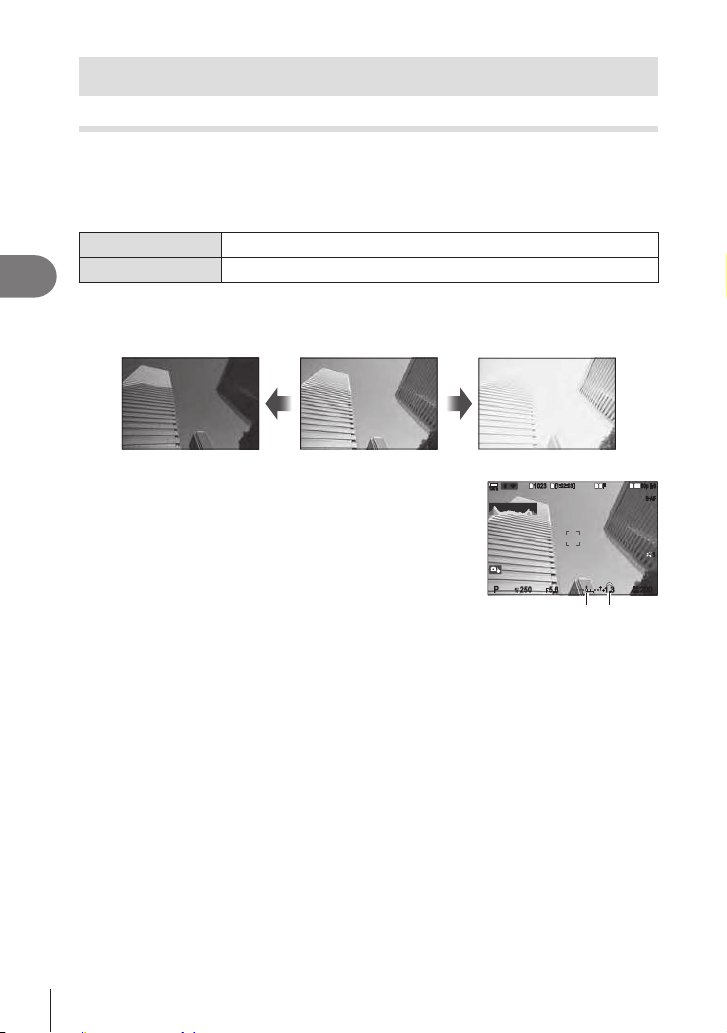
106
EN
Shooting Settings
4
Metering and Exposure
Controlling exposure (Exposure Compensation)
PASM
B
n
The exposure selected automatically by the camera can be altered to suit your artistic
intent. Choose positive values to make pictures brighter, negative values to make them
darker.
Button*
F (Exposure compensation) button n HIkj
Super Control Panel
Q n Exposure Comp.
* When using in M mode, rotate the front or rear dial while pressing the F (Exposure
compensation) button.
%To enable exposure compensation in mode M, select [Auto] for [K ISO] (P. 113).
Negative (–) No compensation (0) Positive (+)
• During photo shooting, exposure compensation can be
• During movie recording, exposure compensation can be
•
view, select [Standard] for [K
for [KNight Vision] (P. 225).
P
1
/
250
P
1
/
F
250 5.65.6
F
00
+
+
-
+1.3
+1.3
1
10231023
1
1
[
1
:
02
:
03
][
1
:
02
:
03
]
FF
60p60p L
-
8L
-
8
S
-
AFS
-
AF
33
L
1
4K
100
%
100
%
rr
O
O
200200
ISO
Auto
ISO
Auto
Exposure bar Exposure
compensation
• The front and rear dials or touch controls can be used to adjust exposure during movie
recording.

107
EN
Shooting Settings
4
Adjust ing Ex posure Compe nsa tion
Modes P, A, and S
In movie mode, exposure compensation can be adjusted when [P], [A], or [S] is selected for
[nMode] (movie exposure mode) (P. 60).
1
Rotate the front dial to adjust exposure compensation.
• You can also choose a value by pressing the F button and using HI.
2
Take pictures.
Mode M
In movie mode, exposure compensation can be adjusted when [M] is selected for [nMode]
bISO-Auto] (P. 115) and
[Auto] for [n ISO] (P. 113).
1
Press the F button and then rotate the front dial or rear dial to adjust
exposure compensation.
2
Take pictures.
Re set t ing Exposure Com pe nsat ion
To reset exposure compensation, press and hold the Q button.
EV Steps for Exposure Control (EV Step)
PASMB
n
Choose the size of the increments used when adjusting shutter speed, aperture,
exposure compensation, and other exposure-related settings. Choose from 1/3, 1/2,
and 1 EV.
Menu
MEN U n
_
n4. Exposure n EV Step
Fine-Tuning Exposure (Exposure Shift)
PASMB
n
Fine-tune exposure. Use this option if you want the results of auto exposure to be
consistently brighter or darker.
# Fine-tuning is not normally required. Use only as necessary. In normal circumstances,
exposure can be adjusted using exposure compensation (P. 106).
# Fine-tuning exposure reduces the amount of exposure compensation available in the
Menu
MEN U n
_
n4. Exposure n Exposure Shift
p
(digital ESP)
p.
[-1] – [±0] – [+1]
B (center-
weighted
averaging)
B.
[-1] – [±0] – [+1]
C (spot)
C.
[-1] – [±0] – [+1]

108
EN
Shooting Settings
4
Reducing Flicker Under LED Lighting
(KFlicker Scan / nFlicker Scan)
PA SM B
n
Banding may occur in photographs taken under LED lighting. Use [KFlicker Scan] /
[nFlicker Scan] to optimize shutter speed while viewing banding in the display.
# K
: This item can be used in S, M, and silent mode and with Pro Capture shooting.
n
: This item can be used when [nMode] (movie exposure mode) is [S] or [M].
# The range of available shutter speeds is reduced.
Menu
MEN U n
_
n4. Exposure n KFlicker Scan
MEN U n
n
n1. Basic Settings/Image Quality n nFlicker Scan
• When set to [On], “FlickerScan” will be displayed.
FlickerScan
100
%
100
%
S
1
/
250.0
S
1
/
250.0
FlickerScanFlickerScan
#
I NFO
Choosing t he Shut t e r Spe e d
• Choose a shutter speed using the front or rear dial or the FG buttons. If desired,
the shutter speed can be selected by keeping FG pressed.
• You can also rotate the front dial to adjust shutter speed in the exposure increments
selected for [EV Step] (P. 107).
• Continue adjusting shutter speed until banding is no longer visible in the display.
Magnifying the display (P. 80) makes it easier to check for banding.
• Press the IN FO button; the display will change and the
“FlickerScan”
will no longer
be displayed. You can adjust aperture and exposure compensation. Do so using the
front or rear dial or the arrow pad.
• Press the IN FO
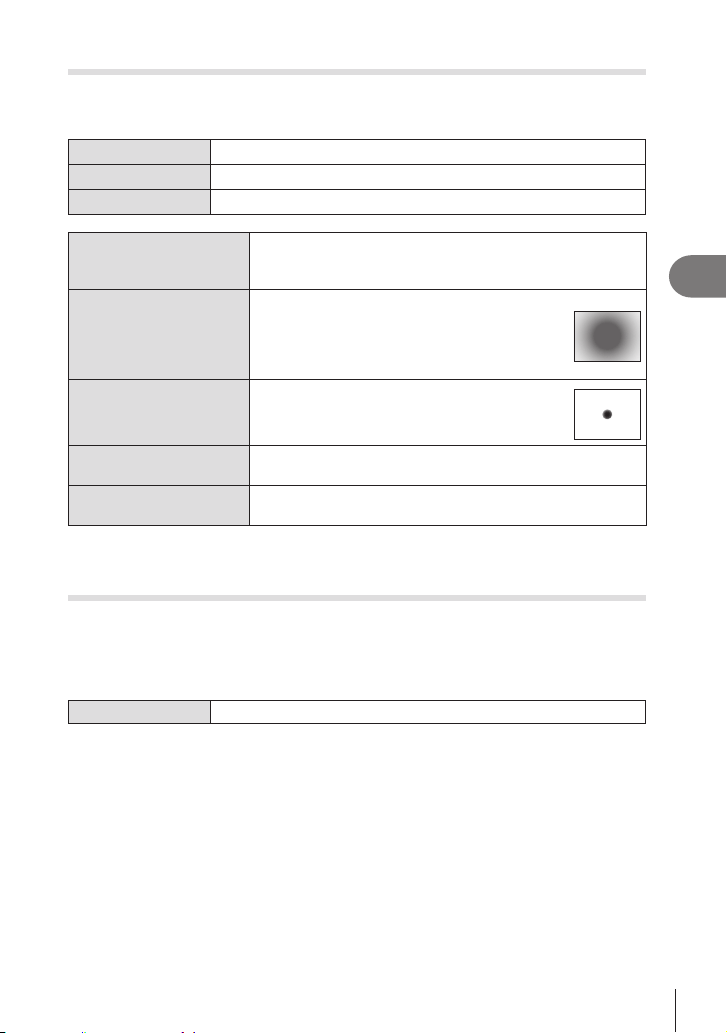
109
EN
Shooting Settings
4
Choosing how the camera measures brightness (Metering)
PASMB
n
You can choose how the camera meters subject brightness.
Button
AF m button n FGk
Super Control Panel
Q n Metering
Menu
MENU n
_
n5. Metering n Metering
p
Digital ESP
metering
Suited to most scenes, including back-lit subjects. The
camera meters 324 areas of the frame and calculates optimal
exposure taking into consideration the nature of the scene.
B
Center weighted
averaging
metering
Suited to compositions that place the main
subject at the center of the frame. The camera
sets exposure based on the average light level
for the entire frame while assigning the greatest
weight to the area in the center.
C
Spot metering
exposure. The camera meters a small portion
(approximately 2%) of the frame.
CHi
Spot metering
(highlight)
Increases spot metering exposure. Ensures bright subjects
appear bright.
CSh
Spot metering
(shadow)
Lowers spot metering exposure. Ensures dark subjects
appear dark.
%The spot metering position can be set at the selected AF target. g “Metering the Focus
Target (NSpot Metering)” (P. 112)
Locking the exposure (AE Lock)
PASMB
n
You can lock the exposure by pressing the AEL button. Use this when you want to
adjust the focus and exposure separately or when you want to shoot several images at
the same exposure.
Button AEL button
%g [B
Auto Reset] (P. 110)
• If the AEL
(P. 213) to a control using [Button Function] (P. 208).
• If you press the AEL button once, the exposure is locked and “AEL” is displayed.
• Press the button once again to release the AE Lock.
• The lock will be released if you operate the mode dial, MEN U button, or Q button.
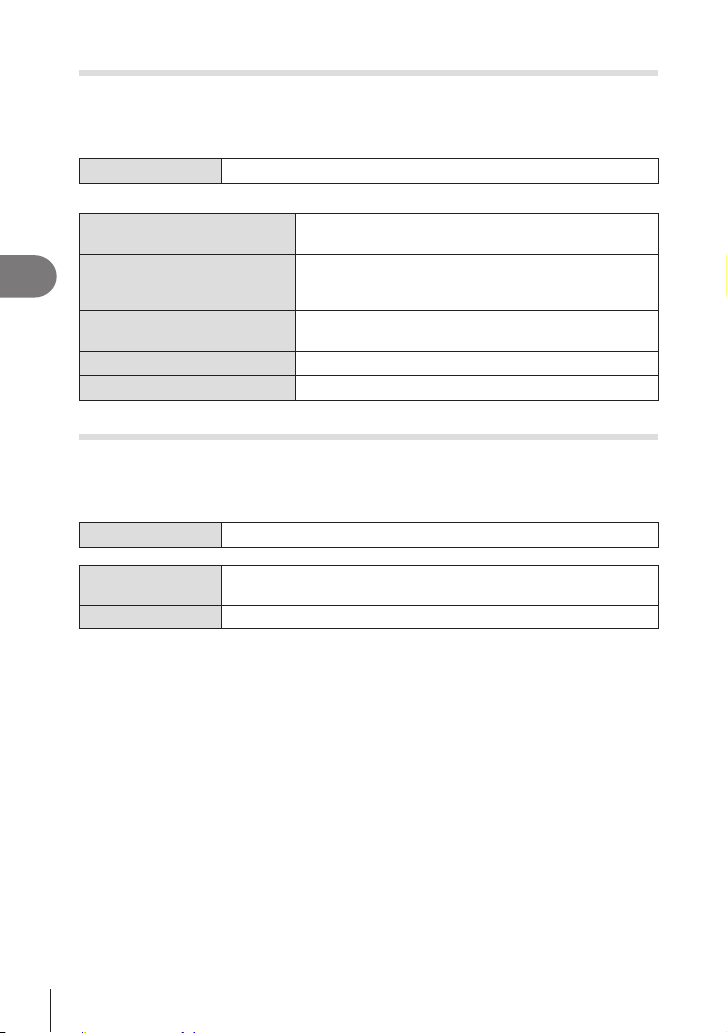
110
EN
Shooting Settings
4
AE Lock Exposure Metering (Metering during B)
PASMB
n
Choose the metering method used to meter exposure when exposure is locked using
the AEL button.
Menu
MEN U n
_
n5. Metering n Metering during B
• For more information on AE lock, see P. 109.
Auto
Exposure is metered using the method selected for
[Metering] (P. 109).
B (center-weighted averaging)
The camera sets exposure based on the average light
level for the entire frame while assigning the greatest
weight to the area in the center.
C (spot metering)
The camera meters a small portion (approximately 2%)
of the frame.
CHi (spot highlight metering)
Brightens the spot metering area, brightening highlights.
CSh (spot shadow metering)
Darkens the spot metering area, darkening highlights.
Releasing AE Lock after shooting (B Auto Reset)
PASMB
n
exposure is locked using the AEL button.
Menu
MEN U n
_
n5. Metering n B Auto Reset
No
Exposure remains locked after shooting. Press the AEL button to
release the lock.
Yes Exposure lock is released after shooting.
%When multiple photos are taken using such functions like sequential shooting, custom
self-timer or interval shooting, exposure lock will be released after a series of photos have
been taken.

111
EN
Shooting Settings
4
Locking exposure when the shutter button is pressed halfway
(AEL by half-pressing a)
PASMB
n
halfway.
Menu
MEN U n
_
n5. Metering n AEL by half-pressing a
No
Exposure is not locked when the shutter button is pressed halfway.
Exposure is determined based on the shooting conditions when the
shutter button is pressed fully.
Yes Exposure is locked when the shutter button is pressed halfway.
S-AF Only
Exposure is locked when the shutter button is pressed halfway only
when the AF mode is [S-AF], [S-AFb], [FAF] or [FAFb].
# If exposure is locked by pressing the AEL button, it remains locked when you press the
shutter button halfway regardless of this setting.
%
is pressed halfway, you can choose whether the camera meters brightness for each
frame during sequential shooting. g “Setting metering options for sequential shooting
(Metering during j)” (P. 112)
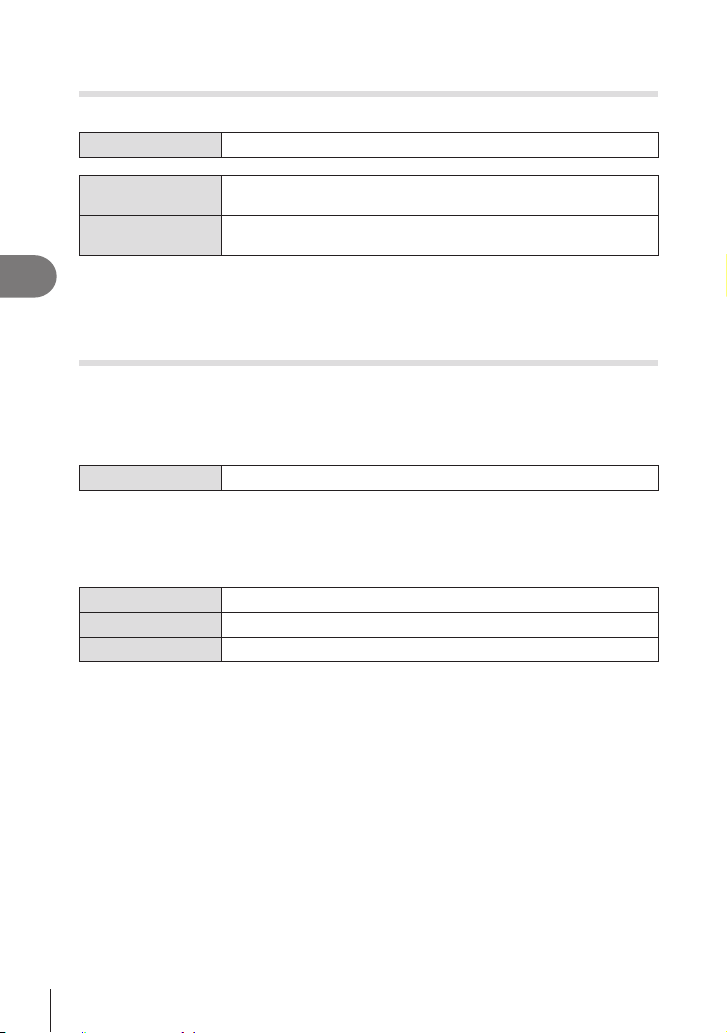
112
EN
Shooting Settings
4
Setting metering options for sequential shooting
(Metering during j)
PASM
B
n
Menu
MEN U n
_
n5. Metering n Metering during j
No
exposure is locked during sequential shooting.
Yes
The camera meters brightness and determines exposure for each
frame.
# If exposure is locked by pressing the AEL button (P. 109) or pressing the shutter button
halfway (P. 111), exposure remains locked during sequential shooting even when
[Metering during j] is set to [Yes].
# When [♥jSH1] or [ProCap SH1] is set, [Metering during j
Metering the Focus Target (NSpot Metering)
PASMB
n
Choose whether the camera meters the current AF target when [C] is selected for
[Metering]. Settings can be adjusted separately for spot, spot highlight, and spot
shadow metering.
Menu
MEN U n
_
n5. Metering n NSpot Metering
1
Select a metering method with which you want the camera to meter the
current AF target, and put a check (v) next to it.
• Select an option using FG and press the Q button to put a check (v) next to it.
To remove the check, press the Q button again.
Spot
Applied when [Metering] is [C] (spot metering).
Spot Hilight
Applied when [Metering] is [CHi] (spot highlight metering).
Spot Shadow
Applied when [Metering] is [CSh] (spot shadow metering).
#
# ISingle or ySmall is selected as the AF target
mode (P. 77).
# The camera zooms in on the selected AF target during focus zoom (P. 80).

113
EN
Shooting Settings
4
Changing ISO sensitivity (ISO)
PASMB
n
Select a value according to subject brightness. Higher values let you photograph
darker scenes but also increase image “noise” (mottling). Select [Auto] to let the
camera adjust sensitivity according to lighting conditions.
Button
ISO button n HIj
Super Control Panel
Q n ISO
#
for [nMode] (movie exposure mode). Setting [nMode] to [M] allows other options to be
selected. g “Assigning Roles to the Front and Rear Dials (KDial Function / nDial
Function)” (P. 216)
Auto
Sensitivity is adjusted automatically according to shooting conditions.
During still photography, you can choose the maximum and standard
values for ISO sensitivity. ([KISO-A Upper/Default] (P. 114))
You can change the shutter speed at which ISO sensitivity starts to
rise in P and A modes. ([KISO-A Lowest S/S] (P. 115))
# During movie recording, ISO sensitivity will be set to values of
from ISO 200 to 12800. When [M] is selected for [nMode] (movie
exposure mode), auto ISO sensitivity control can be enabled by
selecting [On] for [bISO-Auto]. You can also choose maximum
and standard values for ISO sensitivity.
g
“Setting the shutter speed at which the camera automatically
raises ISO sensitivity (KISO-A Lowest S/S)” (P. 115)
L80, L100,
200–102400
(still photography)
between noise and dynamic range. Choose [L100] or [L80] for larger
apertures (higher f-numbers) or slower shutter speeds. [L80] is
equivalent to ISO 80, [L100] to ISO 100.
# [L80] and [L100] are available at all exposure step values.
# [L80] and [L100] reduce dynamic range.
200–12800
(movie recording)
between noise and dynamic range.
# Combining values over ISO 16000 with settings that use an electronic shutter (for
#
using ISO bracketing in silent mode is 1/50 s.
# When [M] is selected for [nMode] (movie exposure mode), ISO sensitivity can be
adjusted during recording using touch controls (P. 62) or by rotating the front or rear
dial.
# If [Dramatic Tone] or [Watercolor] is chosen for picture mode during still photography,
sensitivity will not exceed ISO 1600 when [Auto] is selected.

114
EN
Shooting Settings
4
# The following restrictions apply when [M] is selected for [n Mode] (movie exposure
mode) depending on the picture mode:
• [a2 OM-Log400] / [a3 HLG]:
- If the frame rate selected for [nK] is 23.98p, 24.00p, 25.00p, or 29.97p, [Auto]
is restricted to sensitivities of ISO 400–6400.
- If the frame rate selected for [nK] is 50.00p or 59.94p, [Auto] is restricted to
sensitivities of ISO 400–12800.
- The lowest value that can be selected manually is ISO 400.
• [Dramatic Tone] / [Watercolor]:
- [Auto] is restricted to sensitivities of ISO 200–3200.
•
- If the frame rate selected for [
n
K] is 23.98p, 24.00p, 25.00p, or 29.97p, [Auto]
is restricted to sensitivities of ISO 200–3200.
- If the frame rate selected for [nK] is 50.00p or 59.94p, [Auto] is restricted to
sensitivities of ISO 200–6400.
• Other picture modes:
- If the frame rate selected for [nK] is 23.98p, 24.00p, 25.00p, or 29.97p, [Auto]
is restricted to sensitivities of ISO 200–6400.
EV Steps for ISO Sensitivity Control (ISO Step)
PASMB
n
Choose the size of the increments used when adjusting ISO sensitivity. Choose from
1/3 and 1 EV.
Menu
MEN U n
_
n3. ISO/Noise Reduction n ISO Step
Setting the range of ISO sensitivity values selected in [Auto] mode
(KISO-A Upper/Default / bISO-A Upper/Default)
PASM
B
n
Choose the range of ISO sensitivity values selected by the camera when [Auto] is
selected for [KISO] or [nISO].
Menu
MEN U n
_
n3. ISO/Noise Reduction n KISO-A Upper/Default
MEN U n n n3. ISO/Noise Reduction n bISO-A Upper/
Default
Upper Limit
Choose the maximum sensitivity selected automatically by the
camera.
Set the value using FG or the front/rear dials.
Default
Choose the default sensitivity.
Set the value using FG or the front/rear dials.
• Switch between [Upper Limit] and [Default] using HI.
# KISO] and [nISO]. If the optimal
exposure cannot be achieved under the aperture and shutter speed conditions, a lower
sensitivity is applied.

115
EN
Shooting Settings
4
Setting the shutter speed at which the camera automatically raises
ISO sensitivity (KISO-A Lowest S/S)
PA
SMB
n
Choose the shutter speed at which the camera starts raising the ISO sensitivity when
[Auto] is selected for [KISO].
Menu
MEN U n
_
n3. ISO/Noise Reduction n KISO-A Lowest S/S
Auto The camera sets it automatically.
1/8000 – 60”
speed.
Press the Q button and set the shutter speed using FG.
Choosing the modes in which [Auto] can be used for ISO
sensitivity (KISO-Auto / bISO-Auto)
PASM
B
n
Choose the modes in which [Auto] can be used for ISO sensitivity.
Menu
MEN U n
_
n3. ISO/Noise Reduction n KISO-Auto
MEN U n n n3. ISO/Noise Reduction n bISO-Auto
KISO-Auto
P/A/S
[Auto] can be used for ISO sensitivity when the shooting mode is P,
A, or S.
P/A/S/M
[Auto] can be used for ISO sensitivity when the shooting mode is P,
A, S, or M .
bISO-Auto
O
[Auto] cannot be used for ISO sensitivity when [nMode] (P. 60)
is [M].
On
[Auto] can be used for ISO sensitivity when [nMode] (P. 60) is
[M].

116
EN
Shooting Settings
4
High ISO Noise Reduction Options
(KNoise Filter / nNoise Filter)
PASMB
n
of noise reduction performed.
Menu
MEN U n
_
n3. ISO/Noise Reduction n KNoise Filter
MEN U n n n3. ISO/Noise Reduction n nNoise Filter
O Noise reduction disabled.
Low / Standard /
High
Choose the amount of noise reduction performed.
Image Processing Options (Low ISO Processing)
PASMB
n
Choose the type of processing applied to photographs taken at low ISO sensitivities
using sequential shooting.
Menu
MEN U n
_
n3. ISO/Noise Reduction n Low ISO Processing
Drive Priority
Image processing is adapted so as not to curtail the number of
pictures that can be taken in a single burst.
Detail Priority Image processing prioritizes image quality.
%Photographs taken in single shooting are processed in [Detail Priority] mode even if [Drive
Priority] is selected.

117
EN
Shooting Settings
4
Long Exposure Noise Reduction Options (Noise Reduction)
PASMB
n
Choose whether to process photos taken at slow shutter speeds to reduce image
artifacts (“noise”). At slow shutter speeds, noise is caused by the heat generated from
the camera itself. After each photo is taken, the camera captures a second image for
noise reduction, causing a delay equal to the selected shutter speed before the next
photo can be taken.
Menu
MEN U n
_
n3. ISO/Noise Reduction n Noise Reduction
O Noise reduction not performed.
On Noise reduction is performed at all shutter speeds.
Auto
Noise reduction is performed automatically when the camera’s
internal temperature is elevated.
# During noise reduction, the camera displays the time remaining until the process is
complete.
#
performed.
#
shooting conditions.
%s Settings]
setting (P. 132).

118
EN
Shooting Settings
4
Flash photography
Using a ash (Flash photography)
various shooting modes to meet your needs.
Fla sh unit s designed for use w ith t he c a m e ra
the output required and whether the unit supports macro photography. Flash units
TTL auto and super FP. Flash units can be mounted on the camera hot shoe or
Radio-Controlled Flash Photography: CMD, #CMD, RCV, and X-RCV Modes
Wireless Remote-Control Flash Photography: RC Mode
Fe at ure s Availa ble w ith Compat ible Fla sh Unit s
Flash unit
Supported ash control
modes
GN (Guide Number,
ISO 100)
Supported wireless
systems
FL-700WR
TTL-AUTO, MANUAL,
FP TTL AUTO,
FP MANUAL, MULTI, RC,
SL MANUAL
GN 42 (75/150 mm *
1
)
GN 21 (12/24 mm *
1
)
CMD, #CMD, RCV,
X-RCV, RC
FL-900R
TTL-AUTO, AUTO,
MANUAL, FP TTL AUTO,
FP MANUAL, MULTI, RC,
SL AUTO, SL MANUAL
GN 58 (100/200 mm *
1
)
GN 27 (12/24 mm *
1
)
RC
STF-8
TTL-AUTO, MANUAL,
RC *
2
GN 8.5 RC *
2
FL-LM3
Varies with camera
settings.
GN 9.1 (12/24 mm *
1
) RC *
2
slashes are 35 mm format equivalent focal lengths).
*2 Functions as commander (transmitter) only.

119
EN
Shooting Settings
4
At tac hing Com pat ible Fla sh Unit s
the documentation provided with the unit for details. The instructions here apply to the
FL-LM3.
#
1
•
back of the shoe.
Hot shoe cover
2
photography or direct lighting.
•
•
3
ON /OFF lever to the ON position.
• Rotate the lever to the OFF
not in use.
ON/OFF lever
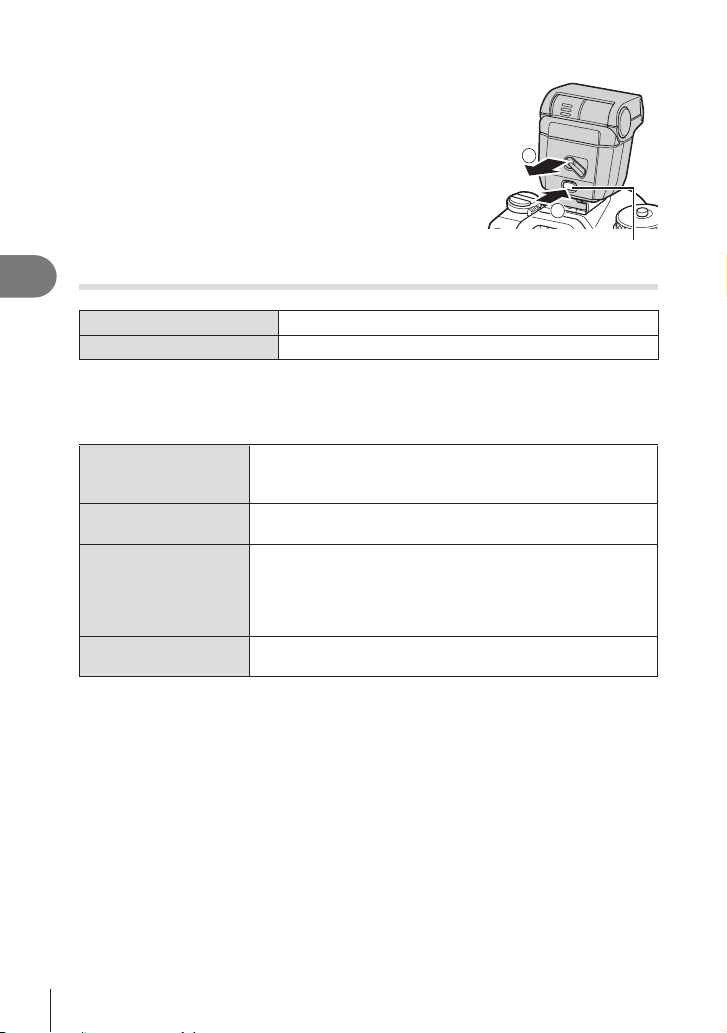
120
EN
Shooting Settings
4
Re m oving Flash U nit s
1
Keeping the UNLOCK button pressed, slide the
2
1
UN LOCK button
Choosing a Flash Mode (Flash Mode)
Button
jY
# button n FGk
Super Control Panel
Q n Flash Mode
Fla sh M odes
Settings] (P. 123).
#
Fill In
# Shutter speed can be set to values between that selected for
[# Slow Limit] (P. 124) and [# X-Sync.] (P. 124).
$
Flash O
#
#Slow
Slow
Slow shutter speeds are used to capture both the main subject
and the background.
# Shutter speed is set according to the exposure value
metered by the camera and is not restricted by the option
selected for [# Slow Limit].
#Manual
Manual
Appears only when the FL-LM3 is attached.

121
EN
Shooting Settings
4
Fla sh M ode and Shut t e r Spe ed
available speeds can be further restricted using the options in the menu.
g [# X-Sync.] (P. 124), [# Slow Limit] (P. 124)
Exposure
mode
Flash
mode
[Reduce
Red-eye]
(P. 123)
[Synchro
Settings]
(
P. 123
)
Super
control
panel
Red-eye
reduction
Flash
timing
Shutter
speed
P/A
[No]
[First
Curtain]
#
No
Front-
curtain
sync
60 - 1/250 s
[Second
Curtain]
#2
Rear-
curtain
sync
[Yes]
[First
Curtain]
V
Yes
Front-
curtain
sync
[Second
Curtain]
V2
Rear-
curtain
sync
Slow
[No]
[First
Curtain]
#Slow
No
Front-
curtain
sync
[Second
Curtain]
#Slow2
Rear-
curtain
sync
[Yes]
[First
Curtain]
VSlow
Yes
Front-
curtain
sync
[Second
Curtain]
VSlow2
Rear-
curtain
sync
Manual
value*
1
(regardless
of setting)
(regardless
of setting)
#Manual
No
Front-
curtain
sync
(regardless
of setting)
(regardless
of setting)
$
— — —

122
EN
Shooting Settings
4
Exposure
mode
Flash
mode
[Reduce
Red-eye]
(P. 123)
[Synchro
Settings]
(
P. 123
)
Super
control
panel
Red-eye
reduction
Flash
timing
Shutter
speed
S/M
[No]
[First
Curtain]
#
No
Front-
curtain
sync
60 - 1/250 s
[Second
Curtain]
#2
Rear-
curtain
sync
[Yes]
[First
Curtain]
V
Yes
Front-
curtain
sync
[Second
Curtain]
V2
Rear-
curtain
sync
Manual
value*
1
(regardless
of setting)
(regardless
of setting)
#Manual
No
Front-
curtain
sync
(regardless
of setting)
(regardless
of setting)
$
— — —
B
[No]
[First
Curtain]
#
No
Front-
curtain
sync
—
[Second
Curtain]
#2
Rear-
curtain
sync*
2
—
[Yes]
[First
Curtain]
V
Yes
Front-
curtain
sync
—
[Second
Curtain]
V2
Rear-
curtain
sync*
2
—
Manual
value*
1
(regardless
of setting)
(regardless
of setting)
#Manual
No
Front-
curtain
sync
—
(regardless
of setting)
(regardless
of setting)
$
— — —
*1 This is displayed only when the FL-LM3 is attached. You can select the value by selecting
[Manual Value] from the super control panel.
[Second Curtain] is selected.
• In red-eye reduction mode, the shutter will be released approximately one second after
Also note that red-eye reduction may not produce the desired results in some conditions.
•
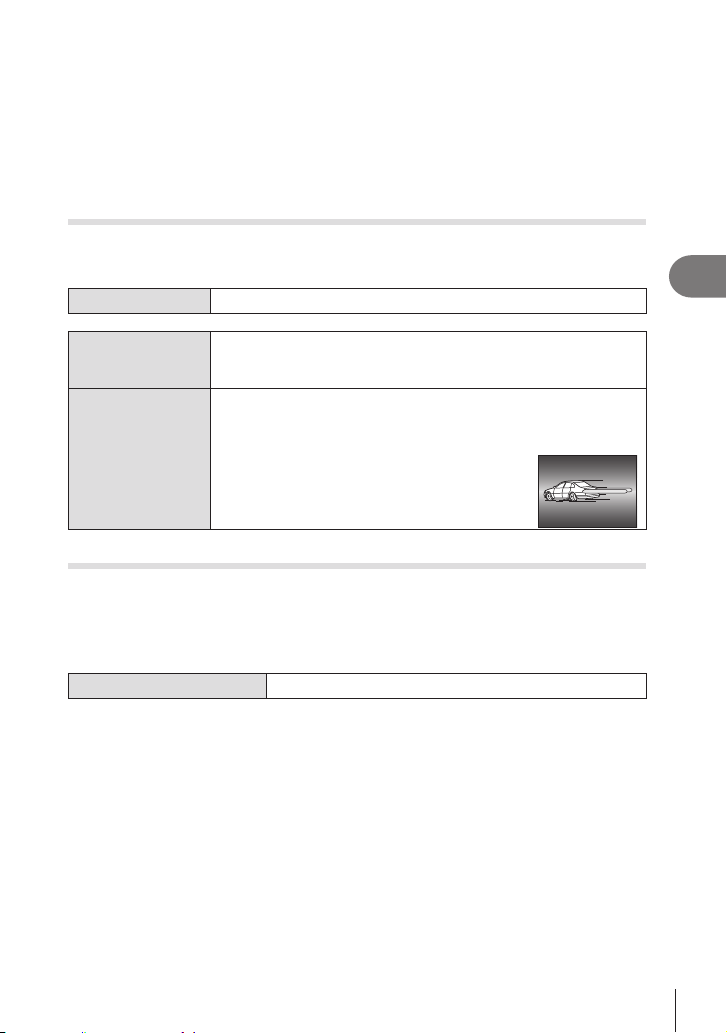
123
EN
Shooting Settings
4
•
bracketing (P. 178) is 1/100 s. Setting [K ISO] to a value over ISO 16000 when
using an option that requires the electronic shutter (for example, silent mode or focus
during ISO bracketing (P. 176).
•
overexposure in pictures taken at short range, select mode A or M and choose a smaller
aperture (higher f-number) or choose a lower setting for [K ISO].
Conguring ash modes (Flash Mode Settings)
PASMB
n
Menu
MEN U n _ n6. Flash n Flash Mode Settings
Reduce Red-eye
Reduce “red-eye” in portrait photos.
[No]: The camera does not display Reduce Red-eye modes.
[Yes]: The camera displays Reduce Red-eye modes.
Synchro Settings
[First Curtain]
[Second Curtain]
closes. Moving objects appear to leave trails of
light behind them.
Adjusting ash output (Flash Exposure Comp.)
PASMB
n
even though the exposure in the rest of the frame is appropriate.
Flash compensation is available in modes other than manual.
Super Control Panel
Q n Flash Exposure Comp.
•
the camera.
124
EN
Shooting Settings
4
Wireless Remote Flash Control (# RC Mode)
PASMB
n
Menu
MEN U n _ n6. Flash n # RC Mode
On
• Selecting [On] displays the RC mode super control panel in the camera monitor. To view
the regular super control panel, press the IN FO button.
Choosing a Flash Sync Speed (# X-Sync.)
PASM
B
n
subject brightness.
Menu
MEN U n _ n6. Flash n # X-Sync.
Choosing the Minimum Shutter Speed (# Slow Limit)
PA
SMB
n
P/A modes.
This item is used to select the slowest setting available to the camera when selecting
#Slow, #Slow2, VSlow and
VSlow2) modes.
• Available values: 60 s to value selected for [# X-Sync.]
Menu
MEN U n _ n6. Flash n # Slow Limit
Flash and Exposure Compensation (
x
+F)
PASM
B
n
Menu
MEN U n _ n6. Flash n x+
F
O Flash and exposure compensation are set independently.
On
compensation.

125
EN
Shooting Settings
4
Setting the exposure balance for TTL metering
(Balanced Flash Metering)
PASMB
n
mode.
Menu
MEN U n _ n6. Flash n Balanced Flash Metering
O Gives priority to the subject during metering.
On
Gives priority to the balance between the subject and the
background during metering.
%When selecting [On], it is recommended that you set [KISO] to [Auto].

126
EN
Shooting Settings
4
Sequential Shooting/Self-Timer
Performing the sequential/self-timer shooting
PASM
B
n
Adjust settings for burst or self-timer photography. Choose an option according to your
subject. Other options, including anti-shock and silent modes, are also available.
# Fix the camera securely on a tripod for self-timer shooting.
Button
jY
# button n HIj
Super Control Panel
Q n Drive j/Y
Menu
MEN U n _ n7. Drive Mode n Drive j/Y
o / to
♥o
Single
Single-frame advance. The camera takes one
photo each time the shutter button is pressed all
the way down.
j / tj
♥j
Sequential
The camera takes photos at up to about 20
fps while the shutter button is held all the way
down. When [KAF Mode] (P. 72) is set to
[C-AF], [C-AFb], [C-AF+TR], or [C-AF+TRb],
the camera will focus before each shot. When
[Metering during j] (P. 112) is set to [Yes], the
camera will meter the brightness and determines
the exposure before each shot.
jSH1
High-speed
Sequential SH1
The camera takes photos at up to about 120 fps
while the shutter button is held all the way down.
Focus, exposure, and white balance are locked at
jSH2
High-speed
Sequential SH2
The camera takes photos at up to about 50
fps while the shutter button is held all the way
down. When [KAF Mode] (P. 72) is set to
[C-AF], [C-AFb], [C-AF+TR], or [C-AF+TRb],
the camera will focus before each shot. When
[Metering during j] (P. 112) is set to [Yes], the
camera will meter the brightness and determines
the exposure before each shot.
ProCap
ProCap SH1
ProCap SH2
Pro Capture
Capture starts when the shutter button is pressed
halfway. The camera starts recording pictures,
including those captured while the button was
pressed halfway, when the button is pressed all the
way down (P. 133).
Focus and exposure during each ProCap mode
jjSH1]
jSH2]

127
EN
Shooting Settings
4
Y12s / tY12s
Y12s
Self-timer 12 sec
The shutter is released 12 seconds after the
shutter button is pressed all the way down. The
self-timer lamp will light for about 10 seconds and
shutter is released. The camera focuses when the
shutter button is pressed halfway.
Y2s / tY2s
Y2s
Self-timer 2 sec
When the shutter button is pressed all the way
a photo will be taken after about 2 seconds. The
camera focuses when the shutter button is pressed
halfway.
YC / tYC
YC
Custom Self-timer
Adjust self-timer settings, including the self-timer
delay and the number of shots taken when the
timer expires (P. 130).
%You can choose the frame advance rate and the maximum number of shots in each series
(P. 128).
%Items marked with t allows you to take pictures with the small amount of blur caused by
operation of the shutter reduced. Use this option when even slight camera motion can
cause blur, for example during macro or telephoto photography. This option is available
when [Anti-Shockr] is set to [On] in [Anti-Shockr Settings] (P. 131).
%
1/8000 seconds, or in settings where the sound of the shutter would be unwelcome.
%j
details.
%To cancel the activated self-timer, press G.
%In j, tjj and ProCap modes, the camera displays the view through the lens
jjSH2, ProCap SH1, and ProCap SH2 modes, it displays
the shot immediately preceding the current frame.
# jSH2 or ProCap SH2 with [C-AF], [C-AFb], [C-AF+TR] or
[C-AF+TRb] selected for [KAF Mode] (P. 72) and an aperture value larger than F8,
the focus accuracy will decrease. (F will be displayed.
# jSH1 and ProCap SH1 modes, the lower limit of the shutter speed is 1/15 s.
# jSH2 and ProCap SH2 modes, the lower limit of the shutter speed is 1/640 s when
[Max fps] under [Sequential Shooting Settings] is set to 50 and 1/320 s when it is set to
25.
# Shooting speed will be lower when [KISO] is 16000 or higher.
# When [Kj
and the shooting speed will be limited to a maximum of 10 fps.
# If you stand in front of the camera to press the shutter button when using the self-timer,
the picture may be out of focus.
# The speed of sequential shooting varies depending on the lens you are using and the
focus of the zoom lens.
# During sequential shooting, if the battery level icon blinks due to low battery, the camera
stops shooting. The camera may not save all of the pictures depending on how much
battery power remains.
# Photographs taken in silent and pro-capture modes may be distorted if the subject or
camera moves quickly during shooting.
#
[Silents Settings] (P. 132).
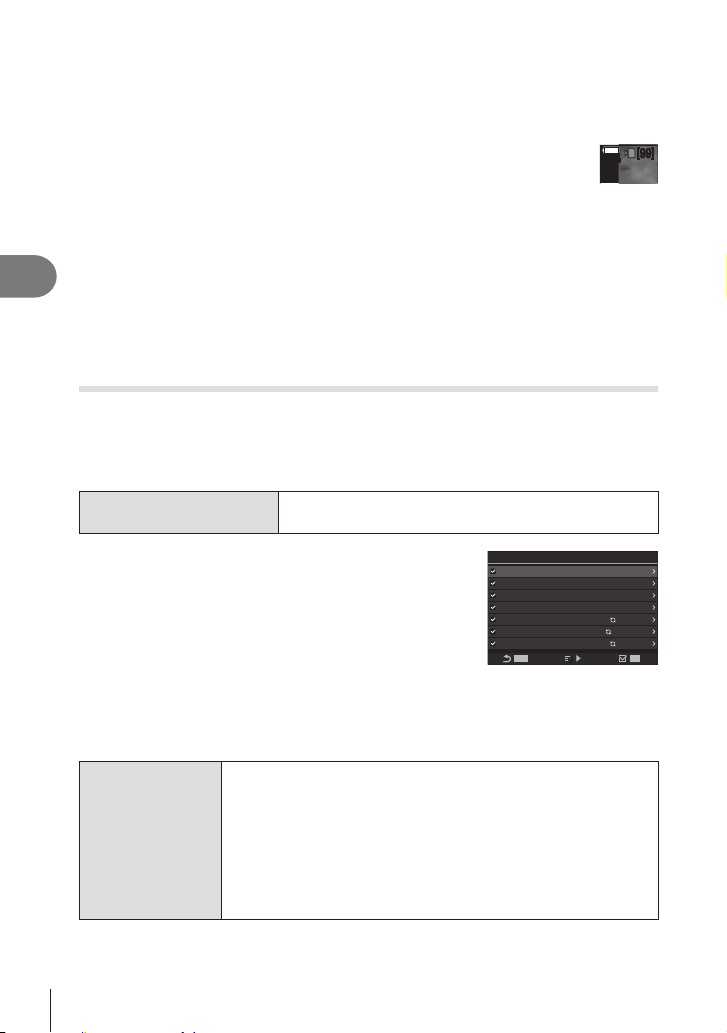
128
EN
Shooting Settings
4
# Shooting speed may be lower when shooting in a dark place. You may be able to increase
shooting speed by setting [Kg “Making the display easier to see
in dark places (KNight Vision)” (P. 225)
Numbe r of pic t ure s that c a n be t a ken
The camera displays the number of pictures that can be stored in the
When the shutter button is pressed halfway, when the shutter button is
pressed fully, when writing to SD card
When it becomes [00] (red), the camera will be unable to record the next
will increase and the will be able to record pictures.
100
%
100
%
[
99
][
99
]
# It is not displayed when there is no card in the camera.
# It may not be displayed depending on the functions that are in use.
%The number is approximate and not exact. It may change depending on the shooting
conditions.
Conguring the sequential shooting functions
(Sequential Shooting Settings)
PASM
B
n
You can choose which types of sequential shooting modes are displayed when
you press the
j
Y
# button, and the maximum speed/number of frames for each
sequential shooting mode.
Menu
MEN U
n
_
n
7. Drive Mode
n
Sequential Shooting
Settings
1
Select a sequential shooting mode that you want to
have displayed, and put a check (v) next to it.
• Select an option using FG and press the Q button to
put a check (v) next to it.
To remove the check, press the Q button again.
%[tj] is displayed when [Anti-Shockr] is set to [On]
in [Anti-Shockr Settings] (P. 131).
MENUMENU
j 10fps
j
OK
j
SH1
j
SH2
ProCap
ProCapSH1
ProCapSH2
HH
20fps
120fps
50fps
10 / 20fps
28 / 120fps
12 / 50fps
Sequential Shooting Settings
Sequential Shooting Settings
screen
2
Press I.
3
Max fps
Set the shooting speed for sequential shooting. The numbers
indicate the approximate maximum speeds.
j
/t
j
: 1 – 10 fps
j
: 5, 10, 15, 20 fps
j
SH1: 60, 100, 120 fps
j
SH2: 25, 50 fps
ProCap: 5, 10, 15, 20 fps
ProCap SH1: 60, 100, 120 fps
ProCap SH2: 25, 50 fps

129
EN
Shooting Settings
4
Pre-shutter Frames
(ProCap/ProCap
SH1/ProCap SH2
only)
Set the number of frames to be captured before the shutter button is
pressed fully from between 0 and 70.
Frame Count
Limiter
Set the total number of frames from 2 to 99 (including the pre-
shutter frames) to be captured. You can limit the number of frames
that are captured after you press the shutter button fully. Shooting
stops automatically when the limit is reached.
•
frames.
• To put a limit on the number of frames, select the number and
press the Q button. The setting screen appears. You can change
the number with FG.
• For Pro Capture shooting, the number of frames includes the pre-
shutter frames. g “Shooting without a release time lag (Pro
Capture shooting)” (P. 133)
# When [HDR], [Focus Stacking] or [Focus BKT] is enabled, [Frame Count Limiter] will be
#
j
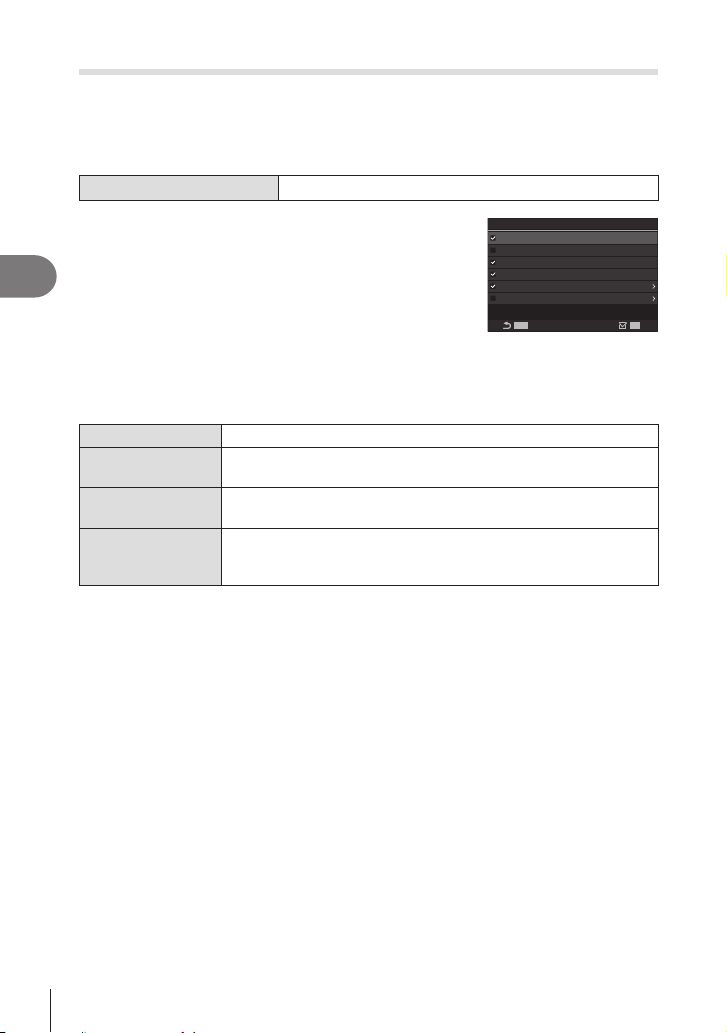
130
EN
Shooting Settings
4
Conguring the self-timer functions (Self-timer Settings)
PASM
B
n
You can choose which types of self-timer modes are displayed when you press the
j
Y
# button, and change the self-timer settings such as the time the camera waits
before taking a picture, and the number of frames it captures.
Menu
MEN U n
_
n7. Drive Mode n Self-timer Settings
1
Select a self-timer mode that you want to have
displayed, and put a check (v) next to it.
• Select an option using FG and press the Q button to
put a check (v) next to it.
To remove the check, press the Q button again.
%[tY12s] / [tY2s] / [tYC] are displayed when [Anti-
Shockr] is set to [On] in [Anti-Shockr Settings]
(P. 131).
MENUMENU
Y
12s
Y
12s
OK
Y
2s
Y
2s
Y
C
Y
C
Self-timer Settings
Self-timer Settings screen
2
When setting Custom Self-timer, select [YC] / [tYYC] and press I.
3
Number of Frames Choose the number of shots taken when the timer expires.
Y Timer
Choose how long the camera waits to begin shooting after the
shutter button is pressed all the way down.
Interval Length
If the number of shots is 2 or more, choose the interval between the
shots taken when the timer expires.
Every Frame AF
[On]: The camera focuses before each shot.

131
EN
Shooting Settings
4
Shooting without the vibration caused by shutter button operations
(Anti-Shockr Settings)
PASMB
n
Anti-shock shooting modes can be used to reduce the slight blur caused by shutter
motion.
Use this option when even slight camera motion can cause blur, for example during
macro or telephoto photography.
Menu
MEN U n
_
n7. Drive Mode n Anti-Shockr Settings
Anti-Shockr
to], [tj], etc.) are not
displayed on the drive mode selection screen. Normal shooting
modes ([o], [j], etc.) are displayed.
[On]: Anti-shock shooting modes ([to], [tj], etc.) are displayed
on the drive mode selection screen. Normal shooting modes ([o],
[j], etc.) are not displayed.
Waiting Time
Choose how long the camera waits to begin shooting after the
shutter button is pressed all the way down when shooting in anti-
shock shooting modes.
[0sec], [1/8sec], [1/4sec], [1/2sec], [1sec], [2sec], [4sec], [8sec],
[15sec], [30sec]
• Be sure there is a check (v) next to a sequential shooting mode with t in [Sequential
Shooting Settings] (P. 128).
• Select a mode with t (P. 126), press the Q
time elapses, the shutter will be released and pictures will be taken.

132
EN
Shooting Settings
4
Shooting without shutter sound (Silents Settings)
PASM
B
n
In situations where the shutter sound is a problem, you can use the silent shooting
modes to shoot without making a sound. An electronic shutter is used to reduce the
minuscule camera shake caused by the motion of the mechanical shutter, much as is
the case for anti-shock photography.
Menu
MEN U n _ n7. Drive Mode n Silents Settings
Waiting Time
Choose how long the camera waits to begin shooting after the
shutter button is pressed all the way down when shooting in silent
shooting modes.
[0sec], [1/8sec], [1/4sec], [1/2sec], [1sec], [2sec], [4sec], [8sec],
[15sec], [30sec]
Noise Reduction
[O]: Shoots normally.
[Auto]: Reduces image “noise” in long exposures during silent
photography. The sound of the shutter may be audible when noise
reduction is active.
8
AF Illuminator
(P. 96).
Flash Mode
# During High Res Shot shooting (P. 156), [8], [AF Illuminator], and [Flash Mode] work in
[Allow] mode even if they are set to [Not Allow].
When [High Res Shot] is set to [Onn$
• Be sure there is a check (v
Shooting Settings] (P. 128).
• Q button, then take pictures. The monitor turns
dark for a short while when the shutter is released. The shutter does not sound.
#
or LED lamps or if the subject moves abruptly during shooting.
# The fastest available shutter speed is 1/32000 s.
# KISO] is 16000 or higher.
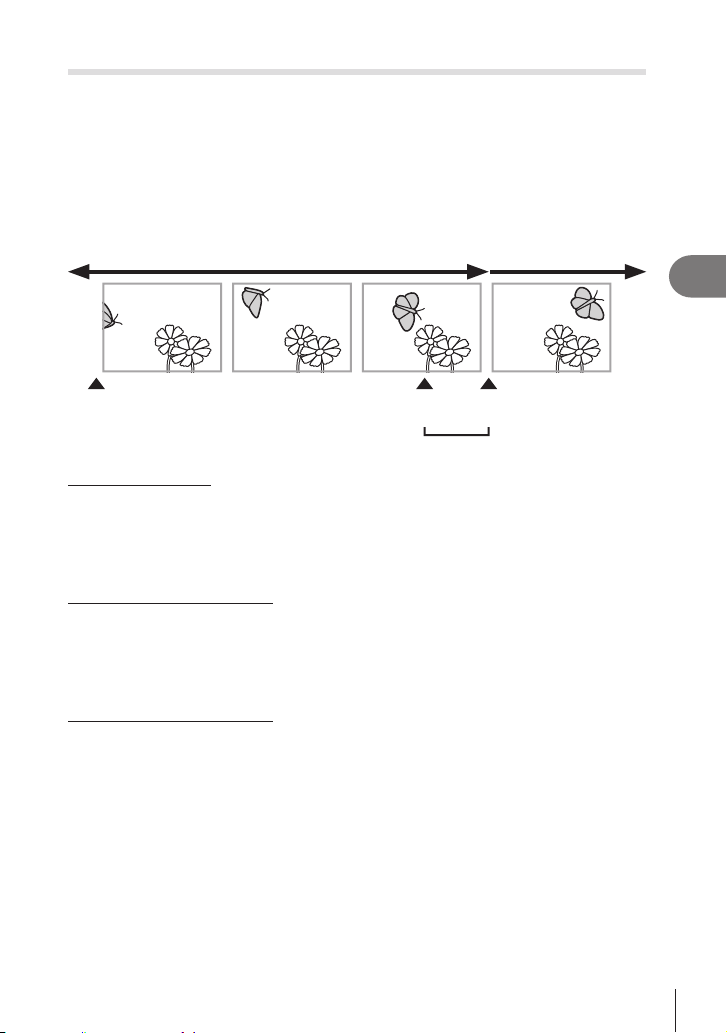
133
EN
Shooting Settings
4
Shooting without a release time lag (Pro Capture shooting)
PASMB
n
Capture starts when the shutter button is pressed halfway; the moment the button
is pressed the rest of the way down, the camera will start saving the last n captured
pictures to the memory card, where n is a number selected before shooting begins. If
the button is held all the way down, shooting will continue until the selected number of
pictures is recorded. Use this option to capture moments you might otherwise miss due
to your subject’s reactions or shutter lag.
Shutter button pressed
halfway
Shutter lag
Up to 70 frames
Burst shooting
continues
Shutter button pressed all
the way down
Moment you
want
Pro Capture (ProCap)
Choose this option if you anticipate that the distance to the subject will change
during shooting. The camera shoots at up to 20 fps. A maximum of 70 frames can be
captured before the shutter button is pressed all the way down. If [C-AF], [C-AF
b
],
[C-AF+TR], or [C-AF+TR
b
] is selected for [KAF Mode] (P. 72), the camera will
focus before each shot.
Pro Capture SH1 (ProCap SH1)
Choose this option if the distance to the subject is unlikely to change very much
during shooting. The camera shoots at up to 120 fps. A maximum of 70 frames can be
captured before the shutter button is pressed all the way down. The camera will use [S-
AF] when [C-AF] or [C-AF+TR] is selected for [KAF Mode] (P. 72) and [S-AF
b
]
when [C-AF
b
] or [C-AF+TR
b
] is selected.
Pro Capture SH2 (ProCap SH2)
The camera shoots at up to 50 fps. A maximum of 70 frames can be captured before
the shutter button is pressed all the way down. If [C-AF], [C-AF
b
], [C-AF+TR], or
[C-AF+TR
b
] is selected for [KAF Mode] (P. 72), the camera will focus before
each shot.
#
# When using ProCap SH2 with [C-AF], [C-AFb], [C-AF+TR] or [C-AF+TRb] selected
for [KAF Mode] (
P. 72) and an aperture value larger than F8, the focus accuracy will
decrease. (F will be displayed.
# In ProCap SH1 mode, the lower limit of the shutter speed is 1/15 s.
# In ProCap SH2 mode, the lower limit of the shutter speed is 1/640 s when [Max fps] under
[Sequential Shooting Settings] is set to 50 and 1/320 s when it is set to 25.

134
EN
Shooting Settings
4
Button
jY
# button n HIj
Super Control Panel
Q n Drive j/Y
Menu
MEN U n
_
n 7. Drive Mode n Drive j/Y
1
Select ProCap, ProCap SH1, or ProCap SH2 and press the Q button.
2
Press the shutter button halfway to start capturing.
• When the shutter button is pressed halfway, a capture
icon (
) will be displayed. If the button is kept pressed
halfway for over a minute, capture will end and the
icon will clear from the display. Press the shutter button
halfway again to resume shooting.
• Shooting will continue while the shutter button is
pressed all the way down, up to the number of shots
selected for [Frame Count Limiter].
1
10231023
P
1
/
250
P
1
/
F
250 5.65.6
1
1
[
1
:
02
:
03
][
1
:
02
:
03
]
FF
60p60p L
-
8L
-
8
S
-
AFS
-
AF
33
L
1
4K
ISO
Auto
ISO
Auto
F
00
+
-
0.00.0
100
%
100
%
rr
O
O
200200
Capture icon
%[Max fps], [Pre-shutter Frames], and [Frame Count Limiter] can be adjusted in
[Sequential Shooting Settings] (P. 128).
3
Press the shutter button all the way down to start saving pictures to the
memory card.
# Pro Capture is not available while the camera is connected to a smartphone (Wi-Fi).
#
cause distortions in images.
# During capture, the monitor will not go dark and the sound of the shutter will not be heard.
# The slowest shutter speed is limited.
# Depending on subject brightness and the options selected for [ISO] and exposure
compensation, the display frame rate may drop below that selected for [Frame Rate]
(P. 225).

135
EN
Shooting Settings
4
Reducing Flicker in Photographs (Anti-Flicker Shooting)
PASM
B
n
the shutter release accordingly.
Menu
MENU n
_
n7. Drive Mode n Anti-Flicker Shooting
• “FLK” appears in the display when [On] is selected.
FLK
FLK
1
10231023
P
1
/
250
P
1
/
F
250 5.65.6
1
1
[
1
:
02
:
03
][
1
:
02
:
03
]
FF
60p60p L
-
8L
-
8
S
-
AFS
-
AF
33
L
1
4K
F
00
+
-
0.00.0
10
0
%
10
0
%
rr
OO
#
# Normal release timing is used at slow shutter speeds.
#
burst photography.

136
EN
Shooting Settings
4
Image Stabilization
Reducing camera shake (KImage Stabilizer / nImage Stabilizer)
PASMB
n
You can reduce the amount of camera shake that can occur when shooting in low light
Super Control Panel
Q n KImage Stabilizer / nImage Stabilizer
Menu
MEN U n _ n8. Image Stabilizer n KImage Stabilizer
MEN U n n n4. Image Stabilizer n nImage Stabilizer
KImage Stabilizer
S-IS O (Still-I.S. O)
Image stabilization disabled. Select this option when
using a tripod.
S-IS Auto (Auto I.S.)
Image stabilization applies to motion on all axes.
If panning motion is detected, the camera will
automatically suspend image stabilization on that axis.
S-IS1 (All Direction Shake I.S.) Image stabilization applies to motion on all axes.
S-IS2 (Vertical Shake I.S.)
Image stabilization applies to vertical motion. Use
when panning the camera horizontally.
S-IS3 (Horizontal Shake I.S.)
Image stabilization applies to horizontal motion. Use
when panning the camera vertically.
nImage Stabilizer
M-IS O (Movie-I.S. O)
M-IS1 (All Direction Shake I.S.)
Electronic image stabilization combined with VCM-
controlled image sensor movement.
M-IS2 (All Direction Shake I.S.) VCM-controlled image sensor movement only.
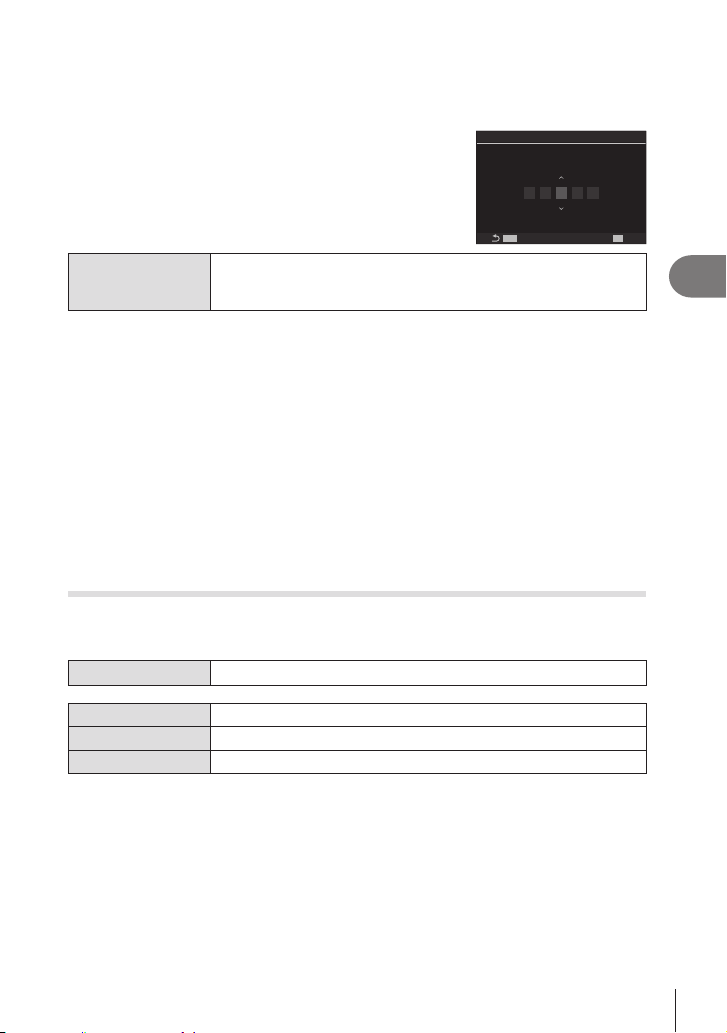
137
EN
Shooting Settings
4
Se tting the de t aile d opt ion of im a ge st a bilize r
When using lenses other than Micro Four Thirds or Four Thirds system lenses, input
the focal length of the lens.
1
Press the INFOKImage
Stabilizer] or [nImage Stabilizer]. Input the focal
length using FGHI and then press the Q
button.
MENU
OK
mm
0 0 0 9 0.
K
Image Stabilizer
Focal Length
Focal Length
Set the lens focal length. Input the number that is printed on the
lens.
[0.1] – [1000.0] mm
# Image stabilization may be unable to compensate for excessive camera motion or very
slow shutter speeds. Use a tripod in these cases.
#
# The setting selected with the lens image stabilization switch, if any, takes priority over that
selected with the camera. This can be changed. g “Image Stabilization for IS Lenses
(Lens I.S. Priority)” (P. 139)
# [S-IS Auto] functions as [S-IS1] when [On] is selected for [Lens I.S. Priority] (P. 139).
# jSH2/ProCap SH2 selected as the drive
mode (P. 126), the image stabilization will be suitable for camera moves in the depth
direction, compared to when used with other sequential shooting modes.
%You can choose whether image stabilization will be performed while the shutter button is
pressed halfway. g “Half-press image stabilization (aImage Stabilizer)” (P. 138)
%The selected value is not reset when you select [Reset Shooting Settings] in [Reset/
Initialize Settings] (“Restoring Default Settings (Reset/Initialize Settings)” (P. 257)).
Image stabilization options (nIS Level)
PASMB
n
Choose the amount of image stabilization applied during movie recording.
Menu
MEN U n n n4. Image Stabilizer n nIS Level
+1 Choose for static hand-held shots.
±0 Recommended in most situations.
–1 Choose for hand-held panning, tilting, or tracking shots.

138
EN
Shooting Settings
4
Half-press image stabilization (aImage Stabilizer)
PASMB
n
Choose whether image stabilization applies while the shutter button is pressed halfway.
An example of a situation in which you might want to suspend image stabilization
would be when using the level gauge to keep the camera level while framing
photographs.
Menu
MEN U n _ n8. Image Stabilizer n aImage Stabilizer
On
Image stabilization is performed while the shutter button is pressed
halfway.
O
Image stabilization is not performed while the shutter button is
pressed halfway.
Burst mode image stabilization (jImage Stabilizer)
PASM
B
n
Choose the type of image stabilization applied during burst shooting.
the image sensor for every shot. This slightly reduces the frame advance rate.
Menu
MEN U n _ n8. Image Stabilizer n jImage Stabilizer
IS Priority
Priority is given to image stabilization. The frame advance rate drops
slightly.
Fps Priority
Priority is given to the frame advance rate. Image stabilization may

139
EN
Shooting Settings
4
Displaying camera motion on the monitor (Handheld Assist)
PASMB
n
display the motion of the camera and
the boundaries of motions that can be
corrected by the image stabilizer when
the shutter button is pressed halfway
and during exposure. This is useful
when you want to reduce camera
motion during long exposure with the
camera held by hand.
1
10231023
P
1
/
250
P
1
/
F
250 5.65.6
1
1
[
1
:
02
:
03
][
1
:
02
:
03
]
FF
60p60p L
-
8L
-
8
S
-
AFS
-
AF
33
200200
L
1
4K
ISO
Auto
ISO
Auto
F
00
+
-
0.00.0
10
0
%
10
0
%
rr
O
O
Camera
motion
(horizontal/
vertical)
Camera
motion (roll)
The boundaries of motions
that can be corrected by
the image stabilizer (gray)
Menu
MEN U n _ n8. Image Stabilizer n Handheld Assist
O Camera motion is not displayed on the monitor.
On
Camera motion is displayed on the monitor when the shutter button
is pressed halfway and during exposure.
# There is no guarantee that the picture will be without blurs, even if the camera motion
indicator stays within the gray frame.
# Camera motion cannot be displayed correctly when the camera is close to the subject.
# Camera motion is not displayed if [K
third-party lenses, with which only the lens image stabilizer operates.
# If [a
Image Stabilization for IS Lenses (Lens I.S. Priority)
PASMB
n
When using a third-party lens with an on-board image stabilizer, choose whether image
stabilization gives priority to the camera or the lens.
#
enable or disable image stabilization.
Menu
MEN U n
_
n8. Image Stabilizer n Lens I.S. Priority
On Priority is given to lens image stabilization.
O Priority is given to camera image stabilization.

140
EN
Shooting Settings
4
Color and Quality
Setting the Quality of Photos and Movies (KK / nK)
You can set the image quality modes for photos and movies. Select a quality suitable
for the application (such as for processing on PC, use on website etc.).
Super Control Panel
Q n KK /
n
K
Menu
MEN U n
_
n1. Basic Settings/Image Quality n KK
MEN U n
n
n1. Basic Settings/Image Quality n
n
K
Se tting KK
Option Image size Compression ratio File format
YSF
5184 × 3888 SuperFine (1/2.7) JPG
YF
5184 × 3888 Fine (1/4) JPG
YN
5184 × 3888 Normal (1/8) JPG
uN
3200 × 2400 Normal (1/8) JPG
RAW 5184 × 3888 Lossless compression ORF
RAW+JPEG RAW plus the JPEG option selected above
%The image size/compression combinations available can be selected in the menus.
g “Combinations of JPEG image sizes and compression rates (KK Detailed
Settings)” (P. 143)
%During the high resolution shooting (P. 156), you can select between
A
F,
I
F,
J
F,
A
F+RAW,
I
F+RAW, and
J
F+RAW.
# When [Standard], [Dual Same1], or [Dual Same3], or [Auto Switch] is selected for
[KSave Settings] (P. 242), the selected option applies to the cards in both slots
5
and
4
.
# AF and AF+RAW are unavailable when [Onn] is selected for High Res Shot
(P. 156).
# Selecting High Res Shot (P. 156) changes the image quality option selected; be
sure to check the image quality setting before shooting.
%
“.ORF”) for pictures that will later be enhanced.
- Cannot be viewed on other cameras
- Can be viewed on computers using OM Workspace Digital Photo Managing software
- Can be saved in JPEG format using the [RAW Data Edit] (P. 200) retouch option in
the camera menus

141
EN
Shooting Settings
4
Se tting
n
K
• To change the settings of each image quality mode, press I while an image quality mode
is selected.
The Movie Quality Icon
nK] icon as shown below. Up to three
combinations can be saved.
Movie Resolution
4K 4K 3840×2160
FHD Full HD 1920×1080
C4K 4K Digital Cinema 4096×2160
Motion Compensation
I-8 A-I ALL-Intra*
• Fixed to [L-GOP]
when [Movie
Resolution] is [4K] or
[C4K].
L-8 L-GOP LongGOP
When [nVideo Codec] (P. 144) is [H.264]: “-8”
When [nVideo Codec] (P. 144) is [H.265]: “-10”
* When ALL-Intra is used, the movie will be recorded without interframe
compression. It is suitable for editing, but the data will be large.
Playback Frame Rate
60p 59.94p 59.94fps
• [24.00p] can only be
selected when [Movie
Resolution] is [C4K].
50p 50.00p 50.00fps
30p 29.97p 29.97fps
25p 25.00p 25.00fps
24.00p 24.00p 24.00fps
24p 23.98p 23.98fps
Slow or Fast Motion
-
- Number (rate)
• Large rate means fast recording and small rate means slow
recording.
• Because the movies are played back at the designated speed,
they will look like slow motion/fast motion movies.
# Sound is not recorded.
#
# Slow recording and/or fast recording may be unavailable
depending on the [
n
K] setting.
# Only 1/24 or higher shutter speed is available. Availability
depends on the [Frame Rate] setting.
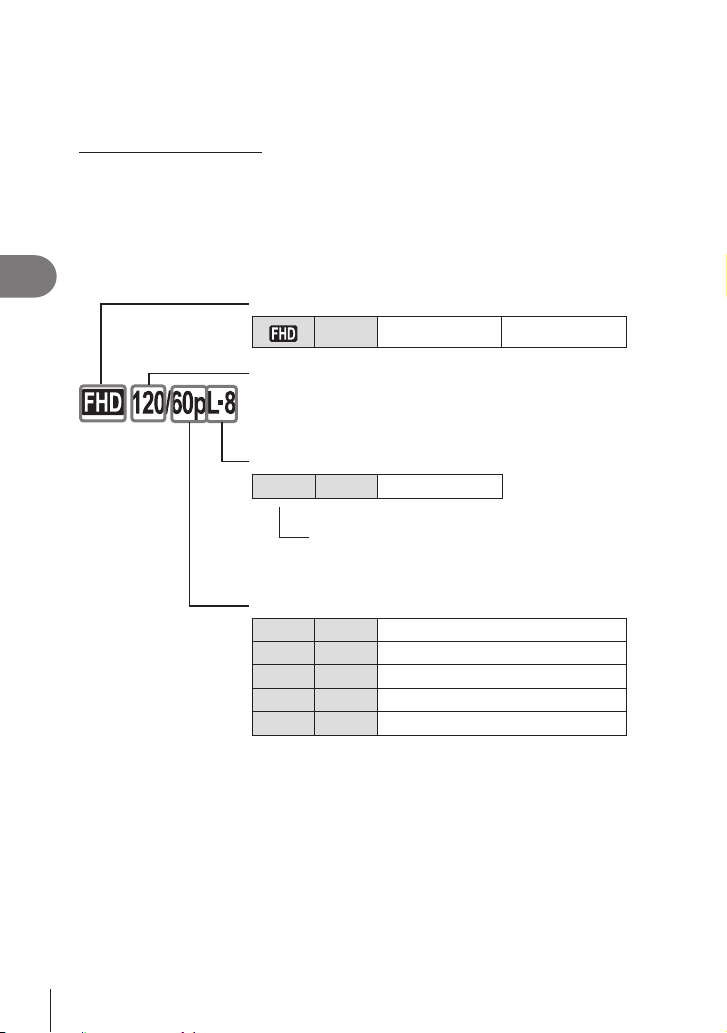
142
EN
Shooting Settings
4
# Depending on the card used, recording may end before the maximum length is reached.
# Motion Compensation selection may be unavailable at some settings.
# Movies are recorded at an aspect ratio of 16:9. C4K movies are recorded at an aspect
ratio of 17:9.
Filming High-Speed Movies
- 59.94 fps. Stretching playback to 2x - 10x the recording time lets you view in slow
motion movements that in real life took only the blink of an eye.
A high-speed movie option can be included in the movie image quality menu. Your
choice of playback frame rate determines the playback speed multiplier. Limitations
apply to combination of the Sensor Frame Rate and Playback Frame Rate.
Movie Resolution
FHD Full HD 1920×1080
Sensor Frame Rate
240fps/200fps/120fps/100fps
• 240fps can only be selected when [nVideo Codec] is
[H.264].
Motion Compensation
L-8 L-GOP LongGOP
When [nVideo Codec] (P. 144) is [H.264]: “-8”
When [nVideo Codec] (P. 144) is [H.265]: “-10”
Playback Frame Rate
60p 59.94p 59.94fps Playback rate : ×0.5/0.25
50p 50.00p 50.00fps Playback rate : ×0.5/0.25
30p 29.97p 29.97fps Playback rate : ×0.25/0.12
25p 25.00p 25.00fps Playback rate : ×0.25/0.13
24p 23.98p 23.98fps Playback rate : ×0.2/0.1
• To change the settings for high-speed movies, press I while an image quality mode
is selected.

143
EN
Shooting Settings
4
#
When an SDXC card is used, recording stops before the playback time reaches 3 hours.
# Focus, exposure, and white balance lock during recording.
# Sound is not recorded.
# The picture angle is slightly reduced.
# Aperture, shutter speed, exposure compensation, and ISO sensitivity cannot be changed
during recording.
# Time codes cannot be recorded or displayed.
# Brightness may change if zoom is adjusted during recording.
# High-speed movie recording is not available while the camera is connected to an HDMI
device.
# When recording high-speed movies, [oAll] cannot be selected for AF target mode.
# [M-IS1] cannot be selected for [nImage Stabilizer] (P. 136).
#
#
# High-speed movie recording is not available during remote photography when the camera
is connected to a smartphone.
Combinations of JPEG image sizes and compression rates
(KK Detailed Settings)
PASMB
n
You can set the JPEG image quality by combining image size and compression rate.
Menu
MEN U n
_
n1. Basic Settings/Image Quality n KK Detailed
Settings
Image size Compression rate
Application
Name Pixel Count
SF
(Super Fine)
F
(Fine)
N
(Normal)
Y
(Large) 5184×3888
YSF
Y
F
Y
N
Select for the print
size
u
(Middle) 3200×2400
uSF uF uN
v
(Middle) 1920×1440
vSF vF vN
w
(Small) 1280×960
wSF wF wN
For small prints and
use on a website
x
(Small) 1024×768
xSF xF xN

144
EN
Shooting Settings
4
Choosing the codec for recording movies (nVideo Codec)
PASMB
n
Choose the codec to be used when recording movies.
Menu
MEN U n
n
n1. Basic Settings/Image Quality n nVideo Codec
H.264
Records 8-bit movies using H.264, which is a versatile codec. Use
this setting for general use.
H.265
Records 10-bit movies using the H.265 codec. This setting is
primarily for movies that are intended to be edited on a computer.
# When [H.265] is selected, only [a2 OM-Log400] and [a3 HLG] are available for
[nPicture Mode] (P. 146). For playback with the correct color and brightness, a TV
or a display compatible with 10-bit input is required. When outputted to a HDMI device
usually look.
Setting the image aspect (Image Aspect)
PASMB
n
Choose the ratio of width to height for pictures according to your intent or your goals
for printing or the like. In addition to the standard aspect (width-to-height) ratio of [4:3],
Super Control Panel
Q n Aspect
Menu
MEN U n
_
n1. Basic Settings/Image Quality n Image Aspect
• JPEG images are recorded at the selected aspect ratio. RAW images are the same size
as the image sensor and are recorded at an aspect ratio of 4:3 with a tag indicating the
aspect ratio selected. A crop indicating the selected aspect ratio is displayed when images
are played back.
Peripheral illumination (Shading Comp.)
PASMB
n
Compensate for the drop in brightness at the edges of the frame due to the optical
characteristics of the lens. Some lenses may exhibit a drop in brightness at the edges
of the frame. The camera can compensate for this by making the edges brighter.
Menu
MEN U n
_
n1. Basic Settings/Image Quality n Shading Comp.
O Shading compensation disabled.
On
The camera detects and compensates for reduced peripheral
illumination.
#
# Noise may be more noticeable at the edges of the frame at high ISO sensitivities.

145
EN
Shooting Settings
4
Processing options (KPicture Mode / nPicture Mode)
PASMB
n
Choose how pictures are processed during shooting to enhance color, tone, and other
properties. Choose from preset picture modes according to your subject or artistic
intent. Contrast, sharpness, and other settings can be adjusted separately for each
Super Control Panel
Q n Picture Mode
Menu
MEN U n
_
n2. Picture Mode/WB n KPicture Mode
MEN U n
n
n2. Picture Mode/WB n nPicture Mode
#
as the [KPicture Mode] (P. 146) setting by selecting [nPicture Mode] from the super
control panel.
- [nVideo Codec] is set to [H.264] and [nPicture Mode] is set to [Same as K]
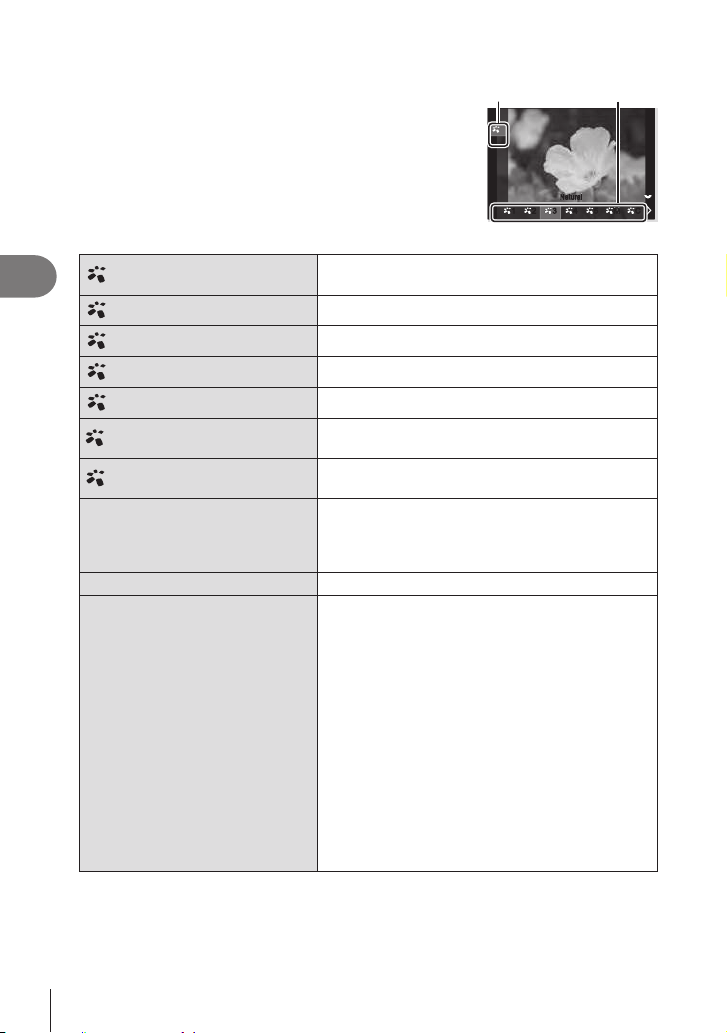
146
EN
Shooting Settings
4
Se tting KPic t ure M ode
1
Select a picture mode using the rear dial or HI.
Option
Picture Mode
NaturalNatural
43
3
21 5 M C
L
Norm
±
0
±
0
±
0
K
u
t
4321 5 M C
Picture Mode setting screen
1
i-Enhance
The camera adjusts colors and contrast for optimal
results according to the type of subject.
2
Vivid Choose for vivid colors.
3
Natural Choose for natural colors.
4
Muted Choose for pictures that will later be retouched.
5
Portrait Enhance skin tones.
M
Monochrome
Record pictures in monochrome. You can apply color
C
Custom
Adjust picture mode parameters to create a custom
version of a selected picture mode.
F
Underwater
Process pictures to preserve the vivid colors seen
under water.
• #+WB]
(P. 154) when this option is selected.
c
Color Creator Adjust hue and color to suit your creative intent.
e
f
g
h
i
j
k
l
m
n
o
p
q
r
v
9
Pop Art
Soft Focus
Pale&Light Color
Light Tone
Grainy Film
Pin Hole
Diorama
Cross Process
Gentle Sepia
Dramatic Tone
Key Line
Watercolor
Vintage
Partial Color
Bleach Bypass
Instant Film
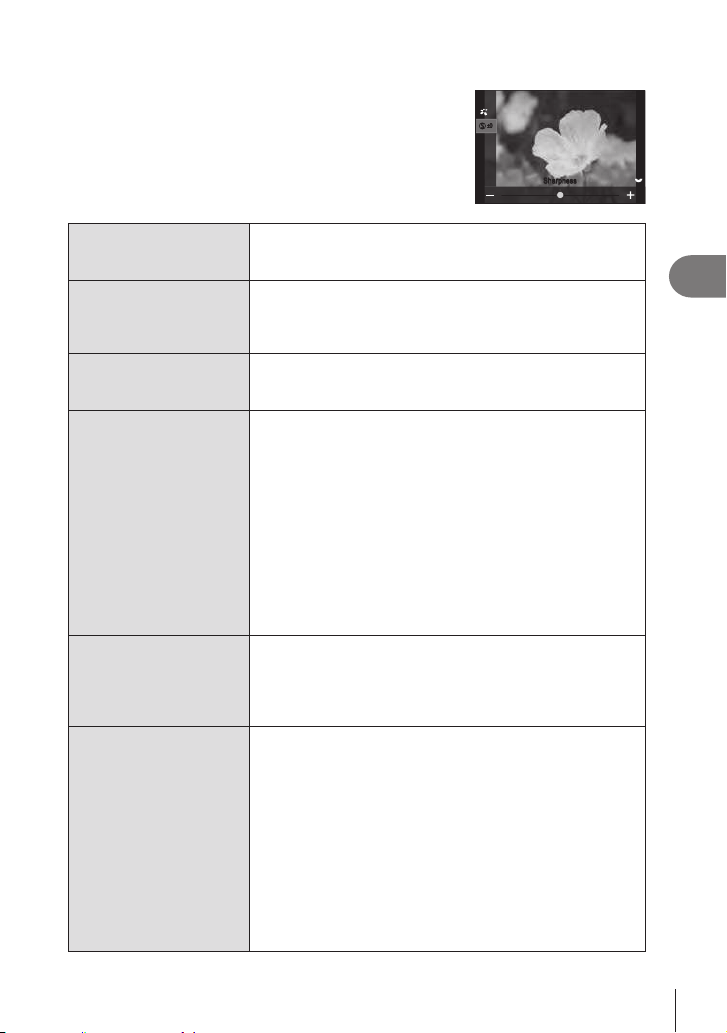
147
EN
Shooting Settings
4
Se tting de taile d opt ions of a KPic t ure M ode
1
Press FG on the Picture Mode setting screen
(P. 146) to select the option you want to set.
• Available settings vary depending on the selected
picture mode.
3
L
Norm
±
0
±
0
±
0
±
0
K
u
t
±
0
K
SharpnessSharpness
K
Sharpness
Adjust image sharpness. Outlines can be emphasized for a
sharp, clear picture.
[-2] – [±0] – [+2]
u
Contrast
Adjust image contrast. Increasing contrast heightens the
[-2] – [±0] – [+2]
t
Saturation
Adjust color saturation. Increasing saturation makes pictures
more vivid.
[-2] – [±0] – [+2]
L
Gradation
Adjust color brightness and shading. Bring pictures closer
to what you envisage by, for example, brightening the entire
picture.
[Shadow Adj]: Divides the image into detailed regions and
adjusts the brightness separately for each region. This is
whites appear too bright or the blacks appear too dark.
[Gradation Normal]: Optimal shading. Recommended in
most circumstances.
[Gradation High Key]: Uses a tone suitable for a bright
subject.
[Gradation Low Key]: Uses a tone suitable for a dark
subject.
Eect Eect
Choose the strength of i-Enhance.
[Eect: Low]
[Eect: Standard]
to images.
[Eect: High]
Filter Color Filter
Orange adds more contrast than yellow, red more contrast
than orange. Green is a good choice for portraits and the like.
[N:None]
[Ye:Yellow]
natural blue sky.
[Or:Orange]: Slightly brings out blue skies or the light of the
setting sun.
[R:Red]: Further brings out blue skies or autumn foliage.
[G:Green]: Adds warmth to skin tones in portraits. The green

148
EN
Shooting Settings
4
Color
Monochrome
Color
Add a tint to pictures when using monochrome picture modes.
[N:Normal]: Creates a normal black and white image.
[S:Sepia]: Shoot in sepia-tinted monochrome.
[B:Blue]: Shoot in blue-tinted monochrome.
[P:Purple]: Shoot in purple-tinted monochrome.
[G:Green]: Shoot in green-tinted monochrome.
l
Picture Mode
Choose a picture mode you want to adjust when using
[Custom].
[i-Enhance], [Vivid], [Natural], [Muted], [Portrait],
[Monochrome]
Color Creator
Rotate the front dial to adjust hue. Rotate the rear dial to
adjust saturation.
To restore default values, press and hold the Q button.
Add Eects
be adjusted.
Color Partial Color
•
quality in place of [RAW].
#
cases tone transitions may be ragged or the image rendered more “grainy”.
%You can choose whether to show or hide each picture mode using the [KPicture Mode
Settings] menu (P. 149).
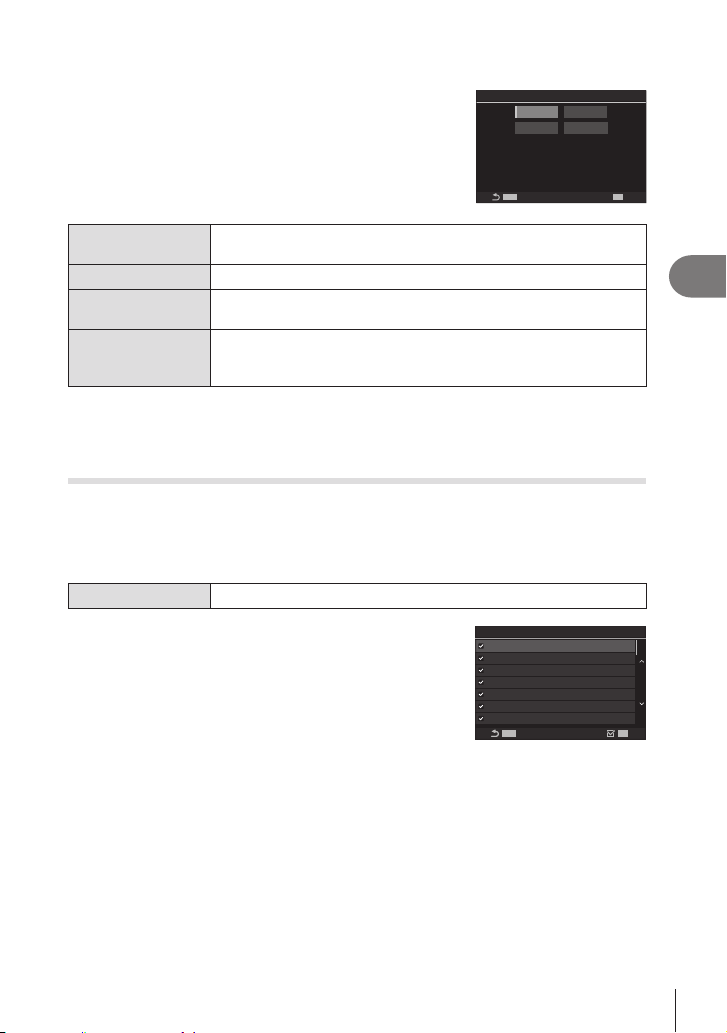
149
EN
Shooting Settings
4
Se tting nPic t ure M ode
1
Select [nPicture Mode] from the menu.
2
Select an option using FGHI.
MENU
OK
Off
a
1
a
3
a
2
K
Records videos using the same
settings as in K Picture Mode.
Same as K
K Same as K
[KPicture Mode].
a1 Flat
Movies are recorded using a tone curve adapted to color grading.
a2 OM-Log400
Movies are recorded using a log tone curve for greater freedom
during color grading.
a3 HLG
Movies are recorded with a high dynamic range, reproducing images
as seen with the naked eye when played back using compatible
equipment.
# [a3 HLG] cannot be selected when [nVideo Codec] (P. 144) is set to [H.264].
# [K] and [a1 Flat] cannot be selected when [nVideo Codec] (P. 144) is set to [H.265].
Choosing which options are displayed when selecting a picture
mode (KPicture Mode Settings)
PASMB
n
You can display only the options you need when selecting a picture mode.
• For details on picture modes, see “Processing options (KPicture Mode / nPicture
Mode)” (P. 145).
Menu
MEN U n
_
n2. Picture Mode/WB n KPicture Mode Settings
1
Select a picture mode that you want to have
displayed, and put a check (v) next to it.
• Select an option using FG and press the Q button to
put a check (v) next to it. To remove the check, press
the Q button again.
MENUMENU
Vivid
Portrait
OK
K
Picture Mode Settings
i-Enhance
Muted
Monochrome
Custom
Underwater
KPicture Mode Settings
screen
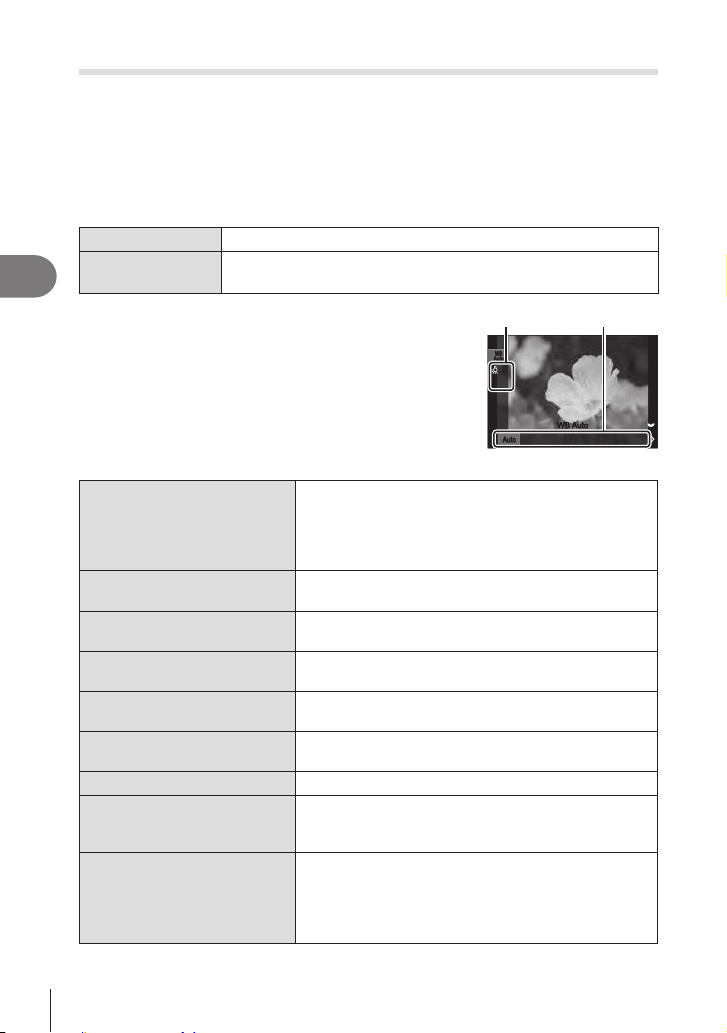
150
EN
Shooting Settings
4
Adjusting color (WB (white balance))
PASMB
n
White balance (WB) ensures that white objects in images recorded by the camera
appear white. [Auto] is suitable in most circumstances, but other values can be
selected according to the light source when [Auto] fails to produce the desired results
or you wish to introduce a deliberate color cast into your images.
Se tting the w hit e ba la nce
Super Control Panel
Q n WB
Menu
MEN U n _ n2. Picture Mode/WB n KWB
MEN U n n n2. Picture Mode/WB n nWB
1
Select a WB mode using the rear dial or HI.
2
To set the detailed options of the selected picture
mode, select an option using FG.
Option WB mode
5 N O
1
>
WB
V
AutoAuto
On
x
WB
Auto
WB
Auto
WB AutoWB Auto
WB setting screen
WBAuto WB Auto
Most normal scenes (scenes containing objects that are
white or close to white)
• This mode is recommended in most situations.
• You can choose the white balance used under
incandescent lighting (P. 154).
5
Sunny 5300K
• Color temperature is set to 5300K.
N
Shadow 7500K
Daylight shots of subjects in the shade
• Color temperature is set to 7500K.
O
Cloudy 6000K
Shots taken in daylight under overcast skies
• Color temperature is set to 6000K.
1
Incandescent 3000K
Subjects under incandescent lighting
• Color temperature is set to 3000K.
>
Fluorescent 4000K
• Color temperature is set to 4000K.
WBV
Underwater Underwater photography
n
WB Flash 5500K
lighting
• Color temperature is set to 5500K.
1
2
3
4
One-touch WB 1-4
Situations in which you want to set white balance for a
• Color temperature is set to a value metered from a
white object under the lighting what will be used in
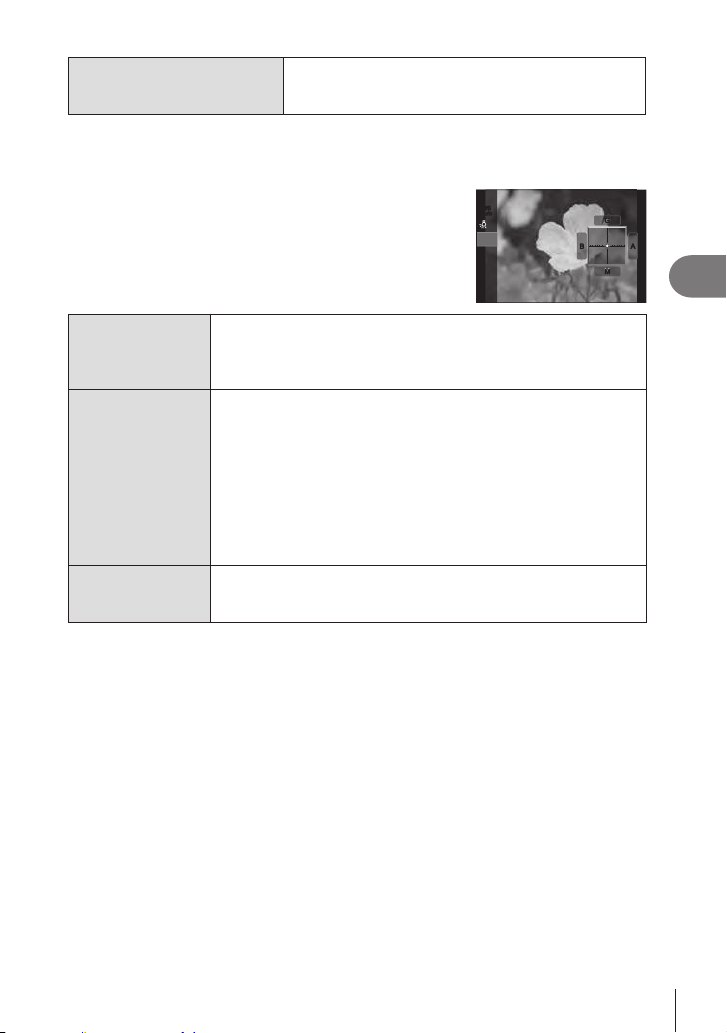
151
EN
Shooting Settings
4
CWB Custom WB
Situations in which you can identify the appropriate color
temperature
• Choose a color temperature.
Making ne adjustments to white balance of each WB mode
1
• Press FG on the WB setting screen (P. 150) to
select the option to adjust.
WB
Auto
WB
Auto
On
x
A
M
G
B A
M
G
B
W Keep Warm
Color
(only when WB
Auto is used)
[O]: The camera suppresses the warm tones produced by
incandescent lighting when WB Auto is used.
[On]: The camera preserves the warm tones produced by
incandescent lighting when WB Auto is used.
x (WB
Compensation)
Use the front dial or HI to adjust the (amber–blue) axis. When the
pointer (M) gets closer to A, a red cast is added and when it gets
closer to B, a blue cast is added.
Use the rear dial or FG to adjust the (green–magenta) axis.
When the pointer (M) gets closer to G, a green cast is added and
when it gets closer to M, a magenta cast is added.
Adjustments made will be reset when you press and hold the Q
button.
You can adjust the settings for all white balance modes at once.
g [All x] (P. 153)
Kelvin
(only for Custom
WB)
You can set the color temperature.
[2000K] - [14000K]
%When x (WB Compensation) is done, a mark (*) appears next to the WB mode icon.
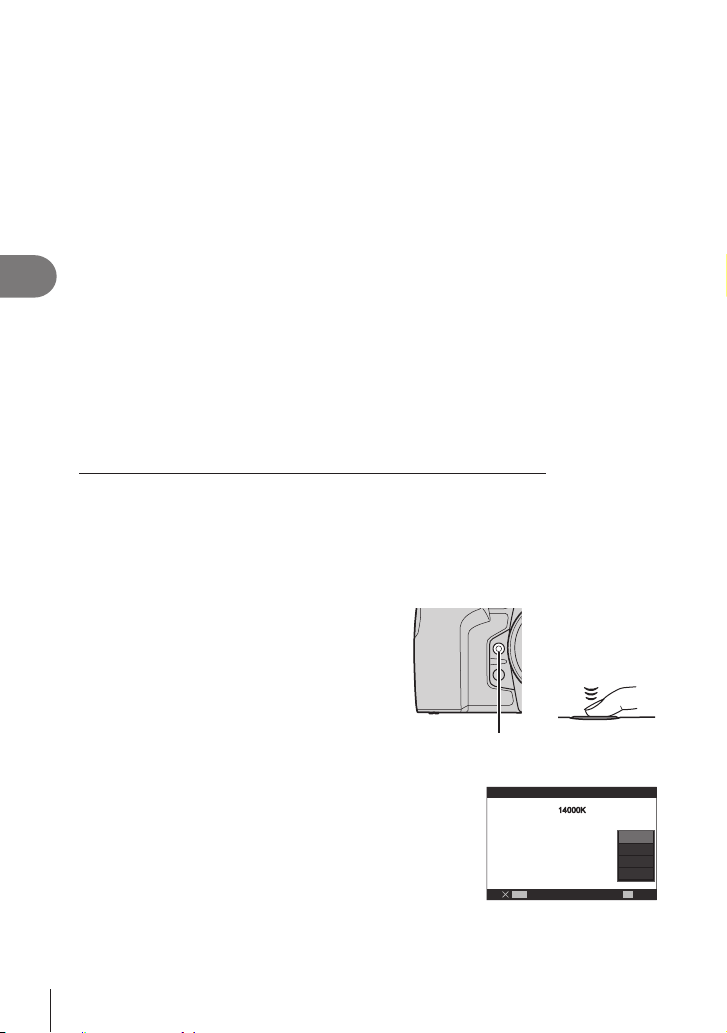
152
EN
Shooting Settings
4
One -t ouc h w hite ba la nc e
Measure white balance by framing a piece of paper or other white object under
compensation or preset white balance options such as 5 (sunlight) or O (overcast).
The camera stores the metered value for quick recall as required.
Settings for still photography and movie recording can be stored individually.
1
After selecting [
1], [
2], [
3], or [
4] (one-touch white balance 1, 2,
3, or 4) on the WB setting screen, press the Q button followed by the INFO
button.
2
Select [Set].
3
Photograph a piece of colorless (white or gray) paper.
•
• Press the IN FO button.
• The one-touch white balance screen appears.
4
Select [Yes] and press the Q button.
• The new value is saved as a preset white balance option.
• The new value is stored until one-touch white balance is measured again. Turning the
Metering White Balance with the One-Touch White Balance Button (Y)
Assigning [] to a button allows the control to be used to measure white balance. By
default, the Y button can be used to measure white balance during still photography.
white balance to a control using [nButton Function] (P. 208).
1
Frame a piece of colorless (white or gray) paper in the center of the display.
•
2
Hold the button to which One-Touch
White Balance is assigned and press the
shutter button all the way down.
• When recording movies, press the one-
touch white balance button to proceed to
Step 3.
• You will be prompted to choose the one-
touch white balance option that will be
used to store the new value.
+
One-touch white balance button (Y)
3
Highlight a one-touch white balance setting using
FG and press the Q button.
• The new value will be saved as the value for the
selected setting and the camera will exit to the shooting
display.
OK
MENU
One Touch WB
14000K14000K
1
2
3
4
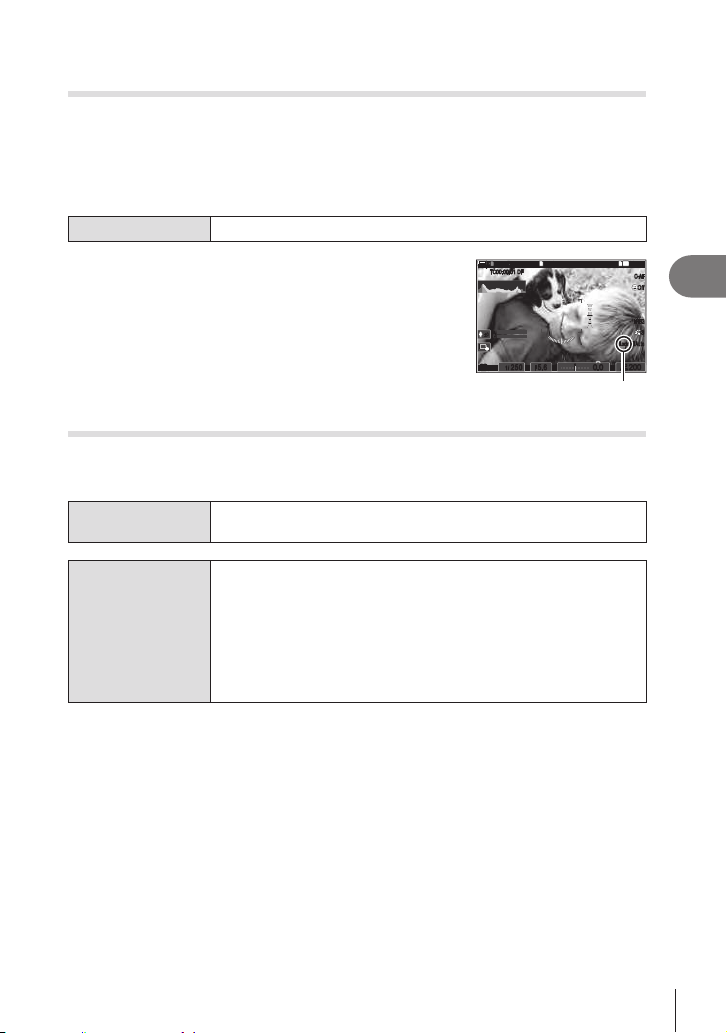
153
EN
Shooting Settings
4
Locking the white balance in movie mode
(nButton Function: WLock)
PASMB
n
When the camera is in movie mode and the white balance is set to [WB Auto], you can
lock the white balance to prevent it from changing even if the subject or the lighting
changes.
# It is required that you assign [WLock] to a button using [nButton Function] (P. 208).
Button
A button to which [WLock] has been assigned
When you press the button, white balance is locked with
the currently selected settings and “Lock” appears to the
left of “WBAuto”. Lock is released when you press the
button again.
145
min
145
min
REC
n
P
1
/
250
P
1
/
LL
R
F
250 5.65.6
1
[
1
:
02
:
03
][
1
:
02
:
03
]
60p60p L
-
8L
-
8
C
-
AFC
-
AF
M
-
IS2M
-
IS2
33
WBAutoWBAuto
OffOff
1
4K
ISO
Auto
ISO
Auto
F
00
+
-
0.00.0
(
REC
00:1200:12
(
n
±0±0
R
TC
00:00:01
TC
00:00:01
DFDF
200200
LockLock
Lock
Making ne adjustments to white balance
(KAll x/nAll x)
PASMB
n
Fine-tune white balance of all white balance modes at once.
Menu
MEN U n
_
n2. Picture Mode/WB n KAll x
MEN U n
n
n2. Picture Mode/WB n nAll x
KAll x / nAll
x
Use the front dial or HI to adjust the (amber–blue) axis. When the
pointer (M) gets closer to A, a red cast is added and when it gets
closer to B, a blue cast is added.
Use the rear dial or FG to adjust the (green–magenta) axis.
When the pointer (M) gets closer to G, a green cast is added and
when it gets closer to M, a magenta cast is added.
Adjustments made will be reset when you press and hold the Q
button.
%When [KAll x] / [nAll x] is done, a mark (*) appears next to each WB mode icon.
154
EN
Shooting Settings
4
Preserving the warm tones of incandescent lighting when in WB
Auto mode (KW Keep Warm Color/nW Keep Warm Color)
PASMB
n
Choose how the camera adjusts white balance for pictures taken using auto white
balance under incandescent lighting.
Menu
MEN U n
_
n2. Picture Mode/WB n KW Keep Warm Color
MEN U n
n
n2. Picture Mode/WB n nW Keep Warm Color
O
The camera suppresses the warm tones produced by incandescent
lighting.
On
The camera preserves the warm tones produced by incandescent
lighting.
%This can also be set from the WB setting screen. g
balance of each WB mode” (P. 151).
Flash White Balance (#+WB)
PASMB
n
photography. Use this option to automatically switch from one white balance setting to
Menu
MEN U n
_
n2. Picture Mode/WB n #+WB
O The camera uses the value currently selected for white balance.
WBAuto The camera uses auto white balance ([WB Auto]).
WB#5500K n]).
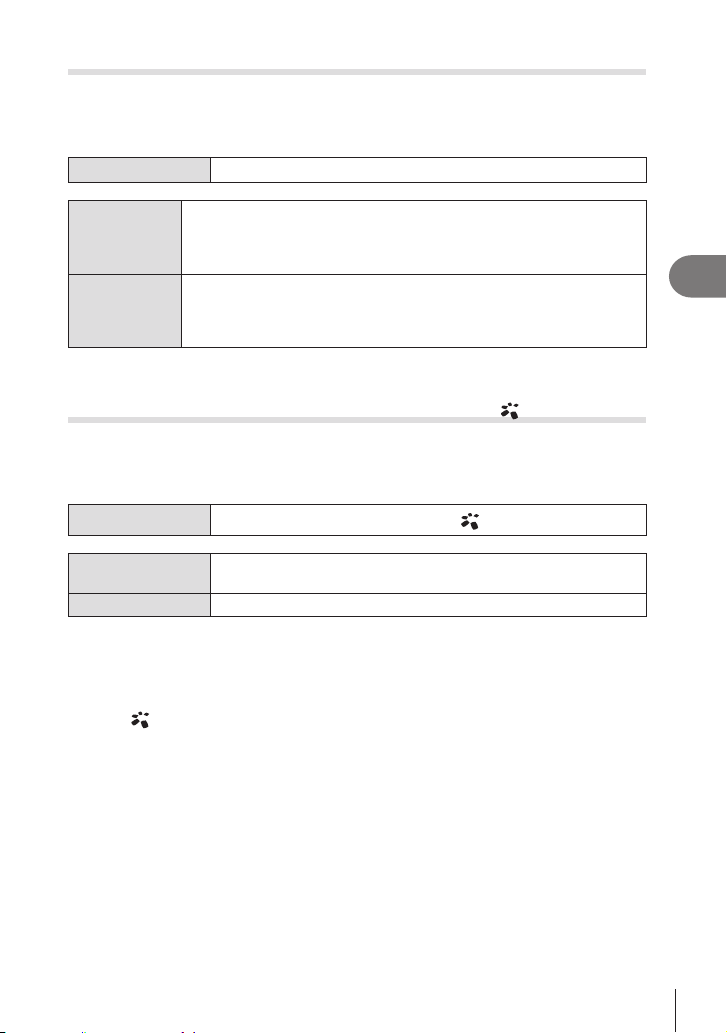
155
EN
Shooting Settings
4
Setting the color reproduction format (Color Space)
PASMB
n
You can select a format to ensure that colors are correctly reproduced when shot
images are regenerated on a monitor or using a printer.
Menu
MEN U n
_
n2. Picture Mode/WB n Color Space
sRGB
The color space standardized by an international standards organization.
It is widely supported across displays, printers, digital cameras,
and computer applications. This setting is recommended in most
circumstances.
AdobeRGB
It can reproduce a wider gamut of colors than sRGB. Accurate color
reproduction is available only with software and devices (displays,
printers, and the like) that support this standard. An underscore (“_”)
# [AdobeRGB] is not available in HDR or movie (n
for picture mode.
Preview Options for Movie Picture Modes (
nView Assist)
PASMB
n
The display can be adjusted for ease of viewing when a movie-only picture mode
option ([a1 Flat] or [a2 OM-Log400]) is selected (P. 149).
Menu
MEN U
n
n
n
2. Picture Mode/WB
n
nView Assist
On
Adjust the picture for ease of viewing. The indicators in the display
may change color.
O Do not adjust the picture for ease of viewing.
#
# This option does not apply when movies recorded using [a1 Flat] or [a2 OM-Log400]
are played back on the camera. It also does not apply when the movies are viewed on a
TV.
%The histogram (P. 38) and zebra pattern (P. 184) are processed based on the picture
before
nView Assist is applied.
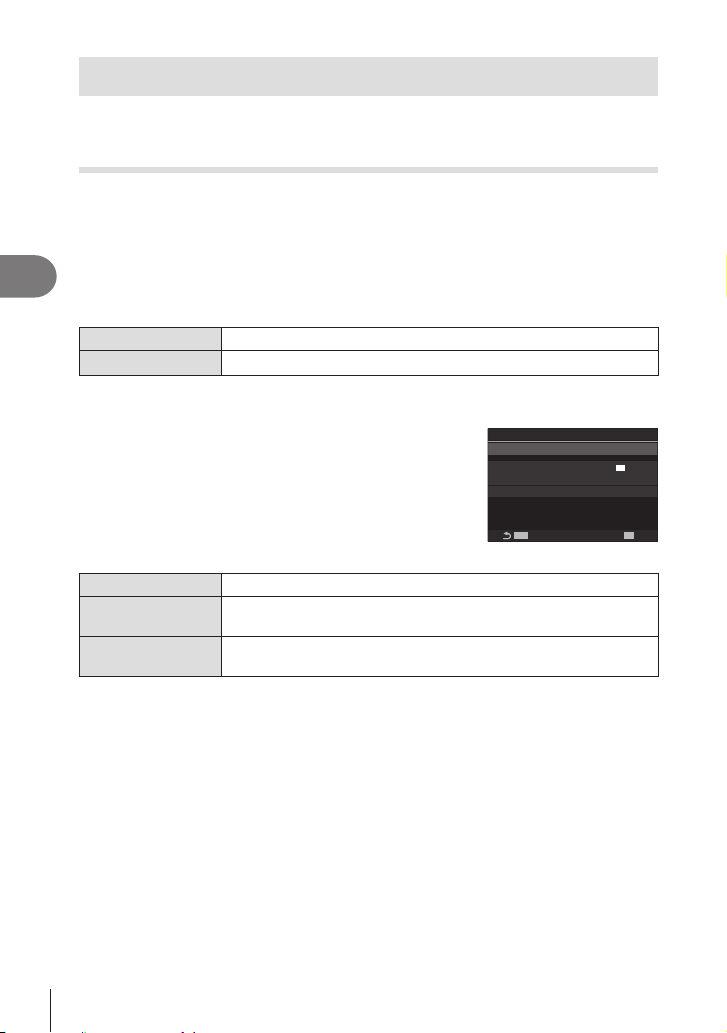
156
EN
Shooting Settings
4
Special shooting modes (Computational Modes)
cannot be achieved in normal shooting modes.
Shooting still pictures in a higher resolution (High Res Shot)
PASMB
n
Shoot at resolutions higher than that of the image sensor. The camera takes a series
of shots while moving the image sensor and combines them to create a single high-
resolution photo. Use this option to capture details that normally would not be visible
even at high zoom ratios.
When High Res Shot is enabled, the image quality mode for High Res Shot can be
selected using [KK] (P. 140).
Button
h button
Menu
MEN U n
‘
n1. Computational Modes n High Res Shot
Ena bling H igh Res Shot
1
Use FG to select [High Res Shot] and press the
Q button.
2
Use HI to select [Onm] (tripod) or [Onn]
(handheld) and press the Q button.
MENUMENU
OK
F+RAW
80M
hK
#
Charge Time
0sec
Waiting Time
Off
0sec
High Res Shot
High Res Shot
High Res Shot setting screen
O High Res Shot is disabled.
Onm
in 80M (10368 × 7776).
Onn
Shoot with the camera in your hands. The RAW picture is recorded
in 50M (8160 × 6120).
3
The display returns to the High Res Shot setting screen.
%h button.
You can also switch between [Onm] (tripod) and [Onn] (handheld) by rotating the front or
rear dial while pressing the h button.

157
EN
Shooting Settings
4
Conguring High Res Shot
1
• Press FG to select an item and press the Q button to
display the setting menu.
• Q button to return
to High Res Shot setting screen.
MENUMENU
OK
F+RAW
80M
hK
#
Charge Time
0sec
Waiting Time
0sec
High Res Shot
High Res Shot
On
m
hK
Choose the image quality of High Res Shot shooting (
P. 140
).
Waiting Time
Set how long the camera waits before releasing the shutter after
camera shake caused by the pressing of the shutter button.
#Charge Time
the camera.
[0.5 sec] / [0.2 sec] / [0.1 sec] / [0 sec]
Shooting
1
Press the MEN U button to close the High Res Shot setting screen and return
to shooting screen.
• A h
camera is steady and ready to shoot.
• After enabling High Res Shot, check the option selected
for image quality. Image quality can be adjusted in the
super control panel.
1
10231023
P
1
/
250
P
1
/
F
250 5.65.6
1
1
[
1
:
02
:
03
][
1
:
02
:
03
]
FF
60p60p L
-
8L
-
8
S
-
AFS
-
AF
33
L
1
4K
F
00
+
-
0.00.0
10
0
%
10
0
%
rr
O
O
$$
S
-
IS
Off
S
-
IS
Off
200200
ISO
Auto
ISO
Auto
Camera readying for High
2
Take pictures.
• Shooting is complete when the green h icon clears from the display.
• The camera will automatically create the composite image when shooting is
complete. A message will be displayed during this process.
• Choose from JPEG (AF, IF, or JF) and RAW+JPEG modes. When image quality
is set to RAW+JPEG, the camera saves a single RAW image (extension “.ORI”) before
combining it with the high resolution shooting. Pre-combination RAW images can be
played back using the latest version of OM Workspace.
# AF and AF+RAW are unavailable when [Onn] (handheld) is selected as the shooting
method.
# KImage Stabilizer] (P. 136) when [Onm] (tripod)
is chosen, [S-IS Auto] when [Onn] (handheld) is selected.
# The maximum wait time for [Onn] (handheld) is 1 second.
#
# The following cannot be used:
correction, and HDR.
# When [High Res Shot] is set to [Onm
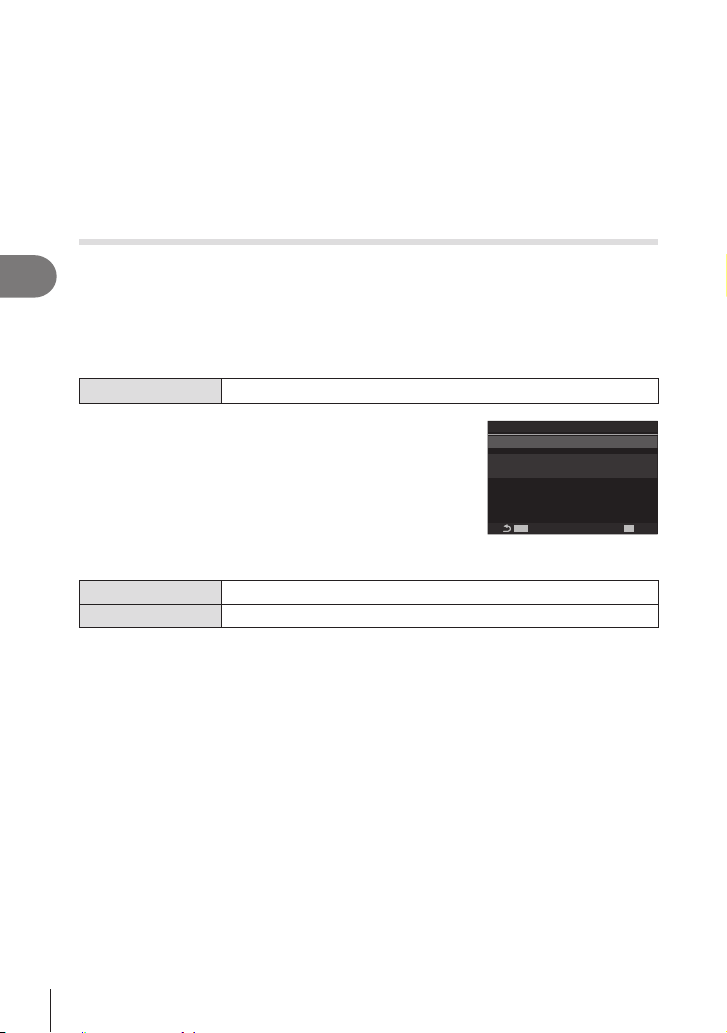
158
EN
Shooting Settings
4
# When High Res Shot is enabled, [Drive j/Y] is set to [♥o]. [♥Y12s] (Silent self-timer
YYC] (Silent custom self-timer) can be set.
#
mode.
#
# If the camera is unable to record a composite image due to blur or other factors, only the
in JPEG format, while if [RAW+JPEG] is selected, the camera will record two copies, one
in RAW (.ORF) and the other in JPEG format.
Slowing the Shutter in Bright Light (Live ND Shooting)
PA SM B
n
The camera makes a series of exposures and combines to create a single photo that
appears to have been taken at a slow shutter speed.
• Changing exposure compensation or shutter speed resets the [LV Simulation] display.
Ena bling Live N D Shoot ing
Menu
MEN U
n
‘
n
1. Computational Modes
n
Live ND Shooting
1
Use FG to select [Live ND Shooting] and press
the Q button.
2
Use FG to select [On] and press the Q button.
MENUMENU
OK
ND8(3EV)
Live ND Shooting
ND Number
LV Simulation
Off
On
Live ND Shooting
Live ND Shooting setting
screen
O Pictures are taken without using this function.
On
3
The display returns to the Live ND Shooting setting screen.
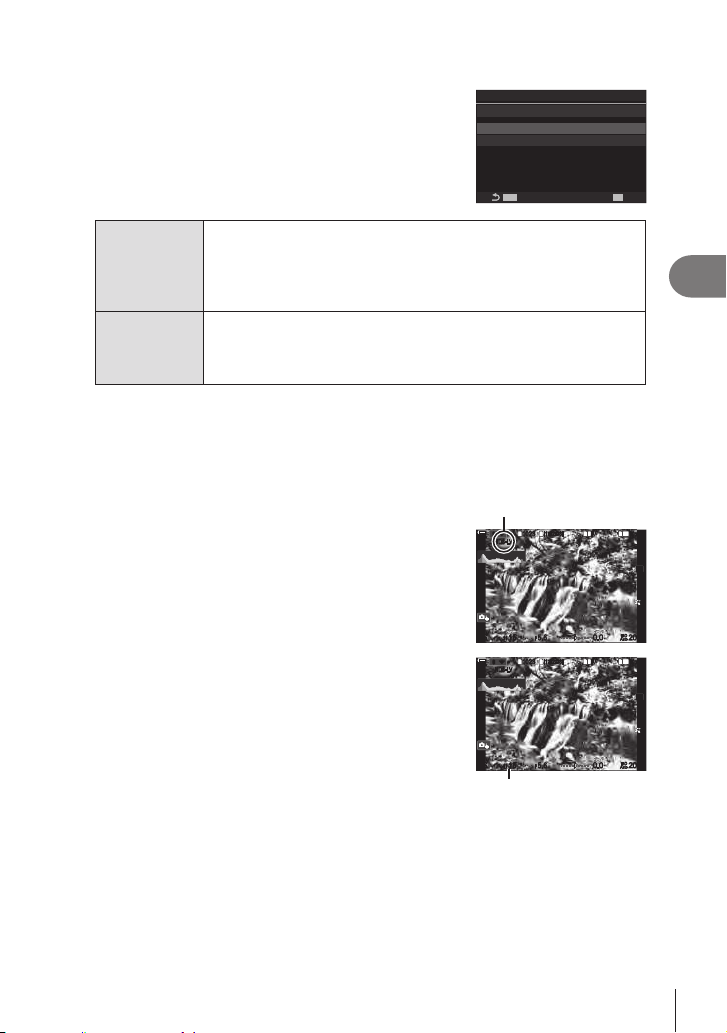
159
EN
Shooting Settings
4
Conguring Live ND Shooting
1
• Press FG to select an item and press the Q button to
display the setting menu.
• Q button to return
to Live ND Shooting setting screen.
MENUMENU
OK
ND8(3EV)
Live ND Shooting
ND Number
LV Simulation
On
On
Live ND Shooting
ND Number
value and reduce exposure by that amount. Options are available in
increments of 1 EV:
[ND2 (1EV)], [ND4 (2EV)], [ND8 (3EV)], [ND16 (4EV)],
[ND32 (5EV)], [ND64 (6EV)]
LV Simulation
current shutter speed.
[O]: Use the standard shooting display.
[On]
Shooting
1
Press the MEN U button to close the Live ND Shooting setting screen and
return to shooting screen.
•
•
enabled.
•
ND Shooting] display shown in Step 2.
Live ND Shooting
ND8
-
LV
SS
S
-
AFS
-
AF
33
$$
1
10231023
1
1
[
1
:
02
:
03
][
1
:
02
:
03
]
FF
60p60p L
-
8L
-
8
L
1
4K
10
0
%
10
0
%
rr
O
O
1
/
151
/
F
15 5.65.6
200200
ISO
Auto
ISO
Auto
F
00
+
-
0.00.0
2
Adjust shutter speed while previewing the results in
the display.
• Adjust shutter speed using the rear dial.
• The slowest shutter speed available varies with the ND
[ND2 (1EV)]: 1/60 s [ND16 (4EV)]: 1/8 s
[ND4 (2EV)]: 1/30 s [ND32 (5EV)]: 1/4 s
[ND8 (3EV)]: 1/15 s [ND64 (6EV)]: 1/2 s
ND8
-
LV
SS
S
-
AFS
-
AF
33
$$
1
10231023
1
1
[
1
:
02
:
03
][
1
:
02
:
03
]
FF
60p60p L
-
8L
-
8
L
1
4K
10
0
%
10
0
%
rr
O
O
1
/
151
/
F
15 5.65.6
200200
ISO
Auto
ISO
Auto
F
00
+
-
0.00.0
Shutter speed
•
previewed in the display.
• The camera requires a length of time equivalent to the selected shutter speed to
• When the time equivalent to the selected shutter speed passes, the “LV” part of the
icon on the screen turns green. When the icon is green, the display is similar to the

160
EN
Shooting Settings
4
3
Take pictures.
# [Frame Rate] will be [Normal] during live ND photography.
# The upper limit for [K ISO] during live ND photography is ISO 800. This also applies
when [Auto] is selected for [K ISO].
# The following cannot be used:
HDR, High Res Shot, multiple exposure, keystone compensation, bracketing, focus
stacking, interval-timer photography, K
# When Live ND Shooting is enabled, [Drive j/Y] is set to [♥
o
]. [♥Y12s] (Silent self-
timer 12s), [♥Y2s] (Silent self-timer 2s) and [♥YC] (Silent custom self-timer) can be set.
#
the image sensor, and consequently very bright subjects may be overexposed.
Increasing Depth of Field (Focus Stacking)
PASM
B
n
shot. The camera takes a series of shots at focus distances both in front of and behind
the current focus position and creates a single image from the areas that are in focus
in each shot.
Choose this option if you want all areas of the subject in focus in photographs taken at
short ranges or wide apertures (low f-numbers). The pictures are taken in silent mode
using the electronic shutter.
# The composite image is recorded in JPEG format, regardless of the option selected for
image quality.
# The composite image is enlarged 7% horizontally and vertically.
# Shooting will end if focus or zoom is adjusted after the shutter button has been pressed all
the way down to start focus stacking photography.
# If focus stacking fails, the camera will record the selected number of photos without
creating a composite image.
# This option is available only with lenses that support focus stacking. See our website for
information on compatible lenses.
#
Menu
MEN U n
‘
n1. Computational Modes n Focus Stacking
Ena bling Focus Sta cking
1
Use FG to select [Focus Stacking] and press the
Q button.
2
Use FG to select [On] and press the Q button.
MENUMENU
OK
5
8
Focus Stacking
Set number of shots
Set focus differential
#
Charge Time
Off
0sec
Focus Stacking
Focus Stacking setting
screen
O Pictures are taken without using this function.
On
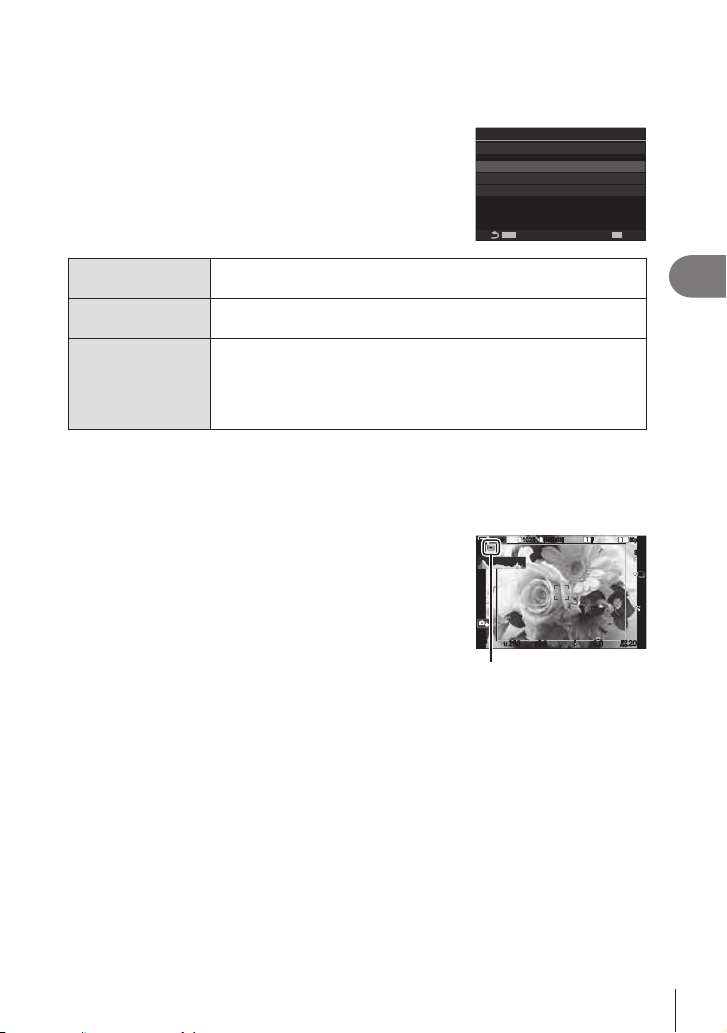
161
EN
Shooting Settings
4
3
The display returns to the Focus Stacking setting screen.
Conguring Focus Stacking
1
• Press FG to select an item and press the Q button to
display the setting menu.
• Q button to return
to Focus Stacking setting screen.
MENUMENU
OK
5
8
Focus Stacking
Set number of shots
Set focus differential
#
Charge Time
On
0sec
Focus Stacking
Set number of
shots
Choose the number of shots to be taken with varied focus positions.
[3] – [15]
Set focus
dierential
Choose the amount the camera varies focus with each shot.
[1] – [10]
#Charge Time
the camera.
[0 sec] / [0.1 sec] / [0.2 sec] / [0.5 sec] / [1 sec] / [2 sec] / [4 sec] /
[8 sec] / [15 sec] / [30 sec]
Shooting
1
Press the MEN U button to close the Focus Stacking setting screen and
return to shooting screen.
• W appears on the screen.
• Picture mode will be set to [Natural].
•
display. Compose the shot with your subject in the
frame.
1
10231023
P
1
/
250
P
1
/
F
250 5.65.6
1
1
[
1
:
02
:
03
][
1
:
02
:
03
]
FF
60p60p L
-
8L
-
8
S
-
AFS
-
AF
33
L
1
4K
F
00
+
-
0.00.0
10
0
%
10
0
%
rr
O
O
$$
200200
ISO
Auto
ISO
Auto
W
2
Take pictures.
• The camera will automatically take the selected number of shots when the shutter
button is pressed all the way down.
# When [Focus Stacking] is set to [On], [Flash Mode] in [Silents Settings] (P. 132)
becomes [Allow].
# KISO] sets
%We recommend using a remote control (P. 279) to reduce blur caused by camera shake.
In [Silents Settings] (P. 132), you can choose how long the camera will wait to release
the shutter after the shutter button is pressed all the way down.
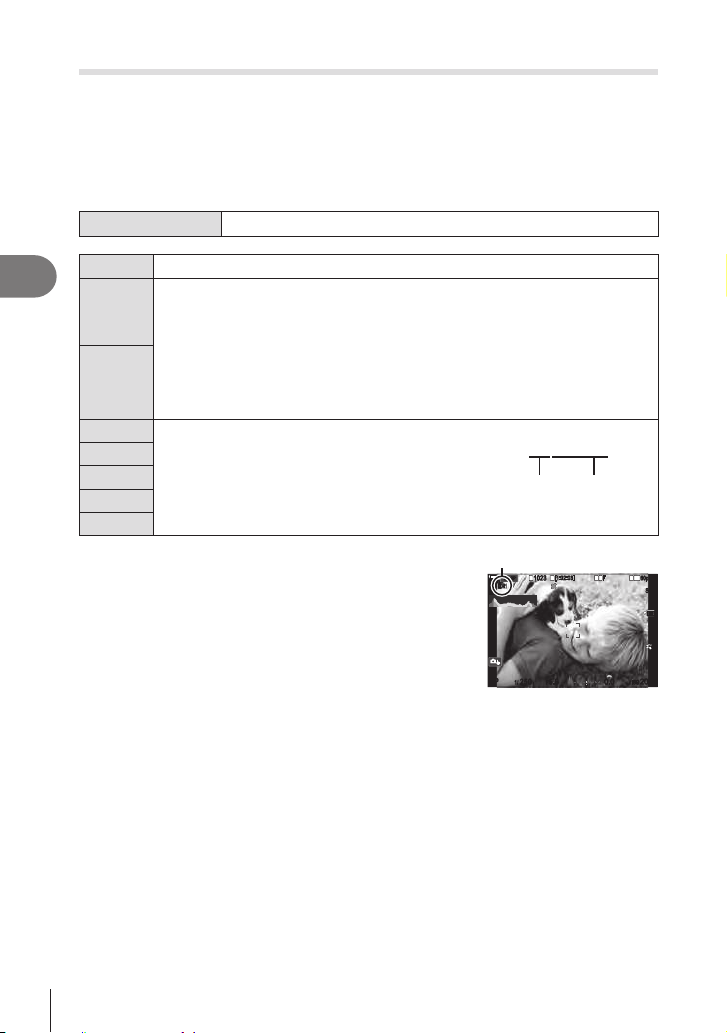
162
EN
Shooting Settings
4
Taking HDR (High Dynamic Range) images (HDR)
PASM
B
n
The camera varies exposure over a series of shots, selects from each tone range
with the highest level of detail, and combines them to create a single picture with a
wide dynamic range. If the photo features a high-contrast subject, details that would
otherwise be lost in shadows or highlights will be preserved.
#
Menu
MEN U n
‘
n1. Computational Modes n HDR
O HDR is disabled.
HDR1
Each time you take a photo, the camera will take a series of shots while varying
exposure and combine them into a single picture. Choose [HDR1] for natural-
• [K
• Shutter speeds can be as slow as 4 s. Shooting will continue for up to 15 s.
•
• The combined picture is saved in JPEG format. If [RAW] is selected for image
quality, it will instead be recorded in RAW + JPEG format.
HDR2
3f 2.0EV
Each time you take a photo, the camera will vary
exposure over a series of shots. The shots are not
combined to create a single picture. The shots can
however be combined using HDR software on a
computer or other device.
3f 2.0EV
Number of
shots
Exposure
range
5f 2.0EV
7f 2.0EV
3f 3.0EV
5f 3.0EV
• ”HDR” appears on the screen.
HDR
HDR1HDR1
1
10231023
P
1
/
250
P
1
/
F
250 5.65.6
1
1
[
1
:
02
:
03
][
1
:
02
:
03
]
FF
60p60p L
-
8L
-
8
S
-
AFS
-
AF
33
L
1
4K
F
00
+
-
0.00.0
100
%
100
%
rr
O
O
$$
200200
ISOISO

163
EN
Shooting Settings
4
1
Take pictures.
• Each time you press the shutter button, the camera will take the selected number of
shots.
• In [HDR1] and [HDR2] modes, the camera will automatically combine the shots into a
single picture.
• Exposure compensation is available in modes P, A, and S.
#
HDR picture.
#
or [HDR2] mode.
# When [HDR1] or [HDR2] is enabled, [Drive j/Y] is set to [♥
o
]. [♥Y12s] (Silent self-
timer 12s), [♥Y2s] (Silent self-timer 2s) and [♥YC] (Silent custom self-timer) can be set.
# The following cannot be used:
Shot.
Recording multiple exposures in a single image (Multiple Exposure)
PASMB
n
Take two shots and combine them into a single picture. Alternatively, you can take a
shot and combine it with an existing picture stored on the memory card.
The combined image is recorded at current image quality settings. Only RAW pictures
can be selected for multiple exposures that include an existing image.
If you record a multiple exposure with RAW selected for [KK], you can then select
it for subsequent multiple exposures using [Overlay], allowing you to create multiple
exposures combining three or more photographs.
Menu
MEN U n
‘
n1. Computational Modes n Multiple Exposure
Ena bling M ult iple Exposure
1
Use FG to select [Multiple Exposure] and press
the Q button.
2
Use FG to select [On] and press the Q button.
MENUMENU
OK
Multiple Exposure
Auto Gain
Overlay
Off
Off
Off
Multiple Exposure
Multiple Exposure setting
screen
O Pictures are taken without using this function.
On Create a multiple exposure from 2 pictures.
3
The display returns to the Multiple Exposure setting screen.
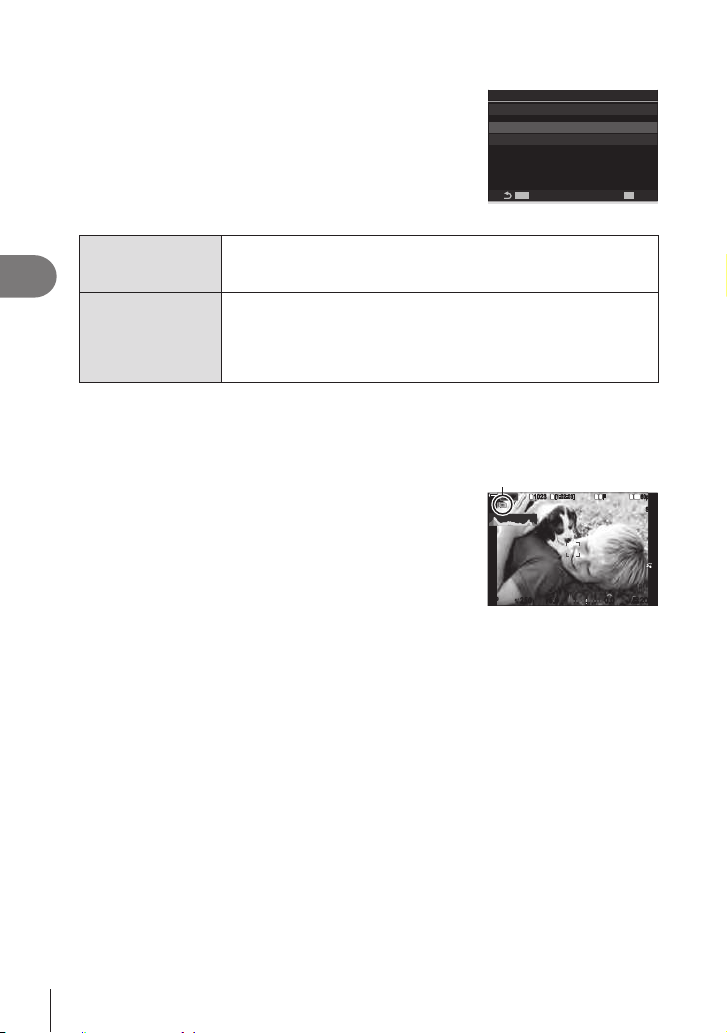
164
EN
Shooting Settings
4
Conguring Multiple Exposure
1
• Press FG to select an item and press the Q button to
display the setting menu.
• Q button to return
to Multiple Exposure setting screen.
MENUMENU
OK
Multiple Exposure
Auto Gain
Overlay
On
Off
Off
Multiple Exposure
Auto Gain
[O]: Do not adjust brightness the brightness of the pictures in the
multiple exposure.
[On]: Halve the brightness of each picture in the multiple exposure.
Overlay
[O]: Create a multiple exposure from the next 2 pictures taken.
[On]: Shoot a multiple exposure that includes an existing RAW
image stored on the memory card.
• [Overlay] is only available when [On] is selected for [Multiple
Exposure].
Shooting
1
Press the MEN U button to close the Multiple Exposure setting screen and
return to shooting screen.
• A X icon will be displayed. X
1
10231023
P
1
/
250
P
1
/
F
250 5.65.6
1
1
[
1
:
02
:
03
][
1
:
02
:
03
]
FF
60p60p L
-
8L
-
8
S
-
AFS
-
AF
33
L
1
4K
F
00
+
-
0.00.0
100
%
100
%
rr
OO
200200
ISO
Auto
ISO
Auto
2
Take pictures.
•
compose the next shot.
• The X icon turns green.
• Normally, a multiple exposure will be created after the second shot is taken.
• Pressing the D
• Press the MEN U button or press the q button to end multiple exposure
photography.
• The X icon clears from the display when multiple exposure photography ends.

165
EN
Shooting Settings
4
When [Overlay] is set
When [On] is selected for [Overlay], a list of pictures is displayed.
1
Highlight a picture using FGHI and press the Q button.
• Only RAW images can be selected.
2
Press the MEN U button to close the menu.
• A
X
icon will be displayed.
• The selected picture is overlaid on the screen.
3
Take pictures.
• You can take additional pictures that will be overlaid on the previously-chosen
photograph.
# The camera will not enter sleep mode during multiple exposure photography.
# Pictures taken with other cameras cannot be used for multiple exposures.
# RAW pictures taken using High Res Shot cannot be used for multiple exposures.
# The RAW pictures listed in the image-selection display when [On] is selected for [Overlay]
# Exit multiple exposure mode before adjusting shooting settings. Some settings cannot be
#
exposure photography:
q or MEN U
mode, or connecting cables of any type. Multiple exposure is also canceled when the
battery is exhausted.
# The image-selection display for [Overlay] shows the JPEG copies of photographs taken
with RAW + JPEG selected for image quality.
# Live composite photography ([Live Comp]) is not available in mode
B
.
# The following are not available in multiple exposure mode:
HDR, bracketing, focus stacking, interval-timer photography, keystone compensation,
%Pictures taken with RAW selected for [KK] can also be overlaid during playback.
g “Combining Pictures (Image Overlay)” (P. 203)
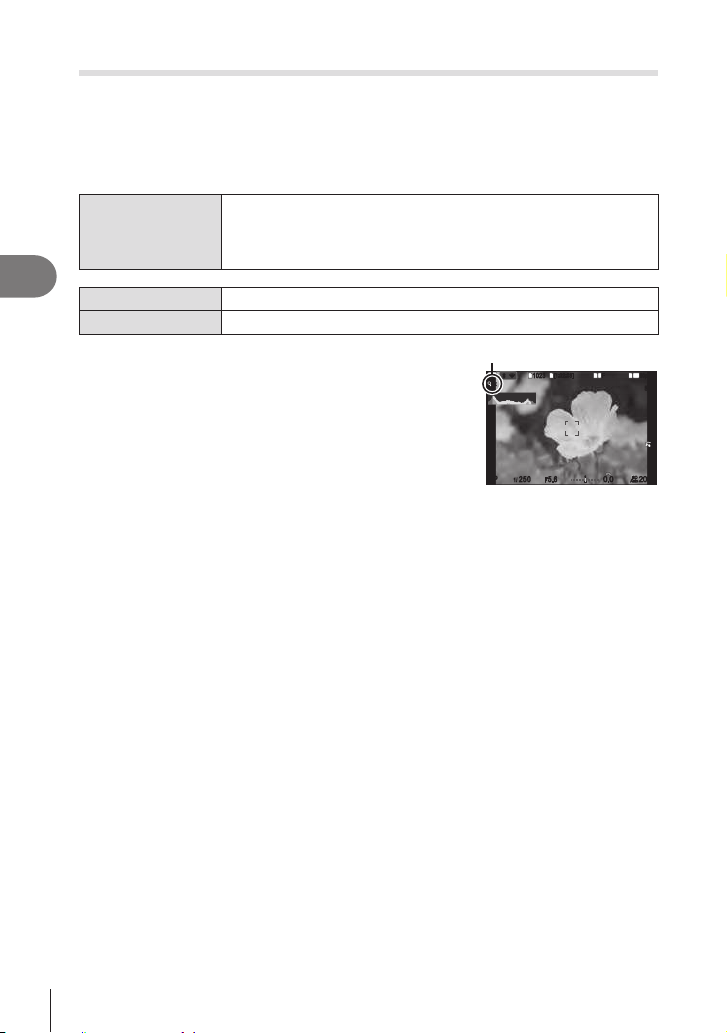
166
EN
Shooting Settings
4
Digital Zoom (KDigital Tele-converter / nDigital Tele-converter)
PASMB
n
This option takes a crop at the center of the frame the same dimensions as the size
you to zoom in past the lens’ maximum focal length, making it a good choice when you
Menu
MEN U n
‘
n2. Other Shooting Functions n KDigital Tele-
converter
MEN U n
n
n1. Basic Settings/Image Quality n nDigital Tele-
converter
O Pictures are taken without using this function.
On Images are recorded enlarged (Still pictures: 2x, Movies: 1.4x).
• When [On] is selected, an icon is displayed and, when
live view is enabled, it is enlarged.
• The size of the AF targets (“Choosing an AF Target
Mode (AF Target Mode)” (P. 77)) increases and their
number decreases.
• JPEG images are recorded at the selected zoom ratio.
In the case of RAW images, a frame shows the zoom
crop. A frame showing the zoom crop is displayed on
the image during playback.
Digital teleconverter
2x2x
1
10231023
P
1
/
250
P
1
/
F
250 5.65.6
1
1
[
1
:
02
:
03
][
1
:
02
:
03
]
FF
60p60p L
-
8L
-
8
S
-
AFS
-
AF
33
L
1
4K
F
00
+
-
0.00.0
100
%
rr
O
O
200200
ISO
Auto
ISO
Auto
# In still photography mode, the following cannot be used:
# In movie mode, this function cannot be used during high-speed movie recording.
# This function cannot be used when outputting HDMI signals in RAW mode (P. 182).
# You cannot zoom in on the display (P. 41, P. 80, P. 102) when [nDigital Tele-
converter] is enabled.
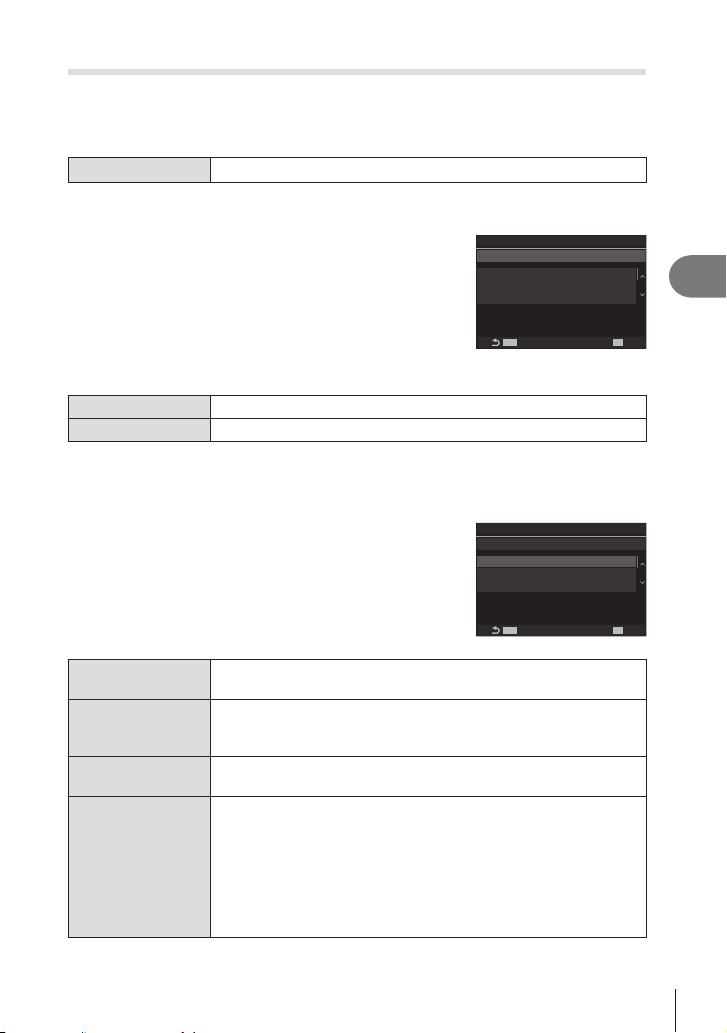
167
EN
Shooting Settings
4
Shooting automatically with a xed interval (Interval Shooting)
PASM
B
n
You can set the camera to shoot automatically with a set time lapse. The shot frames
can also be recorded as into a single movie.
Menu
MEN U n
‘
n2. Other Shooting Functions n Interval Shooting
Ena bling I nt e r va l Shooting
1
Use FG to select [Interval Shooting] and press
the Q button.
2
Use FG to select [On] and press the Q button.
MENUMENU
OK
00:00:01
00:00:01
Start
End
'22.06.04
'22.06.04 10:57
--
:
--
10:56
100
Interval Shooting
Estimated Start Time
TL Movie Length
Number of Frames
Start Waiting Time
Off
Interval Length
Interval Shooting
Interval Shooting setting
screen
O Pictures are taken without using this function.
On
3
The display returns to the Interval Shooting setting screen.
Conguring Interval Shooting
1
• Press FG to select an item and press the Q button to
display the setting menu.
• Q button to return
to Interval Shooting setting screen.
MENUMENU
OK
00:00:01
00:00:01
Start
End
'22.06.04
'22.06.04 10:57
--
:
--
10:56
100
Interval Shooting
Estimated Start Time
TL Movie Length
Number of Frames
Start Waiting Time
On
Interval Length
Interval Shooting
Number of Frames
Choose the number of frames shot.
[002] – [9999]
Start Waiting Time
Choose how long the camera waits before starting interval timer
[00:00:00] – [24:00:00]
Interval Length
Choose how long the camera waits between shots once shooting
has begun.[00:00:01] – [24:00:00]
Interval Mode
Choose whether to put priority on the interval time or the number of
frames.
[Time Priority] / [Frames Priority]
If [Time Priority] is selected, the previous shooting may be still in
progress even when it is time to shoot the next shot.
When the selected [Interval Length] is short or when using long
exposure, the number of recorded frames may be smaller than the
number selected for [Number of Frames].
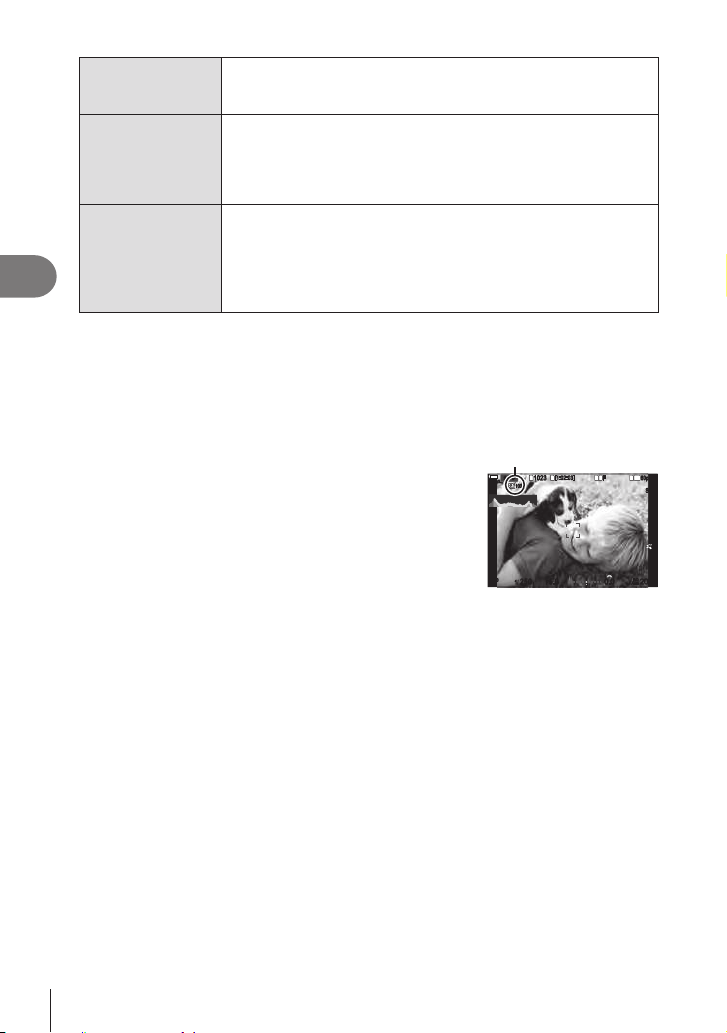
168
EN
Shooting Settings
4
Exposure
Smoothing
Choose whether to smooth the exposure settings for all frames. The
change of exposure will be smooth in the time lapse movie.
[O] / [On]
Time Lapse Movie
Choose whether to record a time-lapse movie.
[O]: The camera saves the individual shots but does not use them
to create a time-lapse movie.
[On]: The camera records the individual shots and also uses them
to create a time-lapse movie.
Movie Settings
Choose the frame size ([Movie Resolution]) and frame rate ([Frame
Rate]) for movies created using [Time Lapse Movie].
Choose the frame size from the following options.
[4K] / [FullHD] / [HD]
Choose the frame rate from the following options.
[30fps] / [15fps] / [10fps] / [5fps]
# [Start Waiting Time], [Interval Length] and [Estimated Time] may change depending on
shooting settings. Use these as guidelines only.
Shooting
1
Press the MEN U button to close the Interval Shooting setting screen and
return to shooting screen.
• An i icon and the selected number of frames appear
on the shooting screen.
Interval-timer photography
100
1
10231023
P
1
/
250
P
1
/
F
250 5.65.6
1
1
[
1
:
02
:
03
][
1
:
02
:
03
]
FF
60p60p L
-
8L
-
8
S
-
AFS
-
AF
33
L
1
4K
F
00
+
-
0.00.0
100
%
rr
O
O
200200
ISO
Auto
ISO
Auto
2
Take pictures.
•
• The i icon will turn green and the number of shots remaining will be displayed.
• Time lapse shooting will be canceled if any of the following is operated:
Mode dial, MEN U button, q button, lens release button, or connection to a computer
using a USB cable.
•
#
position, shoot in MF.
#
# If the time until shooting or the shooting interval is 1 minute 31 seconds or longer, the
monitor will go dark and the camera will enter sleep mode if no operations are performed
for 1 minute. The camera and monitor will reactivate automatically 10 seconds before a
picture is taken, and can be reactivated manually by pressing the shutter button.
# The camera automatically selects [S-AF] for AF mode (P. 72) in place of [C-AF] and
[C-AF+TR], and [S-AFb] in place of [C-AFb] and [C-AF+TRb].
# When [FAF] is selected as the AF mode (P. 72), focus to initiate shooting, then lock
focus and start recording.
# Touch operations are disabled during time lapse shooting.
# Time-lapse shooting cannot be combined with HDR, bracketing, focus stacking, multiple

169
EN
Shooting Settings
4
#
# When 1000 or a larger number is selected for [Number of Frames], [Time Lapse Movie]
# When [High Res Shot] is set to [Onm
# If any of still pictures are not recorded correctly, the time lapse movie will not be
generated.
#
# If there is not enough charge left on the battery, the shooting may end partway through.
mobile battery conforming to the USB-PD standard to the camera when shooting.

170
EN
Shooting Settings
4
Keystone correction and perspective control (Keystone Comp.)
PASM
B
n
compensation can be previewed in the monitor during shooting. The corrected image is
Menu
MEN U n
‘
n2. Other Shooting Functions n Keystone Comp.
O Pictures are taken without using this function.
On Pictures are taken with keystone compensation applied.
• When you select [On], a D icon is displayed and
sliders appear on the monitor.
Keystone compensation
1
10231023
P
1
/
250
P
1
/
F
250 5.65.6
1
1
[
1
:
02
:
03
][
1
:
02
:
03
]
FF
60p60p L
-
8L
-
8
L
1
4K
F
100
%
rr
O
O
200200
ISO
Auto
ISO
Auto
1
Frame the shot and adjust keystone compensation while viewing your subject
in the display.
• Rotate the front dial to make horizontal adjustments and the rear dial to make vertical
adjustments.
• Use FGHI to position the crop. The direction in which the crop can be moved is
shown by an arrow (
).
• To cancel changes, press and hold the Q button.
2
To adjust aperture, shutter speed, and other shooting settings, press the
INFO button.
• Standard shooting indicators will be displayed.
• A D icon is displayed while keystone compensation is enabled. The icon is
displayed in green if adjustments have been made to keystone compensation
settings.
• To return to the keystone compensation display shown in Step 1, press the I NFO
button repeatedly.
3
Take pictures.
# Pictures may seem “grainy” depending on the amount of compensation performed. The
amount of compensation also determines the amount the picture will be enlarged when
cropped and whether the crop can be moved.
# Depending on the amount of compensation, you may be unable to reposition the crop.
# Depending on the amount of compensation performed, the selected AF target may not be
visible in the display. If the AF target is outside the frame, its direction is indicated by a g,
h, i, or j icon in the display.
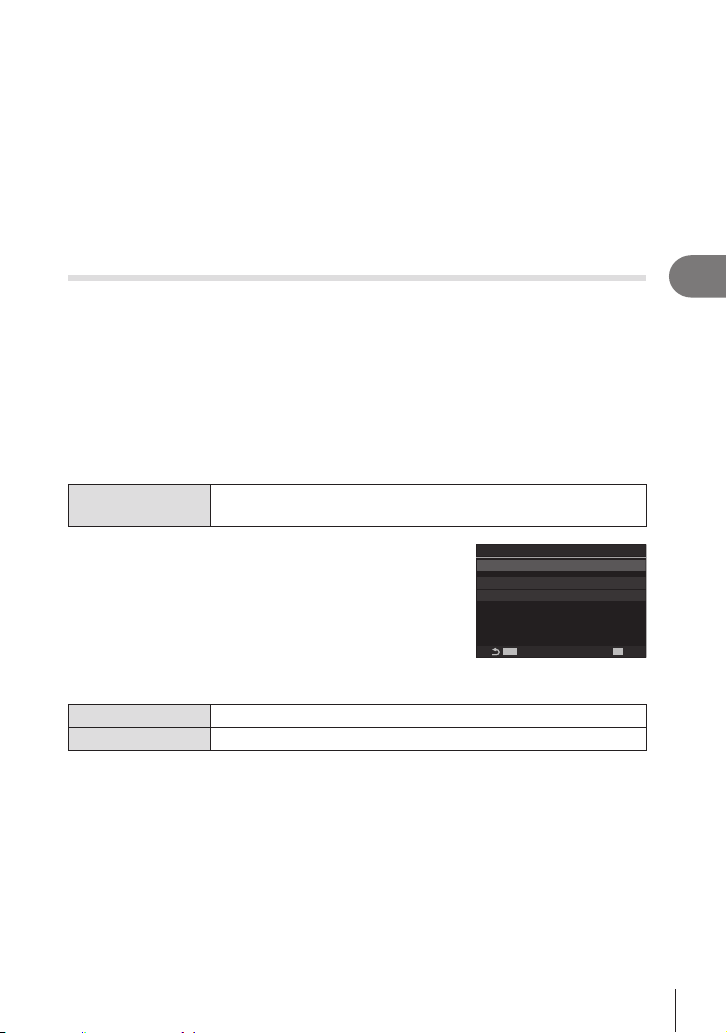
171
EN
Shooting Settings
4
# Pictures taken with [RAW] for image quality are recorded in RAW + JPEG format.
# The following cannot be used:
live composite photography, burst photography, bracketing, focus stacking, HDR,
recording, [C-AF], [C-AFb], [C-AF+TR], and [C-AF+TRb
picture modes, the custom self-timer, and High Res Shot.
# Lens converters may not produced the desired results.
# Be sure to provide [KImage Stabilizer] data for lenses that are not part of the Four Thirds
or Micro Four Thirds family (P. 136).
Where applicable, keystone compensation will be performed using the focal length
supplied for [KImage Stabilizer] (P. 136) or [Lens Info Settings] (P. 246).
Correcting Fisheye Distortion (Fisheye Compensation)
PASMB
n
taken with a wide-angle lens. The amount of correction can be selected from three
under water.
•
As of February 2022, it could be used with the M.ZUIKO DIGITAL ED 8mm F1.8 Fisheye
PRO.
Ena bling Fishe ye Com pensat ion
Menu
MEN U n
‘
n2. Other Shooting Functions n Fisheye
Compensation
1
Use FG to select [Fisheye Compensation] and
press the Q button.
2
Use FG to select [On] and press the Q button.
MENUMENU
OK
1
Fisheye Compensation
Angle
j/iCorrection
Off
Off
Fisheye Compensation
Fisheye Compensation setting
screen
O Pictures are taken without using this function.
On
3
The display returns to the Fisheye Compensation setting screen.
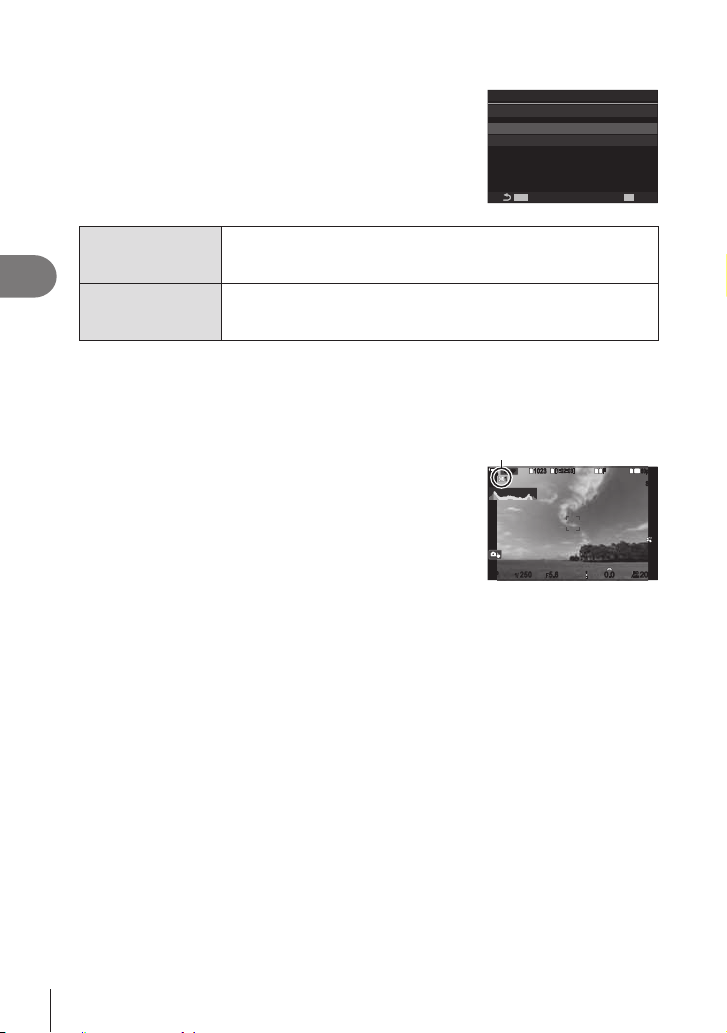
172
EN
Shooting Settings
4
Conguring Fisheye Compensation
1
• Press FG to select an item and press the Q button to
display the setting menu.
• Q button to return
to Fisheye Compensation setting screen.
MENUMENU
OK
1
Fisheye Compensation
Angle
j/iCorrection
On
Off
Fisheye Compensation
Angle
[1] / [2] / [3]
j/iCorrection
Choose whether to correct distortion in photos taken under water in
addition to the correction performed using [Angle].
[O] / [On]
Shooting
1
Press the MEN U button to close the Fisheye Compensation setting screen
and return to shooting screen.
• Z icon will
be displayed together with the selected crop.
Fisheye compensation
11
1
10231023
P
1
/
250
P
1
/
F
250 5.65.6
1
1
[
1
:
02
:
03
][
1
:
02
:
03
]
FF
60p60p L
-
8L
-
8
S
-
AFS
-
AF
33
L
1
4K
F
00
+
-
0.00.0
100
%
100
%
rr
O
O
200200
ISO
Auto
ISO
Auto
2
Take pictures.
# Pictures taken with [RAW] selected for image quality are recorded in RAW + JPEG format.
Fisheye compensation is not applied to the RAW image.
#
# AF target selection is restricted to ISingle and ySmall target modes.
# The following cannot be used:
live composite photography, burst photography, bracketing, focus stacking, HDR,
movie recording, [C-AF], [C-AFb], [C-AF+TR], and [C-AF+TRb
picture modes, the custom self-timer, and High Res Shot.
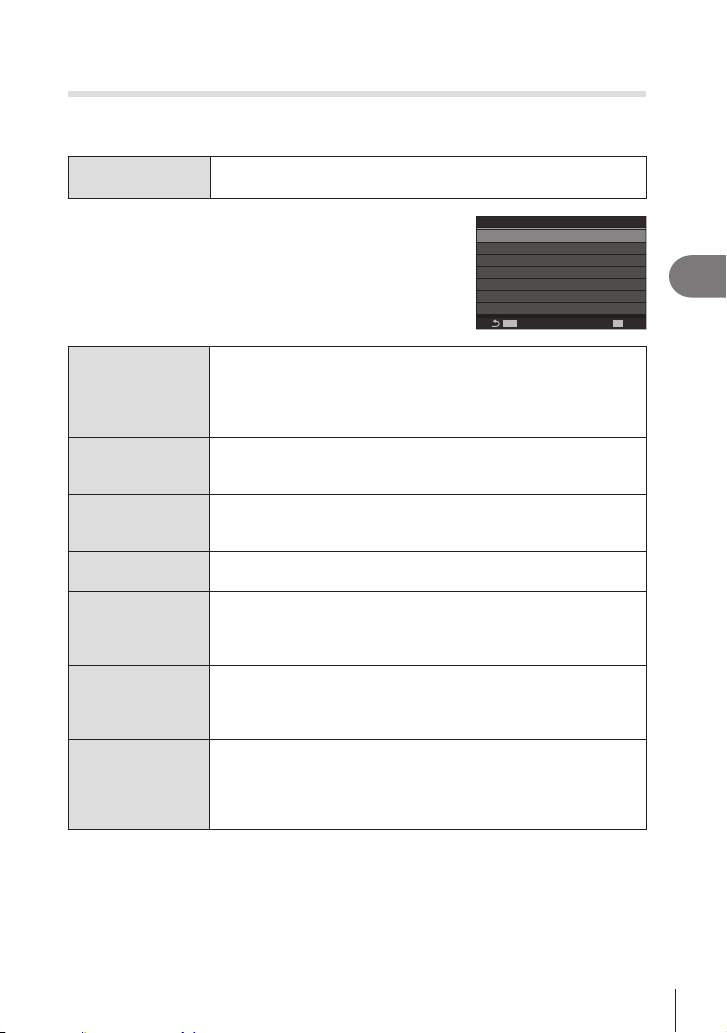
173
EN
Shooting Settings
4
Conguring BULB/TIME/COMP Settings
(BULB/TIME/COMP Settings)
PASMB
n
Set items related to bulb/time/composite photography.
Menu
MENU n
‘
n2. Other Shooting Functions n BULB/TIME/COMP
Settings
1
• Press FG to select an item and press the Q button to
display the setting menu.
MENU
OK
-7
My
BULB/TIME/COMP Settings
Bulb/Time Timer
Bulb/Time Focusing
Live Composite Timer
3h
Bulb/Time Monitor
Live Bulb
Off
Live Time
0.5sec
Composite Settings
1/2sec
8min
On
Bulb/Time
Focusing
Allows manual focusing in B (bulb) mode. You can take pictures
using techniques such as putting the subject out of focus during
exposure or focusing at the end of exposure.
[O]: Disables manual focusing during exposure.
[On]: Enables manual focusing during exposure.
Bulb/Time Timer
Specify the maximum length of bulb/time photography.
[30min] / [25min] / [20min] / [15min] / [8min] / [4min] / [2min] /
[1min]
Live Composite
Timer
Specify the maximum length of live composite photography.
[6h] / [5h] / [4h] / [3h] / [2h] / [1h] / [30min] / [25min] / [20min] /
[15min] / [8min] / [4min]
Bulb/Time Monitor
Specify the display brightness in B (bulb) mode.
[-7] – [±0] – [+7]
Live Bulb
Choose the display interval during bulb photography. The number of
[60sec] / [30sec] / [15sec] /
[8sec] / [4sec] / [2sec] / [1sec] / [0.5sec] / [O]
Live Time
Choose the display interval during time photography. The number of
[60sec] / [30sec] / [15sec] /
[8sec] / [4sec] / [2sec] / [1sec] / [0.5sec] / [O]
Composite
Settings
Set an exposure time to be the reference in composite photography.
[60sec] / [50sec] / [40sec] / [30sec] / [25sec] / [20sec] / [15sec] /
[13sec] / [10sec] /
[8sec] / [6sec] / [5sec] / [4sec] / [3.2sec] / [2.5sec] / [2sec] /
[1.6sec] / [1.3sec] / [1sec] / [1/1.3sec] / [1/1.6sec] / [1/2sec]

174
EN
Shooting Settings
4
Recording a series of shots with varied exposure (AE BKT)
PASM
B
n
Vary exposure over a series of shots. You choose the amount of variation and the
The camera will take pictures while the shutter button is pressed all the way down,
ending when the selected number of shots has been taken.
Menu
MEN U n
‘
n3. Bracketing n AE BKT
O Pictures are taken without using this function.
3f 0.3EV 3 pictures are taken with the bracketing amount of 0.3 EV.
3f 0.5EV 3 pictures are taken with the bracketing amount of 0.5 EV.
3f 0.7EV 3 pictures are taken with the bracketing amount of 0.7 EV.
3f 1.0EV 3 pictures are taken with the bracketing amount of 1.0 EV.
5f 0.3EV 5 pictures are taken with the bracketing amount of 0.3 EV.
5f 0.5EV 5 pictures are taken with the bracketing amount of 0.5 EV.
5f 0.7EV 5 pictures are taken with the bracketing amount of 0.7 EV.
5f 1.0EV 5 pictures are taken with the bracketing amount of 1.0 EV.
7f 0.3EV 7 pictures are taken with the bracketing amount of 0.3 EV.
7f 0.5EV 7 pictures are taken with the bracketing amount of 0.5 EV.
7f 0.7EV 7 pictures are taken with the bracketing amount of 0.7 EV.
“BKT” is displayed in green until all the shots in the bracketing sequence have been
with reduced exposure and then by the shots with increased exposure.
The settings used to alter exposure vary with the shooting mode.
P
(program AE)
Both aperture and shutter speed
A
(aperture-priority AE)
Shutter speed
S
(shutter-priority AE)
Aperture
M
(manual)
• Shutter speed (when [KISO] is not set to [Auto])
• ISO sensitivity (when [KISO] is set to [Auto])
• If exposure compensation is enabled before shooting begins, the camera will vary
exposure around the selected value.
• Changing the option selected for [EV Step] (P. 107) changes the options available for
bracketing amount.
#
bracketing (P. 178).
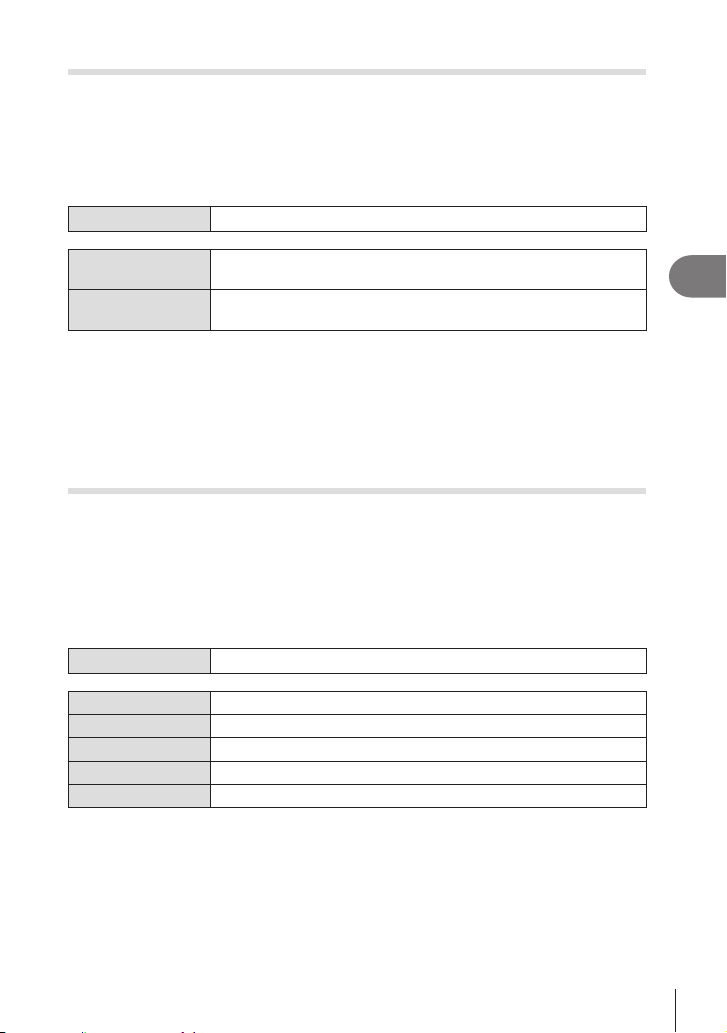
175
EN
Shooting Settings
4
Recording pictures with varied white balance (WB BKT)
PASMB
n
The camera varies white balance to record a series of pictures. You choose the color
axis and the bracketing amount.
Shooting ends after a single shot. The camera takes one picture when the shutter
button is pressed all the way down and automatically processes it to record the
pictures.
Menu
MEN U n
‘
n3. Bracketing n WB BKT
A-B
Select the bracketing amount for the A-B (amber–blue) axis.
[O] / [3f 2Step] / [3f 4Step] / [3f 6Step]
G-M
Select the bracketing amount for the G-M (green–magenta) axis.
[O] / [3f 2Step] / [3f 4Step] / [3f 6Step]
Three pictures are created for each color axis.
negative value for compensation, and the third using a positive value.
•
balance around the selected value.
#
bracketing (P. 178).
Recording pictures with varied ash level (FL BKT)
PASM
B
n
is pressed all the way down. Bracketing ends after the required number of shots has
been taken. In burst shooting modes, the camera will take pictures while the shutter
button is pressed all the way down, ending when the required number of shots has
been taken.
Menu
MEN U n
‘
n3. Bracketing n FL BKT
O Pictures are taken without using this function.
3f 0.3EV 3 pictures are taken with the bracketing amount of 0.3 EV.
3f 0.5EV 3 pictures are taken with the bracketing amount of 0.5 EV.
3f 0.7EV 3 pictures are taken with the bracketing amount of 0.7 EV.
3f 1.0EV 3 pictures are taken with the bracketing amount of 1.0 EV.
“BKT” is displayed in green until all the shots in the bracketing sequence have been
%
changes.
•
around the selected value.
# Flash bracketing cannot be combined with exposure bracketing (P. 174) or focus
bracketing (P. 178).

176
EN
Shooting Settings
4
Recording pictures with varied ISO sensitivity (ISO BKT)
PASMB
n
The camera varies ISO sensitivity to record a series of pictures. You choose the
bracketing amount. Shooting ends after a single shot. The camera takes one picture
when the shutter button is pressed all the way down and automatically processes it to
record the required number of shots.
Menu
MEN U n
‘
n3. Bracketing n ISO BKT
O Pictures are taken without using this function.
3f 0.3EV 3 pictures are taken with the bracketing amount of 0.3 EV.
3f 0.7EV 3 pictures are taken with the bracketing amount of 0.7 EV.
3f 1.0EV 3 pictures are taken with the bracketing amount of 1.0 EV.
sensitivity reduced by the selected amount, and the third with ISO sensitivity increased
by the selected amount.
• If shutter speed or aperture have been changed to modify exposure from the value
selected by the camera, the camera will vary ISO sensitivity around the current exposure
value.
# The maximum sensitivity selected for [KISO-A Upper/Default] does not apply.
#
# Changing the option selected for [ISO Step] (P. 114) does not change the options
available for bracketing amount.
#
bracketing (P. 178).
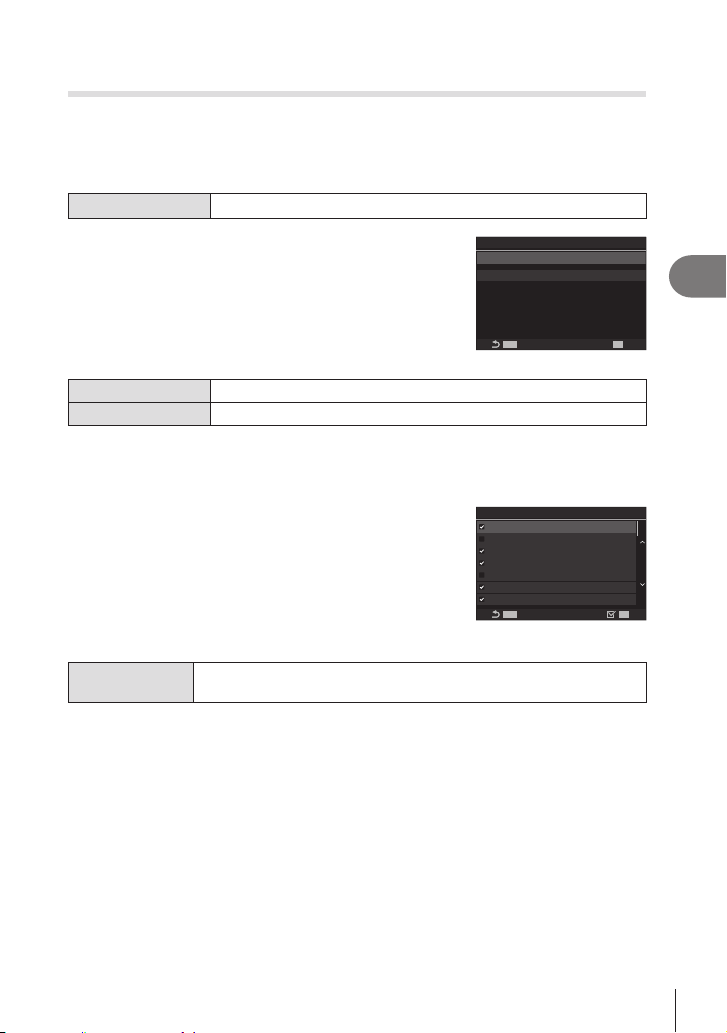
177
EN
Shooting Settings
4
Recording copies of one picture with dierent art lters applied
(ART BKT)
PASMB
n
Enabling art lter bracketing
Menu
MEN U n
‘
n3. Bracketing n ART BKT
1
Use FG to select [ART BKT] and press the Q
button.
2
Use FG to select [On] and press the Q button.
MENU
ART BKT
MENU
OK
ART BKT
ART BKT Setting
Off
ART BKT setting screen
O Pictures are taken without using this function.
On
3
The display returns to the ART BKT setting screen.
Conguring art lter bracketing
1
Select [ART BKT Setting] on the ART BKT setting
screen and press the Q button.
2
check (v) next to it.
• Select an option using FG and press the Q button to
put a check (v) next to it.
To remove the check, press the Q button again.
MENUMENU
OK
ART BKT Setting
Pop Art
[
Pop Art
\
Soft Focus
Pale&Light Color
[
Pale&Light Color
\
Light Tone
Grainy Film
[
ART BKT Setting
[Vivid], [Natural] and [Flat] can also be selected.
#
pictures after shooting.
#
bracketing cannot be combined with other forms of bracketing.
Shooting
1
Press the MEN U button to close the ART BKT setting screen and return to
shooting screen.
2
The camera takes one picture when the shutter button is pressed all the way
applied.
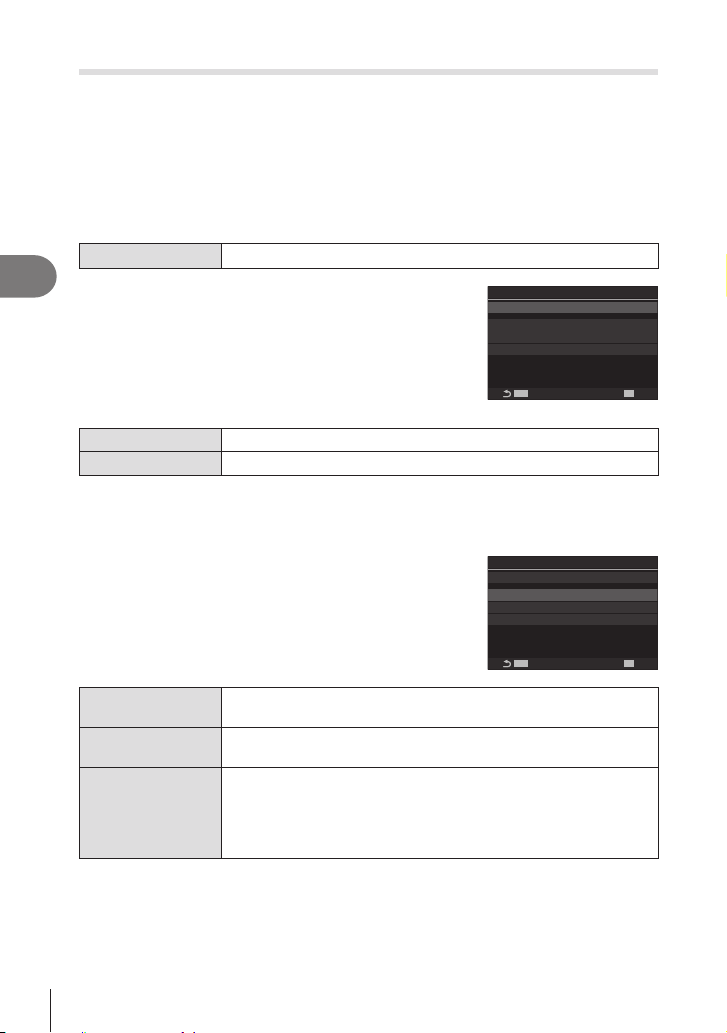
178
EN
Shooting Settings
4
Recording pictures with dierent focus positions (Focus BKT)
PASM
B
n
The camera varies focus over a series of pictures. You choose the amount and the
number of shots. The entire series is shot with a single press of the shutter button.
Each time the shutter button is pressed all the way down, the camera takes the
selected number of shots, varying focus with each shot. The pictures are taken in silent
mode using the electronic shutter.
Ena bling foc us bra cke ting
Menu
MEN U n
‘
n3. Bracketing n Focus BKT
1
Use FG to select [Focus BKT] and press the Q
button.
2
Use FG to select [On] and press the Q button.
MENU
Focus BKT
MENU
OK
5
99
Focus BKT
Set number of shots
Set focus differential
#
Charge Time
Off
0sec
Focus BKT setting screen
O Pictures are taken without using this function.
On Pictures are taken with varied focus positions.
3
The display returns to the Focus BKT setting screen.
Conguring focus bracketing
1
• Press FG to select an item and press the Q button to
display the setting menu.
• Q button to return
to Focus BKT setting screen.
MENU
Focus BKT
MENU
OK
5
99
Focus BKT
Set number of shots
Set focus differential
#
Charge Time
On
0sec
Set number of
shots
Choose the number of shots to be taken with varied focus positions.
[003] – [999]
Set focus
dierential
Choose the amount the camera varies focus with each shot.
[1] – [10]
#Charge Time
the camera.
[0 sec] / [0.1 sec] / [0.2 sec] / [0.5 sec] / [1 sec] / [2 sec] / [4 sec] /
[8 sec] / [15 sec] / [30 sec]

179
EN
Shooting Settings
4
Shooting
1
Press the MEN U button to close the Focus BKT setting screen and return to
shooting screen.
2
Press the shutter button is all the way down.
• Shooting will continue until the selected number of shots has been taken.
• To interrupt bracketing, press the shutter button all the way down a second time.
• The camera varies the focus distance by the amount selected for Set focus
# Shooting will end if focus or zoom is adjusted after the shutter button has been pressed all
the way down to start bracketing.
# When [Focus BKT] is set to [On], [Flash Mode] in [Silents Settings] (P. 132) becomes
[Allow].
# Focus bracketing is not available with Four Thirds system lenses.
# Focus bracketing cannot be combined with other forms of bracketing.
# KISO] sets

180
EN
Shooting Settings
4
Functions that are only available in movie mode
Sound Recording Options (Sound Recording Settings)
PASMB
n
when an external microphone or recorder is connected.
Menu
MEN U n
n
n5. Sound Recording/Connection n Sound
Recording Settings
Recording Volume
Adjust microphone sensitivity. Choose separate values for the built-
in stereo microphone and external microphones.
[Built-In R]: Adjust the sensitivity of the camera’s built-in stereo
microphone.
[-10] - [0] - [+10]
[MIC R]: Adjust the sensitivity of external microphones connected to
the microphone jack.
[-10] - [0] - [+10]
RVolume Limiter
The camera puts a limit on the volume of sounds recorded by the
microphone. Use this option to automatically reduce the level of
sounds above a certain volume.
[O]: Does not put a limit on the volume of sounds recorded by the
microphone.
[On]: Puts a limit on the volume of sounds recorded by the
microphone.
Wind Noise
Reduction
Reduce wind noise during audio recording.
[O]: Does not reduce wind noise during audio recording.
[Low] / [Standard] / [High]: Set the level of wind noise reduction.
Recording Rate
Choose an audio recording format.
[96kHz/24bit]: High-quality audio.
[48kHz/16bit]: Standard-quality audio.
RPlug-in Power
Adjust settings for use with condenser microphones and other
devices that draw power from the camera.
[O]: For devices that do not require power from the camera
(general-purpose dynamic microphones).
[On]: For devices that require power from the camera (condenser
microphones).
# Sound is not recorded:
with high-speed or slow- or fast-motion movies or when ART 7[/ART 7\ (diorama) is
selected for picture mode.
# Audio can only be played on devices that support the option selected for [Recording
Rate].
%Operation sounds of the lens and camera may be recorded in a movie. To prevent it from
recording, reduce the operation sounds by setting [nAF Mode] (P. 72) to [S-AF], [MF],
or [Preb], or by minimizing the button operations of the camera.

181
EN
Shooting Settings
4
Adjusting the headphone volume (Headphone Volume)
PASMB
n
Menu
MEN U n
n
n5. Sound Recording/Connection n Headphone
Volume
Headphone Volume Adjust the volume of audio output to the headphones.
Time Codes (Time Code Settings)
PASMB
n
Adjust time code settings. Time codes are used to synchronize picture and sound
during editing and the like. Choose from the following options.
Menu
MEN U n
n
n5. Sound Recording/Connection n Time Code
Settings
Time Code Mode
Choose a time code recording option. Use time codes where precise
timing is required.
[Drop Frame]: Drop-frame time codes. The time code is adjusted to
compensate for deviations from the recording time.
[Non-DF]: Non-drop-frame time codes. The time code is not
adjusted to compensate for deviations from the recording
time.
Count Up
Choose how the time count is incremented.
[Rec Run]: The count is incremented only during recording.
[Free Run]: The count is incremented continuously, including when
Starting Time
Choose the starting time code.
[Reset]: Reset the time code to 00:00:00
[Manual Input]: Enter the time code manually.
[Current Time]: Set the time code to the current time, frame 00.
# When setting [Starting Time] to [Current Time], be sure that the camera shows the correct
time. g “Setting the Camera Clock (X Settings)” (P. 257)
# Time codes are not recorded on high-speed movies (P. 142).

182
EN
Shooting Settings
4
HDMI Output (nHDMI Output)
PASMB
n
Adjust settings for output to HDMI devices. Options are available for controlling HDMI
recorders from the camera or adding time codes for use during movie editing.
Menu
MEN U n
n
n5. Sound Recording/Connection n nHDMI Output
Output Mode
[Monitor]: The HDMI device functions as an external monitor. The
camera outputs both images and indicators to the display. Output
settings can be adjusted using the [HDMI Settings] option (P. 251).
[Record]: The HDMI device functions as an external recorder. Only
images are output to the device. Frame size and sound settings are
adjusted using camera controls.
[RAW]: Images are output to the HDMI device in RAW format.
Images are not recorded on the card in the camera. Frame size and
sound settings are adjusted using camera controls.
• The camera operates in [Monitor] when the mode dial is set to
P/A/S/M/
B
or when the menu is displayed, or when playing
back an image.
REC Bit
The camera and the external device start and stop recording at the
same time.
• This option is only available with compatible devices.
[O]: Does not use this function.
[On]: Controls the external device.
Time Code
Output time codes to the external device. Time code settings can be
adjusted using [Time Code Settings] (P. 181).
[O]: Does not output time codes to the external device.
[On]: Output time codes to the external device.
About [RAW]
When [RAW] is selected, the raw images, to which shooting settings such as exposure
compensation and white balance have not been applied, can be recorded.
Visit our website for information on HDMI devices compatible with [RAW].
• When [RAW] is selected, “HDMI” will appear on the camera monitor while outputting
signals to an HDMI device.
# The images output from the camera when [RAW] is selected are recorded in ProRes RAW
format.
# When [RAW] is selected and a compatible HDMI device is connected, [nPicture Mode]
will be set to [a2 OM-Log400].
# The following limitations apply when [RAW] is selected.
- [nK]: Only [C4K] and [4K] can be selected. Slow- or fast-motion movies are not
available.
- [n
- [n
- [nAF Mode] when using a Four Thirds system lens: Only [MF] and [Preb] can be
selected.

183
EN
Shooting Settings
4
Displaying a + mark in the center of the screen while recording
movies (Center Marker)
PASMB
n
During movie recording, you can display a “+” mark which
enables you to understand where the center of the screen
is.
145
min
145
min
n
PP
LL
R
M
-
IS2M
-
IS2
33
WBAutoWBAuto
n
±0±0
R
TC
00:00:01
TC
00:00:01
DFDF
1
[
1
:
02
:
03
][
1
:
02
:
03
]
60p60p L
-
8L
-
8
C
-
AFC
-
AF
OffOff
1
4K
rr
O
O
1
/
250
1
/
F
250 5.65.6
ISO
Auto
ISO
Auto
F
00
+
-
0.00.0
200200
80mm80mm
+ mark
Menu
MEN U n
n
n6. Shooting Assist n Center Marker
O The + mark is not displayed.
On
The + mark is displayed in the center of the screen during movie
recording and when in movie recording ready mode.
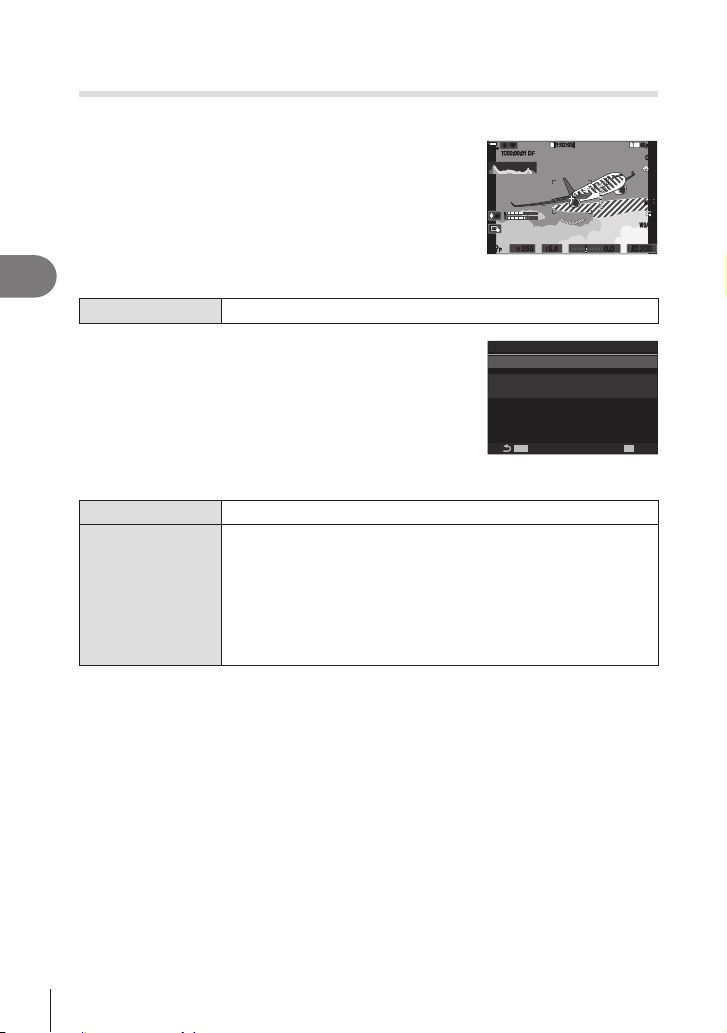
184
EN
Shooting Settings
4
Displaying zebra patterns over high luminance areas while
recording movies (Zebra Pattern Settings)
PASMB
n
During movie recording, you can display zebra patterns
(stripes) over the areas where the luminance levels
exceed the predetermined thresholds. You can specify two
displayed.
145
min
145
min
n
PP
LL
R
M
-
IS2M
-
IS2
33
WBAutoWBAuto
n
±0±0
R
TC
00:00:01
TC
00:00:01
DFDF
1
[
1
:
02
:
03
][
1
:
02
:
03
]
60p60p L
-
8L
-
8
C
-
AFC
-
AF
OffOff
1
4K
rr
O
O
1
/
2501
/
F
250 5.65.6
ISO
Auto
ISO
Auto
F
00
+
-
0.00.0
200200
Displa ying ze bra pa tte r ns
Menu
MEN U n
n
n6. Shooting Assist n Zebra Pattern Settings
1
Use FG to select [Zebra Pattern Settings] and
press the Q button.
2
Use FG to select [On] and press the Q button.
MENUMENU
OK
80
Zebra Pattern Settings
b Level 1
c Level 2
Off
Off
Zebra Pattern Settings
Zebra Pattern Settings
setting screen
O Zebra patterns will not be displayed.
On
During movie recording, zebra patterns (stripes) will be
displayed over the areas where the luminance levels exceed the
predetermined thresholds.
A b pattern will be displayed where the luminance level exceeds
[b Level 1].
A c pattern will be displayed where the luminance level exceeds
[c Level 2].
The c pattern will be displayed where they overlap.
3
The display returns to the Zebra Pattern Settings setting screen.
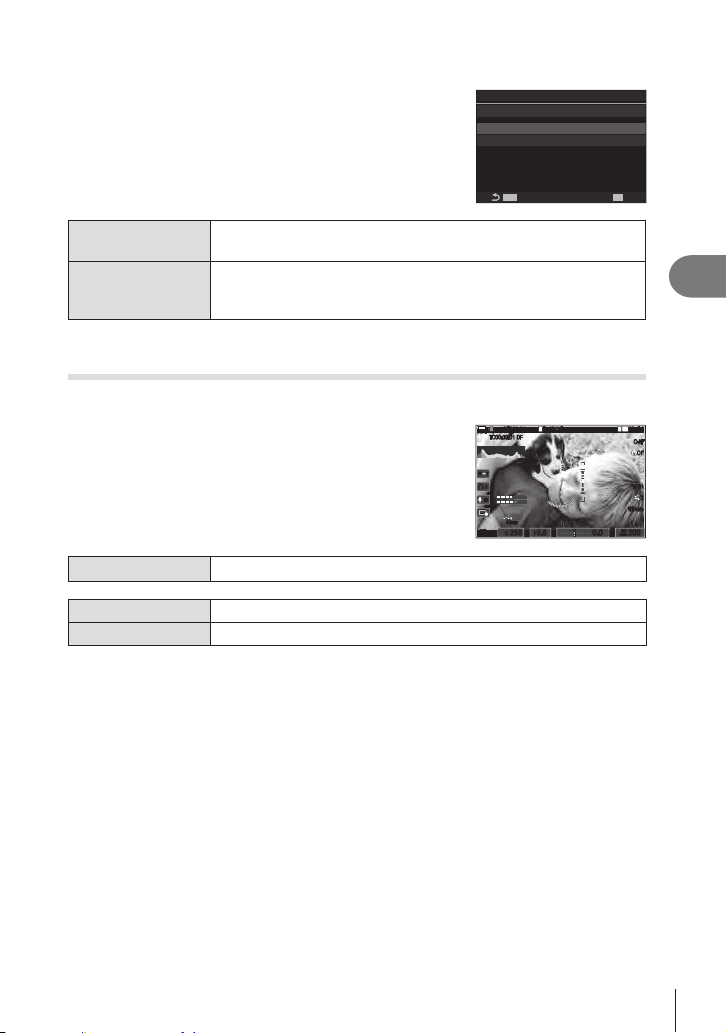
185
EN
Shooting Settings
4
Conguring Zebra Pattern Settings
1
• Press FG to select an item and press the Q button to
display the setting menu.
• Q button to return
to Interval Shooting setting screen.
MENUMENU
OK
80
Zebra Pattern Settings
b Level 1
c Level 2
On
Off
Zebra Pattern Settings
b Level 1
A b pattern will be displayed where the luminance level exceeds
c Level 2
A c pattern will be displayed where the luminance level exceeds
Displaying a red frame while recording movies
(Red Frame during RREC)
PASMB
n
You can display a red outer frame on the screen to make it
easier to see whether the camera is recording a movie.
145
min
145
min
REC
00:01
n
PP
LL
R
1
[
1
:
42
:
21
][
1
:
42
:
21
]
60p60p L
-
8L
-
8
C
-
AFC
-
AF
M
-
IS1M
-
IS1
33
40mm40mm
WBAutoWBAuto
OffOff
1
4K
(
REC
00:01
(
n
±0±0
8
8
W TW T
PP
R
TC
00:00:01
TC
00:00:01
DFDF
1
/
250
1
/
F
250 5.65.6
ISO
Auto
ISO
Auto
F
00
+
-
0.00.0
200200
Menu
MEN U n
n
n6. Shooting Assist n Red Frame during RREC
O The camera will not display a red frame.
On The camera will display a red frame during movie recording.

186
EN
Playback
5
5
Information display during playback
Playback image information
Basic display
100
%
100
%
PPPPPP
x1
JPEG
48
kHz
h
0
1/
250
2022/02/01 16:30:43 100-0015
ND
8
4:3
15/30
F
5.6
ISO
800
±
0.0
x1
JPEG
48
kHz
h
0
1/
250
2022/02/01 16:30:43 100-0015
ND
8
4:3
15/30
F
5.6
ISO
800
±
0.0
1
FF
L
s<s<
PCPC
HDR1HDR1
Comp
x
20
Comp
x
20
ND
8
ND
8
d
c
e
1 723 456 98 ba0
g fh
p
q
r
s
t
u
j iklmno
K
Test
K
Test
Overall display
100
%
100
%
PPPPPP
x1
JPEG
48
kHz
h
0
x1
JPEG
48
kHz
h
0
ND
8
4:3
ND
8
4:3
202
2/02/01 16:30:43 100-0015
ND
8
4:3
15/302022/02/01 16:30:43 100-0015
ND
81/81/8
5184x388840mm
4:3
15/30
1
FF
L
5184x3888
33
CWBCWB
5400K5400K A4 G4A4 G4
ISO
800
ISO
800
±
0.0F5.61/250
±
0.0F5.61/250
P
SRGB
-
18
-
18
+
0.3
+
0.3
SRGB
40mm
2022/02/01 16:40:012022/02/01
TC
00:01:02:03
TC
00:01:02:03
DFDF
16:40:01
[
00:20
][
00:20
]
1.40GB1.40GB
60p60p L-8L-8
4K
100-0016100-0016 16/3016/30
1
s<s<
PCPC
v
w
x
y
zBC AE
H
G
F
J
I
D
K L
Playback
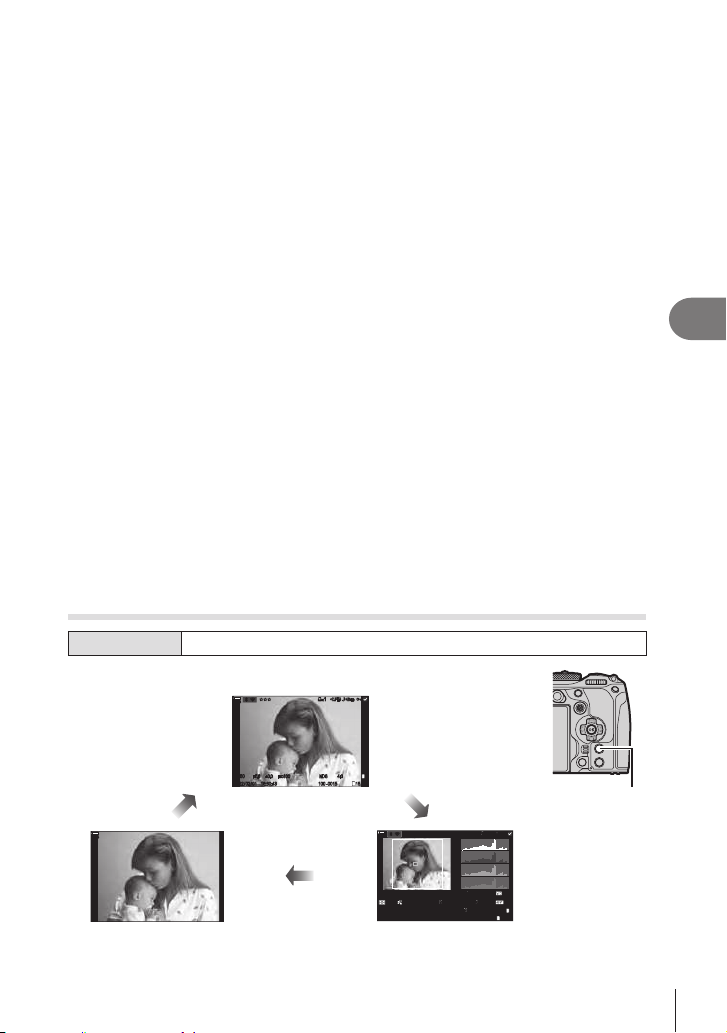
187
EN
Playback
5
1 Battery level ....................................P. 30
2 Active Bluetooth
®
connection
..............................................P. 260, 280
3 Remote control .............................P. 280
4 Wireless LAN connection......P. 261, 267
5 Active connection to computer (Wi-Fi)
......................................................P. 267
6 Rating ...........................................P. 196
7 Test Picture ...................................P. 210
8 GPS data indicator........................P. 266
9 Print order
Number of prints ...........................P. 198
0 Share order ...................................P. 195
a Sound record ................................P. 199
b Protect ..........................................P. 193
c Image selected .............................P. 197
d Image quality ........................P. 140, 141
e Frame number/total number of frames
f Playback slot.................................P. 242
g Aspect ratio ...................................P. 144
h File number ...................................P. 244
i .................................P. 158
j HDR image ...................................P. 162
k Focus stacking ..............................P. 160
l Multiple Exposure .........................P. 163
m Fisheye Compensation .................P. 171
n Keystone Compensation...............P. 170
o Composite shooting
Number of combined shots .............P. 54
p Date and time ...............................P. 257
q Shutter speed ...........................P. 43, 47
r Aperture value ..........................P. 43, 45
s Exposure compensation ...............P. 106
t ISO sensitivity ............................... P. 113
u Airplane Mode...............................P. 260
v AF target display .............................P. 77
w Histogram .......................................P. 38
x Flash intensity control ...................P. 123
y Focus adjustment ...........................P. 95
z Color space...................................P. 155
A
White balance compensation
....P. 151, 153
B Compression rate .............................140
C White balance ...............................P. 150
D Pixel count ....................................P. 140
E Picture mode.................................P. 145
F Focal length
G Metering mode ..............................P. 109
H Shooting mode................................P. 43
I Aspect border ...............................P. 144
J Time Code ....................................P. 181
K Movie recording time ....................P. 328
L ...............................P. 328
* J to L are only displayed when playing
back movies.
Switching the information display
Button
IN FO button
You can switch the information displayed during playback by pressing
the IN FO button.
100
%
100
%
O
PPPPPP
r
O
r
x1
JPEG
48
kHz
h
0
x1
JPEG
48
kHz
h
0
ND
8
4:3
ND
8
4:3
202
2/02/01 16:30:43 100-0015
ND
8
4:3
15/302022/02/01 16:30:43 100-0015
ND
81/81/8
5184x388840mm
4:3
15/30
1
FF
L
5184x3888
33
CWBCWB
5400K5400K A4 G4A4 G4
ISO
800
ISO
800
±
0.0F5.61/ 250
±
0.0F5.61/ 250
P
SRGB
-
18
-
18
+
0.3
+
0.3
SRGB
40mm
10
0
%
10
0
%
O
PPPPPP
r
O
r
x1
JPEG
48
kHz
h
0
1
/250
2022/02/01 16:30:43 100-0015
ND
8
4:3
15/30
F5.6
ISO
800
±
0.0
x1
JPEG
48
kHz
h
0
1
/250
2022/02/01 16:30:43 100-0015
ND
8
4:3
15/30
F5.6
ISO
800
±
0.0
1
FF
L
100
%
100
%
Overall displayImage only
Basic display
IN FO
IN FOIN FO
IN FO button
%You can choose whether or not to display each of three display types. g “Choosing the
information displayed during playback (qInfo Settings)” (P. 206)
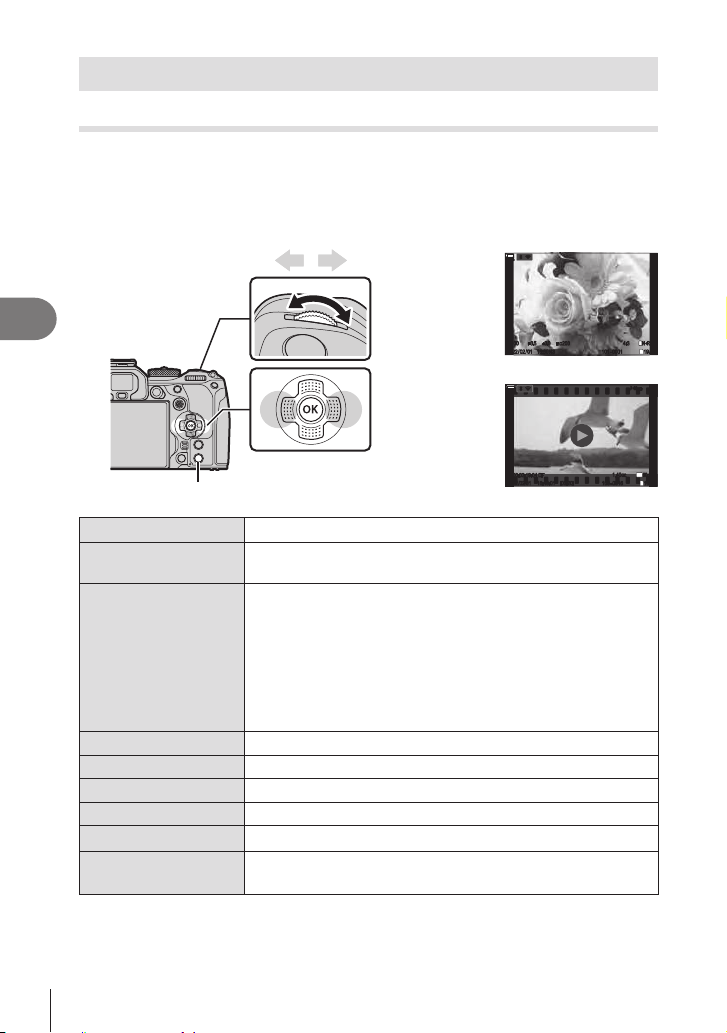
188
EN
Playback
5
Viewing photographs and movies
Viewing photographs
1
Press the q button.
• Your most recent photograph or movie will be displayed.
• Select the desired photograph or movie using the front dial or arrow pad.
• Press the shutter button halfway to return to shooting mode.
Front dial
Arrow pad
Displays
the previous frame
Displays
the next frame
q button
16:30:43
4:3
±
0.0
1/100
2022/02/01 16:30:43 101-0001
4:3
1
9/
32
F3.5
ISO
200
±
0.0
1
N+RAW
L
100
%
100
%
rr
O
O
1/100
2022/02/01 101-0001 19/
32
F3.5
ISO
200
N+RAW
Still image
100
%
100
%
O
r
O
r
48
kHz
48
kHz
2022/02/01 16:40:01 100-0016100-0016 16/3016/302022/02/01
TC
00:02:19:04
TC
00:02:19:04
DFDF
1.40GB1.40GB
1
60p60p
L-8L-8
4K
16:40:01
[
00:20
][
00:20
]
Movie
Rear dial (j) Zoom in (i)/Index (h)
Front dial (k)
Previous (I)/Next (J)
Arrow pad (FGHI)/
multi selector (S/T)
Single-frame playback: Next (I)/previous (H)/playback volume
(FG)
Playback zoom: Press S to display a zoom frame. Press it
again to zoom in on the frame. You can scroll the image by
pressing FGHI during playback zoom.
Index/calendar playback: Highlight image
• The operations performed using FGHI can also be
performed by pressing the multi selector up, down, left, or right.
IN FO button
View image info
H button
Select picture (P. 197)
f button
Assign rating stars to picture (P. 196
)
0 button
Protect picture (P. 193)
D button
Delete picture (P. 194)
Q button
View menus (in calendar playback, press this button to exit to
single-frame playback)
Sw it c hing c a rds w hile view ing phot ogra phs
• The q button can be used to switch between cards while playback is in progress. To
choose a card, hold the q button and rotate the front or rear dial. This does not change
option selected for [KCard Slot Settings] > [qSlot] (P. 242).
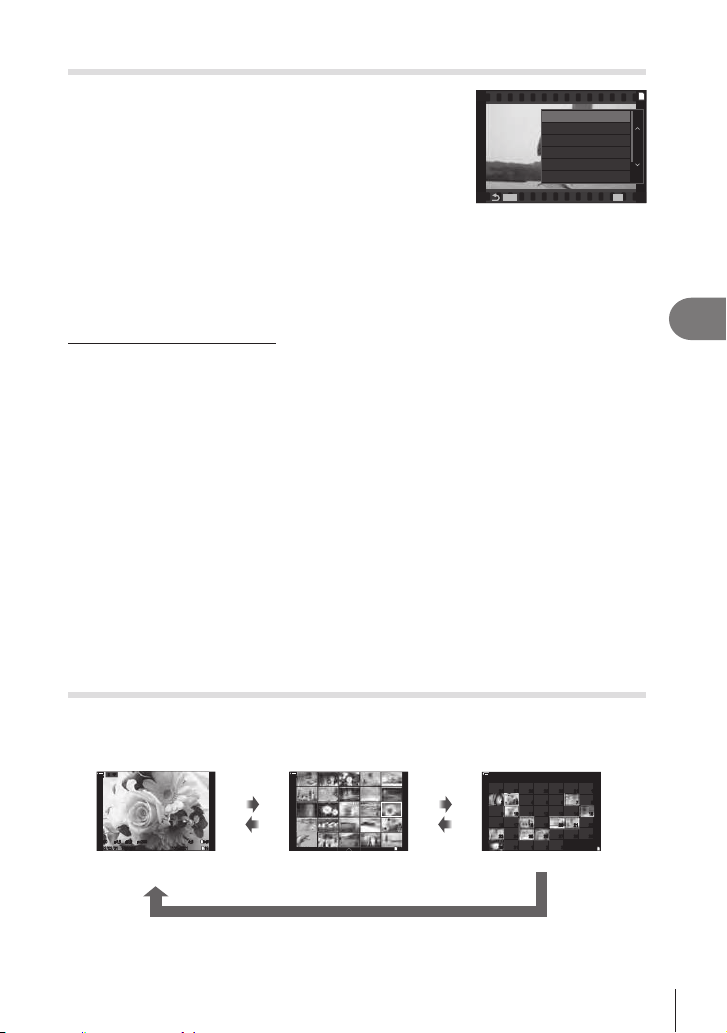
189
EN
Playback
5
Watching movies
1
Press the q button.
• The most recent picture will be displayed.
2
Select a movie and press the Q button.
• The playback menu will be displayed.
3
Select [Play Movie] and press the Q button.
• Movie playback begins.
Fast-forward and rewind using H/I. Press the Q button
again to pause playback. While playback is paused, use F
G to view the last frame. Use
HI or the front dial to view previous or next frame. Press
the MENU button to end playback.
MENUMENU
OK
1
0
Share Order
Movie Edit
Play Movie
Play from Beginning
Copy
Movie
Playing back separated movies
movie.
1
Press the q button.
• The most recent picture will be displayed.
2
Display a long movie you want to view and press the Q button.
• The following options will be displayed.
[Play from Beginning]: Plays back a split movie all the way through
[Play Movie]:
[Delete entire n]:
Deletes all parts of a split movie
[Erase]:
# We recommend using the latest version of OM Workspace to play back movies on a
to the computer.
# Movies recorded with [nVideo Codec] (P. 144) set to [H.265] cannot be played back
using OM Workspace.
Finding Pictures Quickly (Index and Calendar Playback)
• In single-frame playback, rotate the rear dial to G for index playback. Rotate further for
calendar playback.
• Turn the rear dial to a to return to single-frame playback.
Q
Single-frame
playback
16:30:43
4:3
±
0.0
1
/100
2022/02/01 16:30:43 101-0001
4:3
1
9/32
F3.5
ISO
200
±
0.0
1
N+RAW
L
10
0
%
10
0
%
rr
O
O
1
/100
2022/02/01 101-0001 19/32
F3.5
ISO
200
N+RAW
Index display
2022/02/01 16:30:43 15/252022/02/01 16:30:43 15/25
1
100
%
100
%
Calendar display
Sun Mon Tue Wed Thu Fri Sat
1
8765432
1514131211109
22212019181716
3126 27 28 29 30
321
27 28 2926252423
3130
2022 /
1
100
%
100
%
1
h
i
h
i
• You can change the number of frames for index display. g
display (G Settings)” (P. 207)
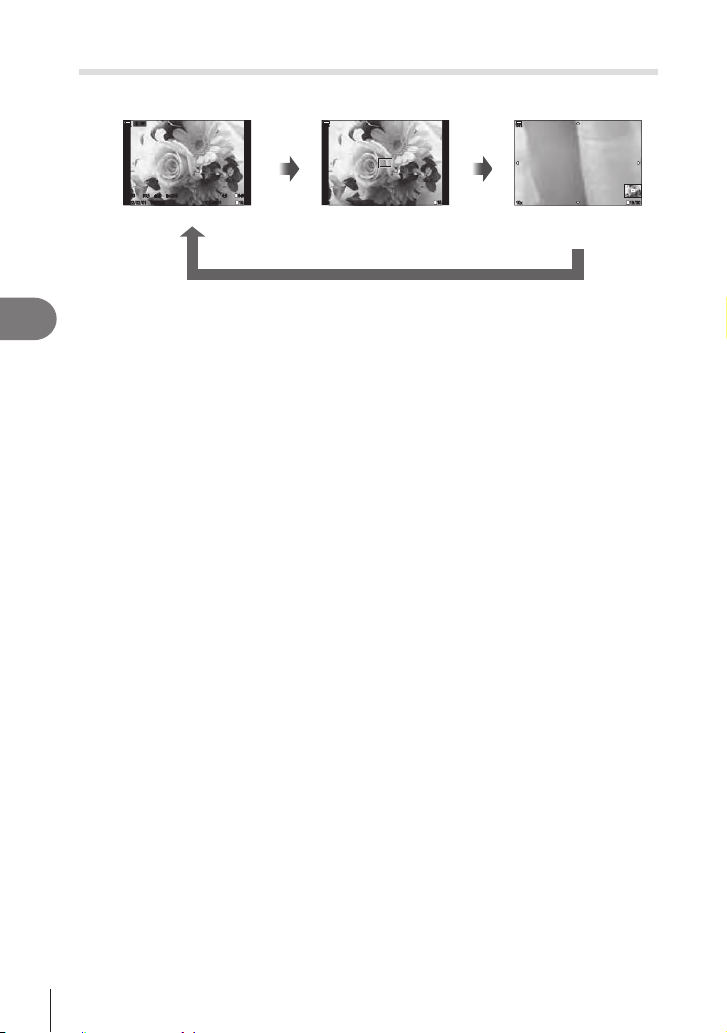
190
EN
Playback
5
Zooming In (Playback Zoom)
S
or
a
S
or
a
S
or
a
Playback display Zoom frame
16:30:43
4:3
±
0.0
1/100
2022/02/01 16:30:43 101-0001
4:3
19/32
F3.5
ISO
200
±
0.0
1
N+RAW
L
100
%
100
%
rr
O
O
1/100
2022/02/01 101-0001 19/32
F3.5
ISO
200
N+RAW
100
%
100
%
10x 15/3010x 15/30
1
10
0
%
10
0
%
10x 15/3010x 15/30
1
Playback zoom
scroll display
When you press S or a button to which [a] (magnify) has been assigned (P. 208),
a zoom frame will be displayed over the part of the picture that was in focus or the part
where the subject was detected. Press the button again to zoom in on the zoom frame.
Press T or FGHI to scroll the image during playback zoom.
• You can change the settings of the zoom frame and image scroll. g “Choosing the
qaInfo Settings)” (P. 206)
• You can change the zoom ratio using the rear dial.
• Playback zoom ends when you press the Q button.
• If [Face & Eye Detection] is enabled, pressing the IN FO button while the zoom frame
is displayed moves the zoom frame to the detected face. During close-up playback, the
detected face will be enlarged.

191
EN
Playback
5
Playback Using Touch Controls
Use touch controls to zoom pictures in and out, scroll pictures, or choose the picture
displayed.
#
# Gloves or monitor covers may interfere with touch screen operation.
Full-frame playback
Displa ying t he previous or next ima ge
•
right to view the previous image.
++
--
h
0
h
0
OffOff
100
%
100
%
rr
O
O
Ma gnify
• Lightly tap the screen to display the slider and P.
Lightly tap the screen twice to magnify the image at the
qaDefault Setting] (P. 205).
• Slide the bar up or down to zoom in or out.
•
zoomed in.
• Tap
P
to display index playback.
Tap
for calendar playback.
++
--
h
0
h
0
OffOff
100
%
100
%
rr
O
O
PP
Movie pla yba ck
• Tap
to begin playback.
• Tap the lower part of the screen to display the control
bar which allows you to end playback and change the
playback volume.
• Tap the center of the screen to pause playback. Tap again
to resume playback.
• By sliding the bar at the bottom of the screen during
playback pause, you can change the position from which
the movie will be played when playback is resumed.
• Tap I to end playback.
100
%
100
%
O
r
O
r
48
kHz
48
kHz
2022/02/01 16:40:01 100-0016100-0016 16/3016/302022/02/01
TC
00:02:19:04
TC
00:02:19:04
DFDF
1.40GB1.40GB
1
60p60p L-8L-8
4K
16:40:01
[
00:20
][
00:20
]
Index/Calendar playback
Displa ying t he previous or next pa ge
•
view the previous page.
• The touch control menu will be displayed when you tap
during index playback. Tap or to switch
the number of images displayed. g
index display (G Settings)” (P. 207)
• Tap
several times to return to single-frame playback.
h
0
h
0
OffOff
-
+
100
%
100
%
V ie w ing ima ge s
• Tap an image to view it full frame.

192
EN
Playback
5
Other functions
Lightly tap the screen during single-frame playback or tap
during index
playback to display the touch menu. You can then perform the desired operation by
tapping the icons in the touch menu.
H
Select an image. You can select multiple images and delete them collectively.
g “Selecting Multiple Pictures (Share Order Selected, Rating Selected, 0,
Copy Select, Erase Selected)” (P. 197)
h
Images you want to share with a smartphone can be set. g “Selecting Pictures
for Sharing (Share Order)” (P. 195)
f
Assign rating stars to an image. g “Rating Pictures (Rating)” (P. 196)
0 Protects an image. g “Protecting Pictures (0)” (P. 193)

193
EN
Playback
5
Setting playback functions
Rotating Pictures (Rotate)
Choose whether to rotate photographs.
1
Play the photograph back and press the Q button.
2
Select [Rotate] and press the Q button.
3
Press F to rotate the image counterclockwise, G to rotate it clockwise; the
image rotates each time the button is pressed.
• Press the Q button to save settings and exit.
• Movies and protected images cannot be rotated.
%
playback. g “Automatically rotating portrait-orientation pictures for playback (R)”
(P. 205)
R].
Protecting Pictures (0)
Protect images from accidental deletion.
1
Display the image you want to protect and press the
0 button.
• 0 (protection icon) appears on the image. Press the
0 button again to cancel protection.
• When an unprotected image is displayed, you can hold
the 0 button and rotate the front or rear dial to protect
all images displayed while the dial is rotated. Any
previously-protected images displayed while the dial is
0 (protect) icon
16:30:43
4:3
±
0.0
1/100
2022/02/01 16:30:43 101-0001
4:3
1
9/32
F3.5
ISO
200
±
0.0
1
N+RAW
L
100
%
100
%
rr
O
O
1/100
2022/02/01 101-0001 19/32
F3.5
ISO
200
N+RAW
00
• When a protected image is displayed, you can hold the 0 button and rotate the front
or rear dial to remove protection from all images displayed while the dial is rotated. Any
• The same operations can be performed during playback zoom or when a picture is
selected in the index display.
%You can also protect multiple selected images. g “Selecting Multiple Pictures (Share
Order Selected, Rating Selected, 0, Copy Select, Erase Selected)” (P. 197).)
# Formatting the card erases all data including protected images.
Copying an image (Copy)
When there are cards with available space in both slots 1 and 2, you can copy an
image to the other card.
1
Display an image you want to copy and press the Q button.
2
Highlight [Copy] and press the Q button.
3
Choose whether to specify the destination folder.
• If you select [Assign], choose a destination folder.
•
I.
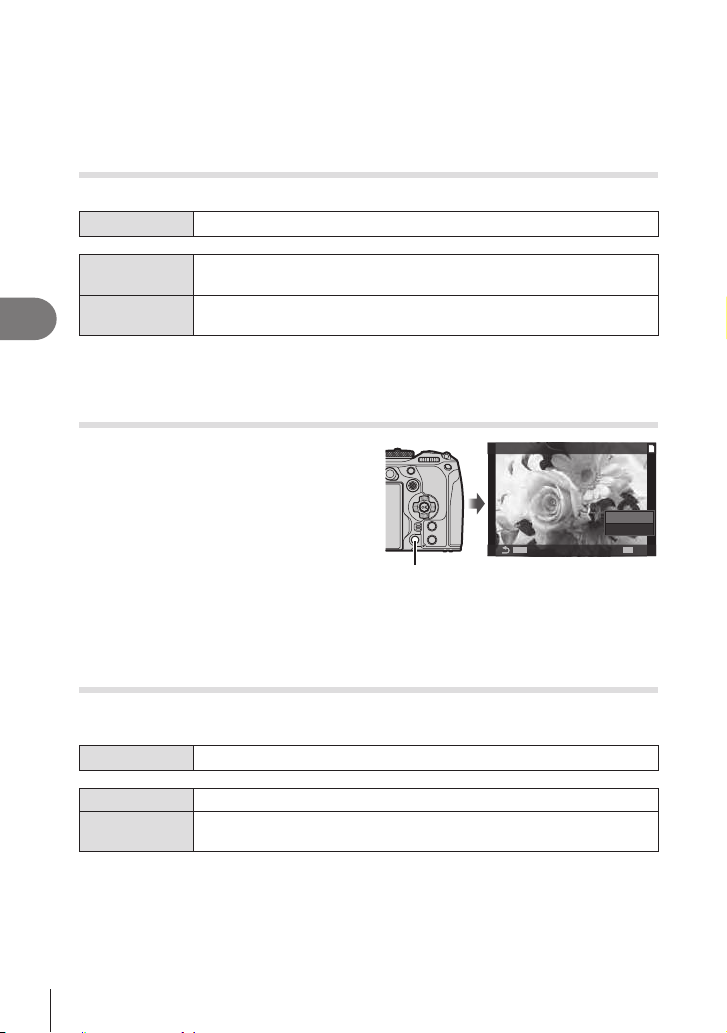
194
EN
Playback
5
4
Highlight [Yes] and press the Q button.
• The picture will be copied to the other card.
%You can also copy all images on a card to the other card at a time. g [Copy All ]
(P. 194)
Copying all images on a card (Copy All)
All images can be copied between the cards inserted in the camera (card slot 1 and 2).
Menu
MEN U n q n 1. File n Copy All
7
All images are copied from the card in card slot 1 to the card in card slot
2.
8
All images are copied from the card in card slot 2 to the card in card slot
1.
# Copying ends when the destination card is full.
#
be copied.
Deleting Pictures (Erase)
1
Display an image you want to delete
and press the
D
button.
2
Select [Yes] and press the Q button.
• The image will be deleted.
# You can erase images without the
button settings. g “Disabling Deletion
MENUMENU
OK
1
Erase
No
Yes
D button
%You can choose whether deleting pictures recorded in RAW+JPEG image quality modes
deletes both copies, only the JPEG copy, or only the RAW copy. g “RAW+JPEG
Deletion Options (RAW+JPEG Erase)” (P. 195)
Deleting All Pictures (Erase All)
Delete all pictures. Protected pictures will not be deleted. You can also exclude the
pictures which have been assigned rating stars (P. 196) and delete all other pictures.
Menu
MEN U n q n 1. File n Erase All
Erase Delete all pictures including those with rating stars assigned.
Save
Keep the pictures with rating stars assigned, and delete all other
pictures.
• If memory cards are inserted in both slots, you will be prompted to choose a slot. Choose
a slot and press the Q button.
# If you choose [Save] and execute [Erase All], it may take some time depending on the
speed class of the card and the number of pictures on the card.
195
EN
Playback
5
Disabling Deletion Conrmation (Quick Erase)
If this option is enabled when the D button is pressed to delete photos or movies,
immediately.
Menu
MEN U n q n 2. Operations n Quick Erase
O
D button is pressed.
On
D button is pressed.
RAW+JPEG Deletion Options (RAW+JPEG Erase)
Choose operation performed when [RAW+JPEG] images are deleted one at time.
Menu
MEN U n q n 2. Operations n RAW+JPEG Erase
JPEG Only the JPEG copy is deleted.
RAW Only the RAW copy is deleted.
RAW+JPEG Both the RAW and JPEG copies are deleted.
%When [RAW+JPEG] pictures are erased using [Erase All] (P. 194) or [Erase Selected]
(P. 197), both the RAW and the JPEG copies will be deleted.
Selecting Pictures for Sharing (Share Order)
You can select images you want to transfer to a smartphone in advance.
1
Display an image you want to transfer and press the Q button.
• The playback menu will be displayed.
2
Select [Share Order] and press the Q button. Then, press F or G.
• The image is marked for sharing. A h
• Up to 200 pictures on each slot can be marked for sharing at a time.
• To cancel a share order, press F or G.
#
%You can select images you want to transfer in advance and set a share order all at once.
g “Selecting Multiple Pictures (Share Order Selected, Rating Selected, 0, Copy
Select, Erase Selected)” (P. 197), “Transferring images to a smartphone” (P. 264)
%You can also mark images for sharing by assigning [h] to a button in [qRFunction]
(P. 205).
Press the [h] button when an unmarked image is displayed during single frame display/
index display/playback zoom. When you hold the [h] button and rotate the front or
rear dial, all images displayed while the dial is rotated will be marked for sharing. Any
When you hold the [h] button and rotate the front or rear dial while a marked image is
displayed, all images displayed while the dial is rotated will be unmarked. Any unmarked

196
EN
Playback
5
Selecting RAW+JPEG Pictures for Sharing (RAW+JPEG h)
In the case of pictures recorded with [RAW+JPEG] for image quality, you can choose
to share only the JPEG copies, only the RAW copies, or both the JPEG and RAW
copies.
Menu
MEN U n q n 2. Operations n RAW+JPEG h
JPEG Only the JPEG copies will be marked for sharing.
RAW Only the RAW copies will be marked for sharing.
RAW+JPEG Both RAW and JPEG copies will be marked for sharing.
# Changing the option selected for [RAW+JPEG h
for sharing.
# Regardless of the option selected, removing share marking removes the marking from
both copies.
Rating Pictures (Rating)
This can be helpful when arranging and searching for pictures using OM Workspace or
other utilities.
Button
f button
If you press the f button when the selected picture has no rating stars assigned,
rating stars will be assigned to the picture. The number of stars will be the same as the
previously set number.
If you press the f button when the selected picture has rating stars assigned, rating
stars will be cleared.
You can change the number of stars by rotating the front or rear dial while holding the
f button.
# Rating stars can only be assigned to still images.
# If the picture was recorded with [RAW+JPEG], the same rating will be applied to both the
# Rating stars cannot be assigned to protected images.
#

197
EN
Playback
5
Selecting the numbers of stars to be used for rating
(Rating Settings)
You can select the numbers of stars that will be displayed as options for rating.
Menu
MEN U n q n 3. Displays n Rating Settings
1
Select the number of stars that you want to display as an option when rating
pictures, and put a check (v) next to it.
• Select an option using FG and press the Q button to put a check (v) next to it.
To remove the check, press the Q button again.
# When there is no item with a check (v) next to it, you cannot assign rating stars to
pictures.
#
already been assigned.
Selecting Multiple Pictures (Share Order Selected, Rating Selected,
0, Copy Select, Erase Selected)
You can select multiple images for [Share Order Selected], [Rating Selected], [0],
[Copy Select] or [Erase Selected].
1
Display an image you want to select and press the H button.
• The image will be selected and v will be displayed.
To cancel selection, press the button again.
• You can select an image during single-frame playback and index playback.
2
Press the Q button to display the menu and select
[Share Order Selected], [Rating Selected], [0],
[Copy Select] or [Erase Selected].
• When an unmarked image is displayed, you can hold
the H button and rotate the front or rear dial to select
all images displayed while the dial is rotated. Any
previously-marked images displayed while the dial is
• When a marked image is displayed, you can hold the
H button and rotate the front or rear dial to deselect
all images displayed while the dial is rotated. Any
previously-unmarked images displayed while the dial is
MENUMENU
OK
1
Selected
Share Order Selected
Rating Selected
0
Copy Select
Erase Selected

198
EN
Playback
5
Print order (DPOF)
You can save digital “print orders” to the memory card listing the pictures to be printed
and the number of copies of each print. You can then have the pictures printed at a
print shop that supports DPOF. A memory card is required when creating a print order.
Conguring print orders
Menu
MEN U n q n 1. File n <
<
Press HI to select the frame that you want to set as print reservation,
then press FG to set the number of prints. To set print reservation
for several pictures, repeat this step. Press the Q button when all the
desired pictures have been selected, and then select the date and time
format.
[No]: The pictures are printed without the date and time.
[Date]: The pictures are printed with the shooting date.
[Time]: The pictures are printed with the shooting time.
<ALL
Select this when you want to set print orders to all of the pictures. Select
the date and time format.
[No]: The pictures are printed without the date and time.
[Date]: The pictures are printed with the shooting date.
[Time]: The pictures are printed with the shooting time.
# When printing images, the setting cannot be changed between the images.
Se tting print orde rs
Set
on the currently selected card.
Cancel Print orders will not be set.
# The camera cannot be used to modify print orders created with other devices. Creating a
new print order deletes any existing print orders created with other devices.
# Print orders cannot include RAW images or movies.
Resetting all protection/share orders/print orders/ratings
(Reset All Images)
You can reset all protection/share orders/print orders/ratings from pictures on a card in
one slot at once.
Menu
MEN U n q n 1. File n Reset All Images
Reset Print Orders Resets all print orders.
Reset Protect Resets all protection.
Reset share Order Resets all share orders.
Reset Ratings Resets all ratings.
• If memory cards are inserted in both slots, you will be prompted to choose a slot. Choose
a slot and press the Q
# When there are a lot of rated pictures, [Reset Ratings] will take a long time.
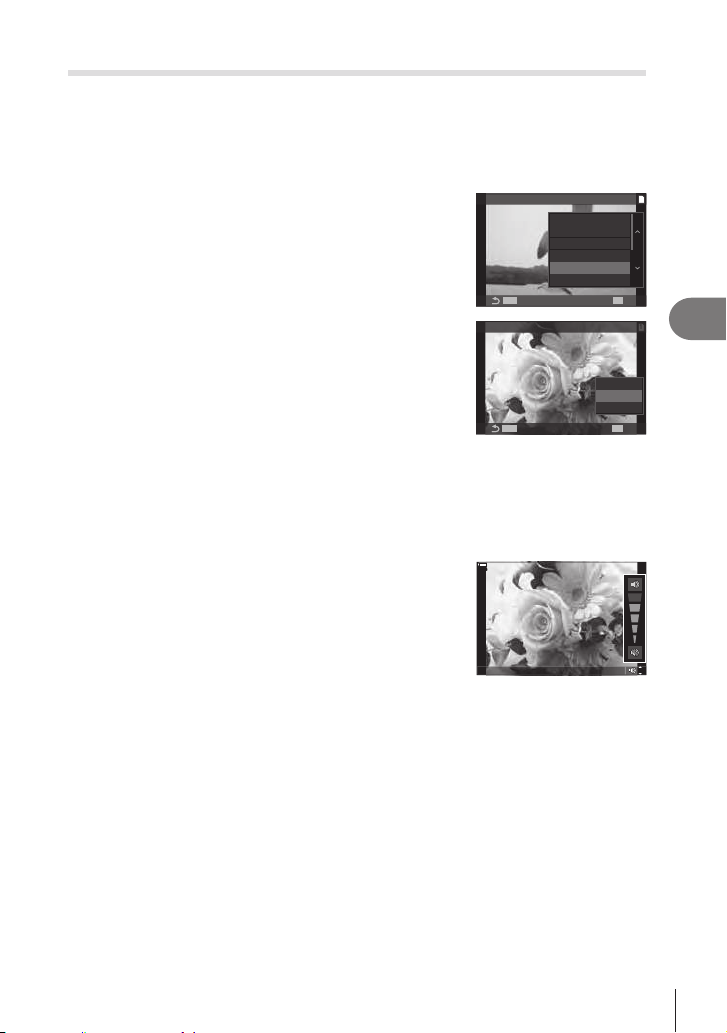
199
EN
Playback
5
Adding Audio to Pictures (R)
You can record audio using the built-in stereo microphone or an optional external
microphone and add it to pictures. The recorded audio provides a simple replacement
for written notes about the pictures. Audio recordings can be up to 30 s long.
1
Display the image to which you want to add audio and press the Q button.
• Audio recording is not available with protected images.
2
Select [R] and press the Q button.
• To exit without adding audio, select [No].
MENUMENU
OK
1
JPEG
R
0
Rating
Share Order
JPEG Edit
Rotate
3
Select [R Start] and press the Q button to begin
recording.
4
Press the Q button to end recording.
• Pictures with audio are indicated by H icons and
indicators showing the recording rate.
• To delete recorded audio, select [Erase] in Step 3.
1
MENUMENU
OK
Erase
R
Start
No
R
%Audio is recorded at the rate selected for movies. The rate can be selected using [Sound
Recording Settings] (P. 180).
Audio Playba ck
Playback begins automatically when a picture with audio is displayed. To adjust the
volume:
1
Display the picture whose audio you want to play
back.
2
Press F or G.
• F button: Raise volume.
• G button: Lower volume.
4
10
0
%
10
0
%
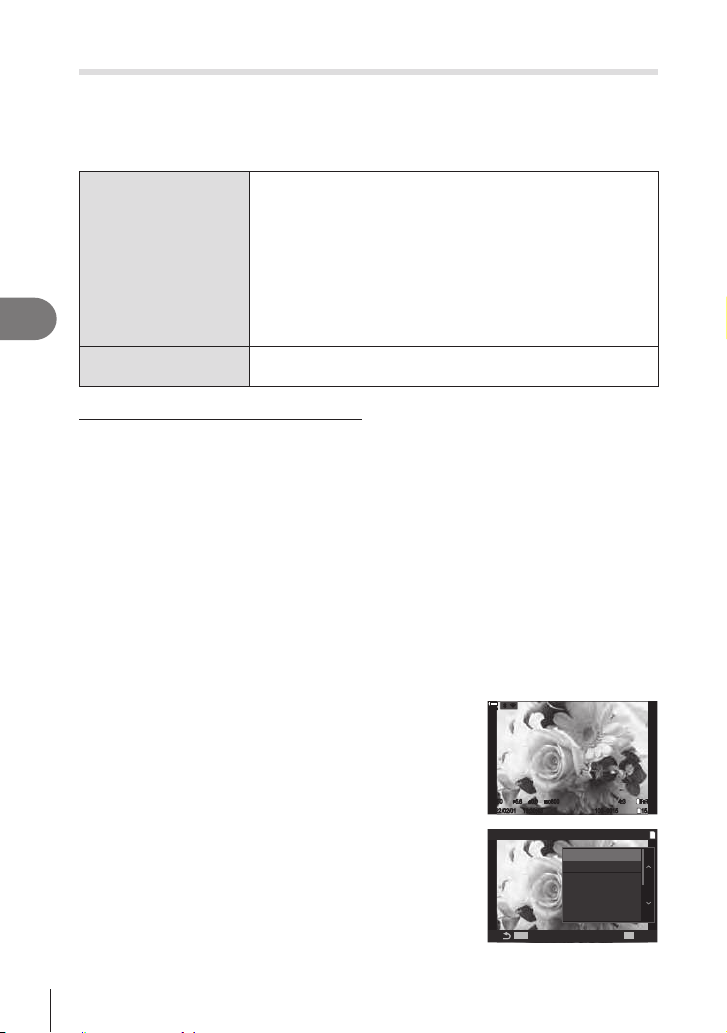
200
EN
Playback
5
Retouching Pictures (Edit)
Create retouched copies of pictures. In the case of RAW pictures, you can adjust the
cropping and resizing.
RAW Data Edit
Retouch pictures and save the resulting copies in JPEG format
(P. 200). The following options are available:
[Current]: Save the picture at the settings currently selected
with the camera.
[Custom1]/[Custom2]: Adjust settings while previewing the
results in the display. The settings are saved as [Custom1] or
[Custom2].
[ART BKT]: The camera creates multiple JPEG copies of each
and apply them to one or more images.
JPEG Edit
Retouch JPEG pictures and save the resulting copies in JPEG
format (P. 201).
Retouching RAW Pictures (RAW Data Edit)
[RAW Data Edit] can be used to adjust the following settings. These are also the
settings applied when you select [Current].
Image quality
Picture mode
Color/saturation (Color Creator)
Color (Partial Color)
White balance
Color temperature
Exposure compensation
Shadows
Mid-tones
Highlights
Aspect ratio
High ISO noise reduction
Color space
Keystone compensation
#
# RAW pictures cannot be retouched if:
there is not enough space on the memory card or if the picture was created with a
1
Display an image you want to edit and press the Q
button.
1/250
2022/02/01 16:30:43 100-0015
4:3
15/30
F5.6
ISO
800
±
0.0
1/250
2022/02/01 16:30:43 100-0015
4:3
15/30
F5.6
ISO
800
±
0.0
1
L
F+RAWF+RAW
100
%
100
%
rr
O
O
2
Use FG to select [RAW Data Edit] and press the
Q button.
• The editing menu will be displayed.
MENU
RAW/JPEG
MENU
OK
1
0
Rating
Share Order
JPEG Edit
RAW Data Edit
R
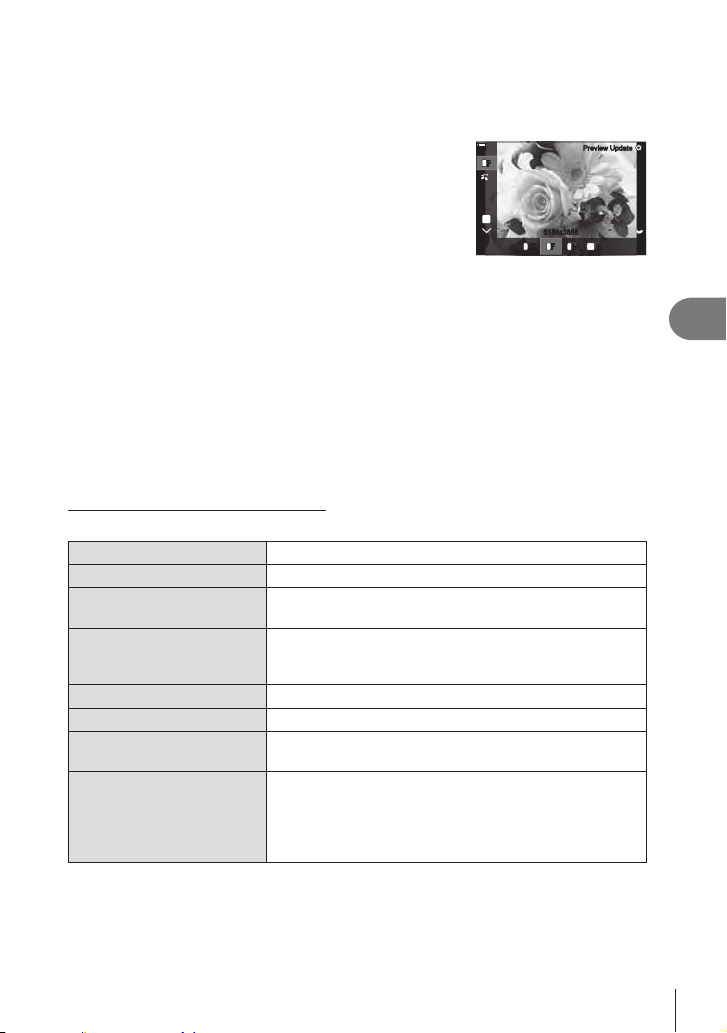
201
EN
Playback
5
3
Highlight items using FG.
• To apply current camera settings, highlight [Current] and press the Q button. Current
settings will be applied.
- Use FG to select [Yes] and press the Q button to record the developed image.
• For [Custom1] or [Custom2], highlight the desired option
and press I, then edit settings as follows:
- Retouch options will be displayed. Highlight items
using FG and use HI to choose settings. Repeat
until all the desired settings have been chosen. Press
the R button to preview the results.
5184x3888
3
FF
L
FF
L
SFSF
L L
NNNN
M1
WB
Auto
F
Hi
5184x3888
10
0
%
10
0
%
Preview UpdatePreview Update
- Press the Q
image.
- Use FG to select [Yes] and press the Q button to record the developed image.
• Highlighting [ART BKT] and pressing I
and press the Qv.
have been selected.
- Press the Q
4
To create additional copies from the same original, highlight [Reset] and
press the Q button. To exit without creating more copies, highlight [No] and
press the Q button.
• Selecting [Reset] displays editing options. Repeat the process from Step 3.
Retouching JPEG Pictures (JPEG Edit)
The [JPEG Edit] menu contains the following options.
Shadow Adj Brighten back-lit subjects.
Red-eye Fix
P
Crop pictures. Size the crop with the front or rear dial and
position it with FGHI.
Aspect
Change the aspect ratio from the standard 4:3 to [3:2],
[16:9], [1:1], or [3:4]. After choosing an aspect ratio, use the
arrow pad to position the crop.
Black & White Create a black-and-white copy of the current picture.
Sepia Create a sepia copy of the current picture.
Saturation
Adjust the vividness of colors. The results can be
previewed in the display.
Q
Create a resized copy 1280 × 960, 640 × 480, or 320 × 240
pixels in size.
Pictures with an aspect ratio other than the standard 4:3
are resized to dimensions as close as possible to the
selected option.
# Red-eye correction may not work depending on the image.
# Editing of a JPEG image is not possible in the following cases:
When an image is processed on a PC, when there is not enough space in the card
memory, or when an image is recorded on another camera.
# The image cannot be resized (Q) to the larger size than the original size.
# Some images can not be resized.

202
EN
Playback
5
# [P] (trimming) and [Aspect] can only be used to edit images with an aspect ratio of 4:3
(standard).
1
Display an image you want to edit and press the Q
button.
1/250
2022/02/01 16:30:43 100-0015
4:3
15/30
F5.6
ISO
800
±
0.0
1/250
2022/02/01 16:30:43 100-0015
4:3
15/30
F5.6
ISO
800
±
0.0
1
L
F+RAWF+RAW
100
%
100
%
rr
O
O
2
Use FG to select [JPEG Edit] and press the Q
button.
• The editing menu will be displayed.
MENU
JPEG
MENU
OK
1
0
Rating
Share Order
JPEG Edit
R
Rotate
3
Highlight items using FG and press the Q button.
•
options are listed for the selected item, use FG to
choose the desired option.
• When [P] is selected, you can size the crop using the
dials and position it using FGHI.
MENUMENU
OK
1
Black & White
Aspect
P
Red-eye Fix
Shadow Adj
Sepia
JPEG Edit
• When [Aspect] is selected, you can select an option using FG, and then set the
position using FGHI.
4
Highlight [Yes] using FG and press the Q button.
• The new copy will be saved at the selected settings and the camera will return to the
playback display.
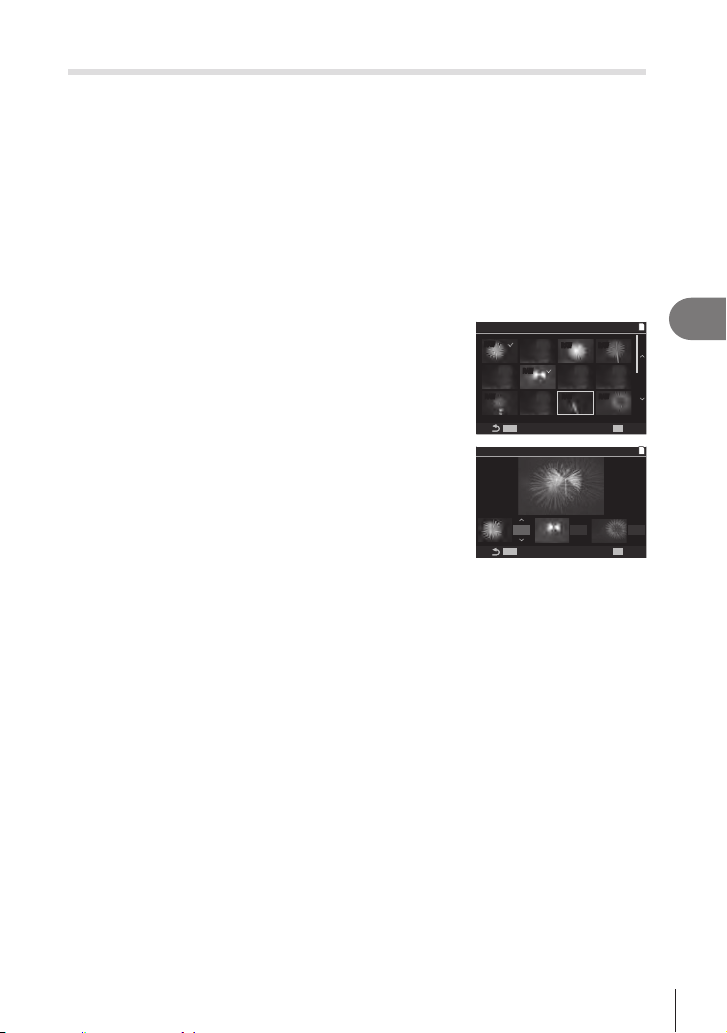
203
EN
Playback
5
Combining Pictures (Image Overlay)
Overlay existing RAW photos and to create a new picture. Up to 3 pictures can be
included in the overlay.
• The overlay is saved in the format currently selected for image quality. Overlays created
with [RAW] selected for image quality are saved in RAW format and in JPEG format using
the image quality option selected for [K2] (P. 140).
• Overlays saved in RAW format can in turn be combined with other RAW images to create
overlays containing 4 or more pictures.
1
Display an image you want to edit and press the Q button.
2
Use FG to select [Image Overlay] and press the Q button.
3
Select the number of images to be overlaid and press the Q button.
4
Use FGHI to select the RAW images to be
overlaid.
• Selected pictures are marked with a v. To deselect,
press the Q button again.
• The overlaid image will be displayed if images of the
5
Adjust the gain for each image to be overlaid.
• Use HI to select an image and FG to adjust gain.
• Gain can be adjusted in the range 0.1 – 2.0. Check the
results in the monitor.
6
Press the Q
dialog.
• Select [Yes] and press the Q button.
RAW
RAW RAW
RAW
RAW RAW RAW
MENUMENU
OK
1
Image Overlay
x1.0 x1.0 x1.0
MENUMENU
OK
1
Image Overlay

204
EN
Playback
5
Trimming movies (Movie Trimming)
containing only footage you want to preserve.
%This option is available only with movies recorded with the camera.
1
Display a movie you want to edit and press the Q button.
2
Select [Movie Edit] and press the Q button.
3
Use FG to select [Movie Trimming] and press the Q button.
• You will be prompted to choose how you want to save the edited movie.
[Overwrite]: Overwrite the existing movie.
[No]: Exit without trimming the movie.
• If the movie is protected, you cannot select [Overwrite].
4
Highlight the desired option and press the Q button.
• You will be presented with an edit display.
5
Trim the movie.
• Use the FG button to skip to the last frame.
• Using the front or rear dial or the H
want to delete and press the Q button.
• Using the front or rear dial or the I button, highlight the last frame of the footage you
want to delete and press the Q button.
6
Highlight [Yes] and press the Q button.
• The edited movie will be saved.
• Q button.
• If you selected [Overwrite], you will be prompted to choose whether to trim additional
footage from the movie. To trim additional footage, highlight [Continue] and press the
Q button.
Creating Movie Stills (In-Movie Image Capture)
Save a still copy of a selected frame.
%This option is available only with [4K] movies recorded with the camera.
1
Display a movie you want to edit and press the Q button.
2
Select [Movie Edit] and press the Q button.
3
Use FG to select [In-Movie Image Capture] and press the Q button.
4
Use HI to select a frame to be saved as a still image and press the Q
button.
• The camera will save a still copy of the selected frame.
• Use the F button to go back and the G button to skip ahead.
205
EN
Playback
5
Changing the role of the R (H) button during playback
(qRFunction)
Choose the role played by the R (H) button during playback.
Menu
MEN U n q n 2. Operations n qRFunction
qRFunction
[h]: Create or modify a “share order” by marking
pictures for upload to a smartphone.
[H]: Select multiple pictures.
Changing the roles of the front and rear dials during playback
(qDial Function)
Choose the roles played by the front and rear dials during playback.
Menu
MEN U n q n 2. Operations n qDial Function
Ga
Zoom in or out or switch to the index display during playback.
Prev/Next View the next or previous image during playback.
Choosing the Playback Zoom Ratio (qaDefault Setting)
Choose the starting zoom ratio for playback zoom (close-up playback).
Menu
MEN U n q n 2. Operations n qaDefault Setting
Recently Zoom in to the most recently selected zoom ratio.
Equally Value
Images are displayed at a zoom ratio of 1:1. A
icon
appears in the monitor.
×2, ×3, ×5, ×7,
×10, ×14
Choose the starting zoom ratio.
Automatically rotating portrait-orientation pictures for playback (R)
Choose whether pictures shot in portrait orientation are automatically rotated for
display on the camera.
Menu
MEN U n q n 3. Displays n R
On Pictures are automatically rotated for display during playback.
O Pictures are not automatically rotated for display during playback.
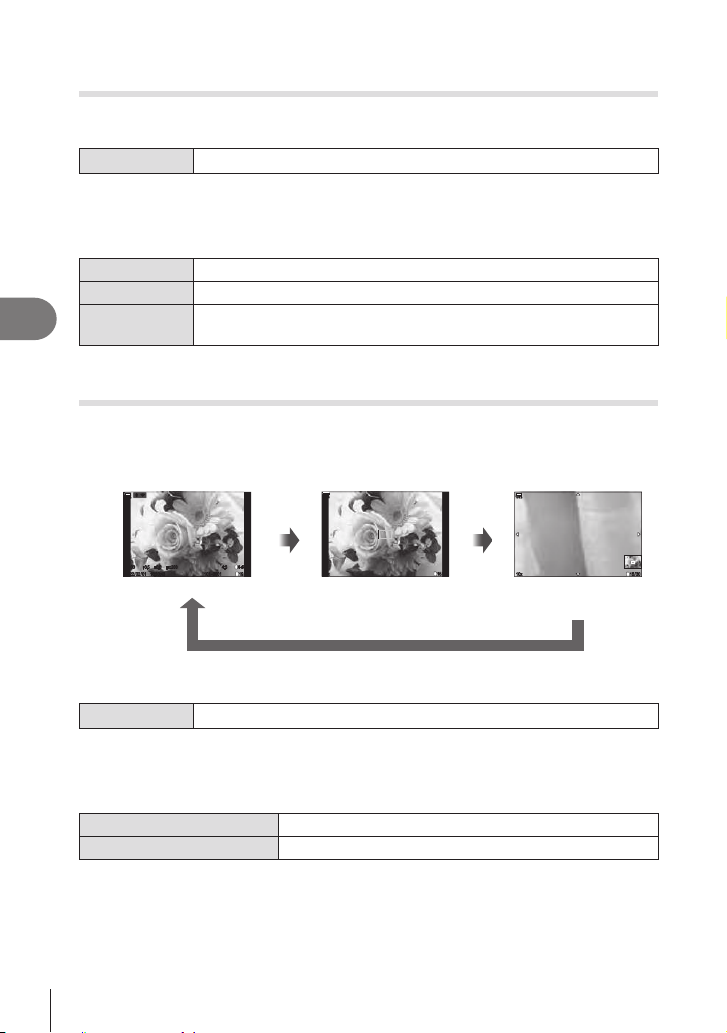
206
EN
Playback
5
Choosing the information displayed during playback
(qInfo Settings)
Choose the information displayed during playback. Pressing the INFO button during
playback will switch the display between the selected displays.
Menu
MEN U n q n 3. Displays n qInfo Settings
1
Select the display type, and put a check (v) next to it.
• Select an option using FG and press the Q button to put a check (v) next to it.
To remove the check, press the Q button again.
Image Only Only the image is shown.
Basic Minimum information is shown.
Overall
Full information including the shooting conditions and histogram is shown
(P. 186).
Choosing the information displayed during magnied playback
(qaInfo Settings)
Choose the display when you magnify the picture by pressing S or a button to which
[a] (magnify) has been assigned (P. 208).
S
or
a
S
or
a
S
or
a
Playback display Zoom frame
16:30:43
4:3
±
0.0
1/100
2022/02/01 16:30:43 101-0001
4:3
1
9/32
F3.5
ISO
200
±
0.0
1
N+RAW
L
100
%
100
%
rr
O
O
1/100
2022/02/01 101-0001 19/32
F3.5
ISO
200
N+RAW
100
%
100
%
10x 15/3010x 15/30
1
10
0
%
10
0
%
10x 15/3010x 15/30
1
Playback zoom
scroll display
# If you remove the checks from all options, you will not be able to magnify the image using
S or a button to which [a] (magnify) has been assigned.
Menu
MEN U n q n 3. Displays n qaInfo Settings
1
Select the display type, and put a check (v) next to it.
• Select an option using FG and press the Q button to put a check (v) next to it.
To remove the check, press the Q button again.
Magnify Frame Displays the zoom frame.
Magnify Scroll

207
EN
Playback
5
Conguring the index display (G Settings)
You can change the number of frames to be displayed on the index display and
whether to use the calendar display.
Menu
MEN U n q n 3. Displays n G Settings
1
Select the display type, and put a check (v) next to it.
• Select an option using FG and press the Q button to put a check (v) next to it.
To remove the check, press the Q button again.
[A4] / [B9] / [C25] /
[C100]
Choose the number of frames to be displayed on the index
display.
Calendar Pictures are displayed on a calendar.

208
EN
Customizing the Camera
6
6
Functions for Conguring Camera Controls
Changing the roles of buttons
(Button Settings)
PASMB
n
Other roles can be assigned to buttons in place of their existing functions.
The functions assigned using [K
photography. The functions assigned using [n
n (movie) mode.
Cust omiza ble Controls
Icon Button
Default role
K
n
F F button
F (exposure compensation)
R
R button
h (High Res Shot)
RREC (movie
recording)
K
ISO button
ISO sensitivity
e
AF-ON button
AF-ON
u AEL button
AEL
u u button u (display selection)
d
Arrow pad
1
D Arrow pad I (right)*
2
b (AF/MF toggle)
E Arrow pad G (down)*
2
WB (white balance)
Y
One-touch white balance button
(one-touch white
balance)
Peaking
Z
Preview button Preview Magnify
PBH
F
F button on the optional power
battery holder
F (exposure compensation)
PBH
K
ISO button on the optional power
battery holder
ISO sensitivity
PBH
e
AF-ON button on the optional
power battery holder
AF-ON
l
Fn button on the lens AF Stop
*1 No function is assigned to the arrow pad by default.
*2 To use I and G on the arrow pad in their assigned roles, select [Direct Function] for
[d] (arrow pad).
Customizing the Camera

209
EN
Customizing the Camera
6
Super Control Panel
Q n KButton Function / nButton Function
Menu
MEN U n G n1. Operations nButton Settings n KButton
Function
MEN U n G n1. Operations nButton Settings n nButton
Function
1
Highlight the desired control using FG and press the Q button.
2
Highlight a function using FGHI and press the Q button to assign it to
the selected control.
Availa ble Role s
“
K
only”: This role is only available in the [KButton Function] menu.
“
n
only”: This role is only available in the [nButton Function] menu.
%The options available vary from button to button.
Role Function
RREC (movie
recording)
The control functions as a movie-record button. Press to start or stop
recording.
Preview (z)
(K only)
Stop aperture down to the selected value. This lets you preview
while the button is pressed. Preview options can be selected using
[zLock] (P. 224).
(one-touch
white balance)
Measure a value for one-touch white balance (P. 152).
To measure white balance during still photography, frame a reference
object (a piece of white paper or the like) in the display, then press
and hold the control and press the shutter button. A list of one-touch
white balance options will be displayed, from which you can choose
the location to which the new value will be saved.
To measure white balance during movie recording, frame a reference
object (a piece of white paper or the like) in the display and press the
button. A list of one-touch white balance options will be displayed, from
which you can choose the location to which the new value will be saved.
AF Area Select
(N)
You can choose the AF target mode (P. 77) and position (P. 76).
Press the control to view the AF target selection display.
Use the front or rear dial to choose AF target mode and the multi
selector or arrow pad to position the AF target.
• You can choose the controls used for this operation. g “AF
Target Selection (NSelect Screen Settings)” (P. 99)
NHome
(NHP) (AF home
position) (K only)
Recall previously-saved [AF Target Mode], and [AF Target Point]
“home position” settings. Home position settings are saved using
[KN Set Home] (P. 98).
• You can save separate home positions for landscape and portrait
orientations. g “Matching AF Target Selection to Camera
Orientation (KOrientation Linked N)” (P. 97)
MF (b) (AF/MF
toggle)
Switch between AF and MF. Press once to select MF and again to
return to the previous mode. The focus mode can also be selected by
holding the button and rotating a dial.

210
EN
Customizing the Camera
6
Role Function
RAW K
(RAW quality)
(K only)
If you press the button when [KK] is set to JPEG, it changes
to RAW+JPEG. When [KK] is set to RAW or RAW+JPEG, the
setting does not change. You can also choose an image quality
setting by holding the button and rotating a dial.
Test Picture
(K Test)
(K only)
actual photograph. If you keep the control pressed while pressing the
shutter button, you will be able to view the results but the picture will
not be saved to the memory card.
Custom Mode
C1–C4
(K only)
Recall settings for the selected custom mode. Press the control
once to recall saved settings, a second time to restore the settings
function when a custom mode is selected with the mode dial.
Exposure Comp.
(F)
Adjust exposure settings. Hold the control and rotate the front or
rear dial. Alternatively, you can press the button to activate settings
and then rotate the dials. The adjustments available vary with the
shooting mode:
[P]: Use the front or rear dial or HI for exposure compensation.
Use the FG buttons for program shift.
[A]: Use the front or rear dial or HI for exposure compensation.
Use the FG buttons for aperture.
[S]: Use the front or rear dial or HI for exposure compensation.
Use the FG buttons for shutter speed.
[M] *: Use the rear dial or FG for shutter speed. Use the front dial or
the HI buttons for aperture.
[B]: Use rear dial or FG to switch between bulb/time and live
composite photography. Use the front dial or HI buttons to choose
the aperture.
* For information on adjusting exposure settings when [Auto]
is selected for [ISO] (P. 113), see “Adjusting Exposure
Compensation” (P. 107).
Digital Tele-
converter
(K: a2x / n:
a1.4x)
recording a movie. During movie recording, a frame indicating the
Keystone Comp.
(D)
(K only)
Press the control to view keystone compensation settings (P. 170).
After adjusting settings, press the control again to exit. To cancel
keystone compensation, press and hold the control.
Fisheye
Compensation (Z)
(K only)
correction. Press again to disable. Hold the button and rotate the
front or rear dial to choose from [Angle] options 1, 2, and 3.
Magnify (a)
Press the control once to display the zoom frame and again to zoom
in (P. 80). Press the control a third time to exit zoom; to hide the
zoom frame, press and hold the control. Use the multi selector, touch
controls, or FGHI to position the zoom frame.
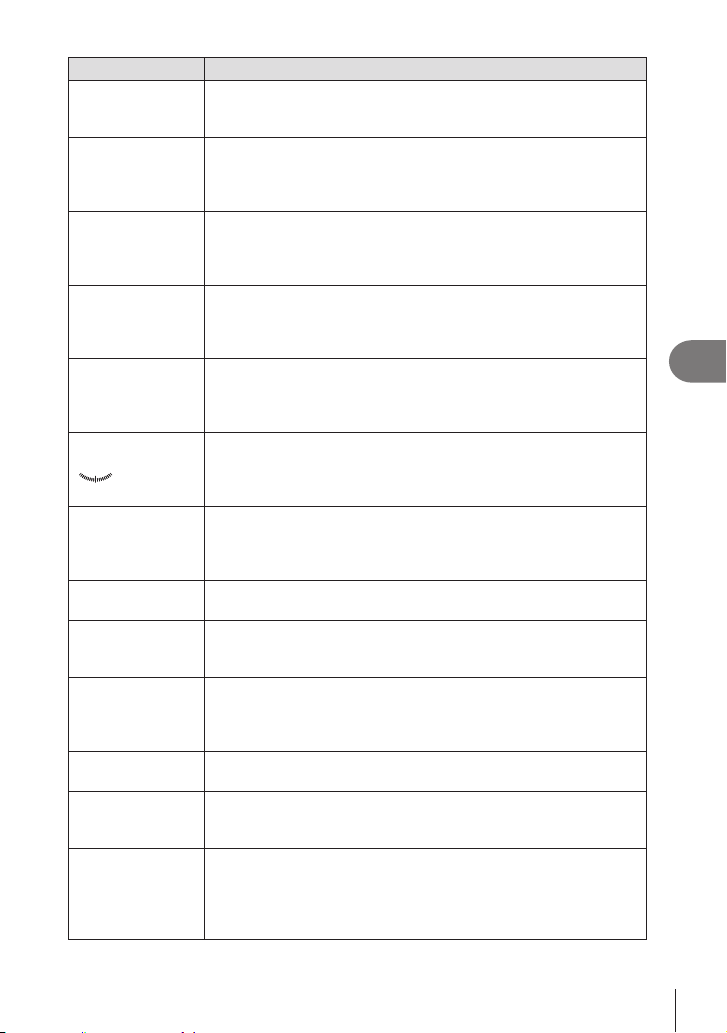
211
EN
Customizing the Camera
6
Role Function
HDR
(K only)
Enable HDR (P. 162). Press once to enable HDR. Press again to
disable. Hold the button and rotate the front or rear dial to adjust HDR
settings, including HDR bracketing.
ISO
Adjust [ISO] settings (P. 113). Hold the control and rotate the front
or rear dial. Alternatively, you can press the button to activate settings
and then rotate the dials. Use the front or rear dial or HI to adjust
settings.
WB (white
balance)
Adjust [WB] settings (P. 150). Hold the control and rotate the front or
rear dial. Alternatively, you can press the button to activate settings
and then rotate the dials. Use the front or rear dial or HI to adjust
settings.
Multi Function
(Multi Fn)
Hold the control and rotate the front or rear dial to choose the
function performed. The selected function can be performed by
pressing the control.
Peaking (Peak)
options (color, amount) can be displayed by pressing the I NFO
button.
VLevel Disp
(
)
Display the digital level gauge. The exposure bar display in the
VStyle 1] or [VStyle 2] is selected
for [EVF Style] (P. 228).
u View
Selection (u)
(display selection)
selected for [EVF Auto Switch] (P. 250), the display will switch
display [EVF Auto Switch] options.
LV Mode (S-OVF)
(K only)
Switches [LV Mode] (P. 225)between [Standard] and [S-OVF].
AF Limiter
(AFLimit)
(K only)
Enable the AF limiter (P. 92). Press once to enable [AF Limiter].
Press again to disable. Hold the button and rotate the front or rear
dial to choose from three stored settings.
Preset MF
(Preb)
Set [AF Mode] to [Preb] (P. 72). Press the control once to
enable preset MF and again to restore the previous focus mode.
Alternatively, you can choose the [AF Mode] by holding the control
and rotating a dial.
Lens Info Settings
(sLens)
Recall previously-saved lens data (P. 246). Recall saved data for the
current lens after changing lenses or the like.
IS Mode (IS)
rotate the front or rear dial to access [Image Stabilizer] options.
Flicker Scan
(Flicker Scan)
Adjust settings for [Flicker Scan] (P. 108). Press the control to select
[On]. You can adjust shutter speed for best results while viewing
banding in the display. Press the control again to display shooting
information and access other settings. Press and hold the control to

212
EN
Customizing the Camera
6
Role Function
Live ND Shooting
(ND)
(K only)
Shooting]. Press again to disable. Hold the button and rotate the front
or rear dial to adjust [Live ND Shooting] settings.
O The control is not used.
Flash Mode (#)
(K only)
and again select the highlighted option and exit. Highlight settings
using the front or rear dial or HI.
• This function can be assigned to the I and G buttons only. You
d] to [Direct Function].
j/Y (sequential
shooting/self-
timer)
(K only)
Choose a drive (sequential shooting/self-timer) mode (P. 126).
Press the button to display drive mode options and then choose a
mode using the front or rear dial or the HI buttons.
• This function can be assigned to the I and G buttons only. You
d] to [Direct Function].
GLock (touch
control lock)
Lock touch controls. Press and hold the button once to lock touch
controls and again to unlock.
• This function can be assigned to the I and G buttons only. You
d] to [Direct Function].
Electronic Zoom
(X)
Zoom power zoom lenses in or out. After pressing the control, use
the arrow pad to zoom in or out. Use For I to zoom in and G or H
to zoom out.
• This function can be assigned to the I and G buttons only. You
d] to [Direct Function].
AF Stop
Suspend autofocus. Focus locks and autofocus is suspended while
the control is pressed. Applies only to lens l buttons.
IFace Selection
(])
Select the face used for focus when the camera detects multiple
portrait subjects. Pressing the button selects the face closest to
the current AF target. If oAll (all targets) is selected for AF-target
mode, pressing the button will instead select the face closest to the
and rotate the front or rear dial. This option can also be used during
movie recording.
Face & Eye
Detection
(
I
)
setting, press the button again. To change the option displayed in the
[Face & Eye Detection] menu, hold the button and rotate the front or
rear dial.
Focus Ring Lock
(B)
Press the control once to disable, and again to enable, the lens focus
ring. This option is available when [S-AFb], [C-AFb], [b],
[C-AF+TRb], [Preb], or [FAFb] is selected for [AF Mode].
The b portion of the AF mode indicator is displayed gray while the
ring is disabled.
In the case of lenses equipped with an MF (manual focus) clutch,
position (closer to the camera body).
Focus ring lock ends when you perform an operation such as turning
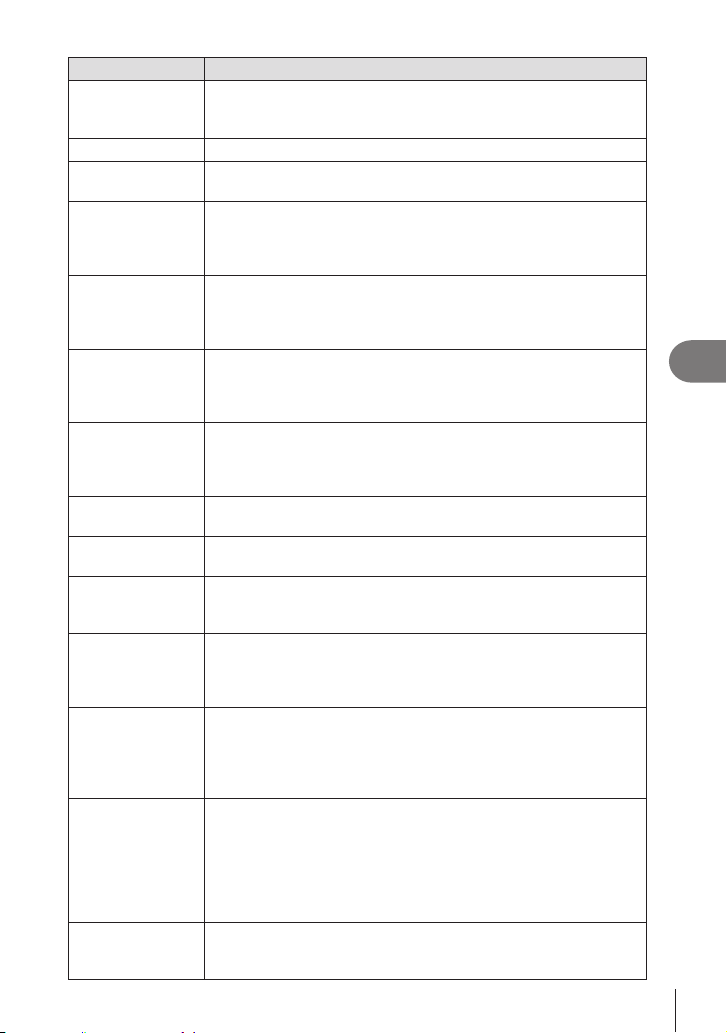
213
EN
Customizing the Camera
6
Role Function
Night Vision
(Night LV)
(K only)
KNight Vision]
(P. 225) selects [On]. If [On] is selected, pressing the button selects
AEL (AE lock) Press the button to lock exposure. Press again to release it.
AF-ON
The camera focuses with autofocus while the button is pressed
(P. 83). The camera stops focusing when the button is released.
AE BKT
(K only)
[AE BKT], hold the button and rotate the front or rear dial.
WB BKT
(K only)
[WB BKT], hold the button and rotate the front or rear dial.
FL BKT
(K only)
[FL BKT], hold the button and rotate the front or rear dial.
ISO BKT
(K only)
[ISO BKT], hold the button and rotate the front or rear dial.
ART BKT
(K only)
press and hold the button.
Focus BKT
(K only)
press and hold the button.
Focus Stacking
(W)
(K only)
Stacking], press and hold the button.
High Res Shot
(h)
(K only)
the setting selected under [High Res Shot]. If an option other than
for [High Res Shot], hold the button and rotate the front or rear dial.
Subject Detection
(^)
selects the setting selected under [Subject Detection]. If an option
choose an option for [Subject Detection], hold the button and rotate
the front or rear dial.
Direct Function
(n)
Assign roles to the buttons on the arrow pad (FGHI). The
following roles can be assigned:
H button: N (AF-target selection)
F button: F (exposure compensation)
I button:
b (AF/MF toggle)
G button: WB (white balance)
• The I and G buttons can be assigned other functions.
WLock (LockW)
(n only)
When recording a movie with the white balance set to [AUTO],
pressing the button locks the white balance. Pressing it again
releases the lock.

214
EN
Customizing the Camera
6
Role Function
nView Assist
(BT.709)
(n only)
Toggle [n
You can change the setting even when you are recording a movie.
Zebra Pattern
Settings (bZebra)
(n only)
You can change the setting even when you are recording a movie.
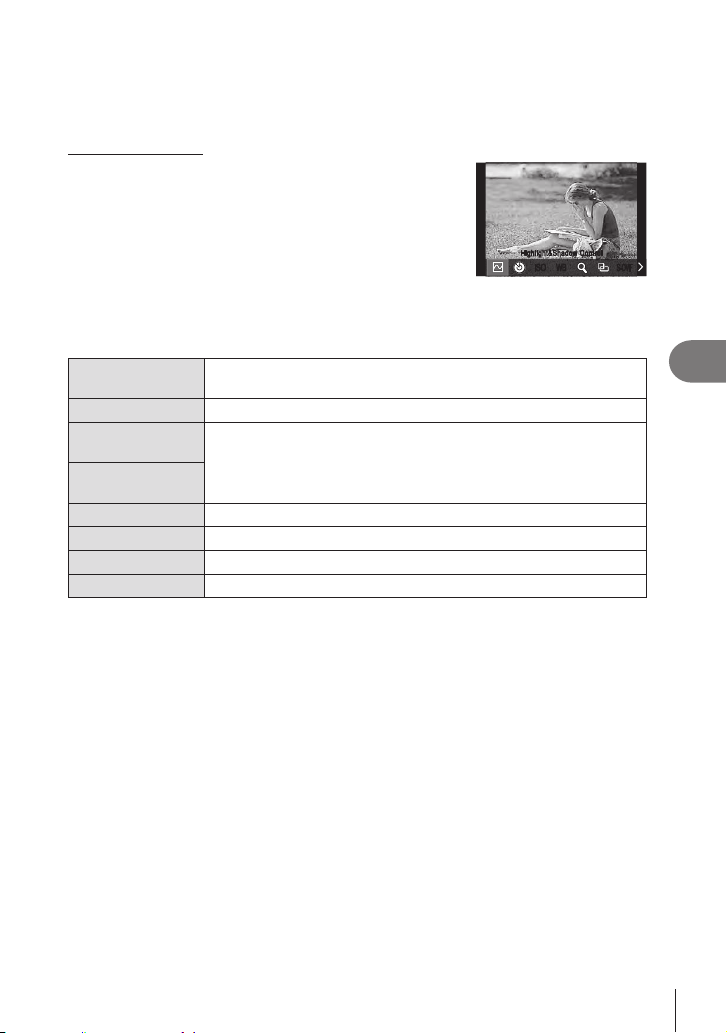
215
EN
Customizing the Camera
6
Using mult i funct ion opt ions (M ult i Func t ion)
Assign multiple roles to a single button.
%
using [Button Settings] (P. 208).
Choosing a function
1
Hold the button to which [Multi Function] is assigned
and rotate the front or rear dial.
• Rotate the dial until the desired feature is highlighted.
Release the button to select the highlighted feature.
2
Press the button to which [Multi Function] is
assigned.
ISOISO
WBWB
S-OVFS-OVF
Highlight&Shadow ControlHighlight&Shadow Control
3
Adjust settings.
The multi-function button can be used to:
Highlight&Shadow
Control
Adjust brightness using the front or rear dial. Press the IN FO button
to choose the tone range (highlights, shadows, or mid-tones).
Color Creator Use the front dial to adjust hue and the rear dial to adjust saturation.
KISO
nISO
Choose a setting using the front or rear dial.
KWB
nWB
Magnify The zoom frame will be displayed.
Image Aspect Choose a setting using the front or rear dial.
KLV Mode
Press the button to switch between [Standard] and [S-OVF].
Peaking
• You can choose the options displayed. g [Multi Function Settings] (P. 236)
%During shooting, [Highlight&Shadow Control] can also be set by pressing the F
(Exposure compensation) and then pressing the
IN FO
button.
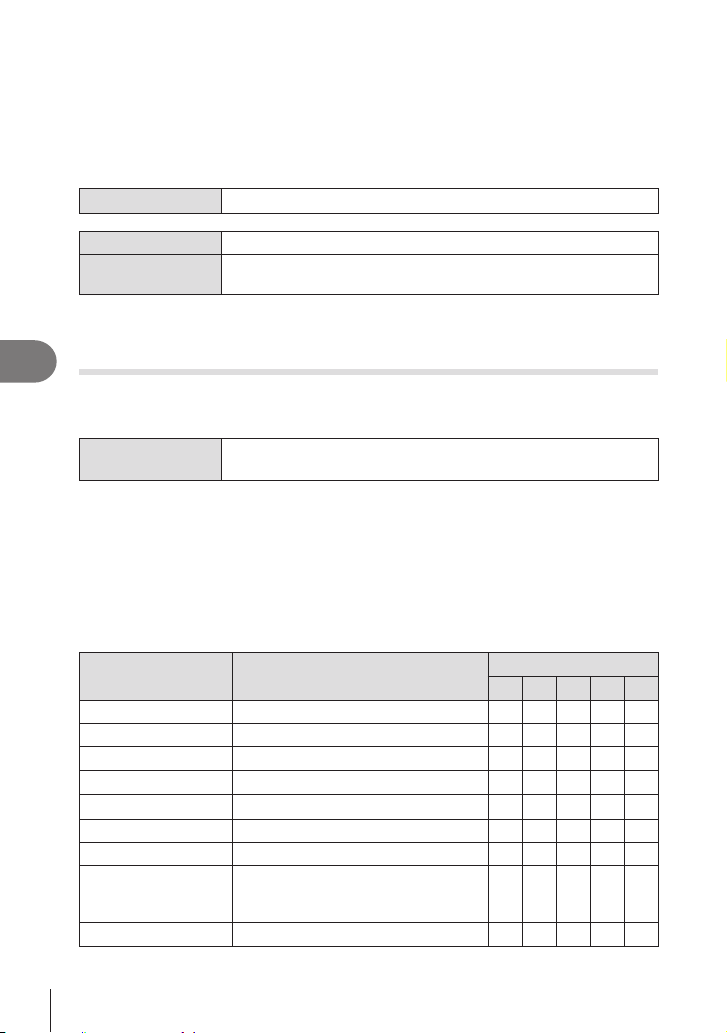
216
EN
Customizing the Camera
6
Re c ording a m ovie by pressing t he shut t e r but t on (nShut t er
Func t ion)
PASMB
n
R (movie record) button. An optional remote control
can then be used to start or stop recording when the mode dial is rotated to
n
(movie).
Menu
MEN U n G n1. Operations n nShutter Function
O The shutter button cannot be used to record movies.
RREC
Press the shutter button all the way down to start or stop movie
recording.
# The R button cannot be used for movie recording when [R REC] is selected.
Assigning Roles to the Front and Rear Dials
(KDial Function / nDial Function)
PASMB
n
Choose the roles performed by the front and rear dials.
Menu
MEN U n G n1. Operations n Dial Settings n KDial Function
MEN U n G n1. Operations n Dial Settings n nDial Function
1
Choose an item to set, and press the Q button.
• Choose a dial using the HI buttons and use the FG buttons to choose a role.
• Press the IN FO button to move between lever positions.
• Press the Q button when settings are complete.
# When [KFn Lever Function] / [nFn Lever Function] is set to a setting other than
[mode1], the functions assigned to lever 1 is enabled even if the lever is in position 2.
The functions that can be assigned in [KDial Function] are listed below.
Role Function
Shooting mode
P A S M
B
Ps Program shift (P. 44).
a
— — — —
Shutter Choose the shutter speed. — —
a a
a *
FNo. Adjust aperture. —
a
—
a a
F
Adjust exposure compensation.
a a a a a
x
a a a a a
ISO Adjust ISO sensitivity.
a a a a a
WB Adjust white balance.
a a a a a
CWB Kelvin
Choose a color temperature when
CWB (custom) is selected for white
balance.
a a a a a
O None.
a a a a a
* Switch between bulb, time, and live composite.

217
EN
Customizing the Camera
6
The functions that can be assigned in [nDial Function] are listed below.
Role Function
n mode (movie
exposure mode)
P A S M
Shutter Choose the shutter speed. — —
a a
FNo. Adjust aperture. —
a
—
a
F
Adjust exposure compensation.
a a a a
ISO Adjust ISO sensitivity. — — —
a
WB Adjust white balance.
a a a a
CWB Kelvin
Choose a color temperature when CWB
(custom) is selected for white balance.
a a a a
RVOL
Adjust the recording level.
a a a a
PVOL
Adjust headphone volume.
a a a a
O None.
a a a a

218
EN
Customizing the Camera
6
Changing the Dial Direction (Dial Direction)
PASMB
n
Choose the direction in which the dials are rotated to set exposure.
Menu
MEN U n G n1. Operations n Dial Settings n Dial Direction
Exposure
Choose the direction the dials are rotated to set aperture and shutter
speed in A, S, M , and B modes.
Ps
Choose the direction the dials are rotated for program shift (mode
P).
Changing the Functions of the Multi Selector
(Multi Selector Settings)
PASMB
n
Choose the direction in which the dials are rotated to set exposure.
Menu
MEN U n G n1. Operations n Multi Selector Settings
SCenter Button
Choose the operation performed by pressing the multi selector. The
multi selector can then function as a button.
[O]
[N]: Press the multi selector to adjust settings for AF target
selection or AF target mode. The arrow pad or front and
rear dials can be used according to the setting selected for
[NSelect Screen Settings] (P. 99).
[NHP]: The multi selector performs the function selected for
[KButton Function] > [NHome] (P. 98).
%This option applies in still photography modes only.
TDirection Key
Choose the operation performed by tilting the multi selector. The
multi selector is normally used to position the AF target, but this
function can be disabled to prevent unintended operation.
[O]: No function is assigned.
[N]: The multi selector can be used to position the AF-target.

219
EN
Customizing the Camera
6
Customizing the Fn Lever (Fn Lever Settings)
PASMB
n
Menu
MEN U n G n1. Operations n Fn Lever Settings
How to congure the Fn lever
KFn Lever
Function
Choose the role played by the Fn lever in still photography modes.
The Fn lever can be used to choose the roles of the front and rear
dials or to recall focus settings. It can also be used to select movie
mode.
P, A, S, M , and B (still
photography modes). The option selected using [nFn Lever
n
(movie) mode.
nFn Lever
Function
Choose the role played by the Fn lever in
n
(movie) mode.
The Fn lever can be used to choose the roles of the front and rear
dials or to recall focus settings.
n
(movie) mode.
In P, A, S, M , and B (still photography) modes, the Fn lever
performs the role selected in [KFn Lever Function].
Fn Lever/Power
Lever
shooting.
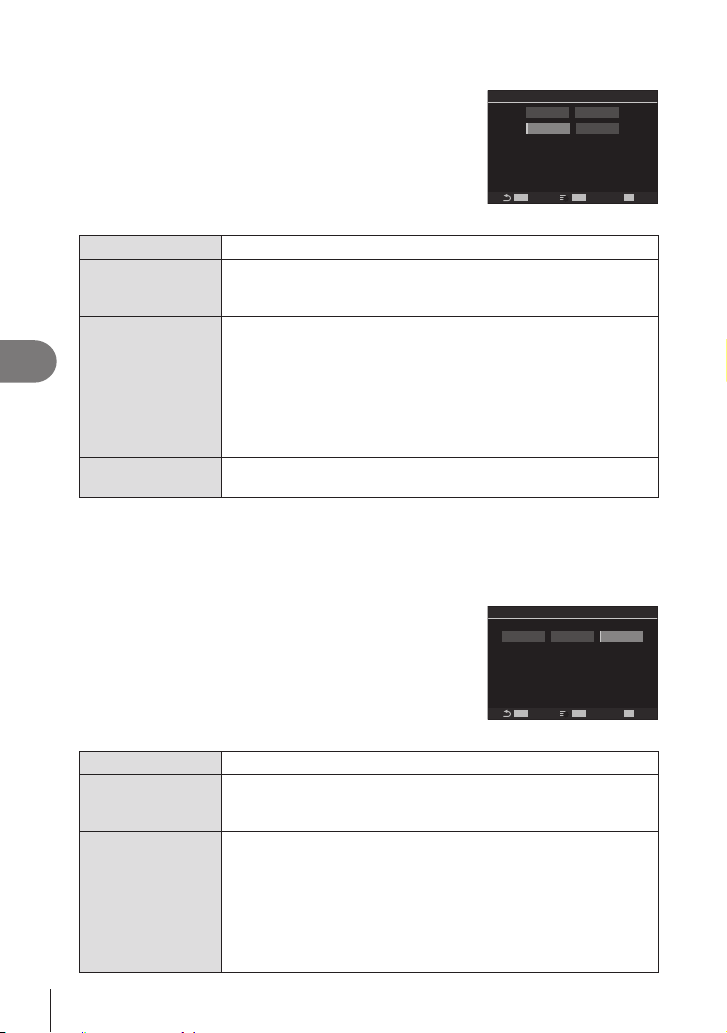
220
EN
Customizing the Camera
6
Conguring [KFn Lever Funct ion]
1
Select [KFn Lever Function] on the [Fn Lever
Settings] screen and press the Q button.
MENU
OK
INFO
HH
mode1
mode2 mode3
Switches AF mode/AF target mode/
AF target point according
to Fn lever position.
Target can be selected.
Off
K
Fn Lever Function
K
Fn Lever Function screen
O Changing the position of the Fn
mode1
Switch the functions of the front and rear dials. The functions
for Positions 1 and 2 conform to the setting selected for [KDial
Function] (P. 216).
mode2
Switch between two groups of settings previously selected for [AF
Mode], [AF Target Mode], and [AF Target Point].
Press the INFO button and put a check (v) next to a setting that
you want to recall with the Fn lever.
To remove the check, press the Q button again.
[AF Mode]: S-AF, C-AF, etc.
[AF Target Mode]: MSingle, oAll, etc.
[AF Target Point]: The position of AF target.
mode3
Toggle the shooting mode. You can switch to
n
(movie) mode
without rotating the mode dial.
# When [mode3] is selected, [nFn Lever Function] cannot be used (P. 221).
# This function cannot be used in the following cases.
- [Fn Lever/Power Lever] (P. 222) is set to [ON/OFF] or [OFF/ON].
Conguring [nFn Lever Funct ion]
1
Select [nFn Lever Function] on the [Fn Lever
Settings] screen and press the Q button.
MENU
OK
INFO
HH
mode1 mode2
Switches AF mode/AF target mode/
AF target point according
to Fn lever position.
Target can be selected.
n
Fn Lever Function
Off
nFn Lever Function screen
O Changing the position of the Fn
mode1
Switch the functions of the front and rear dials. The functions
for Positions 1 and 2 conform to the setting selected for [nDial
Function] (P. 216).
mode2
Switch between two groups of settings previously selected for [AF
Mode], [AF Target Mode], and [AF Target Point].
Press the INFO button and put a check (v) next to a setting that
you want to recall with the Fn lever.
To remove the check, press the Q button again.
[AF Mode]: S-AF, C-AF, etc.
[AF Target Mode]: ySmall, oAll, etc.
[AF Target Point]: AF-target position
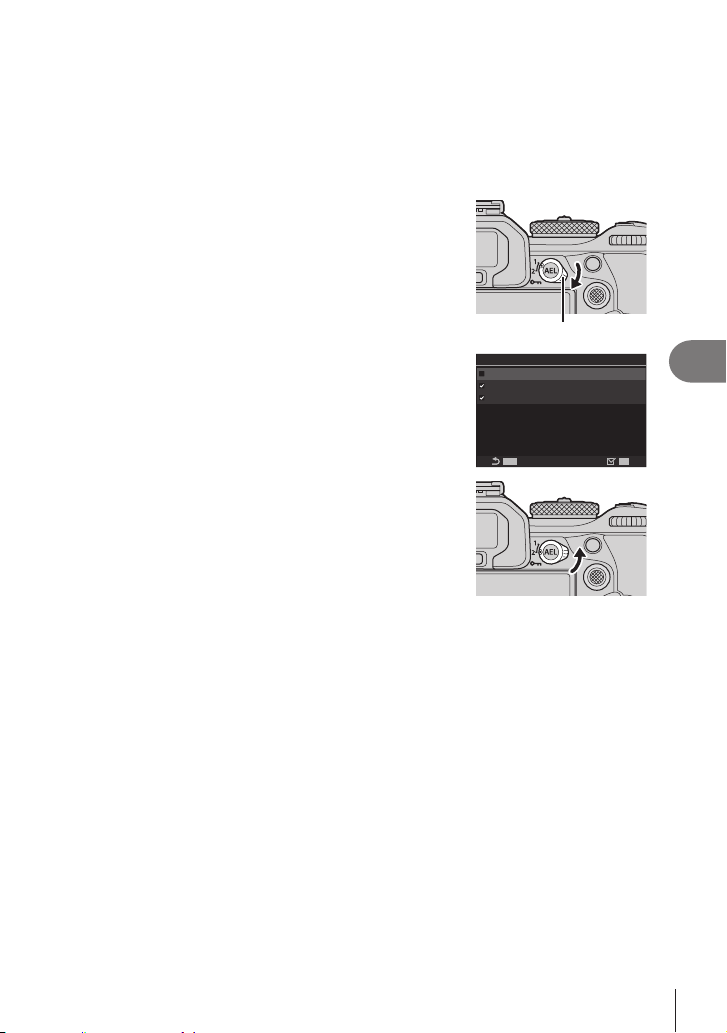
221
EN
Customizing the Camera
6
# This function cannot be used in the following cases.
- [mode3] is selected for [KFn Lever Function] (P. 220).
- [Fn Lever/Power Lever] (P. 222) is set to [ON/OFF] or [OFF/ON].
Using [m ode2 ] of [KFn Lever Function] / [ nFn Lever Function]
When [mode2] is selected for [KFn Lever Function] / [nFn Lever Function], the
camera will store separate focus settings for Positions 1 and 2.
1
Rotate the Fn lever to Position 1 and set the AF
settings.
• The camera can store the settings that have been
checked (v) in:
[AF Mode]: S-AF, C-AF, etc.
[AF Target Mode]:
M
Small,
o
All, etc.
[AF Target Point]: AF-target position
MENU
mode2
MENU
OK
AF Mode
AF Target Mode
AF Target Point
2
Repeat the process for Position 2.
3
Rotate the lever to the desired position to recall the
saved settings.

222
EN
Customizing the Camera
6
Conguring [Fn Lever/Power Lever]
1
Select [Fn Lever/Power Lever] on the [Fn Lever
Settings] screen and press the Q button.
MENU
OK
Fn
ON/OFF OFF/ON
Use Fn Lever for designated
functions. Use power switch
Fn Lever/Power Lever
to control power.
Fn
The lever functions according to the options selected for [KFn
Lever Function] and [nFn Lever Function] (P. 221).
ON/OFF
OFF/ON
2 is on.
#
selected. [KFn Lever Function] and [nFn Lever Function] are similarly unavailable.
Power Zoom Lenses (Electronic Zoom Settings)
PASMB
n
Choose the speed at which power zoom lenses zoom in or out when the zoom ring is
Menu
MEN U n G n1. Operations n Electronic Zoom Settings
KElec. Zoom
Speed
Sets the zoom speed for K (still photography) mode.
[Low]: Slow zoom. A good choice when precise adjustments are
needed.
[Normal]: Normal zoom speed.
[High]: Fast zoom.
nElec. Zoom
Speed
Sets the zoom speed for n (movie) mode.
[Low]: Slow zoom. A good choice when precise adjustments are
needed.
[Normal]: Normal zoom speed.
[High]: Fast zoom.
# Although the same options are displayed for K (still photography) mode and n (movie)
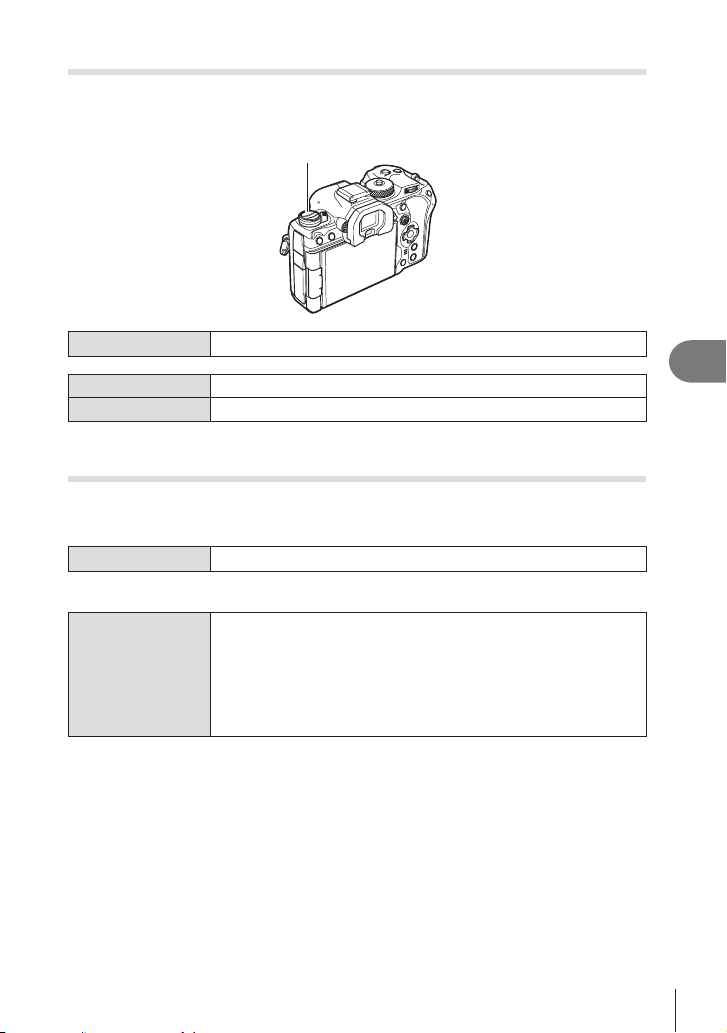
223
EN
Customizing the Camera
6
Locking the v Button
(vLock)
PASMB
n
You can disable the v button.
v button
Menu
MEN U n G n1. Operations n vLock
O
The v button can be used.
On
The v button cannot be used.
Choosing What Happens When the Shutter Button Is Pressed
During Live View Zoom (LV Close Up Mode)
PASMB
n
Choose display options for use with focus zoom.
Menu
MEN U n G n2. Operations n LV Close Up Mode
• For information on live view zoom options, see the explanation on P. 80.
LV Close Up Mode
Choose what happens if the shutter button is pressed halfway during
focus zoom.
[mode1]: Focus zoom ends. You can check the composition after
focusing using focus zoom.
[mode2]
Compose the shot before focusing, then zoom in for
precise focus and take a picture without ever ending zoom.

224
EN
Customizing the Camera
6
Choosing the Behavior of the Control Used for Depth-of-Field
Preview (zLock)
PASMB
n
Menu
MEN U n G n2. Operations n zLock
zLock
[O]: Aperture stops down while the control is pressed.
[On]: Aperture stops down when the control is pressed; to end depth-
Button Hold Options (Press-and-hold Time)
PASMB
n
Choose how long buttons must be pressed to perform resets and other similar
functions for various features. For ease of use, button hold times can be set separately
Menu
MEN U n G n2. Operations n Press-and-hold Time
End LVa
Set the button hold time for each function.
[0.5sec] - [3.0sec]
Reset LVa Frame
Reset F
Reset x
Reset x
Reset s
Reset 7
Reset c
Reset N
Call EVF Auto Switch
Reset D
End D
Switch G Lock
End Flicker Scan
Call WB BKT Setting
Call ART BKT Setting
Call Focus BKT Setting
Call W Setting
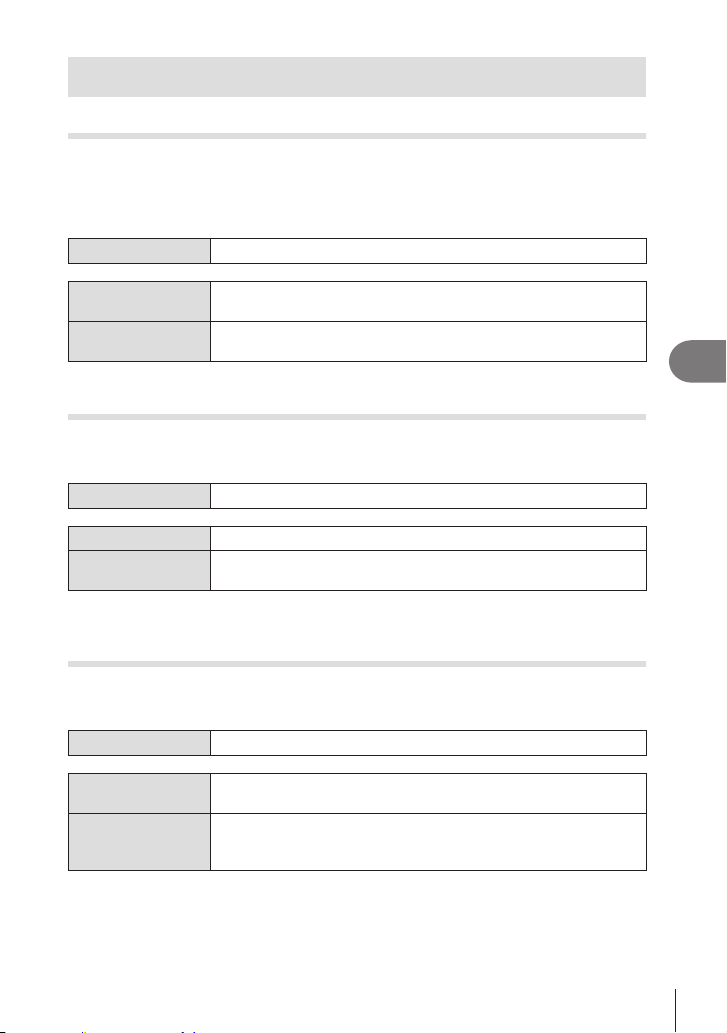
225
EN
Customizing the Camera
6
Functions for adjusting the live view display
Changing the look of the display (KLV Mode)
PASMB
n
Menu
MEN U n H n3. Live View n KLV Mode
Standard
S-OVF
settings are not visible in the display.
• “S-OVF” appears on the display when [S-OVF] is selected.
Making the display easier to see in dark places (KNight Vision)
PASMB
n
Increase brightness of the display to make it easier to see in dark places.
Menu
MEN U n H n3. Live View n KNight Vision
O Normal display.
On
Brightness is adjusted for ease of viewing. The brightness and
• “Night LV” appears on the display when [On] is selected.
# [Frame Rate] will be set to [Normal] when [On] is selected.
Viewnder Display Rate (Frame Rate)
PASMB
n
Menu
MEN U n H n3. Live View n Frame Rate
Normal
The standard frame rate. This is the preferred choice in most
situations.
High
Smooth the motion of fast-moving subjects. Fast-moving subjects
are easier to track. This setting reverts to [Normal] automatically if
the internal temperature of the camera rises during shooting.

226
EN
Customizing the Camera
6
Art Filter Preview (Art LV Mode)
PASMB
n
Menu
MEN U n H n3. Live View n Art LV Mode
mode1
mode2
While the shutter button is pressed halfway, the camera gives
Reducing Flicker in Live View (Anti-Flicker LV)
PASMB
n
Menu
MEN U n H n3. Live View n Anti-Flicker LV
Auto
50Hz
alternating current with a frequency of 50 Hz.
60Hz
alternating current with a frequency of 60 Hz.
O
• This option is not available when [On] is selected for [Anti-Flicker
Shooting] (P. 135).
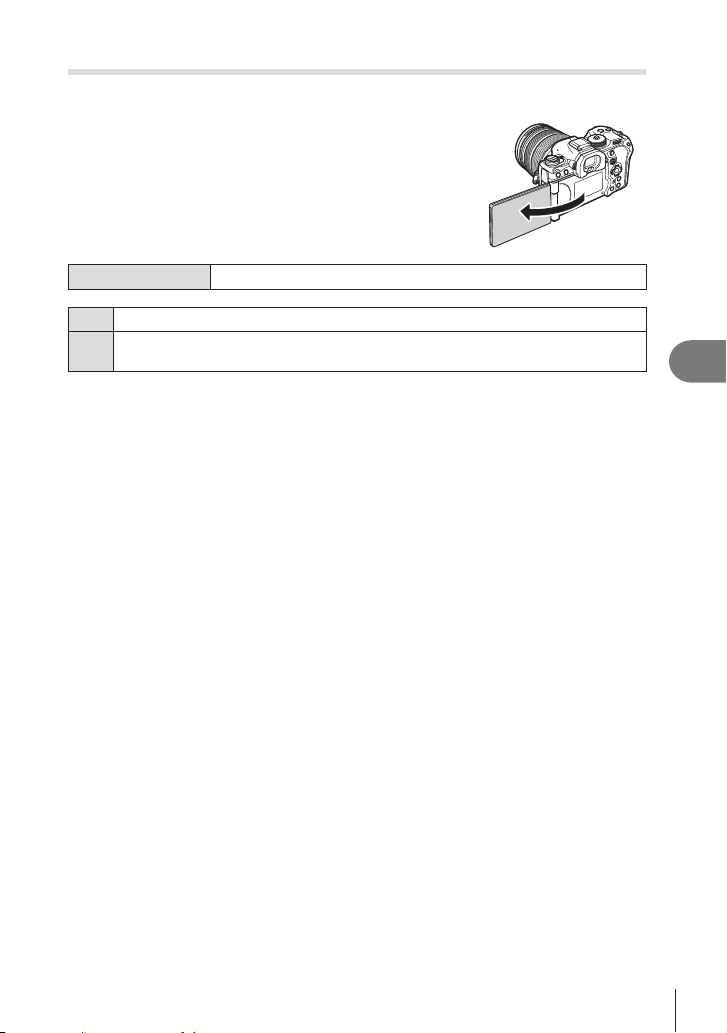
227
EN
Customizing the Camera
6
Sele Assist (Sele Assist)
PASMB
n
Choose the display used when the monitor is reversed for
self-portraits.
Menu
MEN U n H n3. Live View n
O The display does not change when the monitor is reversed.
On
When reversed for self-portraits, the monitor shows a mirror image of the view
through the lens.
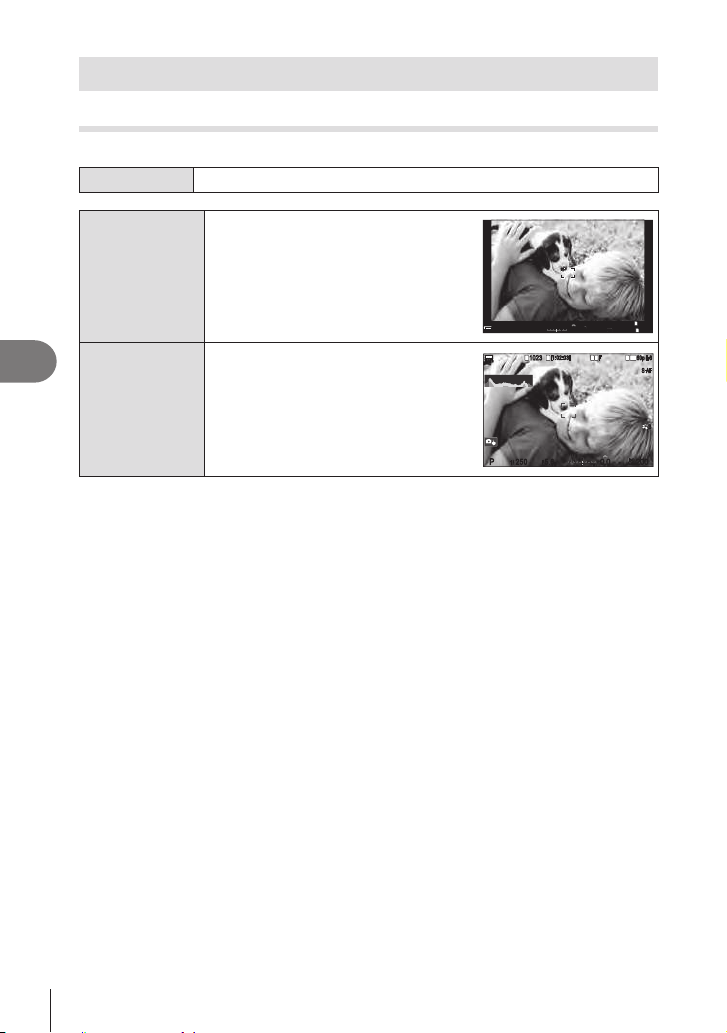
228
EN
Customizing the Camera
6
Functions for Conguring Information Display
Selecting the display style of the viewnder (EVF Style)
PASMB
n
Menu
MEN U n G n 4. Information n EVF Style
VStyle 1 /
VStyle 2
0.00.0
200200
ISO
Auto
ISO
Auto
WBAutoWBAuto
1
1
[
1
:
02
:
03
][
1
:
02
:
03
]
10231023
00
+
-
1
/
250
1
/
F
250
5.65.6
F
PP
100
%
100
%
qStyle 3
The same as the monitor display.
1
10231023
P
1
/
250
P
1
/
F
250 5.65.6
1
1
[
1
:
02
:
03
][
1
:
02
:
03
]
FF
60p60p L
-
8L
-
8
S
-
AFS
-
AF
33
200200
L
1
4K
ISO
Auto
ISO
Auto
F
00
+
-
0.00.0
100
%
100
%
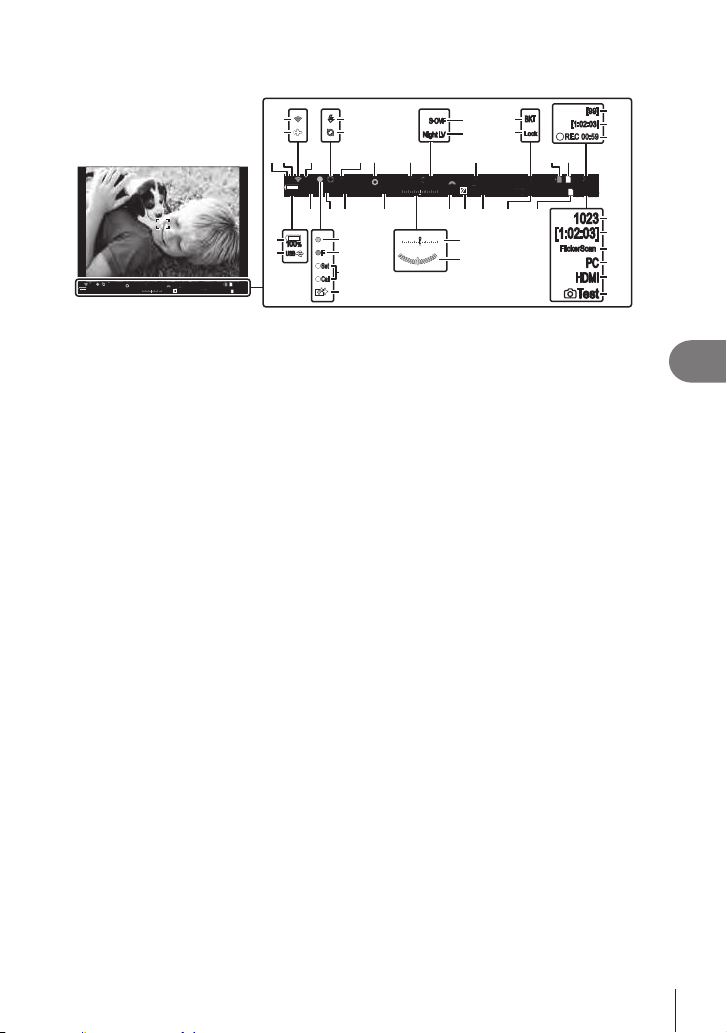
229
EN
Customizing the Camera
6
Viewnder display when shooting using the viewnder (Style 1/Style 2)
s<s<
PCPC
AELAEL
BKTBKT
BKT
BKT BKTBKT
S
-
OVFS
-
OVF
0.00.0
200200
ISO
Auto
ISO
Auto
WB
Auto
WB
Auto
1
1
[
1
:
02
:
03
][
1
:
02
:
03
]
10231023
00
+
-
1
/
250
1
/
F
250
5.65.6
F
P
C1
P
C1
100
%
100
%
s<s<
PCPC
AELAEL
BKTBKT
BKT
BKT BKTBKT
S
-
OVFS
-
OVF
0.00.0
200200
ISO
Auto
ISO
Auto
WB
Auto
WB
Auto
1
1
[
1
:
02
:
03
][
1
:
02
:
03
]
10231023
00
+
-
250
F
250
5.65.6
F
P
C1
P
C1
100
%
100
%
00
+
-
10231023
[
1:02:03][1:02:03]
FlickerScanFlickerScan
PCPC
USBUSB
BKTBKT
LockLock
[
99
][
99
]
(
REC 00:59
[
1
:
02
:
03
][
1
:
02
:
03
]
FF
SetSet
CallCall
##
(
REC 00:59
HDMIHDMI
K
Test
K
Test
1
/
1
/
Night LVNight LV
S
-
OVFS
-
OVF
100
%
100
%
2 f1 5 89 0 c g
m r s yxw zt A
k
l
3
4
d
e
h
j
i
B
C
D
E
F
G
6
7
q
o
n
p
u
v
b
a
1 Active Bluetooth
®
connection
..............................................P. 260, 280
2 Remote control .............................P. 280
3 Wireless LAN connection .....P. 261, 267
4 Airplane Mode...............................P. 260
5 Active connection to computer (Wi-Fi)
......................................................P. 267
6 Flash ............................................. P. 118
(blinks: charging in progress, lights up:
charging completed)
7 Pro Capture active ........................P. 133
8 AE lock..........................................P. 109
9 Preview .........................................P. 224
0 AE BKT .........................................P. 174
a KLV Mode ..................................P. 225
b KNight Vision .............................P. 225
c ISO BKT ........................................P. 176
d WB BKT ........................................P. 175
e WLock ........................................P. 153
f Card write indicator ...................P. 21, 25
g n Save slot .................................P. 243
h Maximum number of continuous shots
......................................................P. 128
i Available recording time ...............P. 327
j Recording time (displayed during
recording)........................................P. 59
k Battery level ....................................P. 30
l Powered via USB PD....................P. 287
m Shooting mode................................P. 43
n ......................P. 40
ojSH2 Aperture warning ...........P. 126
p SET and CALL functions...............P. 293
q Dust reduction...............................P. 305
r Custom mode .................................P. 56
s Shutter speed ...........................P. 43, 47
t Aperture value ..........................P. 43, 45
u Exposure compensation ...............P. 106
v Level gauge *
1
...............................P. 233
w Exposure compensation value......P. 106
x Highlight & shadow control ...........P. 215
y ISO sensitivity ............................... P. 113
z White balance ...............................P. 150
A K Save settings ..........................P. 243
B Number of storable still pictures ...P. 327
C Available recording time ...............P. 327
D Flicker scan...................................P. 108
E Active connection to computer (USB) *
2
......................................................P. 284
F nHDMI Output ............................P. 182
G Test Picture ...................................P. 210
*1 Displayed when the shutter button is pressed halfway. g [Va Level Gauge] (P. 233)
*2 Displayed only when connected to OM Capture and the computer is currently selected in
the [0RAW/Control] menu as the sole destination for new pictures (P. 276).
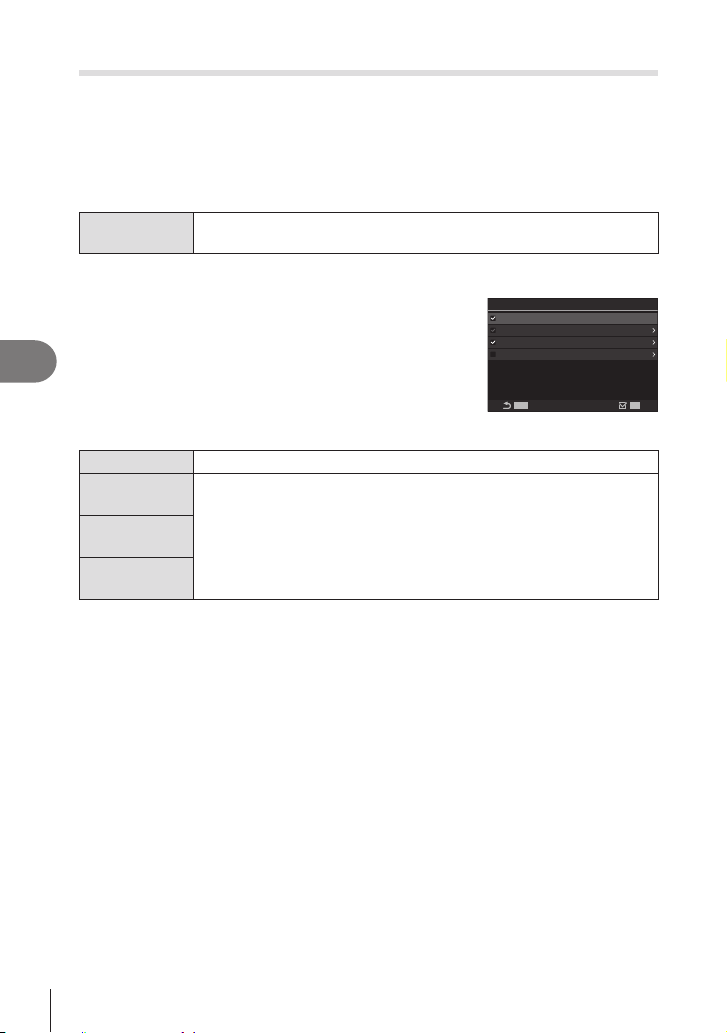
230
EN
Customizing the Camera
6
Shooting Indicators (KInfo Settings / nInfo Settings)
PASMB
n
Choose the indicators listed in the live view display.
You can display or hide shooting setting indicators. Use this option to choose the icons
that appear in the display.
for movie recording mode.
Menu
MEN U n G n 4. Information n KInfo Settings
MEN U n G n 4. Information n nInfo Settings
Conguring KInfo Se t t ings
1
Select an indicator you wish to display when the
INFO button is pressed, and put a check (v) next
to it.
• Select an option using FG and press the Q button to
put a check (v) next to it. To remove the check, press
the Q button again.
MENUMENU
OK
K
Info Settings
Image Only
Information 1
Information 2
Information 3
KInfo Settings setting
screen
Image Only No information will be displayed.
Information 1
Select an option using FG and press the Q button to put a check (v)
next to it.
To remove the check, press the Q button again.
To set the details of an item to be displayed, press I. The following
items can be set.
[&] / [Highlight&Shadow] / [Level Gauge] / [All Battery
Information] / [Silent GOperation]
Information 2
Information 3
%The set that is currently in use cannot be disabled, but the items to be displayed can be
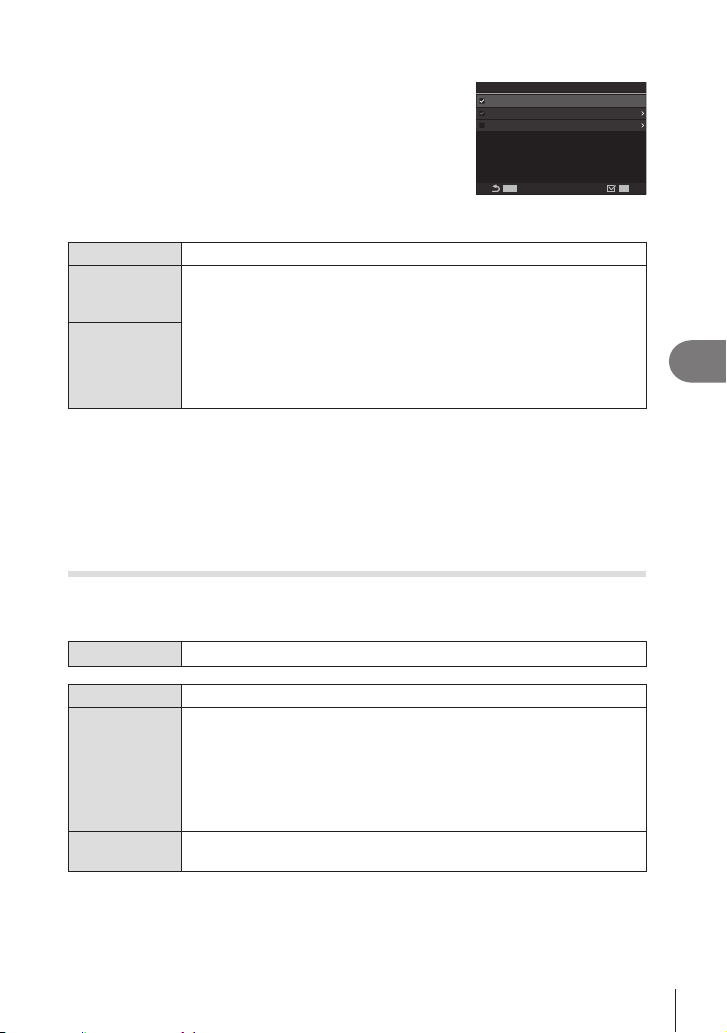
231
EN
Customizing the Camera
6
Conguring nInfo Se t t ings
1
Select an indicator you wish to display when the
INFO button is pressed, and put a check (v) next
to it.
• Select an option using FG and press the Q button to
put a check (v) next to it. To remove the check, press
the Q button again.
MENUMENU
OK
n
Info Settings
Image Only
Information 1
Information 2
nInfo Settings setting
screen
Image Only No information will be displayed.
Information 1
Select an option using FG and press the Q button to put a check (v)
next to it. To remove the check, press the Q button again.
To set the details of an item to be displayed, press I. The following
items can be set.
[&] / [Level Gauge] / [All Battery Information] / [Image Stabilizer] /
[Picture Mode ] / [WB] / [AF Mode] / [Face & Eye Detection] / [Sound
Recording Level Meter] / [Headphone Volume] / [Time Code] / [Silent
GOperation] / [Grid]
Information 2
%The set that is currently in use cannot be disabled, but the items to be displayed can be
Choosing a Display
Press the IN FO button during shooting to cycle through the selected displays.
g “Switching the information display” (P. 38)
Conguring the display for when the shutter button is pressed
halfway (Info by half-pressing a)
PASMB
n
Menu
MEN U n G n 4. Information n Info by half-pressing a
O No information is displayed while the shutter button is pressed halfway.
On1
Only the following exposure-related items are displayed while the shutter
button is pressed halfway.
• Shutter speed
• Aperture value
• Exposure compensation value
•
• ISO sensitivity
On2
The display does not change even when the shutter button is pressed
halfway.
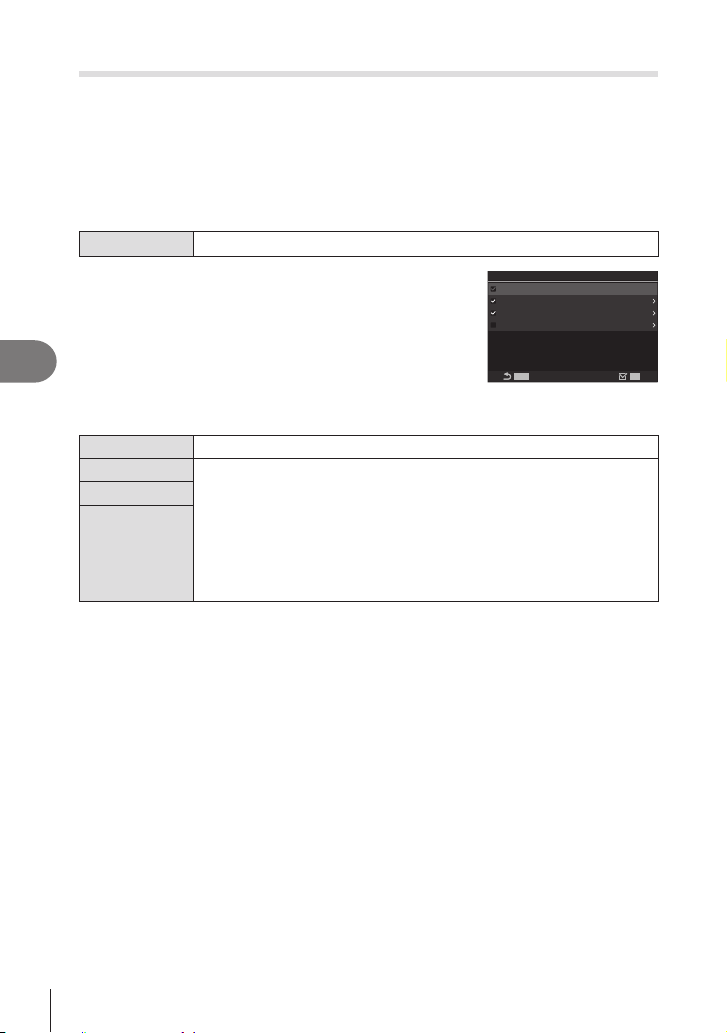
232
EN
Customizing the Camera
6
Viewnder Info Display Options (VKInfo Settings)
PASMB
n
Choose the information that can be viewed by pressing the IN FO button in the
IN FO button. This item is used to choose
mode and [VStyle 1] or [VStyle 2] is selected for [EVF Style] (P. 228). The option
selected for [nn mode (P. 231).
Menu
MEN U n G n 4. Information n VKInfo Settings
1
Select an indicator you wish to display when the
INFO button is pressed, and put a check (v) next
to it.
• Select an option using FG and press the Q button to
put a check (v) next to it. To remove the check, press
the Q button again.
MENUMENU
OK
V
K
Info Settings
Image Only
Information 1
Information 2
Information 3
VKInfo Settings setting
screen
Image Only No information will be displayed.
Information 1
Select an option using FG and press the Q button to put a check (v)
next to it. To remove the check, press the Q button again.
To set the details of an item to be displayed, press I. The following
items can be set.
[&]
[Highlight&Shadow]: Tints applied to over- and under-exposed areas.
[Level Gauge]: The level gauge.
[All Battery Information]: Information on all batteries.
Information 2
Information 3
%The set that is currently in use cannot be disabled, but the items to be displayed can be
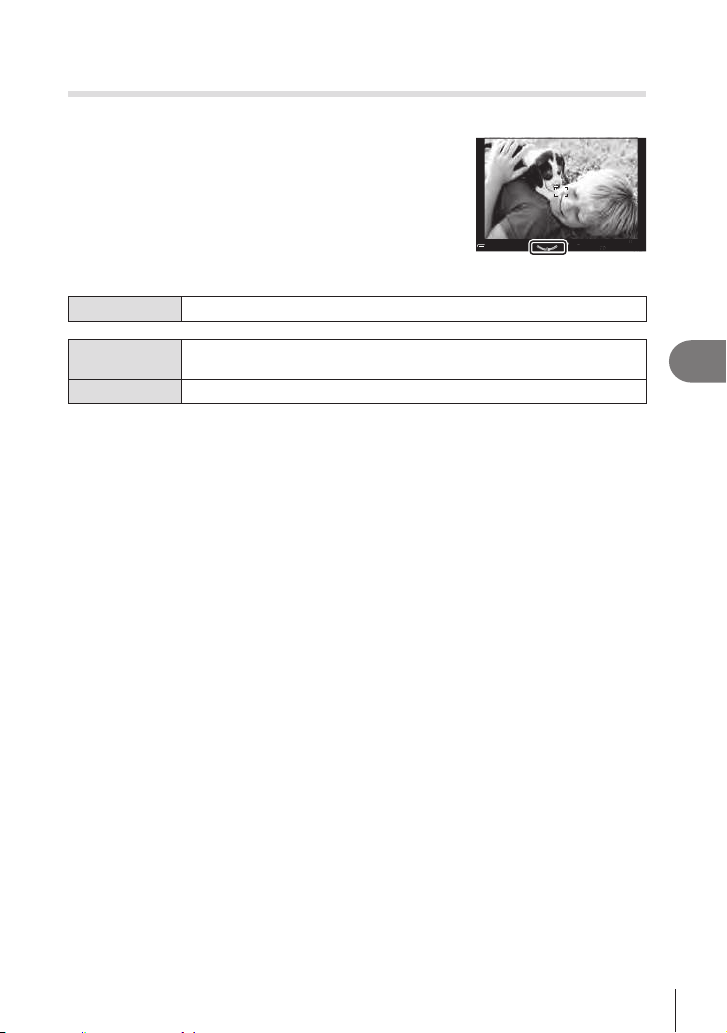
233
EN
Customizing the Camera
6
Displaying the Level Gauge when the shutter button is pressed
halfway (Va Level Gauge)
PASMB
n
Choose whether the level gauge can be displayed in the
[VStyle 1] or [VStyle 2] is selected for [EVF Style]
(P. 228).
0.00.0
200200
ISO
Auto
ISO
Auto
WB
Auto
WB
Auto
[
99
][
99
]
10231023
1
/
250
1
/
F
250
5.65.6
F
PP
100
%
100
%
Display when shutter
button is pressed halfway
Menu
MEN U n G n 4. Information n Va Level Gauge
On
pressed halfway. The level gauge appears in place of the exposure bar.
O The level gauge is not displayed.

234
EN
Customizing the Camera
6
Framing Guide Options (KGrid Settings / nGrid Settings)
PASMB
n
Menu
MEN U n G n 5. Grid/Other Displays n KGrid Settings
MEN U n G n 5. Grid/Other Displays n nGrid Settings
Display Color
Choose the displayed color.
[Preset 1]: The settings of [Color of Preset 1] are used.
[Preset 2]: The settings of [Color of Preset 2] are used.
Exclusive for n
(nGrid Settings only)
Choose whether to use a movie-exclusive setting when
displaying guides in n (movie) mode.
[O]: Use the same setting as when in still photography
mode.
[On]: Use the settings dedicated to movie recording
mode.
Displayed Grid
Select the type of guides displayed. Choose from:
[O] / [w] / [x] / [1] / [y] / [X] / [x] (KGrid
Settings only)
• When [x] is selected, the guides are adjusted for
a 16:9 movie frame when movies are shot in still
photography mode. Depending on the option selected
for [nK], the guides may be displayed with an
aspect ratio of 17:9.
Color of Preset 1
[R]: Increase the number to emphasize the red tint.
[G]: Increase the number to emphasize the green tint.
[B]: Increase the number to emphasize the blue tint.
[α]: Increase the number to make the color of the
guides deeper.
Color of Preset 2
#
%The settings made here are also used when [qStyle 3] is selected for [EVF Style].

235
EN
Customizing the Camera
6
Viewnder Framing Grid Options (VKGrid Settings)
PASMB
n
[VStyle 1] or [VStyle 2] is selected for [EVF Style] (P. 228). The option selected for
[nn mode (P. 231).
Menu
MEN U n G n 5. Grid/Other Displays n VKGrid Settings
Exclusive for V
[O]: Use the same setting as when using the monitor.
[On]
Display Color
Choose the displayed color.
[Preset 1]: The settings of [Color of Preset 1] are used.
[Preset 2]: The settings of [Color of Preset 2] are used.
Displayed Grid
Select the type of guides displayed. Choose from:
[O] / [w] / [x] / [1] / [y] / [X] / [x]
• When [x] is selected, the guides are adjusted for
a 16:9 movie frame when movies are shot in still
photography mode. Depending on the option selected
for [
nK], the guides may be displayed with an
aspect ratio of 17:9.
Color of Preset 1
[R]: Increase the number to emphasize the red tint.
[G]: Increase the number to emphasize the green tint.
[B]: Increase the number to emphasize the blue tint.
[α]: Increase the number to make the color of the
guides deeper.
Color of Preset 2
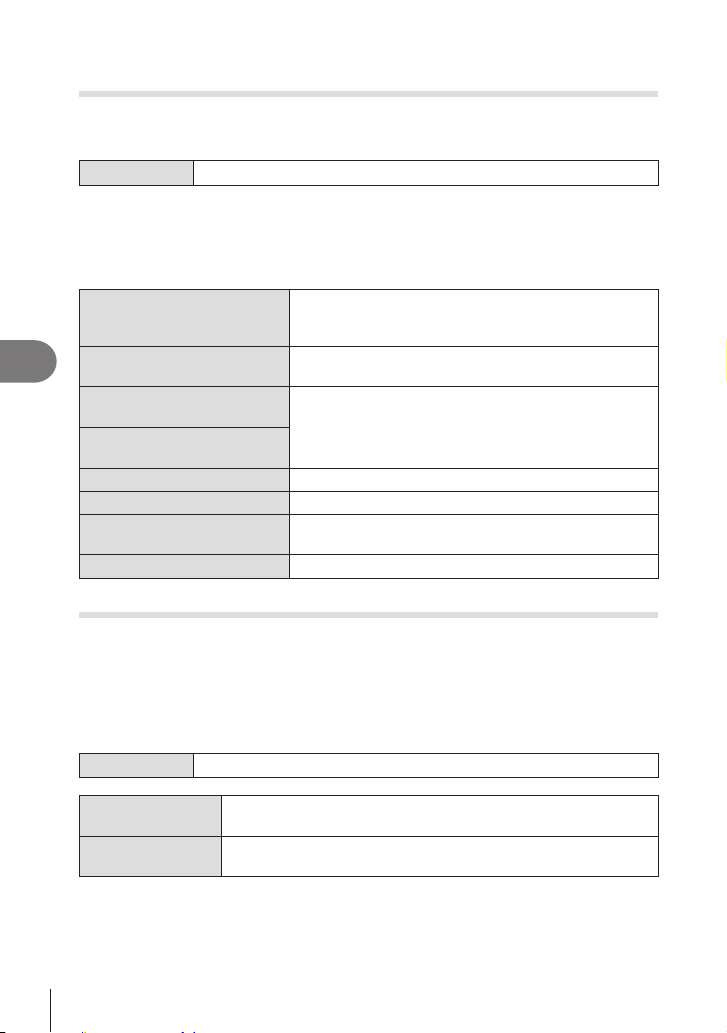
236
EN
Customizing the Camera
6
Choosing the Settings Available via Multi-Fn
(Multi Function Settings)
PASMB
n
Choose the settings that can be accessed via multi-function buttons.
Menu
MEN U n G n 5. Grid/Other Displays n Multi Function Settings
1
Select an indicator you wish to display when the INFO button is pressed, and
put a check (v) next to it.
• Select an option using FG and press the Q button to put a check (v) next to it. To
remove the check, press the Q button again.
Highlight&Shadow Control
Change the setting using the front and rear dials. Press
the IN FO button to change the area (highlight, midtone,
Color Creator
Use the front dial to adjust hue and the rear dial to adjust
saturation.
KISO
nISO
Change the setting using the front and rear dials.
KWB
nWB
Magnify A zoom frame will be displayed.
Image Aspect Change the setting using the front and rear dials.
KLV Mode
The setting switches between [Standard] and [S-OVF]
with each press of the button.
Peaking
Histogram Exposure Warning (Histogram Settings)
PASMB
n
Choose the brightness levels that the histogram shows as overexposed (highlights)
or underexposed (shadows). These levels are used for exposure warnings in the
histogram displays during shooting and photo playback.
•
are also selected according to the values chosen for this option.
Menu
MEN U n G n 5. Grid/Other Displays n Histogram Settings
Highlight
Choose the minimum brightness for the highlight warning.
[245] – [255]
Shadow
Choose the maximum brightness for the shadow warning.
[0] – [10]

237
EN
Customizing the Camera
6
Settings related to operation and display of menus
Conguring the cursor on the menu screen (Menu Cursor Settings)
PASMB
n
Choose where the cursor will be displayed when you open the menu or move to a
Menu
MEN U n G n 2. Operations n Menu Cursor Settings
Page Cursor Position
[Save]
cursor appears where it was the last time the page
was opened.
[Reset]
cursor appears at the top of the page.
Menu Start Position
[Recently]: When you open the menu, the last used
tab, page, and cursor position are recalled.
[_]
[_] tab is displayed.
[My]
[My] tab is displayed.
Shortcut to B Mode Settings
MEN U button in
B mode.
[O]: The menu opens according to the setting of
[Menu Start Position].
[On]: [Live Bulb] (P. 173), [Live Time] (P. 173), or
[Composite Settings] (P. 173) opens, depending on
the selected mode.
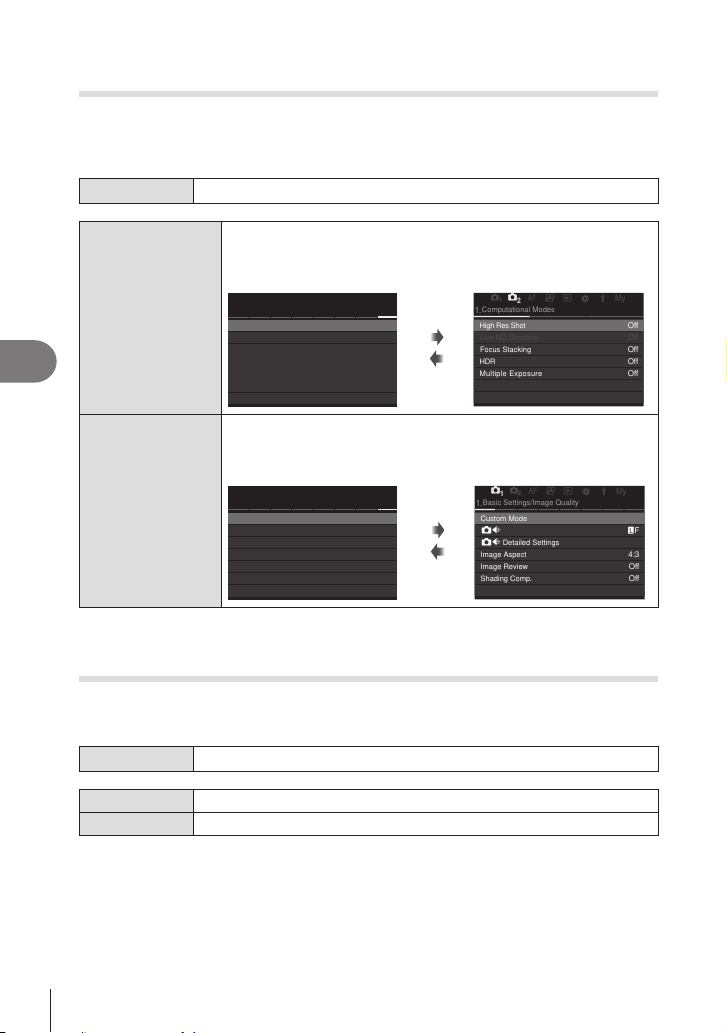
238
EN
Customizing the Camera
6
Choosing how to move between pages with the rear dial
(g Loop in Menu Tab)
PASMB
n
Choose whether to switch the pages only within the same menu tab when the rear dial
is turned.
Menu
MEN U n G n 1. Operations n Dial Settings n g Loop in Menu Tab
No
When you move to the last page by turning the rear dial and turn it
further, the last page of the previous tab is displayed.
K
2
K
1
AF
My
n
q
G
e
K
1
S-IS Auto
8.
Image Stabilizer
K
Image Stabilizer
Handheld Assist
Lens I.S. Priority
Off
Off
On
Fps Priority
j
Image Stabilizer
a
Image Stabilizer
i
h
K
2
K
1
AF
My
n
q
G
e
K
2
1.
HDR
Computational Modes
High Res Shot
Multiple Exposure Off
Live ND Shooting
Focus Stacking
Off
Off
Off
Off
Yes
When you move to the last page by turning the rear dial and turn it
further, the last page of the current tab is displayed.
K
2
K
1
AF
My
n
q
G
e
K
1
S-IS Auto
8.
Image Stabilizer
K
Image Stabilizer
Handheld Assist
Lens I.S. Priority
Off
Off
On
Fps Priority
j
Image Stabilizer
a
Image Stabilizer
i
h
K
2
K
1
AF
My
n
q
G
e
K
1
Y
F
4:3
1.
K
K
Basic Settings/Image Quality
Custom Mode
Image Aspect
Image Review
Shading Comp.
Off
Off
K
K
Detailed Settings
%HI to switch
pages, it always works in the same way as when [No] is selected.
[Yes]/[No] Default (Priority Set)
PASMB
n
Menu
MEN U n G n 2. Operations n Priority Set
No [No] is highlighted by default.
Yes [Yes] is highlighted by default.
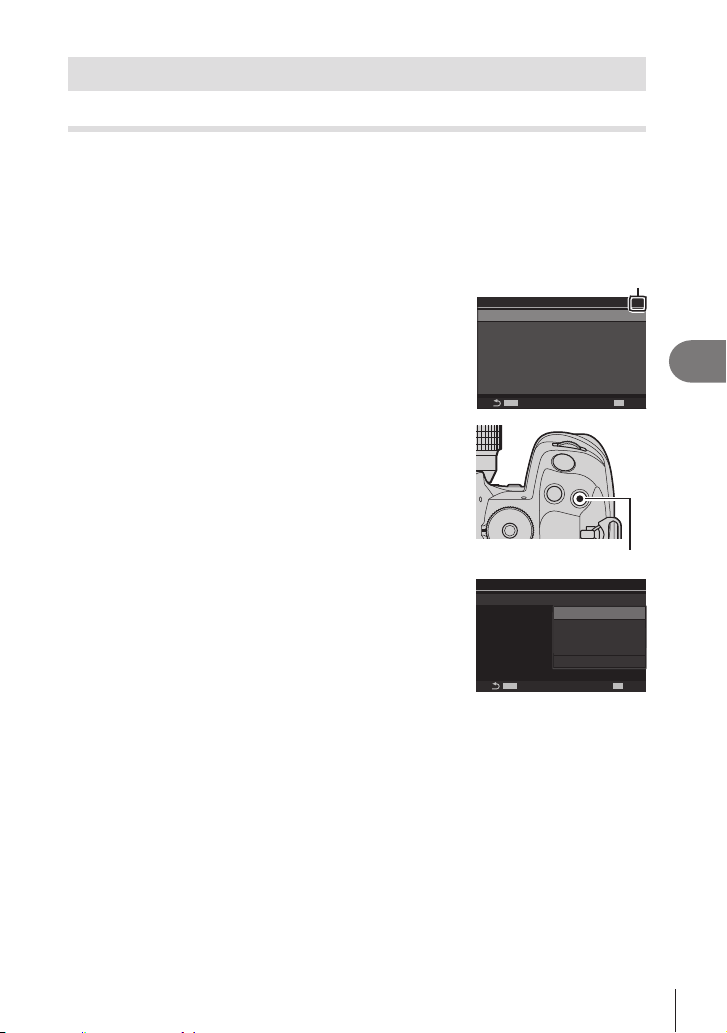
239
EN
Customizing the Camera
6
“My Menu” Settings
Using “My Menu”
You can use “My Menu” to create a personalized menu tab containing only items you
select. “My Menu” can contain up to 5 pages of 7 items each. You can delete items or
change the page or item order.
At purchase, “My Menu” contains no items.
1
Press the MEN U button to display the menus.
2
Highlight an item for inclusion in “My Menu”.
• Any item in the menus _ through e can be added
to “My Menu” if it appears on the screen with tabs
displayed.
• Some other menu items can also be added to “My
Menu”. If the menu item can be added, “My” is
displayed at the top right corner of the display.
Item can be added to
“My Menu”
MENU
OK
-7
My
BULB/TIME/COMP Settings
Bulb/Time Timer
Bulb/Time Focusing
Live Composite Timer
3h
Bulb/Time Monitor
Live Bulb
Off
Live Time
0.5sec
Composite Settings
1/2sec
8min
On
3
Press the R button.
R button
• You will prompted to choose a page. Use FG on the
arrow pad to choose the “
My Menu” page to which the
item will be added.
My
MENU
OK
-7
Bulb/Time Timer
Bulb/Time Focusing
Live Composite Timer
3h
Bulb/Time Monitor
Live Bulb
Off
Live Time
0.5sec
Composite Settings
1/2sec
8min
On
Select My Menu to add.
My4
My5
My3
My2
My1

240
EN
Customizing the Camera
6
4
Press the Q button to add the item to the selected
page.
• The camera will display a message stating that the item
has been added to “
My Menu”.
My1
-7
Bulb/Time Timer
Bulb/Time Focusing
Live Composite Timer
3h
Bulb/Time Monitor
Live Bulb
Off
Live Time
0.5sec
Composite Settings
1/2sec
8min
On
Added to My Menu.
• Items that have been added to “My Menu” are indicated
by the number of the “My Menu” page.
• Items can be removed from “My Menu” by pressing the
R
proceed, highlight [Yes] and press the Q button.
MENU
OK
-7
My1
BULB/TIME/COMP Settings
Bulb/Time Timer
Bulb/Time Focusing
Live Composite Timer
3h
Bulb/Time Monitor
Live Bulb
Off
Live Time
0.5sec
Composite Settings
1/2sec
8min
On
• Items saved to “My Menu” are added to the My (“My
Menu”) tab.
My (“My Menu”) tab
K
2
K
1
AF
My
n
q
G
e
My
1.
My Menu
Bulb/Time Focusing
On
5
To access “My Menu”, select the “My” tab.
%MEN U button.
g
Ma na ging “M y Menu”
You can reorder items in “My Menu”, move them between pages, or remove them from
“My Menu” altogether.
1
Press the MEN U button to display the menus.
2
Display the “My Menu” page you want to edit and
press the R button.
R button
• The options below will be displayed.
[Rearrange Order]: Change the order of items or pages.
Use the arrow pad (FGHI) to choose the new
location.
[Remove this item]: Remove the highlighted item from
“My Menu”. Highlight [Yes] and press the Q button.
[Remove this page]: Remove from “My Menu” all items
on the current page. Highlight [Yes] and press the Q
button.
K
2
K
1
AF
My
n
q
G
e
My
1.
K
K
My Menu
K
WB
Metering
Flash Mode Settings
Bulb/Time Focusing
On
Remove this page
Remove this item
Rearrange Order

241
EN
Setting Up the Camera
7
7
Card/Folder/File Settings
Formatting the card (Card Formatting)
PASMB
n
other cameras or computers.
All data stored on the card, including protected images, is erased when the card is
formatted.
on the card. g “Usable cards” (P. 25)
Menu
MEN U n e n 1. Card/Folder/File n Card Formatting
Format Card
[Yes]: The card will be formatted.
[No]: Formatting will be cancelled.
No Formatting will be cancelled.
• When there are cards in both slots 1 and 2, card slot selection appears. Select a card slot
and press the Q button.
Setting Up the Camera

242
EN
Setting Up the Camera
7
Setting the card to record to
(KCard Slot Settings / nCard Slot Settings)
PASMB
n
When there are cards in both slots 1 and 2, you can select which card to record still
images and movies to.
Super Control Panel
Q n KSave Settings
Menu
MEN U n e n1. Card/Folder/File n KCard Slot Settings
MEN U n e n1. Card/Folder/File n nCard Slot Settings
Conguring KCa rd Slot Se t t ings
KSave Settings
Choose the recording method for still images (P. 243).
[y] / [z] / [1/y] / [3/y] / [1=y] / [3=y]
KSave Slot
Choose the card used to record photographs. This option
[y] or [z] is selected for [KSave
Settings].
[5]: Photographs are recorded on the card in slot 1.
[4]: Photographs are recorded on the card in slot 2.
qSlot
Choose the card used for still image playback when [KSave
Settings] is set to [1/y], [3/y], [1=y], or [3=y].
[5]: Photographs on the card in slot 1 are played back.
[4]: Photographs on the card in slot 2 are played back.
%You can also choose a card for playback using the q button. Hold the q button and
rotate the front or rear dial to switch cards while playback is in progress. This does not
change the option selected for [qSlot].

243
EN
Setting Up the Camera
7
Conguring KSave Se t t ings
y
Standard
Pictures are recorded to the memory card in the slot selected for
[KSave Slot] (P. 242). Shooting ends when the card is full.
z
Auto Switch
Pictures are recorded to the memory card in the slot selected
for [KSave Slot] (P. 242). Pictures will be recorded to the
setting automatically reverts to [Standard] when only one
memory card is inserted.
1
Dual
Independent1
image quality formats. Choose an image quality for each slot
(P. 140). Shooting ends when either card is full. Image quality is
set separately for each slot; after changing the option selected,
check the current image quality setting.
2
Dual
Independent3
image quality formats. Choose an image quality for each slot
(P. 140). Recording continues to the card in the remaining slot
slot; after changing the option selected, check the current image
quality setting.
3 Dual Same1
Each picture is recorded twice, once to each card, using the
option currently selected for image quality. Shooting ends when
either card is full. This setting automatically reverts to [Standard]
when only one memory card is inserted.
4 Dual Same3
Each picture is recorded twice, once to each card, using the
option currently selected for image quality. Recording continues
setting automatically reverts to [Standard] when only one
memory card is inserted.
# The image quality mode may change if you change the option selected for [KSave
additional photographs. Check the image quality mode before taking photographs.
%When [z] (Auto Switch) is selected for [KSave Settings], the camera will automatically
Conguring nCa rd Slot Se t t ings
5
Movies are recorded on the card in slot 1.
4
Movies are recorded on the card in slot 2.

244
EN
Setting Up the Camera
7
Specifying a folder to save images in (Assign Save Folder)
PASMB
n
Specify the folder on the card in which the images will be saved.
Menu
MEN U n e n 1. Card/Folder/File n Assign Save Folder
Assign *
[New Folder]: Specify a 3-digit folder number.
1st digit: [0] - [9]
2nd digit: [0] - [9]
3rd digit: [0] - [9]
[Existing Folder]: Select an existing folder using FG
frames and the last frame in the folder are displayed.
Do not assign
*
I.
File Naming Options (File Name)
PASMB
n
Menu
MEN U n e n 1. Card/Folder/File n File Name
%
Auto
higher number, numbering will continue from the highest number.
Reset
new card is inserted. If the card already contains images, numbering will
continue from the highest number.

245
EN
Setting Up the Camera
7
Naming Files (Edit Filename)
PASMB
n
cards.
Menu
MEN U n e n 1. Card/Folder/File n Edit Filename
sRGB
[Date (mdd)]: The 2nd to 4th digits will be made up of the numbers
corresponding to the month and day of the recording date (A to C sill be
used for October to December).
You can set the 1st digit as you wish.
[Directory Number]: The 2nd to 4th digits will be made up of the number
of the destination folder (“100” – “999”).
You can set the 1st digit as you wish.
[Manual]
alphanumeric characters.
AdobeRGB
[Date (mdd)]: The 2nd to 4th digits will be made up of the numbers
corresponding to the month and day of the recording date (A to C sill be
used for October to December).
The 1st digit cannot be changed from “_”.
[Directory Number]: The 2nd to 4th digits will be made up of the number
of the destination folder (“100” – “999”).
The 1st digit cannot be changed from “_”.
[Manual]: You can set the 2nd to 4th digits as you wish using
alphanumeric characters. The 1st digit cannot be changed from “_”.
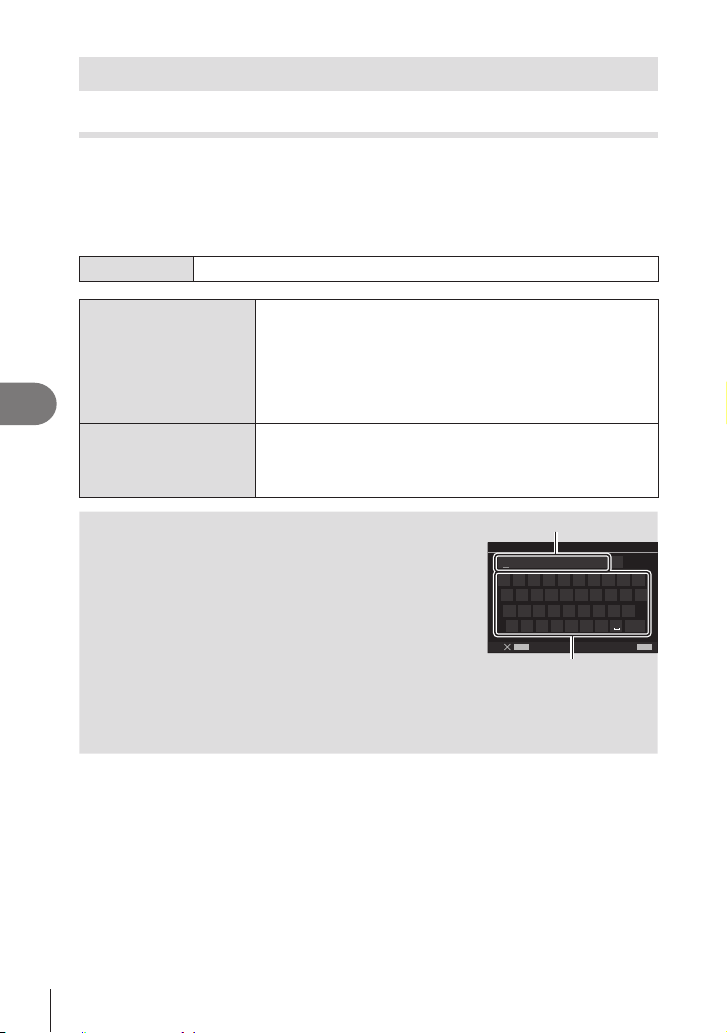
246
EN
Setting Up the Camera
7
User information
Saving lens info (Lens Info Settings)
PASMB
n
The camera can store information for up to 10 lenses that do not conform to the Micro
Four Thirds or Four Thirds system standards. These data also supply the focal length
used for the image stabilization and keystone compensation features. The data are
saved as Exif tags.
Menu
MEN U n e n 2. Information Record n Lens Info Settings
Create Lens Information
Register the lens information.
[Lens Name]: Input the name of the lens.
[Focal Length]: Input the focal length.
[0.1] – [1000.0] mm
[Aperture Value]: Input the aperture value.
[00.00] – [99.99]
[Set]: Save the lens information you have inputted.
Lens01 (registered
name) – Lens10
(registered name)
Edit the registered lens information.
[Edit]: Edit the registered lens information.
Edit [Lens Name], [Focal Length], and [Aperture Value].
[Delete]: Delete the registered lens information.
Entering characters
1) Press the I N FO button to switch between uppercase,
lowercase and symbols.
2) Select a character using FGHI and press the Q
button.
• The selected character appears in the character entry
area.
• To delete a character, press the D button.
3) To delete a character in the character entry area, move the
cursor using the front and rear dials.
• Select a character and press the D button to delete it.
4)
the Q button.
Character entry area
MENU
INFO
S
a A #
0/31
f
1 2 3 4 5 6 7 8 9 0
q w e r t y u i o
a s d f g h j k l
z x c v b n m
End
p
Lens Name
Character selection area
• The lens will be added to the lens info menu.
• When a lens that does not supply info automatically is attached, the info used is indicated
by checks (v). Highlight lenses to which you want to add checks (v) and press the Q
button.
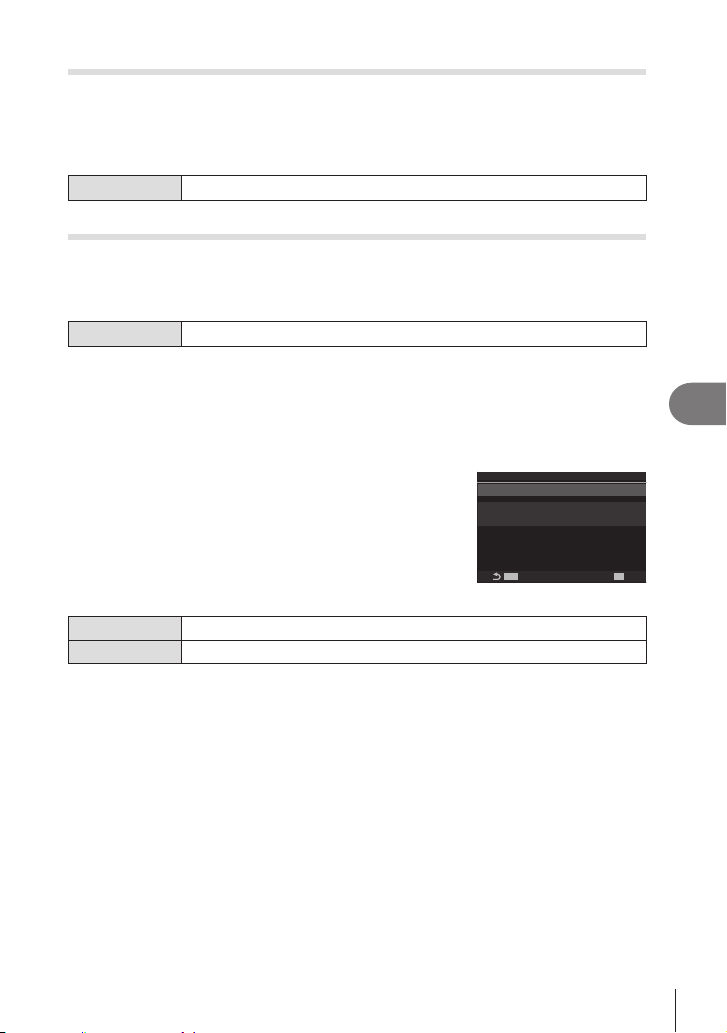
247
EN
Setting Up the Camera
7
Output Resolution (dpi Settings)
PASMB
n
Choose the output resolution information (in dots per inch, or dpi) stored with photo
setting is stored as an Exif tag.
Menu
MEN U n e n 2. Information Record n dpi Settings
Adding Copyright Information (Copyright Info.)
PASMB
n
Choose the copyright information stored with photos when they are saved.
Copyright information is stored as Exif tags.
Menu
MEN U n e n 2. Information Record n Copyright Info.
# We will not be held liable for any disputes or damages arising from use of the [Copyright
Info.] feature. Use at your own risk.
%To delete the copyright information you have entered, delete the characters on the entry
screen of each item (P. 248).
Ena bling Copyright I nfo.
1
Use FG to select [Copyright Info.] and press the
Q button.
2
Use FG to select [On] and press the Q button.
MENUMENU
OK
Copyright Info.
Artist Name
Copyright Name
OffCopyright Info.
Copyright Info. setting screen
O Do not add Exif tags naming the photographer and/or copyright holder.
On Add Exif tags naming the photographer and/or copyright holder.
3
The display returns to the Copyright Info. setting screen.
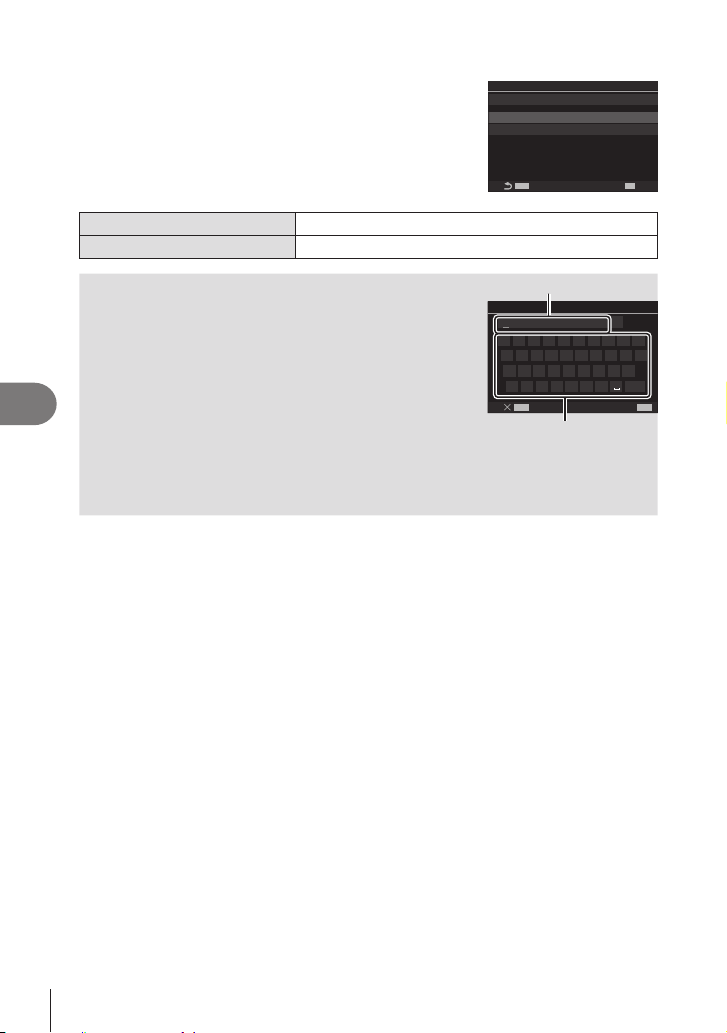
248
EN
Setting Up the Camera
7
Conguring Copyright Info.
1
• Press FG to select an item and press the Q button to
display the setting menu.
• Q button to return
to Copyright Info. setting screen.
MENUMENU
OK
Copyright Info.
Artist Name
Copyright Name
OnCopyright Info.
Artist Name Enter the name of the photographer.
Copyright Name Enter the name of the copyright holder.
Entering characters
1) Press the I N FO button to switch between uppercase,
lowercase and symbols.
2) Select a character using FGHI and press the Q
button.
• The selected character appears in the character entry
area.
• To delete a character, press the D button.
3) To delete a character in the character entry area, move the
cursor using the front and rear dials.
• Select a character and press the D button to delete it.
4)
the Q button.
Character entry area
MENU
INFO
S
a A #
0/63
f
1 2 3 4 5 6 7 8 9 0
q w e r t y u i o
a s d f g h j k l
z x c v b n m
End
p
Copyright Name
Character selection area

249
EN
Setting Up the Camera
7
Monitor/Sound/Connection Settings
Disabling Touch Controls (Touchscreen Settings)
PASMB
n
Enable or disable touch controls.
Menu
MEN U n e n 3. Monitor/Sound/Connection n Touchscreen Settings
O Disable touch controls.
On Enable touch controls.
Monitor Brightness and Hue (Monitor Adjust)
PASMB
n
Adjust monitor color temperature and brightness. This option applies in both still
photography and movie modes.
Menu
MEN U n e n 3. Monitor/Sound/Connection n Monitor Adjust
j (Color temperature)
Adjust color temperature.
Use the front dial or HI to adjust the “amber–blue” axis.
Moving the pointer (M) closer to A adds a red cast and moving
it closer to B adds a blue cast.
Use the rear dial or FG to adjust the “green–magenta” axis.
Moving the pointer (M) closer to G adds a green cast and
moving it closer to M adds a magenta cast.
k (Brightness)
Adjust brightness. Use FG to choose a setting.
[-7] – [±0] – [+7]
• Press the IN FO button to switch between color temperature and brightness and set each
item.
• You can reset the setting by pressing and holding the Q button.
• In B mode, the monitor uses the brightness selected in [Bulb/Time Monitor].
g

250
EN
Setting Up the Camera
7
Viewnder Brightness and Hue (EVF Adjust)
PASMB
n
these settings are being adjusted.
Menu
MEN U n e n 3. Monitor/Sound/Connection n EVF Adjust
j (Color temperature)
Adjust color temperature.
Use the front dial or HI to adjust the “amber–blue” axis.
Moving the pointer (M) closer to A adds a red cast and moving
it closer to B adds a blue cast.
Use the rear dial or FG to adjust the “green–magenta” axis.
Moving the pointer (M) closer to G adds a green cast and
moving it closer to M adds a magenta cast.
k (Brightness)
[EVF Auto Luminance O] / [EVF Auto Luminance On]:
to ambient lighting conditions. Change the setting using HI.
[k]:
Adjust brightness. Use FG to choose a setting.
[-7] – [±0] – [+7]
# Brightness cannot be changed when [EVF Auto Luminance
On] is selected.
• Press the IN FO button to switch between color temperature and brightness and set each
item.
• You can reset the setting by pressing and holding the Q button.
Conguring the eye sensor (Eye Sensor Settings)
PASMB
n
Menu
MEN U n e n 3. Monitor/Sound/Connection n Eye Sensor Settings
EVF Auto Switch
[O]: The display does not switch when you put your
u button.
[On]
Behavior when switched
Choose what will be displayed when the display
[Maintain Screen]: The screen that was shown on the
[Shooting Screen]
even if the playback screen or a menu was shown on
the monitor.

251
EN
Setting Up the Camera
7
When Monitor is Opened
[Operative]: When [EVF Auto Switch] is [On] and you
[Inoperative]: When [EVF Auto Switch] is [On] and
%The [EVF Auto Switch] setting screen appears when you press and hold the u button.
Disabling the Focus Beep (8)
PASMB
n
Disable the beep that sounds when the camera focuses.
Menu
MEN U n e n 3. Monitor/Sound/Connection n 8
On A beep sounds after successful autofocus operations. The beep sounds
O A beep does not sound after successful autofocus operations.
%You may need to adjust settings in the [Silents Settings] menu in order to enable the
focus beep during silent shooting (P. 132).
External Monitor Display Options (HDMI Settings)
PASMB
n
Choose the signal output to external monitors connected via HDMI. Adjust the frame
Menu
MEN U n e n 3. Monitor/Sound/Connection n HDMI Settings
Output Size
Choose the type of signal output to the HDMI
connector.
[C4K]: The signal is output in 4K digital cinema (4096
× 2160) format.
[4K]: If possible, the signal is output in 4K (3840 ×
2160).
[1080p]: If possible, the signal is output in Full HD
(1080p).
[720p]: If possible, the signal is output in HD (720p).
Output Frame Rate
Choose the signal frame rate according to whether the
device supports NTSC or PAL.
[60p Priority]: Frame rate for areas supporting NTSC.
[50p Priority]: Frame rate for areas supporting PAL.
# [Output Frame Rate] cannot be changed when the camera is connected to a device via
HDMI.
# Sound will not be played back unless the connected device is compatible with the sound
format.
%
movie mode. g “HDMI Output (nHDMI Output)” (P. 182)

252
EN
Setting Up the Camera
7
Choosing a USB Connection Mode (USB Settings)
PASMB
n
Choose how the camera functions when connected to external devices via USB.
Menu
MEN U n e n 3. Monitor/Sound/Connection n USB Settings
USB Mode
[Select]: The menu for selecting the connection mode
appears each time a USB cable is connected..
[Storage]: The camera functions as an external storage
device. The data on the camera memory card can be
copied to the computer.
[MTP]: The pictures on the memory card can be viewed
or copied to the computer using computer software
(P. 286).
[0RAW/Control]: Employing computer controls
available via OM Workspace, process pictures using the
camera’s high-speed image processing engine. Also, by
using OM Capture, you can shoot and transfer images
to a computer and control the camera from a computer.
For details, see “Connecting to Computers via USB”
(P. 283).
[USB PD]: Select this when you do not want the camera
to be powered automatically when connected to a USB
PD-compliant device.
Power Supply from USB
Choose whether to power the camera when connecting
to a computer via USB.
[Yes]: The camera will be powered when the camera
and computer are connected via USB.
[No]: The camera will not be powered when the camera
and computer are connected via USB.
%When you connect the camera to a computer via USB while [Storage], [MTP], or
[0RAW/Control] is selected, you can use the camera while powering it.
253
EN
Setting Up the Camera
7
Battery/Sleep Settings
Displaying Battery Status (NBattery Status)
PASMB
n
View the status of the batteries inserted in the camera. Status of the battery in the
camera and of the battery in the power battery holder are displayed individually.
Menu
MEN U n e n 5. Battery/Sleep n NBattery Status
# Some items are not displayed when the camera is powered from the supplied USB-AC
adapter or a USB PD-compliant USB device.
Setting which Battery Is Used First (NBattery Priority)
PASMB
n
optional power battery holder (P. 295).
Menu
MEN U n e n 5. Battery/Sleep n NBattery Priority
Body Battery
PBH Battery
Changing the battery level display during movie recording
(nNDisplay Pattern)
PASMB
n
Choose a format for the battery level display. Battery level can be displayed as a
percentage or as the amount of shooting time remaining.
• The shooting time display is intended as a guide only.
Menu
MEN U n e n 5. Battery/Sleep n nNDisplay Pattern
% Battery level is shown as a percentage.
min
Battery level is shown as the shooting time remaining. In still
photography modes, the battery level is displayed only while recording
movies.

254
EN
Setting Up the Camera
7
Dimming the Backlight (Backlit LCD)
PASMB
n
Choose the length of time before the monitor backlight dims when no operations are
performed. Dimming the backlight reduces the drain on the battery.
Menu
MEN U n e n 5. Battery/Sleep n Backlit LCD
8sec / 30sec / 1min
Hold The monitor backlight does not dim.
Setting Sleep (Power Saving) Options (Sleep)
PASMB
n
Choose the delay before the camera enters sleep mode when no operations are
Menu
MEN U n e n 5. Battery/Sleep n Sleep
O The camera does not enter sleep mode.
1min / 3min / 5min
• Normal operation can be restored by pressing the shutter button halfway.
# The camera will not enter sleep mode in the following situations.
while a multiple exposure is in progress, while connected to an HDMI device, while
connected to a smartphone via Wi-Fi, while connected to a computer via Wi-Fi or USB,
while connected to a remote control wirelessly, or while being powered via USB.
Setting Auto Power O Options (Auto Power O)
PASMB
n
it has entered sleep mode. This option is used to choose the delay before the camera
Menu
MEN U n e n 5. Battery/Sleep n
O
5min / 30min / 1h / 4h
%
ON/OFF lever.
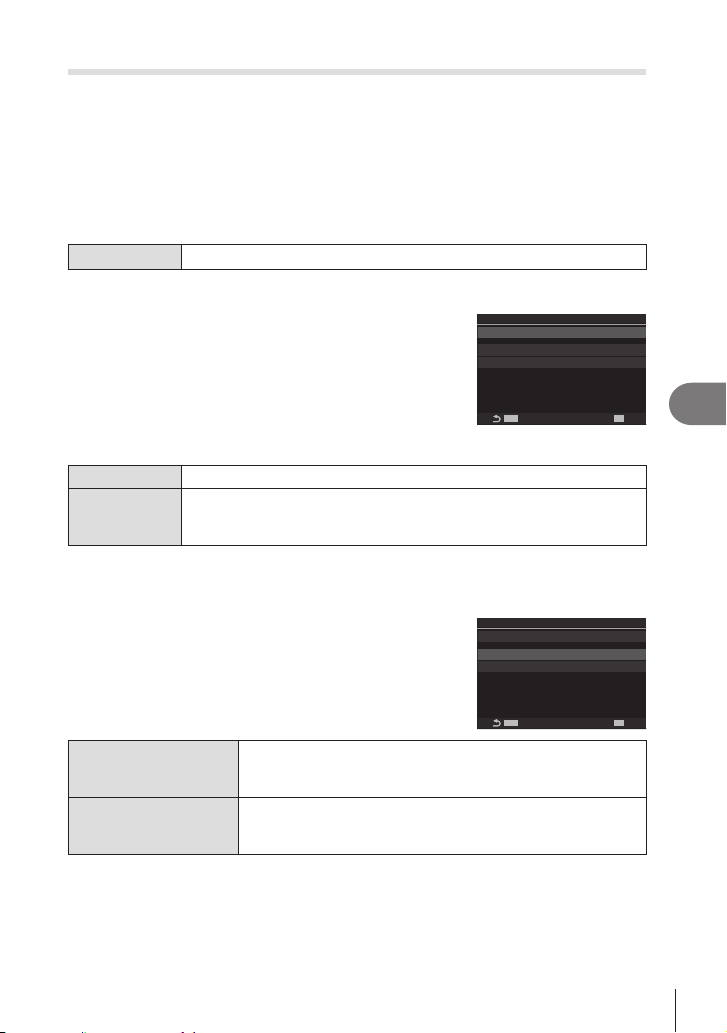
255
EN
Setting Up the Camera
7
Reducing Power Consumption (Quick Sleep Mode)
PASMB
n
# Power saving is not available:
interval timer photography is in progress, while connected to an HDMI device, while
connecting to a smartphone via Wi-Fi, while connecting to a computer via Wi-Fi or USB,
or while Bluetooth is enabled
Menu
MEN U n e n 5. Battery/Sleep n Quick Sleep Mode
Ena bling Quick Sle ep M ode
1
Use FG to select [Quick Sleep Mode] and press
the Q button.
2
Use FG to select [On] and press the Q button.
MENUMENU
OK
Quick Sleep Mode
Backlit LCD
Sleep
Off
8sec
10sec
Quick Sleep Mode
Quick Sleep Mode setting
screen
O The camera does not enter power-saving mode.
On
The camera is quick to enter power-saving mode. When power-saving
displayed on the monitor.
3
The display returns to the Quick Sleep Mode setting screen.
Conguring Quick Sleep Mode
1
• Press FG to select an item and press the Q button to
display the setting menu.
• Q button to return
to Quick Sleep Mode setting screen.
MENUMENU
OK
Quick Sleep Mode
Backlit LCD
Sleep
On
8sec
10sec
Quick Sleep Mode
Backlit LCD
Choose the length of time before the monitor backlight dims
when no operations are performed.
3sec / 5sec / 8sec
Sleep
Choose the delay before the camera enters sleep mode when
no operations are performed.
3sec / 5sec / 8sec / 10sec / 15sec / 30sec / 1min


257
EN
Setting Up the Camera
7
Reset/Clock/Language/Others Settings
Restoring Default Settings (Reset/Initialize Settings)
PASMB
n
Reset the camera to factory default settings. You can opt to reset almost all settings or
only those directly related to photography.
Menu
MEN U n e n 6. Reset/Clock/Language/Others n Reset/Initialize
Settings
Reset Shooting Settings Reset photography-related settings only.
Initialize All Settings
Reset all settings with a few exceptions, such as the
clock and language.
%See “Default Settings” (P. 311) for information on the settings that are reset.
%Settings can be saved using OM Workspace or OM Image Share. For more information,
visit our website.
Setting the Camera Clock (X Settings)
PASMB
n
Set the camera clock.
Menu
MEN U n e n 6. Reset/Clock/Language/Others n X Settings
X
Set the date, time, and date format. Use the HI buttons to highlight
items and use the FG buttons to change the highlighted item.
Time Zone
Set the time zone and daylight saving time. Use the FG buttons to
change the time zone.
Pressing the IN FO button allows you to set the daylight saving time. It
IN FO button is pressed.
Choosing a Language (W)
PASMB
n
Choose a language for camera menus and tool tips.
Menu
MEN U n e n 6. Reset/Clock/Language/Others n W

258
EN
Setting Up the Camera
7
Calibrating the Level Gauge (Level Adjust)
PASMB
n
plumb or level.
Menu
MEN U n e n 6. Reset/Clock/Language/Others n Level Adjust
Reset Reset the gauge to factory default settings.
Adjust
Choose the reference (zero) point. Calibrate the level gauge after
positioning the camera appropriately.
Image Processing Check (Pixel Mapping)
PASMB
n
Check the image sensor and image processing functions simultaneously. For best
results, end shooting and playback and wait at least a minute before performing
proceeding.
#
is in progress.
Menu
MEN U n e n 6. Reset/Clock/Language/Others n Pixel Mapping
Viewing the Firmware Version (Firmware Version)
PASMB
n
currently connected. You may need this information when contacting customer support
Menu
MEN U n e n 6. Reset/Clock/Language/Others n Firmware Version
Viewing Certicates (Certication)
PASMB
n
manual.
Menu
MEN U n e n 6. Reset/Clock/Language/Others n

259
EN
Connecting the Camera to External Devices
8
8
A number of tasks can be accomplished by connecting the camera to an external
device such as a computer or smartphone. Choose a connection type and software
according to your goals.
Precautions for Using Wi-Fi and Bluetooth
®
Disable wireless LAN and Bluetooth
®
in countries, regions, or locations in which their
use is prohibited.
The camera is equipped with wireless LAN and Bluetooth
®
. Use of these features in
countries outside the region of purchase may violate local wireless regulations.
Some countries and regions may prohibit the acquisition of location data without prior
governmental permission. In some sales areas, the camera may consequently ship
with location data displays disabled.
Each country and region has its own laws and regulations. Check them before traveling
and observe them while abroad. Our company assumes no liability for any failure on
the part of the user to observe local laws and regulations.
Disable Wi-Fi on airplanes and in other locations where their use is prohibited.
g “Disabling the camera’s wireless communication (Airplane Mode)” (P. 260)
# Wireless transmissions are vulnerable to interception by third parties. Use wireless
features with this in mind.
# The wireless transceiver is located in the camera grip. Keep it as far away as practicable
from metal objects.
# When transporting the camera in a bag or other container, be aware that the contents
of the container or the materials of which it is constructed may interfere with wireless
transmissions, which can prevent the camera connecting to a smartphone.
# Wi-Fi connections increase the drain on the batteries. The connection may be lost during
use if the batteries are low.
# Devices such as microwave ovens and cordless phones that generate radio-frequency
wireless data transmission.
# Some wireless LAN features are unavailable when the memory card write-protect switch
is in the “LOCK” position.
Connecting the Camera to External
Devices

260
EN
Connecting the Camera to External Devices
8
Disabling the camera’s wireless communication (Airplane Mode)
PASMB
n
You can disable the wireless communication (Wi-Fi/Bluetooth
®
) of the camera.
Menu
MEN U n e n4. Wi-Fi/Bluetooth n Airplane Mode
O Wireless communication is enabled.
On
Wireless communication is disabled. You cannot use it until you
change the setting to [O]. z appears when you select [On].
%Communication with the Wireless Radiowave Commander FC-WR is possible even if you
select [On].
Connecting the camera to a smartphone
Use the camera’s wireless LAN (Wi-Fi) and Bluetooth
®
features to connect to a
smartphone, where you can use the dedicated app to enhancement your enjoyment of
the camera both before and after shooting. Once a connection has been established,
you can download and take pictures remotely and add position information to images.
• Operation is not guaranteed on all smartphones.
Things you can do with the specied app, OM Image Share
• Download images from the camera to the smartphone
You can load images in the camera that have been marked for sharing (P. 195) to a
smartphone.
You can also use the smartphone to select images for download from the camera.
• Remote shooting from a smartphone
You can remotely operate the camera and shoot using a smartphone.
• Beautiful image processing
• Addition of GPS tags to camera images
Using the smartphone’s GPS function, you can add position information when taking
pictures with the camera.
For details, visit our website.
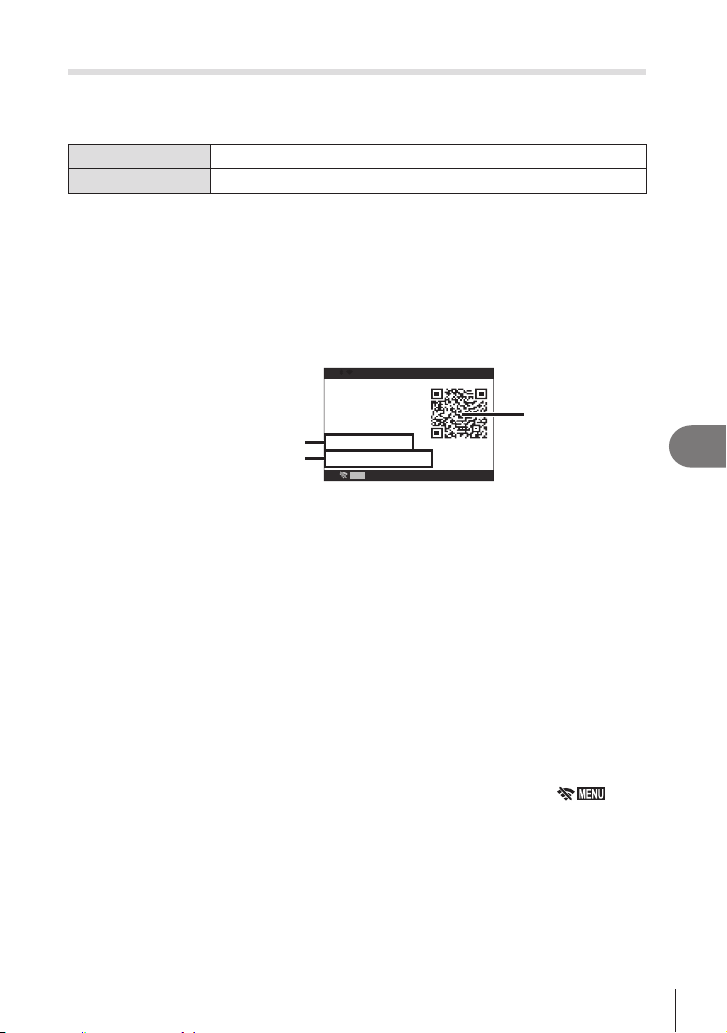
261
EN
Connecting the Camera to External Devices
8
Pairing the Camera and Smartphone (Wi-Fi Connection)
• Adjust pairing settings using OM Image Share, not the settings app that is part of the
smartphone operating system.
Super Control Panel
r O
Menu
MEN U n e n 4. Wi-Fi/Bluetooth n Wi-Fi Connection
• You can also connect by tapping rO in the live view display.
1
Launch the copy of the dedicated OM Image Share app previously installed
on your smartphone.
2
Select [Device Connection] and press the Q button.
3
Follow the on-screen guide to adjust Wi-Fi/Bluetooth
®
settings.
• The Bluetooth local name and passcode, the Wi-Fi SSID and password, and a QR
code are displayed in the monitor.
MENU
3/3
Bluetooth Name xxxxxxxxxxx:
Bluetooth Passkey 000000:
Wi-Fi SSID xxx-x-x-xxxxxxxx:
Wi-Fi Password 0000000000000000:
rr
OO
Connection Setup
Scan the QR code, using
the OI.Share app.
QR code
Wi-Fi SSID
Wi-Fi Password
Bluetooth local name
Bluetooth Passcode
4
Tap the camera icon at the bottom of the OM Image Share display.
• An [Easy Setup] tab will be displayed.
5
Follow the on-screen instructions in OM Image Share to scan the QR code
and adjust connection settings.
• If you are unable to scan the QR code, follow the on-screen instructions in OM Image
Share to adjust settings manually.
- Bluetooth
®
: To connect, select the local name and enter the passcode displayed
in the camera monitor into the Bluetooth settings dialog in OM Image
Share.
- Wi-Fi: To connect, enter the SSID and password displayed on the camera
monitor into the Wi-Fi settings dialog in OM Image Share.
• O on the screen will turn green when pairing is complete.
• The Bluetooth
®
icon indicates the status as follows:
r: The camera is emitting wireless signal.
s: Wireless connection has been established.
6
To end the Wi-Fi connection, press MEN U on the camera or tap on
the monitor screen.
•
• At default settings, Bluetooth
®
connection is kept active even after Wi-Fi connection
is terminated, allowing you to shoot remotely with a smartphone. To set the camera
to also terminate Bluetooth
®
connection when terminating Wi-Fi connection, set

262
EN
Connecting the Camera to External Devices
8
Wireless Connection Standby Setting for When the Camera Is On
(Bluetooth)
You can choose whether the camera will be on standby for wireless connection with
the smartphone or the optional remote control when the power is on.
%Complete the pairing of camera and smartphone or the optional remote control
beforehand. [Bluetooth] cannot be selected unless the pairing has been completed.
Menu
MEN U n e n 4. Wi-Fi/Bluetooth n Bluetooth
O The camera will not be on standby for wireless connection and
wireless signal will not be emitted even when the power is on.
Onr
When the camera is on, it will emit wireless signal and be on
standby for wireless connection.
You can connect the camera and the smartphone through operation
of OM Image Share and shoot remotely or transfer images.
Onr<
When the camera is on, it will emit wireless signal and be on
standby for wireless connection with the optional remote control
(P. 279) if it has already been paired with the camera.
%When [Onr] is selected and the OM Image Share app is recording GPS logs, the camera
receives position information and adds it to the picture taken.
263
EN
Connecting the Camera to External Devices
8
Wireless Settings for When the Camera Is O (Power-o Standby)
You can choose whether the camera will maintain a wireless connection to the
Menu
MEN U n e n 4. Wi-Fi/Bluetooth n d Settings n
Standby
Select
whether to maintain the wireless connection to the smartphone.
O
smartphone.
On
remains active and the smartphone can still be used to download or
view the pictures on the camera.
“Se le c t”
•
• The camera is currently connected with a smartphone
(P. 261)
• The memory card is correctly inserted
OK
Power-off Standby
Yes
No
Activate Wi-Fi/Bluetooth Power-off
Standby so images can be imported
while power is off?
Yes
No
#
# If left active, the wireless connection will automatically terminate if:
- the connection remains inactive for 12 hours
- the memory card is removed
- the battery is replaced
- a charging error occurs during on-board battery charging
The connection can be restored by turning the camera on.
%
when the ON/OFF lever is rotated to ON .

264
EN
Connecting the Camera to External Devices
8
Transferring images to a smartphone
You can select images in the camera and load them to a smartphone. You can also use
the camera to select images you want to share in advance. g “Selecting Pictures for
Sharing (Share Order)” (P. 195)
• r<], set it to [Onr].
• If [Bluetooth] (P. 262) is set to [Onr], the camera will be on standby for wireless
connection.
1
Tap [Import Photos] in OM Image Share on the smartphone.
#
appear. Follow the on-screen guidance to connect the smartphone and the camera.
• The images in the camera are displayed in a list.
2
Select the pictures you want to transfer and tap the Save button.
•
• r<], [Import Photos] can be used by
starting [Wi-Fi Connection] n [Device Connection] on the camera.
Automatically uploading images while the camera is o
• Mark images for sharing (P. 195)
•
• If you are using an iOS device, launch OM Image Share
•
transferred to the smartphone.

265
EN
Connecting the Camera to External Devices
8
Shooting remotely with a smartphone (Live View)
You can shoot remotely by operating the camera with a smartphone while checking the
live view on the smartphone screen.
• The camera shows the connection screen and all operations are performed from the
smartphone.
• r<], set it to [Onr].
• If [Bluetooth] (P. 262) is set to [Onr], the camera will be on standby for wireless
connection.
1
Launch OM Image Share and tap [Remote Control].
2
Tap [Live View].
3
Tap the shutter button to shoot.
• The image taken is saved on the memory card in the camera.
• r<], [Live View] can be used by starting
[Wi-Fi Connection] n [Device Connection] on the camera.
• Available shooting options are partially limited.
Shooting remotely with a smartphone (Remote Shutter)
You can shoot remotely by operating the camera with a smartphone (Remote Shutter).
• All operations are available on the camera. In addition, you can shoot pictures and record
movies using the shutter button displayed on the smartphone screen.
• r<], set it to [Onr].
• If [Bluetooth] (P. 262) is set to [Onr], the camera will be on standby for wireless
connection.
1
Launch OM Image Share and tap [Remote Control].
2
Tap [Remote Shutter].
3
Tap the shutter button to shoot.
• The image taken is saved on the memory card in the camera.
• r<], [Remote Shutter] can be used by
starting [Wi-Fi Connection] n [Device Connection] on the camera.

266
EN
Connecting the Camera to External Devices
8
Adding position information to images
Using the smartphone’s GPS function, you can add position information when taking
pictures with the camera.
• r<], set it to [Onr].
• If [Bluetooth] (P. 262) is set to [Onr], the camera will be on standby for wireless
connection.
1
Before taking pictures with the camera, launch OM Image Share and switch
on the position information addition function.
• When you are prompted to synchronize the clocks of the smartphone and the
camera, follow the guides displayed in OM Image Share.
2
Take pictures with the camera.
• When it is possible to add position information, g will be lit on the shooting screen.
When the camera cannot acquire position information, g blinks.
• It may take some time before the camera is ready to add position information when it
has been turned on or it has resumed from sleep mode.
• Position information will be added to pictures taken while g is displayed on the
screen.
• g is displayed on the screen when you view a picture that has position information.
• Position information is not added to movies.
3
function in OM Image Share.
Resetting smartphone connection settings (Reset d Settings)
You can restore smartphone connection settings to default values.
Menu
MEN U n e n 4. Wi-Fi/Bluetooth n d Settings n Reset d Settings
%The following menu items will be reset.
[d
%To connect to a smartphone, start [Device Connection] again (P. 261).

267
EN
Connecting the Camera to External Devices
8
Changing the password (d Connection Password)
To change the Wi-Fi/Bluetooth
®
passwords:
Menu
MEN U n e n 4. Wi-Fi/Bluetooth n d Settings n d Connection
Password
1
Follow the operation guide and press the R button.
• A new password will be set.
%Both the Wi-Fi connection password and Bluetooth
®
connection passcode can be
changed.
%Reconnect to the smartphone after changing passwords. g “Pairing the Camera and
Smartphone (Wi-Fi Connection)” (P. 261)
Connecting to Computers via Wi-Fi
Connect the camera and computer via Wi-Fi. Using Wi-Fi, the camera can connect via
a router to a computer on a household network or the like.
Installing Software
Use “OM Capture” to connect the camera and computer via Wi-Fi.
OM Capture
Use “OM Capture” to automatically download and view pictures taken with a camera
connected via Wi-Fi to the same network as the computer. To learn more or to
download the software, visit our website. When downloading the software, be prepared
to provide the camera serial number.
Follow the on-screen instructions to install the software. System requirements and
installation instructions are available at our website.
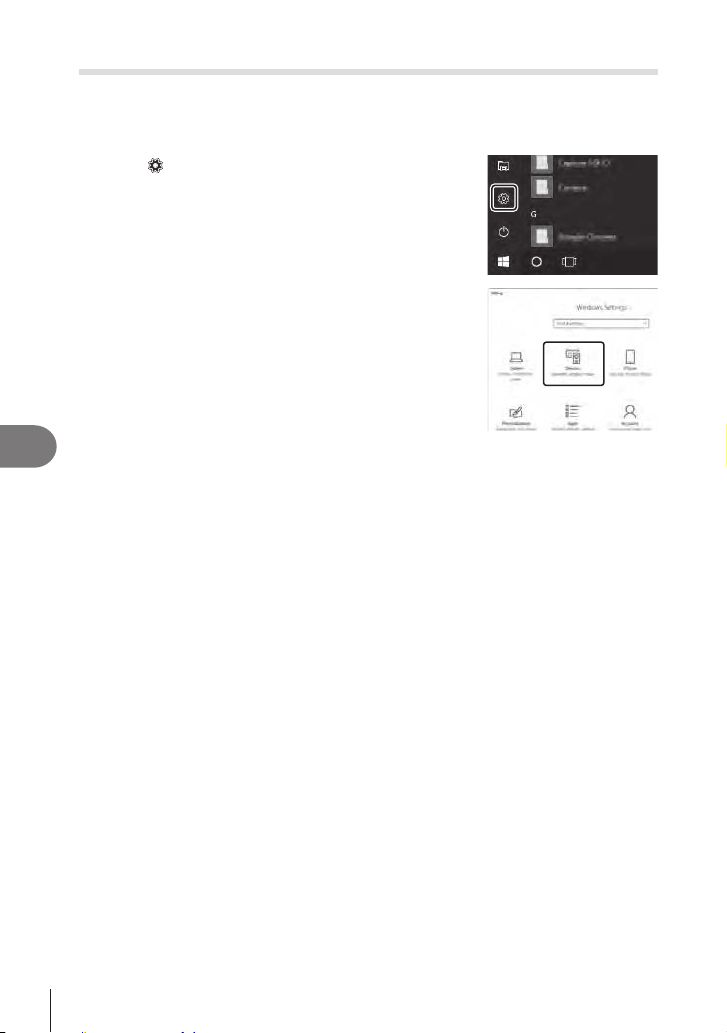
268
EN
Connecting the Camera to External Devices
8
Readying the Computer (Windows)
If Windows is unable to detect a camera connected via a router or access point, follow
the steps below to register the device manually.
1
Click the [Start] button on the computer desktop to display the Start menu.
2
Click (Settings) to display [Windows Settings]
options.
3
Click [Devices] to display options for [Bluetooth &
other devices].
4
Click [Add Bluetooth or other devices].
5
Click [+ Everything else].
• An [Add a device] window will open and [OM-1] will be displayed after a short pause.
6
Click [OM-1].
• When a message is displayed stating the preparation is complete, click [Done].

269
EN
Connecting the Camera to External Devices
8
Pairing the Computer with the Camera (New Link)
PASMB
n
The camera and computer must be paired in order to connect. Up to four computers
can be paired with the camera at a time. To pair a computer with the camera, connect it
via USB. Pairing need only be performed once per computer.
1
USB cable.
• When attaching the USB cable, use the supplied cable protector and cable clip to
prevent damage to the connectors. g “Attaching Cable Protectors” (P. 19)
USB port
USB connector
USB cable (supplied)
• The locations of USB ports vary from computer to computer. See the documentation
provided with the computer for information on USB ports.
• If the USB port on the computer is Type A port, use the optional CB-USB11 cable.
2
Turn the camera on.
• The camera will display a message prompting you to identify the device to which the
USB cable is connected.
%If the message is not displayed, select [Select] for [USB Mode] (P. 252).
# If the batteries are very low, the camera will not display a message when connecting
to a computer. Be sure the batteries are charged.
3
Highlight [0RAW/Control] using FG on the
arrow pad and press the Q button.
USB
MTP
0
RAW/Control
USB PD
OK
Storage
Exit
4
Launch the copy of “OM Capture” installed on the
computer.
• After starting up, “OM Capture” will prompt you to
choose the connection type.

270
EN
Connecting the Camera to External Devices
8
5
Click the [+] to the right of [Create new link].
• If nothing happens, reconnect the camera.
+
• Enter the name that will be used on the camera to identify
the computer. The default is the computer’s “Computer
Name”.
• The name used on the camera can be up to 15
characters long.
6
Click [Settings] in “OM Capture”.
• When a message is displayed stating that pairing is
complete, disconnect the camera as instructed.
[Settings]
• Repeat the above steps to pair the camera with each additional computer.
• The pairing information stored on the camera can be viewed and deleted using “OM
Capture”.

271
EN
Connecting the Camera to External Devices
8
Adjusting Wi-Fi Settings (Wi-Fi Connection)
Adjust settings for connection to the network to which the paired computer belongs.
can be stored on the camera and recalled as desired. [Wi-Fi Connection] settings can
be adjusted via the following methods:
Connect by WPS
To connect using a WPS router or access point, simply press the
device’s WPS button.
[PBC Method]: Connect using only the router WPS button. The
camera connects automatically when the button is pressed.
[PIN Method]: The camera connects in PIN mode. Enter the camera
PIN on the router to connect.
Connect from T
List
Choose the network from a list (P. 274).
The camera will search for available networks; to connect, select a
network from the list and enter the network password.
Connect manually
Adjust connection settings manually (P. 273).
To connect, enter the network name (SSID) and other settings.
• WPS connections require a WPS-compatible router or access point.
• Connecting via WPS in PIN mode requires that the router itself be connected to a
administrator computer from which the PIN can be entered.
• Manual connection requires that you have information on the network to which you are
connecting.
• The camera can connect via routers or access points of the following types:
- Standard: IEEE802.11a/b/g/n/ac
- Band: 2.4 GHz or 5 GHz
- Security: WPA2, WPA3
• The camera can store settings for up to eight networks. The camera will automatically
connect to networks to which it has previously connected.
• Each new connection after the eighth overwrites settings for the connection that has been
left unused for the longest period of time.
•
• For information on using routers or access points, see the documentation provided with
the device.
•
[Reset/Initialize
Settings] (P. 257). To reset network settings, use [Wi-Fi PC Settings] (P. 276) > [Reset
Wi-Fi PC Settings].
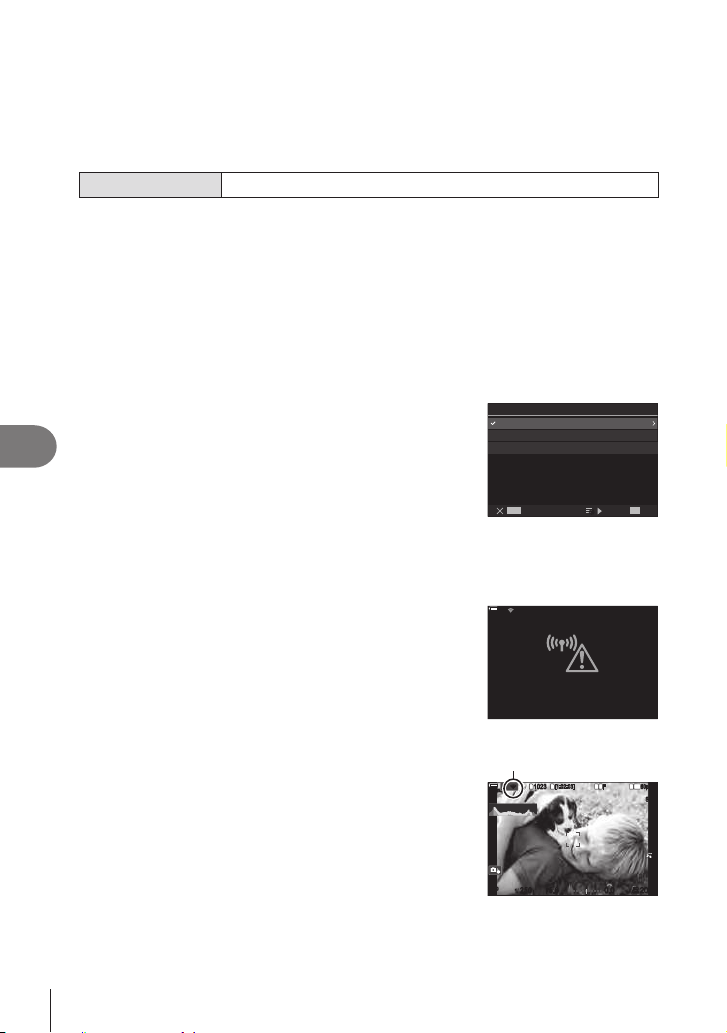
272
EN
Connecting the Camera to External Devices
8
Enabling Camera Wi‑Fi
Before connecting to a network via Wi-Fi, you will need to enable Wi-Fi on the camera.
Connecting via WPS (Connect by WPS)
Connect using the WPS feature on the router or access point.
Menu
MEN U n e n 4. Wi-Fi/Bluetooth n Wi-Fi Connection
1
Highlight [PC Connection] using the FG buttons and press the Q button.
• [PC Connection] options will be displayed.
2
Highlight [Connect by WPS] using the FG buttons and press the Q button.
3
Highlight an option using the FG buttons and press the Q button.
• If you selected [PBC Method], press the WPS button on the router or access point.
• Press the camera Q button to start the connection.
• Some time may be required for connection after the button is pressed.
• If you selected [PIN Method], the camera will display a PIN; enter it on the router or
access point. Press the camera Q button when the router is ready to connect.
4
If the camera is able to connect, the network will
be displayed with a check (v) next to the network
name.
• If the camera has been paired with more than one
computer, you will be prompted to choose a computer
before the network is displayed. Highlight the desired
computer using the FG buttons and press the Q
button.
• The camera can be used only with the selected
terminate the current connection.
MENU
SSID_001
OK
HH
]
U
t
O
Connect by WPS
Connect manually
PC Connection
• If the connection fails, the camera will display a
Step 3. Repeat Steps 3–4.
100
%
100
%
Connection failed
5
Press the Q button to exit to the shooting display.
• The camera will return to the standard shooting display.
O on the screen will turn green.
O
1
10231023
P
1
/
250
P
1
/
F
250 5.65.6
1
1
[
1
:
02
:
03
][
1
:
02
:
03
]
FF
60p60p L
-
8L
-
8
S
-
AFS
-
AF
33
200200
L
1
4K
ISO
Auto
ISO
Auto
F
00
+
-
0.00.0
100
%
100
%
rr
OO
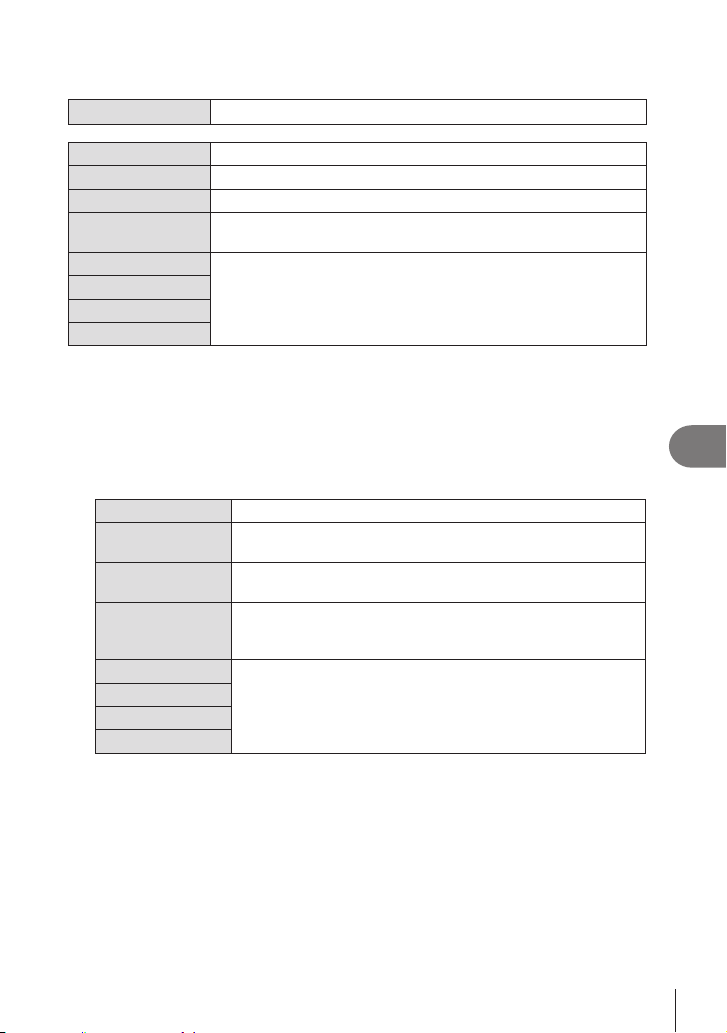
273
EN
Connecting the Camera to External Devices
8
Connect ing M a nually (Connect ma nua lly)
Adjust network settings manually. You will need to provide:
Menu
MEN U n e n 4. Wi-Fi/Bluetooth n Wi-Fi Connection
SSID The network name (SSID).
Authentication The type of security used on the network.
Password The password for connection to a secured network.
IP Address Assign
Choose whether the camera IP address is assigned automatically by
the network DHCP server.
IP Address
The settings used vary with the network.
Subnet Mask
Default Gateway
DNS
1
Highlight [PC Connection] using the FG buttons and press the Q button.
• [PC Connection] options will be displayed.
2
Highlight [Connect manually] using the FG buttons and press the Q
button.
3
Highlight items using the FG buttons and press the Q button.
• Options for the selected item will be displayed.
SSID Enter the network SSID.
Authentication
Select the type of security used on the network. Choose from
[None], [WPA2/WPA3] and [WPA3].
Password
If you selected [WPA2/WPA3] or [WPA3] for [Authentication],
enter the network password.
IP Address Assign
Choose from [Auto(DHCP)] and [Manual]. Automatic IP address
supply IP addresses automatically.
IP Address
Address Assign].
Subnet Mask
Default Gateway
DNS
4
Highlight [Start Connection] using the FG buttons and press the Q button.
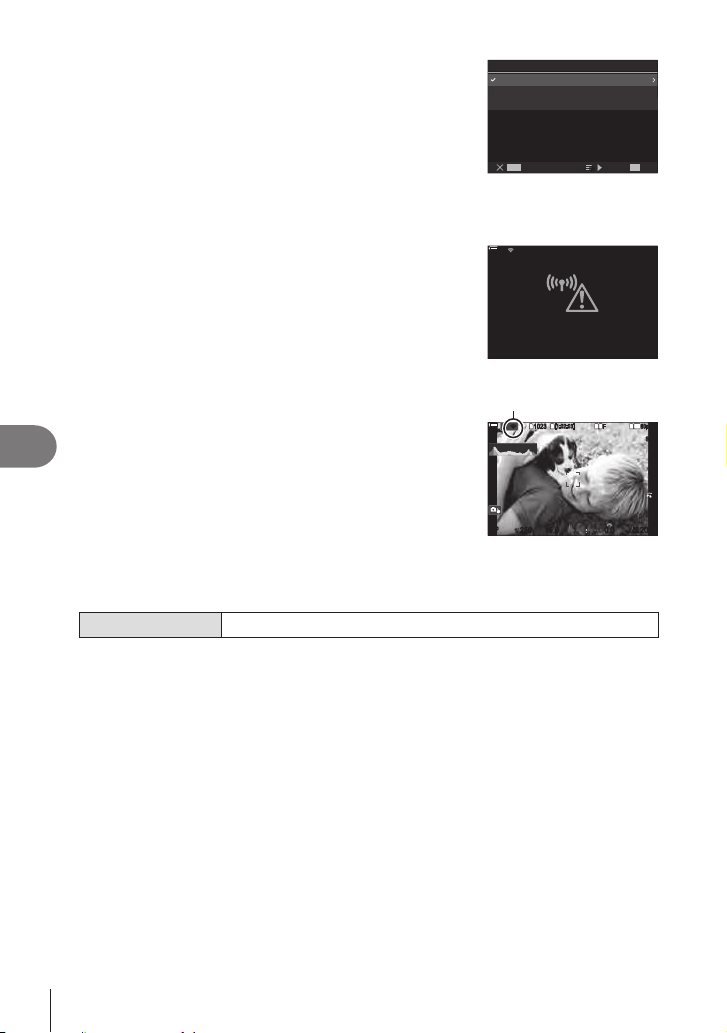
274
EN
Connecting the Camera to External Devices
8
5
If the camera is able to connect, the network will
be displayed with a check (v) next to the network
name.
• If the camera has been paired with more than one computer,
you will be prompted to choose a computer before the
network is displayed. Highlight the desired computer using
the FG buttons and press the Q button.
• The camera can be used only with the selected
terminate the current connection.
MENU
SSID_001
OK
HH
]
U
t
O
Connect by WPS
Connect manually
PC Connection
• If the connection fails, the camera will display a
Step 4. Repeat Steps 4–5.
100
%
100
%
Connection failed
6
Press the Q button to exit to the shooting display.
• Standard shooting indicators will be displayed. O on
the screen will turn green.
O
1
10231023
P
1
/
250
P
1
/
F
250 5.65.6
1
1
[
1
:
02
:
03
][
1
:
02
:
03
]
FF
60p60p L
-
8L
-
8
S
-
AFS
-
AF
33
200200
L
1
4K
ISO
Auto
ISO
Auto
F
00
+
-
0.00.0
100
%
100
%
rr
O
O
Choosing a N e t w ork from a List (Conne c t from Ac c e ss Point List )
The camera will search for available networks and display them in a list from which you
can choose the network to which you wish to connect.
Menu
MEN U n e n 4. Wi-Fi/Bluetooth n Wi-Fi Connection
1
Highlight [PC Connection] using the FG buttons and press the Q button.
• [PC Connection] options will be displayed.
2
Highlight [Connect from T List] using the FG buttons and press the Q
button.
• A list of available networks will be displayed.
3
Highlight the desired network using the FG buttons and press the Q
button.
• If the network is password-protected, you will be prompted to enter a password. Enter
the password and press the Q button.
• Press the I button to display [Detail Settings] for the highlighted network. You can
enter an IP address and adjust other settings manually.
• Press the R button to repeat the search and update the network list.
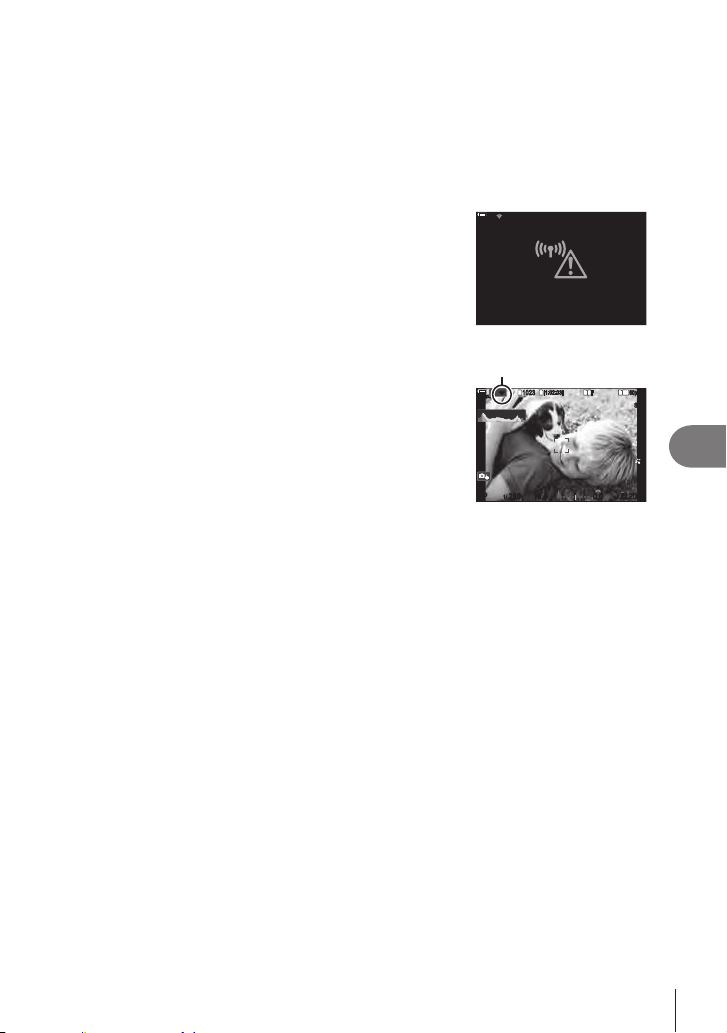
275
EN
Connecting the Camera to External Devices
8
4
If the camera is able to connect, the network will be displayed with a check
(v) next to the network name.
• Password-protected networks are indicated by a t icon.
• If the camera has been paired with more than one computer, you will be prompted to
choose a computer before the network is displayed. Highlight the desired computer
using the FG buttons and press the Q button.
•
• If the connection fails, the camera will display a
Step 3. Repeat Steps 3–4.
10
0
%
10
0
%
Connection failed
5
Press the Q button to exit to the shooting display.
• Standard shooting indicators will be displayed. O on
the screen will turn green.
O
1
10231023
P
1
/
250
P
1
/
F
250 5.65.6
1
1
[
1
:
02
:
03
][
1
:
02
:
03
]
FF
60p60p L
-
8L
-
8
S
-
AFS
-
AF
33
200200
L
1
4K
ISO
Auto
ISO
Auto
F
00
+
-
0.00.0
10
0
%
10
0
%
rr
OO
! Connecting to Previously-Selected Networks
• The camera will automatically reconnect to previously-selected networks when you select
[PC Connection] via the rO icon. You will not be required to supply a password.
•
network.
• Once the camera has connected, it will display a list of available networks with the current
network shown by a check mark v.
• Q button.
• If the camera has been paired with more than one computer on the network, you will be
prompted to choose a computer before the network list is displayed. Highlight the desired
computer using the FG buttons and press the Q button.
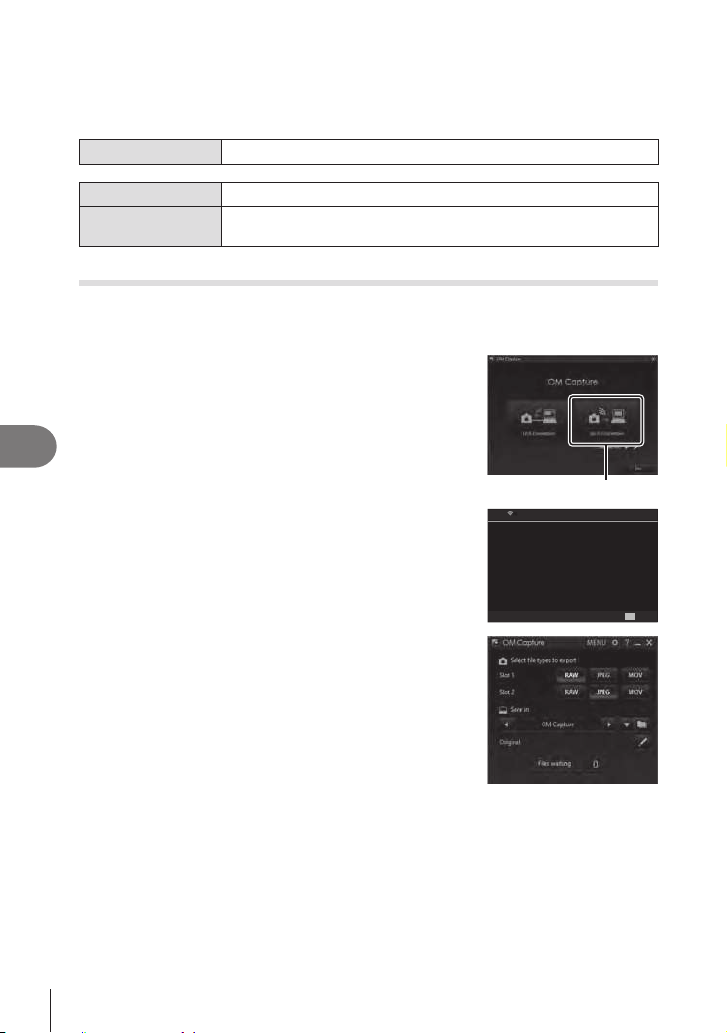
276
EN
Connecting the Camera to External Devices
8
Displaying the MAC address / Resetting Wi‑Fi settings for PC
connection (Wi‑Fi PC Settings)
You can display the camera’s MAC address for Wi-Fi connection and reset the Wi-Fi
settings used for connection to a computer.
Menu
MEN U n e n 4. Wi-Fi/Bluetooth n Wi-Fi PC Settings
Wi-Fi MAC Address Display the camera’s MAC address for Wi-Fi connection.
Reset Wi-Fi PC
Settings
Delete the information about computers the camera has paired with
and access points the camera has connected to.
Uploading Pictures as They Are Taken
Take pictures and upload them to a computer on the same network as the camera.
Before proceeding, connect the camera and computer as described in “Pairing the
Computer with the Camera (New Link)” (P. 269).
1
Launch “OM Capture” on destination computer.
• If prompted to choose a connection type, click [
Wi-Fi
Connection
].
• The computer will display the message, [Camera
connected] when the camera is detected.
[Wi-Fi Connection]
• The camera will display the message shown at right
when a connection is established.
OK
PCPC
PC connection started
Camera is connected to PC.
Recorded images are automatically
transferred to PC.
2
pictures as they are taken.
• Select the source card slot (1 or 2) and the type of
pictures (JPEG photos, RAW photos, or movies) to be
downloaded.
• Choose a destination for the downloaded pictures.
The “OM Capture” control
window

277
EN
Connecting the Camera to External Devices
8
3
Take pictures using camera controls.
• The pictures will be uploaded to the computer after they are saved to the camera
memory card.
• A p (“image upload”) icon will be displayed while
upload is in progress.
• The camera will upload only photos and movies
recorded while the camera and computer are
connected. Any pictures taken before Wi-Fi was
enabled on the camera will not be uploaded.
• The upload queue for each card can contain no more
than 3000 pictures.
Image upload
1
10231023
P
1
/
250
P
1
/
F
250 5.65.6
1
1
[
1
:
02
:
03
][
1
:
02
:
03
]
FF
60p60p L
-
8L
-
8
S
-
AFS
-
AF
33
200200
L
1
4K
ISO
Auto
ISO
Auto
F
00
+
-
0.00.0
10
0
%
10
0
%
rr
PCPC
%While the camera is connected to a network:
- Sleep mode is disabled
- Interval-timer photography is not available
- Some restrictions apply to the options available during playback
%[PC connection ended] options will be displayed when the camera’s connection to the
network ends. Upload of any remaining data will resume when the connection is re-
established. Note, however, that remaining data will not be uploaded if:
- The Wi-Fi connection is ended using camera controls
-
- The source memory card is removed
%
camera control mode.], check:
- that the camera has been paired with the computer,
- that you selected the correct computer when connecting to the network, and
- that the camera is registered with the computer (Windows only). g “Readying the
Computer (Windows)” (P. 268)

278
EN
Connecting the Camera to External Devices
8
Ending the Connection
End the Wi-Fi connection. The use of Wi-Fi may be prohibited in some countries or
regions, in which case Wi-Fi should be disabled.
Ending the Cur rent Conne c tion
1
Tap O in the camera monitor.
1
10231023
P
1
/
250
P
1
/
F
250 5.65.6
1
1
[
1
:
02
:
03
][
1
:
02
:
03
]
FF
60p60p L
-
8L
-
8
S
-
AFS
-
AF
33
200200
L
1
4K
ISO
Auto
ISO
Auto
F
00
+
-
0.00.0
100
%
100
%
rr
O
O
rr
O
O
•
disconnect.
• The network SSID is shown in the display.
MENUMENU
OK
SSID:SSID_001
PC
PC Connection
Disconnect
Maintain
Wi-Fi is active
2
Highlight [Disconnect] using FG and press the Q button.
• The camera will terminate the connection and exit to the shooting display.
•
connection, highlight [Yes] and press the Q button.
3
To reconnect, tap O or select [Wi-Fi Connection] > [PC Connection] and
press the Q button.
• The camera will automatically reconnect to previously-selected networks.
• To connect to a new network, highlight [Maintain] in Step 2 and press the Q button.
Choose from a list of available networks and adjust settings as described in “Choosing a
Network from a List (Connect from Access Point List)” (P. 274).
•
whether to power the camera down and terminate the Wi-Fi connection immediately or to
power the camera down only after upload is complete.
Disabling Wi‑Fi/Bluetooth
®
Set [Airplane Mode] (P. 260) to [On]. Wireless communication will be disabled.
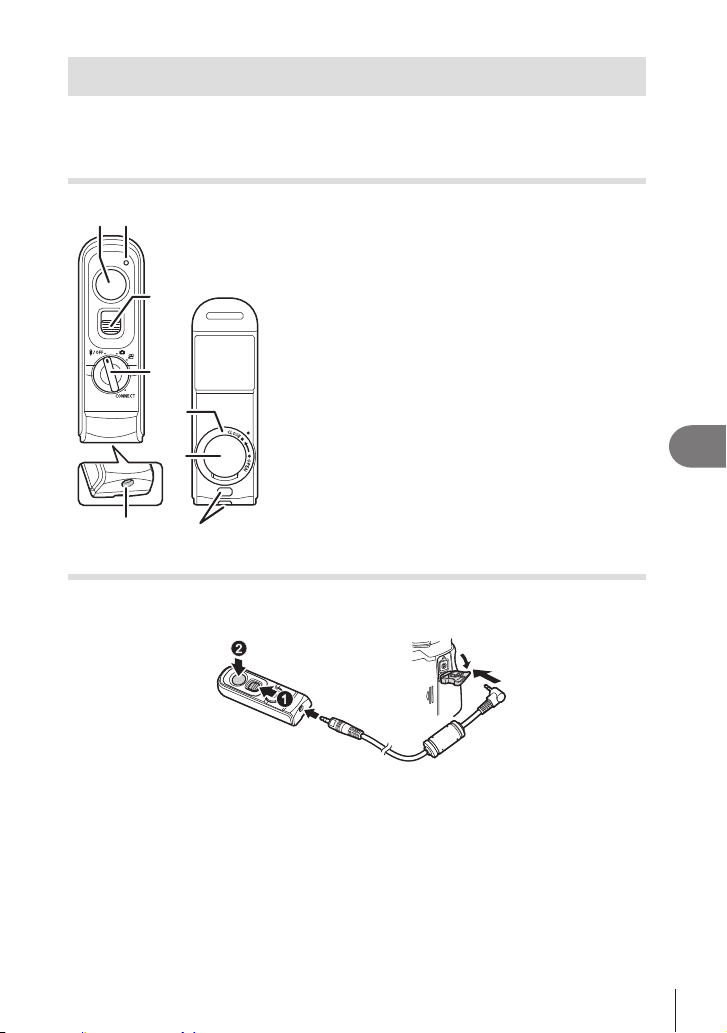
279
EN
Connecting the Camera to External Devices
8
Using the Remote Control
You can control the camera from the optional remote control (RM-WR1) and take
pictures.
Names of parts
3
4
7
6
85
2
1
1 Shutter button
2 Data transfer indicator
3 Shutter button lock
4 Mode dial (
b
/OFF /
K
/
n
/ CONNECT)
5 Cable connector
6 Battery-compartment lid
7 Battery-compartment cover
8 Strap eyelet
Connection
Wired connection
Rotate the mode dial of the remote control to
b
/OFF and connect the remote control to
the camera via the supplied cable.
Photographs can be taken by pressing the shutter button.
To record movies, set [nShutter Function] (P. 216) to [RREC] beforehand.
# Wireless remote control is not available while the cable is connected.
%Bulb photography or the like is available by sliding the shutter button lock up and pressing
the shutter button (1, 2).
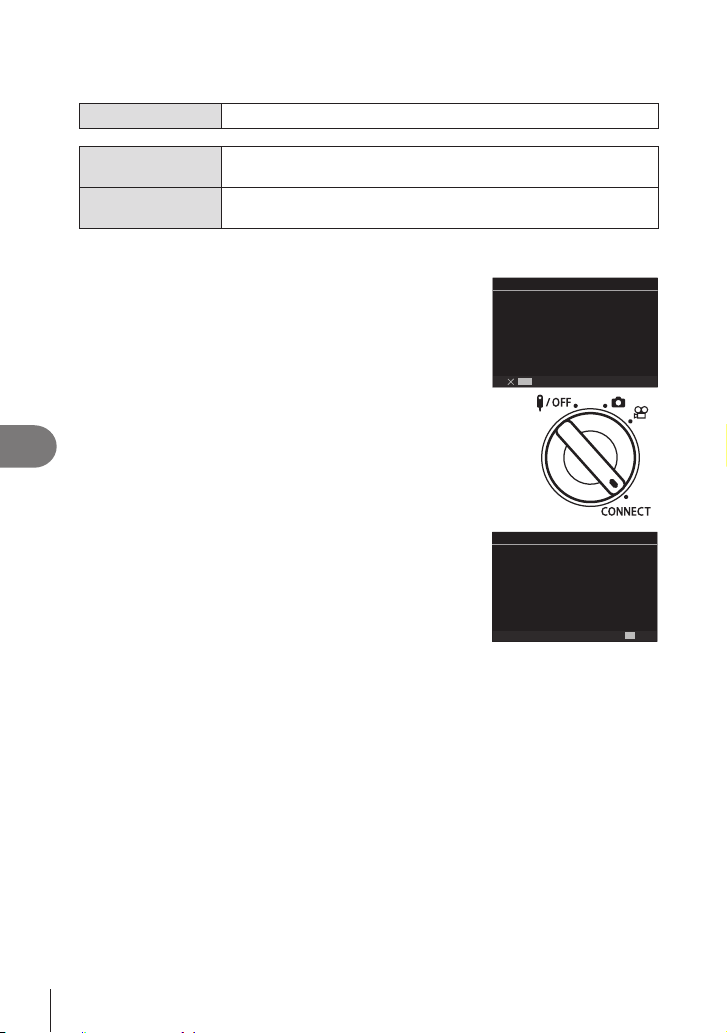
280
EN
Connecting the Camera to External Devices
8
Wireless connection
Menu
MEN U n e n 4. Wi-Fi/Bluetooth n Wireless Shutter Setting
Start Pairing
Follow the on-screen instructions. When pairing is complete,
[Bluetooth] will be set to [Onr<].
Delete Pairing
If you select [Yes] and press the Q button, the paired device will be
deleted.
1
Select [Start Pairing] and press the Q button.
2
When a message indicating pairing is in progress
is displayed, rotate the mode dial of the remote
control to CON N ECT and keep it in the position.
• Pairing starts when it is kept 3 seconds. Keep it in the
CON NECT position until pairing is complete. If you
rotate the mode dial before it is complete, the data
• The data transfer indicator lights when pairing starts.
MENU
s
<
Wireless Shutter Setting
Pairing in progress.
on the wireless shutter release.
Please perform pairing operation
3
When a message indicating pairing is complete is
displayed, press the Q button.
• The data transfer indicator goes out when pairing is
complete.
• [Bluetooth] (P. 262) will be set to [Onr<] when pairing
is complete.
# If you rotate the mode dial of the remote control or press
the MEN U button of the camera before the pairing
completion message is displayed, the pairing process
ends. Paired device information will be reset. Perform
pairing again.
# If you rotate the mode dial of a remote control that
is not currently paired to CON NECT and keep it 3
seconds, or when pairing fails, the pairing information
from previous connections will be reset. Perform pairing
again.
AA:BB:CC:DD:EE:FF
s<
OK
Wireless Shutter Setting
Pairing is complete.
Ons<.
Bluetooth setting is changed to
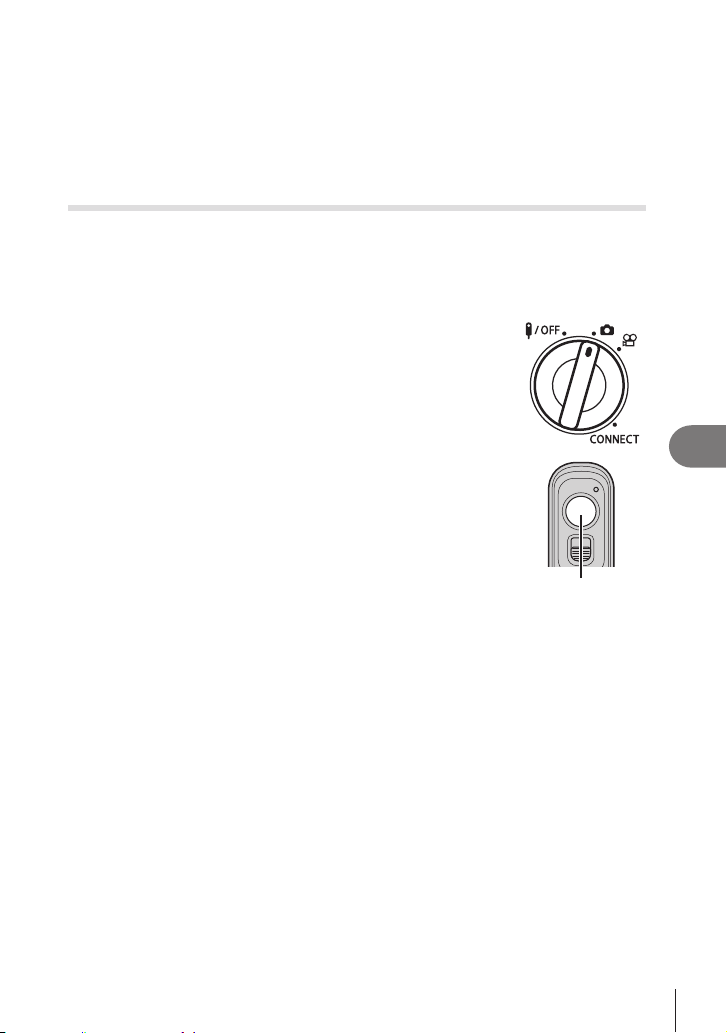
281
EN
Connecting the Camera to External Devices
8
De le t ing pa iring
1
Select [Delete Pairing] and press the Q button.
2
Select [Yes] and press the Q button.
# When you have paired the camera with a remote control, you have to perform [Delete
Pairing] to reset pairing information before you pair the camera with a new remote control.
Shooting from the remote control
PASMB
n
To connect the camera and remote control wirelessly, be sure that [Bluetooth] (P. 262)
is set to [Onr<]. When set to [Onr<], r< is displayed and the camera will be on
standby for wireless communication with the remote control as soon as it is turned on.
1
Rotate the mode dial of the remote control to K or
n.
2
Press the shutter button on the remote control to
take pictures.
• When the mode dial of the remote control is set to K
(still photography mode): When you lightly press the
position (press the shutter button halfway), the AF
() will be displayed, and a green
frame (AF target) will be displayed in the focus location.
• When the mode dial of the remote control is set to n
(movie recording mode): When you press the shutter
button of the remote control, movie recording starts.
Press the shutter button of the remote control again to
stop movie recording.
Shutter button

282
EN
Connecting the Camera to External Devices
8
Dat a t ra nsfe r indica t or of t he re m ot e c ontrol
Lights once Remote control operation is sent to the camera correctly.
Flashes rapidly (1
second)
Remote control operation is not sent to the camera correctly.
Shorten the distance between the camera and the remote control. If
the problem is not solved, check the setting of the camera.
Flashes rapidly (3
seconds)
There is a problem regarding the pairing of the camera and remote
control. Pair the devices again.
Does not light
This may occur in the following situations.
• The battery in the remote control is dead.
• The mode dial of the remote control is in the b/OFF position.
• The camera and remote control are connected with a cable
# Even if [Bluetooth] (P. 262) is set to [Onr<], you can connect the camera to a
smartphone by starting [Device Connection] on the camera.
However, you cannot control the camera from the remote control when it is connected to
a smartphone.
# Pairing devices and remote shooting are not available when [Airplane Mode] (P. 260) is
[On].
# The camera does not enter sleep mode when a remote control is connected wirelessly.
# If you rotate the mode dial of the remote control to the b/OFF position, the camera t enters
sleep mode according to the setting of [Sleep] (P. 254).
When [Bluetooth] (P. 262) is set to [Onr<], the camera does not enter sleep mode unless
you rotate the mode dial of the remote control to the b/OFF position.
# If you operate the remote control while the camera is in sleep mode, it may take a longer
time for the camera to resume operation.
# The camera cannot be controlled from the remote control while it is waking from sleep.
Operate the remote control after the camera has resumed operation.
# Rotate the mode dial of the remote control to the b/OFF
using the remote control.
MAC address of the remote control
The MAC address of the remote control is printed on the warranty card provided with
the remote control.
Precautions for using the remote control
• Do not tug on the battery-compartment cover or use it to turn the battery-compartment lid.
• Do not pierce batteries with sharp objects.
• Do not drop or swing the remote control while holding the cable.
• Moisture on the cable or remote control connectors could interfere with wireless control
and render wired connections unreliable.
•
• Rotate the mode dial to b/OFF before connecting or disconnecting cables.

283
EN
Connecting the Camera to External Devices
8
Connecting to Computers via USB
Connect the camera to a computer using the USB cable.
Installing Software
Install the following software to access the camera while it is connected directly to the
computer via USB.
OM Capture
Use “OM Capture” to automatically download and view pictures as they are taken
or control the camera remotely. To learn more or to download the software, visit our
website. When downloading the software, be prepared to provide the camera serial
number.
Follow the on-screen instructions to install the software. System requirements and
installation instructions are available at our website.
OM Workspace
This computer application is used to download, view, and manage photos and movies
recorded with the camera. When editing RAW data in the OM Workspace, high-speed
processing using the camera engine has been enabled. It can also be used to update
to provide the camera serial number when downloading the software.
Follow the on-screen instructions to install the software. System requirements and
installation instructions are available at our website.
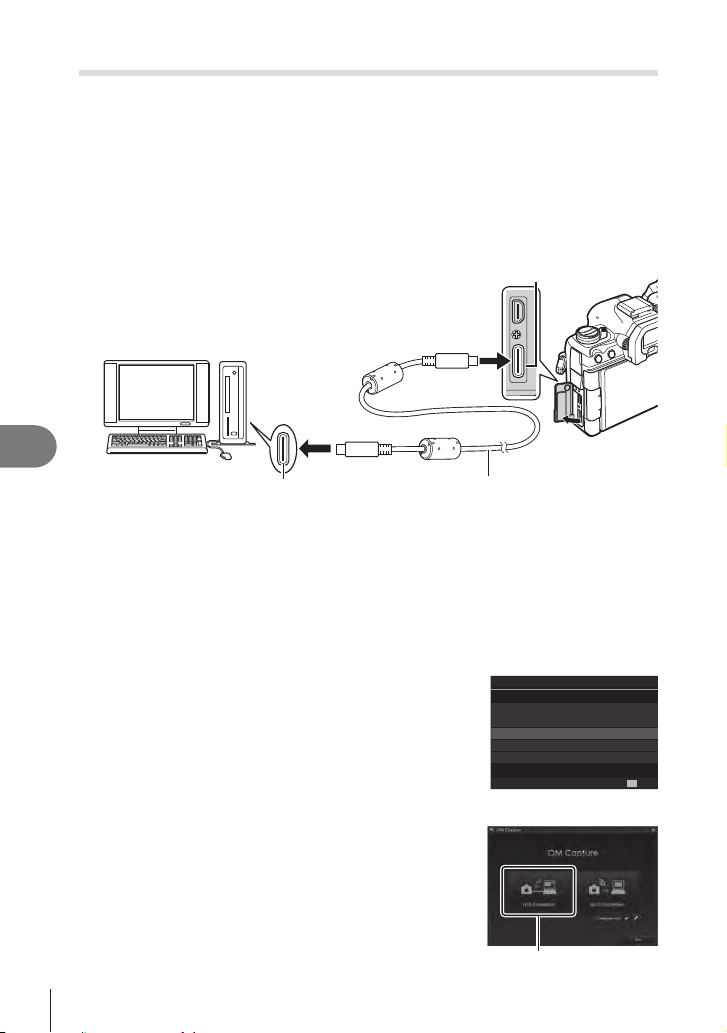
284
EN
Connecting the Camera to External Devices
8
Uploading Pictures as They Are Taken (0RAW/Control)
PASMB
n
Connect the camera to a computer via USB to upload pictures as they area taken.
You can take pictures using the controls on the camera body or while controlling the
camera remotely from the computer.
1
USB cable.
• When attaching the USB cable, use the supplied cable protector and cable clip to
prevent damage to the connectors. g “Attaching Cable Protectors” (P. 19)
USB port
USB connector
USB cable
• The locations of USB ports vary from computer to computer. See the documentation
provided with the computer for information on USB ports.
• If the USB port on the computer is Type A port, use the optional CB-USB11 cable.
2
Turn the camera on.
• The camera will display a message prompting you to identify the device to which the
USB cable is connected.
%If the message is not displayed, select [Select] for [USB Mode] (P. 252).
# If the batteries are very low, the camera will not display a message when connecting
to a computer. Be sure the batteries are charged.
3
Highlight [0RAW/Control] using FG and
press the Q button.
USB
MTP
0
RAW/Control
USB PD
OK
Storage
Exit
4
Launch the copy of “OM Capture” installed on the computer.
• When prompted to choose the connection type, click
[USB Connection].
[USB Connection]

285
EN
Connecting the Camera to External Devices
8
5
• Choose a destination for the downloaded pictures.
6
Take pictures using camera or computer controls.
• The pictures will be downloaded to the computer according to the options chosen.
• See online help for more information on using the software.
• The computer cannot be used to change the camera shooting mode.
• The computer cannot be used to delete pictures from the memory cards inserted in the
camera.
• The camera display frame rate may drop if the view through the camera lens is displayed
simultaneously both on the computer and in the camera monitor.
• The connection to the computer will end if you:
- exit “OM Capture”,
- insert or remove memory cards, or
-
Connecting the Camera for High-Speed RAW Processing
(0RAW/Control)
When you edit RAW data with the camera and computer connected, processing will be
faster than when done with the computer only.
1
USB cable.
2
Turn the camera on.
• The camera will display a message prompting you to identify the device to which the
USB cable is connected.
• If the message is not displayed, select [Select] for [USB Mode] (P. 252).
• If the batteries are very low, the camera will not display a message when connecting
to a computer. Be sure the batteries are charged.
3
Highlight [0RAW/Control] using FG and
press the Q button.
USB
MTP
0
RAW/Control
USB PD
OK
Storage
Exit
4
Launch the copy of “OM Workspace” installed on the computer.
5
Choose the picture to be processed.
• Only the pictures that were taken using the connected camera can be chosen.
• You can not choose pictures on the SD card in the connected camera.

286
EN
Connecting the Camera to External Devices
8
6
Process RAW images.
• Adjustments can be made to the shooting settings available on the camera and RAW
pictures processed accordingly.
• The processed copies will be saved in JPEG format.
• Enabling USB RAW data editing cancels any changes previously made in the edit
window.
• USB RAW data editing is not available when two or more cameras are connected.
• See online help for more information on using the software.
Copying Pictures to the Computer (Storage/MTP)
When connected to a computer, the camera can function as external storage in much
same way as a hard drive or other external storage device. Data can be copied from
the camera to the computer.
1
USB cable.
2
Turn the camera on.
• The camera will display a message prompting you to identify the device to which the
USB cable is connected.
• If the message is not displayed, select [Select] for [USB Mode] (P. 252).
• If the batteries are very low, the camera will not display a message when connecting
to a computer. Be sure the batteries are charged.
3
Highlight [Storage] or [MTP] using FG and press
the Q button.
[Storage]: The camera functions as a card reader.
[MTP]: The camera functions as a portable device.
USB
MTP
0
RAW/Control
USB PD
OK
Storage
Exit
4
The camera will connect to the computer as new storage device.
# Data transfer is not guaranteed in the following environments, even if your computer
is equipped with a USB port.
Computers with a USB port added by means of an extension card, etc., computers
without a factory-installed OS, or home-built computers
# Camera functions cannot be used while the camera is connected to the computer.
# If the computer fails to detect the camera, disconnect and reconnect the USB cable.
# When [MTP] is selected, movies exceeding 4 GB cannot be copied to the computer.
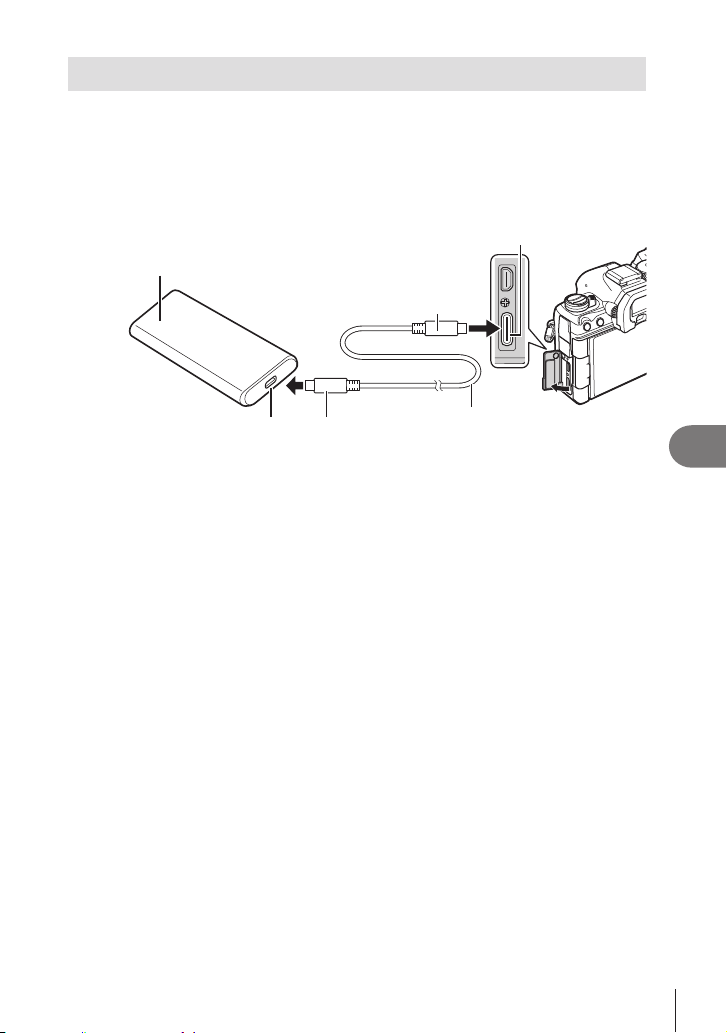
287
EN
Connecting the Camera to External Devices
8
Powering the Camera via USB (USB Power Delivery)
Mobile batteries or USB AC adapters conforming to the USB Power Delivery (USB PD)
standard can be used to power the camera. The devices must:
Standard: Conform to the USB Power Delivery (USB PD) standard
Output: Be rated for an output of 27 W (9 V 3 A, 15 V 2 A, or 15 V 3 A) or more
1
device.
USB connector
Type C
Type CUSB port
Mobile battery or other USB
device
USB cable
• The method used for connection varies from device to device. See the documentation
provided with the device for details.
• You may be unable to use USB Power Delivery (USB PD) with some USB devices.
See the manual supplied with the USB device.
2
Turn the camera on.
• The camera will draw power from the connected USB device.
• If the camera displays a message prompting you to identify the device to which the
USB cable is connected, select [USB PD].
• If the batteries are very low, the display will remain blank when the camera is
connected to the USB device. Be sure the batteries are charged.
• “USBP” is displayed while the camera draws power from the USB device.
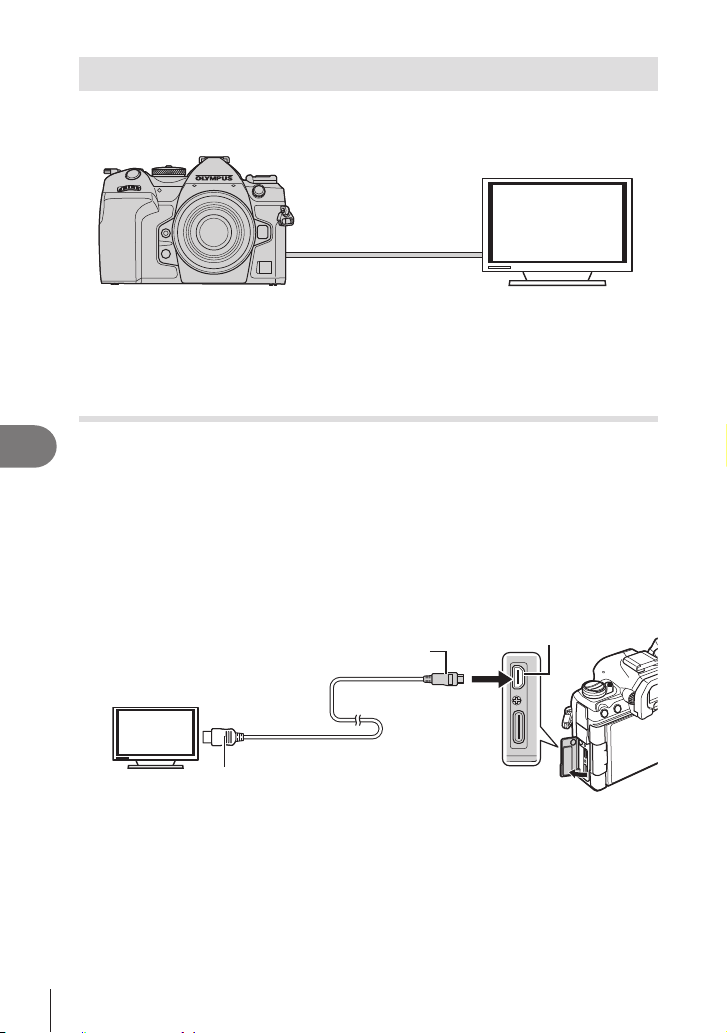
288
EN
Connecting the Camera to External Devices
8
Connecting to TVs or External Displays via HDMI
Pictures can be displayed on televisions connected to the camera via HDMI. Use the
television to display pictures to an audience.
recorder via HDMI.
•
• When the movie resolution is [4K] and playback frame rate is [60p] in [n
K], use an
HDMI cable compliant to HDMI 2.0 or later.
Viewing Pictures on a TV (HDMI)
camera by means of an HDMI cable.
For information on output signal setting, see “External Monitor Display Options (HDMI
Settings)” (P. 251).
Connect ing t he Ca m era to a T V
Connect the camera using an HDMI cable.
1
• When attaching the USB cable, use the supplied cable protector and cable clip to
prevent damage to the connectors. g “Attaching Cable Protectors” (P. 19)
HDMI cable
(Connect to the HDMI connector on
the TV.)
HDMI connector
Type D
Type A
2
Switch the TV to HDMI input and turn the camera on.
• The TV will show the contents of the camera monitor. Press the q button to view pictures.
# For information on switching to HDMI input, see the manual provided with the TV.
# Depending on TV settings, the image may be cropped and some indicators may not be visible.
# HDMI cannot be used while the camera is connected to a computer via USB.
# If [Record] is selected for [nHDMI Output] (P. 182) > [Output Mode], the signal will be
output at the current movie frame size. No image will be displayed if the TV or cable does
not support the selected frame size.
# If [4K] or [C4K] is selected, 1080p priority format will be used during still photography.

289
EN
Cautions
9
9
Information about Dust and Water Resistant Features
•
an IPX3 or higher water resistant lens supplied by our company).
•
conditions).
Prec a ut ions
• Dust and water resistant capabilities may be lost when the camera is subjected to shock.
• Check the following parts for foreign material including dirt, dust or sand: packing parts of
the battery compartment cover, card compartment cover, connector covers, and the parts
that come in contact with them, and the parts that come in contact when attaching the
not produce textile waste.
•
before use.
• Do not operate the camera, open/close the covers, or attach/remove the lens when they
are wet.
• Water resistant feature is ensured only when compatible lenses/accessories are attached.
Check the compatibility.
For compatible accessories, visit our website.
Ma int ena nc e
•
• Remove foreign materials such as dirt, dust or sand thoroughly.
Cautions

290
EN
Cautions
9
Battery and charger
•
• The camera’s power consumption varies widely with usage and other conditions.
• As the following consume a lot of power even without shooting, the battery will be drained
quickly.
• Performing auto focus repeatedly by pressing the shutter button halfway in shooting
mode.
• Displaying images on the monitor for a prolonged period.
• When connected to a computer (except when powering the camera via USB).
• Leaving wireless LAN/Bluetooth
®
enabled.
•
being displayed.
• The battery will not be fully charged at the time of purchase. Charge the battery before
use.
• Remove the batteries before putting the camera into storage for periods of a month or
more. Leaving the batteries in the camera for extended periods shortens their lives,
potentially rendering them unusable.
• The normal charging time using the supplied USB-AC adapter is approximately 2 hours 30
minutes (estimated).
•
supplied USB-AC adapter.
• There is a risk of explosion if the battery is replaced with the incorrect battery type.
• Dispose of the used battery following the instructions “CAUTION” (P. 334) in the
instruction manual.
Using your charger abroad
• The USB-AC adapter can be used in most home electrical sources within the range of
100 V to 240 V AC (50/60 Hz) around the world. However, depending on the country or
a plug adapter to match the wall outlet.
• Do not use commercially available travel adapters as the USB-AC adapter may
malfunction.
291
EN
Information
10
10
Interchangeable lenses
Choose a lens according to the scene and your creative intent. Use
lenses designed exclusively for the Micro Four Thirds system and
bearing the M.ZUIKO DIGITAL label or the symbol shown at right.
With an adapter, you can also use Four Thirds System lenses. The
optional adapter is required.
• When you attach or remove the body cap and lens from the camera, keep the lens mount
on the camera pointed downward. This helps prevent dust and other foreign matter from
getting inside the camera.
• Do not remove the body cap or attach the lens in dusty places.
• Do not point the lens attached to the camera toward the sun. This may cause the camera
lens.
• Be careful not to lose the body cap and rear cap.
• Attach the body cap to the camera to prevent dust from getting inside when no lens is
attached.
Le ns and c a m e ra combina t ions
Lens Camera Attachment AF Metering
Micro Four Thirds system
lens
Micro Four Thirds
system camera
Yes Yes Yes
Four Thirds system lens
Attachment possible
with mount adapter
Yes*
1
Yes
*1 Not available during enlarged display, movie recording or starry sky AF.
Information
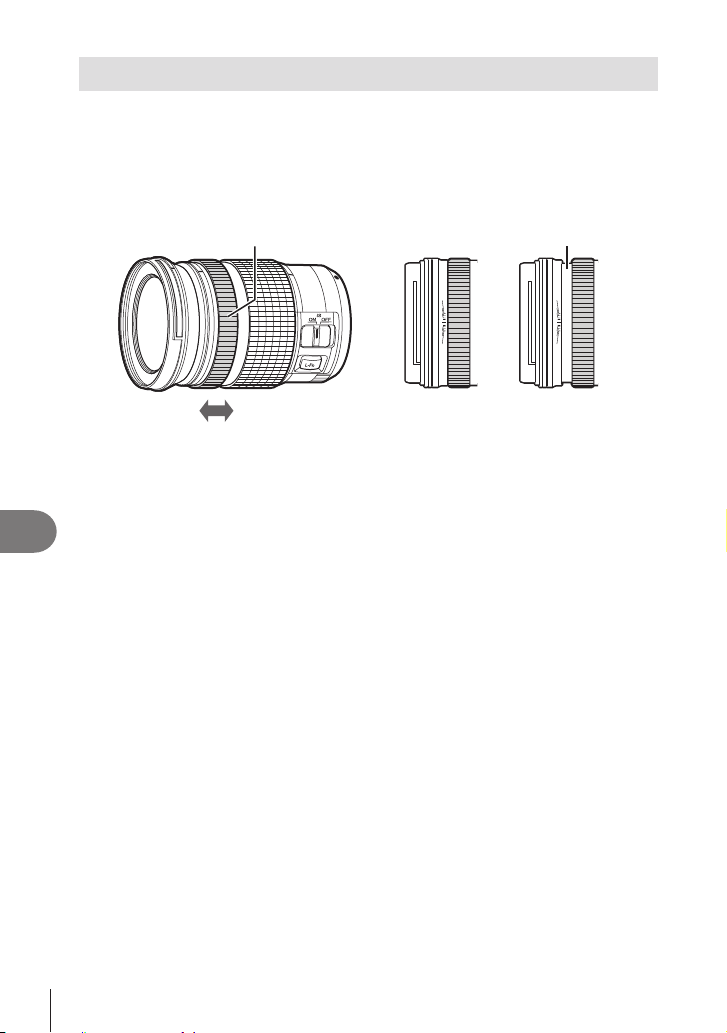
292
EN
Information
10
MF Clutch Lenses
The “MF clutch” (manual focus clutch) mechanism on MF clutch lenses can be used to
switch between auto and manual focus simply by repositioning the focus ring.
• Check the position of the MF clutch before shooting.
• Sliding the focus ring to the AF/MF position at the end of the lens selects autofocus, while
sliding it to the MF position closer to the camera body selects manual focus, regardless of
the focus mode chosen with the camera.
Focus distances visible
2 1 5 3 mm
∞
0.5
5.6 8 11 16
5.681116
2 1 5 3 mm
∞
0.5
5.6 8 11 16
5.681116
Focus ring
AF/MF MFAF/MF MF
• Selecting [Inoperative] for [MF Clutch] (P. 104) disables manual focus even when the MF
clutch is in the MF position.
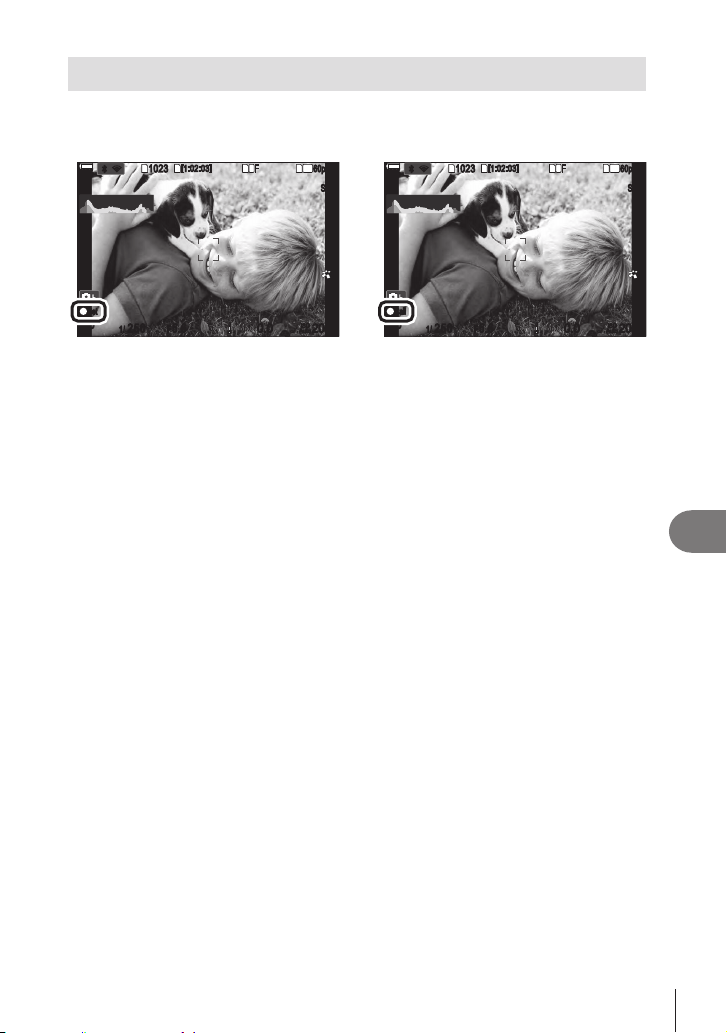
293
EN
Information
10
Camera Displays for Lens SET and CALL Functions
The camera displays “(Set” when the focus position is saved using the SET option
and “(Call” when a saved focus position is restored using the CALL option. For more
information on SET and CALL, see the lens manual.
1
10231023
P
1
/
250
P
1
/
F
250 5.65.6
1
1
[
1
:
02
:
03
][
1
:
02
:
03
]
FF
60p60p L
-
8L
-
8
S
-
AFS
-
AF
33
L
1
4K
ISO
Auto
ISO
Auto
F
00
+
-
0.00.0
100
%
100
%
rr
O
O
SetSet
200200
1
10231023
P
1
/
250
P
1
/
F
250 5.65.6
1
1
[
1
:
02
:
03
][
1
:
02
:
03
]
FF
60p60p L
-
8L
-
8
S
-
AFS
-
AF
33
200200
L
1
4K
ISO
Auto
ISO
Auto
F
00
+
-
0.00.0
100
%
100
%
rr
O
O
CallCall
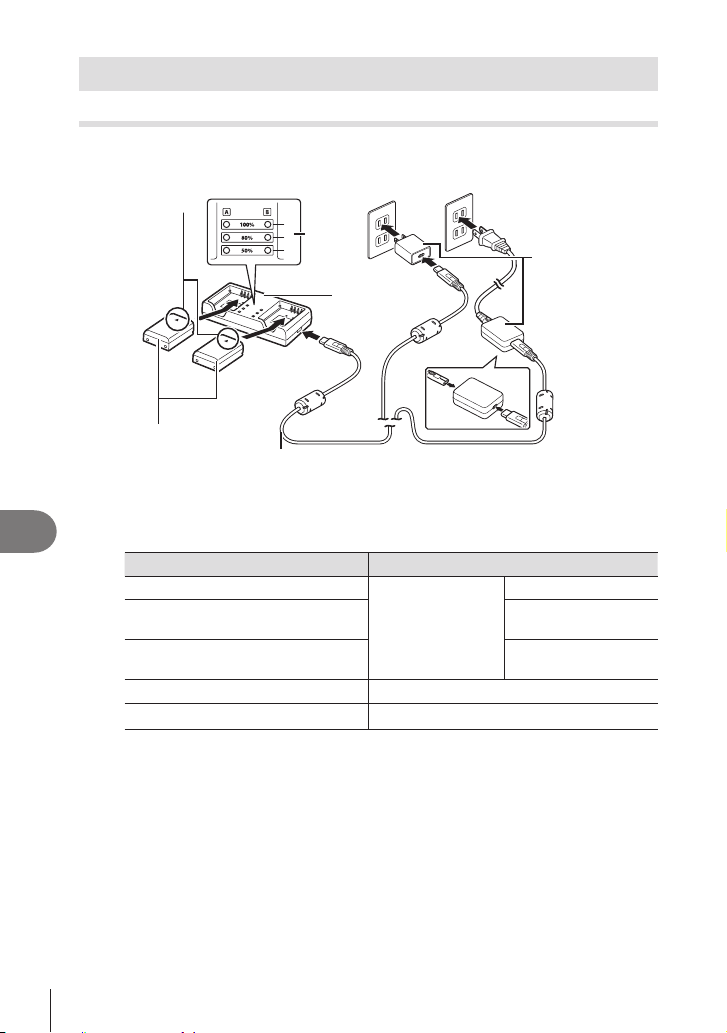
294
EN
Information
10
Optional Accessories
Using the charger (BCX-1)
Two batteries can be inserted. It can also be used with only one battery inserted.
1
Charge the battery.
1
2
3
AC wall
outlet
Lithium
ion battery
(BLX-1)
USB cable (CB-USB13: supplied)
Direction indicating
Charging
indicators
Lithium ion charger
USB-AC adapter
(F-7AC: supplied)
• Charging time is approximately 2 hours 30 minutes. See the table below for status of
the charging indicators and battery charge.
* Charging time does not change even when you charge two batteries at the same
time.
Charging indicator Battery charge
Indicator 1: Blinks
Charging in
progress
Less than 50%
Indicator 1: Lights up,
Indicator 2: Blinks
50% or more
Less than 80%
Indicators 1 and 2: Light up,
Indicator 3: Blinks
80% or more
Less than 100%
All indicators: Unlit Charging complete
All indicators: Blinking Charging error
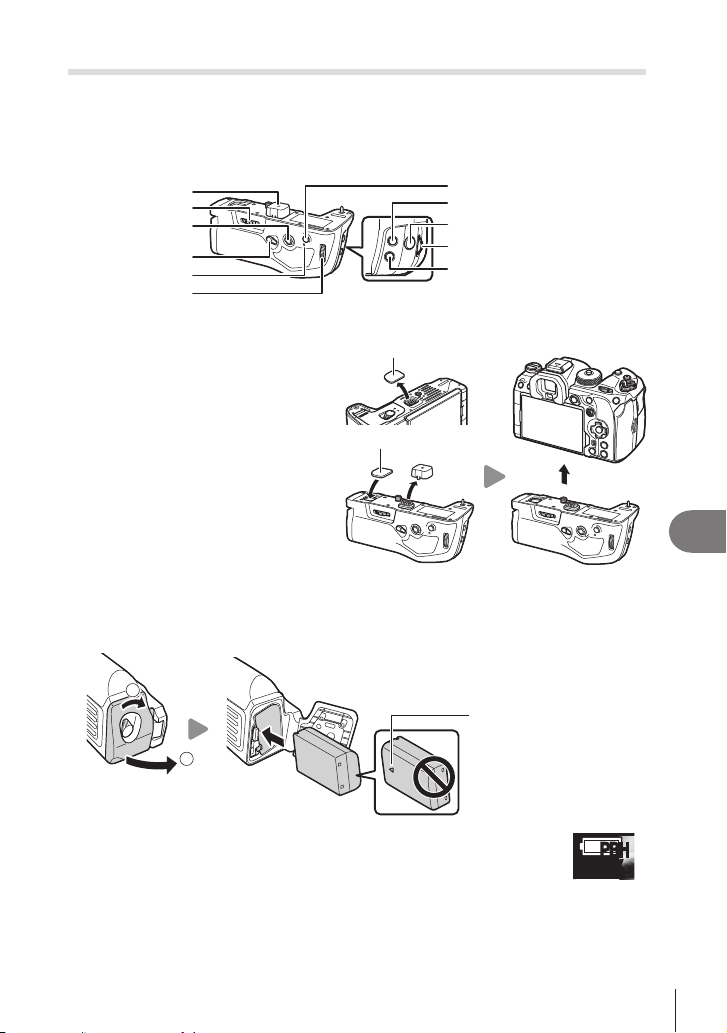
295
EN
Information
10
HLD-10 Power Battery Holder
An optional HLD-10 battery holder can be used to power the camera for extended
periods.
#
Par t na m e s
F
(Exposure compensation) button
Shutter button
Attachment wheel
Terminal cover
Multi selector
Vertical shooting lock
Battery charge lamp
Rear dial
Front dial
AF-ON button
ISO button
At tac hing t he holder
Remove the power battery holder
(PBH) cover on the bottom of the
camera and the terminal cover of
HLD-10 before attaching the HLD-10.
Once attached, make sure the HLD-10
removal knob is tightly secured. When
not using the HLD-10, make sure to
attach the power battery holder (PBH)
cover to the camera and the terminal
cover to the HLD-10.
Power battery holder
(PBH) cover
Power battery holder
(PBH) cover
Store the Power battery holder (PBH) cover in the
HLD-10.
Loa ding t he bat t e r y
Use BLX-1 battery. Once you load the battery, make sure to lock the battery cover.
1
2
Direction indicating mark
%The monitor battery-level indicator (P. 30) shows “PBH” when the
camera is powered by the battery in the HLD-10.
100
%
100
%
PBH

296
EN
Information
10
Cha rging t he bat t e r y in t he pow er ba t ter y holde r
To charge the battery in the power battery holder, load a battery in the holder and
attach the holder to the camera. Charge the battery in the same way as described on
P. 22. The charge lamp of the holder lights during charging.
Using the buttons
Slide the vertical shooting lock of the HLD-10 in the
direction of the arrow. The roles performed by the F
(Exposure compensation) button, ISO button and AF-ON
button on the HLD-10 can be selected using the [Button
Settings] item. g “Changing the roles of buttons (Button
Settings)” (P. 208)
# Buttons on the HLD-10 cannot be used when the vertical
shooting lock is in the LOCK position.
Notes on using this product
• Use only the designated battery. Failure to do so could result in injury, damage to the
• Do not use your nail to turn the attachment wheel. Doing so could result in injury.
• Only use the camera within the guaranteed operating temperature range.
• Do not use or store the product in dusty or humid areas.
• Do not touch the electrical contacts.
• Use a dry, soft cloth to clean the terminals. Do not clean the product with a damp cloth,
thinner, benzine, or any other organic solvents.
• Remove the batteries from the camera and power battery holder before putting the
camera into storage for periods of a month or more. Leaving the batteries in the camera
for extended periods shortens their lives, potentially rendering them unusable.

297
EN
Information
10
Designated External Flash Units
use.
the output required and whether the unit supports macro photography. Flash units
TTL auto and super FP. Flash units can be mounted on the camera hot shoe or
Radio-Controlled Flash Photography: CMD, #CMD, RCV, and X-RCV Modes
Wireless Remote-Control Flash Photography: RC Mode
Fe at ure s Availa ble w ith Compat ible Fla sh Unit s
Flash unit
Supported ash control
modes
GN (Guide Number,
ISO 100)
Supported wireless
systems
FL-700WR
TTL-AUTO, MANUAL,
FP TTL AUTO,
FP MANUAL, MULTI, RC,
SL MANUAL
GN 42 (75/150 mm *
1
)
GN 21 (12/24 mm *
1
)
CMD, #CMD, RCV,
X-RCV, RC
FL-900R
TTL-AUTO, AUTO,
MANUAL, FP TTL AUTO,
FP MANUAL, MULTI, RC,
SL AUTO, SL MANUAL
GN 58 (100/200 mm *
1
)
GN 27 (12/24 mm *
1
)
RC
STF-8
TTL-AUTO, MANUAL,
RC *
2
GN 8.5 RC *
2
FL-LM3
Varies with camera
settings.
GN 9.1 (12/24 mm *
1
) RC *
2
slashes are 35 mm format equivalent focal lengths).
*2 Functions as commander (transmitter) only.

298
EN
Information
10
Wireless remote control ash photography
PASMB
n
on the camera hot shoe. Settings can be adjusted separately for the units in up to three
other groups.
1
• MODE button, and select RC mode.
•
2
Select [On] for [# RC Mode] (P. 124).
• The camera will exit to the shooting display.
• “RC” will be displayed.
RCRC
1
10231023
P
1
/
250
P
1
/
F
250 5.65.6
1
1
[
1
:
02
:
03
][
1
:
02
:
03
]
FF
60p60p L
-
8L
-
8
S
-
AFS
-
AF
33
L
1
4K
##
F
00
+
-
0.00.0
100
%
100
%
rr
O
O
200200
ISO
Auto
ISO
Auto
RC
3
Press the Q button.
• The RC mode super control panel will be displayed.
• The standard LV super control panel can be displayed
by pressing the IN FO button. The display will change
each time the IN FO button is pressed.
±
0.0
±
0.0
A Mode
RC
RC
0.0
5.6250P
Ch1Low
TTL
Off
Off
A
Small
1/ Auto
ISO
#
#
x
G
3
0
+
-
C
B
[
1:02:03
]
1023
r
±
F
200
WB Auto
RC mode super control panel
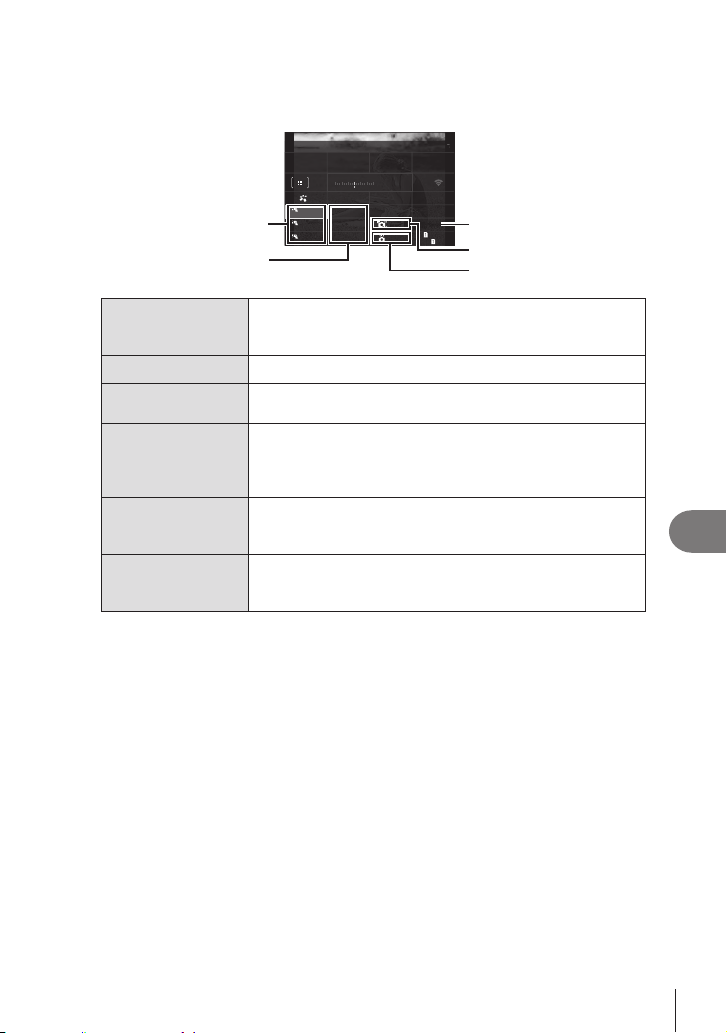
299
EN
Information
10
4
• Highlight items using the FGHI buttons and rotate the front dial to choose
settings.
Flash compensation
±
0.0
±
0.0
A Mode
RC
RC
0.0
5.6250P
Ch1Low
TTL
Off
Off
A
Small
1/ Auto
ISO
#
#
x
G
3
0
+
-
C
B
[
1:02:03
]
1023
r
±
F
200
WB Auto
Channel
Optical signal strength
Flash mode
Group
Choose a group. Changes to settings apply to all units in the
selected group. The unit mounted on the camera works as a
member of Group A.
Flash control mode
Flash compensation
Optical signal
strength
Choose the brightness of the optical control signals emitted by
close to the maximum distance from the camera. This setting
applies to all groups.
Flash mode
Choose # (standard) or FP (super FP). Choose super FP for
applies to all groups.
Channel
5
Set the unit mounted on the camera to [TTL AUTO].
• Flash control settings for the FL-LM3 can only be adjusted using the camera.
# Position the wireless units with the remote sensors facing the camera.
#

300
EN
Information
10
Wireless Flash Control Range
Flash Control Range for Camera-Mounted FL-LM3 Flash Units
7m
5m
100°100°
50°
50°
50°
50°
60°
60°
30°
30°
30°
30°
•
•
mode when a shutter speed slower than 4 s is selected.
• Start wait times longer than 4 s cannot be selected in anti-shock and silent modes.
• Flash control signals may interfere with exposure if subject is too close to the camera.
Other external ash units
•
will damage the camera.
•
damage the camera.
• Select mode M
[KISO] to a setting other than [Auto].
•
and aperture values selected with the camera. Flash brightness can be adjusted by
adjusting either ISO sensitivity or aperture.
•
expressed using 35-mm format equivalent focal lengths.
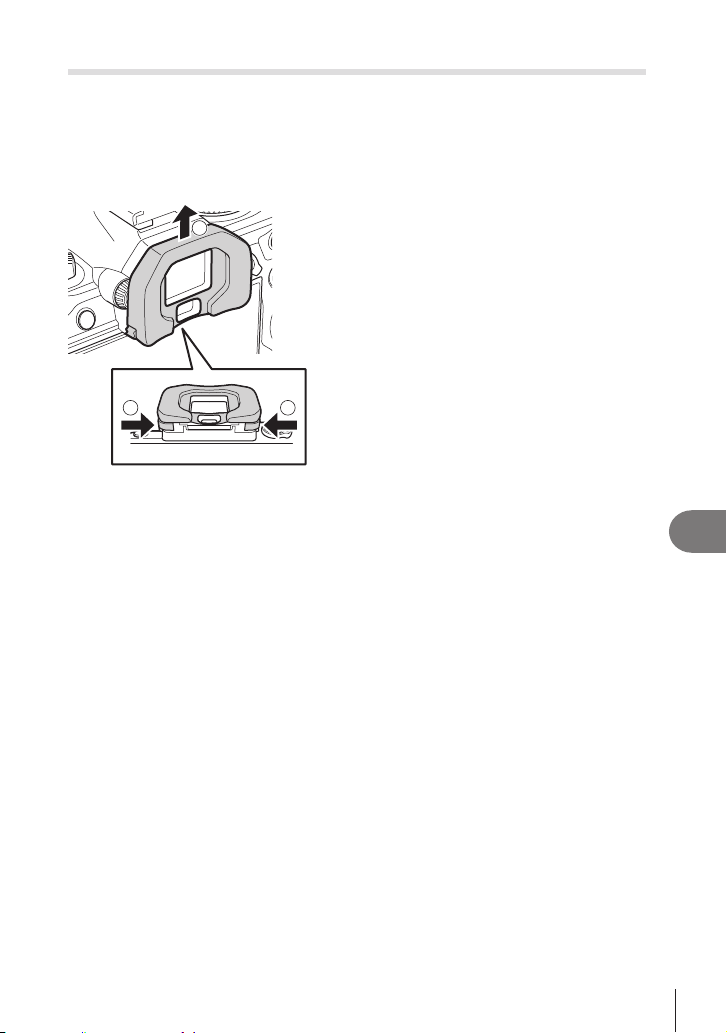
301
EN
Information
10
Principal Accessories
Conver ter le nses
photography. See our website for information on the lenses that can be used.
Eyec up (EP-1 8 )
Removal
1 1
2
Push both levers inward and lift the eyecup.
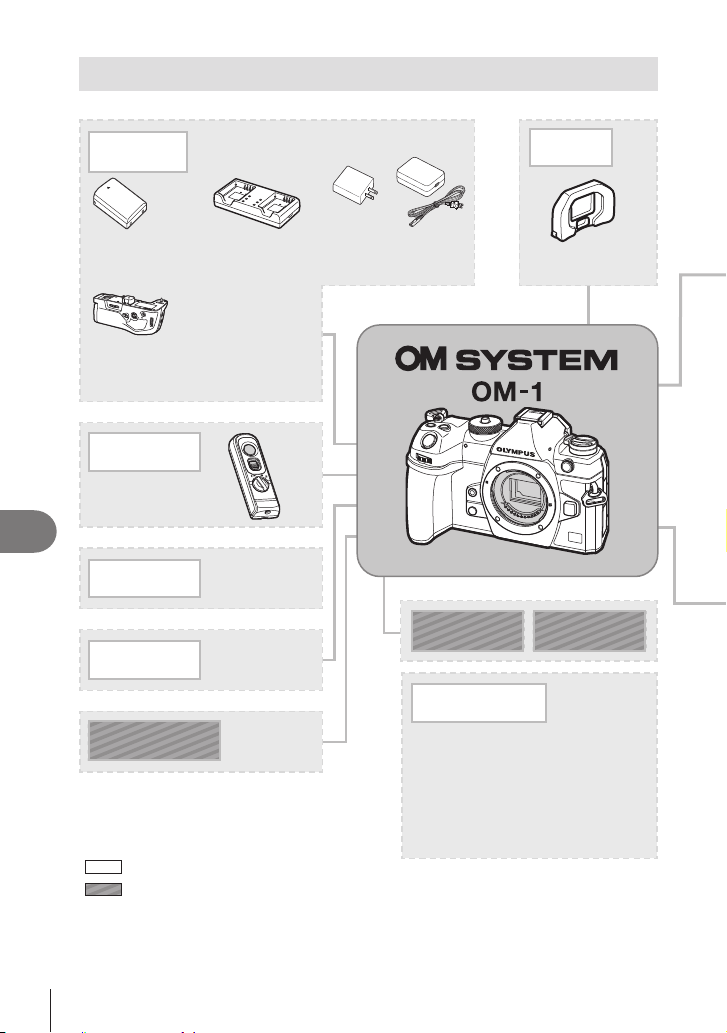
302
EN
Information
10
System chart
: OM-1 compatible products
: Commercially available products
For the latest information, please visit our website.
*1 HDMI cables are available from third-party suppliers.
*2 There are restrictions on the lenses that can be used with the adapter. Visit our website for details.
*3 Visit our website for information on compatible lenses.
Software
OM Workspace
Photo management/editing software
for computers
OM Capture
Camera control software for
computers
OM Image Share
Smartphone app
Headphone Microphone
Remote
Operation
RM-WR1
Remote Control
SD/SDHC/
SDXC
Memory Card
Case / Strap
Shoulder Strap /
Camera Case
Power Supply
BCX-1
Lithium-ion Charger
BLX-1
Lithium-ion battery
HLD-10
Power Battery
Holder
Connection
Cable
USB Cable /
HDMI Cable *
1
F-7AC
USB-AC Adapter
Viewfinder
EP-18
Eyecup
or
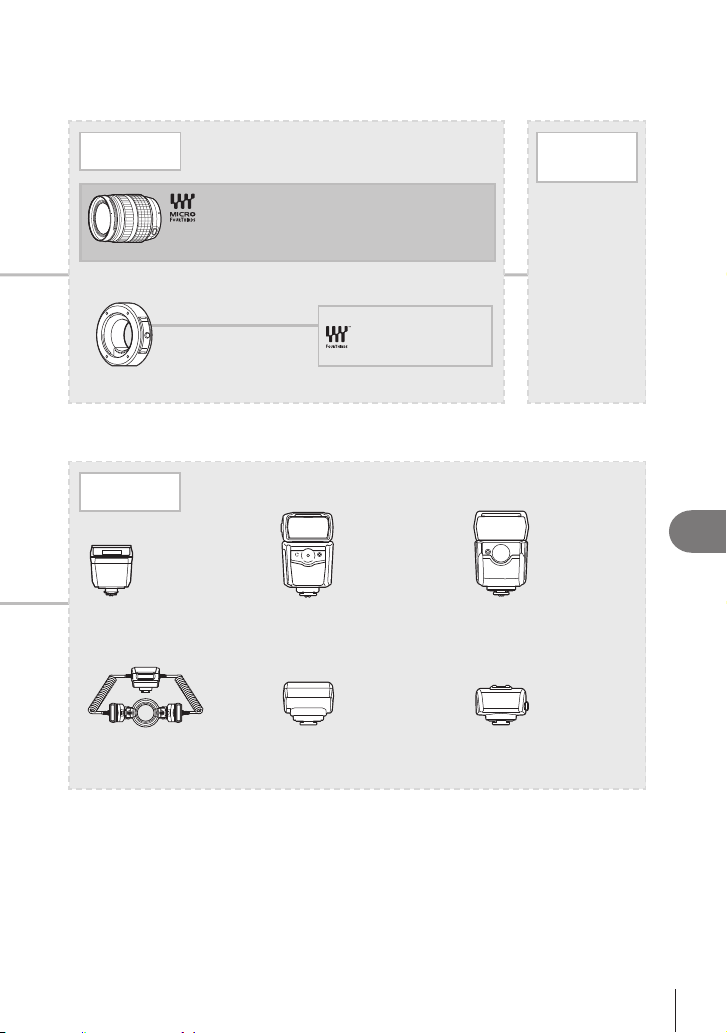
303
EN
Information
10
Lens
MMF-2/MMF-3
*2
Four Thirds Adapter
Four Thirds system
lenses
Micro Four Thirds system lenses
Converter
Lens*
3
MC-20
Teleconverter
MC-14
Teleconverter
FCON-P01
Fisheye
MCON-P02
Macro
Flash
FL-900R
Electronic Flash
FL-LM3
Electronic Flash
FL-700WR
Electronic Flash
FC-WR
Wireless Radiowave
Commander
STF-8
Macro Flash
FR-WR
Wireless Radiowave
Receiver

304
EN
Information
10
Cleaning and storing the camera
Cleaning the camera
• Do not use strong solvents such as benzene or alcohol, or a chemically treated cloth.
Exterior:
• Wipe gently with a soft cloth. If the camera is very dirty, soak the cloth in mild soapy water
and wring well. Wipe the camera with the damp cloth and then dry it with a dry cloth. If you
have used the camera at the beach, use a cloth soaked in clean water and well wrung.
Monitor:
• Wipe gently with a soft cloth.
Lens:
•
a lens cleaning paper.
Storage
• When not using the camera for a prolonged period, remove the battery and card. Store
the camera in a cool, dry place that is well ventilated.
• Insert the battery periodically and test the camera’s functions.
• Remove dust and other foreign matter from the body and rear caps before attaching them.
• Attach the body cap to the camera to prevent dust from getting inside when no lens is
attached. Be sure to replace the front and rear lens caps before putting the lens away.
• Clean the camera after use.
• Do not store with insect repellent.
• Avoid storing the camera in places where chemicals are treated, in order to protect the
camera from corrosion.
• Mold may form on the lens surface if the lens is left dirty.
• Check each part of the camera before use if it has not been used for a long time. Before
taking important pictures, be sure to take a test shot and check that the camera works
properly.

305
EN
Information
10
Cleaning and checking the image pickup device
This camera incorporates a dust reduction function to keep dust from getting on the
image pickup device and to remove any dust or dirt from the image pickup device
surface with ultrasonic vibrations. The dust reduction function operates when the
camera is turned on.
The dust reduction function operates at the same time as the pixel mapping, which
checks the image pickup device and image processing circuitry. Since dust reduction
is activated every time the camera’s power is turned on, the camera should be held
Pixel Mapping - Checking the image processing functions
The pixel mapping feature allows the camera to check and adjust the image pickup
device and image processing functions. For best results, wait at least a minute after
shooting and playback have ended before performing pixel mapping.
1
Select [Pixel Mapping] (P. 258).
2
Select [Yes], then press the Q button.
• The [Busy] bar is displayed when pixel mapping is in progress. When pixel mapping
•
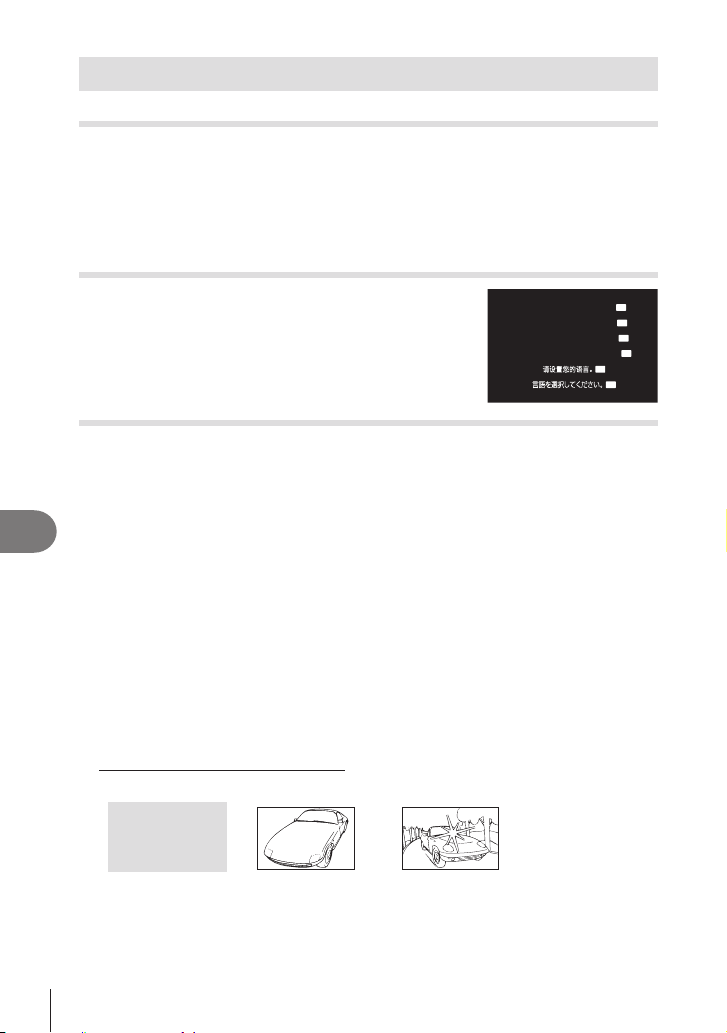
306
EN
Information
10
Shooting tips and information
The camera does not turn on even when a battery is loaded
The battery is not fully charged
• Charge the battery with the USB-AC adapter.
The battery is temporarily unable to function because of the cold
• Battery performance drops at low temperatures. Remove the battery and warm it by
putting it in your pocket for a while.
A dialog prompting you to choose a language is displayed
The dialog is displayed in the following situations.
•
• You have not chosen a language.
See “Initial setup” (P. 31) and choose a language.
No picture is taken when the shutter button is pressed
The camera has turned o automatically
• If [On] is selected for [Quick Sleep Mode] (P. 255), the camera will enter sleep mode if
no operations are performed for a set period. Press the shutter button halfway to exit the
sleep mode.
• The camera automatically enters sleep mode to reduce the drain on the battery if no
operations are performed for a set period of time. g [Sleep] (P. 254)
If no operations are performed for a set time after the camera has entered sleep mode,
g
The ash is charging
• On the monitor, the # mark blinks when charging is in progress. Wait for the blinking to
stop, then press the shutter button.
Unable to focus
• The camera cannot focus on subjects that are too close to the camera or that are not
distance to the subject or focus on a high contrast object at the same distance from the
camera as your main subject, compose the shot, and shoot.
Subjects that are dicult to focus on
mark is blinking.
These subjects
are not focused.
Subject with low
contrast
Excessively bright
light in center of frame
Please select your language.
Por favor, selecciona tu idioma.
Veuillez choisir votre langue.
Bitte wählen Sie Ihre Sprache.
OK
OK
OK
OK
OK
OK
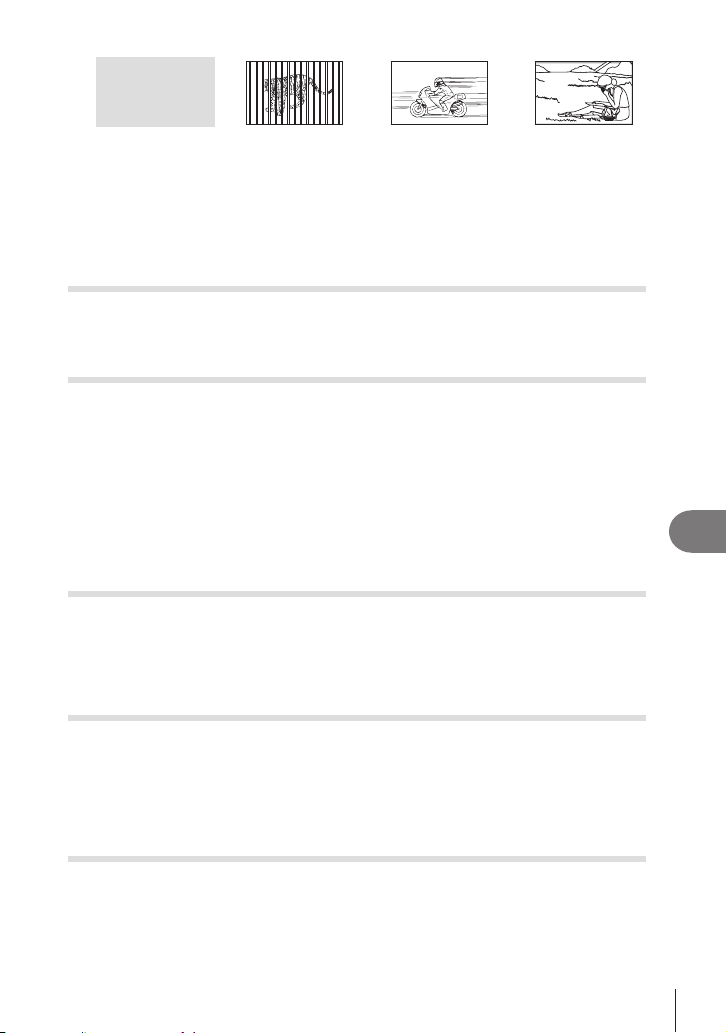
307
EN
Information
10
mark lights up but
the subject is not
focused.
distances
Fast-moving subject Subject not inside
AF area
Noise reduction is activated
• When shooting night scenes, shutter speeds are slower and noise tends to appear in
images. The camera activates the noise-reduction process after shooting at slow shutter
g [Noise Reduction] (P. 117)
The number of AF targets is reduced
The size and number of the AF target changes depending on the [Digital Tele-converter]
(P. 166), [Aspect] (P. 144), group target (P. 77), [Drive j/Y] and [nImage Stabilizer]
settings.
The date and time has not been set
The camera is used with the settings at the time of purchase
• The date and time of the camera is not set when purchased. Set the date and time before
using the camera. g
“Initial setup” (P. 31)
The battery has been removed from the camera
• The date and time settings will be returned to the factory default settings if the camera is
left without the battery for approximately 1 day (in-house measurements). The settings
will be canceled more quickly if the battery was only loaded in the camera for a short time
before being removed. Before taking important pictures, check that the date and time
settings are correct.
Set functions are restored to their factory default settings
Settings adjusted in custom modes (modes C1–C4) will be reset to saved values when
Settings] when a custom mode is selected, changes to settings will automatically be saved
to the selected mode. g “Saving the Changes Made to Settings while in Custom Modes”
(P. 57)
Image taken appears whitish
This may occur when the picture is taken in backlight or semi-backlight conditions. This is
where strong light source is not taken in the picture. Flare may occur even when a light
source is not present in the picture. Use a lens hood to shade the lens from the light
g “Interchangeable lenses” (P. 291)
Unknown bright dot(s) appear on the subject in the picture taken
This may be due to stuck pixel(s) on the image pickup device. Perform [Pixel Mapping].
If the problem persists, repeat pixel mapping a few times. g “Pixel Mapping - Checking the
image processing functions” (P. 305)

308
EN
Information
10
Functions that cannot be selected from menus
When you open the menu, items that cannot be set are displayed in gray.
If you press the Q button while selecting a gray item, the reason it cannot be set will be
displayed.
Refer to the on-screen instructions and check the settings (P. 65).
Functions that cannot be set from the super control panel
Some functions may be unavailable depending on the current shooting settings. Check if the
same function is displayed in gray in the menus (P. 65).
The subject appears distorted
The following functions use an electronic shutter:
movie recording (P. 59), silent mode (P. 132), Pro Capture shooting (P. 133), High
(P. 158), HDR (P. 162)
This may cause distortion if the subject is moving rapidly or the camera is moved abruptly.
Avoid moving the camera abruptly during shooting or use standard sequential shooting.
Lines appear in photographs
be reduced by choosing slower shutter speeds:
movie recording (P. 59), silent mode (P. 132), Pro Capture shooting (P. 133), High
(P. 158), HDR (P. 162)
g [KFlicker Scan], [nFlicker Scan] (P. 108)
Only the subject is displayed and no information is shown
The display has been switched to [Image Only]. Press the IN FO button and switch to
another display mode.
Focus mode cannot be changed from MF (manual focus)
The lens you are using may be equipped with the MF clutch mechanism. In this case, manual
focus is selected when the focus ring is slid to the camera body side. Check the lens.
g “MF Clutch Lenses” (P. 292)
Nothing is displayed on the monitor
g “Switching between displays” (P. 37)

309
EN
Information
10
Error codes
Monitor indication Possible cause Corrective action
No Card
The card is not inserted, or it
cannot be recognized.
Insert a card. Or reinsert the
card properly.
5Card Error
There is a problem with the
memory card in Slot 1.
Remove and reinsert the
memory card. If this does not
solve the problem, format the
card. If formatting fails, the card
cannot be used.
4Card Error
There is a problem with the
memory card in Slot 2.
5Write Protect
The memory card in Slot 1 is
write-protected (“locked”).
The memory card write-protect
switch is in the “LOCK” position.
Return the switch to the
unlocked position (P. 25).
4Write Protect
The memory card in Slot 2 is
write-protected (“locked”).
5Card Full
• Shooting disabled; the
memory card in Slot 1 does
not have space for additional
pictures.
• Shooting disabled; the
memory card in Slot 1 is full.
Insert another memory or
delete pictures. Before deleting
pictures, be sure any pictures
you wish to keep have been
copied to a computer.
If [1/y], [3/y], [1=y] or
[3=y] is selected for [KSave
Settings] (P. 242), choose a
4Card Full
• Shooting disabled; the
memory card in Slot 2 does
not have space for additional
pictures.
• Shooting disabled; the
memory card in Slot 2 is full.
5No Picture
Playback unavailable; the
memory card in Slot 1 contains
no pictures.
The selected memory card
contains no pictures. Take
pictures before choosing
playback mode.
4No Picture
Playback unavailable; the
memory card in Slot 2 contains
no pictures.
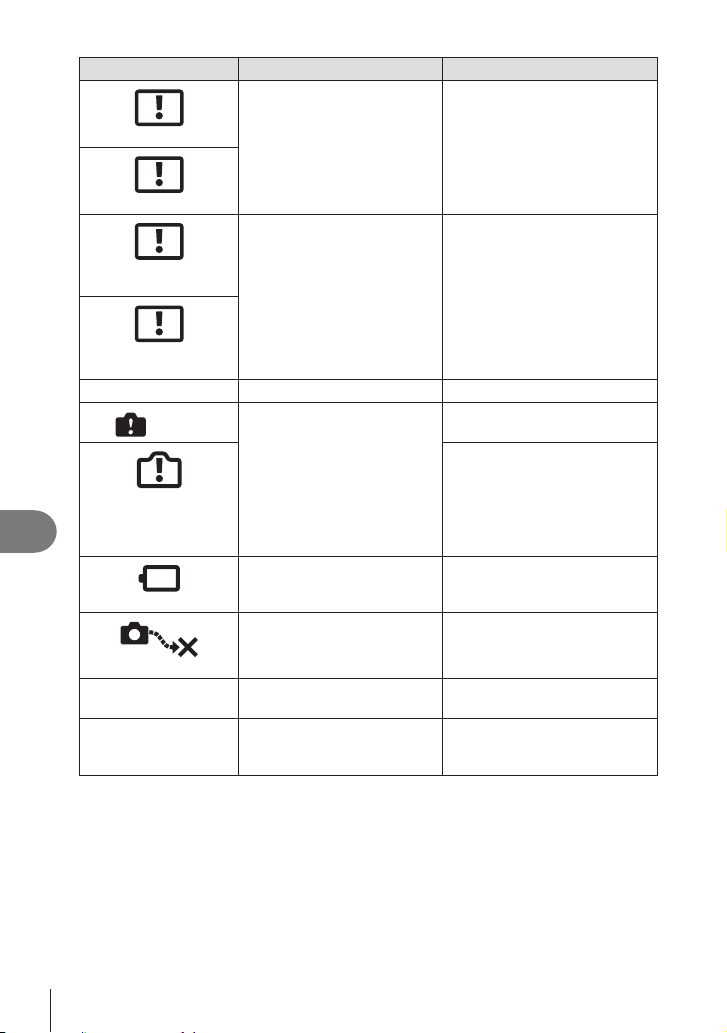
310
EN
Information
10
Monitor indication Possible cause Corrective action
5Picture Error
and cannot be played back.
Alternatively, the picture is in a
format that is not supported by
the camera.
View the picture using computer
imaging software or the like. If
the picture cannot be displayed
corrupt.
4Picture Error
5The Image Cannot Be
Edited
Camera retouch features
cannot be applied to pictures
recorded with other devices.
Retouch the picture on a
computer or other device.
4The Image Cannot Be
Edited
Y/M/D
The clock is not set. Set the clock (P. 257).
Heat
The internal temperature of
the camera has risen due to
sequential shooting.
the internal temperature to cool.
Internal camera
temperature is too high.
Please wait for cooling
before camera use.
Wait a moment for the camera
Allow the internal temperature
of the camera to cool before
resuming operations.
Battery Empty
The battery is drained. Charge the battery.
No Connection
The camera is not correctly
connected to a computer,
HDMI display, or other device.
Reconnect the camera.
The lens is locked.
Please extend the lens.
The lens of the retractable lens
stays retracted.
Extend the lens.
Please check the status
of a lens.
An abnormality has occurred
between the camera and the
lens.
connection with the lens, and
turn the power on again.

311
EN
Information
10
Default Settings
*1: Can be added to [Assign].
*2: Default can be restored by selecting [Initialize All Settings] for [Reset/Initialize Settings].
*3: Default can be restored by selecting [Reset Shooting Settings] for [Reset/Initialize Settings].
Super Control Panel
Shooting mode Function Default *1 *2 *3
g
P/A/S/M/
B
Shooting Mode P — — 43
Shutter Speed 1/250 (When set to S/M),
Bulb (When set to B)
47
Aperture Value F5.6
45
KISO
ISO Auto
113
KAF Target Mode
ySmall
77
Exposure Comp.
106
Wi-Fi/Bluetooth — 261
KPicture Mode
3 Natural
145
KWB
WB Auto
150
KKelvin 5400K (When [KWB] is set
to [CWB])
— 150
KButton Function
—
208
KAF Mode
S-AF
72
Face & Eye
Detection
I
88
Flash Mode
#
120
Flash Exposure
Comp.
123
Manual Value
#Full
(When [
Flash Mode
] is set to
[#Manual])
121
Drive j/Y o
126
Metering
p
109
Aspect 4:3
144
KImage Stabilizer
S-IS Auto
136
KCard Slot
Settings
Standard
242
5KK YF (when High Res Shot is
set: AF+RAW)
140
4KK YF (when High Res Shot is
set: AF+RAW)
140
nK
60p L-8
141

312
EN
Information
10
Shooting mode Function Default *1 *2 *3
g
n (movie)
nMode
P
59
Shutter Speed 1/250
47
Aperture Value F5.6 —
45
nISO
ISO Auto —
113
nAF Target Mode
AMiddle
—
77
Exposure Comp.
106
Wi-Fi/Bluetooth — — — — 261
nPicture Mode
3 Natural
149
nWB
WB Auto —
150
nKelvin 5400K (When [KWB] is set
to [CWB])
—
— 150
nButton Function
— —
— 208
nAF Mode
C-AF
72
Face & Eye
Detection
I
— 88
nImage Stabilizer
M-IS1
136
nK
60p L-8
141
Sound Recording
Level
62
Headphone Volume 8
62
RC mode Shooting Mode P — 43
Shutter Speed 1/250 (When set to S/M),
Bulb (When set to B)
47
Aperture Value F5.6
45
KISO
ISO Auto
113
KAF Target Mode
ySmall
77
Exposure Comp.
106
Wi-Fi/Bluetooth — — — — 261
KPicture Mode
3 Natural
145
KWB
WB Auto
150
KKelvin 5400K (When [KWB] is set
to [CWB])
150
KButton Function
—
208
A mode TTL
298
B mode
C mode
Flash compensation
Flash output
Flash Mode 1/1 (when in Manual mode)
#/FP #(Normal)
a optical signal
strength
Low
Channel Ch1
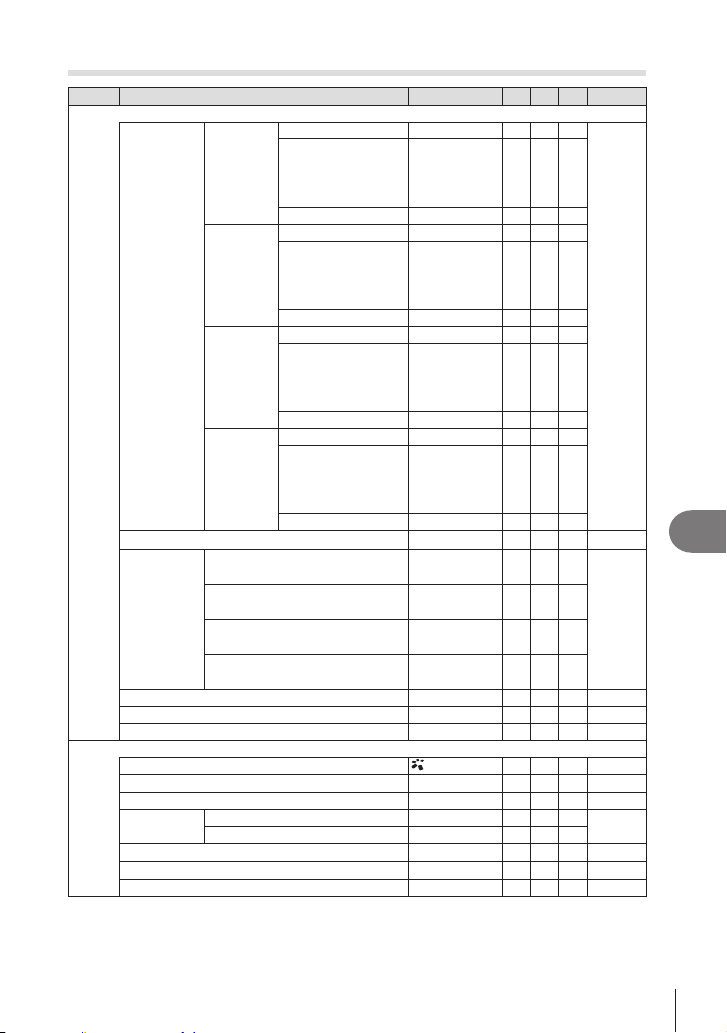
313
EN
Information
10
_
Tab
Page Function Default *1 *2 *3
g
1. Basic Settings/Image Quality
Custom
Mode
C1 Recall
56
Assign
Shooting
Mode
:
P
Image quality:
YF+RAW
Save Settings Reset
C2 Recall
Assign
Shooting
Mode
:
P
Image quality:
YF+RAW
Save Settings Reset
C3 Recall
Assign
Shooting
Mode
:
P
Image quality:
YF+RAW
Save Settings Reset
C4 Recall
Assign
Shooting
Mode
:
P
Image quality:
YF+RAW
Save Settings Reset
KK
YF
140
KK
Detailed
Settings
K
1
Pixel Count:
Y
Compression: SF
140
K
2
Pixel Count:
Y
Compression: F
K
3
Pixel Count:
Y
Compression: N
K
4
Pixel Count:
u
Compression: N
Image Aspect 4:3
144
Image Review
42
Shading Comp.
144
2. Picture Mode/WB
KPicture Mode
3 Natural
145
KPicture Mode Settings
All items:
149
KWB
WB Auto
150
KAll x
A-B 0
153
G-M 0
KW Keep Warm Color
On
154
#+WB
154
Color Space sRGB
155
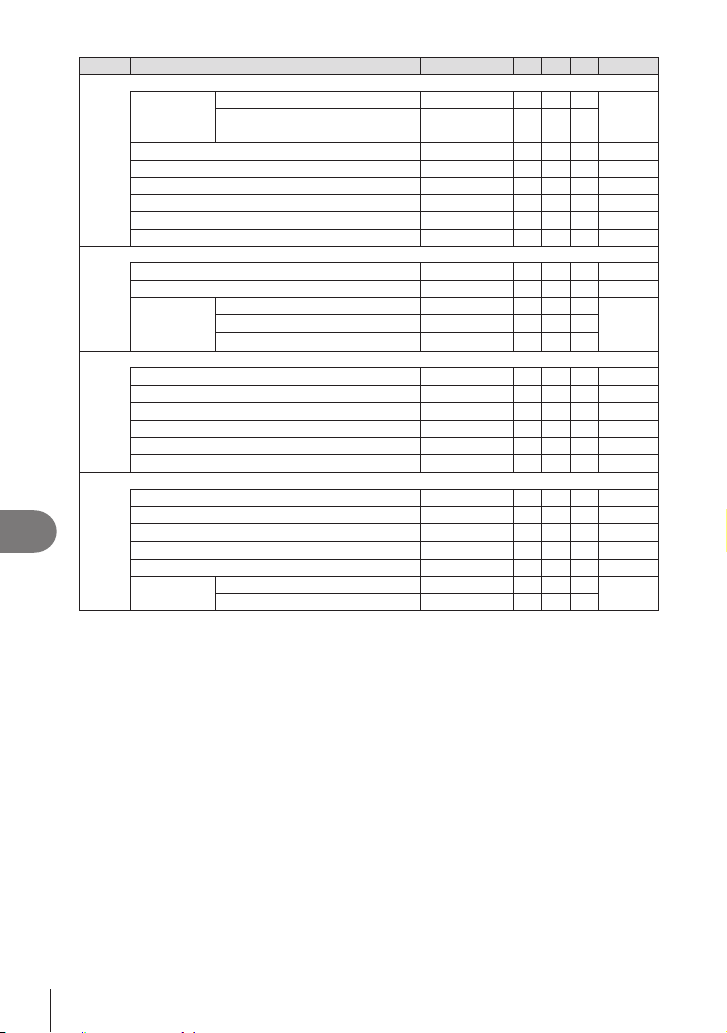
314
EN
Information
10
Page Function Default *1 *2 *3
g
3. ISO/Noise Reduction
KISO-A
Upper/
Default
Upper Limit 25600
114
Default 200
KISO-A Lowest S/S
Auto
115
KISO-Auto
P/A/S/M
115
ISO Step 1/3EV
114
KNoise Filter
Standard
116
Low ISO Processing Drive Priority
116
Noise Reduction Auto
117
4. Exposure
KFlicker Scan
108
EV Step 1/3EV
107
Exposure
Shift
p
107
B
C
5. Metering
Metering
p
109
Metering during B
Auto
110
B Auto Reset
No
110
AEL by half-pressing a
S-AF Only
111
Metering during j
Yes
112
NSpot Metering
All items:
112
6. Flash
# RC Mode
124
# X-Sync.
1/250sec
124
# Slow Limit
1/60sec
124
x
+
F
124
Balanced Flash Metering
125
Flash Mode
Settings
Reduce Red-eye No
123
Synchro Settings First Curtain
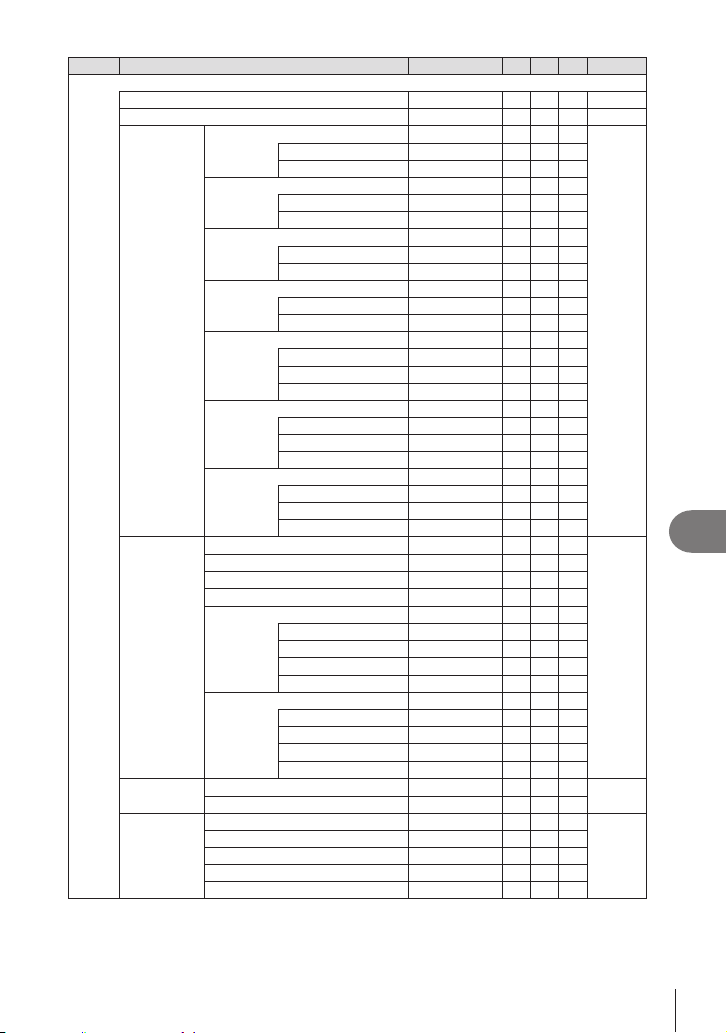
315
EN
Information
10
Page Function Default *1 *2 *3
g
7. Drive Mode
Drive j/Y
o
126
Anti-Flicker Shooting
135
Sequential
Shooting
Settings
j
128
Max fps 10fps
Frame Count Limiter
j
Max fps 20fps
Frame Count Limiter
jSH1
Max fps 120fps
Frame Count Limiter
jSH2
Max fps 50fps
Frame Count Limiter
ProCap
Max fps 20fps
Pre-shutter Frames 10
Frame Count Limiter 50
ProCap SH1
Max fps 128fps
Pre-shutter Frames 28
Frame Count Limiter 50
ProCap SH2
Max fps 50fps
Pre-shutter Frames 12
Frame Count Limiter 50
Self-timer
Settings
Y
12
130
Y
12
(without
)
Y
2
Y
2
Y
C
Number of Frames 3f
Y Timer
1sec
Interval Length 0.5sec
Every Frame AF
Y
C
(without
)
Number of Frames 3f
Y Timer
1sec
Interval Length 0.5sec
Every Frame AF
Anti-Shockr
Settings
Anti-Shockr
131
Waiting Time 0sec
Silents
Settings
Waiting Time 0sec
132
Noise Reduction
8
Not Allow
AF Illuminator Not Allow
Flash Mode Not Allow
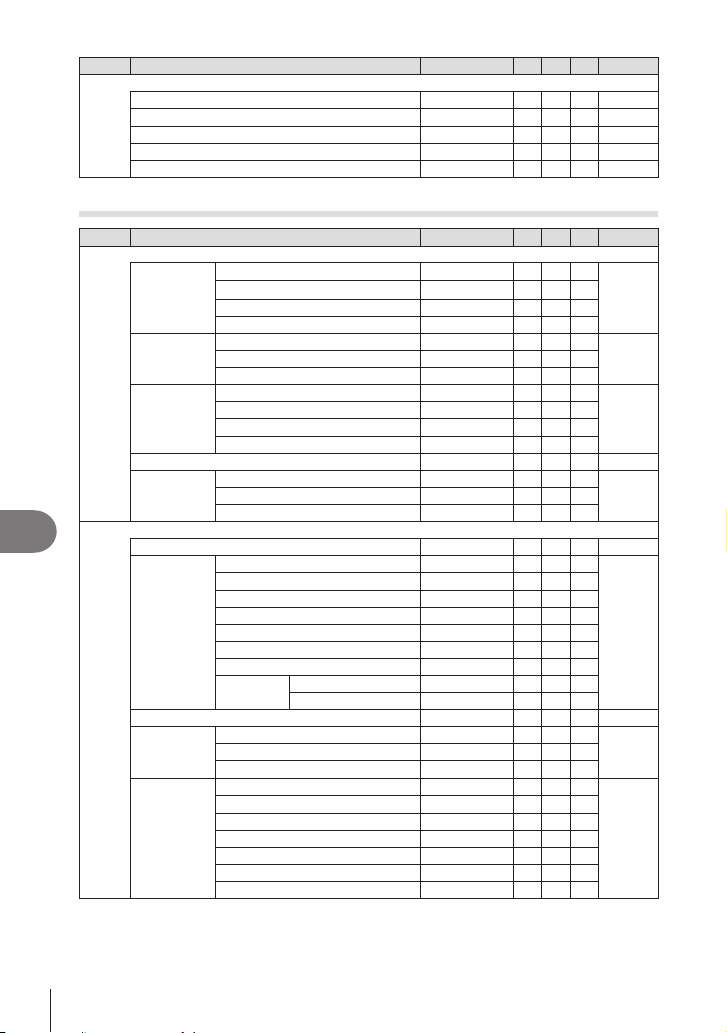
316
EN
Information
10
Page Function Default *1 *2 *3
g
8. Image Stabilizer
KImage Stabilizer
S-IS Auto
136
jImage Stabilizer
Fps Priority
138
aImage Stabilizer
On
138
Handheld Assist
139
Lens I.S. Priority
139
‘ Tab
Page Function Default *1 *2 *3
g
1. Computational Modes
High Res
Shot
High Res Shot
156
hK
AF+RAW
Waiting Time 0sec
#Charge Time
0sec
Live ND
Shooting
Live ND Shooting
158
ND Number ND8(3EV)
LV Simulation On
Focus
Stacking
Focus Stacking
160
Set number of shots 8
5
#Charge Time
0sec
HDR
162
Multiple
Exposure
Multiple Exposure
163
Auto Gain
Overlay
2. Other Shooting Functions
KDigital Tele-converter
166
Interval
Shooting
Interval Shooting
167
Number of Frames 100
Start Waiting Time 00:00:01
Interval Length 00:00:01
Interval Mode Time Priority
Exposure Smoothing On
Time Lapse Movie
Movie
Settings
Movie Resolution FullHD
Frame Rate 10fps
Keystone Comp.
170
Fisheye
Compensation
Fisheye Compensation
171
Angle 1
j/iCorrection
BULB/TIME/
COMP
Settings
Bulb/Time Focusing On
173
Bulb/Time Timer 8min
Live Composite Timer 3h
Bulb/Time Monitor -7
Live Bulb
Live Time
0.5sec
Composite Settings
1/2sec
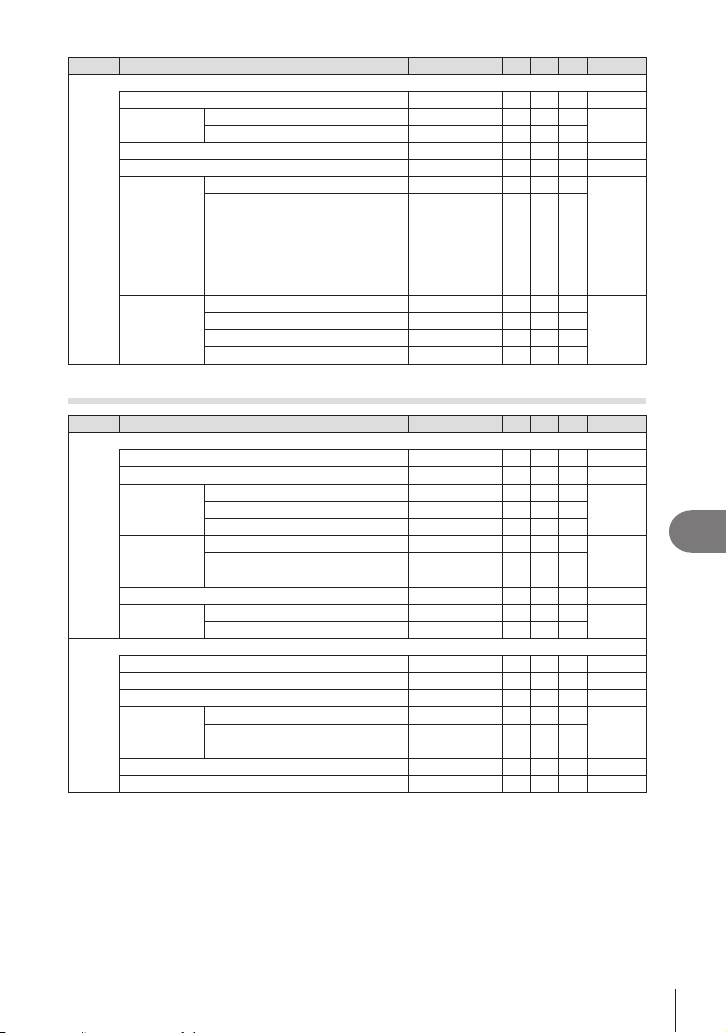
317
EN
Information
10
Page Function Default *1 *2 *3
g
3. Bracketing
AE BKT
174
WB BKT A-B
175
G-M
FL BKT
175
ISO BKT
176
ART BKT ART BKT
177
ART BKT Setting ART only:
(ART with
multiple
types: only
the [ type is
checked
.)
Focus BKT Focus BKT
178
Set number of shots 99
5
#Charge Time
0sec
AF Tab
Page Function Default *1 *2 *3
g
1. AF
KAF Mode
S-AF
72
KAF+MF
82
Starry Sky AF
Setting
AF Priority Speed
85
AF Operation
eStart/Stop
Release Priority
KAF by
half-pressing
a
S-AF Yes
83
C-AF/C-AF+TR Ye s
e in MF mode
No
84
Release
Priority
S-AF
84
C-AF/C-AF+TR On
2. AF
AF Illuminator On
96
AF Area Pointer On1
96
Face & Eye Detection
88
KFace
& Eye AF
Button
a
I Priority
89
e
I Priority
Subject Detection
90
Eye Detection Frame On
91
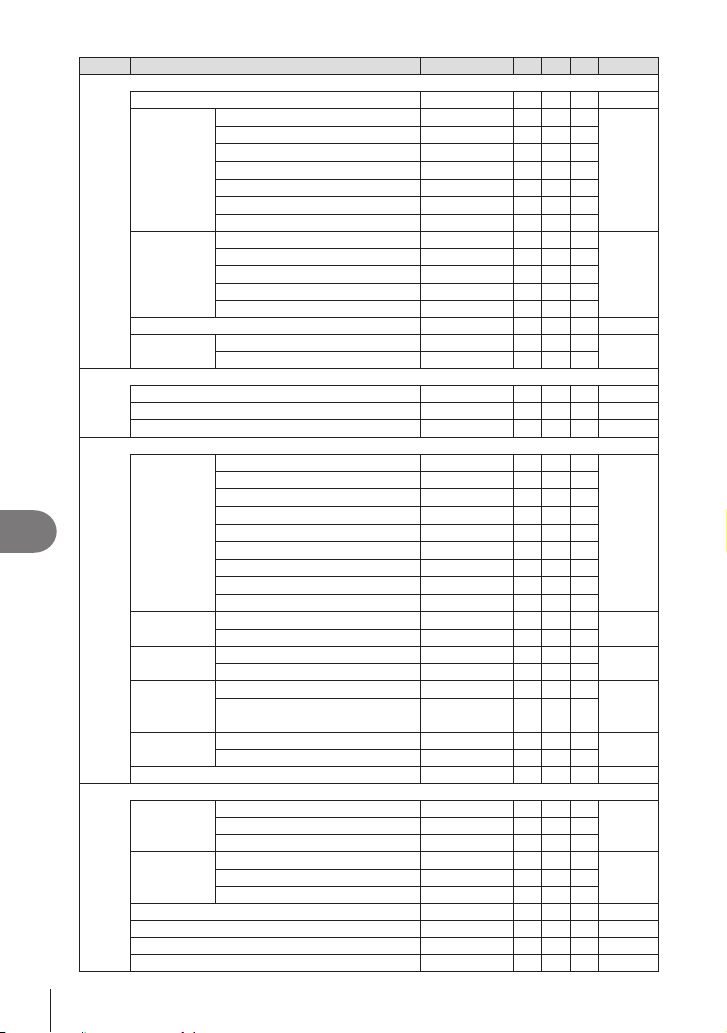
318
EN
Information
10
Page Function Default *1 *2 *3
g
3. AF
KC-AF Sensitivity
87
KC-AF
Center
Priority
zCross
86
AMid
BLarge
CC1
(without
)
CC2
(without
)
CC3
(without
)
CC4
(without
)
KAF Limiter
AF Limiter
92
Distance for On1 5.0 - 999.9m
Distance for On2 10.0 - 999.9m
Distance for On3 50.0 - 999.9m
Release Priority On
KAF Scanner
On
94
KAF Focus
Adjustment
AF Focus Adjustment
95
Fine-tuning Value
4. Movie AF
nAF Mode
C-AF
72
nC-AF Speed
87
nC-AF Sensitivity
87
5. AF Target Settings & Operations
KAF
Target Mode
Settings
oAll
79
MSingle
zCross
AMid
BLarge
CC1
(without
)
CC2
(without
)
CC3
(without
)
CC4
(without
)
KOrientation
Linked N
AF Target Mode
(without
)
97
AF Target Point
(without
)
KN Set
Home
AF Target Mode
(oAll)
98
AF Target Point
NSelect
Screen
Settings
f dial
N Mode
99
d button
6Pos
N Loop
Settings
N Loop Selection
100
Via oAll
No
AF Targeting Pad
101
6. MF
MF Assist Magnify
102
Peaking
Focus Indicator
Peaking
Settings
Peaking Color Red
103
Highlight Intensity Normal
Image Brightness Adj.
Preset MF distance 999.9m
104
MF Clutch Operative
104
Focus Ring
b
104
Reset Lens
105
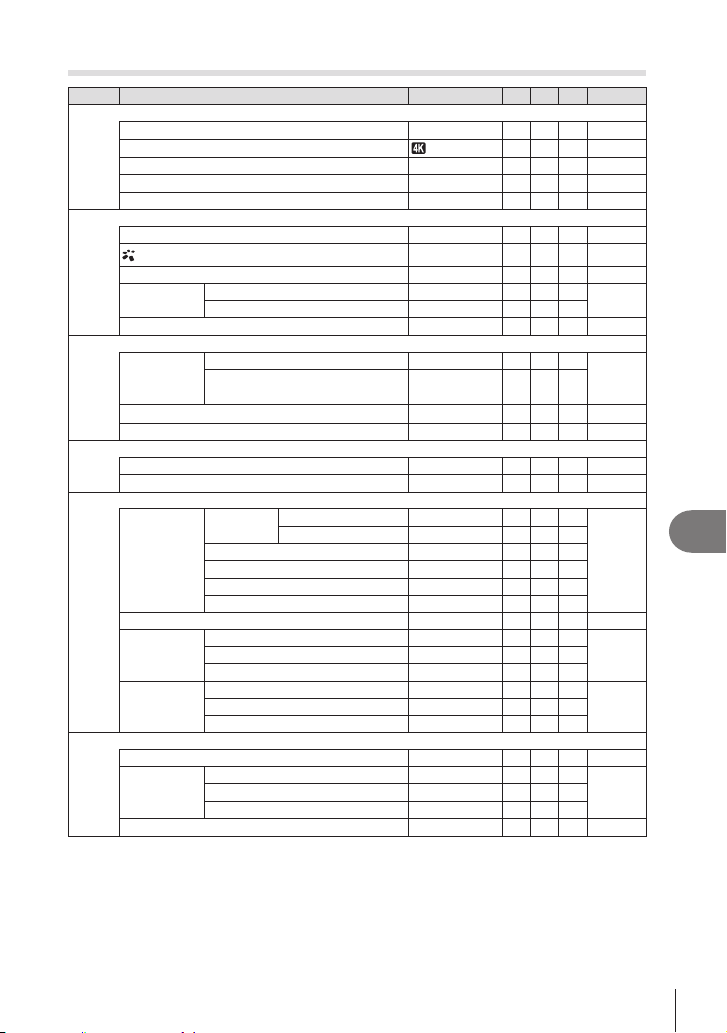
319
EN
Information
10
n
Tab
Page Function Default *1 *2 *3
g
1. Basic Settings/Image Quality
nVideo Codec
H.264
144
nK
60p L-8
141
nMode
P
59
nFlicker Scan
108
nDigital Tele-converter
166
2. Picture Mode/WB
nPicture Mode Same as K
145
nView Assist
155
nWB
WB Auto
150
nAll x
A-B 0
153
G-M 0
nW Keep Warm Color
On
154
3. ISO/Noise Reduction
bISO-A
Upper/
Default
Upper Limit 12800
114
Default 200
bISO-Auto
On
115
nNoise Filter
Standard
116
4. Image Stabilizer
nImage Stabilizer
M-IS1
136
nIS Level
137
5. Sound Recording/Connection
Sound
Recording
Settings
Recording
Volume
Built-In R
180
MIC R
RVolume Limiter
On
Wind Noise Reduction
Recording Rate 48kHz/16bit
RPlug-in Power
Headphone Volume 8
181
Time Code
Settings
Time Code Mode Drop Frame
181
Count Up Rec Run
Starting Time
nHDMI
Output
Output Mode Monitor
182
REC Bit
Time Code On
6. Shooting Assist
Center Marker
183
Zebra Pattern
Settings
Zebra Pattern Settings
184
b Level 1
80
c Level 2
Red Frame during RREC
On
185

320
EN
Information
10
q
Tab
Page Function Default *1 *2 *3
g
1. File
198
Reset All Images
198
Copy All
194
Erase All
194
2. Operations
qRFunction
205
qDial Function
205
qaDefault Setting
Recently
205
Quick Erase
195
RAW+JPEG Erase RAW+JPEG
195
RAW+JPEG h
JPEG
196
3. Displays
R
On
205
qInfo Settings
All items:
206
qaInfo Settings
All items:
206
G Settings
[C25] and
[Calendar]:
207
Rating Settings
All items:
196
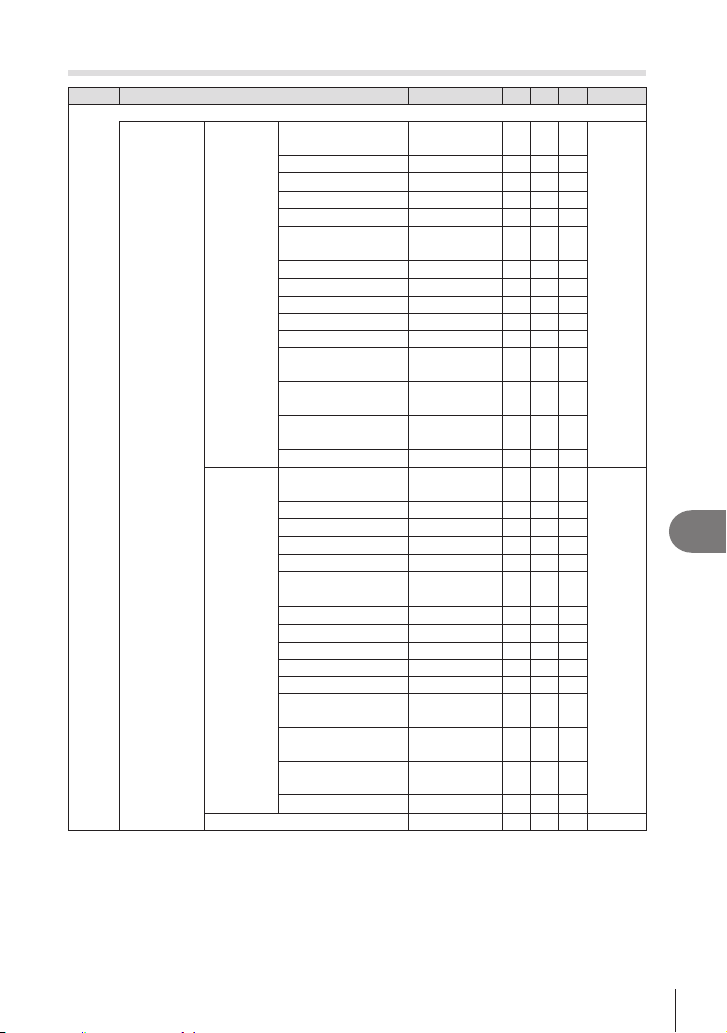
321
EN
Information
10
G Tab
Page Function Default *1 *2 *3
g
1. Operations
Button
Settings
KButton
Function
F
Exposure
Comp.
208
R
High Res Shot
K
ISO
e
AF-ON
u
AEL
u u View
Selection
d
D
E
Y
Z
Preview
PBH
F
Exposure
Comp.
PBH
K
ISO
PBH
e
AF-ON
l
AF Stop
nButton
Function
F
Exposure
Comp.
208
R RREC
K
ISO
e
AF-ON
u
AEL
u u View
Selection
d
D
E
Y
Peaking
Z
Magnify
PBH
F
Exposure
Comp.
PBH
K
ISO
PBH
e
AF-ON
l
AF Stop
nShutter Function
216

322
EN
Information
10
Page Function Default *1 *2 *3
g
Dial Settings
KDial
Function
P Lever 1
k: Exposure
Comp.
i: Ps
216
Lever 2
k: ISO
i: WB
A Lever 1
k: Exposure
Comp.
i: Aperture
Value
Lever 2
k: ISO
i: WB
S Lever 1
k: Exposure
Comp.
i: Shutter
Speed
Lever 2
k: ISO
i: WB
M/B Lever 1
k: Aperture
Value
i: Shutter
Speednnn
Lever 2
k: Exposure
Comp.
j: ISO
nDial
Function
P Lever 1
k: Exposure
Comp.
j: Exposure
Comp.
216
Lever 2
k:
R
VOL
j:
R
VOL
A
Lever 1
k: Exposure
Comp.
j: Aperture
Value
Lever 2
k: RVOL
j: RVOL
S Lever 1
k: Exposure
Comp.
j: Shutter
Speed
Lever 2
k: RVOL
j: RVOL
M Lever 1
k: Aperture
Value
j: Shutter
Speed
Lever 2
k: RVOL
j: ISO
g Loop in Menu Tab
No
238
Dial
Direction
Exposure Dial1
218
Ps Dial1
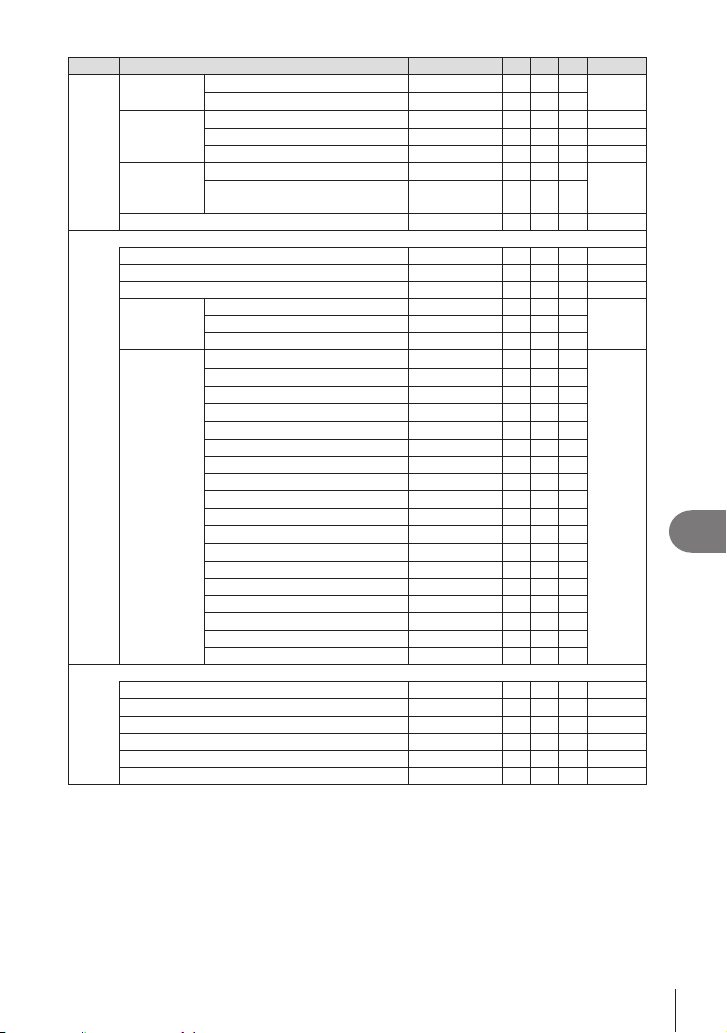
323
EN
Information
10
Page Function Default *1 *2 *3
g
Multi Selector
Settings
SCenter Button
218
TDirection Key
N
Fn Lever
Settings
KFn Lever Function
mode2
220
nFn Lever Function
mode2
220
Fn Lever/Power Lever Fn
222
Electronic
Zoom
Settings
KElec. Zoom Speed
Normal
222
nElec. Zoom Speed
Normal
vLock
223
2. Operations
LV Close Up Mode mode2
223
zLock
224
Priority Set No
238
Menu Cursor
Settings
Page Cursor Position Reset
237
Menu Start Position Recently
Shortcut to B Mode Settings On
Press-and-
hold Time
End LVa
0.7sec
224
Reset LVa Frame
0.7sec
Reset F
0.7sec
Reset x
0.7sec
Reset x
0.7sec
Reset s
0.7sec
Reset 7
0.7sec
Reset c
0.7sec
Reset N
0.7sec
Call EVF Auto Switch 0.7sec
Reset D
0.7sec
End D
0.7sec
Switch G Lock
0.7sec
End Flicker Scan 0.7sec
Call WB BKT Setting 0.7sec
Call ART BKT Setting 0.7sec
Call Focus BKT Setting 0.7sec
Call W Setting
0.7sec
3. Live View
KLV Mode
Standard
225
KNight Vision
225
Frame Rate Normal
225
Art LV Mode mode1
226
Anti-Flicker LV
226
On
227

324
EN
Information
10
Page Function Default *1 *2 *3
g
4. Information
EVF Style
VStyle 2
228
KInfo Settings
[Image Only],
[Information
1] and
[Information
2]:
230
Info by half-pressing a
On2
231
VKInfo Settings
[Image Only],
[Information
1] and
[Information
2]:
232
Va Level Gauge
On
233
nInfo Settings
[Image
Only] and
[Information
1]:
231
5. Grid/Other Displays
KGrid
Settings
Display Color Preset 1
234
Displayed Grid
Color of Preset 1 R/G/B: 38
Color of Preset 2 R: 180
G/B: 0
VKGrid
Settings
Exclusive for V
235
Display Color Preset 1
Displayed Grid
Color of Preset 1 R/G/B: 38
Color of Preset 2 R: 180
G/B: 0
nGrid
Settings
Exclusive for n
234
Display Color Preset 1
Displayed Grid
Color of Preset 1 R/G/B: 38
Color of Preset 2 R: 180
G/B: 0
Multi Function Settings All items
except ISO:
236
Histogram
Settings
Highlight 255
236
Shadow 0
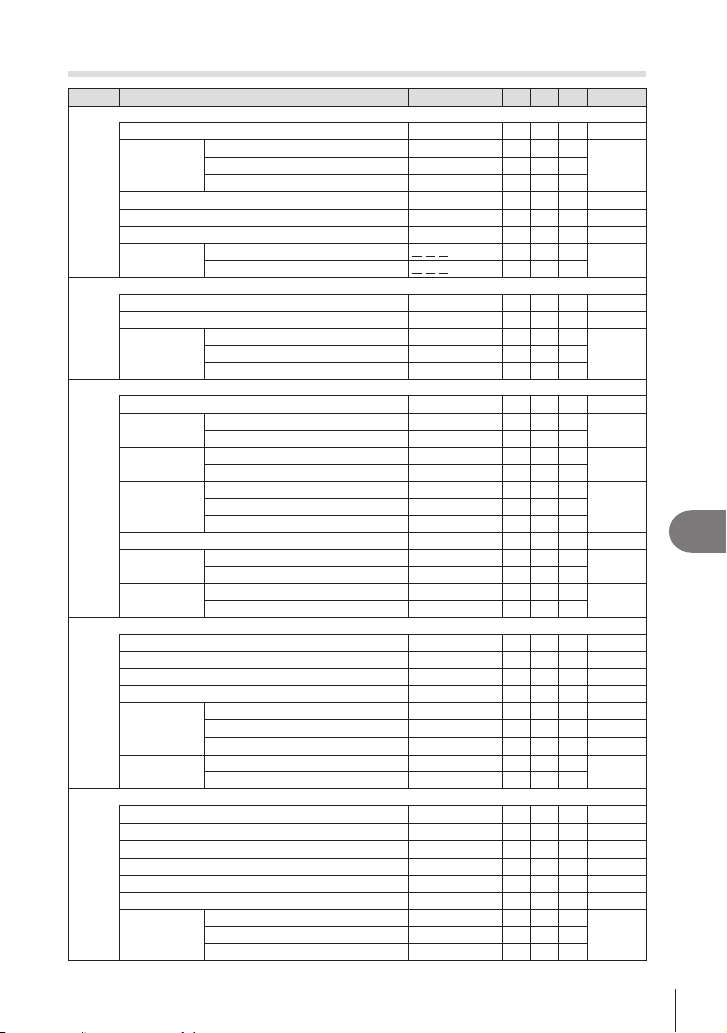
325
EN
Information
10
e
Tab
Page Function Default *1 *2 *3
g
1. Card/Folder/File
Card Formatting
241
KCard Slot
Settings
KSave Settings
Standard
242
KSave Slot
5
qSlot
5
nCard Slot Settings
5
243
Assign Save Folder Do not assign
244
File Name Reset
244
Edit Filename sRGB
M D D
245
Adobe RGB
M D D
2. Information Record
Lens Info Settings
246
dpi Settings 350dpi
247
Copyright
Info.
Copyright Info.
247
Artist Name
Copyright Name
3. Monitor/Sound/Connection
Touchscreen Settings On
249
Monitor
Adjust
k (Brightness)
249
j (Color temperature)
A0, G0
EVF Adjust
k (Brightness)
Auto
250
j (Color temperature)
A0, G0
Eye Sensor
Settings
EVF Auto Switch On
250
Behavior when switched
Maintain Screen
When Monitor is Opened Inoperative
8
On
251
HDMI
Settings
Output Size 4K
251
Output Frame Rate 60p Priority
USB Settings USB Mode Select
252
Power Supply from USB Yes
4. Wi-Fi/Bluetooth
Airplane Mode
260
Bluetooth
262
Wireless Shutter Setting
279
Wi-Fi Connection
271
d Settings
263
d Connection Password
267
Reset d Settings
266
Wi-Fi PC
Settings
Wi-Fi MAC Address
276
Reset Wi-Fi PC Settings
5. Battery/Sleep
NBattery Status
253
NBattery Priority
PBH Battery
253
nNDisplay Pattern
min
253
Backlit LCD Hold
254
Sleep 1min
254
4h
254
Quick Sleep
Mode
Quick Sleep Mode
255
Backlit LCD 8sec
Sleep 10sec

326
EN
Information
10
Page Function Default *1 *2 *3
g
6. Reset/Clock/Language/Others
Reset/
Initialize
Settings
Reset Shooting Settings
257
Initialize All Settings
X Settings X
257
Time Zone
W
257
Level Adjust
258
Pixel Mapping
258
Firmware Version
258
258
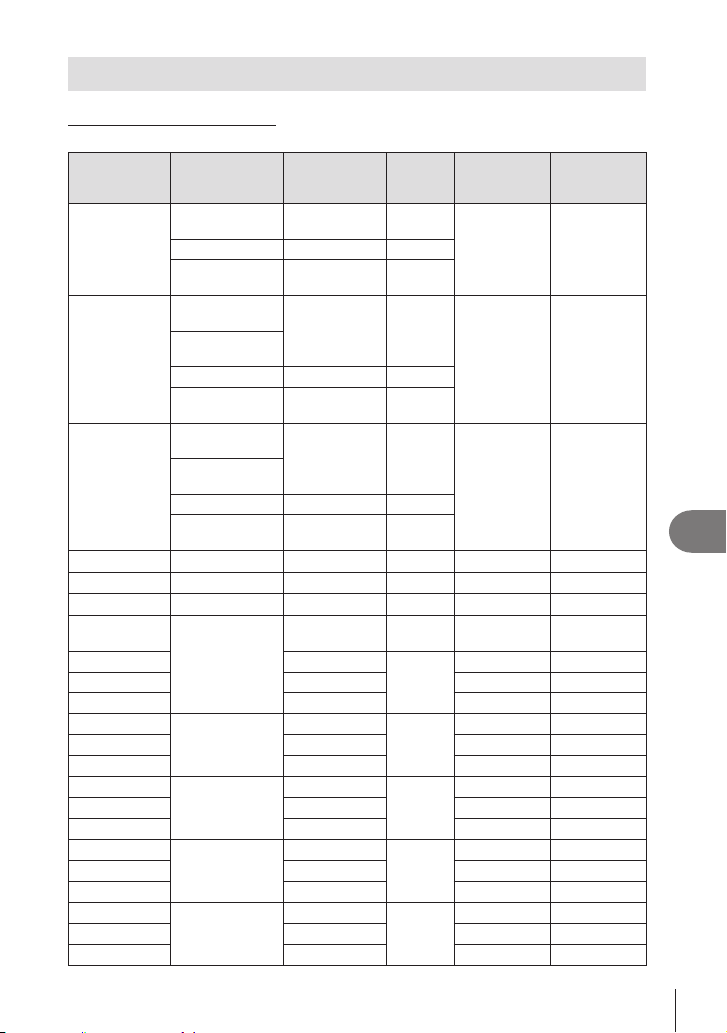
327
EN
Information
10
Memory Card Capacity
Memory Card Capacity: Photos
Figures are for a 64 GB SDXC card used to record photos with an aspect ratio of 4:3.
Record mode
Image size
(Pixel Count)
Compression
ratio
File
format
File size (MB)
(approx.)
Number of
storable still
pictures
AF+RAW
(Tripod)
10368×7776
Loss-less
compression
ORF
(Tripod)
183.6
(Tripod)
323
10368×7776 1/4 JPEG
5184×3888
Loss-less
compression
ORI
IF+RAW
(Tripod)
10368×7776
Loss-less
compression
ORF
(Tripod)
170.4
(Handheld)
122.9
(Tripod)
350
(Handheld)
483
(Handheld)
8160×6120
8160×6120 1/4 JPEG
5184×3888
Loss-less
compression
ORI
JF+RAW
(Tripod)
10368×7776
Loss-less
compression
ORF
(Tripod)
159.7
(Handheld)
112.2
(Tripod)
376
(Handheld)
534
(Handheld)
8160×6120
5760×4320 1/4 JPEG
5184×3888
Loss-less
compression
ORI
AF
10368×7776 1/4 JPEG 35.2 1564
IF
8160×6120 1/4 JPEG 22 2503
JF
5760×4320 1/4 JPEG 11.2 4882
RAW
5184×3888
Loss-less
compression
ORF 22.4 2727
YSF
1/2.7
JPEG
13.4 4103
YF
1/4 9.2 5954
YN
1/8 4.9 11355
uSF
3200×2400
1/2.7
JPEG
5.4 10172
uF
1/4 3.8 14360
uN
1/8 2.2 24413
vSF
1920×1440
1/2.7
JPEG
2.3 24413
vF
1/4 1.7 32551
vN
1/8 1.1 48827
wSF
1280×960
1/2.7
JPEG
1.3 40689
wF
1/4 1.1 48827
wN
1/8 0.4 122067
xSF
1024×768
1/2.7
JPEG
1.1 54252
xF
1/4 0.5 122067
xN
1/8 0.3 162756

328
EN
Information
10
• The number of storable still pictures may change according to the subject, whether or not
print reservations have been made, and other factors. In certain instances, the number
of storable still pictures displayed on the monitor will not change even when you take
pictures or erase stored images.
•
• The maximum number of storable still pictures displayed on the monitor is 9999.
Memory Card Capacity: Movies
Figures are for a 64 GB SDXC memory card.
Frame size
Motion
compensation
Playback
frame rate
Capacity (approx.)
When [nVideo
Codec] is set to
[H.264]
When [nVideo
Codec] is set to
[H.265]
C4K —
59.94p 41 minutes 54 minutes
50.00p 41 minutes 54 minutes
29.97p 81 minutes 108 minutes
25.00p 81 minutes 108 minutes
24.00p 81 minutes 108 minutes
23.98p 81 minutes 108 minutes
4K —
59.94p 41 minutes 54 minutes
50.00p 41 minutes 54 minutes
29.97p 81 minutes 108 minutes
25.00p 81 minutes 108 minutes
23.98p 81 minutes 108 minutes
FHD
A-I
29.97p 41 minutes 101 minutes
25.00p 41 minutes 101 minutes
23.98p 41 minutes 101 minutes
L-GOP
59.94p 160 minutes 199 minutes
50.00p 160 minutes 199 minutes
29.97p 312 minutes 384 minutes
25.00p 312 minutes 384 minutes
23.98p 312 minutes 384 minutes
• Figures are for footage recorded at the maximum frame rate. The actual bit rate varies
with the frame rate and scene recorded.
•
the 3-hour limit is reached).
• When an SD/SDHC card is used, movies over 4 GB in size are recorded over multiple
before the 4 GB limit is reached).
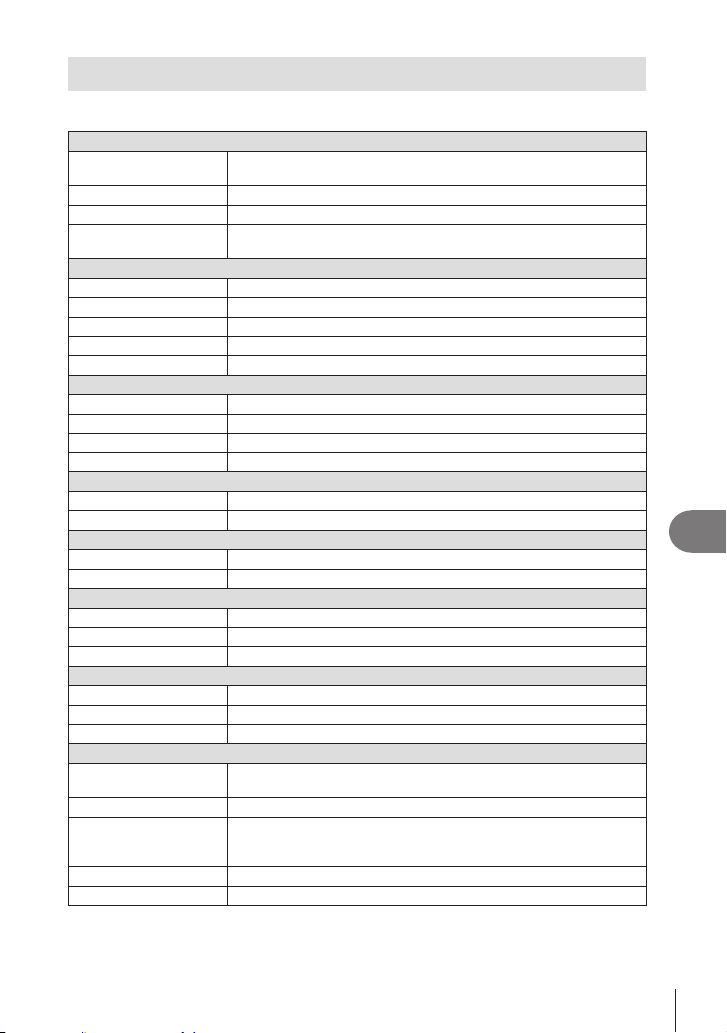
329
EN
Information
10
Specications
Ca mera
Product type
Product type Digital camera with interchangeable Micro Four Thirds Standard lens
system
Lens M.ZUIKO DIGITAL, Micro Four Thirds System Lens
Lens mount Micro Four Thirds mount
Equivalent focal length on
Approx. twice the focal length of the lens
Image pickup device
Product type 4/3” Live MOS sensor
Total no. of pixels Approx. 22.93 million pixels
Approx. 20.37 million pixels
Screen size 17.4 mm (H) × 13.0 mm (V)
Aspect ratio 1.33 (4:3)
Viewnder
Type
No. of pixels Approx. 5.76 million dots
100%
Eye point
)
Live view
Sensor Uses Live MOS sensor
100%
Monitor
Product type 3.0” TFT color LCD, Vari-angle, touch screen
Total no. of pixels Approx. 1.62 million dots (aspect ratio 3:2)
Shutter
Product type Computerized focal-plane shutter
Shutter speed 1/8000 - 60 sec., bulb photography, time photography
Flash sync speed Up to 1/250 sec.
Auto focus
Product type Hi-Speed Imager AF
Focusing points 1053 points
Selection of focusing point Auto, Optional
Exposure control
Metering system TTL metering system (imager metering)
Digital ESP metering/Center weighted averaging metering/Spot metering
Metered range
Shooting modes
P: Program AE (program shift available); A: Aperture priority AE;
S:
Shutter-priority AE; M: Manual;
B
: Bulb (bulb, time, and composite);
C1/C2 /C3 /C4 : Custom Modes; n: Movie
ISO sensitivity L80; L100; 200 - 25600 in steps of 1/3 or 1 EV
Exposure compensation

330
EN
Information
10
White balance
Mode setting Auto/Preset WB (7 settings)/Customized WB/One-touch WB (camera can
store up to 4 settings)
Recording
Memory SD, SDHC and SDXC
UHS-II compatible
Recording system Digital recording, JPEG (DCF2.0), RAW Data
Applicable standards Exif 2.31, Digital Print Order Format (DPOF)
Sound with still pictures Wave format
Movie MOV (H.264/MPEG-4 AVC, H.265/HEVC)
Audio Stereo linear PCM, 16 bit; sampling frequency 48 kHz (wave format)
Stereo linear PCM, 24 bit; sampling frequency 96 kHz (wave format)
Playback
Display format Single-frame playback/Close-up playback/Index display/Calendar display
Drive
Drive mode Single frame; sequential; anti-shock; silent; Pro Capture; self-timer
Sequential shooting
Up to 10 fps (j)
j/ProCap)
j/ProCap SH2)
j/ProCap SH1)
Self-timer Operation time: 12 sec./2 sec./Customized
Energy saving function Switch to sleep mode: 1 minute, Power OFF: 4 hours
(This function can be customized.)
Flash
Flash control mode
X-Sync. 1/250 s or slower
Wireless LAN
Compatible standard IEEE 802.11a/b/g/n/ac *
Bluetooth
®
Compatible standard Bluetooth Version 4.2 BLE
External connector
microphone jack (ø3.5 mm stereo mini-jack); headphone jack (ø3.5 mm stereo mini-jack)
Power supply
Battery Lithium-ion Battery ×1
Dimensions/weight
Dimensions Approx. 134.8 mm (W) × 91.6 mm (H) × 72.7 mm (D) (5.4” × 3.7” × 2.9”)
(excluding protrusions)
W
eight Approx. 599 g (1.3 Ib.) (including battery and memory card)
Operating environment
Temperature
(storage)
Humidity 30% - 90% (operation)/10% - 90% (storage)
Water resistance Type: IEC Standard publication 60529 IPX3 (applies if camera is used
with our IPX3 or higher water-resistant lens)
331
EN
Information
10
Fla sh
MODEL NO. FL-LM3
Guide number 9.1 (ISO100•m)
12.7 (ISO200•m)
Firing angle
Covers the picture angle of a 12 mm lens (equivalent to 24 mm in 35 mm
format)
Dimensions Approx. 43.6 mm (W) × 49.4 mm (H) × 39 mm (D) (1.7” × 1.9” × 1.5”)
Weight Approx. 51 g (1.8 oz.)
Splash resistance Type Equivalent to IEC Standard publication 60529 IPX1
Lit hium -ion batt e r y
MODEL NO. BLX-1
Type Rechargeable Lithium-ion battery
Nominal voltage DC 7.2 V
Nominal capacity 2280 mAh
No. of charge and
discharge times
Approx. 500 times (varies with usage conditions)
Ambient temperature 0 °C - 40 °C (32 °F - 104 °F) (charging)
Dimensions Approx. 40 mm (W) × 22 mm (H) × 55 mm (D) (1.6” × 0.9” × 2.2”)
Weight Approx. 86 g (3.1 oz.)
USB-AC a da pt er
MODEL NO. F-7AC-1/F-7AC-2
Rated input AC 100 V - 240 V (50/60 Hz)
Rated output
DC 5V, 3 A
DC 9V, 3 A
Ambient temperature
0 °C - 40 °C (32 °F - 104 °F) (operation)/
–20 °C - 60 °C (–4 °F - 140 °F) (storage)
•
or obligation on the part of the manufacturer.
•
Multimedia Interface, and the HDMI Logo are
trademarks or registered trademarks of HDMI
Licensing Administrator, Inc. in the United
States and other countries.
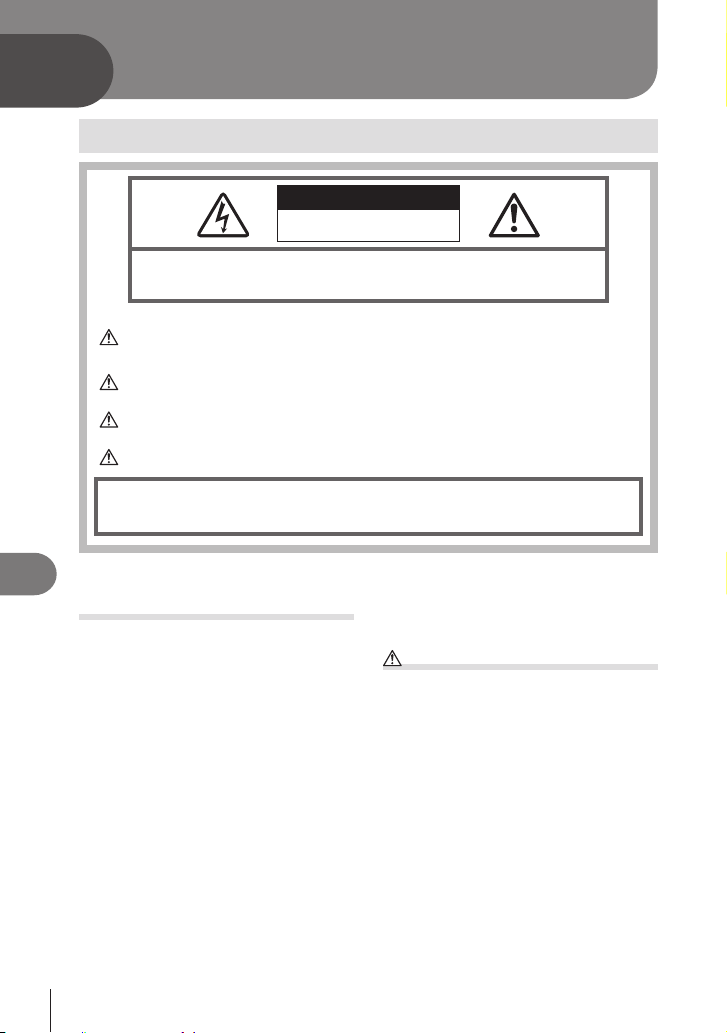
332
EN
SAFETY PRECAUTIONS
11
11
SAFETY PRECAUTIONS
CAUTION
RISK OF ELECTRIC SHOCK
DO NOT OPEN
CAUTION: TO REDUCE THE RISK OF ELECTRICAL SHOCK, DO NOT
REMOVE COVER (OR BACK). NO USER-SERVICEABLE PARTS INSIDE.
REFER SERVICING TO QUALIFIED SERVICE PERSONNEL.
An exclamation mark enclosed in a triangle alerts you to important operating
and maintenance instructions in the documentation provided with the
product.
WARNING
If the product is used without observing the information given under this
symbol, serious injury or death may result.
CAUTION
If the product is used without observing the information given under this
symbol, injury may result.
NOTICE
If the product is used without observing the information given under this
symbol, damage to the equipment may result.
WARNING!
TO AVOID THE RISK OF FIRE OR ELECTRICAL SHOCK, NEVER DISASSEMBLE, EXPOSE
THIS PRODUCT TO WATER OR OPERATE IN A HIGH HUMIDITY ENVIRONMENT.
SAFETY PRECAUTIONS
General Precautions
Re ad All I nstruc t ions — Before you use the
product, read all operating instructions. Save all
manuals and documentation for future reference.
Pow e r Sourc e — Connect this product only to
the power source described on the product label.
Foreign Obje c ts — To avoid personal injury,
never insert a metal object into the product.
Clea ning — Always unplug this product from
the wall outlet before cleaning. Use only a damp
cloth for cleaning. Never use any type of liquid or
aerosol cleaner, or any type of organic solvent to
clean this product.
He a t — Never use or store this product near
any heat source such as a radiator, heat register,
stove, or any type of equipment or appliance that
Lightning — If a lightning storm occurs while
using a USB-AC adapter, remove it from the wall
outlet immediately.
Att a chme nt s — For your safety, and to avoid
damaging the product, use only accessories
recommended by our company.
Locat ion — To avoid damage to the product,
mount the product securely on a stable tripod,
stand, or bracket.
WARNING
• Do not use the camera near ammable or
explosive gases.
• Rest your eyes periodically when using
the viewnder.
Failure to observe this precaution could result
in eyestrain, nausea, or sensations similar to
motion sickness. The length and frequency
of the required rest varies with the individual;
use your own judgement. If you feel tired
necessary consult a physician.
• Do not use the ash and LED (including
AF illuminator) on people (infants, small
children, etc.) at close range.
• You must be at least 1 m (3 ft.) away
from the faces of your subjects. Firing the
cause a momentary loss of vision.

333
EN
SAFETY PRECAUTIONS
11
• Do not look at the sun or strong lights
with the camera.
• Keep young children, infants away from
the camera.
• Always use and store the camera out of
the reach of young children and infants to
prevent the following dangerous situations
which could cause serious injury:
• Becoming entangled in the camera
strap, causing strangulation.
• Accidentally swallowing the battery,
cards or other small parts.
•
own eyes or those of another child.
• Accidentally being injured by the
moving parts of the camera.
• If you nd that the USB-AC adapter or
charger is extremely hot or notice any
unusual odors, noise, or smoke around
it, unplug the power plug from wall outlet
immediately and stop using it. Then,
contact an authorized distributor or
service center.
• Stop using the camera immediately if
you notice any unusual odors, noise, or
smoke around it.
• Never remove the batteries with bare
your hands.
• Never hold or operate the camera with wet
hands.
This may cause overheating, exploding,
burning, electrical shocks, or malfunctions.
•
Do not leave the camera in places where
it may be subject to extremely high
temperatures.
• Doing so may cause parts to deteriorate
and, in some circumstances, cause the
charger or USB-AC adapter if it is covered
(such as a blanket). This could cause
• Handle the camera with care to avoid
getting a low temperature burn.
• When the camera contains metal
parts, overheating can result in a low-
temperature burn. Pay attention to the
following:
• When used for a long period, the
camera will get hot. If you hold on
to the camera in this state, a low-
temperature burn may be caused.
• In places subject to extremely cold
temperatures, the temperature of the
camera’s body may be lower than the
environmental temperature. If possible,
wear gloves when handling the camera
in cold temperatures.
• To protect the high-precision technology
contained in this product, never leave the
camera in the places listed below, no matter if
in use or storage:
• Places where temperatures and/or
humidity are high or go through extreme
changes. Direct sunlight, beaches, locked
cars, or near other heat sources (stove,
• In sandy or dusty environments.
•
• In wet places, such as bathrooms or in
the rain.
• In places prone to strong vibrations.
• The camera uses a lithium ion battery
or charger. Do not use any other USB-AC
adapters or chargers.
• Never incinerate or heat batteries in
microwaves, on hot plates, or in pressure
vessels, etc.
• Never leave the camera on or near
electromagnetic devices.
This may cause overheating, burning, or
exploding.
•
Do not connect terminals with any metallic
objects.
• Take precautions when carrying or storing
batteries to prevent them from coming into
contact with any metal objects such as
jewelry, pins, fasteners, keys, etc.
The short circuit may cause overheating,
exploding, or burning, which burn or damage
you.
• To prevent causing battery leaks or damaging
their terminals, carefully follow all instructions
regarding the use of batteries. Never attempt
to disassemble a battery or modify it in any
way, solder, etc.
•
your eyes immediately with clear, cold
running water and seek medical attention
immediately.
• If you cannot remove the battery from the
camera, contact an authorized distributor
or service center. Do not try to remove the
battery by force.
Damage to the battery exterior (scratches,
etc.) may produce heat or an explosion.
• Always store batteries out of the reach of
small children and pets. If they accidentally
swallow a battery, seek medical attention
immediately.
• To prevent batteries from leaking,
use only batteries recommended for use with
this product.

334
EN
SAFETY PRECAUTIONS
11
• If rechargeable batteries have not been
charging them and do not use them.
• Do not use batteries with scratches or damage
to the casing, and do not scratch the battery.
• Never subject batteries to strong shocks or
continuous vibration by dropping or hitting.
This may cause exploding, overheating, or
burning.
• If a battery leaks, has unusual odor, becomes
discolored or deformed, or becomes
abnormal in any other way during operation,
stop using the camera, and keep away from
•
medical attention immediately.
• Never use lithium-ion batteries in a low-
temperature environment. Doing so may cause
generation of heat, ignition, or explosion.
• The lithium-ion battery is designed to be used
only for the digital camera. Do not use the
battery to other devices.
• Do not allow children or animals/pets to
handle or transport batteries (prevent
dangerous behaviour such as licking,
putting in mouth or chewing).
Use Only Dedicated Rechargeable
Battery, Battery Charger and
USB-AC adapter
We strongly recommend that you use only
the genuine rechargeable battery, battery
company with this camera. Using a non-genuine
rechargeable battery, battery charger and/or
injury due to leakage, heating, ignition or damage
to the battery. Our company does not assume
any liability for accidents or damage that may
result from the use of a battery, battery charger,
genuine accessories.
CAUTION
• Do not cover the ash with a hand while
ring.
• The included USB-AC adapter F-7AC is
designed to be used only with this camera.
Other cameras cannot be charged with this
USB-AC adapter.
• Do not connect the included USB-AC adapter
F-7AC to equipment other than this camera.
• Never store batteries where they will be
exposed to direct sunlight, or subjected to
high temperatures in a hot vehicle, near a
heat source, etc.
• Keep batteries dry at all times.
• The battery may become hot during
prolonged use. To avoid minor burns, do not
remove it immediately after using the camera.
• This camera uses one of our lithium-ion
There is a risk of explosion if the battery is
replaced with the incorrect battery type.
• Please recycle batteries to help save our
planet’s resources. When you throw away
dead batteries, be sure to cover their
terminals and always observe local laws and
regulations.
NOTICE
• Do not use or store the camera in dusty or
humid places.
• Use SD/SDHC/SDXC memory cards only.
Never use other types of cards.
If you accidently insert another type of card
into the camera, contact an authorized
distributor or service center. Do not try to
remove the card by force.
• Regularly back up important data to a
computer or other storage device to prevent
accidental loss.
• Our company accepts no liability for any loss
of data associated with this device.
• Be careful with the strap when you carry the
camera. It could easily catch on stray objects
and cause serious damage.
• Before transporting the camera, remove a
tripod and all other accessories made by
other companies.
• Never drop the camera or subject it to severe
shocks or vibrations.
• When attaching the camera to or removing
it from a tripod, rotate the tripod screw, not
the camera.
• Do not touch electric contacts on cameras.
• Do not leave the camera pointed directly
at the sun. This may cause lens or shutter
curtain damage, color failure, ghosting on
the image pickup device, or may possibly
•
strong light source or direct sunlight. The
• Do not push or pull severely on the lens.
• Be sure to remove any water droplets or other
moisture from the product before replacing
the battery or opening or closing covers.
• Before storing the camera for a long period,
remove the batteries. Select a cool, dry
location for storage to prevent condensation
or mold from forming inside the camera. After
storage, test the camera by turning it on and
pressing the shutter button to make sure that
it is operating normally.

335
EN
SAFETY PRECAUTIONS
11
• The camera may malfunction if it is used in
a location where it is subject to a magnetic/
voltage, such as near a TV set, microwave,
video game, loud speakers, large monitor
unit, TV/radio tower, or transmission towers.
again before further operation.
• Always observe the operating environment
restrictions described in the camera’s
manual.
• Insert the battery carefully as described in the
operating instructions.
• Before loading, always inspect the battery
carefully for leaks, discoloration, warping, or
any other abnormality.
• Always unload the battery from the camera
before storing the camera for a long period.
• When storing the battery for a long period,
select a cool location for storage.
• For plug-in type USB-AC adapter:
Connect the plug-in type USB-AC adapter
F-7AC correctly by plugging it vertically into
the wall outlet.
•
As the main plug of AC adapter is used to
disconnect the AC adapter from the mains,
connect it to an easily accessible AC outlet.
• Power consumption by the camera varies
depending on which functions are used.
• During the conditions described below, power
is consumed continuously and the battery
becomes exhausted quickly.
• The zoom is used repeatedly.
• The shutter button is pressed halfway
repeatedly in shooting mode, activating
the auto focus.
• A picture is displayed on the monitor for
an extended period of time.
• Using an exhausted battery may cause the
battery level warning.
• If the battery’s terminals get wet or greasy,
camera contact failure may result. Wipe the
battery well with a dry cloth before use.
• Always charge a battery when using it for
long period.
• When operating the camera with battery
power at low temperatures, try to keep
the camera and spare battery as warm as
possible. A battery that has run down at
low temperatures may be restored after it is
warmed at room temperature.
• Before going on a long trip, and especially
before traveling abroad, purchase extra
batteries. A recommended battery may be
Using the wireless LAN/
Bluetooth
®
functions
• Turn o the camera in hospitals and other
locations where medical equipment is
present.
The radio waves from the camera may
a malfunction that results in an accident. Be
sure to disable wireless LAN/Bluetooth
®
functions in the vicinity of medical equipment
(P. 260).
• Turn o the camera when onboard
aircraft.
Using wireless devices onboard may hinder
safe operation of the aircraft. Be sure to
disable wireless LAN/Bluetooth
®
functions
onboard aircraft (P. 260).
• Do not use this product where it may
interfere with nearby radar systems.
Monitor
• Do not push the monitor forcibly; otherwise
the image may become vague, resulting in
a playback mode failure or damage to the
monitor.
• A strip of light may appear on the top/bottom
of the monitor, but this is not a malfunction.
• When a subject is viewed diagonally in the
camera, the edges may appear zigzagged on
the monitor. This is not a malfunction; it will
be less noticeable in playback mode.
• In places subject to low temperatures, the
monitor may take a long time to turn on or its
color may change temporarily.
When using the camera in extremely cold
places, it is a good idea to occasionally place
it in a warm place. The monitor exhibiting
poor performance due to low temperatures
will recover in normal temperatures.
• The monitor of this product is manufactured
with high-quality accuracy, however, there
may be a stuck or dead pixel on the monitor.
on the image to be saved. Because of the
characteristics, the unevenness of the color
or brightness may also be found depending
on the angle, but this is due to the structure
of the monitor. This is not a malfunction.
Legal and Other Notices
• Our company makes no representations or
expected by using this unit lawfully, or any
request from a third person, which are caused
by the inappropriate use of this product.
• Our company makes no representations or
warranties regarding any damages or any
which are caused by erasing picture data.

336
EN
SAFETY PRECAUTIONS
11
Disclaimer of Warranty
• Our company makes no representations or
warranties, either expressed or implied, by
or concerning any content of these written
materials or software, and in no event
shall be liable for any implied warranty of
purpose or for any consequential, incidental
or indirect damages (including but not limited
business interruption and loss of business
information) arising from the use or inability
to use these written materials or software
or equipment. Some countries do not allow
the exclusion or limitation of liability for
consequential or incidental damages or of
the implied warranty, so the above limitations
may not apply to you.
• Our company reserves all rights to this
manual.
Warning
Unauthorized photographing or use of
copyrighted material may violate applicable
copyright laws. Our company assumes no
responsibility for unauthorized photographing,
use or other acts that infringe upon the rights of
copyright owners.
Copyright Notice
All rights reserved. No part of these written
materials or this software may be reproduced
or used in any form or by any means, electronic
or mechanical, including photocopying and
recording or the use of any type of information
storage and retrieval system, without the prior
written permission of our company. No liability
is assumed with respect to the use of the
information contained in these written materials
or software, or for damages resulting from the
use of the information contained therein. Our
company reserves the right to alter the features
and contents of this publication or software
without obligation or advance notice.
Trademarks
• Microsoft and Windows are registered
trademarks of Microsoft Corporation.
• SDXC Logo is a trademark of SD-3C, LLC.
• Apical logo is a registered
trademark of Apical Limited.
• Micro Four Thirds, Four Thirds, and the
Micro Four Thirds and Four Thirds logos are
trademarks or registered trademarks of the
OM Digital Solutions Corporation in Japan, the
United States, the countries of the European
Union, and other countries.
• Wi-Fi is a registered trademark of the Wi-Fi
Alliance.
• The Bluetooth
®
word mark and logos
are registered trademarks owned by the
Bluetooth SIG, Inc. and any use of such
marks by OM Digital Solutions Corporation is
under license.
•
referred to in this manual are the “Design
Rule for Camera File System/DCF” standards
stipulated by the Japan Electronics and
Information Technology Industries Association
(JEITA).
• All other company and product names are
registered trademarks and/or trademarks of
their respective owners.
THIS PRODUCT IS LICENSED UNDER THE
AVC PATENT PORTFOLIO LICENSE FOR THE
PERSONAL AND NONCOMMERCIAL USE
OF A CONSUMER TO (i) ENCODE VIDEO IN
COMPLIANCE WITH THE AVC STANDARD (“AVC
VIDEO”) AND/OR (ii) DECODE AVC VIDEO THAT
WAS ENCODED BY A CONSUMER ENGAGED
IN A PERSONAL AND NON-COMMERCIAL
ACTIVITY AND/OR WAS OBTAINED FROM A
VIDEO PROVIDER LICENSED TO PROVIDE
AVC VIDEO. NO LICENSE IS GRANTED OR
SHALL BE IMPLIED FOR ANY OTHER USE.
ADDITIONAL INFORMATION MAY BE OBTAINED
FROM MPEG LA, L.L.C. SEE HTTP://WWW.
MPEGLA.COM
The software in this camera may include third
party software. Any third party software is subject
to the terms and conditions, imposed by the
owners or licensors of that software, under which
software is provided to you.
Those terms and other third party software
notices, if any, may be found in the software
https://cs.olympus-imaging.jp/en/support/imsg/
digicamera/download/notice/notice.cfm

337
EN
Symbols
#+WB ...............................................154
#RC Mode ........................................ 298
# Slow Limit......................................124
# X-Sync. .........................................124
0 (Protect) .....................................193
0 (Uploading Pictures) ................ 284
8 ...................................................... 251
aImage stabilizer ..............................138
B Auto Reset ................................. 110
d Connection Password ....................267
e in MF mode .................................84
g Loop in Menu Tab ......................... 238
G Settings .......................................207
jImage stabilizer ............................ 138
KK Detailed Settings ...................143
KNMode Settings ..........................78
KN Set Home ................................98
KAF+MF ...........................................82
KAF by half-pressing a....................83
KAF Focus Adjustment .....................95
KAF Limiter ....................................... 92
KAF Scanner ....................................94
KAF Target Mode Settings ................ 79
KC-AF Center Priority ....................... 86
KFace & Eye AF Button .................... 89
KISO-A Lowest S/S ........................ 115
K LV Mode ......................................225
K Night Vision .................................225
KOrientation Linked N ...................97
KPicture Mode Settings ..................149
K Save Settings ..............................243
n N Display Pattern ...................... 253
nC-AF Speed ....................................87
nHDMI Output .................................182
n Mode (Movie exposure modes .......60
n (Movie recording) ...........................59
n Shutter Function ...........................216
N Loop Settings..............................100
N Select Screen Settings .................99
NSpot Metering .............................. 112
N Battery Priority ............................253
N Battery Status .............................253
qRFunction ...................................205
qa Default Setting.........................205
qDial Function ................................205
qInfo Settings .................................206
R (automatic rotation) .....................205
v Lock ..............................................223
V K Grid Settings .......................... 235
V K Info Settings...........................232
V a Level Gauge ............................233
W ....................................................257
W Keep Warm Color
Movie ..............................................154
Still image .......................................154
WLock .............................................153
x+F ...............................................124
X Settings.........................................257
z Lock ..............................................224
A
A (Aperture priority AE) .......................45
Accessories .......................................301
AdobeRGB ........................................155
AEL by half-pressing a ..................... 111
AE lock ..............................................109
AF Area Pointer ...................................96
AF Illuminator ......................................96
AF Mode
Movie ................................................72
Still image .........................................72
AF-ON button ......................................83
AF Targeting Pad ............................... 101
AF Target Mode ................................... 77
AF Target Point .................................... 76
AF tracking (C-AF+TR) ........................73
Airplane Mode ...................................260
All x
Movie ..............................................153
Still image .......................................153
Anti-Flicker LV ...................................226
Index

338
EN
Anti-Flicker Shooting .........................135
Anti-shockr settings ........................131
Aperture-Priority AE ............................. 45
Art LV Mode ....................................... 226
Assign Save Folder ...................244, 246
Assign to Custom Mode ......................56
Audio Playback .................................. 199
Audio recording .................................199
..................................254
B
B (Long Exposures) ............................51
Backlit LCD ........................................ 254
.................... 125
Battery charge ...............................22, 23
Battery level ......................................... 30
Battery level display...........................253
Bluetooth ...........................................262
Bluetooth® .........................................260
Bracketing (BKT)
AE BKT ...........................................174
ART BKT ......................................... 177
FL BKT ............................................ 175
Focus BKT ......................................178
ISO BKT .......................................... 176
WB BKT ..........................................175
Bulb .....................................................51
BULB/TIME/COMP Settings .............. 173
Button Function
Movie ..............................................208
Still image .......................................208
C
Cable clip ............................................. 19
Cable protector .................................... 19
C-AF+TR (AF tracking) ........................73
C-AF (Continuous AF) .........................72
C-AF Sensitivity
Movie ................................................87
Still image .........................................87
Calendar display ................................ 191
Calendar playback ............................. 189
CALL function ....................................293
Card ..................................................... 24
Card Formatting.................................241
Card Slot Settings
Movie ..............................................242
Still image .......................................242
Center marker....................................183
........................................258
Charger..............................................294
Charging via USB .......................... 22, 23
Color Space ....................................... 155
....................... 11 8
Composite Settings .............................54
Compression rate ......................140, 327
Connection
Computer ................................267, 283
Smartphone ....................................260
Continuous AF .....................................72
Continuous AF (C-AF) .........................72
Copy
Copy ...............................................193
Copy All ...........................................194
Copyright Info. ...................................247
Copy Select .......................................197
Custom Mode (C1 /C2 /C3 /C4 ) ........... 56
D
Dial Direction .....................................218
Dial Function
Movie ..............................................216
Still image .......................................216
Digital Tele-converter
Movie ..............................................166
Still image .......................................166
Diopter adjustment ..............................37
Direct button ........................................66
dpi Settings ........................................ 247
DPOF .................................................198
E
Edit
JPEG ..............................................201
RAW ................................................200
Edit Filename.....................................245
Electronic Zoom.................................212
Electronic Zoom Settings...................222

339
EN
Erase .................................................194
Erase All ............................................194
Erase Selected ..................................197
EVF Adjust ......................................... 250
EVF Style...........................................228
EV Step .............................................107
Exposure compensation .................... 106
Exposure shift .................................... 107
Eyecup............................................... 301
Eye detection frame.............................90
Eye Sensor Settings .......................... 250
F
Face & Eye Detection .......................... 88
Face Priority ......................................212
File format..................................140, 327
File Name ..........................................244
File size .............................................327
Firmware Version...............................258
Fisheye Compensation ...................... 171
Flash .......................................... 118, 297
Flash Exposure Comp. ...................... 123
Flash mode settings ..........................123
Flash photography ............................. 118
Flicker scan
Movie ..............................................108
Still image .......................................108
Fn Lever
Movie ..............................................219
Still image .......................................219
Focus Ring ........................................104
Focus Ring Lock ................................ 212
Focus Stacking ..................................160
Frame Rate........................................225
Movie ..............................................328
Frame size ......................................... 328
G
Grid Settings
Movie ..............................................234
Still image .......................................234
H
Handheld assist ................................. 139
HDMI .................................................288
HDMI Settings ...................................251
HDR (High Dynamic Range) .............162
High Res Shot
(High resolution shooting) .............156
High-speed movie..............................142
Histogram display ................................ 38
Histogram Settings ............................236
I
Image aspect .....................................144
Image Overlay ...................................203
Image quality
Movie ..............................................141
Still image .......................................140
Image Review ...................................... 42
Image size .................................140, 327
Image stabilizer
Movie ..............................................136
Still image .......................................136
Index display......................................191
Index playback...................................189
IN FO button .......................... 38, 65, 187
Info by half-pressing a .....................231
Information display
Playback .........................................186
Info Settings
Movie ..............................................230
Still image .......................................230
In-Movie Image Capture .................... 204
Interchangeable lenses .....................291
Interval Shooting................................167
ISO-A Upper/Default
Movie .............................................. 11 4
Still image ....................................... 114
ISO-Auto
Movie .............................................. 11 5
Still image ....................................... 115
ISO-Auto Set
Still image ....................................... 113
ISO sensitivity .................................... 113
ISO step............................................. 114

340
EN
K
Keystone Comp. ................................ 170
L
Language.....................................33, 257
Lens Info Settings .............................. 246
Lens I.S. Priority ................................139
Level Adjust .......................................258
Level Disp .......................................... 211
Level gauge display ............................. 38
Lighten Blending (B: Live composite
photography) ...................................54
Live Bulb .............................................. 51
Live ND shooting ...............................158
Live Time .............................................51
Location data ..................................... 259
Long exposures (B: Bulb/Time) ...........51
Low ISO Processing .......................... 116
LV Close Up Mode .............................223
LV super control panel ................. 69, 311
LV Super control panel ...................... 3 11
M
M (Manual Exposure) ..........................49
Manual Exposure.................................49
Manual focus (MF)...............................72
Menu.................................... 63, 241, 311
Menu Cursor Settings ........................ 237
Metering............................................. 109
Metering during B ......................... 110
Metering during j ........................... 112
MF (AF/MF toggle) ............................209
MF Assist ...........................................102
MF Clutch ..................................104, 292
MF (Manual focus)...............................72
Monitor Adjust .................................... 249
Motion compensation ........141, 142, 328
Movie exposure mode .........................60
Movie playback .................................. 189
Movie recording .............................59, 61
Movie resolution ........................141, 142
Movie Trimming .................................204
Multi Function ....................................215
Multi Function Settings ......................236
Multiple Exposure .............................. 163
Multi Selector
Settings ........................................218
My Menu ............................................ 239
Add .................................................239
Manage ........................................... 240
N
Movie .............................................. 11 6
Still image ....................................... 116
Noise reduction.................................. 117
O
One-touch white balance ................... 152
P
P (Program AE) ...................................43
Peaking Settings................................103
Picture mode
Movie ..............................................145
Picture Mode
Still image .......................................145
Pixel Mapping ............................ 258, 305
Playback
Movie ..............................................189
Still image .......................................188
Playback frame rate...................141, 142
Playback zoom (a) ..........................190
Position information ........................... 266
Power Battery Holder ........................295
.............................263
Preset MF distance............................104
Preset MF (PreMF) .............................. 73
Press-and-hold Time .........................224
Print order .......................................... 198
Priority Set .........................................238
Pro Capture shooting.........................133
Program AE .........................................43
Program shift (Ps) ............................... 44
Protect ...............................................193
Protect selected ................................. 197
P s (Program shift) ............................... 44

341
EN
Q
Quick Erase .......................................195
Quick Sleep Mode .............................255
R
Rating ................................................196
Rating Selected .................................197
Rating Settings ..................................197
RAW+JPEG h ..................................196
RAW+JPEG Erase ....................194, 195
RAW image .......................................140
RC mode ...........................................298
Recall from Custom Mode ................... 58
Red Frame during RREC ................. 185
Release Priority ...................................84
Remote Control .................................279
Remote shooting
Live View ........................................265
Remote Shutter ...............................265
Reset All Images................................198
Reset/Initialize Settings .....................257
Reset Lens ........................................105
Rotate ................................................193
S
S (Shutter priority AE)..........................47
S-AF (Single AF)..................................72
Save Settings ....................................246
Save Slot ...........................................246
.......................................227
Self-timer ...........................................126
Self-timer settings .............................. 130
Sensor frame rate .............................. 327
Sequential shooting ........................... 126
Sequential shooting settings..............128
SET function ......................................293
Shading Comp. .................................. 144
Share Order ....................................... 195
Share Order Selected ........................ 197
Shooting Menu ..................................313
Shooting modes...................................39
Shutter-Priority AE ...............................47
Silent s Settings .............................. 132
Silent controls ......................................62
Single AF (S-AF)..................................72
Sleep ...........................................30, 254
Sound Recording Settings ................. 180
sRGB .................................................155
Starry Sky AF (FAF) ..........................74
Starry Sky AF Setting ..........................85
Storage ..............................................286
Subject detection ................................. 90
Super control panel .............................69
Super Spot AF .....................................80
T
Test Picture ........................................ 210
Time .....................................................51
Touch screen
Playback .........................................191
Shooting ............................................41
Touchscreen Settings ........................249
U
USB Power Delivery ..........................287
USB Settings .....................................252
User registration ....................................2
V
View Assist (
nView Assist) ..........155
W
White balance .................................... 150
Wi-Fi/Bluetooth Settings .................... 272
Wi-Fi Connection ...............................271
Computer ........................................267
Smartphone ....................................261
Wi-Fi PC Settings ..............................276
(# RC Mode) ................................298
Wireless Remote Flash Control
(#RC Mode) .................................124
Z
Zebra Pattern Settings.......................184
Zoom frame .......................................206
Zoom frame AF/Zoom AF ....................80

WD838700
date of issue 2022.02.
2022
https://om-digitalsolutions.com/