
Loading ...
Loading ...
Loading ...
Be sure your extension cord is properly wired and in
good condition. Always replace a damaged extension cord or
have it repaired by a qualified person before using it. Protect
your extension cords from sharp objects, excessive heat and
damp or wet areas.
(when using 120 volts only)
Ampere Rating
more qhan not more th;_n
0 6
6 10
10 12
12 16
Totallength ofcordinfeet
25' 50' 100' 150'
i18 16 16 14
18 16 14 12
t6 16 14 12
14 12 Notrecommended
SAVE THESE iNSTRUCTiONS
RECOMMENDED ACCESSORIES
Visit your Sears Hardware Department or see the Sears
Power and Hand Tool Catalog to purchase recommended
accessories for this power tool.
To avoid personal injury:
• Use only accessories recommended for this band saw.
o Follow instructions that accompany accessories. Use of
improper accessories may cause hazards.
Use only accessories designed for this band saw to
avoid injury from thrown broken parts or workpieces.
Do not use any accessory unless you have completely
read the instruction or owner's manual for that accessory.
ITEM
Miter gauge
Blade width: 1/8", 1/4", 3/8",1/2"
Blade length: 80"
UNPACKING AND CHECKING
CONTENTS
Carefully unpack the band saw and all its parts, and
compare against the list below and the illustration on page 7.
Place the saw on a secure surface and examine it carefully.
o To avoid injury from unexpected starting, do not plug the
power cord into a power source receptacle during
unpacking and assembly. This cord must remain
unplugged whenever you are assembling or adjusting
the saw.
o Although compact, this saw is heavy. To avoid back
injury, get help whenever you have to lift the saw.
• If any part is missing or damaged, do not plug the band
saw in until the missing or damaged part is replaced,
and assembly is complete.
TABLE OF LOOSE PARTS
ITEM DESCRIPTION QUANTITY
BAND SAW
A Band saw with motor 1
B. Table with insert 1
C. Table trunnions 2
D. Table hardware
Hex bolts 6
Lock washers 6
Table alignment pin 1
E. Trunnion support bracket !
F. Trunnion support hardware
Long bolt 2
Short hex. bolt 1
Hex nut 1
Table lock knobs 2
Washers 2
G. Miter gauge 1
H. Sawdust port 1
Hex bolts 2
Washers 2
I. Power cord hooks 2
Phillips head bolts 2
J. Hex. key 1
K. Stand attachment hardware
Large washers 8
Hex. nuts 4
Long hex. bolts 4
LEG STAND
L. Leg stand top plate
M. Legs
N. Short lower brackets
O. Long lower brackets
R Foot pads
Q. Bag:
Carriage bolts
Hex. nuls
Washers
1
4
2
2
4
32
32
32
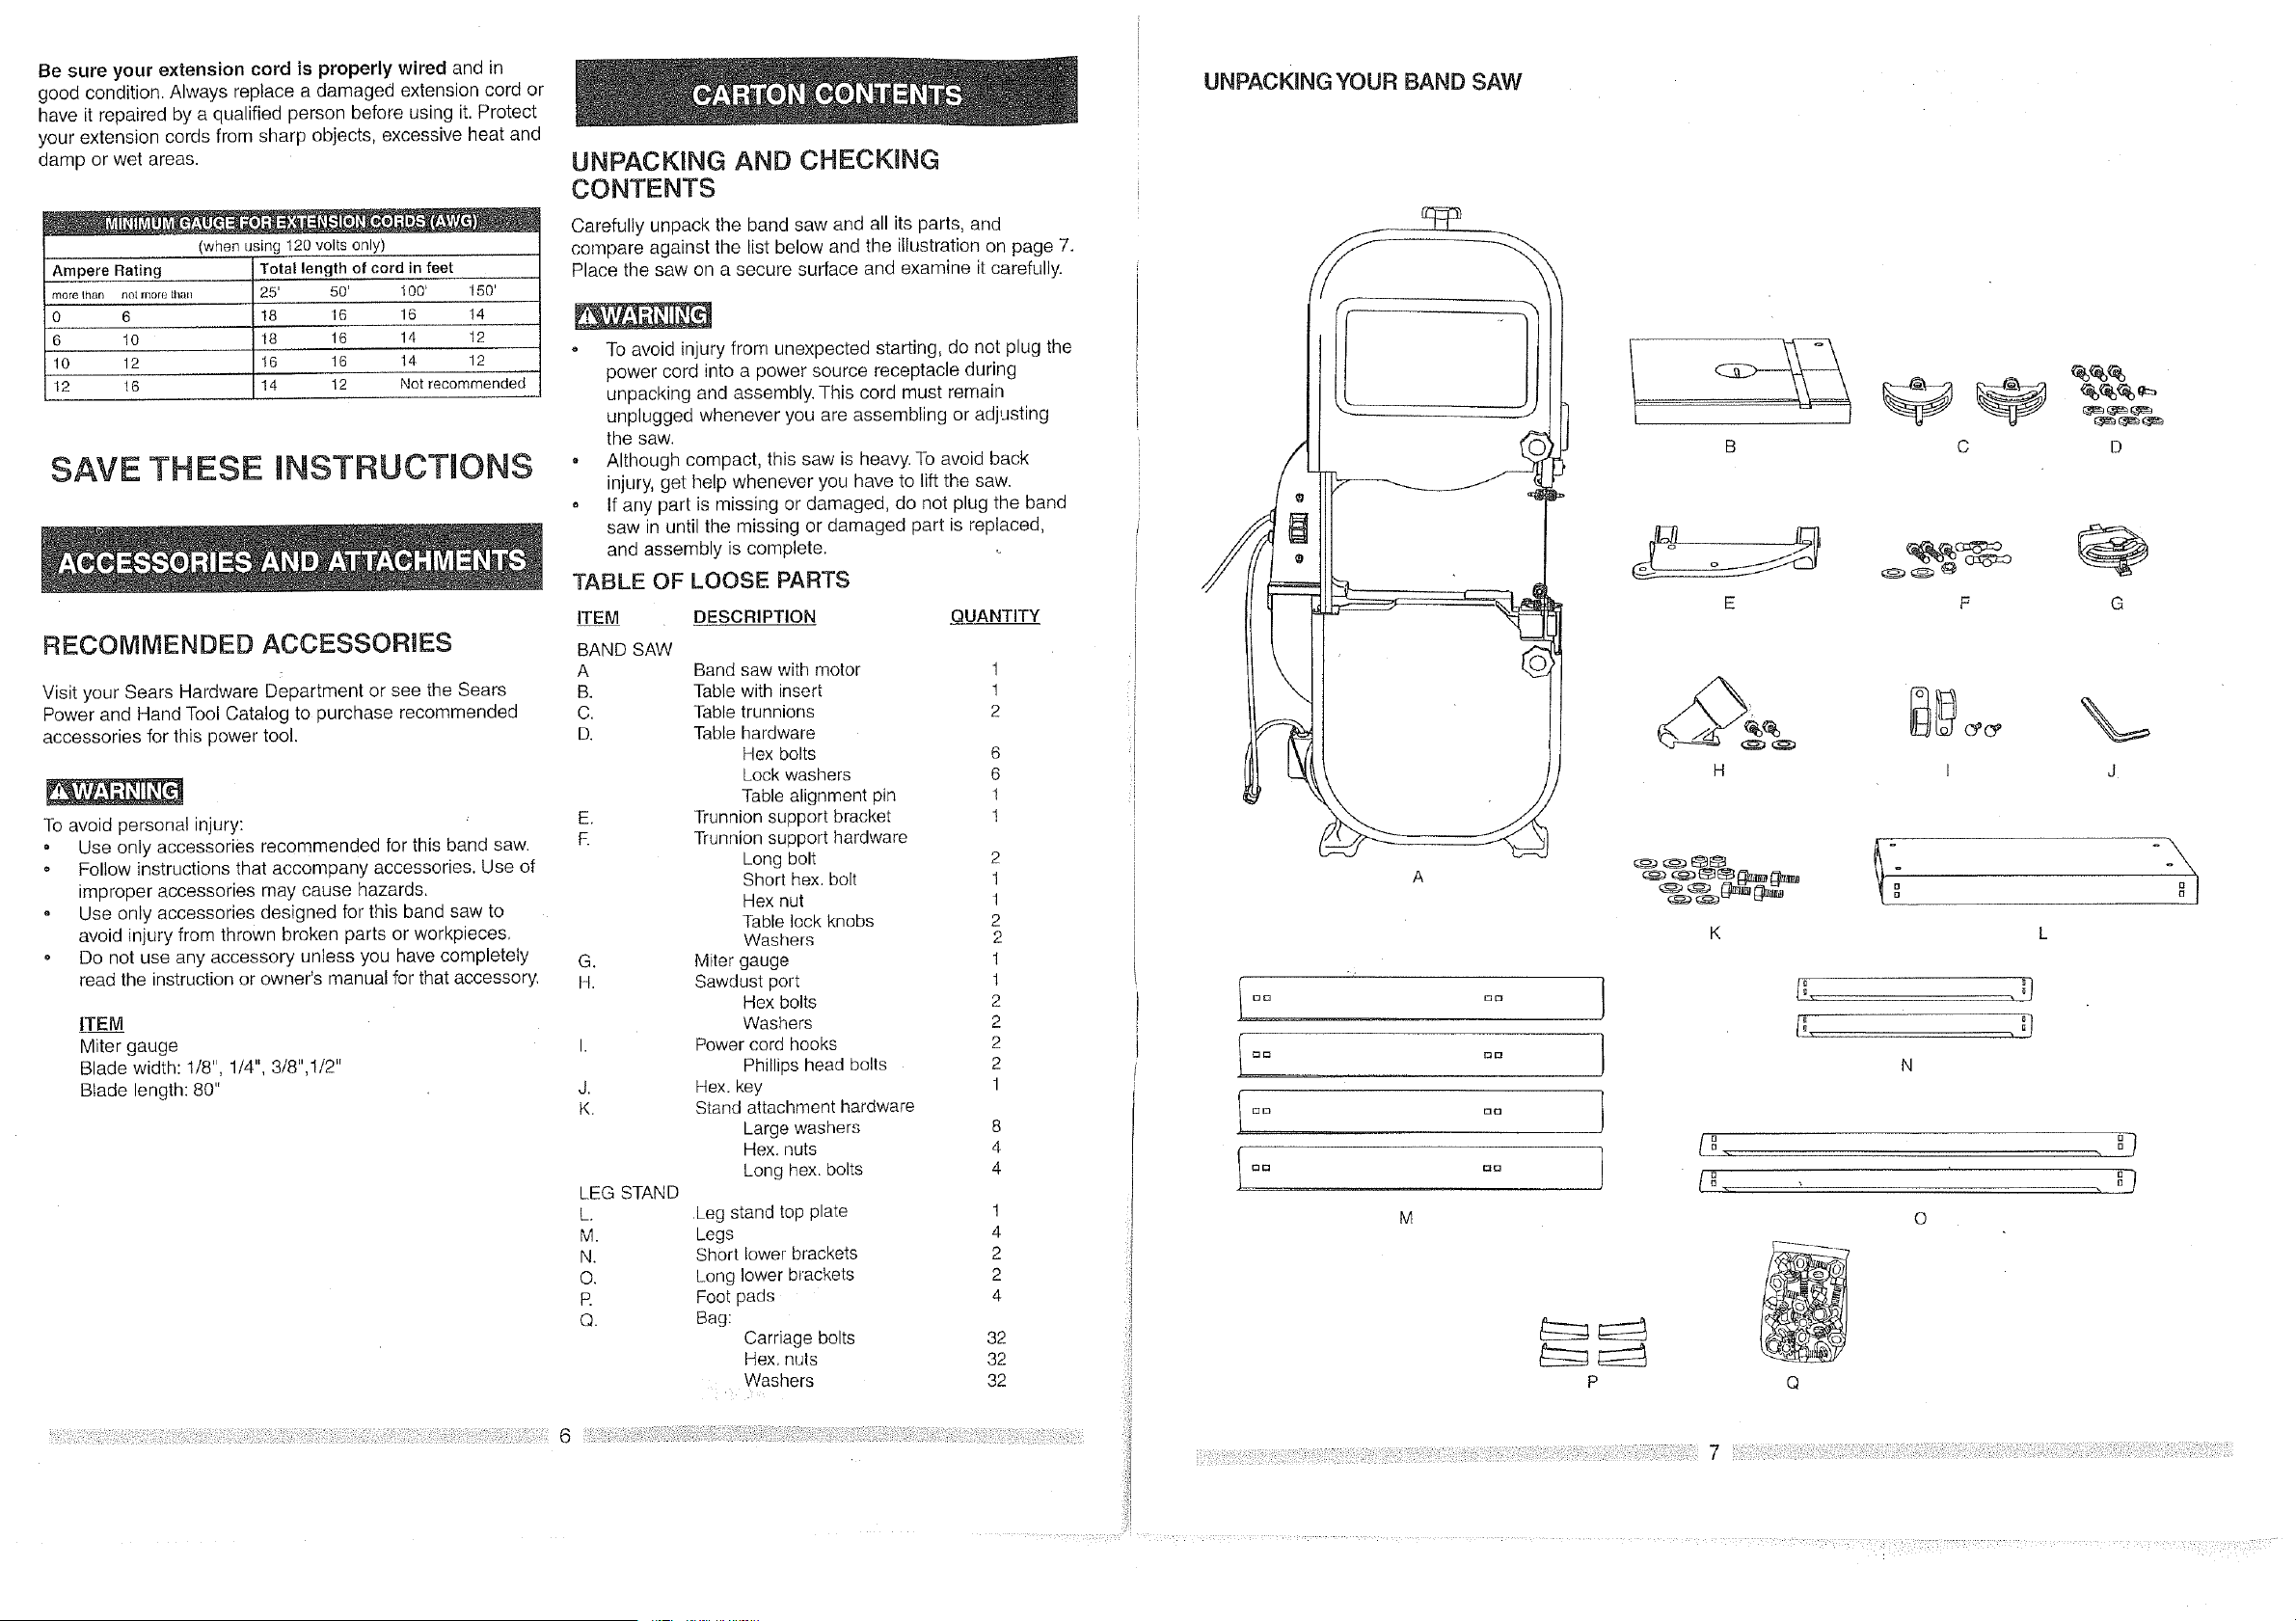
UNPACKING YOUR BAND SAW
A
B C D
E F G
H I J
K L
I 1 ° °
oo °o F, ,°!
f °° °° 1
N
I °o I
I°° °° 1
M O
P
Loading ...
Loading ...
Loading ...