Loading ...
Loading ...
Loading ...
EN
©2021 Hestan Commercial Corporation
9
CABINET INSTALLATION
(continued)
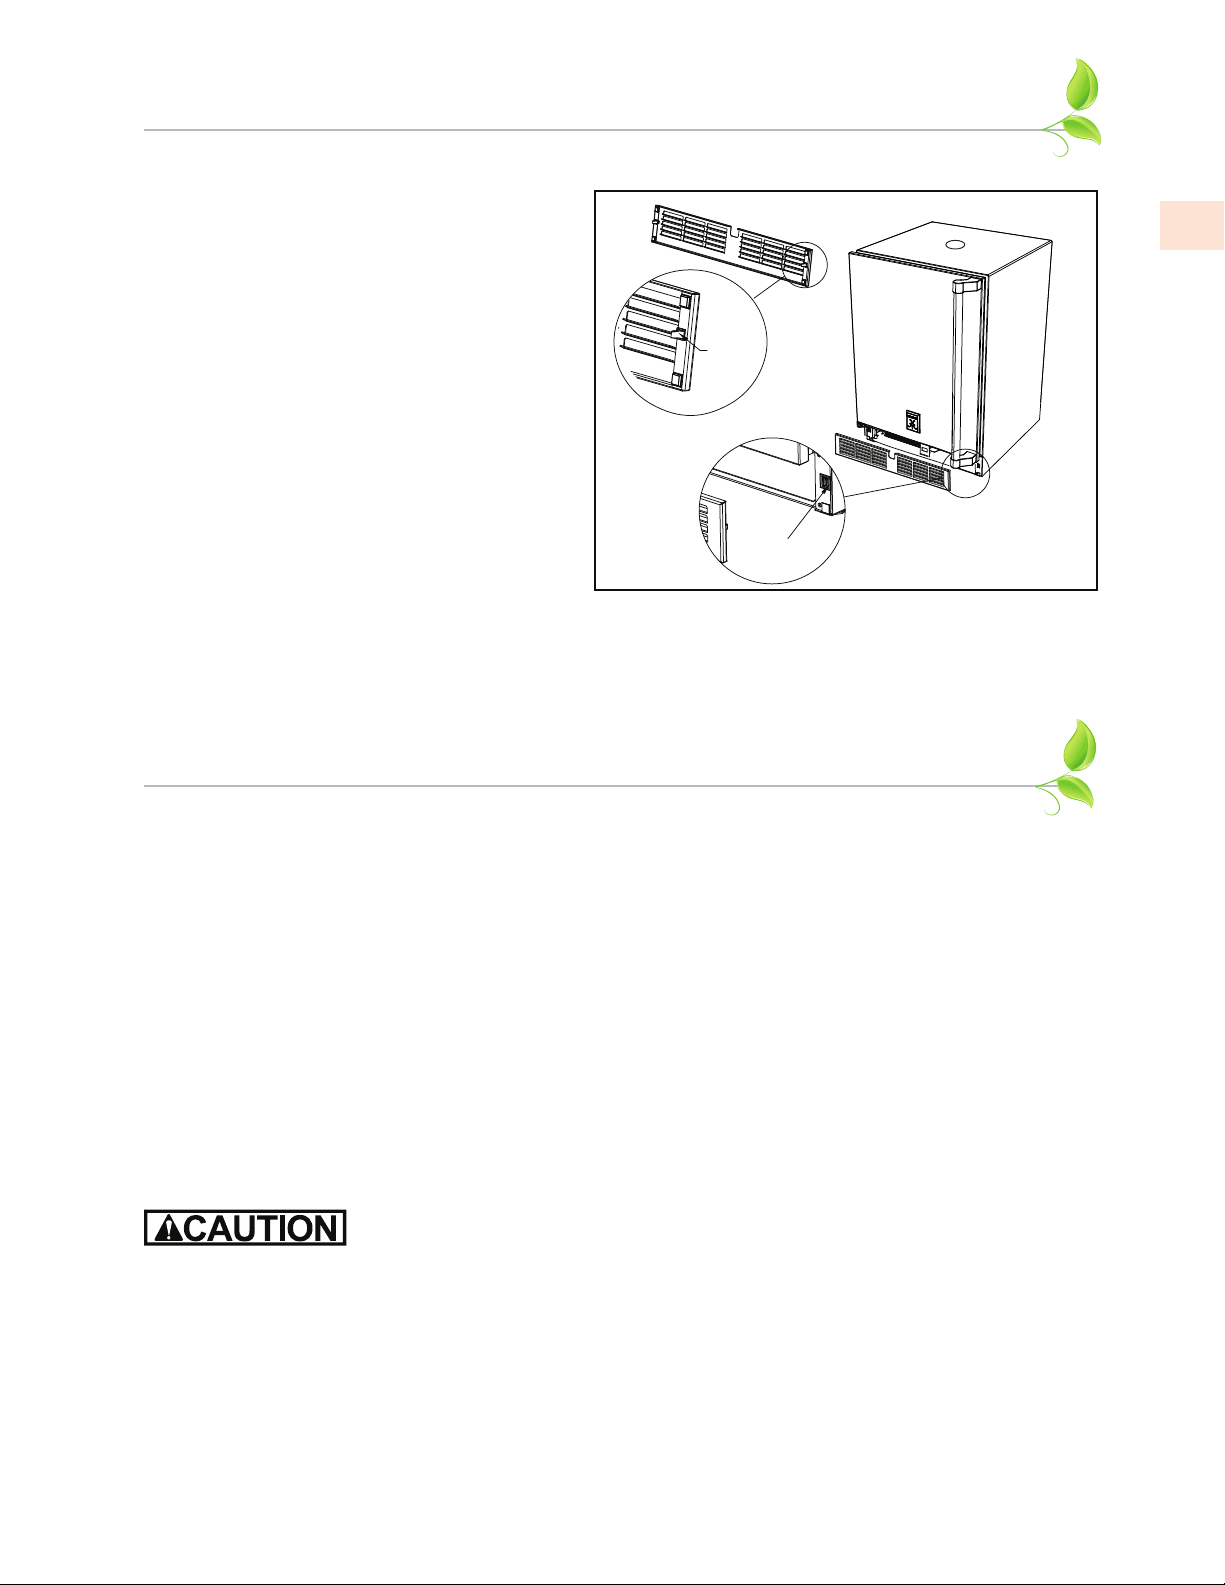
INSTALLING THE FRONT GRILLE COVERINSTALLING THE FRONT GRILLE COVER
Once the unit is secured in place, install the
louvered front grille cover. Secure the cover
by snapping the latch into the latch catch on
the unit (Figure 3).
The vent grille must be removed to service the
unit. The floor cannot interfere with removal,
and the louvered sections must not be covered
or obstructed. Obstructions could prevent
proper air circulation, which may damage the
unit.
NOTE: To achieve maximum performance,
interior louver openings and fan guard
openings should never be obstructed.
Latch
Catch
Latch
Figure 3. Front Grille Cover Installation
DOOR INFORMATION
DOOR OPTIONSDOOR OPTIONS
Hestan residential units can be converted from stainless steel to overlay panels to match existing
cabinetry. Solid doors are shipped from the factory with stainless steel panels and handles in place
on the unit. All stainless steel doors are convertible to fully integrated models, ready to accept
custom panels from your cabinetry supplier. You can contact Hestan Customer Care to send you any
of the following templates, or download directly from the Hestan website at
www.hestanoutdoor.com.
028370 - Template, Overlay, 24” Solid Door, Undercounter Refrigeration
028371 - Template, Overlay, 24” Toe Kick/Grille, Undercounter Refrigeration
028374 - Installation Instructions, Overlay Door/Drawer, Undercounter Refrigeration
Take care in choosing the correct template for your specific unit. The original appliance handle or
custom cabinet handle can be installed onto your overlay panel.
HANDLE INSTALLATIONHANDLE INSTALLATION
The handle mounting on the wood overlay should be mounted on the overlay only (not the actual
door) to avoid damage to the factory door. Proper woodworking materials and equipment should be
used to avoid damage or errors in workmanship.
1. Handle must be attached to the overlay before mounting the overlay onto the door. Mark the
rear of the wood overlay panel with handle fastening locations.
2. Drill through the wood overlay panel at marked locations, taking care not to damage the panel.
3. Countersink screw heads so that screw heads are flush with the back side of the panel. Attach
the handle to the overlay panel.
Loading ...
Loading ...
Loading ...