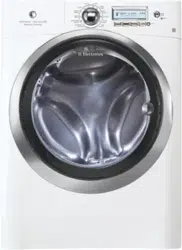
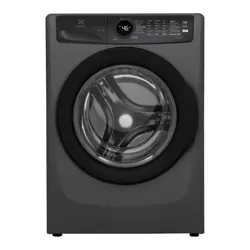
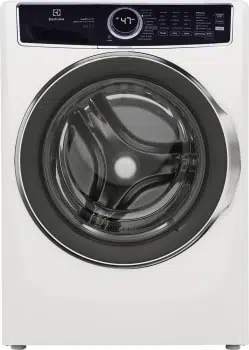
Operating Instructions
Getting Started
To run your washer, follow these basic steps:
1. Sort laundry into loads that can be washed together. (See page 8.)
2. Prepare items for washing. (See page 8.)
3. Pretreat stains and heavy soil. (See page 9.)
4. Add laundry load to the washer. (See page 9.)
5. Add laundry products to the dispenser. (See page 10-11.)
6. Select the appropriate cycle and settings for the load. (See page 12.)
7. Start the washer. (See pages 12-13.)
Normal Operating Sounds
Operating Your Washer
BEFORE USING YOUR WASHER
Read these important instructions in this section of the Use and Care Guide before operating your washer.
WARNING To reduce the risk of fi re, electric shock or injury to persons, read the IMPORTANT SAFETY INSTRUCTIONS in this Use and Care Guide before operating your washer.
OPERATING YOUR WASHER
1. Sort laundry into loads that can be washed together.
Sort items by recommended cycle and water temperature. Separate white, light and colorfast items from dark and non-colorfast items. Separate items that shed lint from items that attract lint. Casual, synthetic, knit, and corduroy items will pick up lint from towels, rugs, and bedspreads. Separate heavily soiled items from lightly soiled items. Separate lacy, sheer, loosely knit, or delicate items from durable items. Do not machine wash items containing fi berglass. Small particles of fi berglass left in the drum may transfer to fabrics in other loads and cause skin irritation or damage to fabrics.
2. Prepare items for washing.
Empty pockets. Brush off lint and dirt. Shake out rugs and beach towels. Close zippers, fasten hooks, button buttons, tie strings and sashes, and remove non-washable trims and ornaments. Mend rips and tears to prevent further damage during washing. Turn knit items inside out to prevent pilling. Place delicate and small items such as bras, hosiery and baby socks in a mesh bag.
3. Pretreat stains and heavy soil.
See Stain Removal Guide in this guide or Stain Guides in the LCD User Interface for safe, successful stain removal instructions.
4. Add laundry load to washer.
Combine large and small items in a load. Load large items fi rst. Large items should not be more than half the total wash load. Washing single items such as a sweater, towel or jeans is ineffi cient and may cause an out-ofbalance load. Add 1 or 2 similar items to help balance the load. Wash a single heavy item such as a king-sized comforter, bedspread or sleeping bag separately. The washer can be fully loaded, but the items should not be tightly packed. The door should close easily.
5. Add laundry products to the dispenser
For best results , Use a low-sudsing, high effi ciency detergent to prevent oversudsing in front load washers. Look for this symbol on the detergent label
Detergent, liquid chlorine bleach and liquid fabric softener will be dispensed at the proper times in the cycle. To unlatch the dispenser drawer push on the dispenser drawer latch indicator. To close and latch the dispenser drawer push the drawer in until you hear a slight click with the drawer face fl ush to the panel.
IMPORTANT Open and close the dispenser drawer slowly. Closing the drawer too quickly could result in early dispensing of the bleach or fabric softener.
Use the cap or scoop provided by the detergent manufacturer to measure the amount recommended. Detergent dosage may need to be adjusted for water temperature, water hardness, load size and soil level.
NOTE From time to time you may see water in the “Main Wash -liquid only”, “Pre-Wash”, “Liquid Bleach” and “Fabric Softener” chambers. This is part of the normal operation of the washer.
Liquid Detergent
Add the recommended amount of a high effi ciency liquid detergent to the “Main Wash - liquid only” cup. Do not exceed the MAX fi ll line. Liquid detergent can also be added directly to the “Main Wash” chamber when not using the “Pre-Wash” option.
Powder Detergent
To use a high effi ciency powder detergent, remove the “Main Wash - liquid only” cup and add the powder directly to the “Main Wash” detergent chamber.
IMPORTANT Save the liquid cup insert for future use. DO NOT discard it while you are using powder detergent.
Other Wash Products
Water conditioner, detergent booster and enzyme products may be added with the detergent. Put liquid products with liquid detergent in the “Main Wash - liquid only” detergent cup or powder products with powder detergent in the “Main Wash” detergent chamber.
IMPORTANT Do not mix liquids and powders.
IMPORTANT Use of multi-product (detergent plus softener) sheets or color-absorbing sheets NOT recommended. They could disable your machine and result in unwarranted repair costs.
Detergent for Prewash
For heavily soiled or stained loads, select the prewash option and add the recommended amount of detergent to the “Pre-Wash” detergent cup.
Liquid Chlorine Bleach
If desired, add liquid chlorine bleach to the chamber labeled “Liquid Bleach” and marked with this symbol . Fill to the MIN line for small loads or the MAX line for large loads. DO NOT fi ll above the maximum fi ll line.
IMPORTANT To prevent fabric damage, do not overfi ll the “Liquid Bleach” chamber or pour liquid chlorine bleach directly onto the load.
Liquid Fabric Softener
If desired, pour the recommended amount of liquid fabric softener into the chamber labeled “Fabric Softener” and marked with this symbol . Fill to the MIN line for small loads or the MAX line for large loads. DO NOT fi ll above the maximum fi ll line.
NOTE To prevent staining, do not overfi ll the “Fabric Softener” chamber or pour liquid fabric softener directly on the wash load.
Use of a fabric softener-dispensing ball is not recommended in tumble action washers.
6. Select the appropriate cycle and settings for the load.
Turn the cycle selector knob in either direction to select the cycle desired. The icon for that cycle will be illuminated and if the cycle description feature is turned on, the cycle and estimated cycle time are displayed on the User Interface screen for 5 seconds. Press any key to advance the User Interface to select settings and options. See the “Cycle Selection” section in this guide for descriptions of each cycle. Press any key or the User Interface screen will automatically advance after 5 seconds and display the preset wash water temperature, fi nal spin speed and soil level for each cycle. See the “Cycle Settings” and “Cycle Selection Chart” in this guide for descriptions and available settings for each cycle. To change the settings, press the temp, spin speed, and soil level buttons to scroll to the desired settings. Press the scroll up or scroll down buttons under options to scroll through the options menu. Press the select button to add or delete options. The estimated cycle time will be displayed at the top of the screens.
NOTE To provide the best care of your laundry, not every setting or option is available with every cycle. If a setting is not available for the cycle selected, it will not be displayed.
Adjustments to a cycle will be remembered and recalled each time that cycle is selected in the future. To return to the factory default settings, select RESET in set prefs under the options scroll buttons. To customize and save up to 3 cycles in noncustom mode plus 9 more cycles for custom users, see save as favorite and CUSTOM MODE in the User Interface sections of this guide.
7. Start the washer.
Close the door and press start. The washer will not operate with the door unlatched and DOOR OPEN will be displayed. Select delay start to delay the beginning of the cycle for up to 22 hours if desired. As a safety measure, the door will automatically lock and remained locked during the entire wash cycle and DOOR LOCKED will be displayed. To add a forgotten item to the washer any time during the wash portion of the cycle, press pause. When the door unlocks, open the door, add the item, close the door and press start to resume the cycle. To change the cycle once the cycle has begun, press cancel, select a new cycle, and press start again. Just turning the cycle selector knob will not change the cycle. To change settings or options after the cycle has begun, press pause, select the new settings or options, and press start again.
NOTE If the cycle is interrupted during spin, the door lock will not release until the tub has stopped spinning. DO NOT force open the door. To stop the cycle, press cancel. When the cycle ends, a signal will sound, COMPLETE - DOOR CAN BE OPENED will be displayed and the drum light will come on. Remove items from the wash drum when the cycle ends and place in dryer, line dry or dry fl at as directed on the fabric care label. Excess wrinkling, color transfer or odors may develop in items left in the washer after the cycle has ended if not removed promptly.
CAUTION ENTRAPMENT and TIP-OVER HAZARD An open door could entice children to hang on the door or crawl inside the washer. If there are no small children present, you may leave the door ajar to prevent mildew and odor build up.