IMPORTANT SAFETY
INSTRUCTIONS
When using electrical appliances, especially when
children are present, basic safety precautions
should always be taken, including the following:
READ ALL INSTRUCTIONS
BEFORE USING
FOR HOUSEHOLD USE ONLY
KEEP AWAY FROM WATER
DANGER – Any appliance is electrically
live, even when the switch is off.
To reduce the risk of death or injury by
electric shock:
1. Always unplug appliance from electrical
outlet immediately after using (except when
charging unit).
2. Do not place or store appliance where it could
fall or be pulled into a tub or sink.
3. Do not use appliance while bathing or in the
shower.
4. Do not place appliance in, or drop into, water
or other liquids.
5. If appliance has fallen into water, do not
reach for it. Unplug immediately.
6. Unplug this appliance before cleaning.
WARNING – To reduce the risk of
burns, electric shock, fire, or injury to persons:
1.
Never leave a plugged-in appliance
unattended.
2. This appliance should not be used by, on, or near
children or individuals with certain disabilities.
3. Use appliance only for its intended use as
described in this manual. Use only attachments
recommended by the manufacturer. Do not use
an extension cord to operate the appliance.
4. Never operate the appliance if it has a
damaged cord or plug, is not working proper-
ly, has been dropped or damaged, or dropped
into water. Return the appliance to a Conair
Service Center for examination and repair.
5. Keep the appliance cord away from heated
surfaces.
6. Do not pull, twist or wrap the cord around the
appliance.
7. Never drop or insert any object into any
opening of the appliance.
8. Do not place the appliance on any surface
while it is operating.
9. Do not use the appliance with a damaged
or broken comb or with teeth missing from the
blades, as injury may result. Before each use,
make certain the blades are aligned properly
and oiled.
10. Do not use the appliance outdoors or where
aerosol (spray) products are being used or
oxygen is being administered.
SAVE THESE
INSTRUCTIONS
OPERATING INSTRUCTIONS
Before using the Class 2 Power Supply, read
these instructions carefully.
Use with adapter CA51
Rated input voltage: 100–240V AC, 50/60Hz
0.2A Max
Rated output: 6.0V DC 70mA
OPERATION
1. For dry location use only. Do not expose to water.
2. When not in use, unplug unit completely.
3. Unit will become warm during operation.
CAUTION
1. Dry location use only. Do not expose to liquid,
vapor, or rain.
2. Ensure jack is plugged into the trimmer unit
before plugging the adapter into the outlet.
3. Do not operate any appliance that has a
damaged output cord or housing.
4. Always unplug the unit before cleaning or
when not in use.
5. This power unit is intended to be correctly
oriented in a vertical or floor mount position.
6. Be sure voltage is correct before plugging in.
For connection to a supply not in the U.S.A. use
an attachment plug adapter of the proper
configuration for power outlet.
This device complies with Part 15 of the FCC
Rules. Operation is subject to the following two
conditions: (1) this device may not cause harmful
interference, and (2) this device must accept any
interference received, including interference that
may cause undesired operation.
Warning: Changes or modification to this unit
not expressly approved by the party responsible
for compliance could void the user's authority to
operate the equipment.
TROUBLESHOOTING
If your rechargeable trimmer does not seem to
be taking a charge, take the following trouble-
shooting steps before returning it for repair:
1. Be sure the electrical outlet is working by
plugging in another appliance to test the outlet.
2. Make sure the electrical plug is not con-
nected to a switch that turns power off when
lights are turned off.
3. Be sure you have inserted the adapter prop-
erly into the trimmer, that all connections are
secure, and that the trimmer switch is in the
OFF position.
OPERATING
INSTRUCTIONS
1. Before using the trimmer for the first time,
charge continuously for 16 hours. Maximum
battery capacity will be reached only after 3
charging and discharging cycles.
2. Always check to see if the charging light is on
when you firmly connect the unit with the adapter.
3. Plug the adapter into any wall outlet (at the
voltage listed on the label affixed to the adapter).
Unplug adapter when not in use.
4. The adapter may become warm while
charging. This is normal.
5. Preserving the batteries: in order to maintain
the optimum capacity of the rechargeable
batteries, the trimmer should be recharged for 16
hours approximately every 3 months.
USER MAINTENANCE
INSTRUCTIONS
OILING THE BLADE (oil not included)
About once a month you should oil the trimmer
blade with a light mineral oil. It is best to do this
over a piece of newspaper. Turn the trimmer on
and hold it so that the blades are pointed down-
ward. Spread one drop of oil across the blades,
then turn the trimmer off and wipe away the
excess oil with a soft cloth.
Be careful not to use too much oil and don’t oil
your trimmer more than necessary, as this could
damage the motor. (Never attempt to oil the motor
bearing, as it is permanently lubricated.)
BLADE CARE
Because the trimmer blade is precision-made for
a very special use, it should always be handled
with care. Each time you finish using the trimmer,
brush away any loose hair that has collected in
the blade.
Be especially careful when changing or adjusting
the blade. When you have your trimmer serviced,
be sure that the blade is sharpened or replaced at
the same time.
To promote the long life of the trimmer, use it only
for the purpose intended by the manufacturer – to
trim your beard and mustache.
GROWING A BEARD AND MUSTACHE
There are three key factors that will determine
which beard or mustache style is best for you:
1. The shape and dimensions of your face.
2. The natural growth of your beard/mustache.
3. The thickness of your beard/mustache. If you
are unsure about the type of beard or mustache
that would most suit your face, speak with a
professional hair stylist and ask for an opinion
on what style would be best. Once your beard
or mustache has been styled, it is essential that
you maintain its appearance. To do this, use your
trimmer to trim your beard/mustache weekly.
For the best trimming results, your beard should
be slightly damp (NOT WET) when using your
trimmer. This will prevent the trimmer from
removing more hair than desired.
TYPES OF BEARDS/MUSTACHES
GETTING STARTED
OUTLINING YOUR BEARD
1. It is always best to begin with a clean, slightly
damp beard.
2. After you have combed through your beard in
the direction it grows naturally, you will want to
outline the desired shape, beginning under your
jawline.
3. Begin defining your beard’s
shape under your chin and work
upward on each side of your
face toward your ears. Then
define the upper outline of your beard across
your cheeks, past your sideburns, and toward
your hairline.
TRIMMING YOUR BEARD
1. The trimmer includes a
5-position comb for use
with the hair trimming blade
(2–10mm) which provides
lengths of 3/32" (shortest) to
3/8" (longest).
2. To use the 5-position comb, slide the unit
over the trimmer blade and snap it down into
position. At first, until you become familiar with
the adjustments, use the longest trim setting.
(You can always go back and make your beard
a little shorter.)
3. Begin trimming your
beard using smooth,
even strokes. Start with
your sideburns and work
downward toward your
chin. (Never attempt to trim against the natural
growth of your beard because the hair will be
cut too short.)
4. If you decide you want a closer trim, you can
now adjust the 5-position comb attachment to
a shorter setting (such as 3/32" or 5/32") and
go over your beard again until you achieve the
desired length.
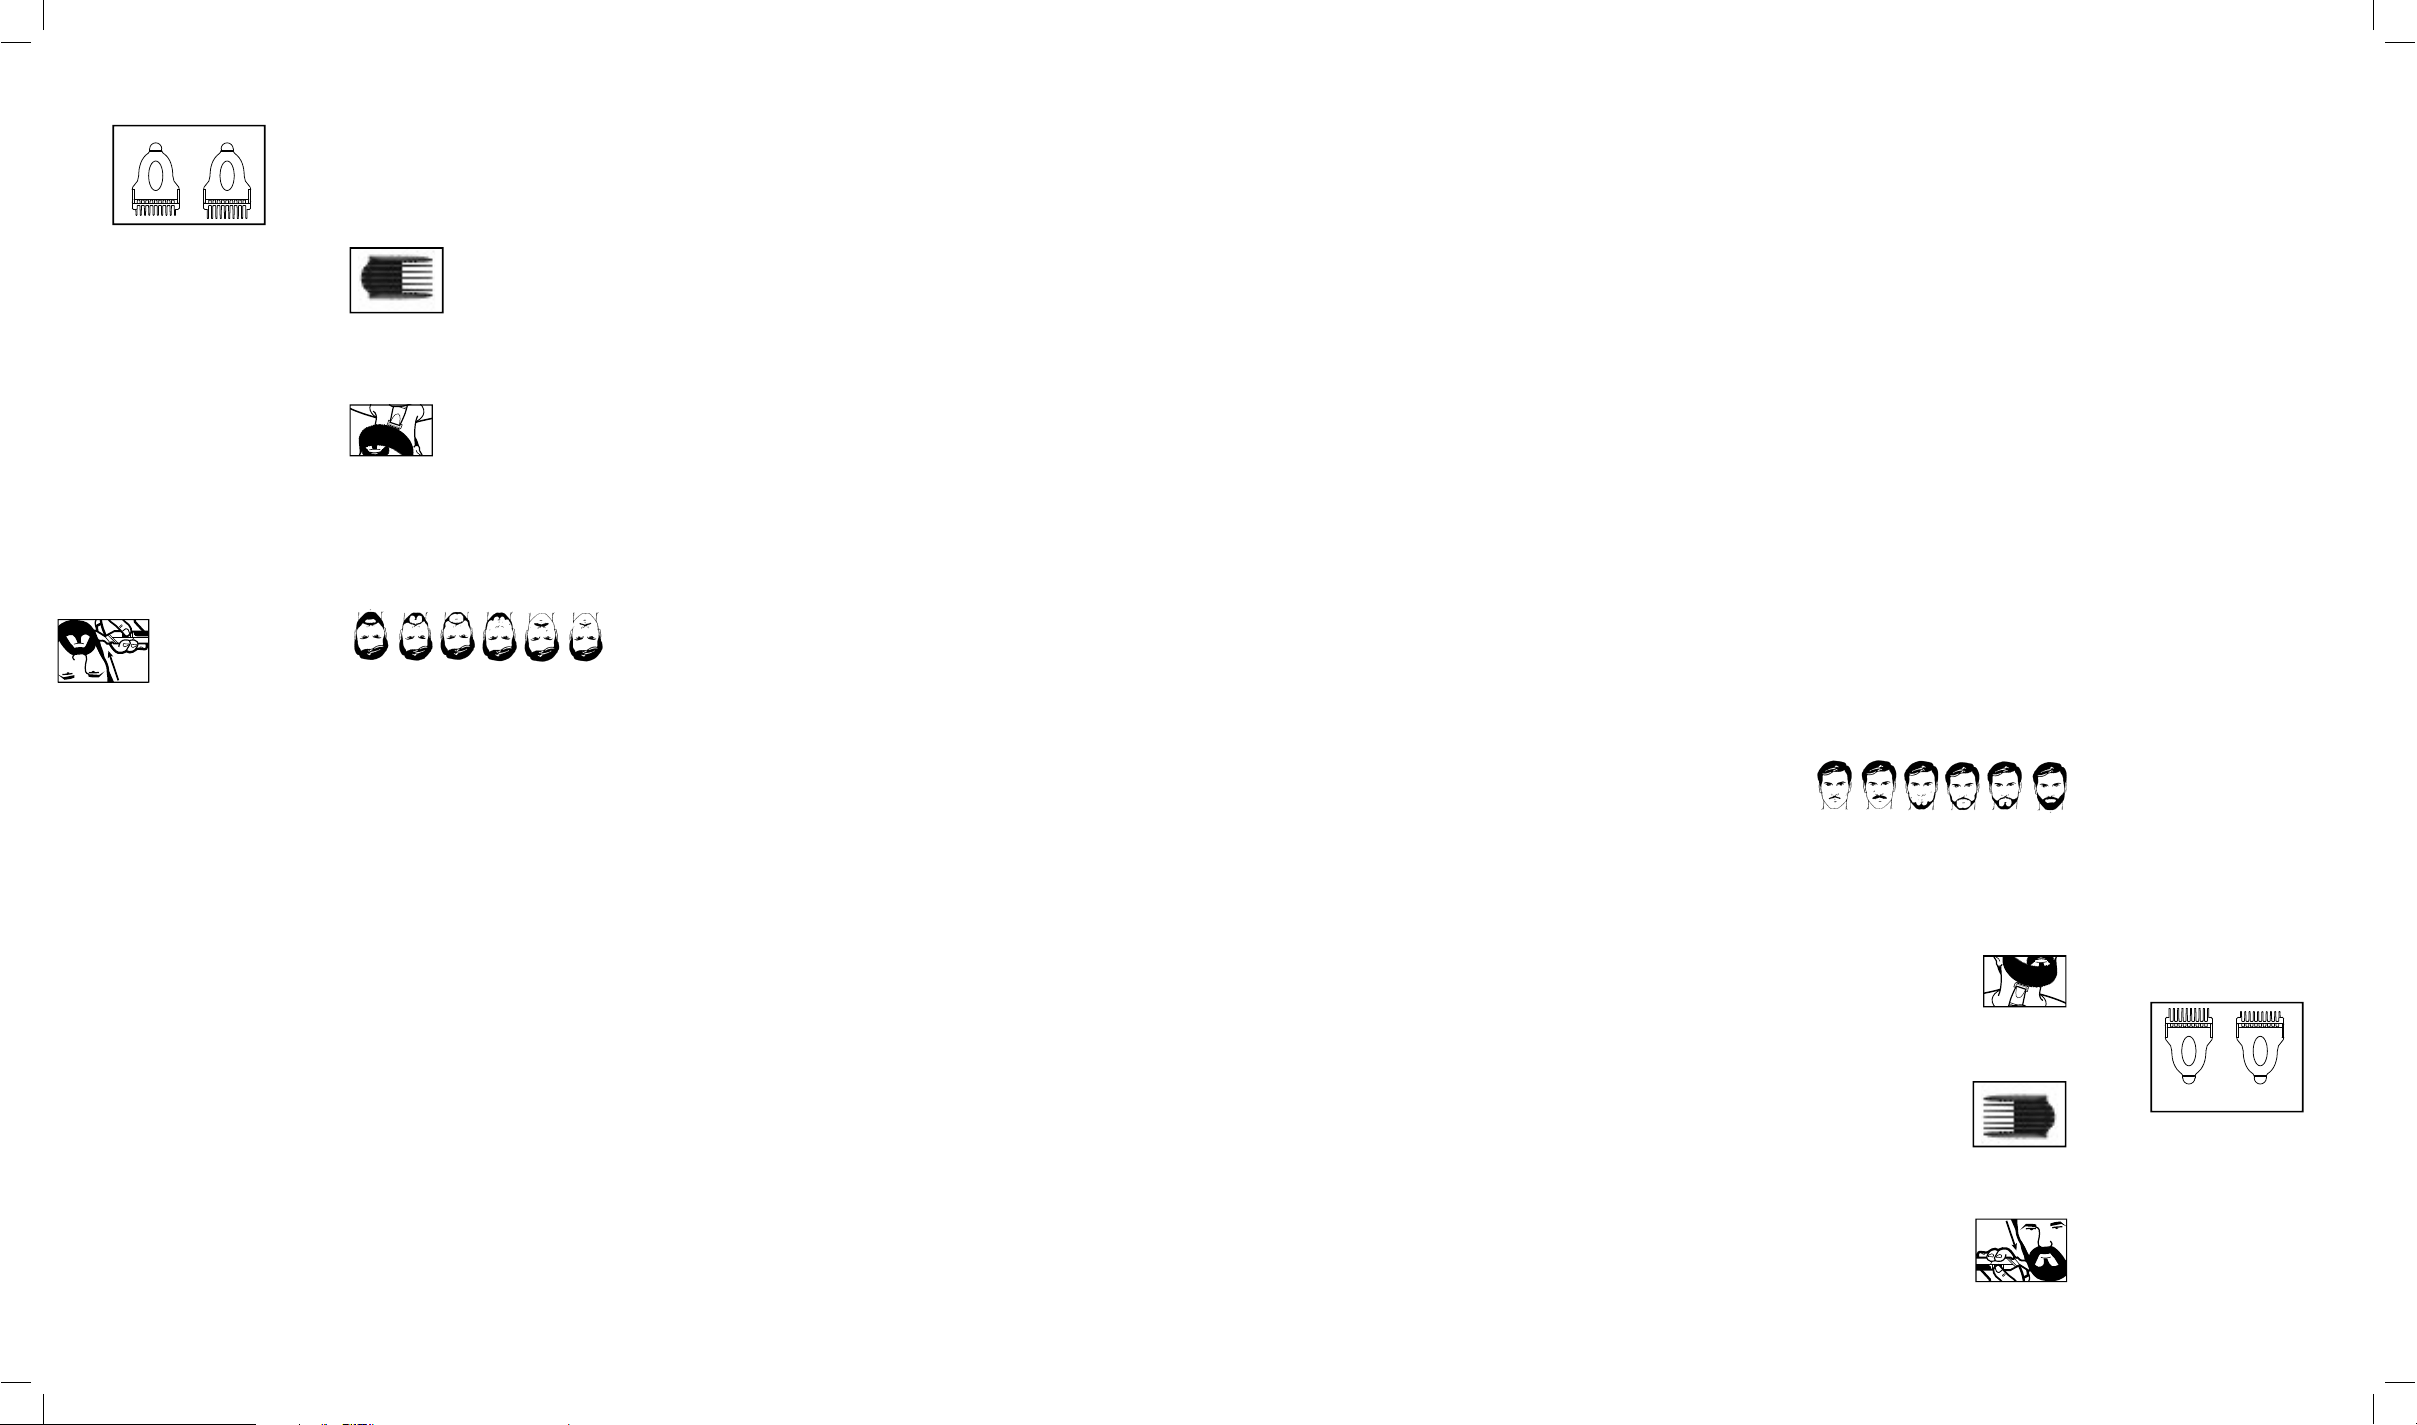
BLENDING THE JAWLINE
1. Two all-purpose attachments, AC14, which
provides lengths of 3mm (shortest) and AC13,
which provides lengths of 5mm (longest), will
help you to achieve a neat, finished trim under
your chin. To use one of the attachments, press it
down over the trimmer blades until it clicks into
position.
2. Hold the trimmer in an upright position and
begin trimming under your jawline, using short,
even strokes.
3. After your beard is blended, turn off the
trimmer and remove the attachment by gently
pulling up on tab.
JAWLINE COMB AC14 JAWLINE COMB AC13
MEDIDAS DE
SEGURIDAD
IMPORTANTES
Siempre que use aparatos eléctricos,
especialmente en la presencia de niños, debe
tomar precauciones básicas de seguridad,
entre las cuales las siguientes:
LEA TODAS LAS
INSTRUCCIONES
ANTES DE USARLO
PARA USO DOMÉSTICO
SOLAMENTE
MANTÉNGALO ALEJADO
DEL AGUA
PELIGRO – Cualquier aparato
enchufado permanece bajo tensión, aunque
esté apagado.
Para reducir el riesgo de muerte o herida por
descarga:
1. Siempre desconecte el aparato
inmediatamente después de usarlo (a
menos que lo esté cargando).
2. No coloque ni guarde el aparato donde
pueda caer o ser empujado a una bañera o un
lavabo.
3. No lo use en el baño o la ducha.
4. No coloque el aparato ni lo deje caer al agua
u otro líquido.
5. No trate de alcanzar el aparato después
de que hubiese caído al agua. Desconéctelo
inmediatamente.
6. Desconecte el aparato antes de limpiarlo.
ADVERTENCIA – Para reducir el
riesgo de quemaduras, electrocución, incendio
o heridas:
1.
Nunca deje el aparato desatendido
mientras esté conectado.
2. Este aparato no debería ser usado por,
sobre o cerca de niños o personas con ciertas
discapacidades.
3. Utilice este aparato únicamente con el
propósito para el cual fue diseñado y solamente
según las instrucciones. Sólo use accesorios
recomendados por el fabricante. No utilice una
extensión con este aparato.
4. No utilice este aparato si el cable o la
clavija estuviesen dañados, si no funcionase
debidamente, si estuviese dañado, o
después de que se hubiese caído al piso
o al agua. Regrese el aparato a un centro
de servicio autorizado para su revisión y
reparación.
5. Mantenga el cable alejado de superficies
calientes.
6. No jale, retuerza ni enrolle el cable alrededor
del aparato.
7. Nunca deje caer ni inserte ningún objeto en
ninguna de las aberturas del aparato.
8. No coloque el aparato sobre ninguna
superficie mientras esté funcionando.
9. No utilice este aparato con guías o cuchillas
rotas o dañadas. Esto podría provocar una
herida. Asegúrese de que las cuchillas estén
debidamente alineadas y lubricadas antes de
cada uso.
10. No lo utilice en exteriores, ni lo haga
funcionar donde se estén usando productos en
aerosol (spray) o donde se esté administrando
oxígeno.
GUARDE ESTAS
INSTRUCCIONES
INSTRUCCIONES DE OPERACIÓN
Lea las instrucciones cuidadosamente antes de
utilizar el adaptador de clase 2.
Utilice el adaptador sector proveído (CA51)
únicamente.
Potencia nominal de entrada: 100–240V AC;
50/60Hz; 0.2A Max
Potencia nominal de salida: 6.0V DC 70mA
FUNCIONAMIENTO
1. Para uso en lugares secos únicamente. No lo
exponga al agua.
2. Desenchufe el aparato cuando no lo está
usando.
3. El adaptador se volverá ligeramente caliente
durante el uso. Esto es normal.
PRECAUCIÓN
1. Para uso en lugares secos únicamente. No lo
exponga al agua, al vapor o a la lluvia.
2. Siempre conecte el cable al aparato antes de
enchufar el adaptador en la toma de corriente.
3. No utilice el aparato si su cuerpo o el cable
estuviesen dañados.
4. Siempre desconecte el adaptador después de
usarlo y antes de limpiarlo.
5. Asegúrese de que el selector de voltaje esté
en la posición debida antes de conectar el
aparato a la toma de corriente. Puede que sea
necesario utilizar un adaptador de enchufe (no
incluido) para conectar el aparato fuera de los
Estados Unidos.
Este artefacto cumple con la Sección 15 de la
Normativa FCC. Su funcionamiento está sujeto
a las dos condiciones siguientes: (1) Este
artefacto no puede causar ninguna interferencia
perjudicial, y (2) Este artefacto debe aceptar
cualquier interferencia recibida, incluso alguna
interferencia que pudiera ocasionar una
operación no deseada.
Advertencia: Se advierte que las
modificaciones no aprobadas expresamente
por la autoridad competente en materia de
conformidad podrían rescindir el permiso del
usuario para operar el equipo.
RESOLUCIÓN DE PROBLEMAS
Si su aparato no agarra carga, siga los pasos
siguientes antes de regresarlo a un centro de
servicio:
1. Conecte otro aparato a la toma de corriente
para asegurarse de que esté funcionando.
2. Asegúrese de que la toma de corriente no
esté conectada a un interruptor que corta el
suministro eléctrico cuando la luz está apagada.
3. Asegúrese de que el adaptador esté
debidamente conectado al aparato, que todas
las conexiones estén seguras y que el botón de
encendido/apagado esté en la posición "OFF".
INSTRUCCIONES DE
OPERACIÓN
1. Cargue el aparato durante 16 horas
antes del primer uso. La batería recargable
alcanzará su capacidad máxima después de
3 ciclos de carga/descarga.
2. Siempre averigüe que la luz de carga está
encendida.
3. Enchufe el adaptador. Averigüe el voltaje
indicado en la etiqueta del adaptador antes de
enchufarlo. Desconecte el adaptador cuando no
esté en uso.
4. Puede que el adaptador se vuelva caliente.
Esto es normal.
5. Para lograr un desempeño óptimo y
mantener la capacidad de la batería recargable,
cargue el aparato durante 16 horas cada tres
meses.
INSTRUCCIONES DE
MANTENIMIENTO
LUBRICACIÓN DE LAS CUCHILLAS
(aceite no incluido)
Lubrique las cuchillas aproximadamente una vez
al mes, usando un aceite mineral ligero. Para
no ensuciar, haga esto encima de un periódico.
Sostenga el aparato al revés y enciéndalo. Coloque
una gota de aceite sobre las cuchillas, apague el
aparato y limpie el exceso de aceite con un paño
suave.
No use demasiado aceite y no lubrique el aparato
más de lo necesario. Esto podría dañar el motor.
Tampoco intente lubricar las piezas del motor, las
cuales son lubricadas de por vida.
LIMPIEZA DE LAS CUCHILLAS
Las cuchillas de su aparato fueron diseñadas
con precisión para un uso específico, y deben
recibir un cuidado muy especial. Limpie las
cuchillas después de cada uso con un cepillo
de limpieza.
Tenga cuidado cuando sea necesario cambiar o
ajustar las cuchillas. Asegúrese de que las dos
cuchillas siempre estén cambiadas o afiladas al
mismo tiempo.
Para seguir disfrutando de su aparato durante
mucho tiempo, utilícelo únicamente con el
propósito para el cual fue diseñado: cortar la
barba y el bigote.
BARBAS Y BIGOTES
El tipo de barba o de bigote que más conviene a
una persona depende de:
1. La forma y el tamaño de su rostro.
2. La forma del crecimiento natural de su barba
o de su bigote.
3. El espesor de su barba o de su bigote. Si no
está seguro del tipo de barba o bigote que le
conviene, pida consejo a un barbero. Después
de dar forma a su barba o a su bigote, deberá
mantener su aspecto, usando la cortadora una
vez por semana.
Para lograr resultados óptimos, humedezca
ligeramente su barba antes de recortarla (no la
moje). Esto evitará cortar demasiado pelo.
TIPOS DE BARBAS Y BIGOTES
FUNCIONAMIENTO BÁSICO
EL CONTORNEO
1. Se le hará más fácil cortar la barba si está
limpia y ligeramente humedecida.
2. Peine la barba en la dirección del
crecimiento natural del pelo antes de empezar
a darle forma.
3. Dé forma a su barba
empezando debajo de la quijada
y subiendo hacia la oreja, en
cada lado del rostro. Siga dando
forma al área de la mejilla, a las patillas y a la
línea de nacimiento del cabello.
CÓMO CORTAR SU BARBA
1. Su cortadora incluye
una guía ajustable con 5
posiciones para uso con la
cuchilla para la barba, y que
corta el pelo de 2 a 10 mm.
2. Instale la guía encima de la cuchilla de corte.
Le recomendamos que utilice el ajuste más
largo para empezar Siempre podrá volver a
acortar la barba.
3. Empiece a cortar su
barba con movimientos
parejos y suaves, desde
las patillas hasta la
quijada. Nunca corte en
dirección contraria al crecimiento natural del
pelo. El pelo resultaría demasiado corto.
4. Si desea un recorte aún más corto, escoja un
largo de recorte más corto, como 9.5 mm (5/32
pulgada) o 12.5 mm (3/32 pulgada), y siga
acortando su barba hasta conseguir el tamaño
deseado.
IGUALAR LA QUIJADA
1. Las guías para la quijada (la guía AC14 que
corta el pelo a 3 mm y la guía AC13 que corta
el pelo a 5 mm) le permitirán lograr un recorte
neto y preciso. Instale la guía encima de la
cuchilla de acabado.
2. Sostenga la cortadora recta y corte el pelo
usando pequeños movimientos uniformes.
3. Después de terminar, apague el aparato y
retire el accesorio.
GUÍA PARA LA
QUIJADA AC14
GUÍA PARA LA
QUIJADA AC13
5-Position Comb Attachment 5POS-189 $2.25
2 Jawline Combs 2JAW-189 $5.50
TRIMMER REPLACEMENT PARTS & ACCESSORIES ORDER FORM
Pricing in effect through June 1, 2015. Orders postmarked after this date
will be accepted, and the customer will be notified if pricing has changed.
ITEM PART # PRICE QUANTITY AMOUNT
Mail to:
Conair Corporation
Service Department
150 Milford Road
East Windsor, NJ 08520-9730
Subtotal
Sales Tax*
TOTAL
CUT HERE
Enclose check or money order made payable to Conair. (We cannot accept cash,
stamps or C.O.D. orders.) *CT, IL, AZ, and PA residents should add applicable state
sales tax. Minimum order of $10.00 or a $2.00 handling charge will be added to order.
All prices include handling and return postage.
Prices are subject to change without notice.
Prices are valid only for shipments within the continental United States.
Please allow 4–6 weeks for delivery.
To avoid delays, please print clearly.
We must have a street address, as UPS cannot deliver to a P.O. box.
NAME _________________________________________________________________________________________________
ADDRESS ___________________________________________ APT. ______________________________________________
CITY ________________________________________________STATE _________ ZIP
________________________________
TELEPHONE ( ) _____________________________________________________________
(We call only if we have a question about your order.)
For information on other Conair haircut kit parts call: 1-800-3-CONAIR.
5POS-189
2JAW-189
13PG140638 IB-12092
LIMITED TWO-YEAR WARRANTY
Conair will repair or replace (at our option) your
unit free of charge for 24 months from the
date of purchase if the appliance is defective in
workmanship or materials.
To obtain service under this warranty, return the
defective product to the service center listed on
back, together with your purchase receipt and
$3.00 for postage and handling. California resi-
dents need only provide proof of purchase and
should call 1-800-366-0937 for shipping instruc-
tions. In the absence of a purchase receipt, the
warranty period shall be 24 months from the
date of manufacture.
ANY IMPLIED WARRANTIES, OBLIGATIONS, OR
LIABILITIES, INCLUDING BUT NOT LIMITED TO
THE IMPLIED WARRANTY OF MERCHANTABILITY
AND FITNESS FOR A PARTICULAR PURPOSE,
SHALL BE LIMITED IN DURATION TO THE
24-MONTH DURATION OF THIS WRITTEN,
LIMITED WARRANTY. Some states do not allow
limitations on how long an implied warranty lasts,
so the above limitations may not apply to you.
IN NO EVENT SHALL CONAIR BE LIABLE
FOR ANY SPECIAL, INCIDENTAL, OR
CONSEQUENTIAL DAMAGES FOR BREACH OF
THIS OR ANY OTHER WARRANTY, EXPRESS OR
IMPLIED, WHATSOEVER. Some states do not
allow the exclusion or limitation of special, inci-
dental, or consequential damages, so the above
limitation may not apply to you.
This warranty gives you specific legal rights, and
you may also have other rights, which vary from
state to state.
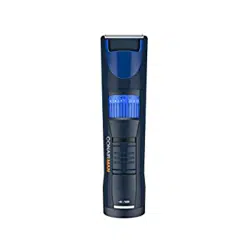
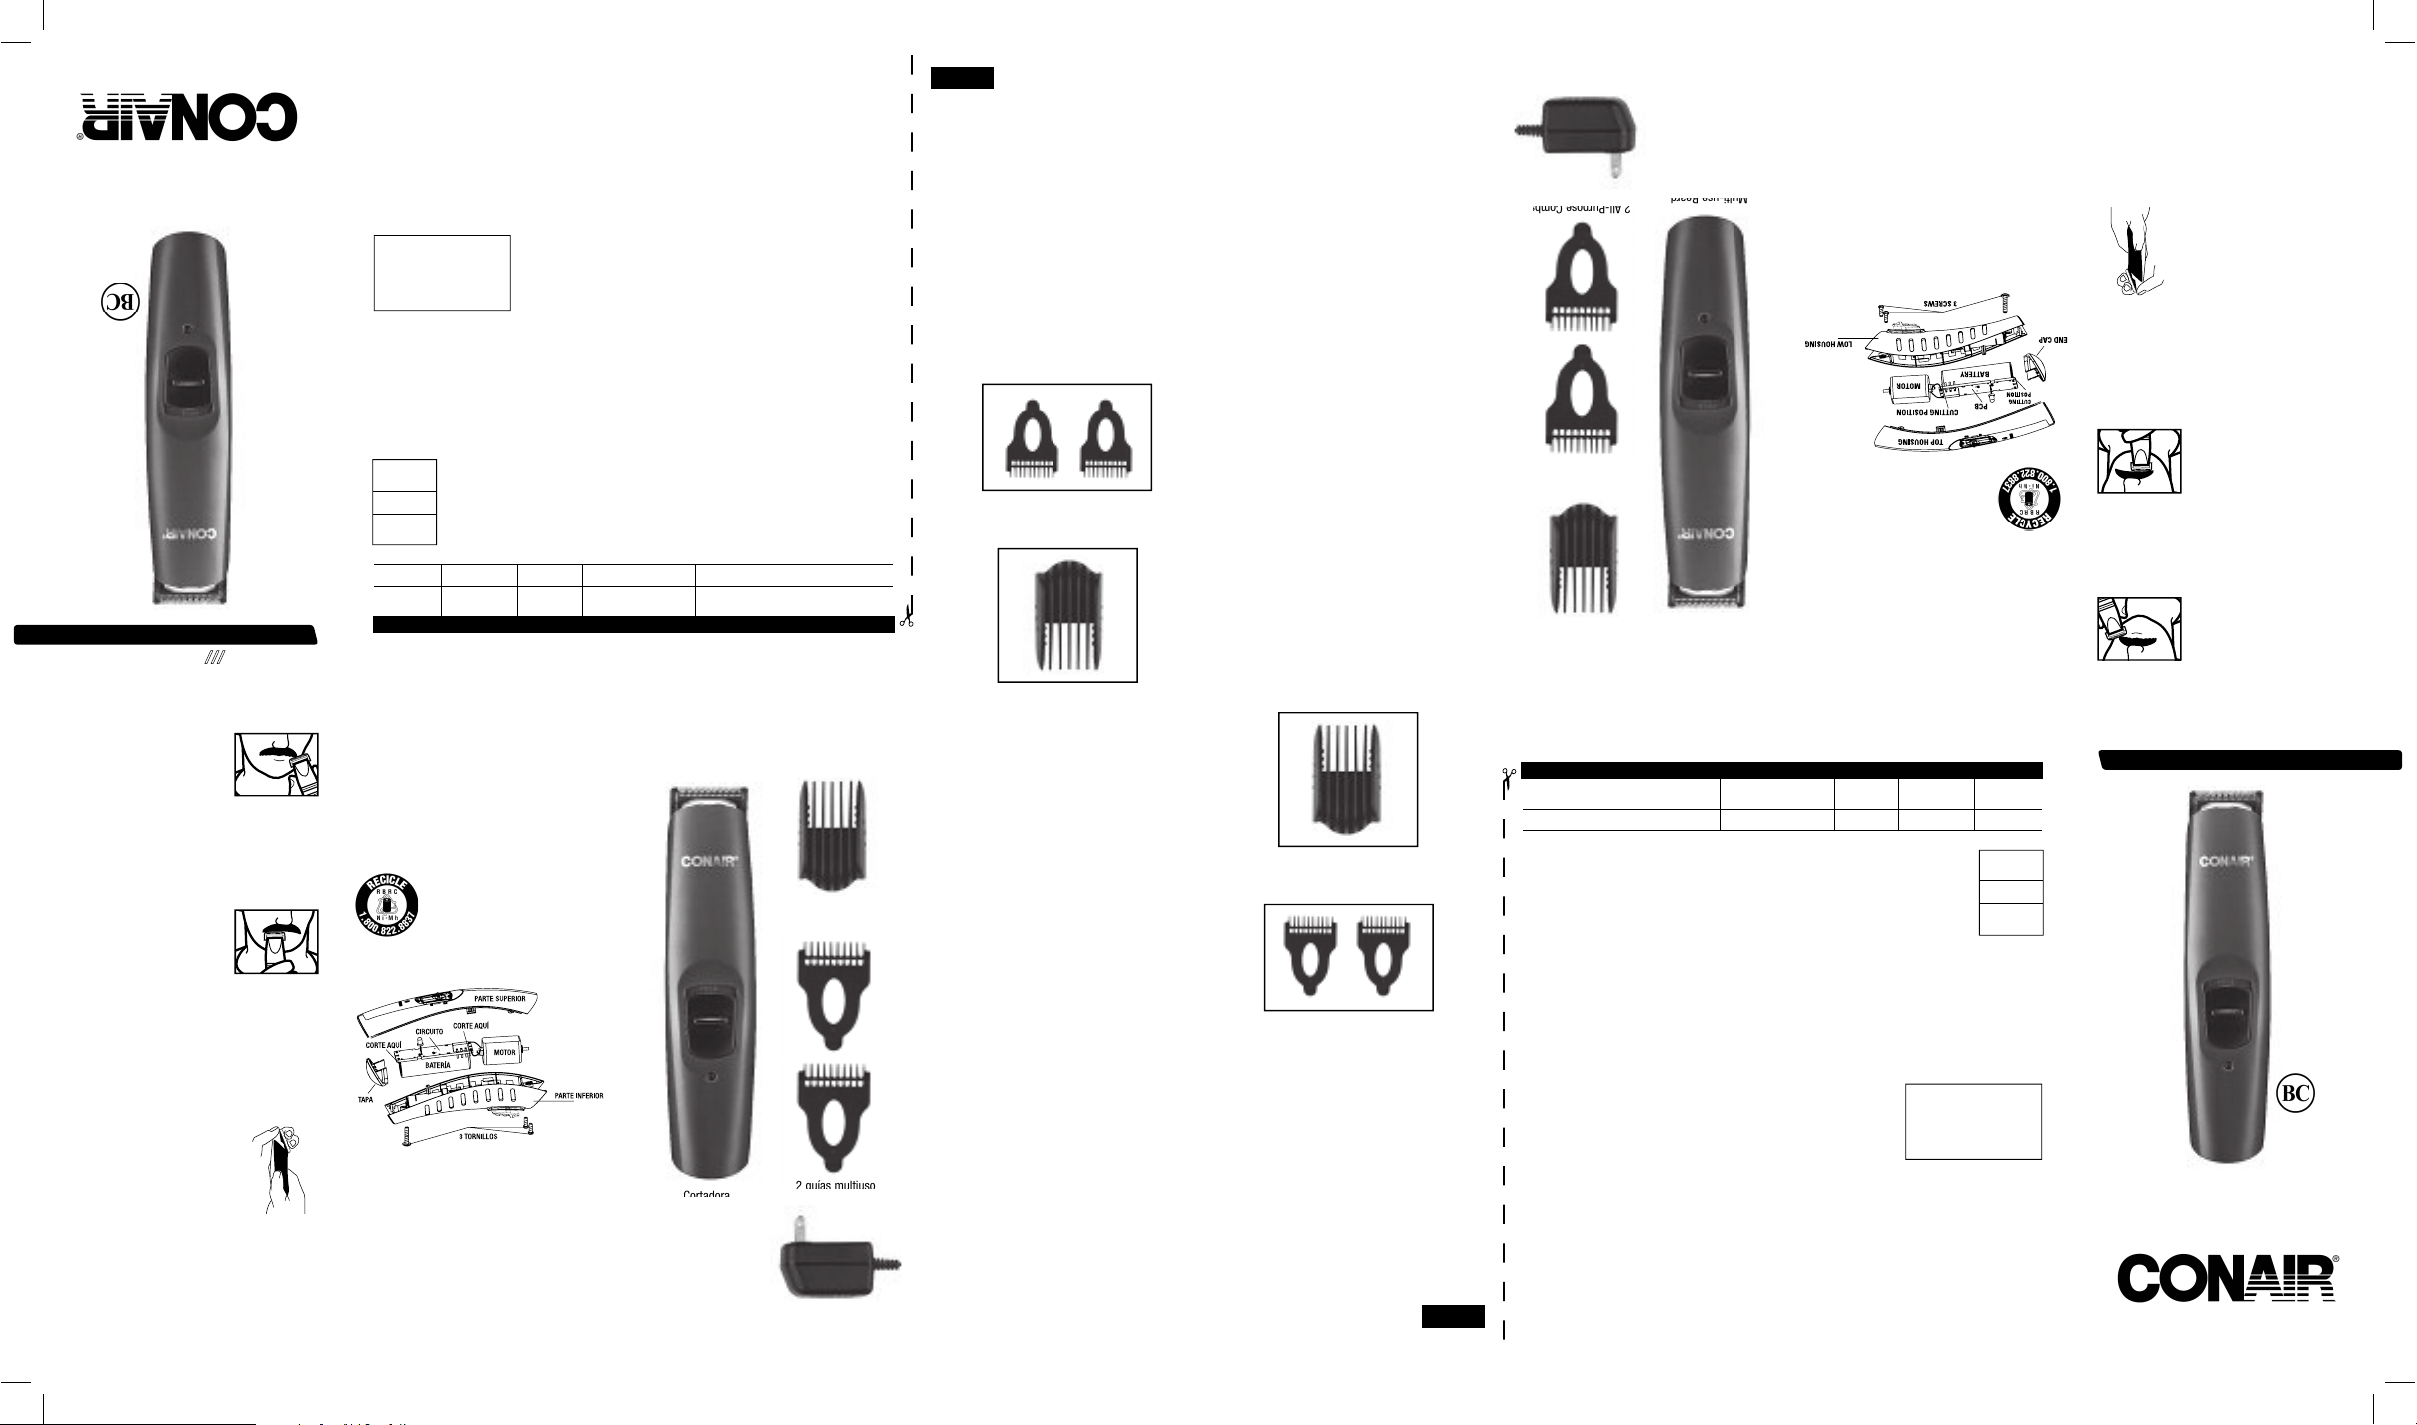
MODEL GMT10RCSB
BEARD/MUSTACHE TRIMMER
5-Position
Adjustable Comb
2 All-Purpose Combs
Adapter
Multi-use Beard
& Mustache
Trimmer
Facial Hair Blade
2 A
ll-
Pur
pos
e C
omb
s
Mul
ti-
use
Be
ard
TRIMMING YOUR MUSTACHE
1. For best results, start with a
clean, slightly damp mustache.
2. Comb through your mustache
in the direction it grows.
3. Place the 5-position comb over the facial hair
blade and snap it into position. It is a good idea
to start with the longest trim setting adjustment.
(You can always go back and cut your mustache
more closely with a shorter setting.) Always
trim your mustache from the top down.
4. After your mustache has
been trimmed to the desired
length, remove the 5-position
comb and, using the blade only,
define the outline of the bottom
of your mustache.
ON/OFF SWITCH
To operate, simply slide switch toward blade; to
stop, slide switch away from blade.
CARE OF YOUR TRIMMER
REPLACEMENT (REMOVAL) OF BLADE SET
To remove blade set from your
trimmer, make sure the trimmer
is in the OFF position. Remove the
blade set by placing thumb against
the smaller cutter and pushing for-
ward, releasing the cutter assem-
bly from the trimmer housing.
Replace with new cutting system and reverse
the removal procedure, only this time place your
thumb on the large cutter and snap into place.
BATTERY REMOVAL
1. Using a small Phillips head screwdriver, remove
the screws at the back of the trimmer.
2. Remove the bottom housing and cut the
battery out. Bring the battery to the nearest
collection center for proper disposal. DO NOT
throw the battery into the normal municipal
waste system.
©2013 Conair Corporation
Service Center
Conair Corporation
Service Department
7475 North Glen Harbor Blvd.
Glendale, AZ 85307
Please register this product at:
www.conair.com/registration
T R I M M E R
ALL-IN-ONE
BEARD
///
MUSTACHE
Model GMT10RCSB
Instruction Booklet
For your safety and continued enjoyment
of this product, always read the instruction
booklet carefully before using.
CONTAINS NICKEL METAL HYDRIDE BATTERY.
MUST BE COLLECTED, RECYCLED OR DISPOSED
OF PROPERLY. DO NOT DISPOSE OF IN THE
MUNICIPAL WASTE.
Guía ajustable con 5 posiciones 5POS-189 $2.25
2 guías para la quijada 2JAW-189 $5.50
FORMULARIO DE PEDIDO – PARTES DE REPUESTO Y ACCESORIOS
Precios válidos hasta el 1
ero
de junio de 2015. Aceptaremos los pedidos enviados después
de esta fecha y le informaremos de cualquier cambio de precio.
DESCRIPCIÓN MODELO PRECIO CANTIDAD TOTAL
Subtotal
*Impuesto a la venta
TOTAL
CORTAR AQUÍ
Favor de incluir un cheque o giro postal al nombre de Conair. Sentimos no poder
aceptar dinero en efectivo, estampillas, ni pedidos contra reembolso.
Los residentes de CT, IL, AZ y PA deben sumar al subtotal el impuesto estatal a las
ventas. Se requiere un pedido mínimo de $10.00; de lo contrario se sumará $2.00 al
pedido por gastos administrativos.
Los precios incluyen gastos de manejo y envío.
Los precios están sujetos a cambio sin previo aviso.
Precios válidos únicamente para envíos en la parte continental de los EE.UU.
La entrega demora entre 4 y 6 semanas.
Para evitar demoras, por favor escriba claramente.
Favor de incluir su dirección completa; UPS no puede hacer entregas a casillas postales.
NOMBRE _______________________________________________________________________________________________
DIRECCIÓN _________________________________________________________
CIUDAD _____________________________________________ESTADO _______ CÓDIGO POSTAL ___________________
TELÉFONO ( ) ______________________________________
(en caso de pregunta)
Para información sobre otras partes de repuesto y accesorios, llame al: 1-800-3-CONAIR.
5POS-189
2JAW-189
13PG140638 IB-12092
GARANTÍA LIMITADA DE DOS AÑOS
Conair reparará o remplazará (a su opción) su
aparato sin cargo por un período de 24 meses
a partir de la fecha de compra si presentara
defectos de materiales o fabricación.
Para
obtener servicio técnico bajo esta garantía,
regrese su aparato al Centro de Servicio
indicado al dorso, junto con su recibo de
compra y un cheque o giro postal de US$3.00
por gastos de manejo y envío. Los residentes
de California sólo necesitan dar una prueba de
compra y deben llamar al 1-800-366-0937 para
recibir instrucciones de envío. En ausencia del
recibo de compra, el período de garantía será
de 24 meses a partir de la fecha de fabricación.
CUALQUIER GARANTÍA, OBLIGACIÓN O
RESPONSABILIDAD IMPLÍCITAS, INCLUYENDO
PERO NO LIMITADAS A LA GARANTÍA
IMPLÍCITA DE COMERCIABILIDAD Y APTITUD
PARA UN PROPÓSITO ESPECÍFICO, ESTARÁN
LIMITADAS POR LOS 24 MESES DE LA
PRESENTE GARANTÍA ESCRITA. Algunos
Estados no permiten limitaciones sobre la
duración de una garantía implícita, de modo
que las limitaciones mencionadas pueden no
regir para usted.
CONAIR
NO SERÁ RESPONSABLE, EN NINGÚN
CASO, POR NINGÚN DAÑO ESPECIAL,
INCIDENTAL O CONSECUENTE DEBIDO AL
INCUMPLIMIENTO DE ESTA O CUALQUIER
OTRA GARANTÍA, EXPRESA O IMPLÍCITA.
Algunos Estados no permiten la exclusión o
limitación de daños especiales, incidentales o
consecuentes, de modo que las limitaciones
mencionadas pueden no regir para usted.
Esta garantía le otorga derechos legales
específicos y usted puede tener otros derechos
que varían de un Estado a otro.
MODELO GMT10RCSB
CORTADORA DE BARBA/BIGOTE
Guía ajustable
con 5 posiciones
2 guías multiuso
Adaptador
Cortadora
multiuso
Cuchilla normal
2 g
uía
s m
ult
ius
o
Cortadora
CÓMO CORTAR SU BIGOTE
1. Se le hará más fácil cortar
su bigote si está limpio y
ligeramente humedecido.
2. Peine su bigote en la
dirección del crecimiento
natural del pelo.
3. Instale la guía ajustable sobre la cuchilla
normal. Empiece con la posición más larga
(siempre podrá volver a acortar el bigote).
SIEMPRE CORTE SU BIGOTE
DESDE ARRIBA HASTA ABAJO
4. Después de terminar, retire
la guía y dé forma a la parte
inferior de su bigote.
BOTÓN DE ENCENDIDO/APAGADO
Para encender el aparato, deslice el botón de
encendido/apagado hacia las cuchillas. Para
apagarlo, deslícelo hacia atrás.
MANTENIMIENTO DE SU
CORTADORA
CAMBIO DEL JUEGO DE CUCHILLAS
Para sacar el juego de cuchillas,
apague el aparato (OFF).
Sostenga el aparato con el botón
de encendido/apagado frente
su cuerpo y empuje la cuchilla
pequeña con el pulgar para
desencajar el juego de cuchillas.
Para instalar el juego de cuchillas, instálelo
sobre el cabezal y presione la cuchilla grande
para sujetarlo.
REMOCIÓN DE LA BATERÍA
1. Retire los tornillos ubicados en la
parte trasera del aparato con un pequeño
destornillador cruciforme.
2. Abra el cuerpo del aparato y corte los
alambres que conectan la batería. Lleve la
batería al centro de reciclaje más cercano.
NO tire las baterías con el resto de la basura.
©2013 Conair Corporation
Centro de servicio
Conair Corporation
Service Department
7475 North Glen Harbor Blvd.
Glendale, AZ 85307
Para registrar su producto, visítenos en:
www.conair.com/registration
MULTIUSO
CORTADORA
DE BARBA
///
BIGOTE
Modelo GMT10RCSB
Manual de instrucciones
Para su seguridad y para disfrutar plenamente
de este producto, siempre lea las instrucciones
cuidadosamente antes de usarlo.
ESTE APARATO CONTIENE UNA BATERÍA DE
NÍQUEL E HIDRURO METÁLICO (NIMH),
LA CUAL DEBE RECICLARSE SEGÚN LAS
LEYES VIGENTES AL FINAL DE SU VIDA ÚTIL.
NO TIRE LA BATERÍA CON EL RESTO DE LA
BASURA.
Enviar a:
Conair Corporation
Service Department
150 Milford Road
East Windsor, NJ 08520-9730