Loading ...
Loading ...
Loading ...
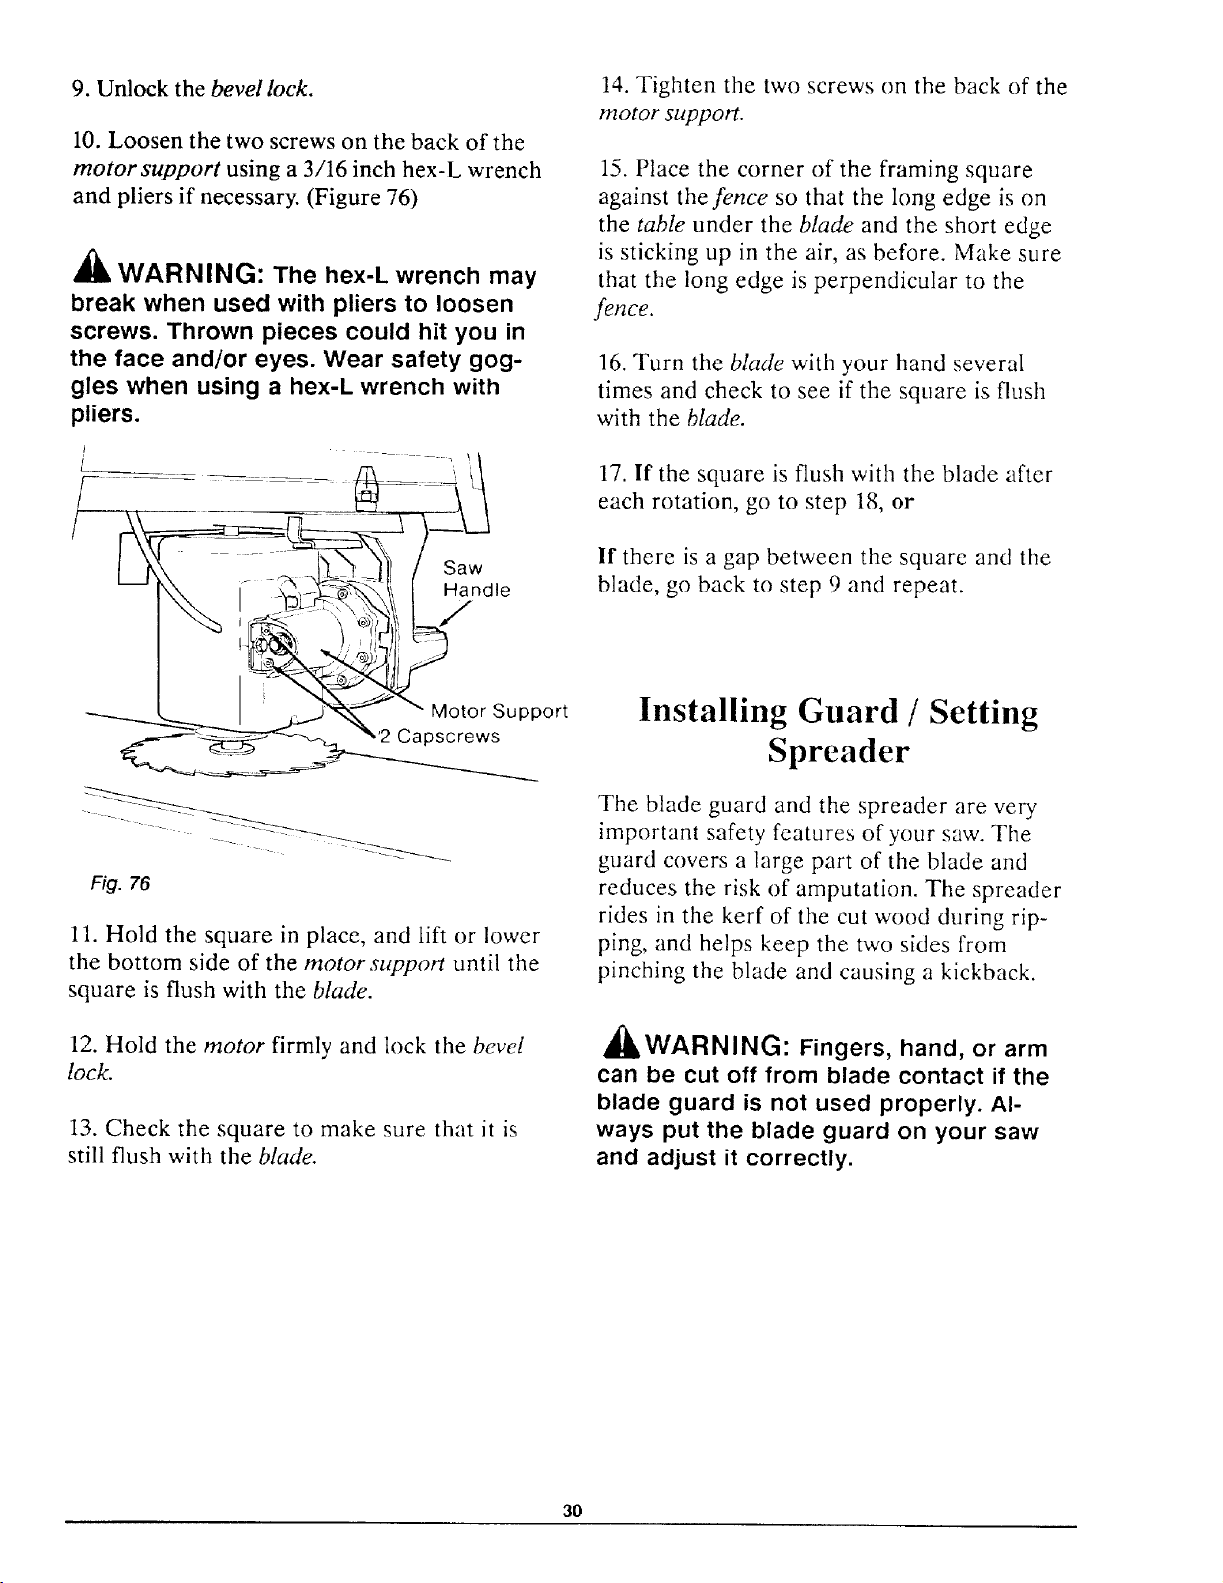
9. Unlock the bevel lock.
10. Loosen the two screws on the back of the
motor support using a 3/16 inch hex-L wrench
and pliers if necessary. (Figure 76)
WARNING: The hex-L wrench may
break when used with pliers to loosen
screws. Thrown pieces could hit you in
the face and/or eyes. Wear safety gog-
gles when using a hex-L wrench with
pliers.
Saw
Handle
14. Tighten the two screws on the back of the
motor support.
15. Place the corner of the framing square
against the fence so that the long edge is on
the table under the blade and the short edge
is sticking up in the air, as before. Make sure
that the long edge is perpendicular to the
fence.
16. Turn the blade with your hand several
times and check to see if the square is flush
with the blade.
17. If the square is flush with the blade after
each rotation, go to step 18, or
If there is a gap between the square and the
blade, go back to step 9 and repeat.
Motor Support
Capscrews
Fig. 76
11. Hold the square in place, and lift or lower
the bottom side of the motor support until the
square is flush with the blade.
12. Hold the motor firmly and lock the bevel
lock.
13. Check the square to make sure that it is
still flush with the blade.
Installing Guard / Setting
Spreader
The blade guard and the spreader are very
important safety features of your saw. The
guard covers a large part of the blade and
reduces the risk of amputation. The spreader
rides in the kerf of the cut wood during rip-
ping, and helps keep the two sides from
pinching tile blade and causing a kickback.
dUkWARNINL_: Fingers, hand, or arm
can be cut off from blade contact if the
blade guard is not used properly. Al-
ways put the blade guard on your saw
and adjust it correctly.
3O
Loading ...
Loading ...
Loading ...