Loading ...
Loading ...
Loading ...
Range Hood Mounting Screws Installation
• The hood attaches to the wall with two mounting brackets
with adjustment screws and four mounting screws.
1. Determine and mark the centerline on the wall where the
canopy range hood will be installed.
2. Select a mounting height between a minimum of 30" (76.2 cm)
and a suggested maximum of 36" (91.4 cm), above the
cooking surface and the bottom of the range hood. To this
distance, add 16" (40.6 cm) and mark a horizontal line.
3. Mark 2 points on each side of the horizontal line the distance
shown in "A" below (based on the size of your range hood).
D
B C
A. Distance from center of mounting
bracket to centerline.
30" (76.2 cm) hood:
13_" (34.0 cm)
36" (91.4 cm) hood:
16_" (41.6 cm)
42" (106. 7 cm) hood:
19 _" (49.4 cm)
48" (121.9 cm) hood:
22_" (56.8 cm)
B. Mounting screws (4)
C. Mounting brackets and
adjustment screws
D. Bottom of hood
4,
Adjust the two adjusting screws on the mounting brackets to
the lowest point and attach to the wall with the screws
provided. The screws provided for mounting this hood must
be fastened into solid wood. Do not fasten into sheet rock
only.
Optional Duct Cover Installation
1. Attach the full-width duct cover to the top of the range hood
with the screws provided. The duct cover must be attached
to the top of the range hood before mounting the range hood
to the wall. For information on ordering the optional duct
cover, see "Accessories" section.
A. Distance from center of mounting
bracket to centerline.
30" (76.2 cm) hood:
13 r_2" (34.2 cm)
36" (91.4 cm) hood:
16 r_2" (41.8 cm)
42" (106. 7 cm) hood:
191_2" (49.4 cm)
48" (121.9 cm) hood:
22 r_2" (57.1 cm)
B. Mounting brackets
C. Top of hood
2, Install each bracket on the wall as shown. Make sure the
screws and brackets are securely fastened to the wall.
IMPORTANT: Install only the brackets. Do not install the
hood.
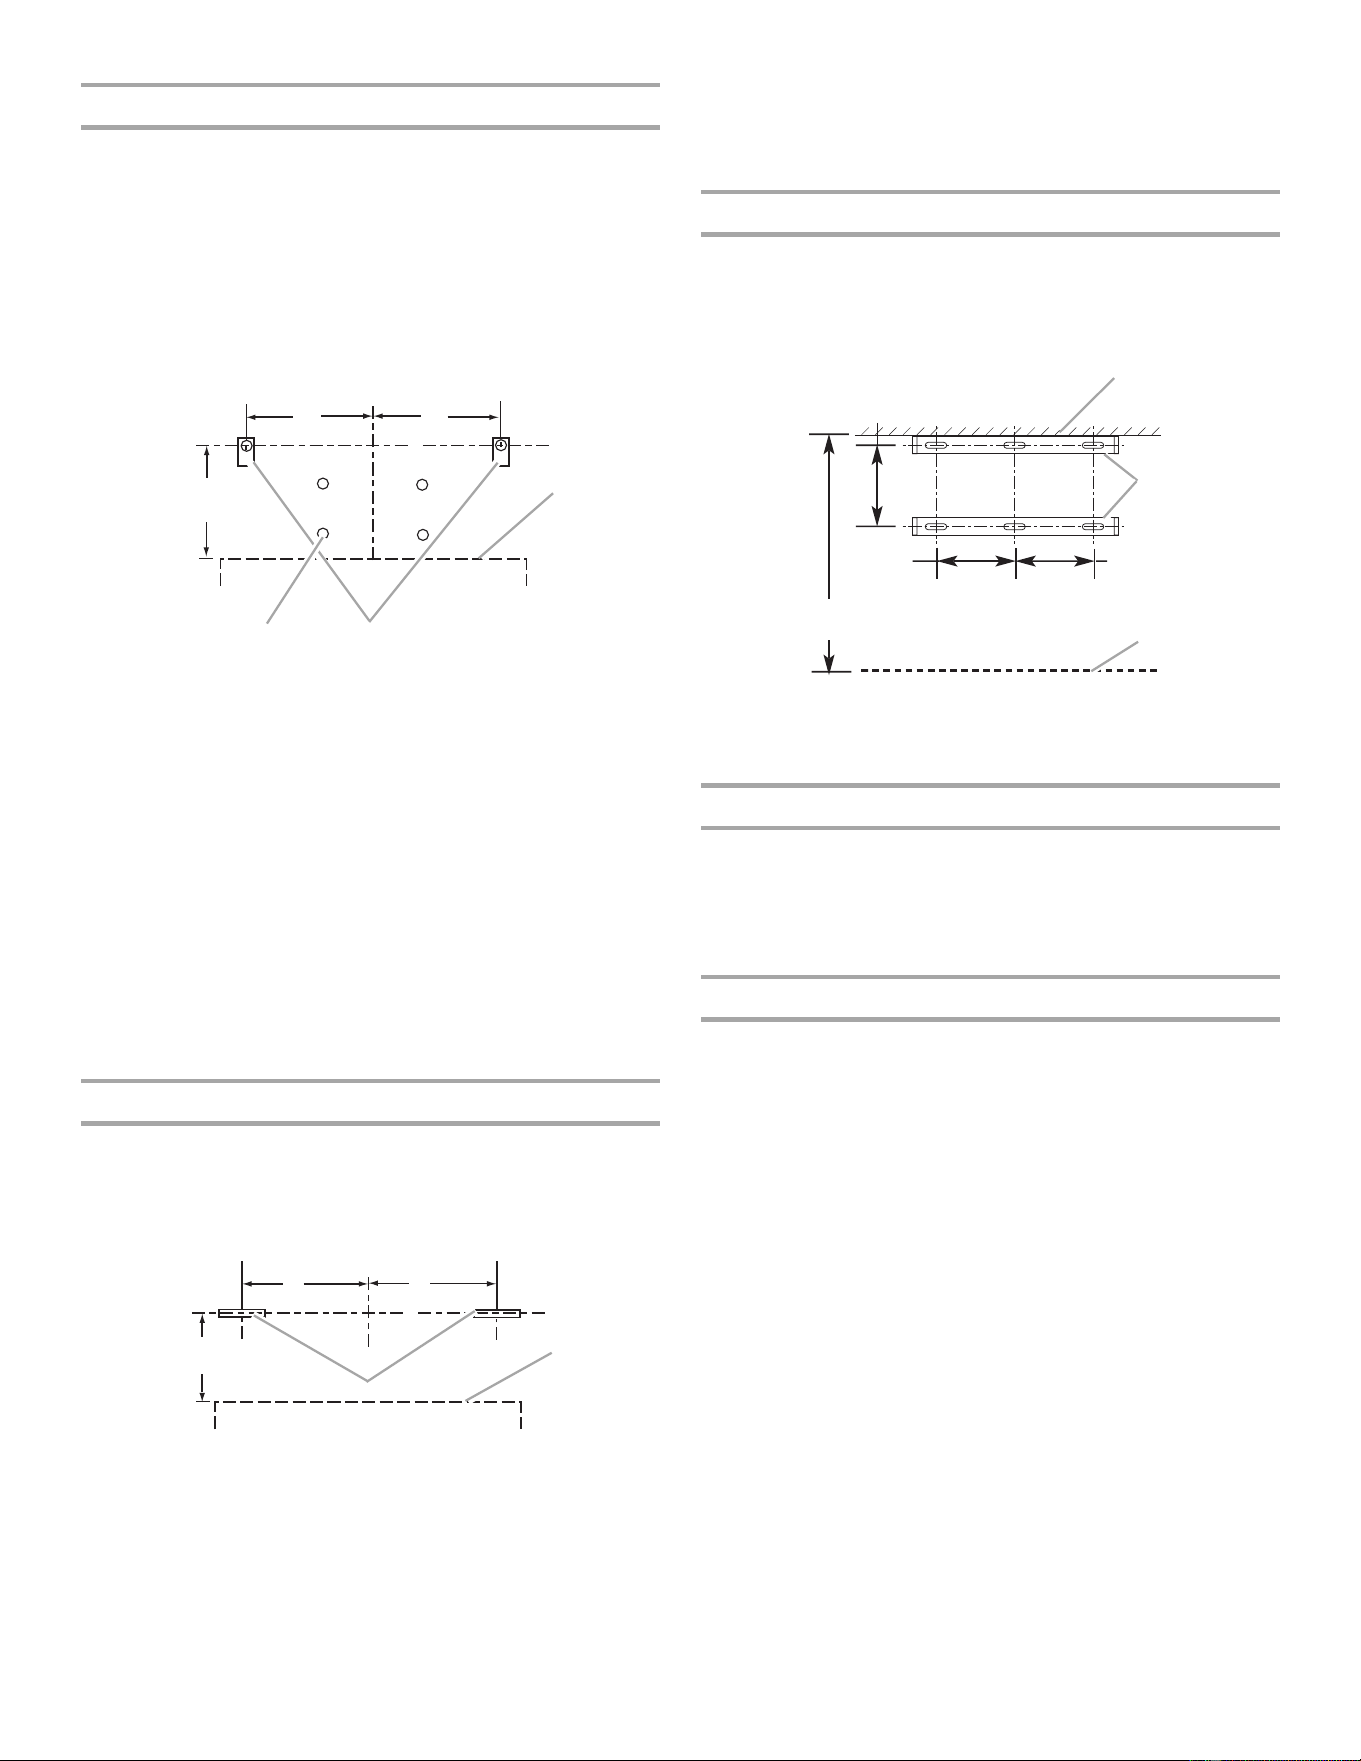
Optional Chimney Extension Installation
1. If a chimney extension is used, attach the extension brackets
as shown. Make sure that the screws are securely fastened to
the wall. For information on ordering the optional chimney
extensions, see "Accessories" section.
A
10%" ,//
(27 cm) //
/ _ / / / A / / / / / / / / J'/// / / / /
_ _ __ _ _ "_
i i i/
1ow,o"__ 10,5/,o"
(27.8cm) (27.8cm)
23" (58.4 crn) max.
12" (30.5 cm) min.
k ///C
A. Ceiling
B. Brackets
C. Top of hood
Optional Heat Lamp Installation
1. Remove the bottom panel at the rear of the hood by removing
the screws located at each end.
2. Install the heat lamp kit with the tabs inserted into the
corresponding slots on the hood and the screws toward the
front of the hood. Replace the screws to secure it in place.
Complete Preparation
1. Determine and make all necessary cuts in the wall for the vent
system. Install the vent system before installing the range
hood. See the "Venting Requirements" section.
2. Determine the location where the power supply cable will be
run through the wall.
3. Drill a 1V4"(3.2 cm) hole at this location.
4. Pull enough power supply cable through the wall to allow for
easy connection to the terminal box.
5. If roof or wall cap does not have a damper, attach damper to
exhaust opening(s) on top of the hood using two Phillips-
head screws.
6. If 48" (121.9 cm) hood is to be connected to 10" (25.4 cm)
round vent system, install the vent transition piece now.
Loading ...
Loading ...
Loading ...