SEARS
Kenmore
OWNER'S
MANUAL
MODEL NO.
911.95361
911.95368
911. 95455
911.95459
911,95465
911.95469
911.95371
911.95378
CAUTION:
Read and Follow All Safety
Rules and Operating
Instructions Before First
Use of This Product
911.95465
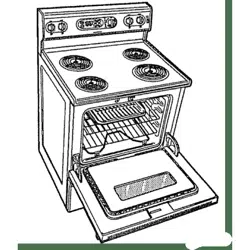
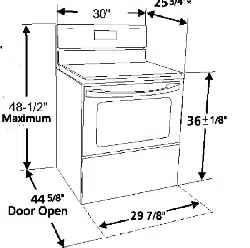
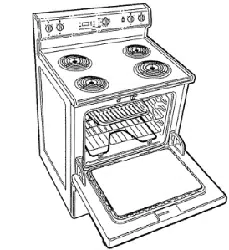
30"RADIANT
SELF-CLEANING
FREE-STANDING
RANGE
• Safety Instructions
• Features
• Operation
• Care and Cleaning
• Problem Solving
• Easy Adjustment
• Consumer Service
Sears, Roebuck alld Co., Hoffman Esfales, IL 60t 79 U.S.A.
MAR292000 "2'_r'l(l?lll_(lG4-2($RI0287)

RADIANTFREE-STANDINGRANGE
TABLEOFCONTENTS
Range Safety .............. ,
_tabJlity Device .........................
, _ __ _,..._
Removal of Packaging Tape ........... "
Features of Your Range ....................... 8
Protecting Your New Cooktop ............ 7
Cooking Zones ........................................ 9
Cooking Utensils and Woks .................... 9
Checking Your Cookware ......... _-_
Radiant Coils ................................... b
Cookware Performance ......................... 9
Radiant Unit Cycle ............................... !0
Control Settings .................................... 10
Home Canning ................................... 10
Arrow Pads ........................................... 11
Display ................................................ 11
Indicator Lights ..................................... 11
F-Codes ................................................. 11
PF-Codes .............................................. 11
Black-Out Display .................................. 11
Automatic Shut-Off ................................ ! 1
To Set the Clock ................................. 12
To Set the Timer .................................. 12
To Reset the Timer ............................. 12
To Cancel the firner ...................... 12
,'empeFi,', ;_ "_T bstmefl[ ................... 15
,: .... _b _.> _ z, ! : ,,[7 _,!oats lof
Self.Cleaning ..................... tz- t8
P_eparing Your Over} ........................... 17
Oven Door Gasket .............................. 17
r?,-7o_Lock De,foe ................................ !7
t',.'_llsel the Oven ................................ 17
m_; lo Set A Clean Cycle ..................... 18
io Stop A Cycle .................................... 18
4Rer The Cycle ..................................... 18
Control Panel ......................................... 20
Broiler Pan and Grid .............................. 20
Painted Surfaces ................................... 20
O/,_ssCeramic Cooktop ....................... 19
Surface Cofttrol Knobs .......................... 21
Oven Light Bulb ................................... 21
Storage Drawer ..................................... 22
Oven Racks ......................................... 23
Oven Door ............................................. 23
_Iore C;tl!ing for Service ............ 24, ,2.5
Temperature Adjustment ............. 26
(_d)aslJnl_r Service NlJni_]ers ........... 27
Warranty
For your convenience and future reference, please write down
your model and serial numbers in the space provided. They ,_re
located o_ th_ _re,_ fr_m_ b_b;_J t • stor;_o d_,-_wer,
MODEL NUMBER:
SERIAL NUMBER:
.
IMPORTANTINSTRUCTIONSFORYOURSAFETY
• All Ranges Can Tip
• Injury To Persons Could
Result
• Install Anti-tip Device
Packed With Range
• See Installation Instructions
Tools you will need:
Phillips head screwdriver
1 3/8" open end or adjustable wrench
fo Remove the bracket from the prepack
located inside the oven.
!. Decide whetherthe bracket will be installed
on the right or left side of range location.
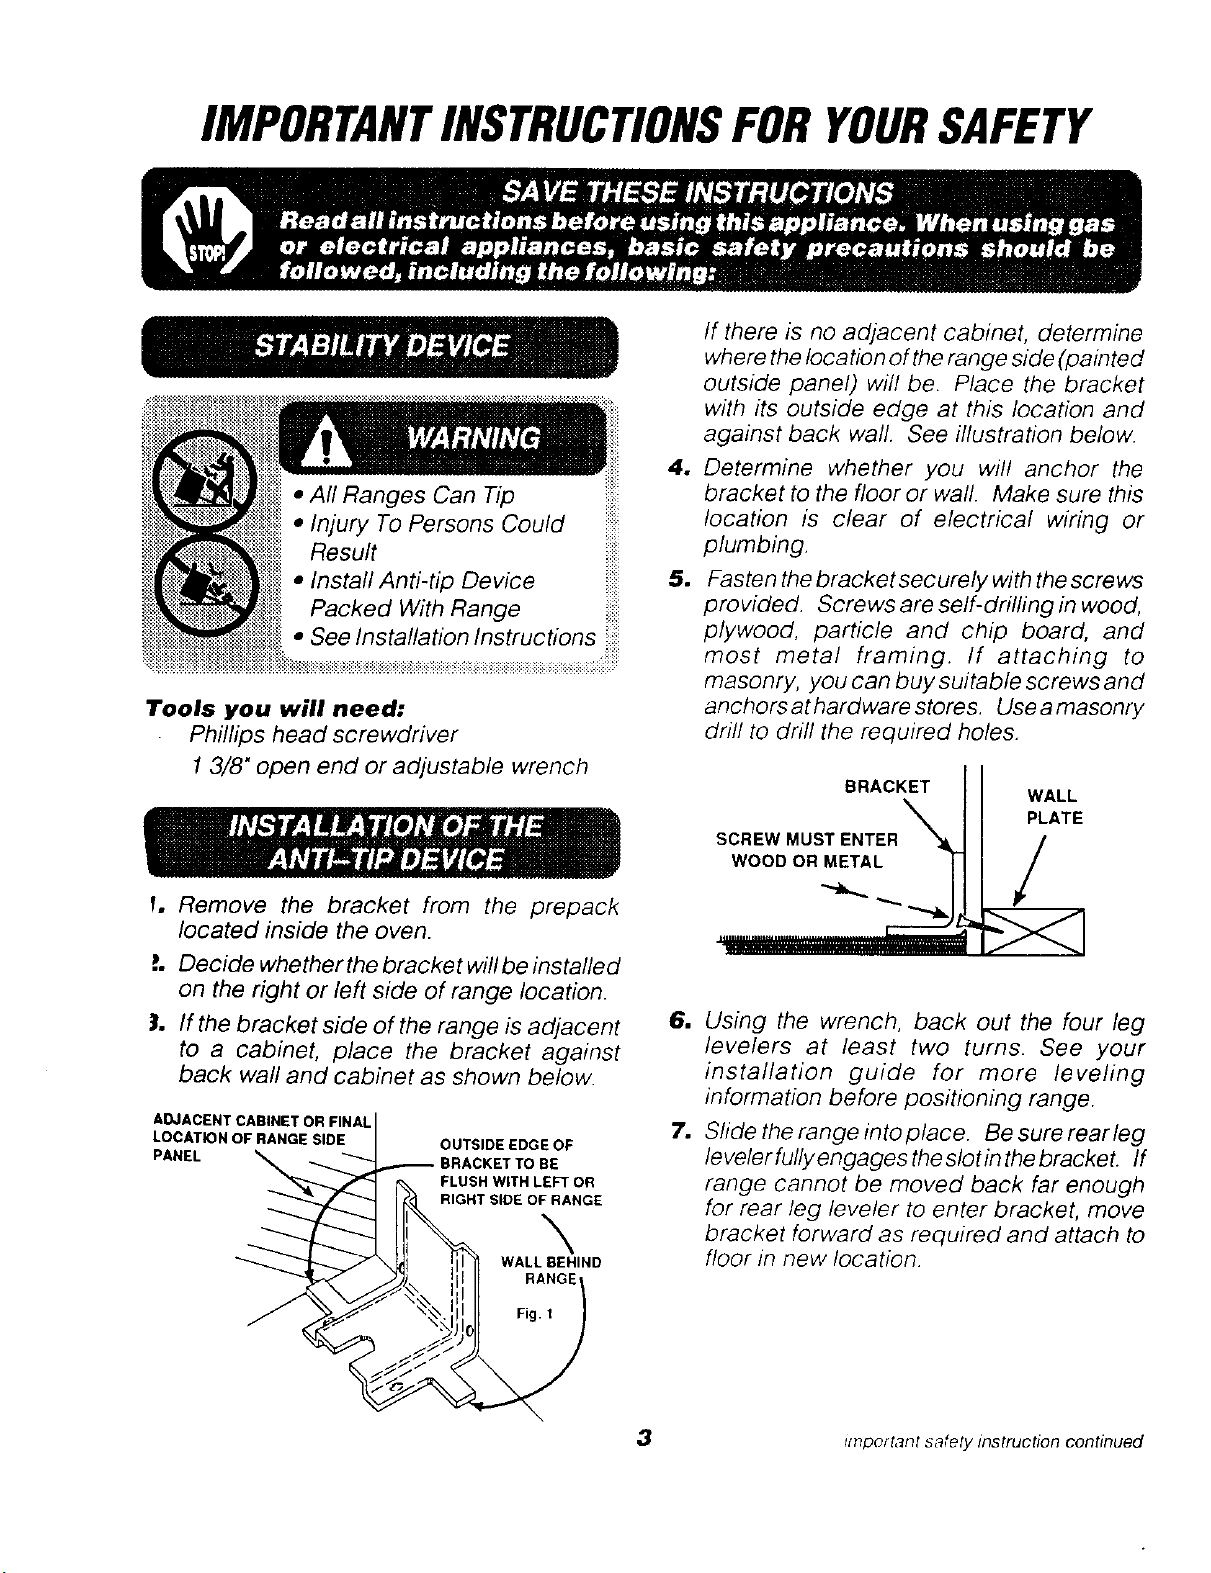
3. If the bracket side of the range is adjacent
to a cabinet, place the bracket against
back wall and cabinet as shown below.
AOJACEN"
LOCATION OF RANGE SIDE
PANEL
OUTSIDE EDGE OF
0 BE
FLUSH WITH LEFT OR
RIGHT SIDE OF RANGE
N
WALL BEHIND
1
1
If there is no adjacent cabinet, determine
where the location of the range side (painted
outside panel) wil! be. Place the bracket
with its outside edge at this location and
against back wall. See illustration below.
Determine whether you will anchor the
bracket to the floor or wall. Make sure this
location is clear of electrical wiring or
plumbing.
Fasten the bracket securely with the screws
provided. Screws are self-drilling in wood,
plywood, particle and chip board, and
most meta! framing. If attaching to
masonry, you can buy suitable screws and
anchorsathardware stores. Useamasonry
drill to drill the required holes.
BRACKET
SCREW MUST ENTER X
WOOD OR METAL
WALL
PLATE
/
6. Using the wrench, back out the four leg
levelers at least two turns. See your
installation guide for more leveling
information before positioning range.
7. Sfide the range into place. Be sure rear leg
levelerfully engages the slot in the bracket. If
range cannot be moved back far enough
for rear leg leveler to enter bracket, move
bracket forward as required and attach to
floor in new location.
3 smportant safety instruction continued
IMPORTANTINSTRUCTIONSFORYOURSAFETYeontinue<,
To insure safety for yourself, family and home,
please read your Owner's Manual carefully
Keep it handy for reference Pay close
attention to Safety Sections.
.iF- SURE your ap'pD_u;d<_ ,
) ,u,l,t_lc, dl.,.,cJt_,,,l,/ ,_,t:!L,k , ,
The California Safe Drink;_,_ W-tte_
and Toxic Enforcement _:..
requires the governor of Cali_err_i_
to publish a list of substar, ce
known to the state to cause _irti:
defects or other reproductive hart_ _
and requires businesses to war;;
their customers of potentia_
exposure to such substances.
The fiberglass insulation i;-
self.cleaning oven will give off
very small amount of carbo_:
monoxide during the cleanf,_
cycle. Exposure can be minimiz_ _
by venting with an open door c
window or using a ventilation f_,
or hood.
i
WARNING!
_ Toprevent accidental tippingof the
range from abnormal usage,
including excessive loading of the
oven door, attach it to the wall or
floorbymstalling theAnti- Tipdevice
supplied, ff the range is moved for cleaning,
servicing or any reason, he sure the Anti-T;p
device is re-engaged properly when the rang_
is slid hack in the opening. Failure to do so
could result in the range tipping or personal
injury. Toinspect the anti-tip device, remove
the storage drawer and look to see if the rear
leg leveler fully engages theslot in thebracket.
DO NOT touch heating elements, surfaces
near them or Interior oven surfaces These
m_v be hot enough to burn even though the}
._ d_rk in color Durin B and after use, do nr_i
• ,_l_ "_r i, "+ C!._+i!,_ - <_,, f/_?ln?_Tb! _ _),rTt,,_, ,
_ i_i ' _f?_:? 1,- ; <_f?,/f,;iTe?,jt)t r
,,+ ;}1; s :,, i(_ t( C_)c L',_;} i ?utfacosn,,?[. -
<,7 ._jUrtT.-7
_0 NOT i_a_ Ch_/_'f*(_'_unattended nea/ .
f _:ACH CHILDREN _--i_"Jl,_>,_,i_
• f,d,'_tto play wUh controls or _lllr..__
.:. ;., part of the appDance
¢41
,..: t<_s,:, ,.lit'n,) or static' on
;he door or any ot.4er pa// of
tire appliance
+.2..._U TION: Ne vet s tore items
" _nterest to children on the
_uard or in CablrT_',
tb,e appliance Children
.. n,bmg or;, the a_pliance
ouid be seriously injured
_ EEP THIS book for later use.
NEVER TRY to repair or replace any part of
the _ppllance unless instructions are given in
this manual. All other work should be done by
a qualified technician.
NEVER USE your appliance
:._r _'i_:rmll_g or heating the room.
ALWAYS KEEP comb(ssd_le
:';a)/ coverings, curtains, dish
:_oths, towels, potho/ders and
either ;i,_ens a safe dista_ce from
the _,pp//ance
NEVER HEAT unopez_ed food containers.
Pm_'.,.re L_usl<_up c,_n c_use the container to
burst <'_nd cause in!try
4 importa_t safety instruction contlrlued
IMPORTANTINSTRUCTIONSFORYOURSAFETYcontinued
NEVER LEAVE jars or cans of fat or
drippings in your oven.
ALWAYS KEEP the oven and surface unit
areas free from things that will bum. Food,
wooden utensils, grease buildup, gasoline and
other flammable vapors or
liquids could catch fire.
Plastic utensils could melt and
canned foods could explode.
Your appliance should never
be used as a storage area.
SOME CLEANERS produce _ ,
noxious fumes and wet cloths
or sponges could cause steam
burns.
NEVER WEAR hanging or loose fitting
clothing when using your appliance.
NEVER USE a towel or other
bulky cloth as a potholder and
make sure the potholder is
dry. Moist potholders could
cause steam bums. Do not let
3otholders touch heating
_lements.
WLY SOME kinds of glass or ceramic
9okware can be used for cooktop cooking.
lake sure the cookware you choose to use is
esigned for cooktop cooking without
reaking due to the sudden changes in
",mperatures.
ILWA YS USE care when touching cooktop
-ooking zones. They will retain heat after the
"ange has been turned off.
NEVER BLOCK the oven air vent on the
backguard of the range.
COOKWARE USED for
cooktop cooking should be
flat on the bottom and large
enough to cover the heating area being used.
This will improve heating efficiency.
Undersized utensils expose the heating area
and may result in direct contact or ignition of
clothing.
NEVER LEA VE surface units unattended at
high settings. Boilovers result in smoking or
greasy spills that could catch fire.
ALWAYS turn utensil handles inward and
away from other surface units to reduce the
risk of burns, ignition, unintended contact or
spillage.
NEVER cook on a broken cooktop; cleaning
solutions or spillage could penetrate it and
create the risk of electrical shock or fire.
PLACE OVEN RACKS in the desired
position while the oven is cool. Ifracks must be
moved while oven is hot, do not let the potholder
contact the hot oven elemenL
AFTER BROILING, always take the broiler
pan and grid out of the oven and clean them.
Leftover grease in the broiler pan could catch fire
next time you use your oven.
ALWAYS USE care when opening the oven
door. Let hot air and steam escape before
moving foods.
NEVER USE aluminum foil to line the oven
bottom. Improper use of foil could result in the
risk of electrical shock and fire.
5
IMPORTANTINSTRUCTIONSFORYOURSAFETYeontin,ed
CLEAN ONLY the parts listed in tb,is manu,_ '
Jlow all cleaning instructions. Be sure r:.
_move the broilerpan and grid befo,"_ _t_r_J___;
e self-clean cycle.
,F THE SELF.CLEANING mode
nalfunctions, turn off the controls or d;sconnect
the power supply. Have serviced by a qualified
technician.
NEVER RUB, move or damage the door
gasket on self-cleaning ranges.
NEVER TRY to clean utensils, cookware,
removable parts or broiler pan and grid in the
self-clean cycle.
DO NOT USE oven cleaners- No commerc sal
oven cleaner or protective coating of any kind
should be used in or around any part of the ove __
l
READAND
UNDERSTANDTHIS
INFORMATIONNOW!
_;._ouldyou ever need it, you will nothave time
for reading. Be sure everyone in your home
i_!ows what to do in case of fire. Never use
water ona grease fire; it will only spread the
flames.
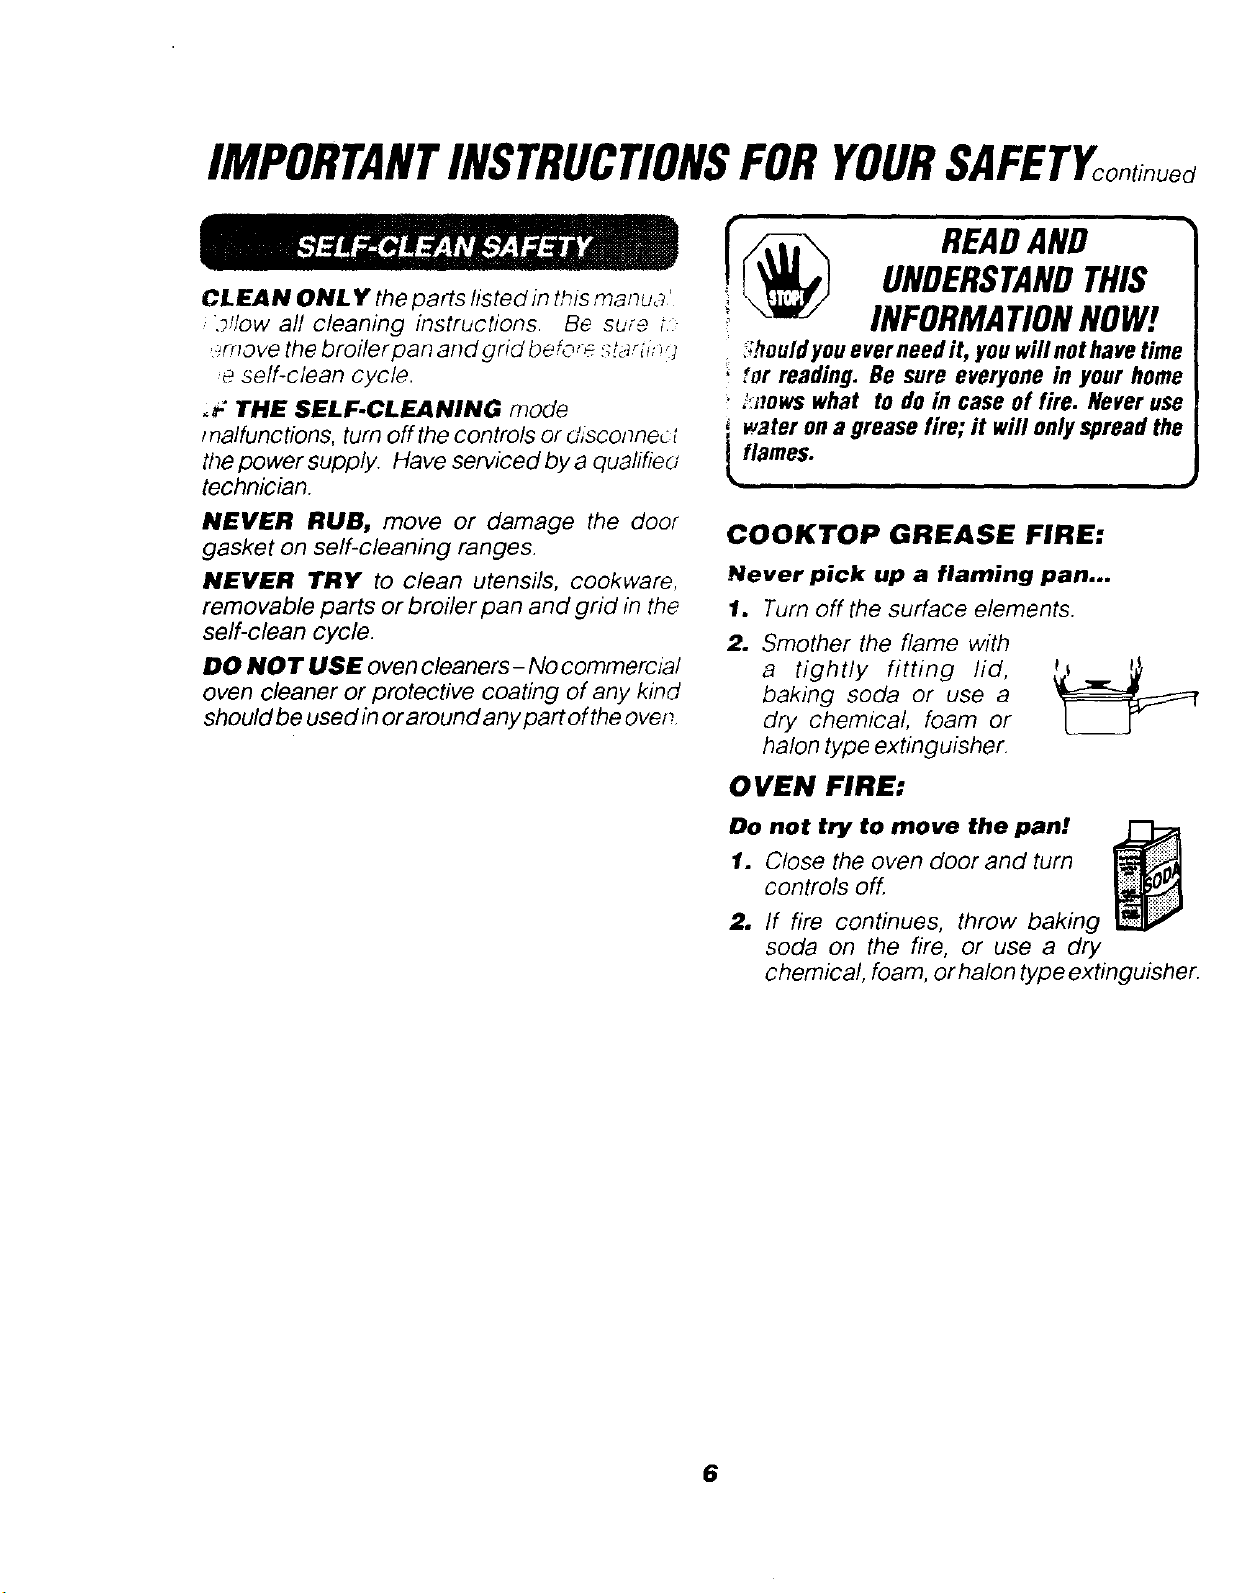
COOKTOP GREASE FIRE:
Never pick up a flaming pan...
1. Turn off the surface elements.
2. Smother the flame with
a tightly fitting lid,
baking soda or use a
dry chemical, foam or
halon type extinguisher.
OVEN FIRE:
Do not try to move the pan!
1. Close the oven door and turn
controls off.
2. If fire continues, throw baking
soda on the fire, or use a dry
chemical, foam, or halon type extinguisher.
6
PROTECTINGYOURNEWCOOKTOP
• Donotslidecookwareacrossyourcooktop.
• Do not use a dish towel orsponge to clean
or wipe down your cooktop.
• Do not use scouring powders or plastic,
nylon or metal cleaning pads on your
cooktop.
• Do not apply your cooktop cleaning creme
to the cooktop surface if the surface is hot.
• Read the instruction label on the cooktop
cleaning creme bottle before attempting to
clean the surface of your cooktop.
• Aftercleaning the cooktop surface, be sure
to wipe off any residue that may be left from
the creme with a dry paper towel.
• For major spills, turn the surface control
knob to OFF; use a dry paper towel to wipe
up spill, then use a razor scraper (held with
a potholder) at a 30" angle against the
surface of the cooktop to scrape remaining
spill from the hot cooking zone.
,, Do not cook directly on the surface of the
glass.
, Do not use the cooktop as a cutting board.
To remove the adhesive left from packaging
tape, use household dishwashing liquid,
mineral oil or cooking oil. With a soft cloth rub
into the area and allow to soak. Rinse and dry
well. Repeat procedure using an appliance
polish to insure no damage is done to the
oven. This should be done before the
range is turned on for the first time.
The tape cannot be removed once the
oven has heated.
Packaging tape can be found in the
following areas:
Cooktop surface
Door handle
Control panel area
Door trim
Oven area
r
_ AUTION:
When the surface controls are
turnedoff, the HotSurfacelndicator
light willremain lit until thecooktop
surface has cooled to approximately 150°F.
The glass ceramic surface will retain heat
afterthe indicator light goes out. Usecaution
until the cooktap surface has had time to
cool.
7
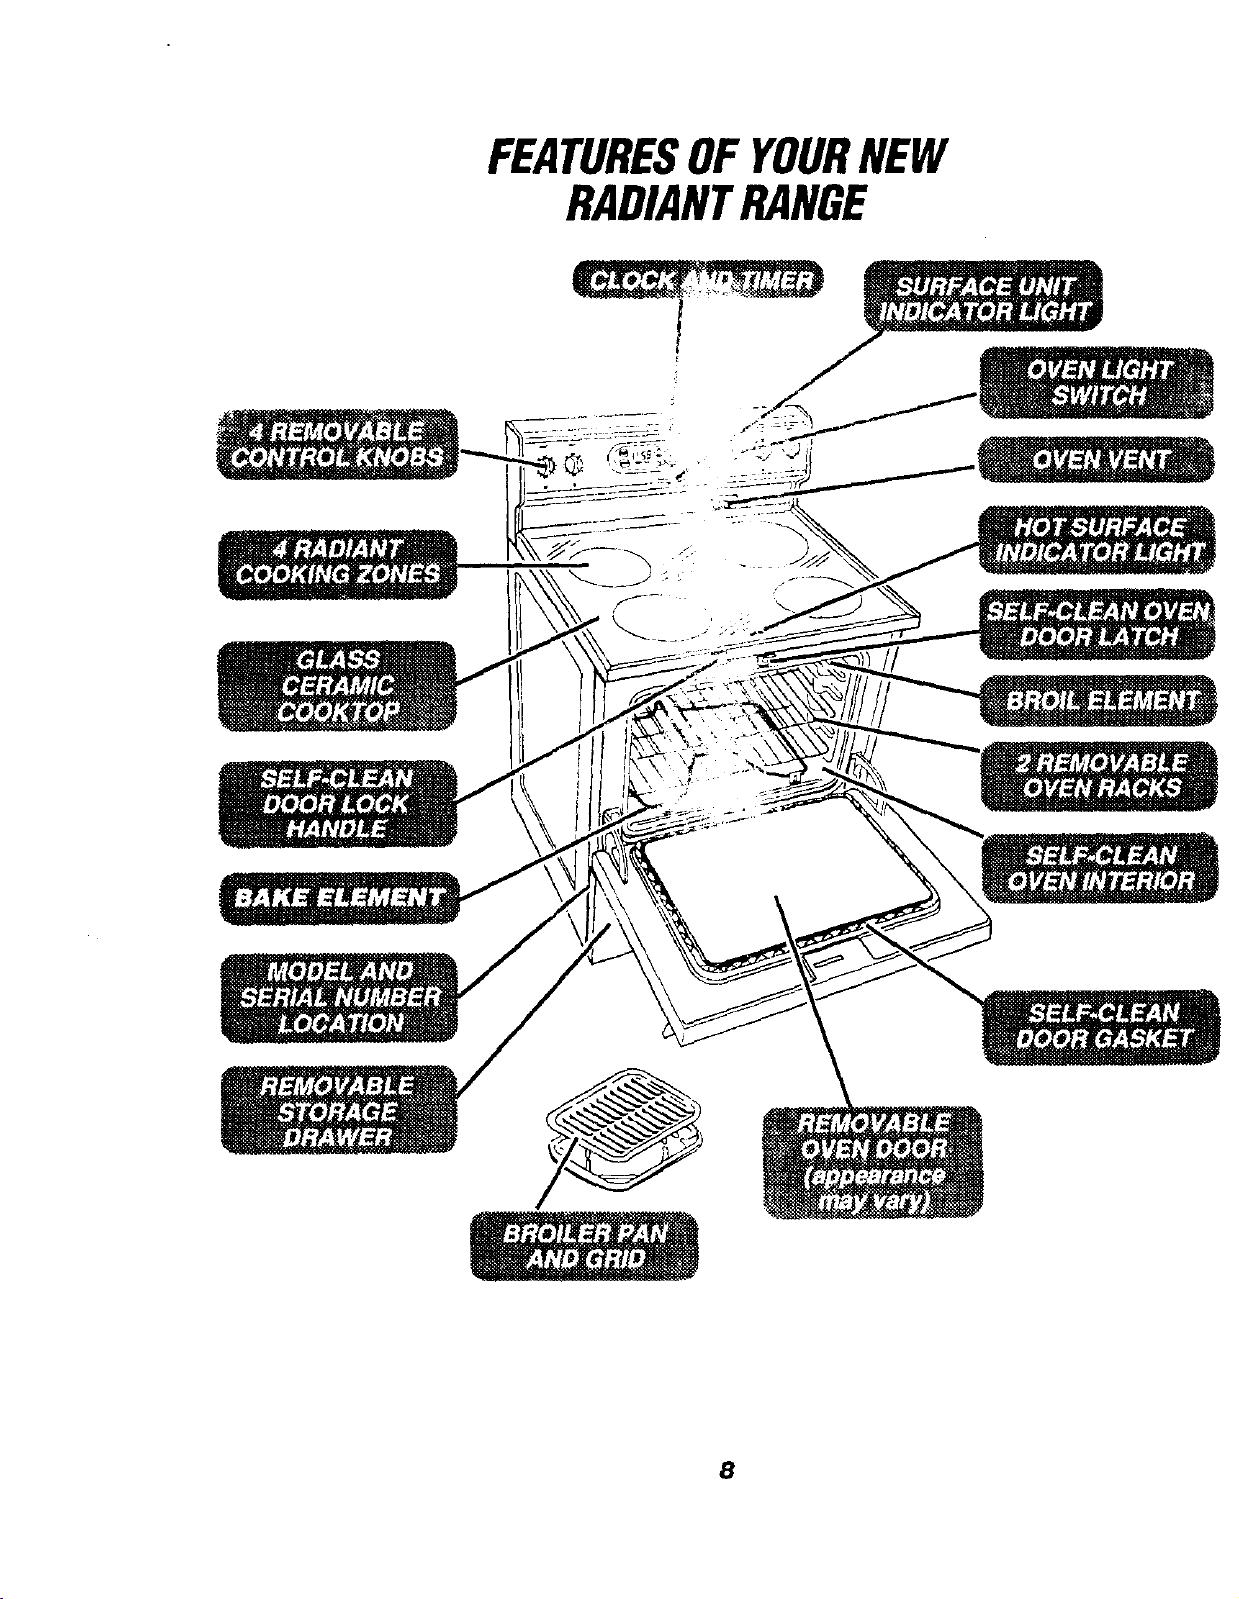
FEATURESOFYOURNEW
RADIANTRANGE
8
RADIANTCOOKTOPCOOKING
Before using your new radiant
cooktop, clean it with the Cooktop
Cleaning Creme®. This will leave
a protective coating.
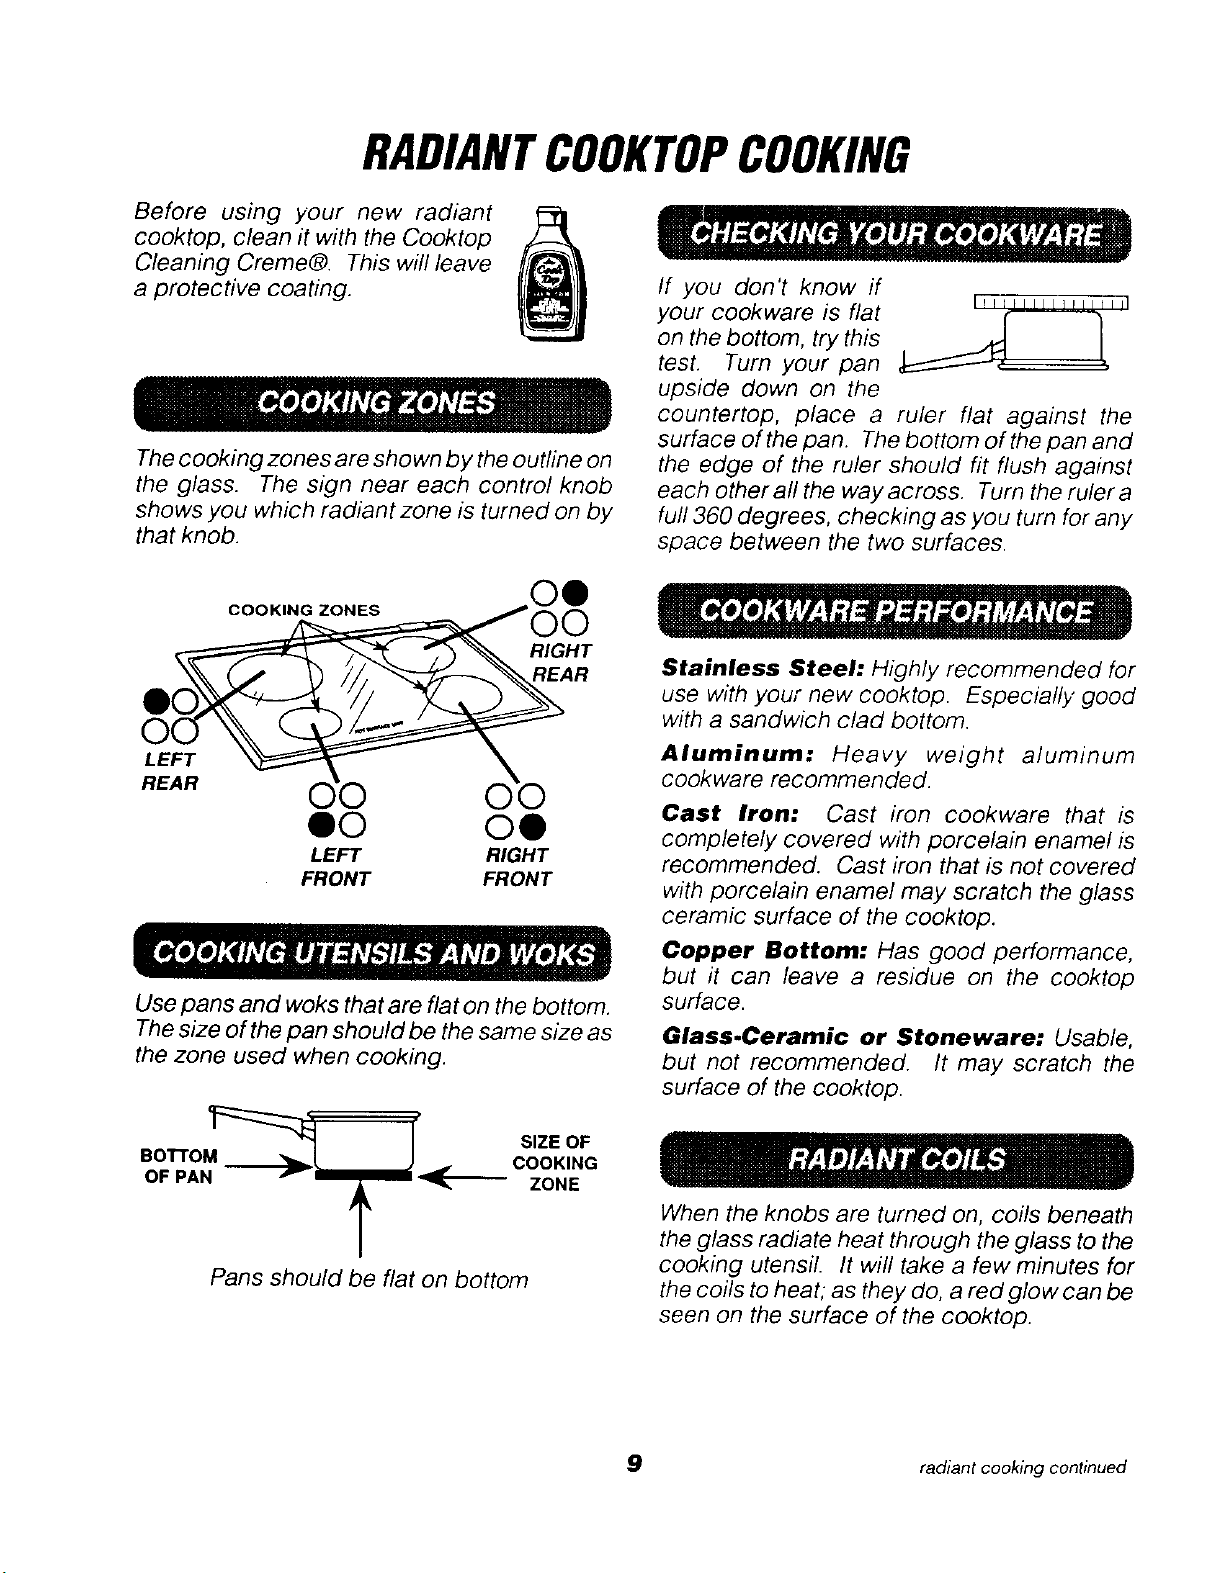
The cooking zones are shown by the outline on
the glass. The sign near each control knob
shows you which radiant zone is turned on by
that knob.
If you don't know if
your cookware is flat (
on the bottom, try this . .,_J
test. Turn your pan
upside down on the
countertop, place a ruler flat against the
surface of the pan. The bottom of the pan and
the edge of the ruler should fit flush against
each other all the way across. Turn the ruler a
full 360 degrees, checking as you turn for any
space between the two surfaces.
COOKING ZONES
RIGHT
REAR
LEFT
REAR
O0 o0
LEFT RIGHT
FRONT FRONT
Use pans and woks that are flat on the bottom.
The size of the pan should be the same size as
the zone used when cooking.
B0"r'I'OM_ i
OF PAN '_m"_
/
Pans should be flat on bottom
SIZE OF
COOKING
ZONE
Stainless Steel: Highly recommended for
use with your new cooktop. Especially good
with a sandwich clad bottom.
Aluminum: Heavy weight aluminum
cookware recommended.
Cast Iron: Cast iron cookware that is
completely covered with porcelain enamel is
recommended. Cast iron that is not covered
with porcelain enamel may scratch the glass
ceramic surface of the cooktop.
Copper Bottom: Has good performance,
but it can leave a residue on the cooktop
surface.
Glass.Ceramic or Stoneware: Usable,
but not recommended. It may scratch the
surface of the cooktop.
When the knobs are turned on, coils beneath
the glass radiate heat through the glass to the
cooking utensil. It will take a few minutes for
the coils to heat; as they do, a red glow can be
seen on the surface of the cooktop.
9 radiant cooking continued
RADIANTCOOKINGcontinued
The Temperature Limiters of the cooking zones
provide a protection for your new cooktop..
The Limiters will turn the radiant coils on and
off while cooking or canning. This procedure
helps maintain an even cooking temperature
without allowing the cooking zones to
overheat.
r ¸
Water-bath or pressure canners and large
diameter pots extending more than 1"beyond
the edge of the cooktop zones may be used
when canning. This is because the temperature
needed to boil water is not harmful to the
surfaces surrounding the cooktop zones.
However, do not use large diameter
canners, pots or pans for anything
other than boiling water.
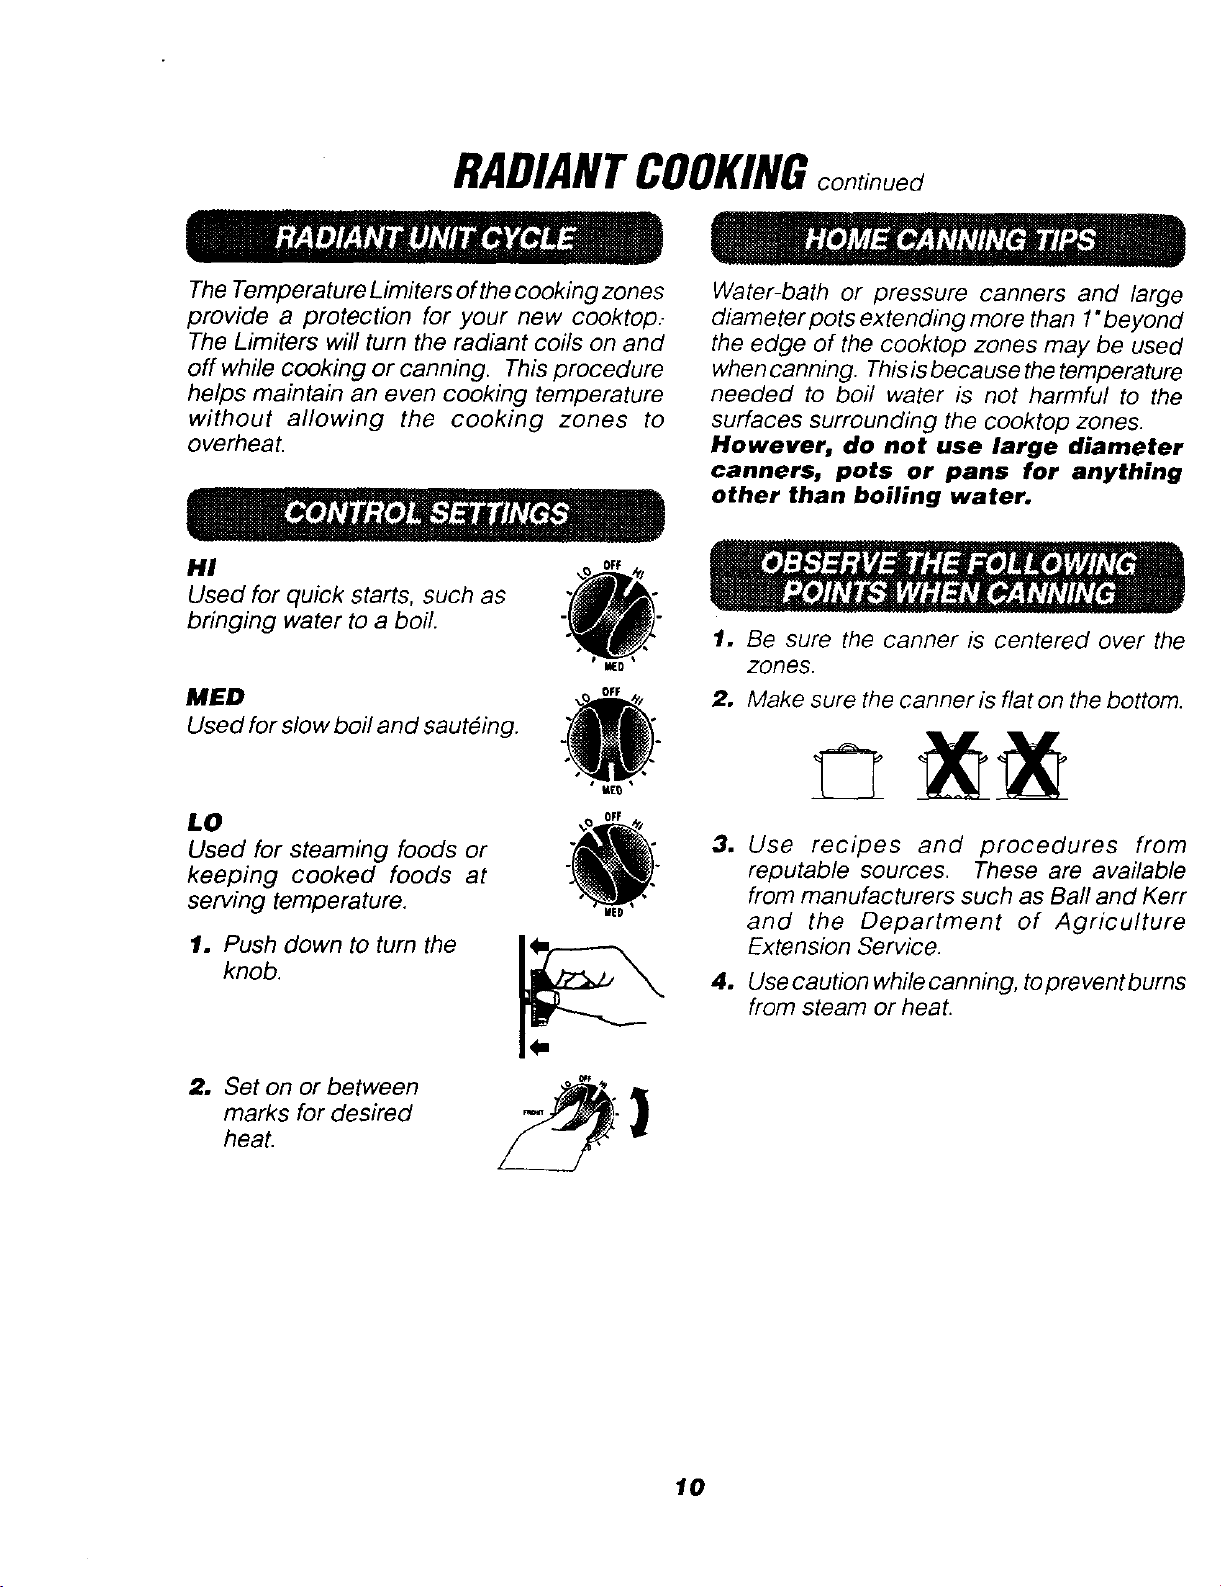
HI
Used for quick starts, such as
bringing water to a boil.
O
• , 1. Be sure the canner is centered over the
zones.
MED
Used for slow boil and saut6ing.
2, Make sure the canner is flat on the bottom.
LO
Used for steaming foods or
keeping cooked foods at
serving temperature.
1. Push down to turn the
knob.
OFF
O
3. Use recipes and procedures from
reputable sources. These are available
from manufacturers such as Ball and Kerr
and the Department of Agriculture
Extension Service.
4. Use caution while canning, toprevent bums
from steam or heat.
2. Set on or between
marks for desired
heat.
10
CLOCK,TIMER,& OVENCONTROL
I I.EO
I I "-I._1 HOUR
HOUR MIN.
MIN.
OVEN
ON
©
LOCK
©
DOOR
©
PRE-
HEATED
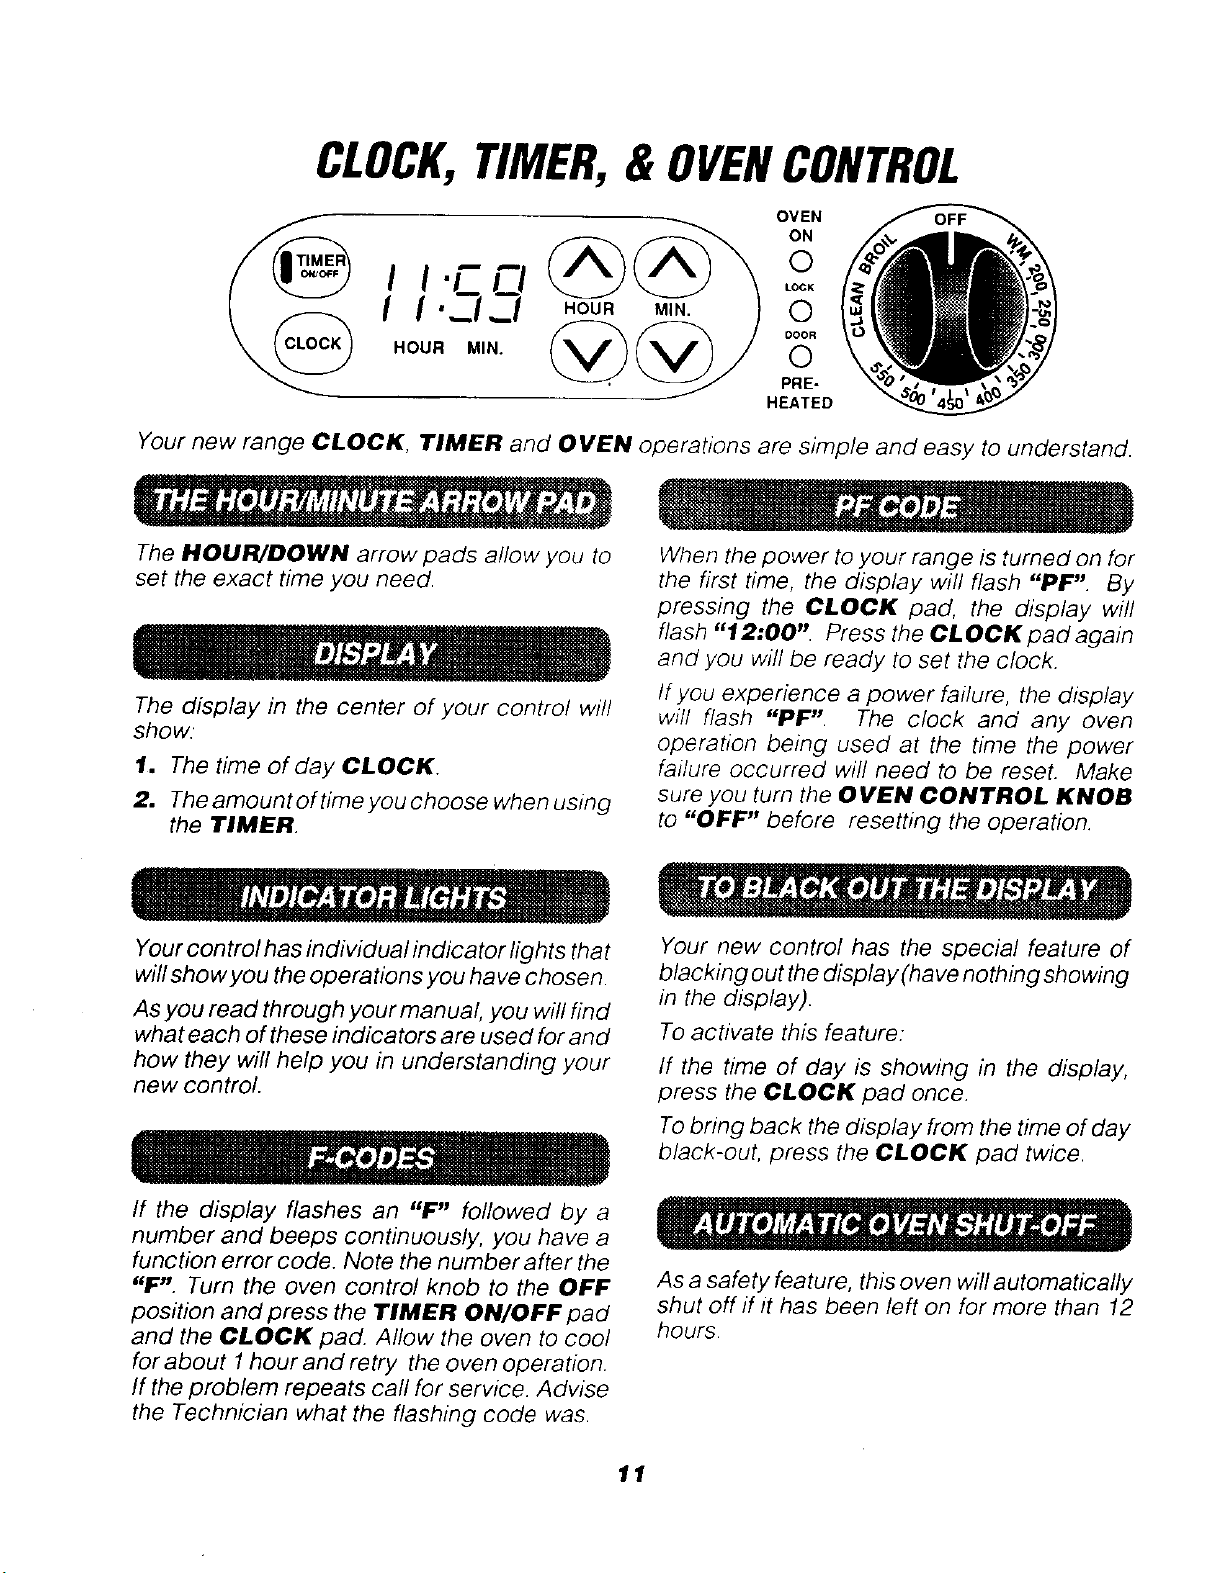
Your new range CLOCK, TIMER and OVEN operations are simple and easy to understand.
The HOUR/DOWN arrow pads allow you to
set the exact time you need.
............ r.....
When the power to your range is turned on for
the first time, the display will flash "PF". By
pressing the CLOCK pad, the display will
flash "12:00". Press the CLOCK pad again
and you will be ready to set the clock.
The display in the center of your control will
show:
1. The time of day CLOCK.
2. The amount of time you choose when using
the TIMER.
If you experience a power failure, the display
will flash "PF'. The clock and any oven
operation being used at the time the power
failure occurred will need to be reset. Make
sure you turn the OVEN CONTROL KNOB
to "OFF" before resetting the operation.
Your control has individual indicator lights that
will show you the operations you ha ve chosen.
As you read through your manual, you will find
what each of these indicators are used for and
how they will help you in understanding your
new control.
Your new control has the special feature of
blacking out the display (have nothing showing
in the display).
To activate this feature:
If the time of day is showing in the display,
press the CLOCK pad once.
To bring back the display from the time of day
black-out, press the CLOCK pad twice.
If the display flashes an "F" followed by a
number and beeps continuously, you have a
function error code. Note the number after the
"F'. Turn the oven control knob to the OFF
position and press the TIMER ON/OFF pad
and the CLOCK pad. Allow the oven to cool
for about 1 hour and retry the oven operation.
If the problem repeats call for service, Advise
the Technician what the flashing code was.
As a safety feature, this oven will automatically
shut off if it has been left on for more than 12
hours.
11
CLOCKANDTIMER
HOUR _N.
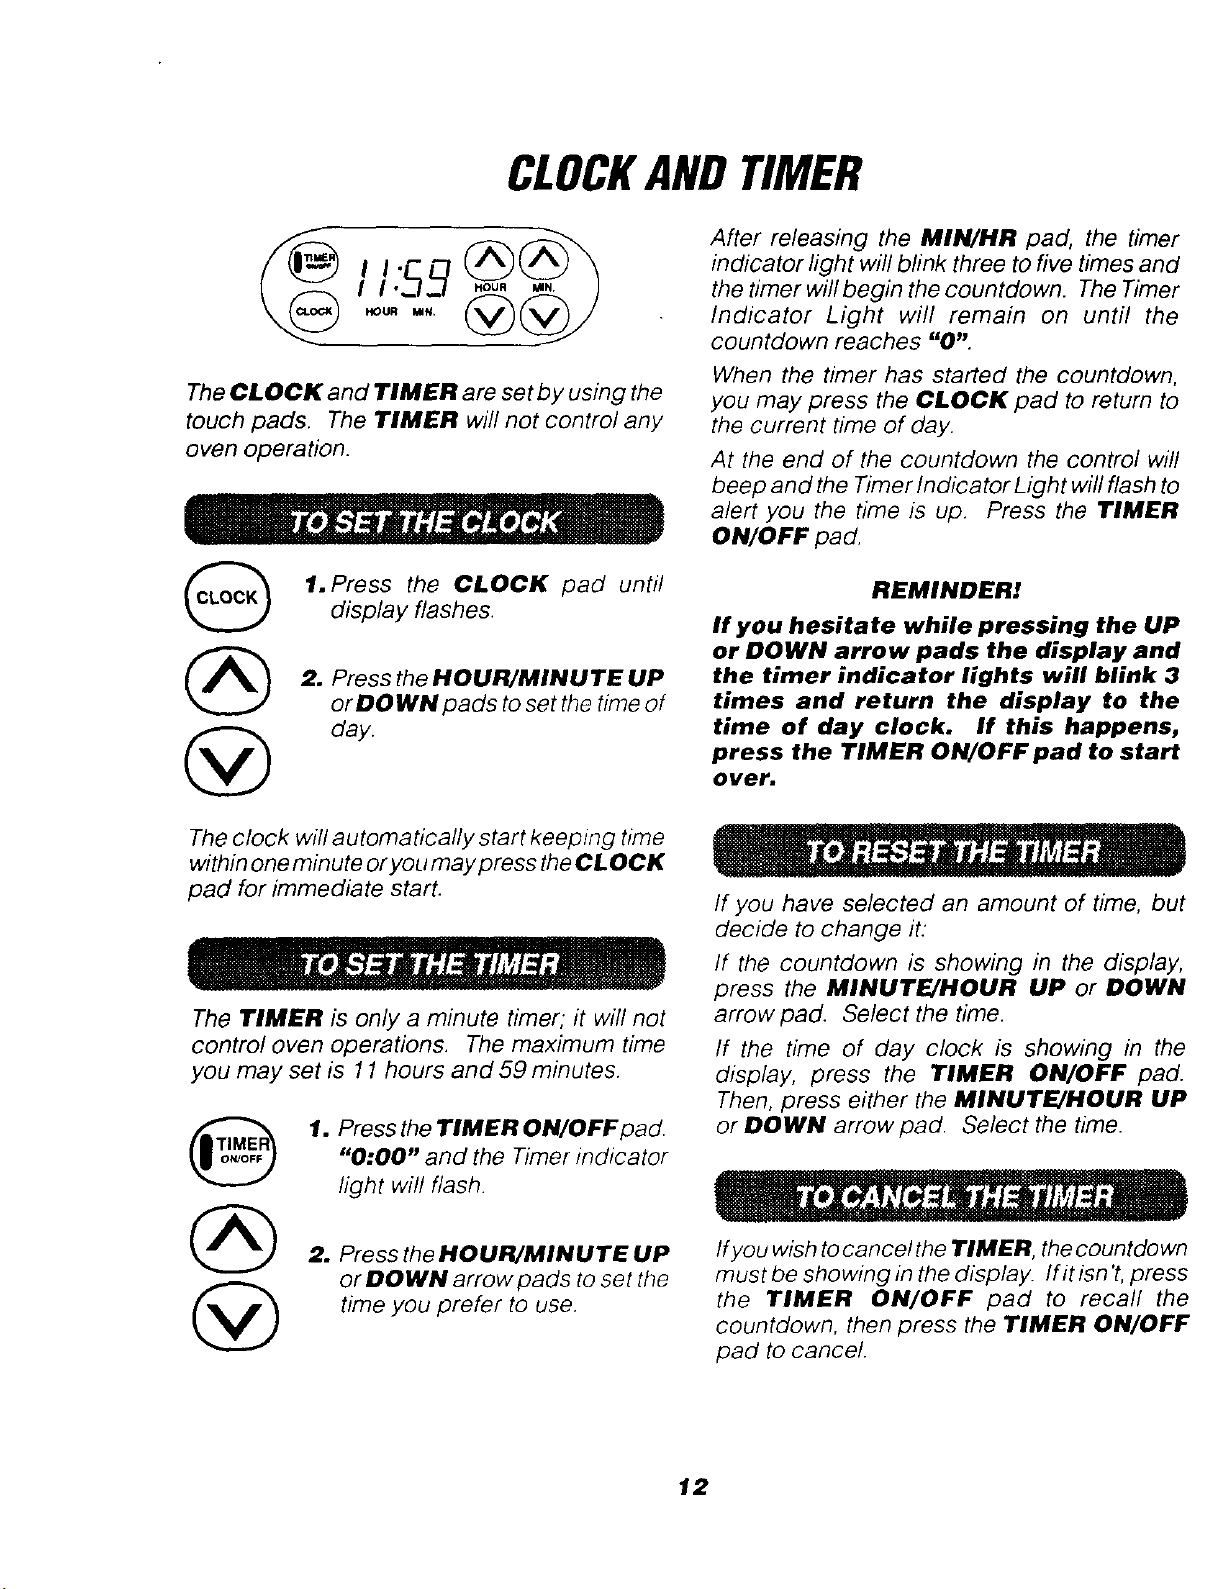
The CLOCK and TIMER are set by using the
touch pads. The TIMER will not control any
oven operation.
1. Press the CLOCK pad until
display flashes.
2. Press the HOUR/MINUTE UP
or DOWN pads to set the time of
day.
The clock will automatically start keeping time
within one minute oryou may press the CLOCK
pad for immediate start.
The TIMER is only a minute timer; it will not
control oven operations. The maximum time
you may set is 11 hours and 59 minutes.
@
1. Press the TIMER ON/OFF pad.
"0:00" and the Timer indicator
light will flash
2. Press the HOUR/MINUTE UP
or DOWN arrow pads to set the
time you prefer to use.
After releasing the MIN/HR pad, the timer
indicator light will blink three to five times and
the timer will begin the countdown. The Timer
Indicator Light will remain on until the
countdown reaches "0".
When the timer has started the countdown,
you may press the CLOCK pad to return to
the current time of day.
At the end of the countdown the control will
beep and the Timer Indicator Light will flash to
alert you the time is up. Press the TIMER
ON/OFF pad.
REMINDER!
If you hesitate while pressing the UP
or DOWN arrow pads the display and
the timer indicator lights will blink 3
times and return the display to the
time of day clock. If this happens,
press the TIMER ON/OFF pad to start
over.
If you have selected an amount of time, but
decide to change it:
If the countdown is showing in the display,
press the MINUTE/HOUR UP or DOWN
arrow pad. Select the time.
If the time of day clock is showing in the
display, press the TIMER ON/OFF pad.
Then, press either the MINUTE/HOUR UP
or DOWN arrow pad. Select the time.
If you wish to cancel the TIMER, the countdown
must be showing in the display. If it isn't, press
the TIMER ON/OFF pad to recall the
countdown, then press the TIMER ON/OFF
pad to cancel.
12
OVENCOOKINGTIPS
It is normal to have some odor when using your
oven for the first time. This is caused by the
heating of new parts and insulation.
To help eliminate this odor, ventilate the
room by opening a window or using a
vent hood.
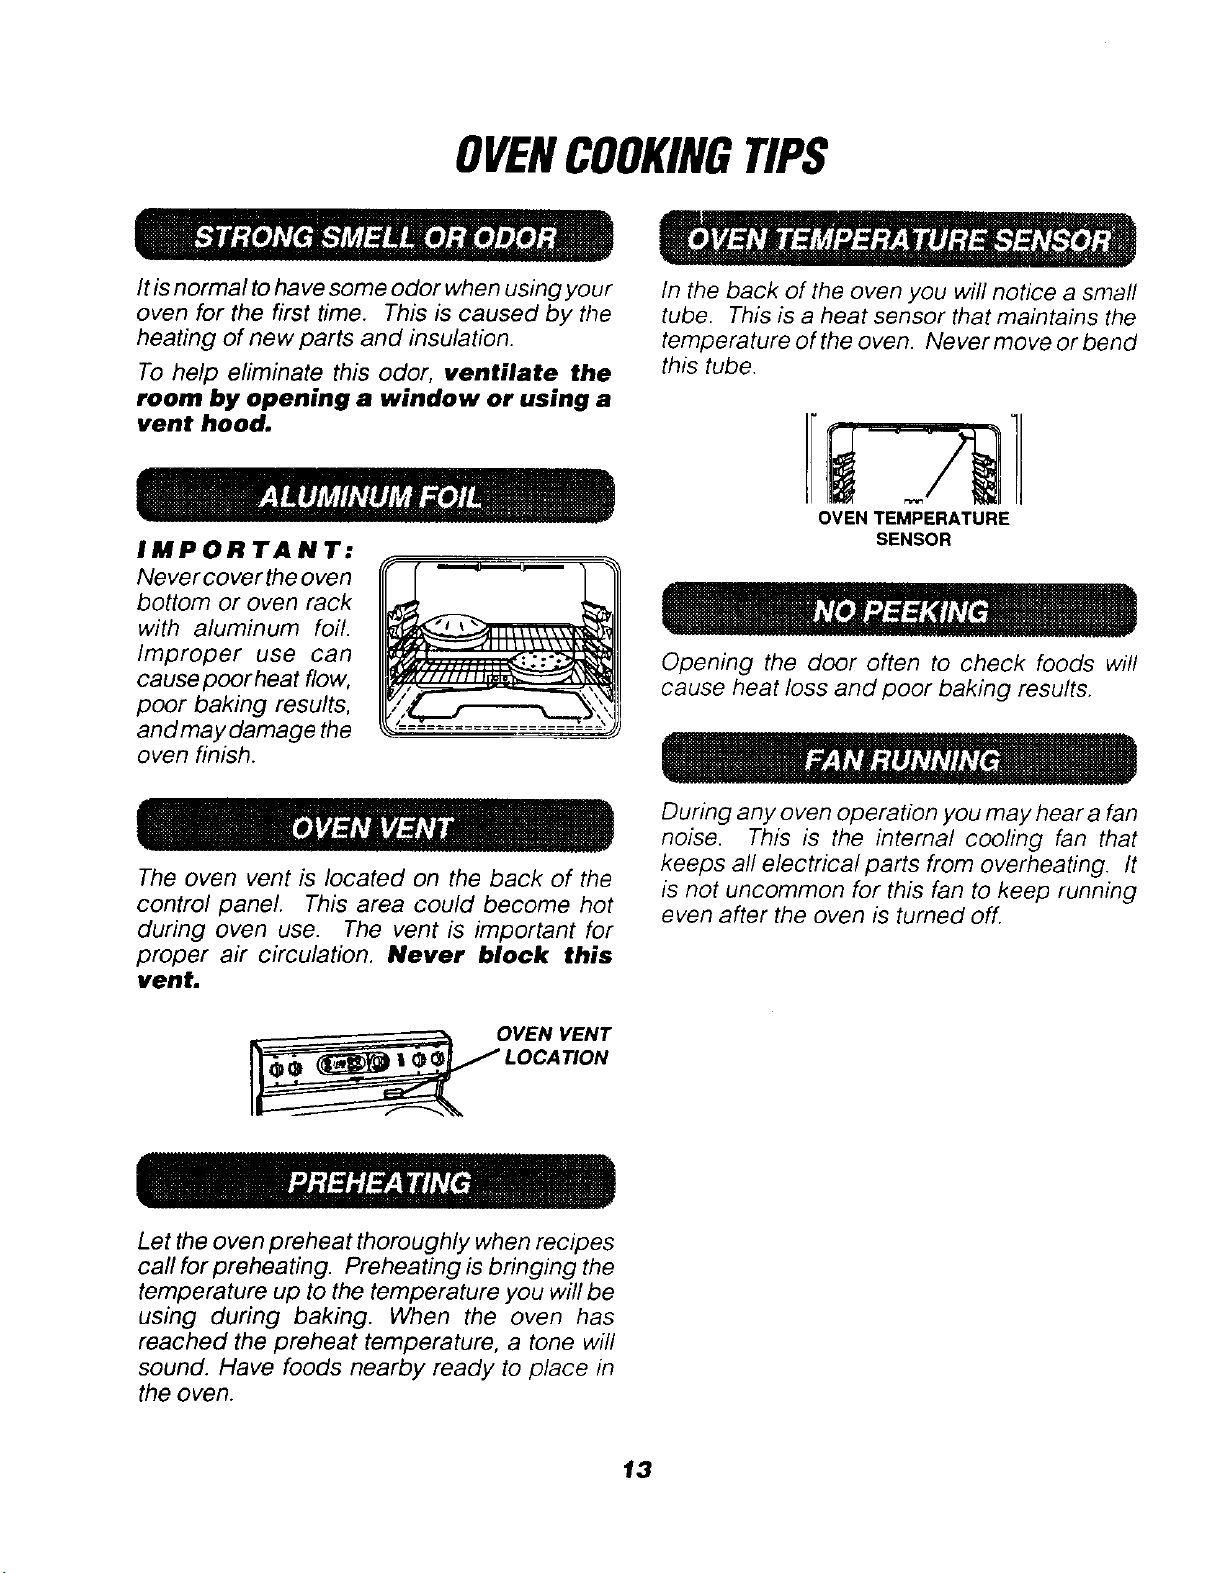
IMPORTANT:
Never coverthe oven
bottom or oven rack
with aluminum foil.
Improper use can
cause poor heat flow,
poor baking results,
andmay damage the
oven finish.
The oven vent is located on the back of the
In the back of the oven you will notice a small
tube. This is a heat sensor that maintains the
temperature of the oven. Never move or bend
this tube.
OVEN TEMPERATURE
SENSOR
control panel. This area could become hot
during oven use. The vent is important for
proper air circulation. Never block this
vent.
Opening the door often to check foods will
cause heat loss and poor baking results.
During any oven operation you may hear a fan
noise. This is the internal cooling fan that
keeps all electrical parts from overheating. It
is not uncommon for this fan to keep running
even after the oven is turned off.
OVEN VENT
LOCATION
Let the oven preheat thoroughly when recipes
call for preheating. Preheating is bringing the
temperature up to the temperature you will be
using during baking. When the oven has
reached the preheat temperature, a tone will
sound. Have foods nearby ready to place in
the oven.
13

OVENCOOKINGTIPScontinued
FLAT COOKIE SHEETS
(without sides)
Flat cookie sheets allow air
to circulate all around the
cookies for even browning.
SHINY PANS
(reflect heat)
Shiny pans are perfect for cakes and quick
breads that have a golden brown crust.
GLASS, DARK NON-STICK, OR
DARKENED BY AGE BAKEWARE
(absorb heat)
Perfect for yeast breads, pie crust or foods that
have a brown crust. The oven temperature
should be reduced by 25°t£
The Oven Temperature Sensor at the back of
the oven continuously senses and controls the
temperature inside the oven. To keep a
constant set temperature, the elements will
cycle or turn on and off during cooking.
The low temperature zone of your oven
(between 170° and 200OF) is available to keep
hot cooked foods warm. However, foods kept
atthese tempera tures longer than 2 hours may
spoil.
As the oven heats, the change in temperature
inside the oven causes water droplets to form
on the oven door glass. To prevent this, open
the door momentarily to allow the moist air out.
If baking with more than one pan, place the
pans so each has at least 1 to 1 1/2" of air
space around it. Place pans so one is not
directly above the other.
The oven racks are
designed with stop
locks, a convenience
as well as a safety
precaution, forplacing
foods in or removing
foods from the oven.
When the racks are
placed correctly in the oven, the guides have
a bump to prevent the racks from tilting.
Your oven has four (4) rack positions that may
be used during cooking.
The top position is only a guide. It
cannot be used as a rack position.
Always place oven racks in the proper
position while oven is cool.
14 oven cooking tJ#scontinued
OVENCOOKINGTIPScontinued
You may feel that your new oven cooks
differently than the oven it replaced. We
recommend that you use your new oven a
few weeks to become more familiar with it,
following the times given in your recipes as
a guide. See Do It Yourseff Temperature
Adjustment in the back of this manual, if you
feel your oven is too hot or too cool for your
cooking preference.
Your new range is equipped with a Self-Clean
Door lock handle (used for self-clean only).
1
2.
• PREHEATED Indicator Light
turns on and stays on when oven has
reached selected temperatures.
• OVEN ON Indicator Light -- turns
on and stays on when bake, broi!, or
clean function has been chosen.
• LOCKOOORIndicatorLight--tums
on for self-clean. If the LOCK DOOR
Indicator Light flashes you should check
for one of the following:
The latch handle is locked during a baking
function.
The latch handle is not locked during a
self-clean function.
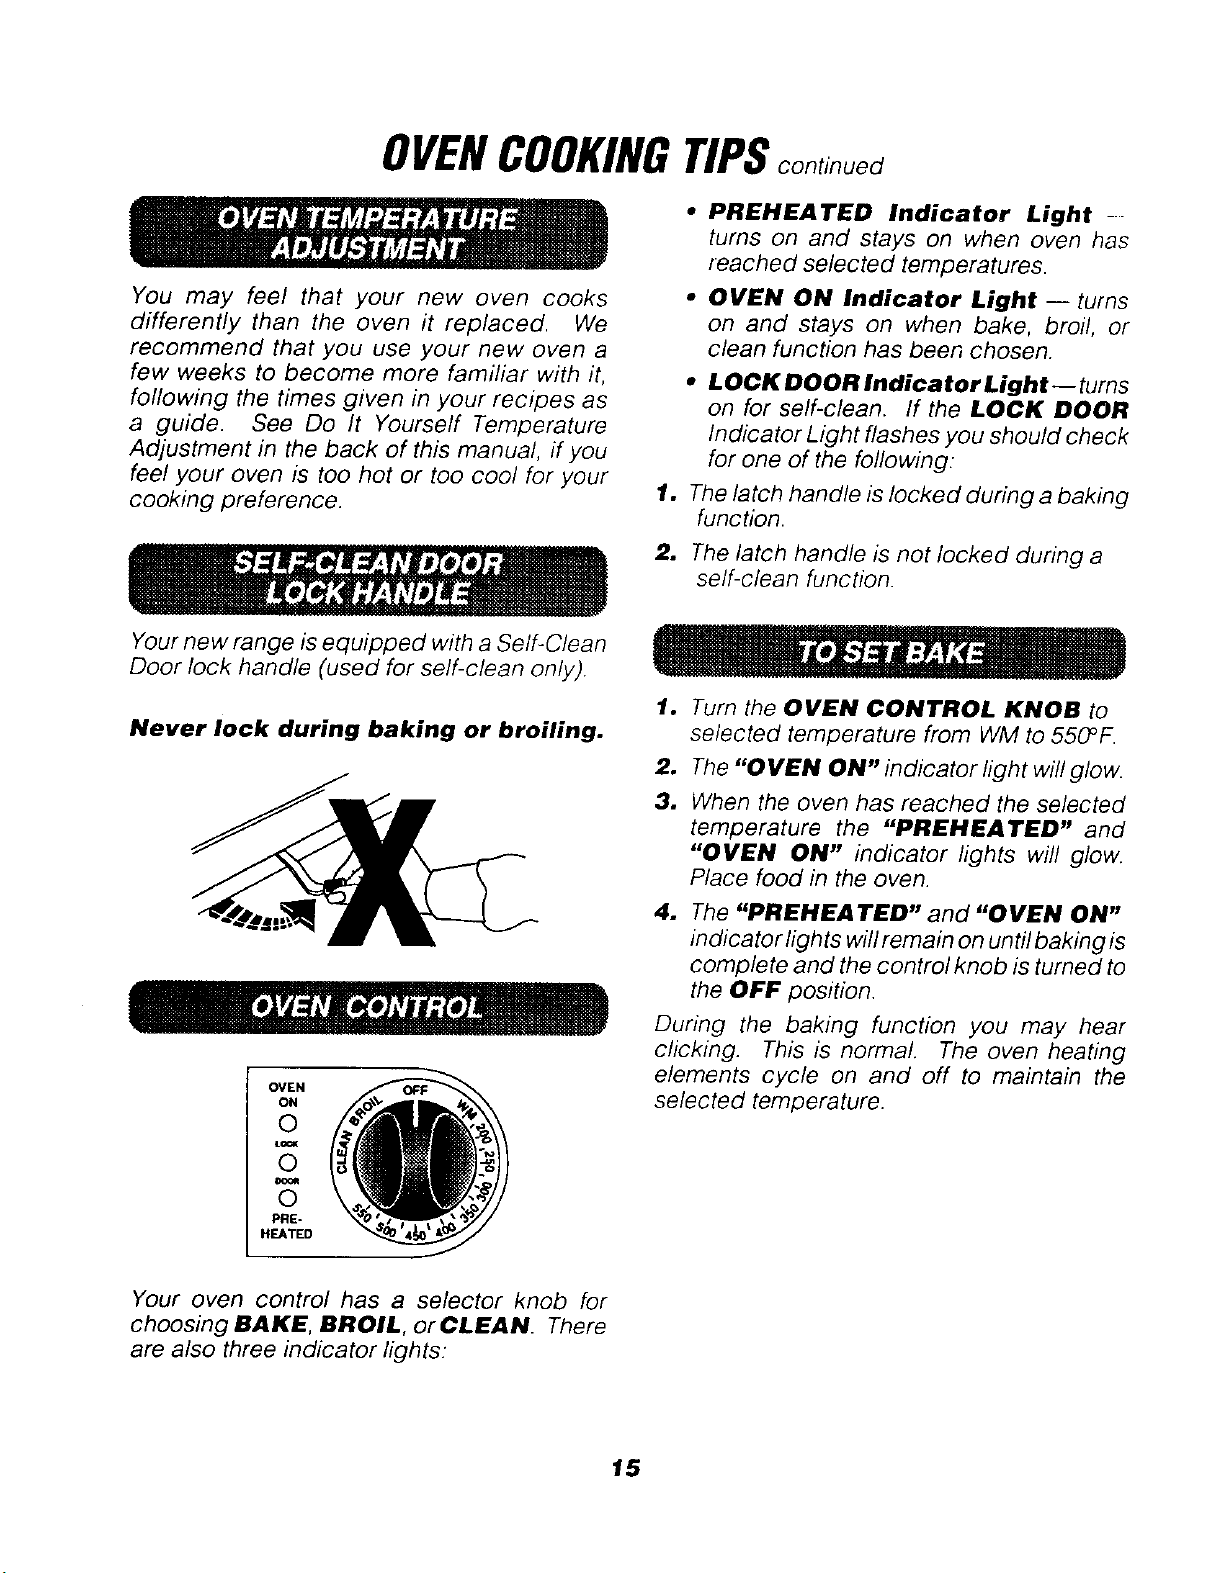
Never lock during baking or broiling.
OVEN
ON
©
LOCK
©
©
PRE-
HEATED
B
2.
3.
Turn the OVEN CONTROL KNOB to
selected temperature from WM to 550_F.
The "OVEN ON" indicator hght will glow.
When the oven has reached the selected
temperature the "PREHEATED" and
"OVEN ON" indicator lights will glow.
Place food in the oven.
4. The "PREHEATED" and "OVEN ON"
indicator lights will remain on until baking is
complete and the control knob is tumed to
the OFF position.
During the baking function you may hear
clicking. This is normal. The oven heating
elements cycle on and off to maintain the
selected temperature.
Your oven control has a selector knob for
choosing BAKE, BROIL, orCLEAN. There
are also three indicator lights.
15
BROILING
Broiling is cooking by direct
heat from the upper element.
The oven door should remain
opened to the broil stop
position during broiling.
It is not necessary to preheat
the oven when broiling. Use the broiler pan
and grid that came with your range. Both are
designed for proper drainage of fat and
liquids.
WARNING!
Foil must be molded tightly to
the grid and slits cut into the foil
to match those of thegrid. This
allows fats and liquids to drain
into the broiler pan, preventing
fire and excessive smoke.
The U.S. Department of Agriculture notes that
meat cooked rare is popular, but meat cooked
to only 140°F (rare) means that some food
poisoning organisms may survive.
The closer you place foods to the broil elemen t,
the faster foods brown on the outside yet
remain red to pink in the center,
Moving meats away from the element will allow
the meat to cook to the center while browning
on the outside. Cook side 1at least 2 minutes
longer than side 2. If your oven is connected
to 208 volts, you may want to use a higher rack
position and/or broil foods longer.
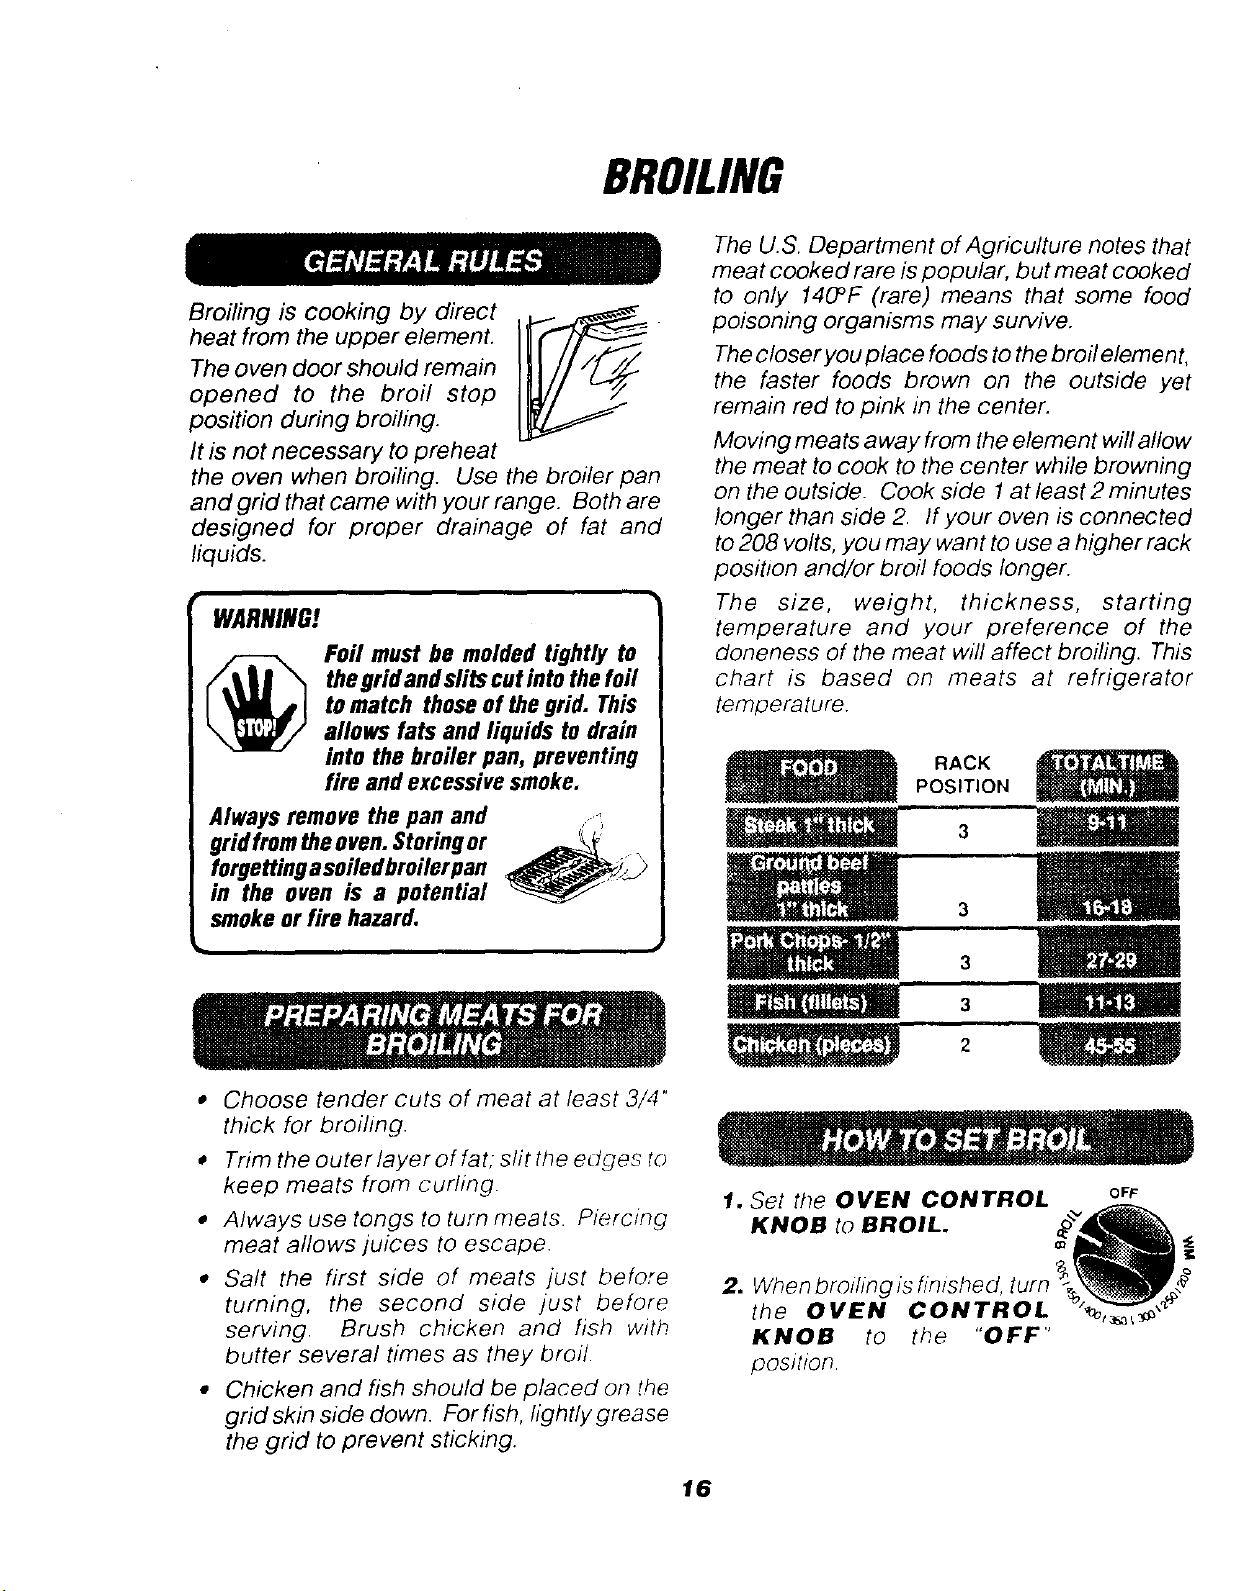
The size, weight, thickness, starting
temperature and your preference of the
doneness of the meat will affect broiling. This
chart is based on meats at refrigerator
temperature.
RACK
POSITION
Always remove the pan and ,,
fromthe oven. Storing or '\&_ , ° _' 3 _"
grid
forgettingasoiledbroilerpan _,_/_
in the even is a potential _
smoke or fire hazard.
* Choose tender cuts of meat at least 3/4"
thick for broiling.
* Trim the outerlayer of fat; slit the edges to
keep meats from curling.
• Always use tongs to turn meats. Piercing
meat allows juices to escape.
• Salt the first side of meats just before
turning, the second side just before
serving. Brush chicken and fish with
butter several times as they broil.
• Chicken and fish should be placed on the
grid skin side down. Forfish, lightly grease
the grid to prevent sticking.
1. Set the OVEN CONTROL OF_
KNOBtoBROIL.
_o
2. When broiling is finished, turn _ X_ e
the OVEN CONTROL %%_,_e
KNOB to the "OFF"
position
16
SELF-CLEANINGCYCLE
f. Remove the broiler pan and grid, oven
racks, utensils and any foil that may be in
the oven.
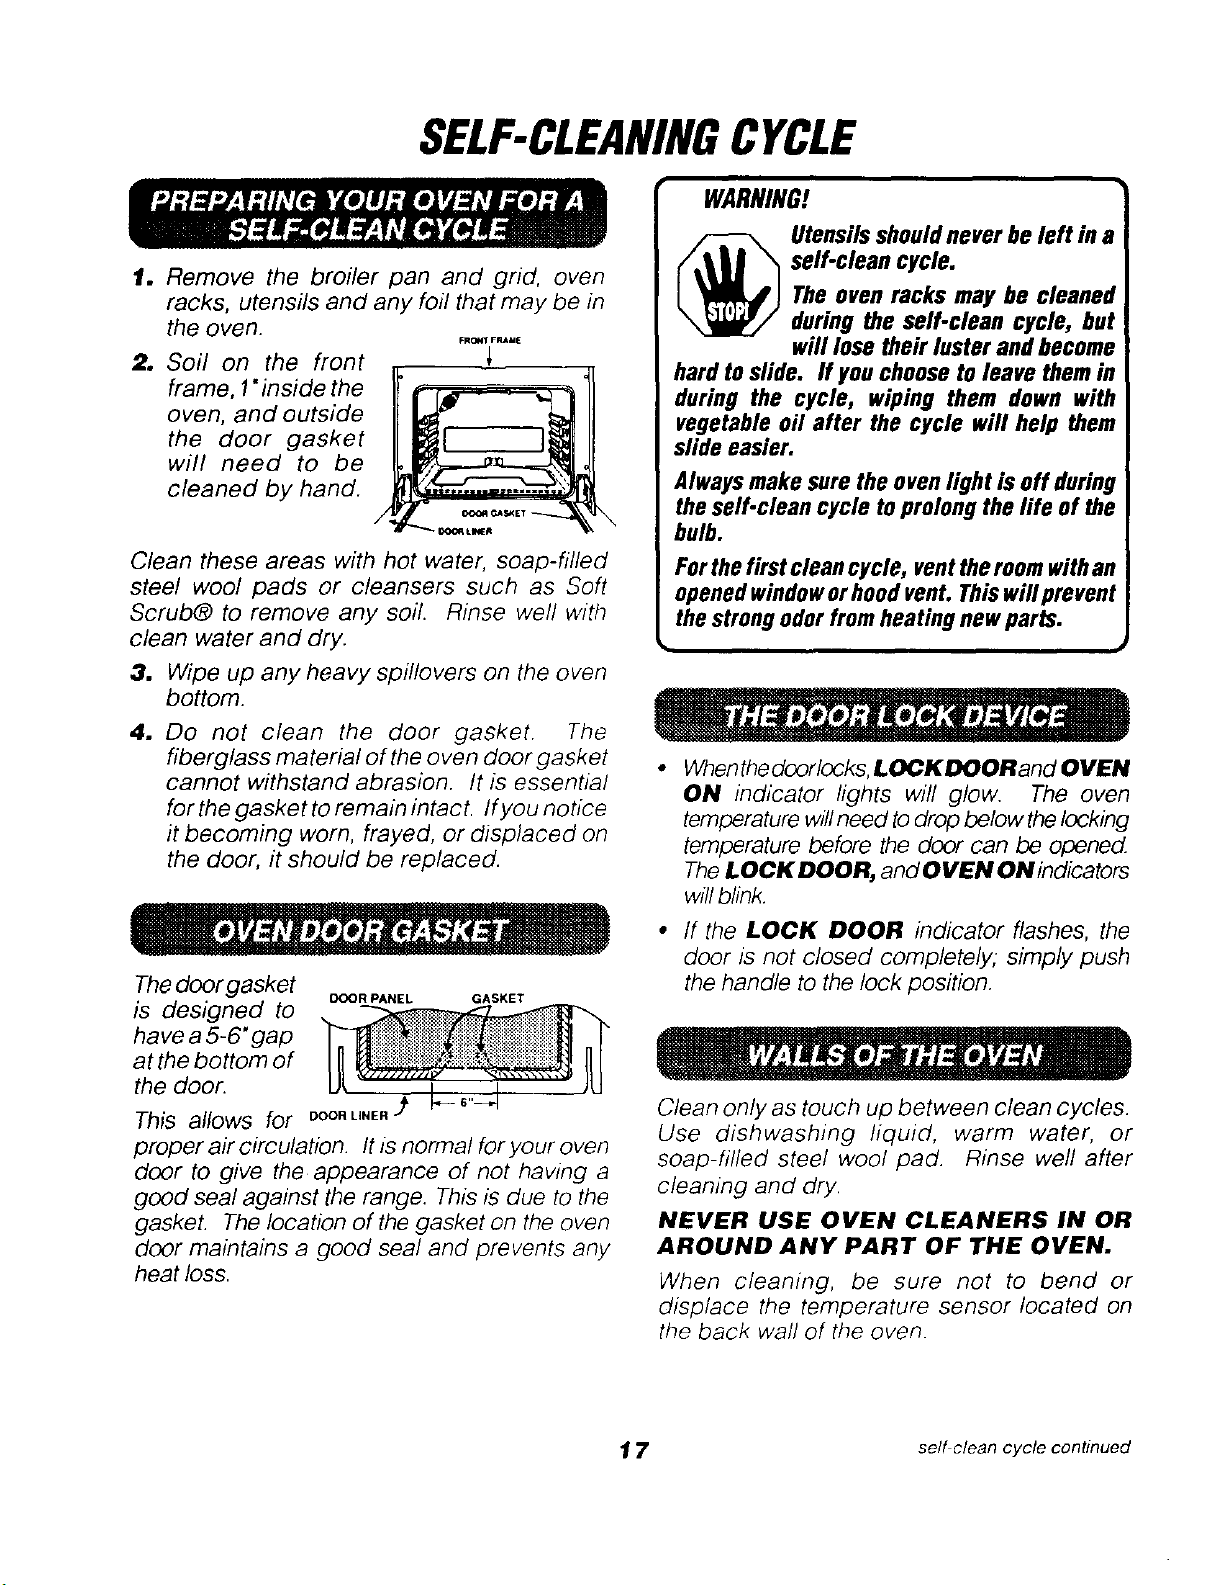
2. Soil on the front
frame, 1"inside the
oven, and outside
the door gasket
will need to be
cleaned by hand.
S
FRON_ FR*U£
\
_ OOOR L_lt
Clean these areas with hot water, soap-filled
steel wool pads or cleansers such as Soft
Scrub® to remove any soil. Rinse well with
clean water and dry.
3. Wipe up any heavy spillovers on the oven
bottom.
4. Do not clean the door gasket. The
fiberglass material of the oven door gasket
cannot withstand abrasion. It is essential
for the gasket to remain intact. Ifyou notice
it becoming worn, frayed, or displaced on
the door, it should be replaced.
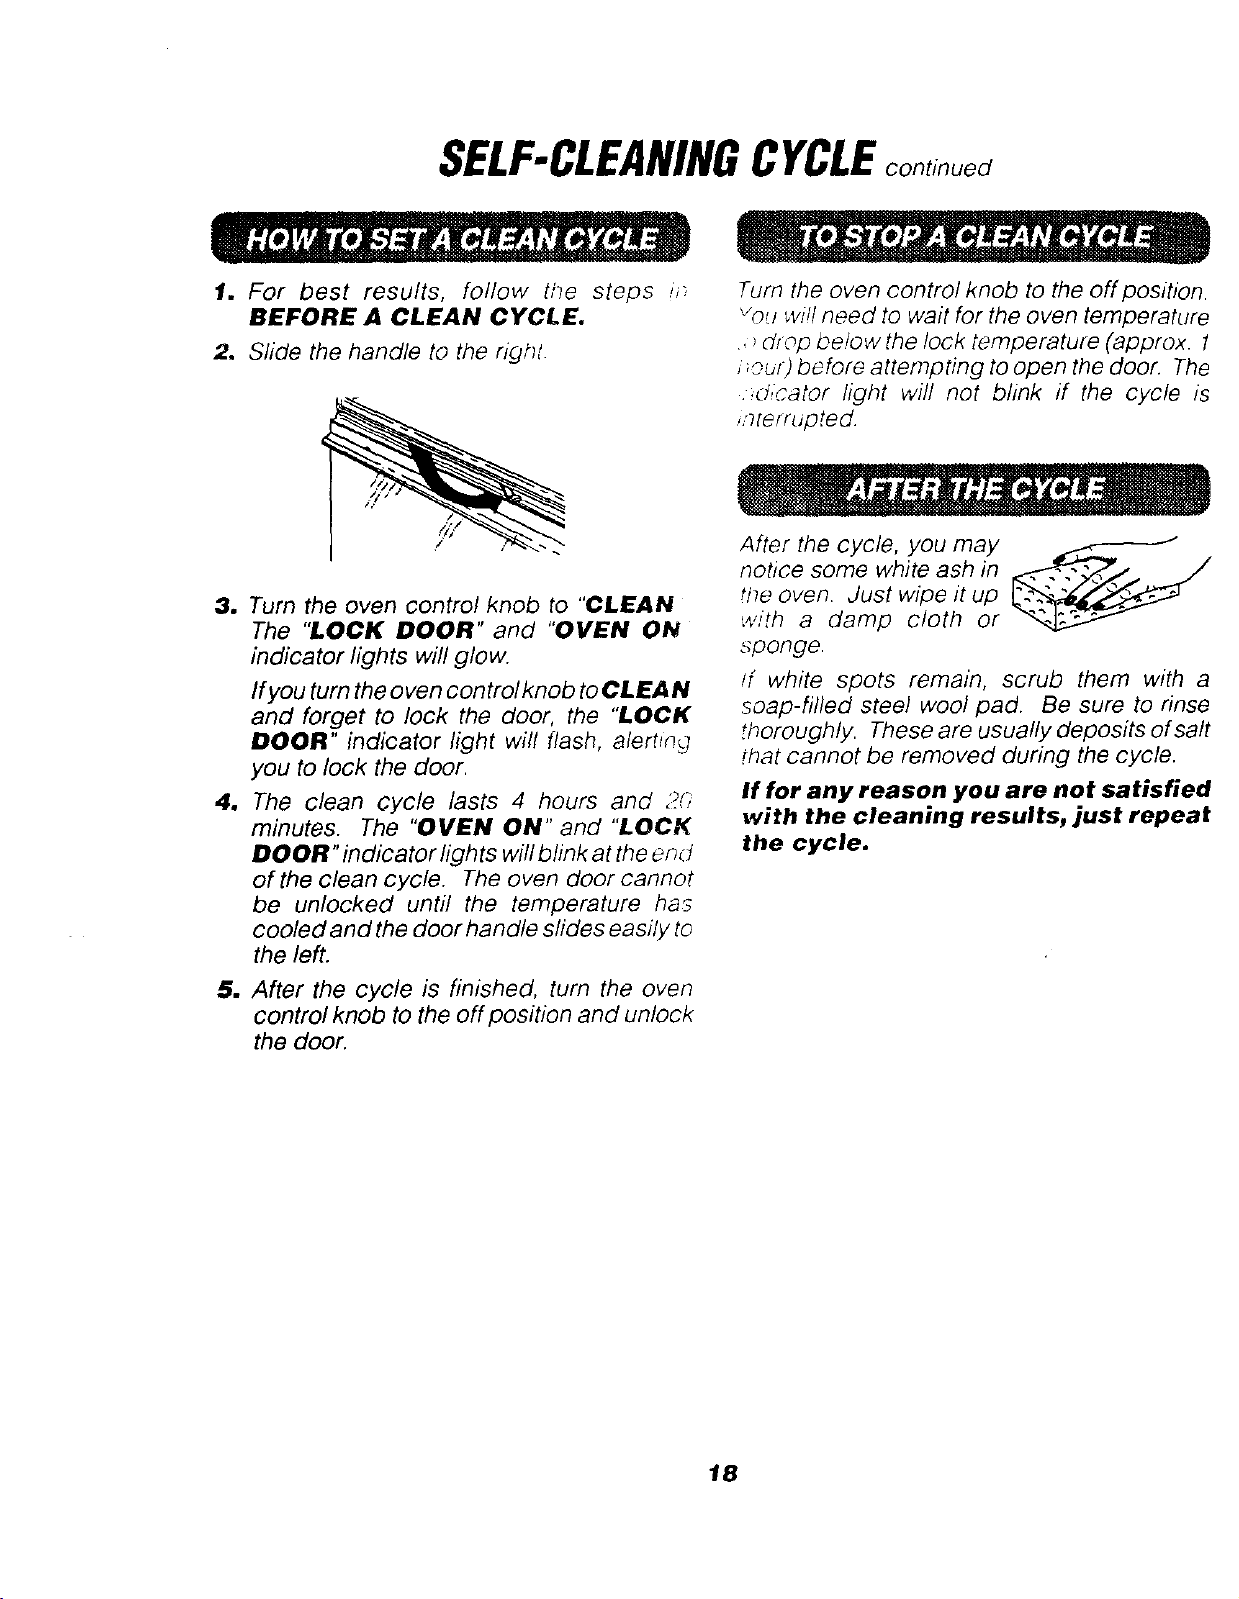
The door gasket O00.PAHEL GASKET
is designed to _lil
have a 5-6"gap
at the bottom of
the door.
This allows for D
proper air circulation. It is normal for your oven
door to give the appearance of not having a
good seal against the range. This is due to the
gaskeL The location of the gasket on the oven
door maintains a good seal and prevents any
heat loss.
WARNING!
_ tensilsshouldneverbeleft in a
self-clean cycle.
Theoven racks may be cleaned
duringthe self-clean cycle, but
will lose theirluster andbecome
hardtoslide, ff youchooseto leave themin
during the cycle, wiping them down with
vegetableoil after the cycle will help them
slide easier.
Always make sure the oven light is off during
the self.clean cycle to prolong the fife of the
bulb.
Forthe first clean cycle, vent theroomwithan
opened window orhood vent. Thiswill prevent
the strong odor from heating new parts.
jl
• Whenthedoorlocks, LOCKDOORandOVEN
ON indicator lights will glow. The oven
temperature will need to drop be/owthe looking
temperature before the door can be opened
The LOCK DOOR, and 0 VEN ON indicators
will blink.
• If the LOCK DOOR indicator flashes, the
door IS not closed completely; simply push
the handle to the lock position.
Clean only as touch up between clean cycles.
Use dishwashing liquid, warm water, or
soap-filled steel wool pad. Rinse well after
cleaning and dry.
NEVER USE OVEN CLEANERS IN OR
AROUND ANY PART OF THE OVEN.
When cleaning, be sure not to bend or
displace the temperature sensor located on
the back wall of the oven.
17 self clean cycle continued
SELF-CLEANINGCYCLEcontinued
1. For best results, follow the steps i/.,
BEFORE A CLEAN CYCLE.
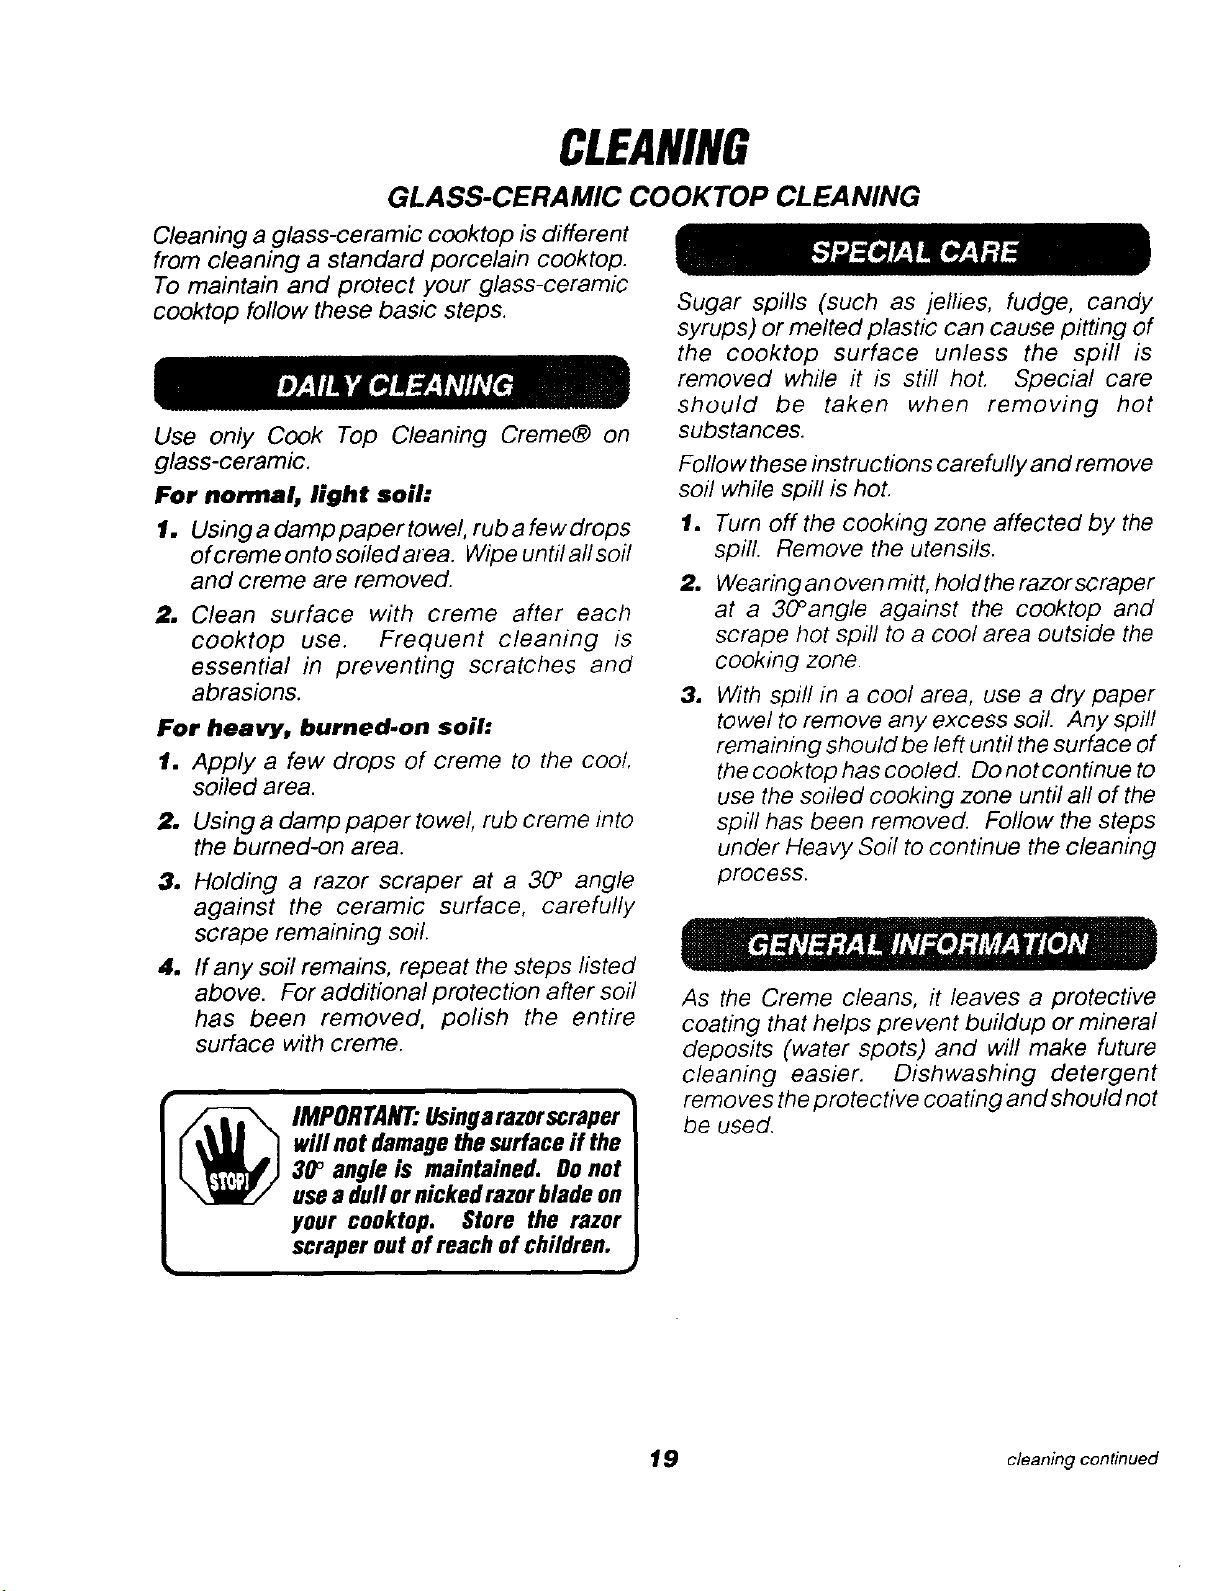
2. Slide the handle to the right
3. Turn the oven control knob to "CLEAN
The "LOCK DOOR" and "OVEN ON
indicator lights will glow.
Ifyou turn the oven control knob to CLEAN
and forget to lock the door, the "LOCK
DOOR" indicator light will flash, alerting
you to lock the door.
4. The clean cycle lasts 4 hours and 2(_
minutes. The "OVEN ON" and "LOCK
DOOR" indicator lights will blink at the end
of the clean cycle. The oven door cannot
be unlocked until the temperature ha_
cooled and the door handle slides easily to
the left.
5. After the cycle is finished, tum the oven
control knob to the off position and unlock
the door.
Turn the oven control knob to the off position.
'/nu wi!l need to wait for the oven temperature
, _drop be!owthe lock temperature (approx. 1
_ou_)before attempting to open the door. The
dicator light will not blink if the cycle is
interrupted.
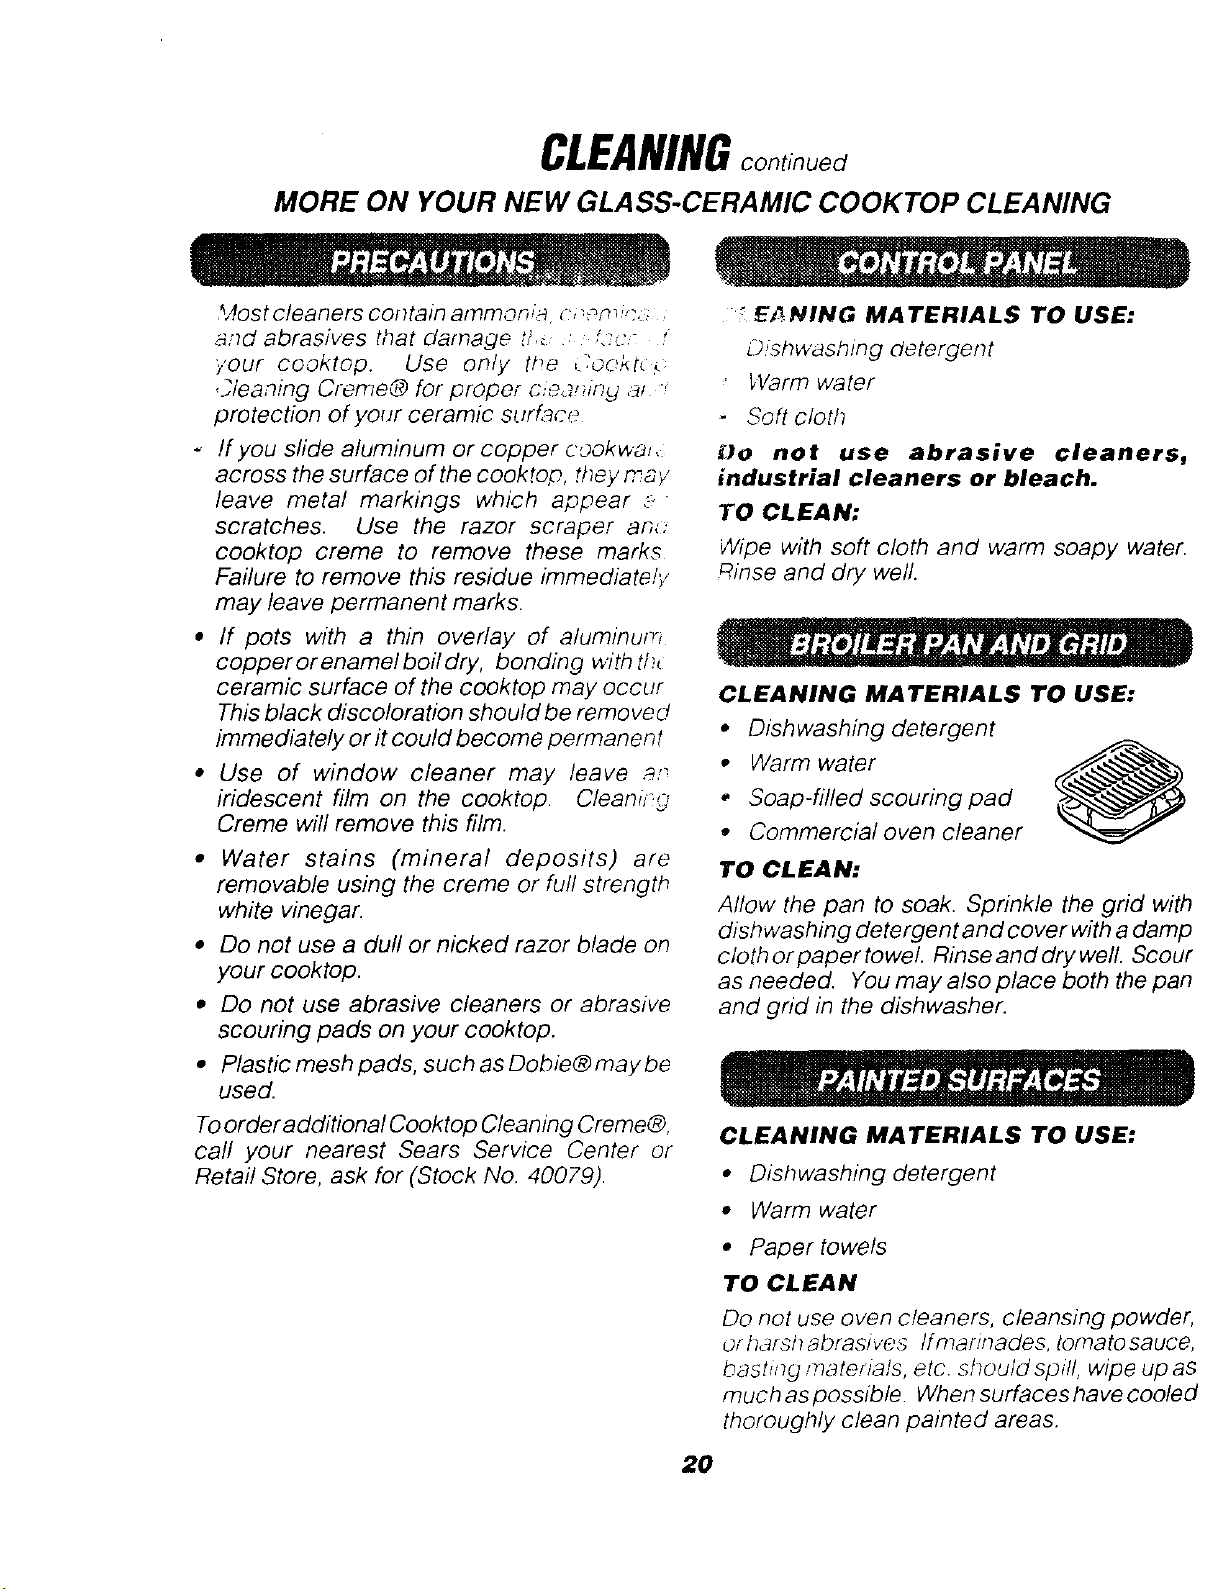
After the cycle, you may
notice some white ash in
rite oven. Just wipe it up
with a damp cloth or
sponge.
/f white spots remain, scrub them with a
soap-filled steel wool pad. Be sure to rinse
thoroughly. These are usually deposits of salt
that cannot be removed during the cycle.
If for any reason you are not satisfied
with the cleaning results, just repeat
the cycle.
18
CLEANING
GLASS-CERAMIC COOKTOP CLEANING
Cleaning a glass-ceramic cooktop is different
from cleaning a standard porcelain cooktop.
To maintain and protect your glass-ceramic
cooktop follow these basic steps.
Use only Cook Top Cleaning Creme® on
glass-ceramic.
For normal, light soil:
1. Using a damp paper towel, rub a few drops
of creme onto soiled area. Wipe until all soil
and creme are removed.
2. Clean surface with creme after each
cooktop use. Frequent cleaning is
essential in preventing scratches and
abrasions.
For heavy, burned.on soil:
1. Apply a few drops of creme to the cool,
soiled area.
2. Using a damp papertowel, rub creme into
the burned-on area.
3, Holding a razor scraper at a 30_ angle
against the ceramic surface, carefully
scrape remaining soil.
4. If any soil remains, repeat the steps listed
above. For additional protection after soil
has been removed, polish the entire
surface with creme.
IMPORTANT."Usingarazorscraper
will not damage the surface ff the
30° angle is maintained. Do not
usea dull or nicked razor blade on
your cooktop. Store the razor
scraper out of reach of children.
Sugar spills (such as jellies, fudge, candy
syrups) or melted plastic can cause pitting of
the cooktop surface unless the spill is
removed while it is still hot, Special care
should be taken when removing hot
substances.
Follow these instructions carefully and remove
soil while spill is hot,
1, Turn off the cooking zone affected by the
spill. Remove the utensils.
Wearing an oven mitt, hold the razor scraper
at a 30_angle against the cooktop and
scrape hot spill to a cool area outside the
cooking zone.
1
With spill in a cool area, use a dry paper
towel to remove any excess soil. Any spill
remaining should be left until the surface of
the cooktop has cooled. Do not continue to
use the soiled cooking zone until all of the
spill has been removed. Follow the steps
under Heavy Soil to continue the cleaning
process.
As the Creme cleans, it leaves a protective
coating that helps prevent buildup or mineral
deposits (water spots) and will make future
cleaning easier. Dishwashing detergent
removes the protective coating and should not
be used.
19 cleaningcontinued
CLEANINGcontinued
MORE ON YOUR NEW GLASS-CERAMIC COOKTOP CLEANING
%_ostcleaners contain ammon,a _:',_pm;,-.:,
si ' '
and abra ves that damage ,,_ . ._.....
your cooktop. Use or}/y the ,.,c,o,<t{ ;.
Cleaning Creme® for proper c,.e,_,nind ,af '
protection of your ceramic surf.ace
- If you sfide aluminum or copper cookwa,,
across the surface of the cooktop, they may
leave metal markings which appear ._
scratches. Use the razor scraper ant:
cooktop creme to remove these marks
Failure to remove this residue immediatei'j
may leave permanent marks.
• If pots with a thin overlay of aluminum
copper or enamel boil dry, bonding with tht
ceramic surface of the cooktop may occur
This black discoloration should be removed
immediately or it could become permanent
• Use of window cleaner may leave _.,_
iridescent film on the cooktop CleaniJ W
Creme will remove this film.
• Water stains (mineral deposits) are
removable using the creme or full strength
white vinegar.
• Do not use a dull or nicked razor blade on
your cooktop.
• Do not use abrasive cleaners or abrasive
scouring pads on your cooktop.
• Plastic mesh pads, such as Dobie® may be
used.
Toorder additional Cooktop Cleaning Creme@,
call your nearest Sears Service Center or
Retail Store, ask for (Stock No. 40079).
_ E_NING MATERIALS TO USE:
D/shwash_ng detergent
Warm water
Soft cloth
_)o not use abrasive cleaners,
industrial cleaners or bleach.
TO CLEAN:
Wipe with soft cloth and warm soapy water.
Rinse and dry well.
CLEANING MATERIALS TO USE:
• Dishwashing detergent
• Warn? water
• Soap-filled scouring pad
• Commercial oven cleaner
TO CLEAN:
Allow the pan to soak. Sprinkle the grid with
dishwashing detergent and cover with a damp
cloth or paper towel. Rinse and dry well. Scour
as needed. You may also place both the pan
and grid in the dishwasher.
'_n[..
CLEANING MATERIALS TO USE:
• Dishwashing detergent
• Warm water
• Paper towels
TO CLEAN
Do not use oven cleaners, cleansing powder,
or Itdrsh abrasives if marinades, tomato sauce,
basting materials, etc. should spill, wipe up as
much as possible When surfaces have cooled
thoroughly clean painted areas.
20
REMOVABLEPARTS
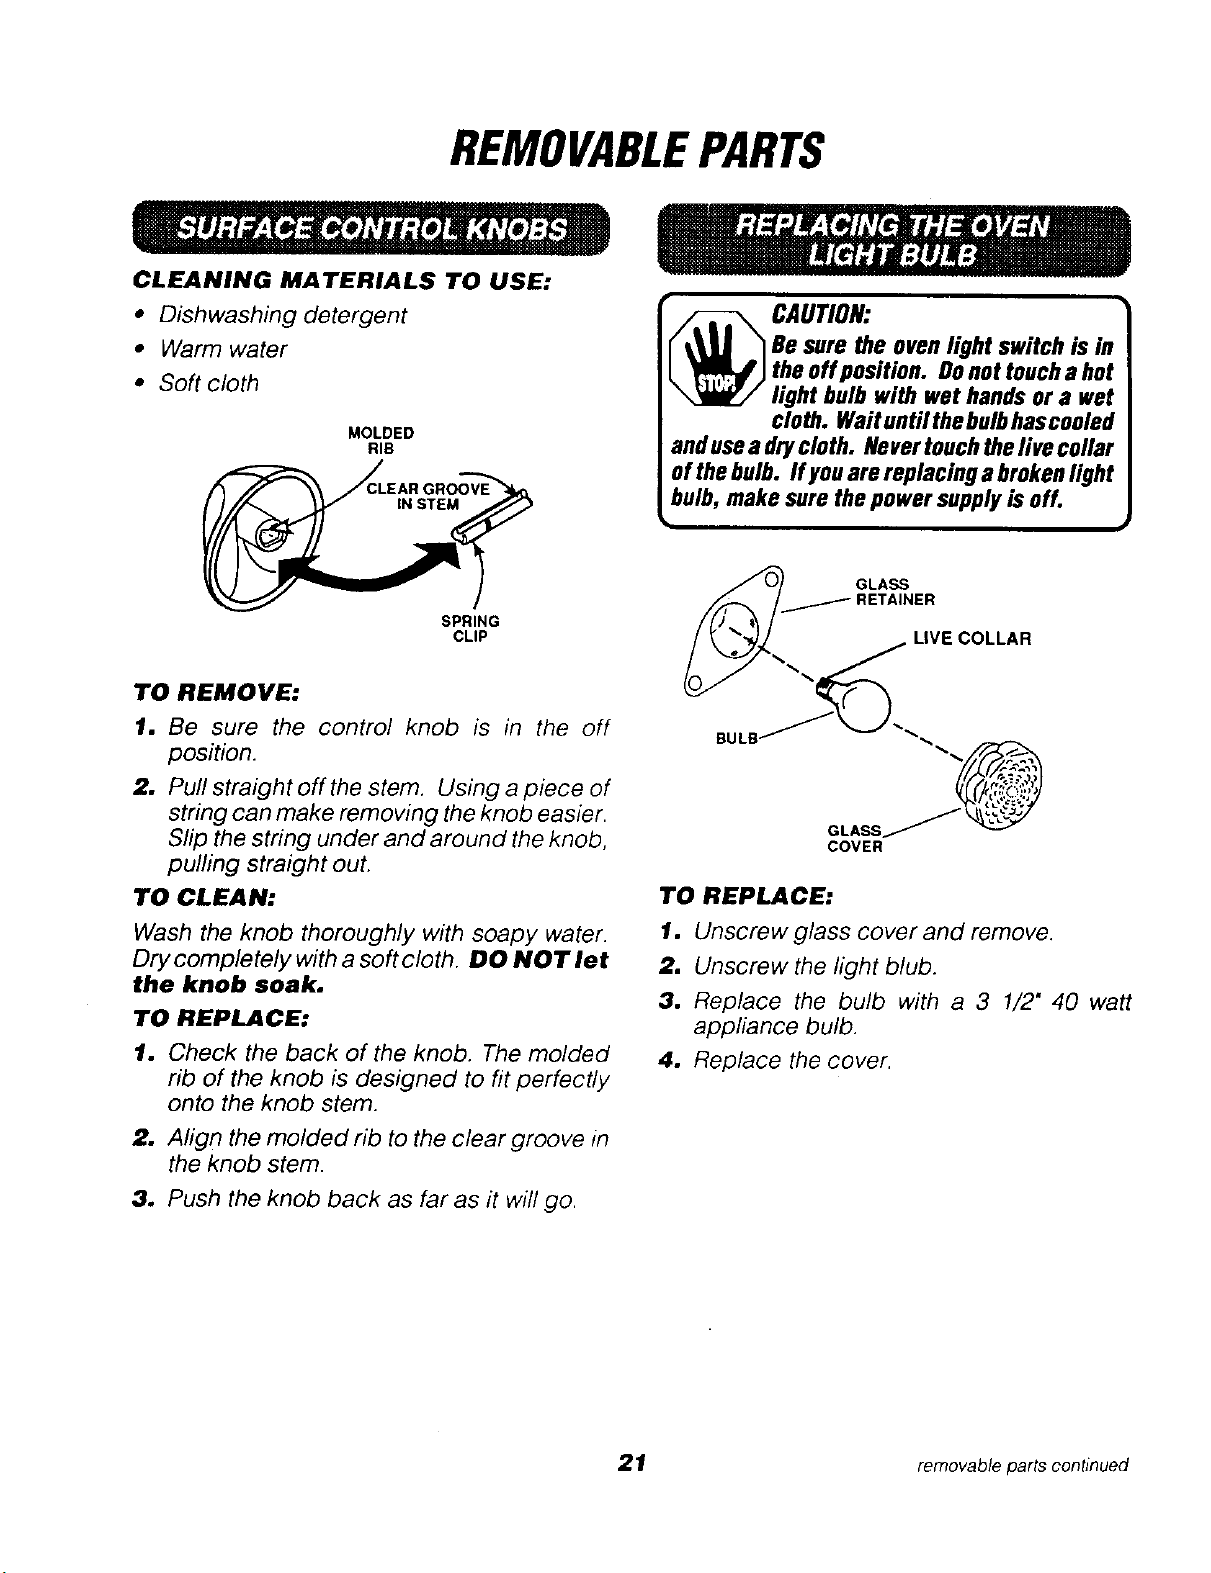
CLEANING MATERIALS TO USE:
• Dishwashing detergent
• Warm water
• Soft cloth
MOLDED
RIB
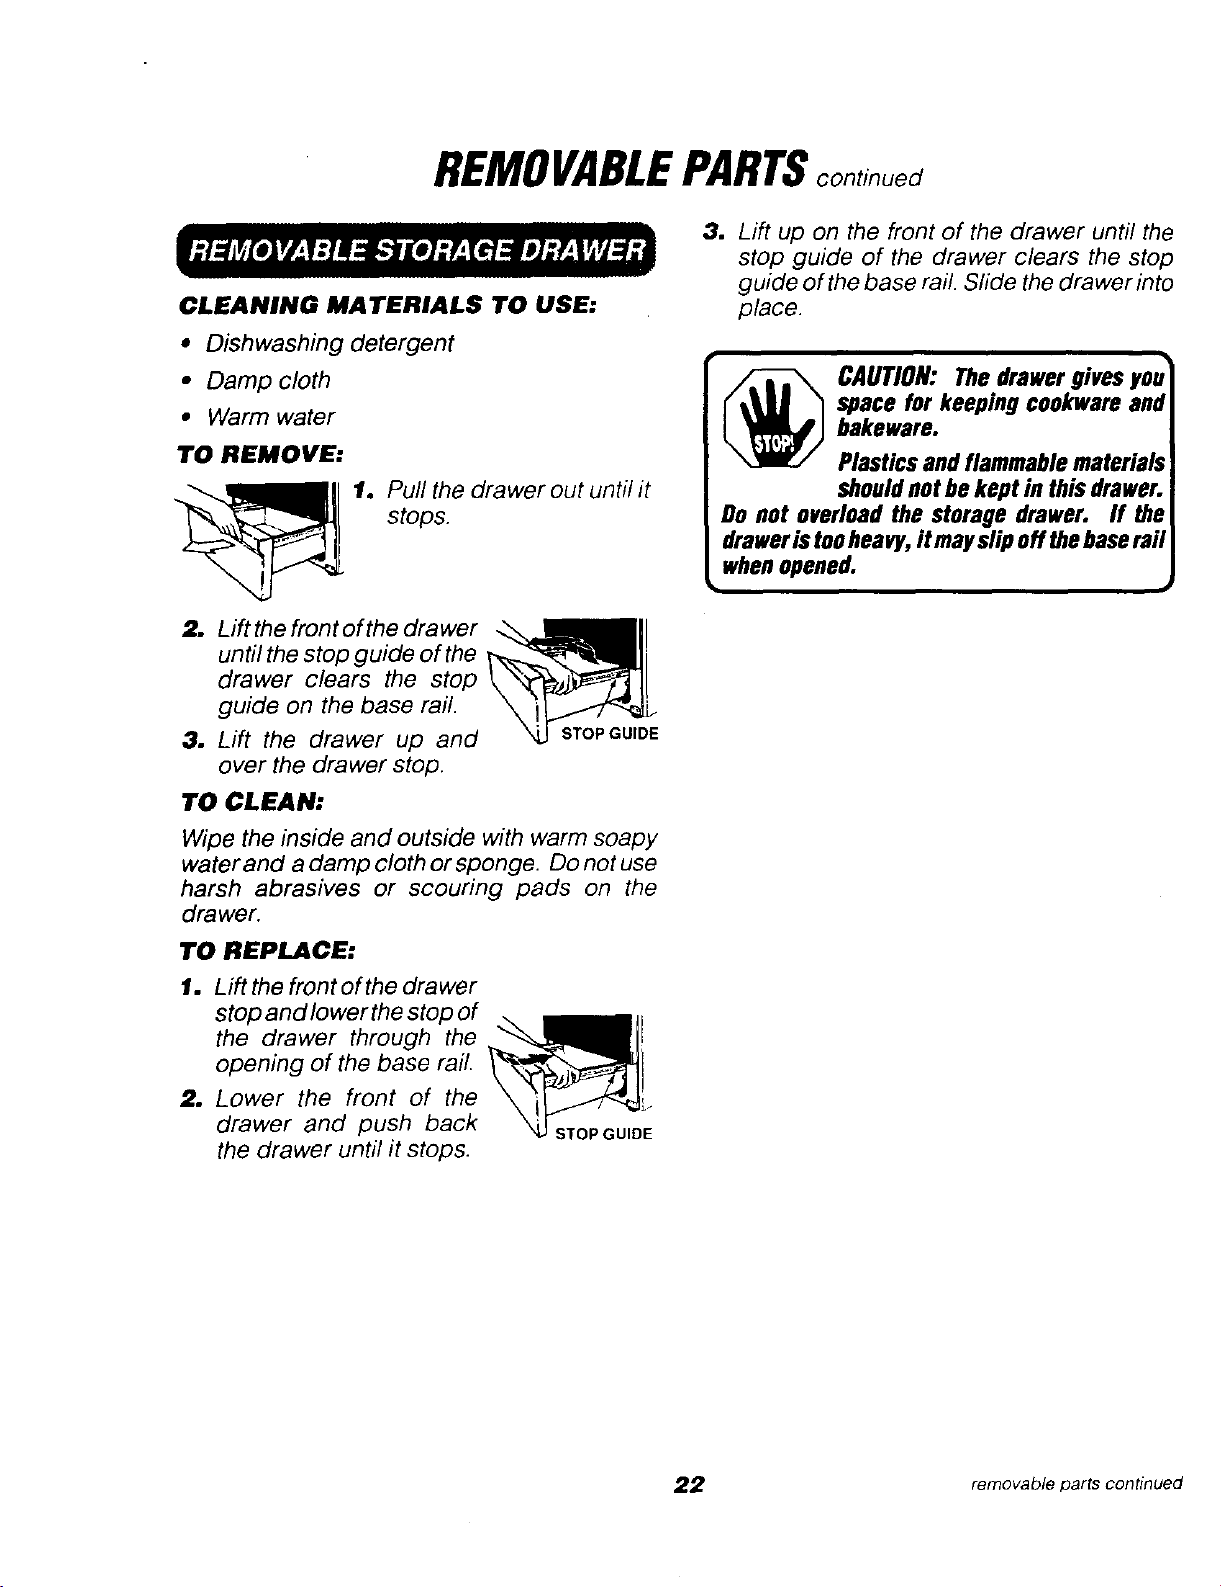
CAUTION:
SPRING
CLIP
TO REMOVE:
1. Be sure the control knob is in the off
position.
2. Pull straight off the stem. Using a piece of
string can make removing the knob easier.
Slip the string under and around the knob,
pulling straight out.
TO CLEAN:
Wash the knob thoroughly with soapy water.
Dry completely with a soft cloth. DO NOT let
the knob soak.
TO REPLACE:
1. Check the back of the knob. The molded
rib of the knob is designed to fit perfectly
onto the knob stem.
2. Align the molded rib to the clear groove in
the knob stem.
3o Push the knob back as far as it will go.
_ LIVE COLLAR
....
GLASSJ
COVER
TO REPLACE:
1. Unscrew glass cover and remove.
2. Unscrew the light blub.
3, Replace the bulb with a 3 1/2" 40 watt
appliance bulb.
4, Replace the cover.
21 removable parts continued
REMOVABLEPARTScontinued
CLEANING MATERIALS TO USE:
• Dishwashing detergent
• Damp cloth
• Warm water
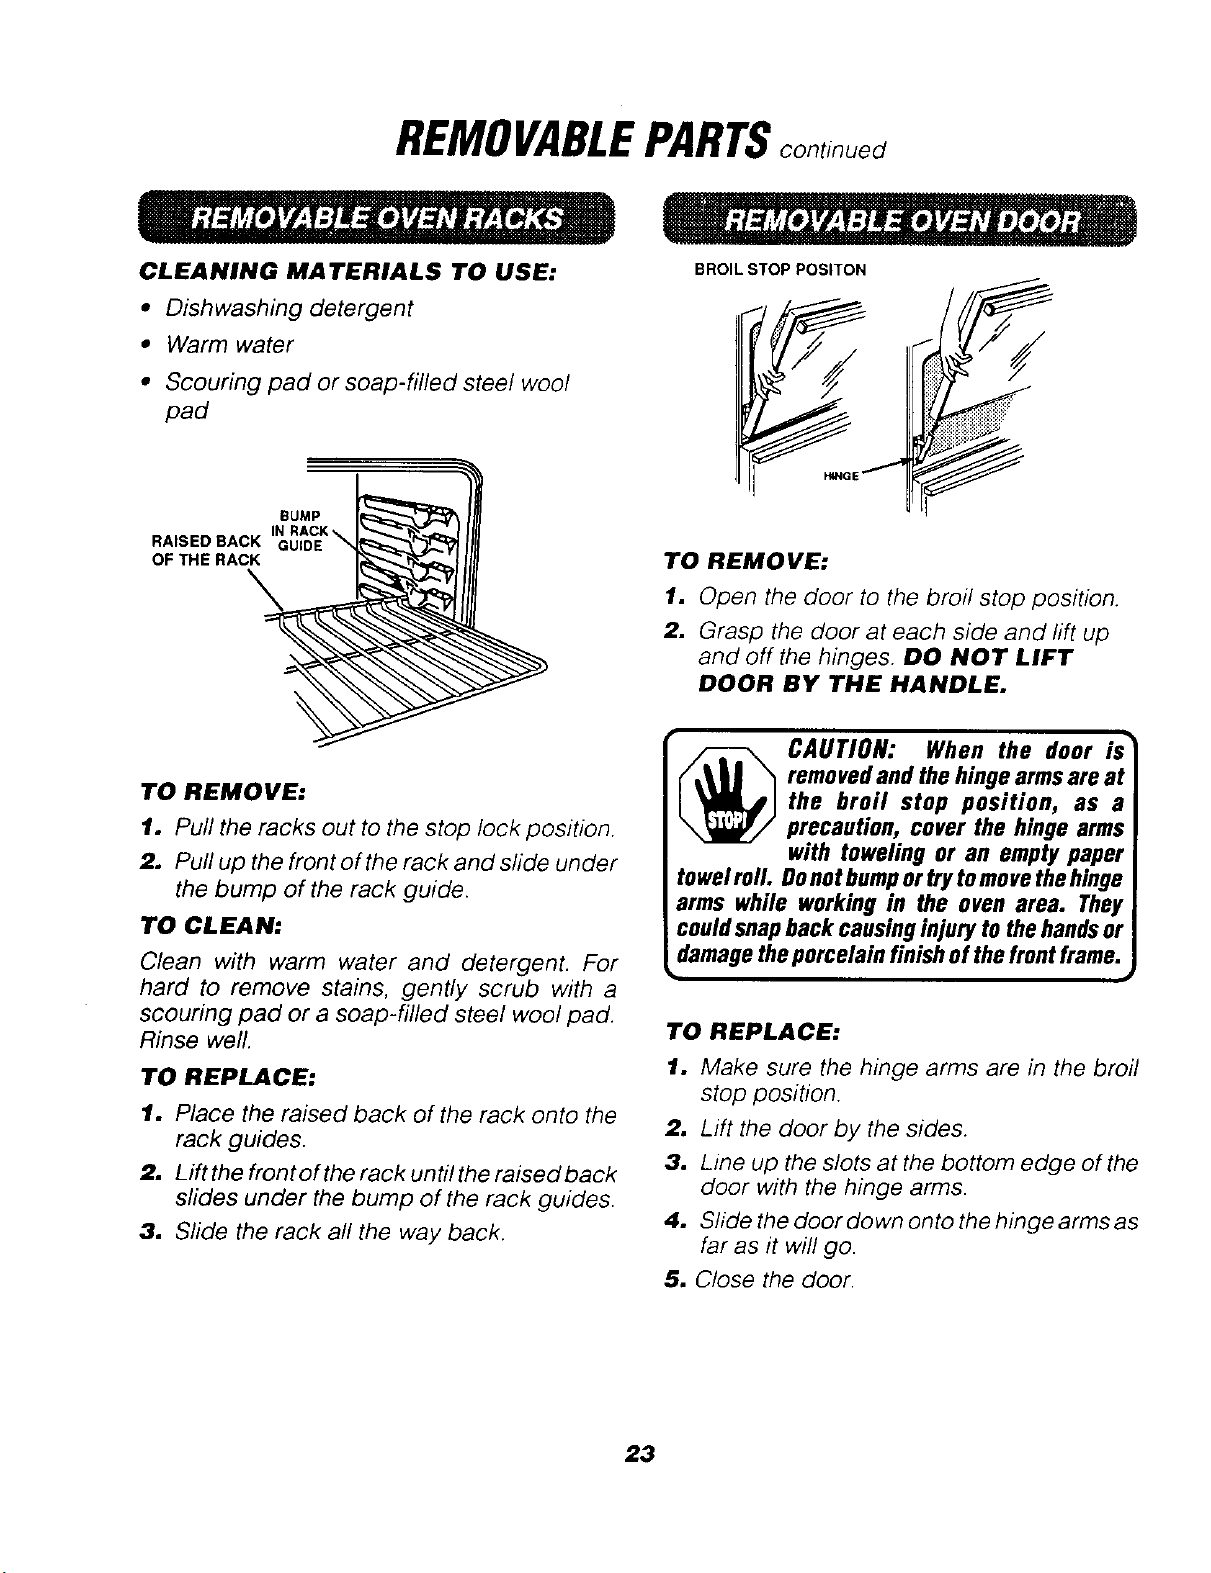
TO REMOVE:
1. Pull the drawer out until it
stops.
2. Lift the front of the drawer
until the stop guide of the
drawer clears the stop
guide on the base raft.
3. Lift the drawer up and
over the drawer stop.
TO CLEAN:
Wipe the inside and outside with warm soapy
water and a damp cloth or sponge. Do not use
harsh abrasives or scouring pads on the
drawer.
TO REPLACE:
1. Lift the front of the drawer
stopandlowerthe stop of __--_.._,,
the drawer through the __]!
opening of the base rail. _'__1
2. Lower the front of the \ _lI_.
drawer and push back X_STOPCUIDE
the drawer until it stops.
3. Lift up on the front of the drawer until the
stop guide of the drawer clears the stop
guide of the base rail. Sfide the drawer into
place.
_ AUTION: The drawer gives you
space for keeping eookware and
bakeware.
Plastics and flammable materials
should not be kept in this drawer.
Do not overload the storage drawer. If the
drawer is tooheavy, it mayslip off the base rail
when opened.
m
22 removable parts continued
REMOVABLEPARTScontinued
CLEANING MATERIALS TO USE:
• Dishwashing detergent
• Warm water
• Scouring pad or soap-filled steel wool
pad
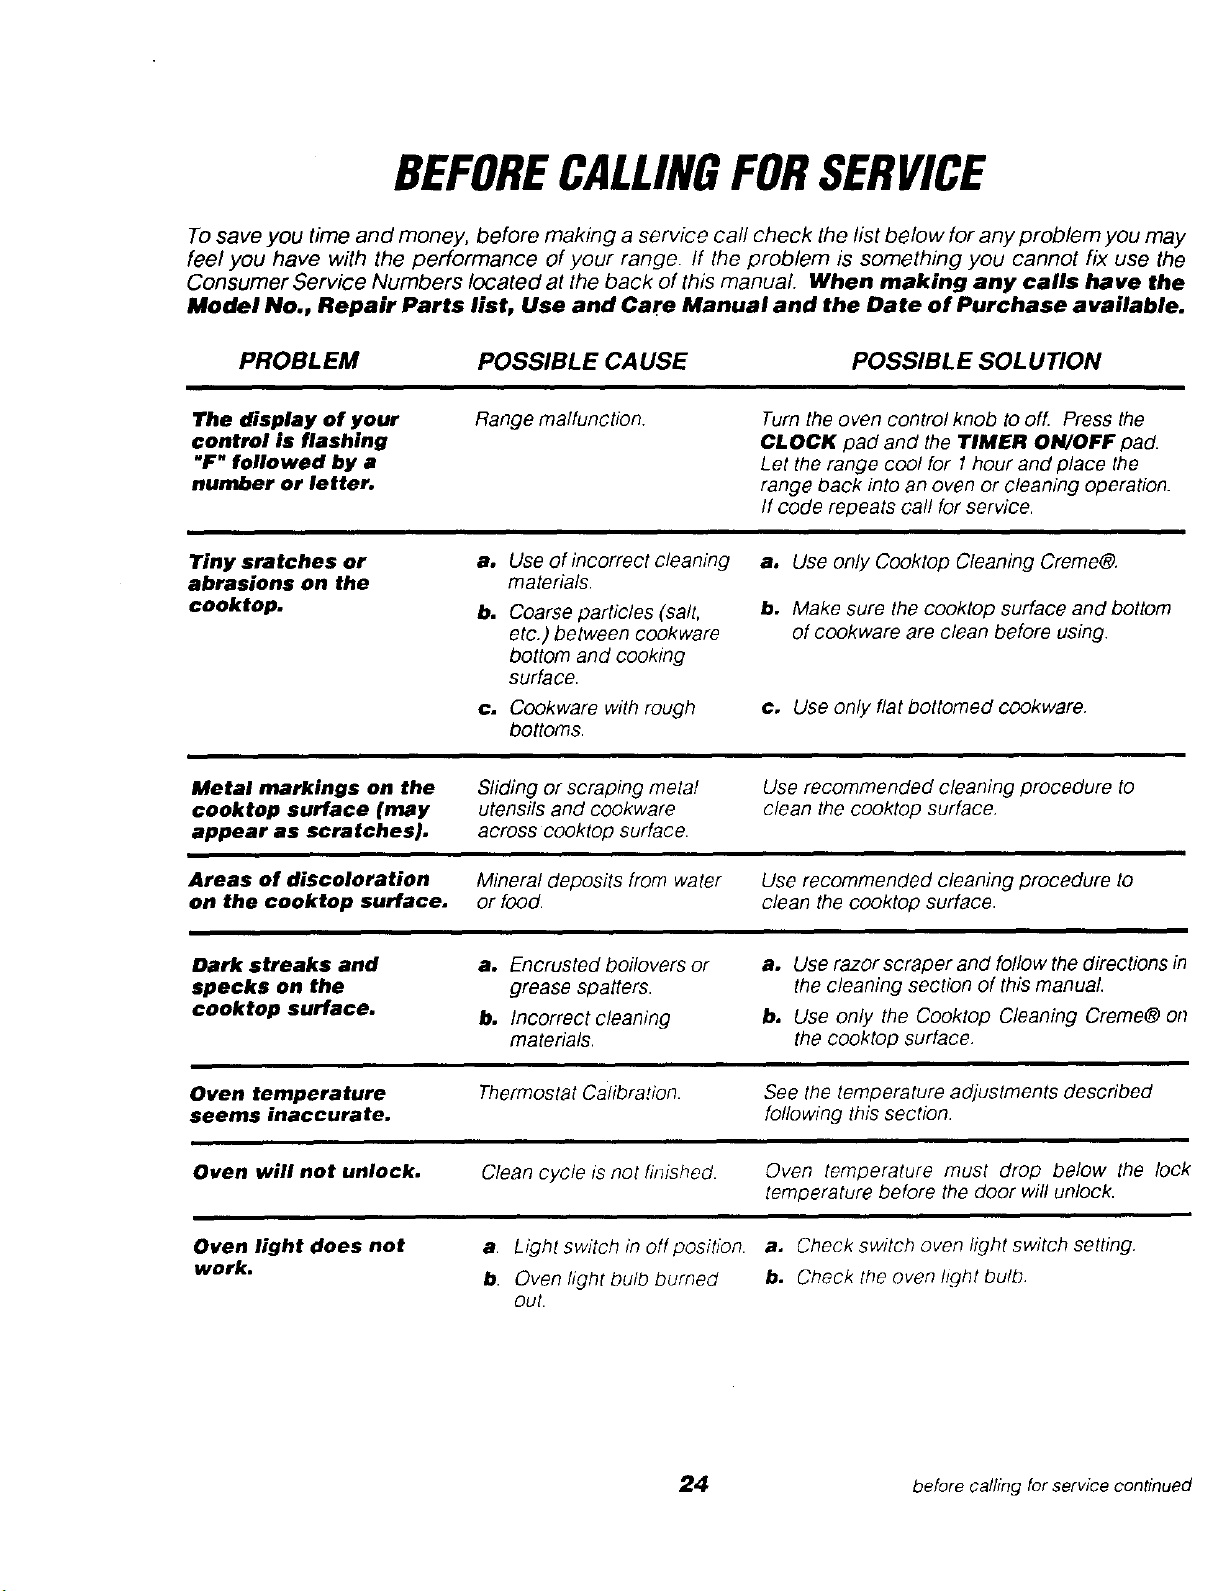
BROIL STOP POSITON
BUMP
RAISED BACK IN RACK
OF THE RACK
TO REMOVE:
1, Pull the racks out to the stop lock position.
2, Pull up the front of the rack and slide under
the bump of the rack guide.
TO CLEAN:
Clean with warm water and detergent. For
hard to remove stains, gently scrub with a
scouring pad or a soap-filled steel woo/pad.
Rinse well.
TO REPLACE:
1, Place the raised back of the rack onto the
rack guides.
2, Lift the front ef the rack until the raised back
slides under the bump of the rack guides.
3, Slide the rack all the way back.
TO REMOVE:
1. Open the door to the broil stop position.
2. Grasp the door at each side and rift up
and off the hinges. DO NOT LIFT
DOOR BY THE HANDLE.
CAUTION:
TO REPLACE:
1, Make sure the hinge arms are in the broil
stop position.
2, Lift the door by the sides.
3, Line up the slots at the bottom edge of the
door with the hinge arms.
4. Slide the door down onto the hinge arms as
far as it will go.
5, Close the door.
23
BEFORECALLINGFORSERVICE
To save you time and money, before making a service call check the list below for any problem you may
feel you have with the performance of your range. If the problem is something you cannot fix use the
Consumer Service Numbers located at the back of this manual. When making any calls have the
Model No., Repair Parts list, Use and Care Manual and the Date of Purchase available.
PROBLEM
POSSIBLE CAUSE
POSSIBL E SOL UTION
The display of your
control is flashing
"F" followed by a
number or letter.
Range malfunction.
Turn the oven control knob to off. Press the
CLOCK pad and the TIMER ON/OFF pad.
Let the range cool for 1 hour and place the
range back into an oven or cleaning operation.
If code repeats call for service.
Tiny sratches or
abrasions on the
cooktop.
a. Use of incorrect cleaning
materials.
b. Coarse particles (salt,
etc.) between cookware
bottom and cooking
surface.
c. Cookware with rough
bottoms.
a. Use only Cooktop Cleaning Creme®.
b. Make sure the cooktop surface and bottom
of cookware are clean before using.
c. Use only flat bottomed cookware.
Metal markings on the
cooktop surface (may
appear as scratches).
Sliding or scraping metal
utensils and cookware
across cooktop surface.
Use recommended cleaning procedure to
clean the cooktop surface.
Areas of discoloration Mineral deposits from water
on the cooktop surface, or food.
Use recommended cleaning procedure to
clean the cooktop surface.
Dark streaks and
specks on the
cooktop surface.
a. Encrusted boilovers or
grease spatters.
b. Incorrect cleaning
materials.
a. Use razor scraper and follow the directions in
the cleaning section of this manual
b. Use only the Cooktop Cleaning Creme® on
the cooktop surface.
Oven temperature
seems inaccurate.
Thermostat Calibration.
See the temperature adjustments described
following this section.
Oven will not unlock.
Clean cycle is not finished.
Oven temperature must drop below the lock
temperature before the door will unlock.
Oven light does not
work.
a. L;ght switch in off position, a. Check switch oven light switch setting.
b. Oven light bulb burned b. Check the oven hght bulb
out.
24 before calling for service continued

BEFORECALLINGFORSERVICEco,tJn.e,
PROBLEM POSSIBL E CA USE POSSIBLE SOL UTION
Foods do not broil
properly.
a. Improper rack
position.
b. Oven preheated.
c. Improper use of foil.
d, Oven door closed during
broiling.
e, Low voltage (208 volts).
f, Improper broiling time.
a.
b.
C,
d.
e.
L
Check broil pan placement; see broiling
section.
Do not preheat when broiling.
Check broiling section.
Open door to broil stop position.
Use higher rack position and/or longer
cooking time.
Check broiling chart in broiling section.
Oven smokes.
a. Dirty oven
b, Improper use
of aluminum foil.
c, Broiler pan containing
grease left in the oven.
a. Check for heavy spillover.
b. Do not let foil cover slits in the gdd; this
will prevent grease drainage.
c, Clean pan and grid after each use.
Cooktop will not
work, oven is ok.
a. Control set improperly.
a. Push knob in while turning to
temperature setting.
Oven will not
work, cooktop ok.
a. Control set improperly.
b, Control knob turned too far
past 550%
a. Check the control and check oven
cooking section.
b, The indicator mark on the knob should
align exactly with 550°.
Oven door
accidentally locked
while
baking.
a. Do not force the lock
handle. Temperatures
above the locking
temperature will prevent the
lock handle from sliding to
the unlock position.
am
Turn the control knob to the off position.
Allow the oven to cool until the
temperature inside drops below the lock
temperature and the handle slides easily.
Cleaning results were a. Clean cycle interrupted.
poor. b. Oven was heavily soiled.
a. Allow the oven to clean its full cycle.
b. Heavy spillovers should be cleaned
before the cycle is set.
25
"DOIT YOURSELF"TEMPERATUREADJUSTMENT
You may feel that your new oven cooks
differently than the oven it replaced. We
recommend that you use your new oven a few
weeks to become more familiar with _t,
following the times given in your recipes as a
guide.
If you think your new oven is too hot (burning
foods) or not hot enough (foods are
undercooked) you can adjust the temperature
yourself. Theappearanceandtextureoffoods
is a better indicator of oven accuracy than an
oven thermometer, such as those found in
grocery stores, to check the temperature
setting of your new oven. These thermometers
can vary by 20-40 degrees. In addition, the
oven door must be opened to read these
thermometers. Opening the door will change
the temperature of the oven.
To decide how much to change the
temperature, set the oven temperature 25
degrees higher (if foods are undercooked) or
25 degrees lower (if foods are burning) than
the temperature in your recipe, then bake. The
results of this "test" should give you an idea of
how much the temperature should be changed.
I-IR
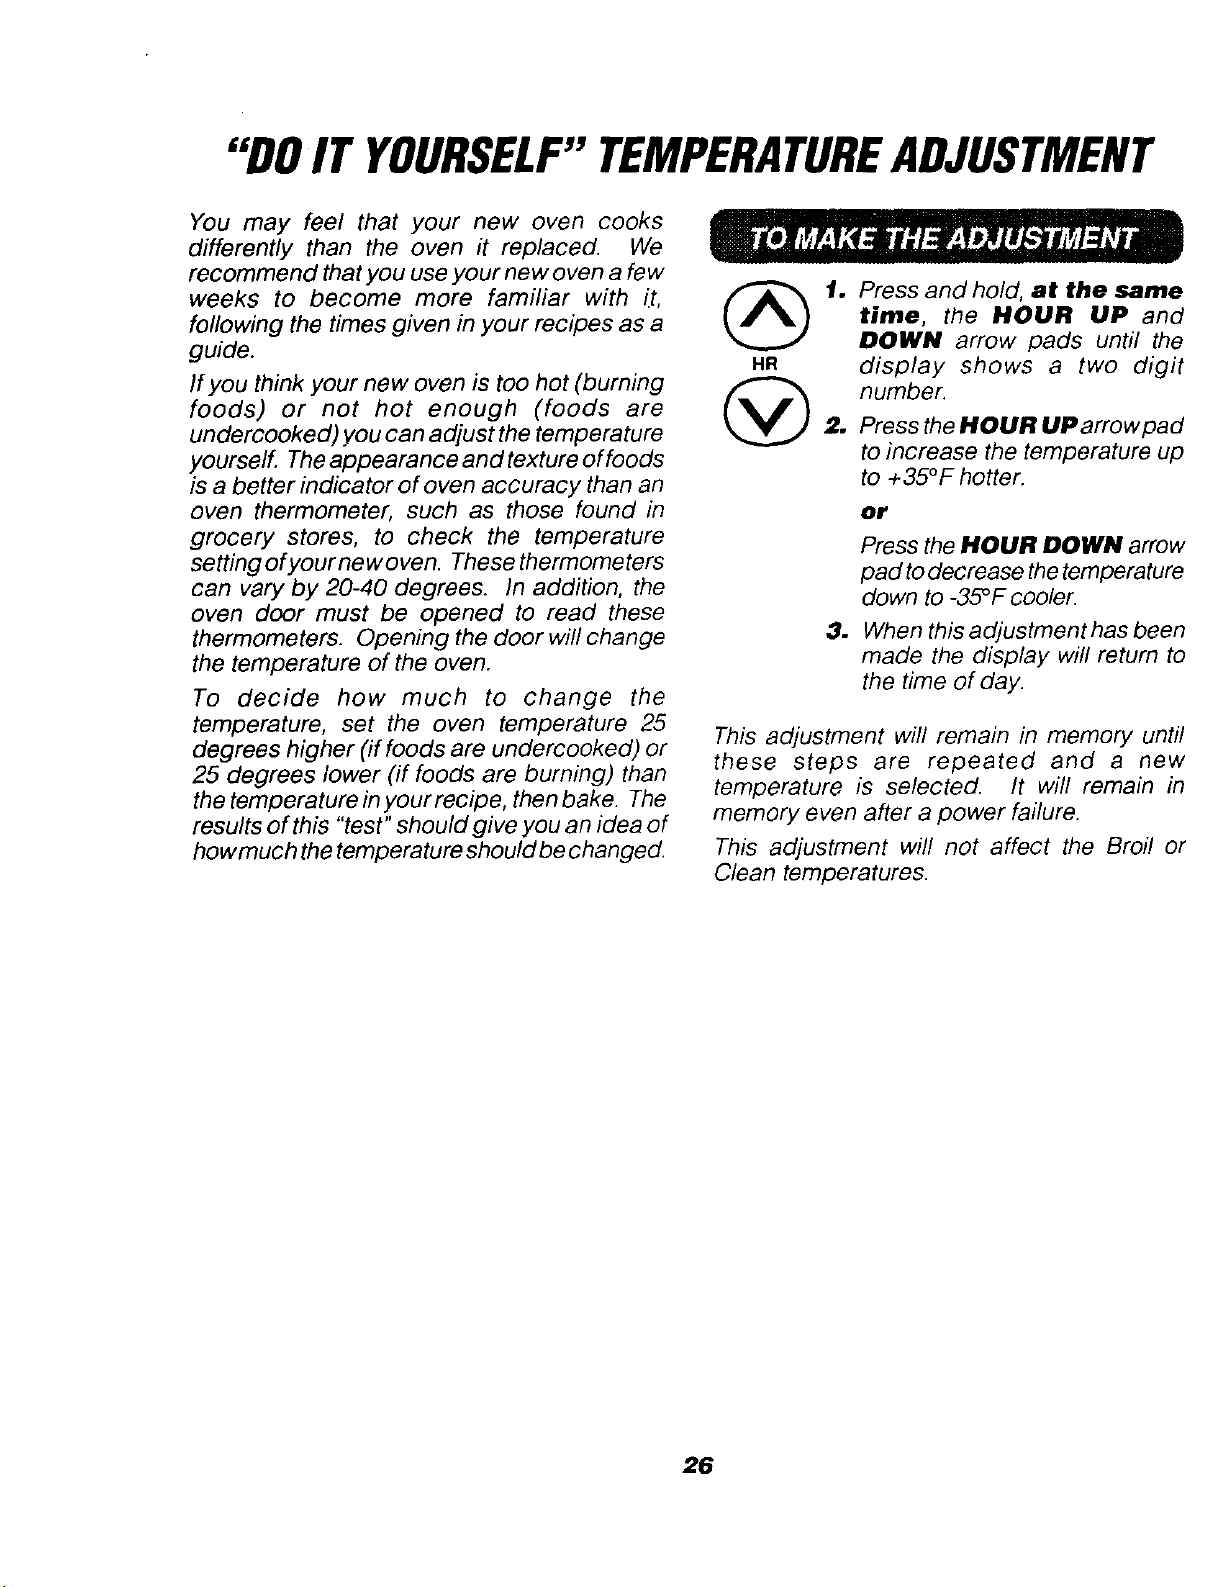
1. Press and hold, at the same
1
time, the HOUR UP and
DOWN arrow pads until the
display shows a two digit
number.
Press the HOUR UP arrowpad
to increase the temperature up
to +35°F hotter.
or
Press the HOUR DOWN arrow
pad to decrease the temperature
down to -35°F cooler.
When this adjustment has been
made the display will return to
the time of day.
This adjustment will remain in memory until
these steps are repeated and a new
temperature is selected. It will remain in
memory even after a power failure.
This adjustment will not affect the Broil or
Clean temperatures.
26

Fortherepairor replacementpartsyouneed
delivereddirectlytoyourhome
Call7 am - 7 pm, 7 days a week
1-800-366-PART
(1-800-366-7278)
Forin-homemajorbrandrepairservice
Call24 hours a day,7 days a week
1-800-4-REPAIR
(1-800-473-7247)
Forthelocationofa
SearspartsandRepairCenterinyourarea
Call24 hours aday,7 days aweek
1-800-488-1222
Forinformationonpurchasinga Sears
MaintenanceAgreementortoinquire ,_-_S_'_i_S __
aboutanexistingAgreement _'_
Call9 am - 5 pro, Monday-Saturday
1-800-827-6655 _'_-"_7
SE/A,R8
America's Repair Speciafists
27

KENMORE ELECTRIC RANGE WARRANTY
Dear Customer:
Our constant efforts are
directed toward making
sure your new Kenmore
Range will arrive at your
home In perfect condl-
ion and will give you
proper performance. As
)art of these efforts, we
feel itis our responsibil-
Ity to provide you with
this warranty for your
range.
Recycle_ Paper
j,
FULL ONE YEAR WARRANTY ON THE FUNCTIONING
PARTS EXCEPT GLASS PARTS
If, within one year from the date of installation, any part, other than a glass
fails to fuji€titan t._operly due to a defect in material or workmanship,
_rs will repair or r,_:_,_ce it, free of charge.
FL_LL3e-DAY W_i_;:A_' TY ON GLASS PARTS AND FINISH OF PONCE.
LA_N ENA;'_ _ _'_HTED OR BRIGHT METAL FINISHED PARTS
If, within 30 d,_ _ _ , = _," _Ie o_'Installation, any glass part or the finish
on any porcei_it_ _r_._mel, _ainled or bright metal part Is defective in
material or workr,_3qshi_, Sears will replace the part, free of charge.
FULL 9D-DAY WARRANTY ON MECHANICAL ADJUSTMENTS
For 90 days from the date of Installation, Sears will provide, free of charge,
any mechanical adjustments necessary for proper operation of the range,
except for normal maintenance.
If the range is subjected to other than private family use, the above
warranty coverage is effective for only 90 days.
WARRANTY SERVICE IS AVAILABLE BY CONTACTING THE
NEAREST SEARS SERVICE CENTER/DEPARTMENT IN THE
UNITED STATES
This warranty applies only while this product isin use in the United States.
This warranty gives you specific legal rights, and you may also have other
rights which vary from state to state. SEARS, ROEBUCK and CO.
Dept. 817 WA
Hoffmnn Estates, IL 60179
WE SERVICE WHAT WE SELL
"We Service What We Sell" is our assurance to you that you can depend on Sears for service because Seers service Is
nationwide.
Your Kenmore Range has added value when you consider that Sears has a service unit near you staffed by Sears trained
technicians.., professional technicians specifically trained on Sears appliances, having the parls, tools and equipment
to ensure that we meet our pledge to you -- "We Service What We Sell!"
TO FURTHER ADD TO THE VALUE OF YOUR RANGE, BUY A SEARS MAINTENANCE AGREEMENT.
Kenmore Ranges are designed, manufactured and tested
for years of dependable operation. Yet, any modern
appliance may require service from time to time. The
Sears Warranty plus the Sears Maintenance Agreement
provides protection from unexpectod repair bi!is ._nd
assures you of en]oylng maximum range efficiency.
Here's a comparative warranty and Maintenance _gre_-
ment chart showing you the benefits of a Sears Range
Maintenance Agreement.
Yeats of 0wnetsh_p Coverage lit year 2nd Yea_ 3rd yew
Raplacemerd of De_ctlw
1 p_r I_ o_ t_an Por¢ll_J_ W MA MA
or GI=Ss
_0 DAYS
2 Me¢h_ml¢_dAd_ustment W MA MA
30 DAyS
3 POr¢'I=J n a'_d GI='s P'r" W MA MA
CONTACT YOUR SEARS SALESPERSON OR LOCAL SEARS SERVICE
CENTER TODAY AND PURCHASE A SEARS MAINTENANCE AGREEMENT.
-- , _p ,
Kenmore ° America's Best Selling Appliance Brand
Sold by SEARS, ROEBUCK AND CO. Hoffman Estates, IL 60|79
II I
-- Printed in the United States--