Loading ...
Loading ...
Loading ...
CAUTION:AVOIDINJURY.Read
_, andunderstandtheentireSafety
section before proceeding.
SERVICE POSITION
Put unit into service position for easy access
to underneath the deck.
CAUTION: Avoid fuel spills. Follow
steps below to help prevent fuel
spills. If fuel leaks into air cleaner,
replace air cleaner. ALWAYS clean
up any spilled fuel.
1. Place unit on a flat, level surface.
2. Disconnect spark plug wire.
3. Remove fuel cap, place a piece of
plastic bag over the opening and tighten
cap securely.
4. Tip unit onto right side.
Make sure unit is secure and will not tip
over.
IMPORTANT: Remove plastic from fuel cap
after unit is upright and service is complete.
HANDLEBAR HEIGHT
To adjust (Figure 14):
1. Place a hole at the bottom of the braces
over the pins on the bracket.
NOTE: To fold handlebars flat for storage,
pull the speed control rod (if equipped) all the
way back, disconnect braces from support
bracket, and fold handlebar forward. Do not
bend speed control rod.
Hole
Pin
Figure 14
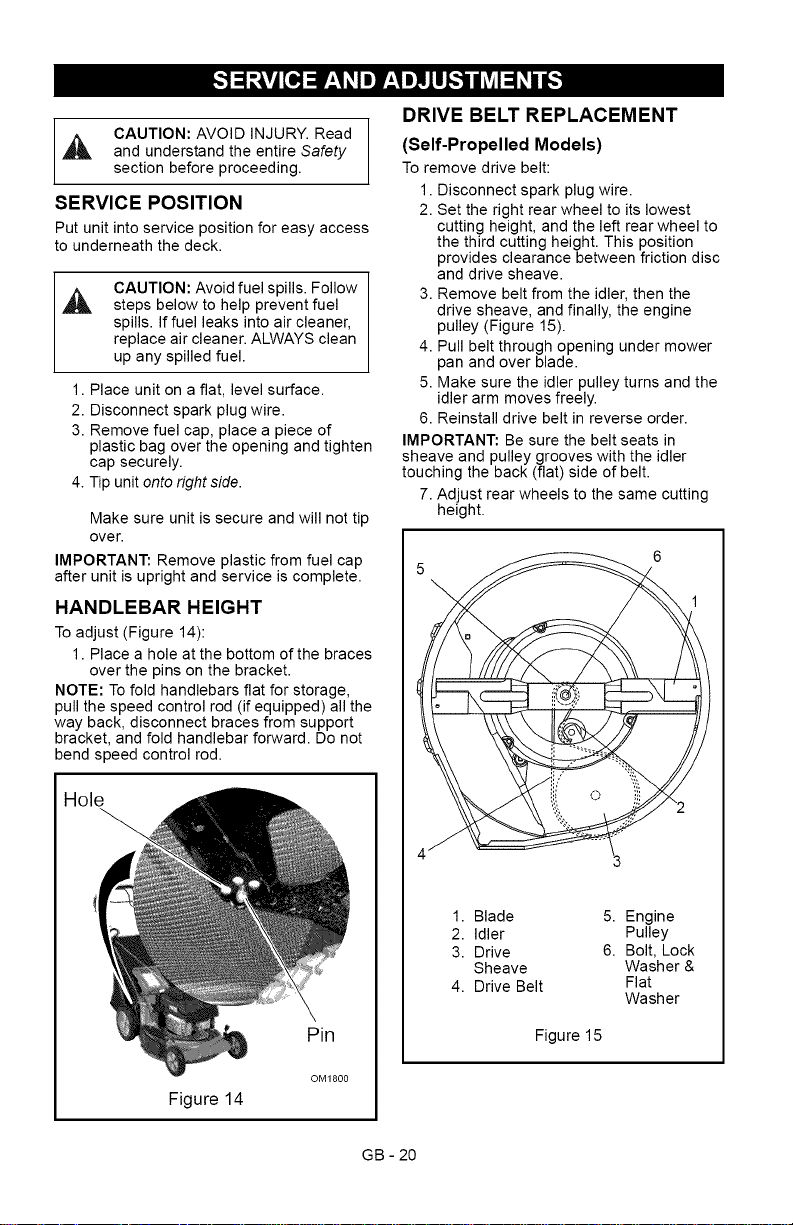
DRIVE BELT REPLACEMENT
(Self-Propelled Models)
To remove drive belt:
1. Disconnect spark plug wire.
2. Set the right rear wheel to its lowest
cutting height, and the left rear wheel to
the third cutting height. This position
provides clearance between friction disc
and drive sheave.
3. Remove belt from the idler, then the
drive sheave, and finally, the engine
pulley (Figure 15).
4. Pull belt through opening under mower
pan and over blade.
5. Make sure the idler pulley turns and the
idler arm moves freely.
6. Reinstall drive belt in reverse order.
IMPORTANT: Be sure the belt seats in
sheave and pulley grooves with the idler
touching the back (flat) side of belt.
7. Adjust rear wheels to the same cutting
height.
1. Blade 5. Engine
2. Idler Pulley
3. Drive 6. Bolt, Lock
Sheave Washer &
4. Drive Belt Flat
Washer
Figure 15
GB - 20
Loading ...
Loading ...
Loading ...