Loading ...
Loading ...
Loading ...
26 49-3000217 Rev 6
Installation Instructions
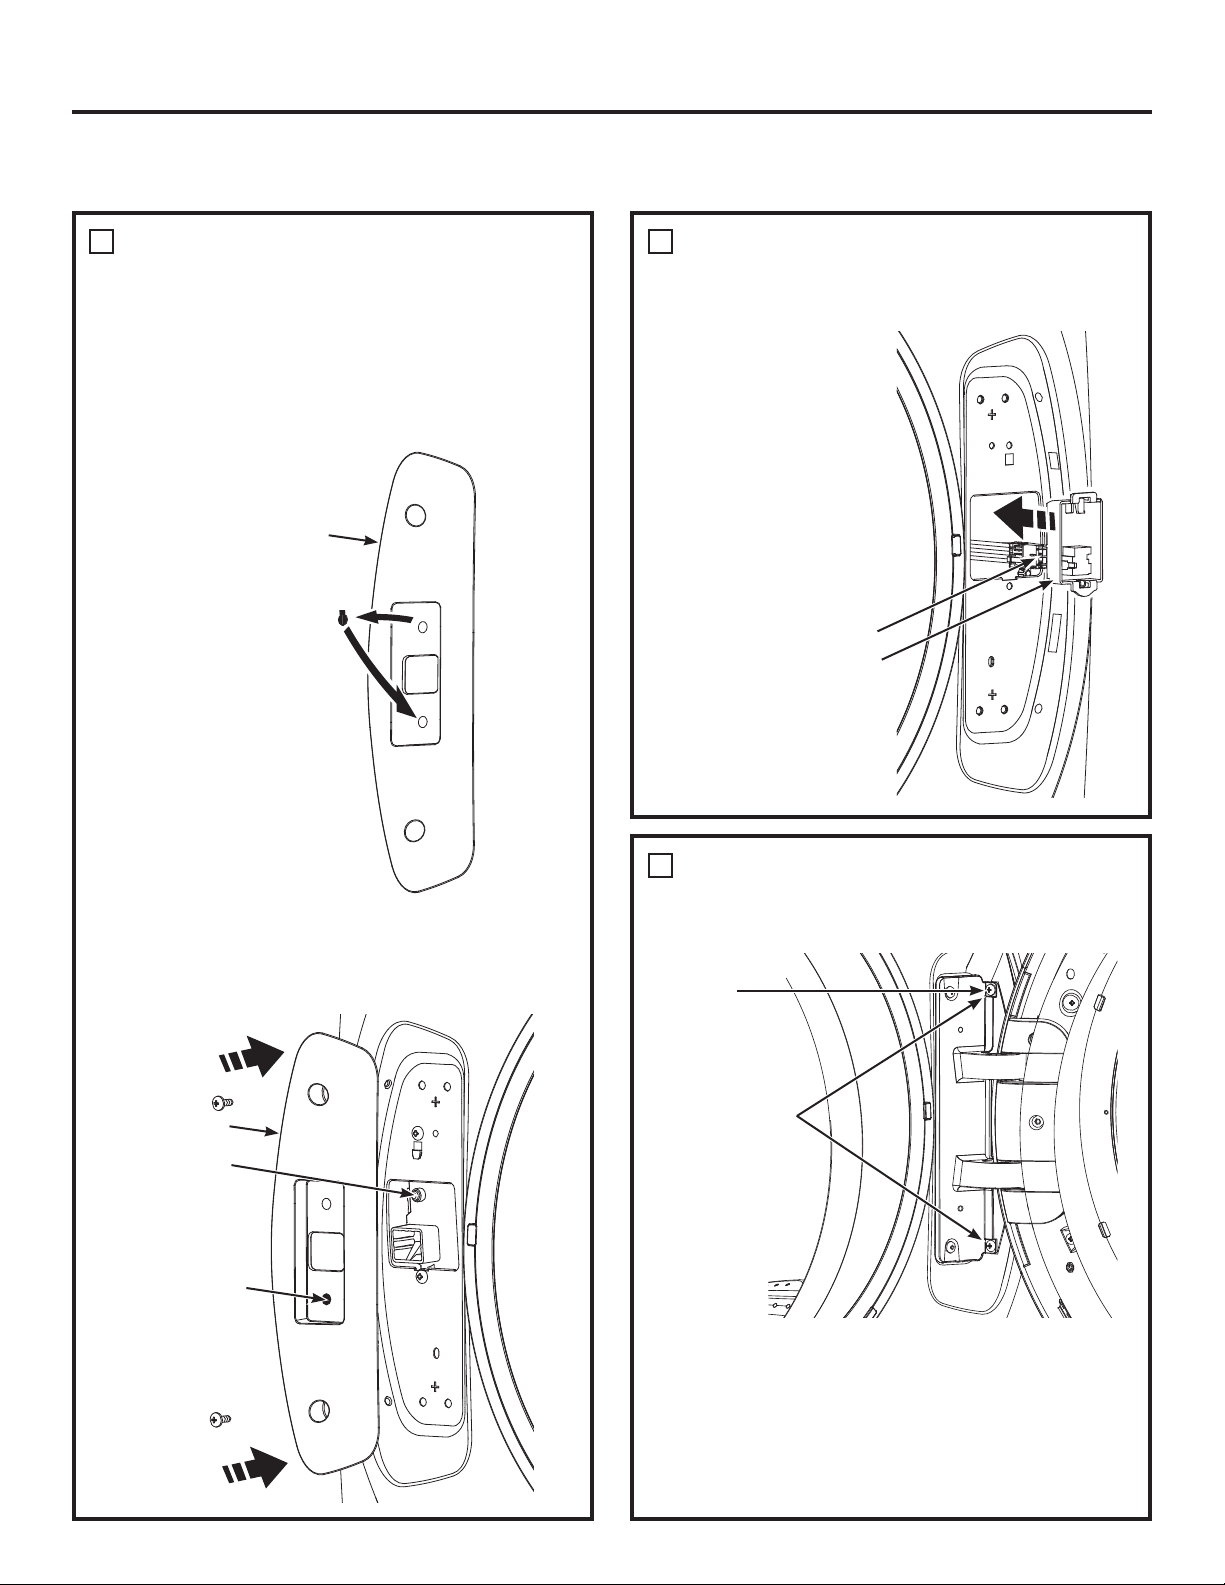
REMOVE LOCK ASSEMBLY AND
INSTALL ON OPPOSITE SIDE OF
WASHER (CONTINUED)
• Remove the lock switch cover button from the back
of the lock cover plate and replace it in the opposite
hole in the lock cover plate.
NOTE: The cover button must be reinstalled into the
lower hole in the lock cover plate as shown.
7
RECONNECT
PIN CONNECTOR
FROM THE WASHER AND REPLACE
THE TERMINAL HOLDER
8
• Reconnect the
pin connector and
press the terminal
holder back into
the washer face on
the opposite side.
• Install the lock cover plate over the lock assembly,
making sure that the lock switch operates freely.
Replace its screws.
Pin Connector
Terminal Holder
REPLACE THE DOOR ASSEMBLY
9
• Lift the door assembly into place and secure it onto
washer face with its 6 screws.
• Close the washer door.
NOTE: Make sure the door opens and closes
correctly. If not, repeat all steps making sure all
parts and screws are securely seated.
• Connect power cord and turn on the breaker.
• Run the washer through a complete cycle to verify
proper operation.
Lock Cover Plate
Cover button
in lower hole
Lock Switch
REVERSING THE DOOR SWING
(
OPTIONAL ON SOME
MODELS ONLY
)
Replace 6 screws
into the hinge and
secure into the
washer face
Replace this
screw first
Press the cover button out,
from front-to-back,
to remove it
Rotate the cover button,
from top-to-bottom, and
press it into the back of
the lower hole
Front Side View
Lock Cover Plate
Loading ...
Loading ...
Loading ...