Loading ...
Loading ...
Loading ...
49-3000217 Rev 6 25
Installation Instructions
REMOVE LOCK ASSEMBLY AND
INSTALL ON OPPOSITE SIDE OF
WASHER (CONTINUED)
7
REVERSING THE DOOR SWING (OPTIONAL ON SOME
MODELS ONLY)
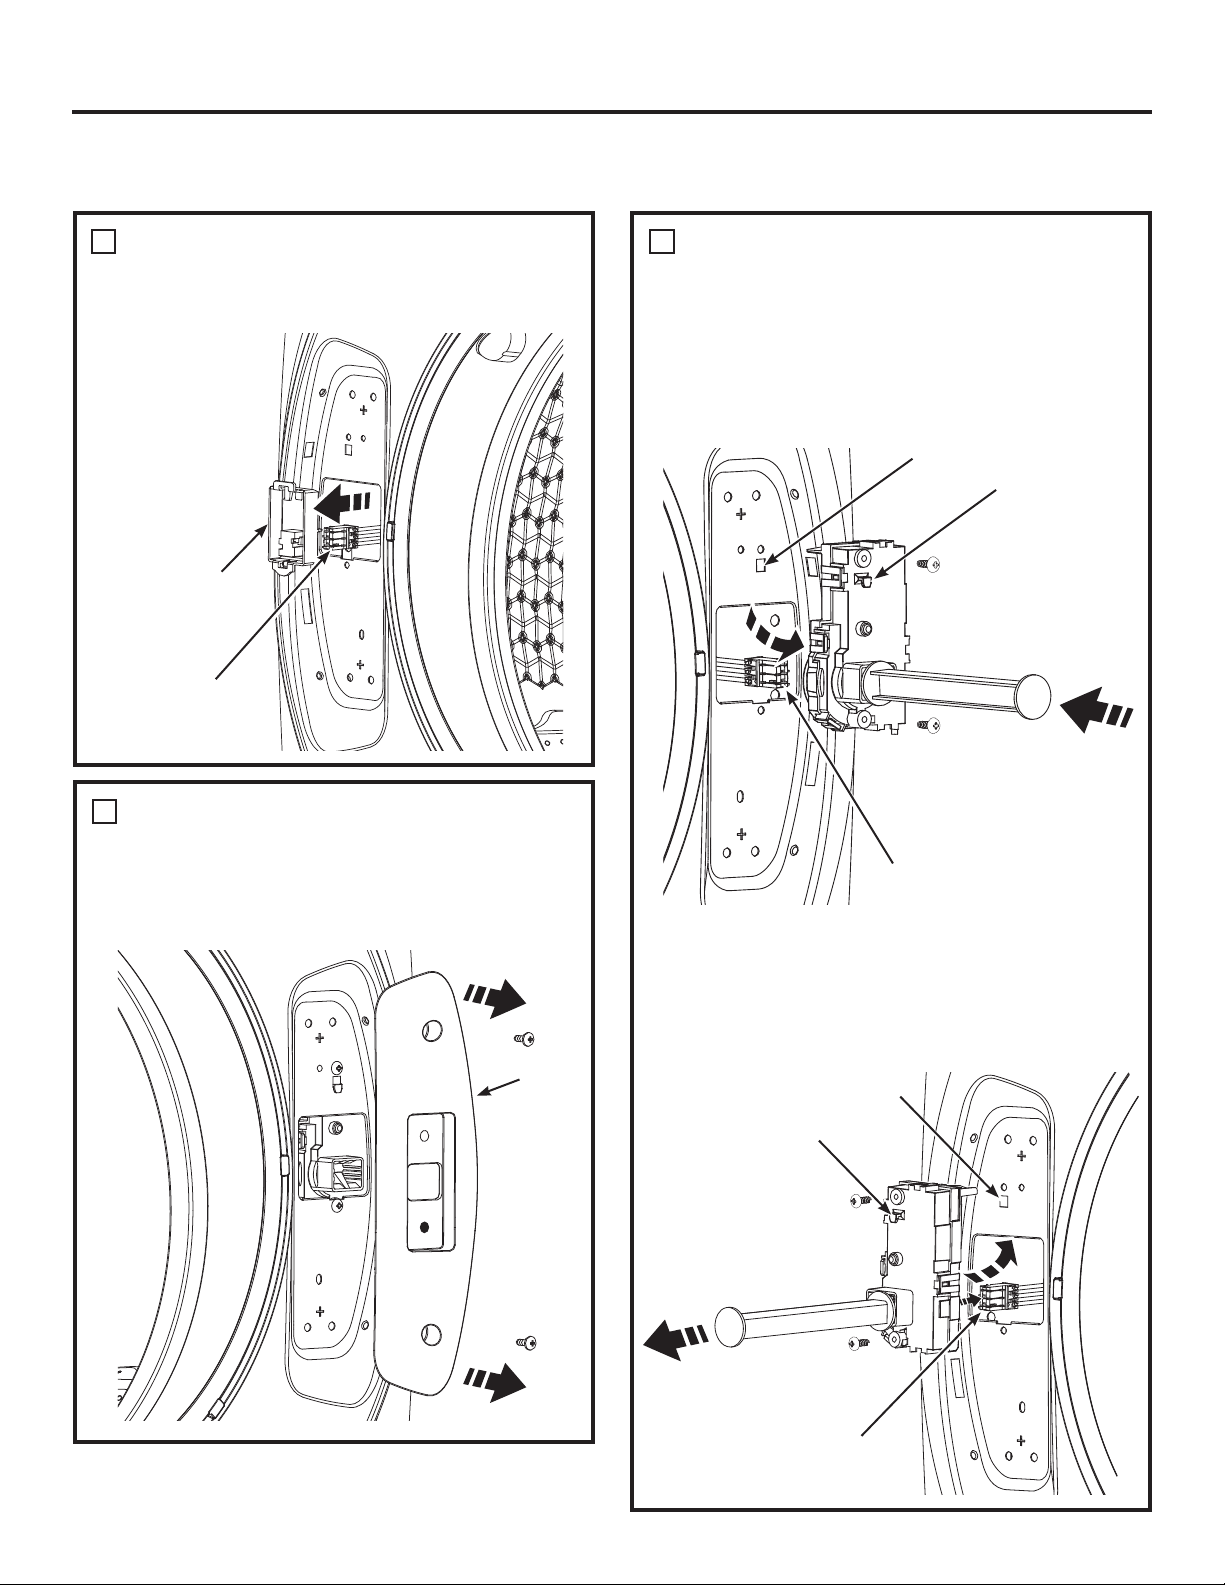
REMOVE THE TERMINAL
HOLDER AND DISCONNECT THE
PIN CONNECTOR FROM WASHER
• Using your
fingers, pry the
terminal holder
from the washer
face.
• Disconnect the
pin connector.
6
Terminal Holder
Pin Connector
REMOVE LOCK ASSEMBLY AND
INSTALL ON OPPOSITE SIDE OF
WASHER
• Remove the 2 screws from the lock cover plate and
remove it from the washer face.
7
Lock
Cover
Plate
• Insert the provided lock bar into the lock mechanism
in the washer face. Remove the lock assembly by
removing its two screws, using the lock bar to lift it up
to unhook, tilting and pulling it out of the washer face.
Disconnect its pin connector by unsnapping its locks.
Insert Lock Bar
Remove
Assembly
Pin Connector
Hook Window
Hook
• Do NOT rotate lock assembly. Move it to the opposite
side of the washer and connect the pin connector making
sure it is fully snap locked together. Tilt and insert
the lock assembly into the washer face, lift it up and
latch its hook into its window. Replace its screws.
Remove the lock bar from the assembly and retain
for future use.
Remove lock bar
Replace
Assembly
Pin Connector
Hook Window
Hook
Loading ...
Loading ...
Loading ...