Loading ...
Loading ...
Loading ...
!
6
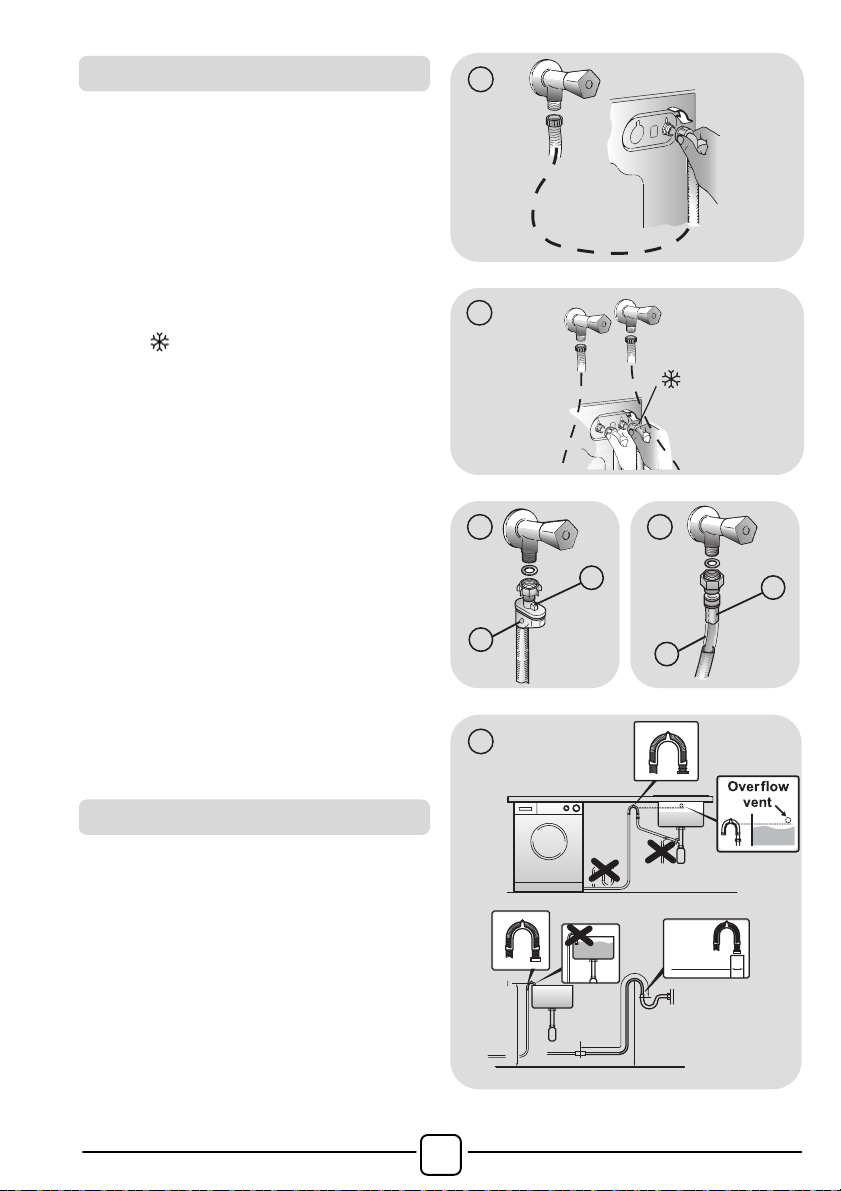
! Connect the water hose to the water
supply faucet (fig. 3) only using the hose
supplied with the appliance (do not
reuse old hose-sets).
! Some models may include one or more of
the following features:
! HOT&COLD (fig. 4):
water mains connection settings with hot
and cold water for higher energy savings.
Connect the grey hose to the cold water
faucet
and the red one to the hot water
faucet. The machine can be connected to
the cold water faucet only: in this case, some
programs may start a few minutes later.
! AQUASTOP (fig. 5):
a device located on the supply hose that
stops water flow if the tube deteriorates;
in this case, a red mark will appear in the
window “A” and the hose must be
replaced. To unscrew the nut, press the
one-way lock device "B".
! AQUAPROTECT – SUPPLY HOSE WITH
GUARD (fig. 6):
Should water leak from the primary
internal hose "A", the transparent
containment sheath "B" will contain water
to permit the washing cycle to complete.
At the end of the cycle, contact the
Customer Service Centre to replace the
supply hose.
! The washing machine should be installed
in its final position such that the water fill
hose is not kinked or trapped. The
corrugated drain hose should be inserted
into a suitable drain pipe that is at a
height between 50 cm and 85 cm above
the floor
using the curved drain hose
support. If an under sink connection is
used the drain hose must be routed
above the sink overfill opening to prevent
back siphoning. Care must be taken to
avoid kinking or trapping the drain hose
(fig. 7).
3
1
4
B
A
5
B
A
6
min 50 cm
max 85 cm
+2,6 mt
max
max 100 cm
min 4 cm
7
Water connections
Setting
Loading ...
Loading ...
Loading ...