Loading ...
Loading ...
Loading ...
• Do not lean' oh hand_. This takes
weight off the wheels and reduces trac-
tion. To get through a really tough sec-
tion of sod or hard ground, apply upward
pressure on handle or lower the depth
stake.
TINE SHEAR PINS
The tine assemblies on your tiller are
secured to the tine shaft with shear pins
(See "FINE REPLACEMENT" in the
Service and Adjustments section ofthis
manual).
If the tiller is unusually overloaded or
jammed, the shear pins are designed to
break before internal damage occurs to
the transmission.
• If shear pin(s) break, replace only with
those shown in the Repair Parts section
of this manual.
i
F'_ .t",, (_
1
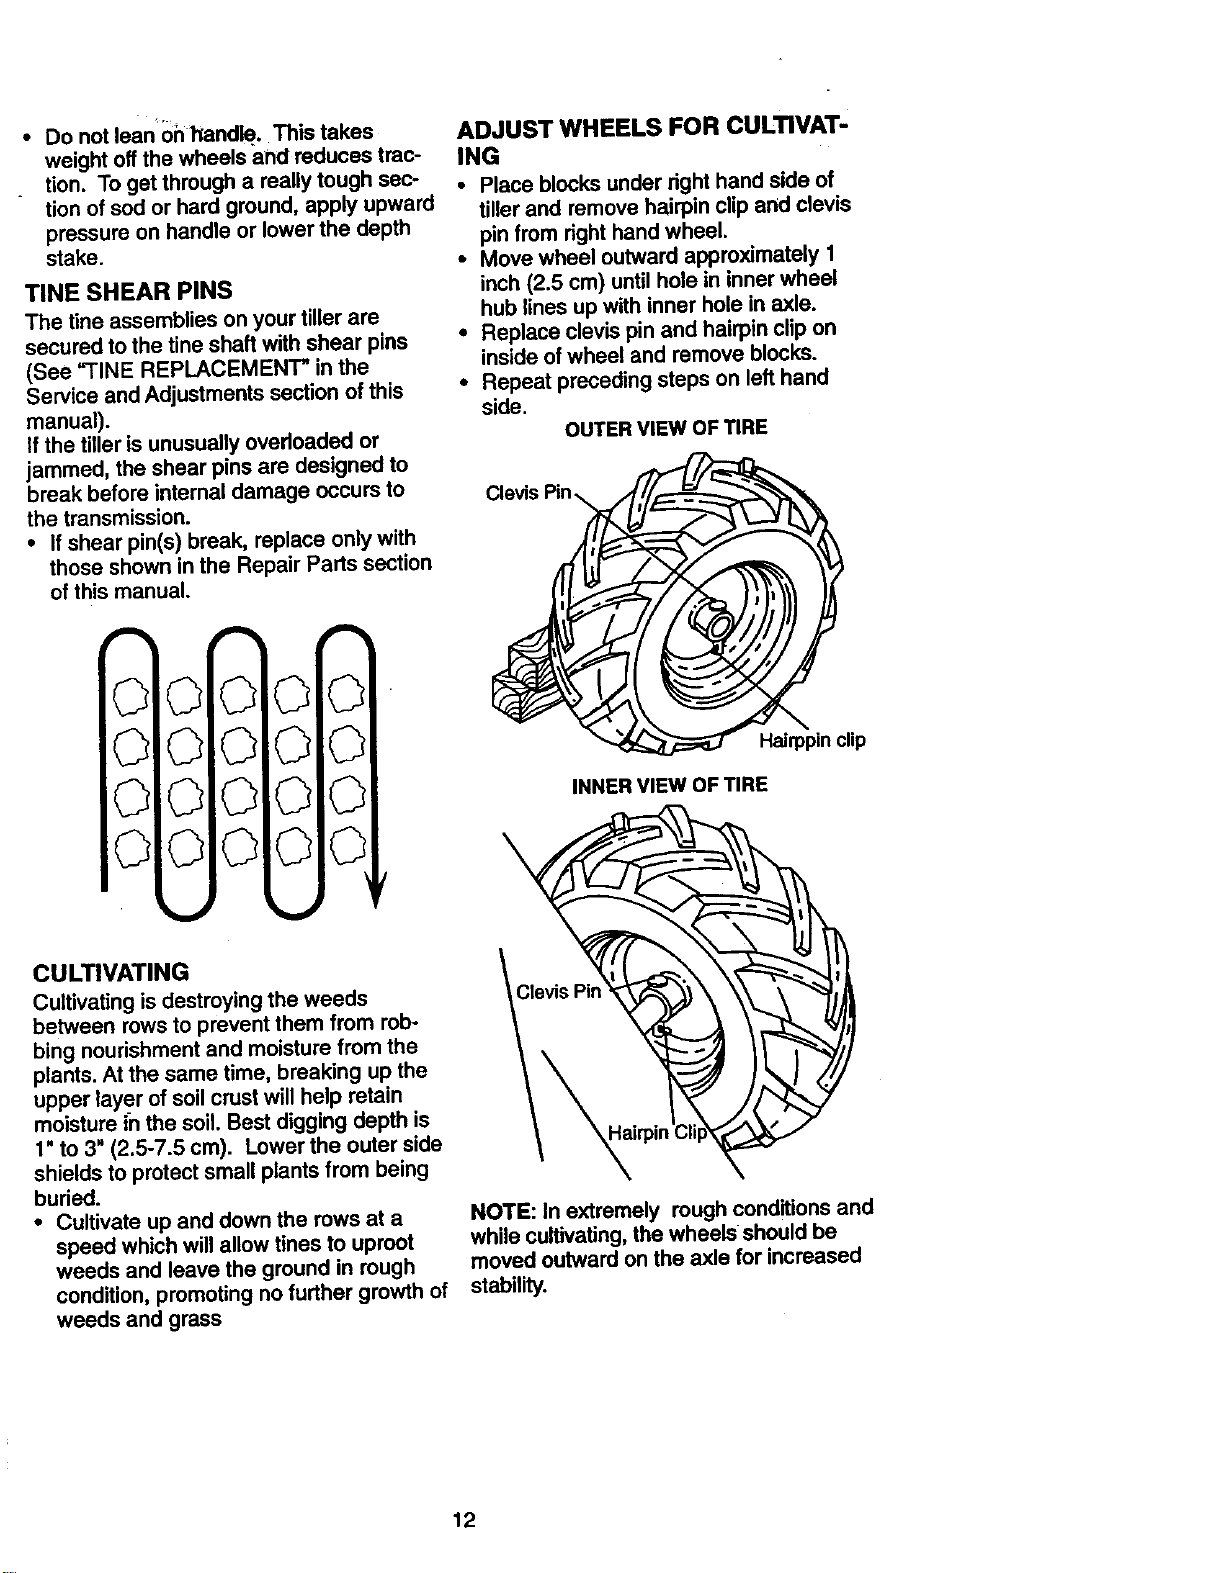
ADJUST WHEELS FOR CULTIVAT-
ING
• Place blocks under dght hand side of
tiller and remove hairpin clip and clevis
pin from right hand wheel.
• Move wheel outward approximately 1
inch (2.5 cm) until hole in inner wheel
hub lines up with inner hole in axle.
• Replace clevis pin and hairpin clip on
inside of wheel and remove blocks.
• Repeat preceding steps on left hand
side.
OUTER VIEW OF TIRE
Clevis Pin
Haiq_pinclip
INNER VIEW OF TIRE
CULTIVATING
Cultivating is destroyingthe weeds
between rowsto prevent them from rob-
bing nourishmentand moisturefrom the
plants. At the same time, breaking up the
upper layer of soilcrustwill help retain
moisture i-nthe soil. Best digging depth is
1"to 3" (2.5-7.5 cm). Lower the outer side
shields to protect small plants from being
buried.
• Cultivate up and down the rows at a
speed which willallow tines to uproot
weeds and leave the ground in rough
condition, promoting nofurther growth of
weeds and grass
NOTE: In extremely rough conditions and
while cultivating, the wheels should be
moved outward on the axle for increased
stability.
12
Loading ...
Loading ...
Loading ...