Loading ...
Loading ...
Loading ...
Safety
Information
◆ There must permanent & adequate ventilation of the room
when operating the range hood with appliances burning
gas or other fuels.
◆ Do not check the status of the filters when the range hood
is operating, wait at least 30 minutes after switching off to
avoid scalding.
◆ Do not touch the (Halogen) light within 30 minutes after
appliance use.
◆ Avoid operating a gas cooker when there is no pan on the
stove, it is a fire hazard and may cause damage to the
hood filters.
◆ Disconnect the electrical plug prior to any maintenance.
◆ This appliance is not intended for use by young children
and persons unless they have been adequately supervised
Features
2.1 This appliance is manufactured from top quality materials,
and offers superb streamlined effects.
2.2 With high suction power and low noise, it is designed to
remove cooking fumes from your kitchen quietly & effectively.
Installation
(
duct
is not supplied)
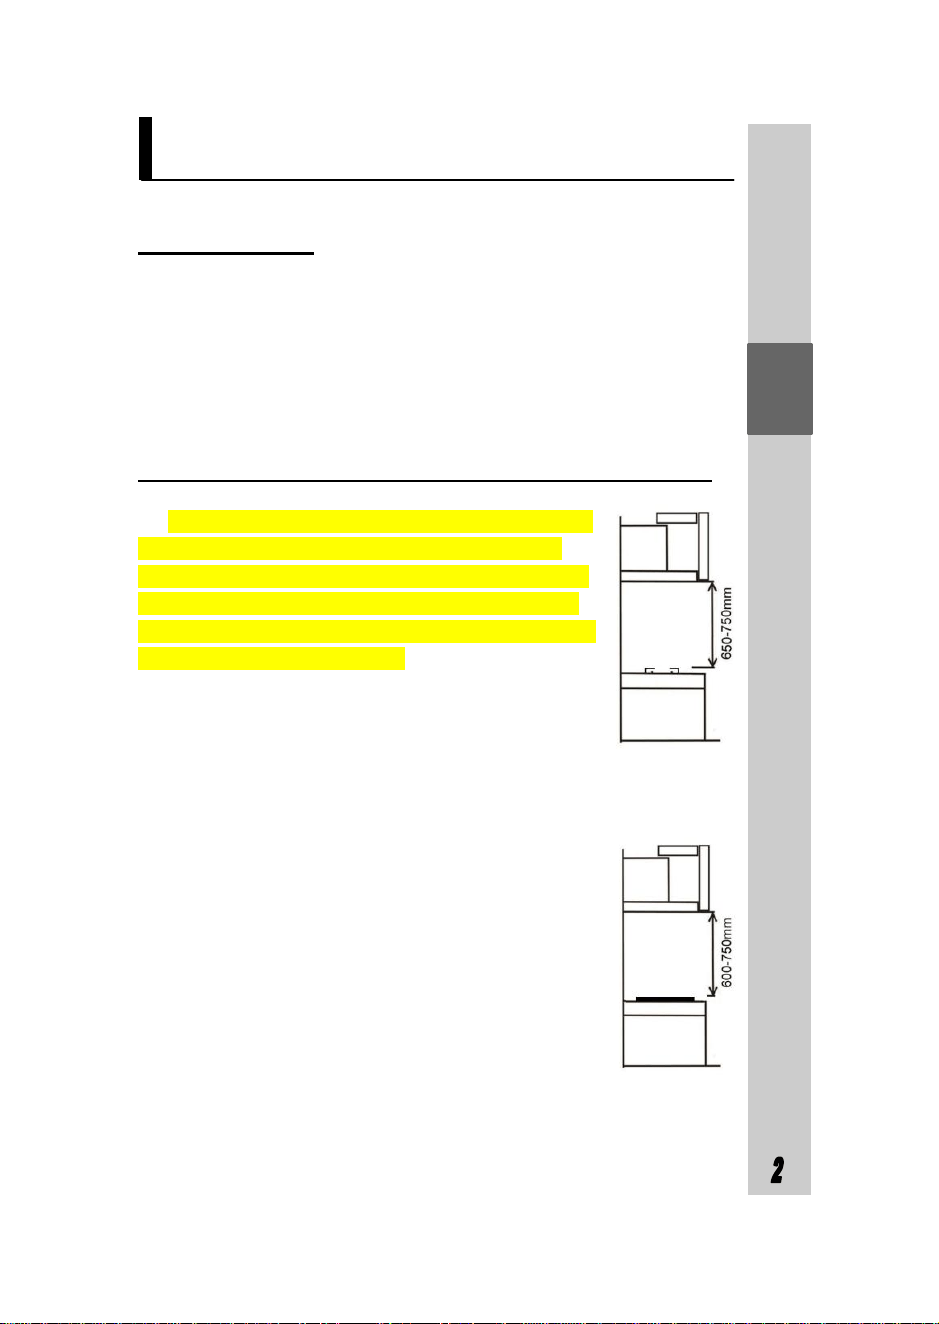
3.1 The clearance between the highest part of the highest
burner of a multi-burner gas cooking appliance and a
range hood or exhaust fan (overhead clearance), shall be
no less than 650mm for the range hood and 750mm for
an exhaust fan (pic.1a) and no less than 600mm above an
electric cooking product (pic.1b). The exhaust air must
not be discharged into a flue which is used for exhausting
fumes from other appliances burning gas or other fuels.
by a responsible person to ensure that they can use the
appliance safely.
◆ The range hood is for home use only and is not suitable
for outdoor, barbecue, and other commercial applications.
◆ The range hood and its filter should be cleaned regularly
for best performance.
◆ Before cleaning, please confirm that the power is
switched off.
◆ Building regulations concerning the discharge of exhaust
air have to be fulfilled.
◆ Don’t cook with an open flame under the range hood.
◆ For any technical issues ensure that a suitably qualified
person effects any repairs or inspection.
3.2 To install, drill 2 holes of Ø8mm on a sturdy wall
and in line with the hood.
3.3 Insert expending screws into the holes.
3.4 Fix drilling template on the wall (see pic 2).
3.5 The appliance should be embedded into the wall unit
or another support. This process should be carried out by
4 screws suitable for the kind of unit following the
instructions for the drilling of the holes as shown in (see
pic 3).
3.6 Attach the duct to the one way valve, and connect
it to the kitchen outlet vent (see pic 4).
pic 1a (gas
product)
pic 1b
(electric
product)
Loading ...
Loading ...
Loading ...