Loading ...
Loading ...
Loading ...
18
【Figure7】
8
5
SCREW
RUBBER
COVER
1
7
2
6
SCREW
CONEGEAR
6B
6A
Dishwasherinstallationsteps
●
.
.
.
.
1
2
3
4
5
9
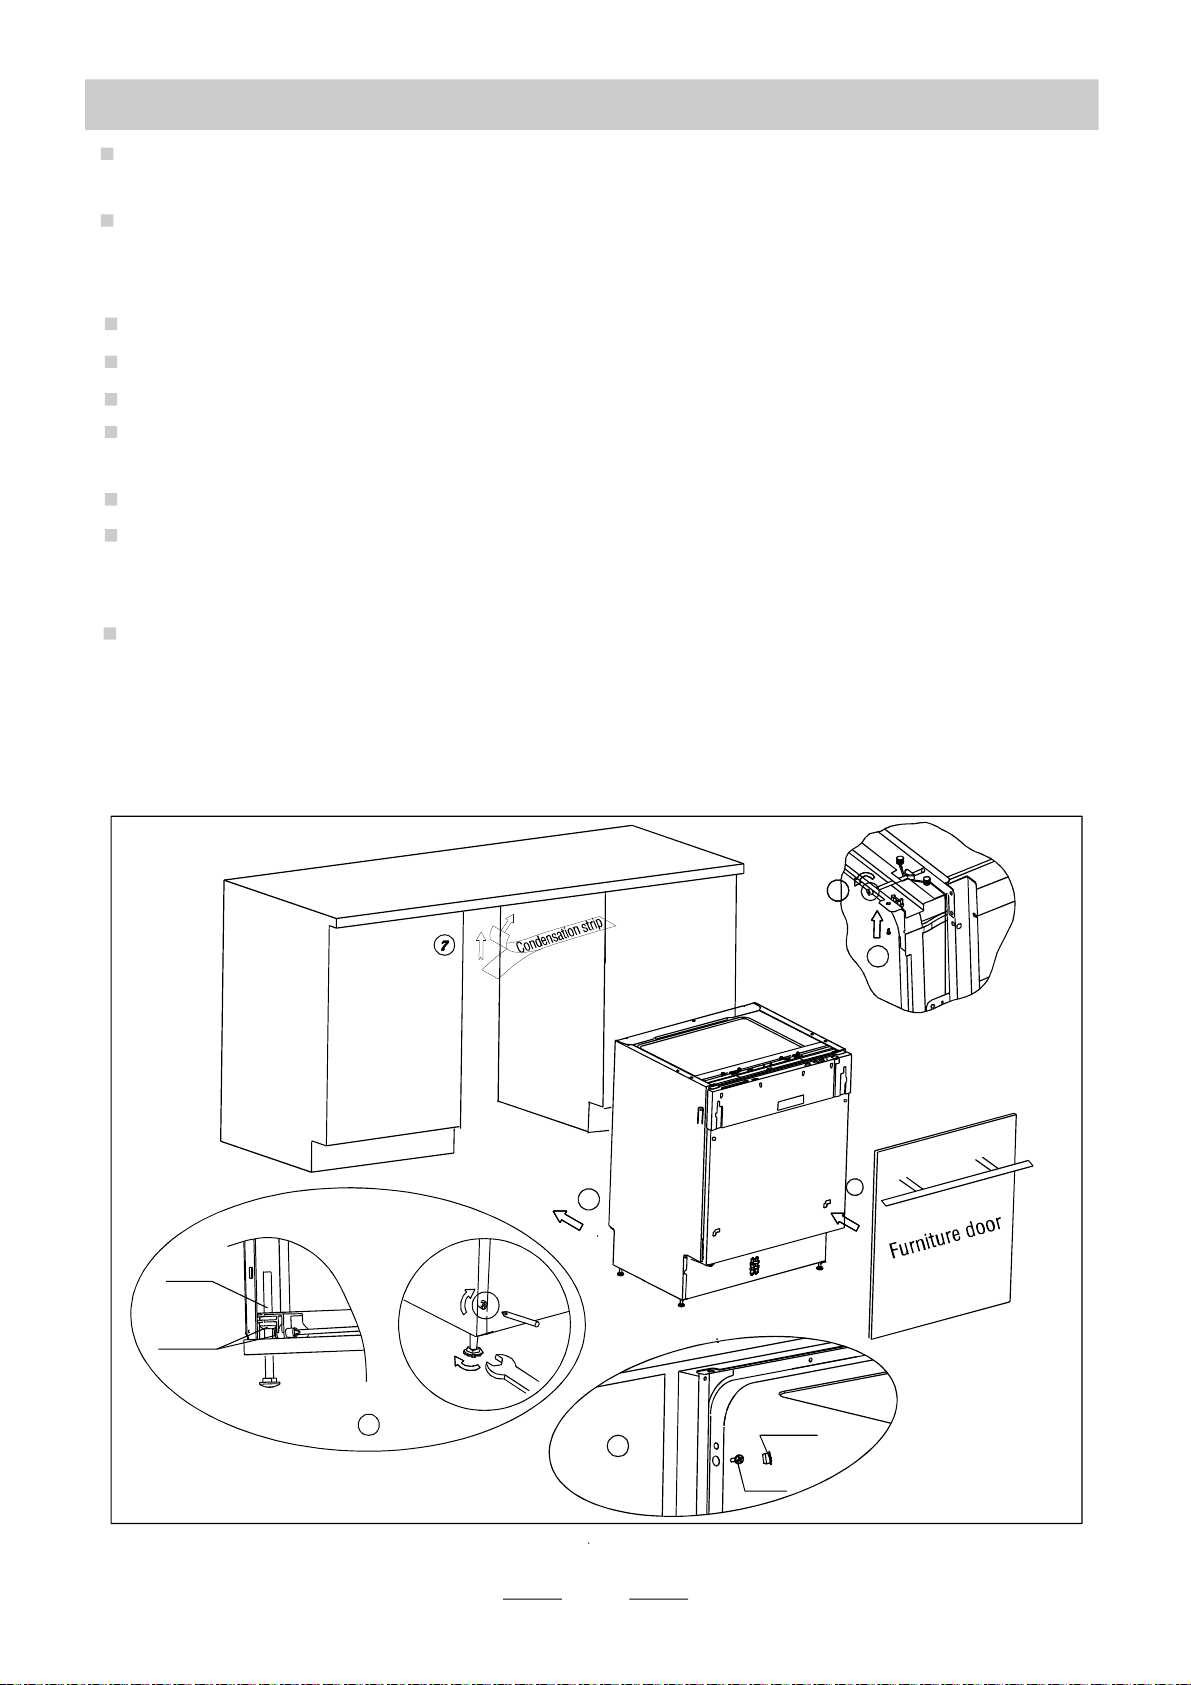
Installthefurnituredoortotheouterdoorofthedishwasherusingthebracketsprovided.Refer
tothetemplateforpositioningofthebrackets.
AdjustthetensionofthedoorspringsbyusinganAllenkeyturninginaclockwisemotionto
tightentheleftandrightdoorsprings.Failuretodothiscouldcausedamagetoyourdishwasher
(Illustration2)
Connecttheinlethosetothecoldwatersupply
Connectthedrainhose.Refertodiagram(Figure6)
Connectthepowercord
Affixthecondensationstripundertheworksurfaceofcabinet.Pleaseensurethecondensation
stripisflushwithedgeofworksurface.
Placethedishwasherintoposition.
Levelthedishwasher.Therearfeetcanbeadjustedfromthefrontofthedishwasherbyturning
thescrewsontheleftandrighthandsideofthecabinet(Illustration6A).Toadjustthefrontfeet,
useawrenchandturnthefrontfeetuntilthedishwasherislevel(Illustration6B).
Thedishwashermustbesecuredinplace.Therearetwowaystodothis:
A.Normalworksurface-securetotheworksurfacebyusingtwowoodscrewsensuringthe
dishwasherweightisnotbeinghitbythesurface(Illustration7).
B.Marbleorgraniteworktop-securethebrackettothesidepanelofthedishwasherandsecure
thedishwashertothefurniturehousing.Puttherubbercapoverthescrew(Illustration8).
6
7
8
Loading ...
Loading ...
Loading ...