Loading ...
Loading ...
Loading ...
7
● If no sidewall access panel/vent is available to reach
the rear wire connection of the appliance, plan for the
appropriate wire length to reach outside of the cabinet so
the wire connection can be made before installing.
NOTE: Furrion recommends dropping the 12V feed wire
from the upper rear of the cabinet down to the terminal
block. Temporarily affix the wires to the upper half of the
appliance with tape so that excess wire will droop without
risk of rubbing with the appliance chassis and floor during
installation.
Drainage Preparation
The cavity condensate drainage is captured in a drain pan
integrated with the unit. No external drainage needs to be
prepared at this point.
Installing the Refrigerator
Electrical Connection
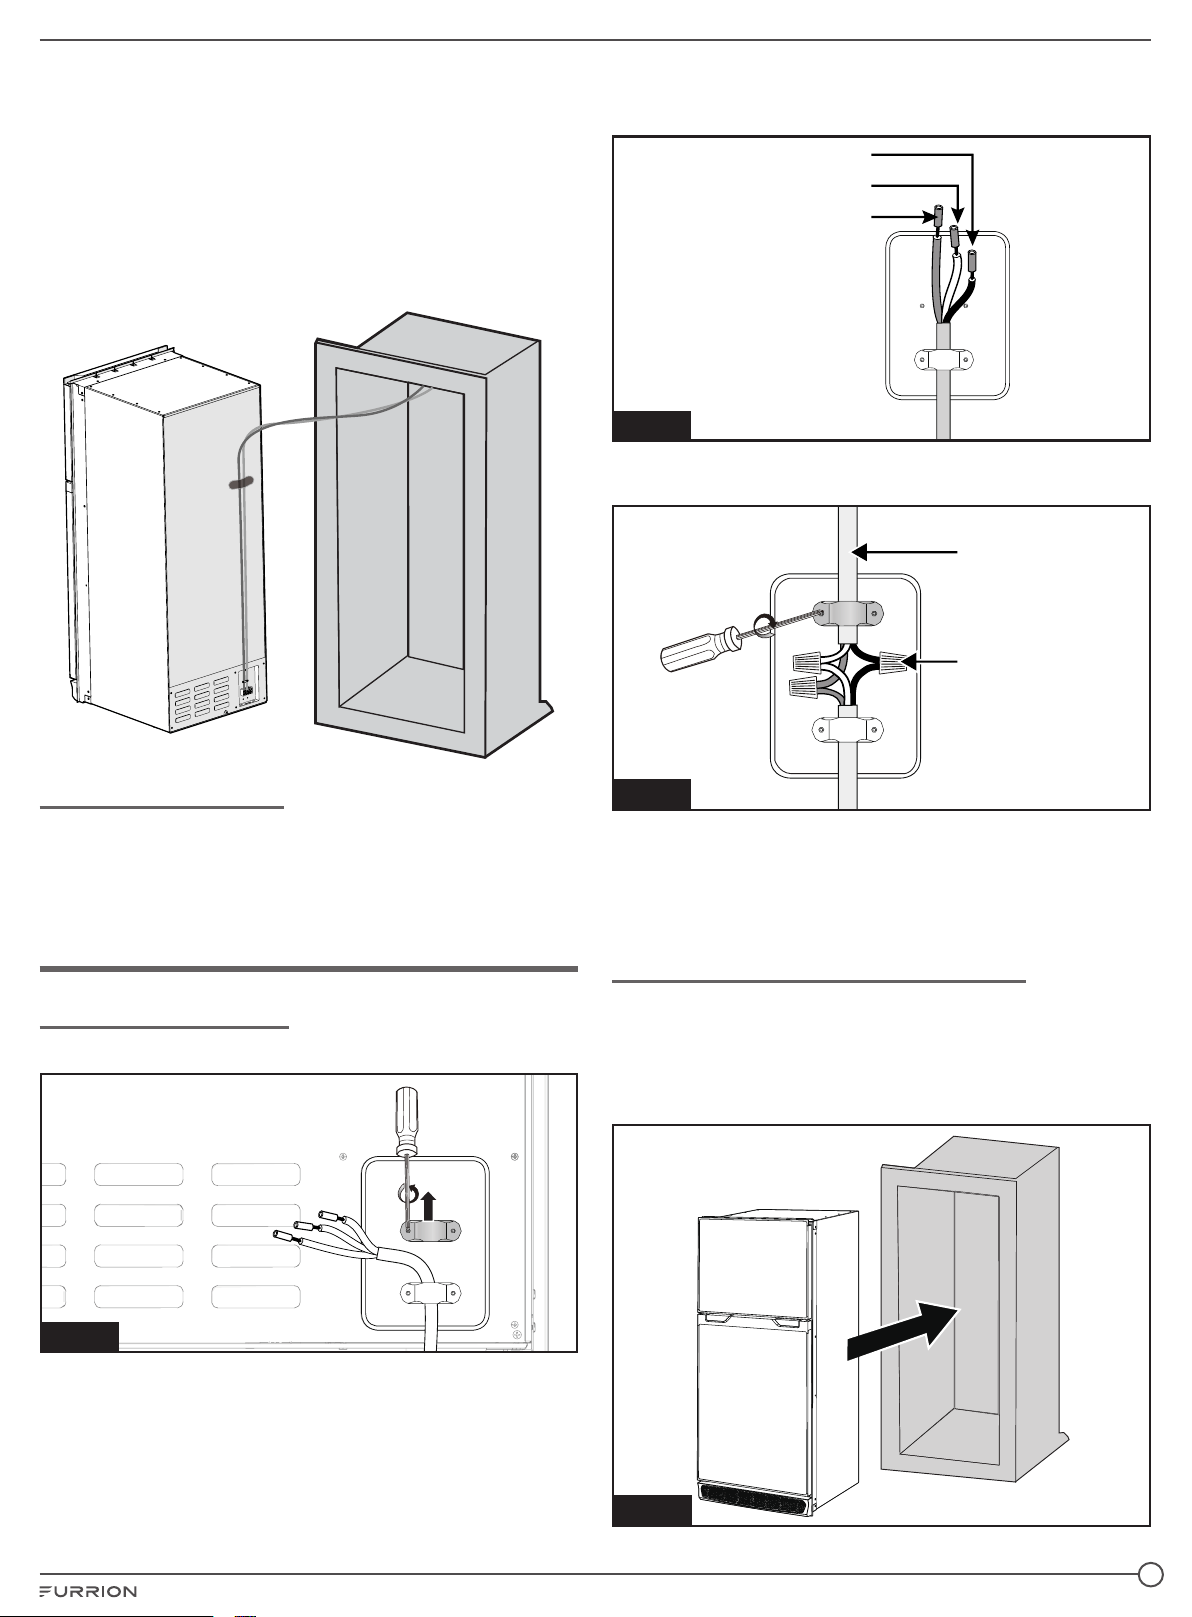
1. Remove the strain relief and connector cover. (Fig. 1)
Remove
Fig. 1
2. Connect the Red "+" to the 12V DC positive pole. Connect
the White "-" and green "GND" wire together with the 12V
DC negative pole. (Fig. 2)
White: -12V
Red: +12V
Green: Grounding
Fig. 2
3. Use the upper strain-relief for securing the wires going to
the battery. (Fig. 3)
Wire from Battery
Not Provided
Fig. 3
NOTE: The inverter’s input winding is electrically separated
from the output winding by an insulation at least equivalent
to DOUBLE INSULATION or REINFORCED INSULATION,
that is intended to supply an appliance or circuit at SAFETY
EXTRA-LOW VOLTAGE.
Installation without Sidewall Access
Slide the unit into the enclosure. Care should be taken
to avoid rubbing the chassis and wire together during
installation. (Fig. 4)
NOTE: Elevating the wire and use of wire sheathing/wire
loom will help protect the wire.
Fig. 4
Loading ...
Loading ...
Loading ...