Loading ...
Loading ...
Loading ...
FF
Gasket
X1
INSTRUCTIONS (continued)
INSTRUCTIONS (continued)
FUNCTION AND OPERATION (continued)
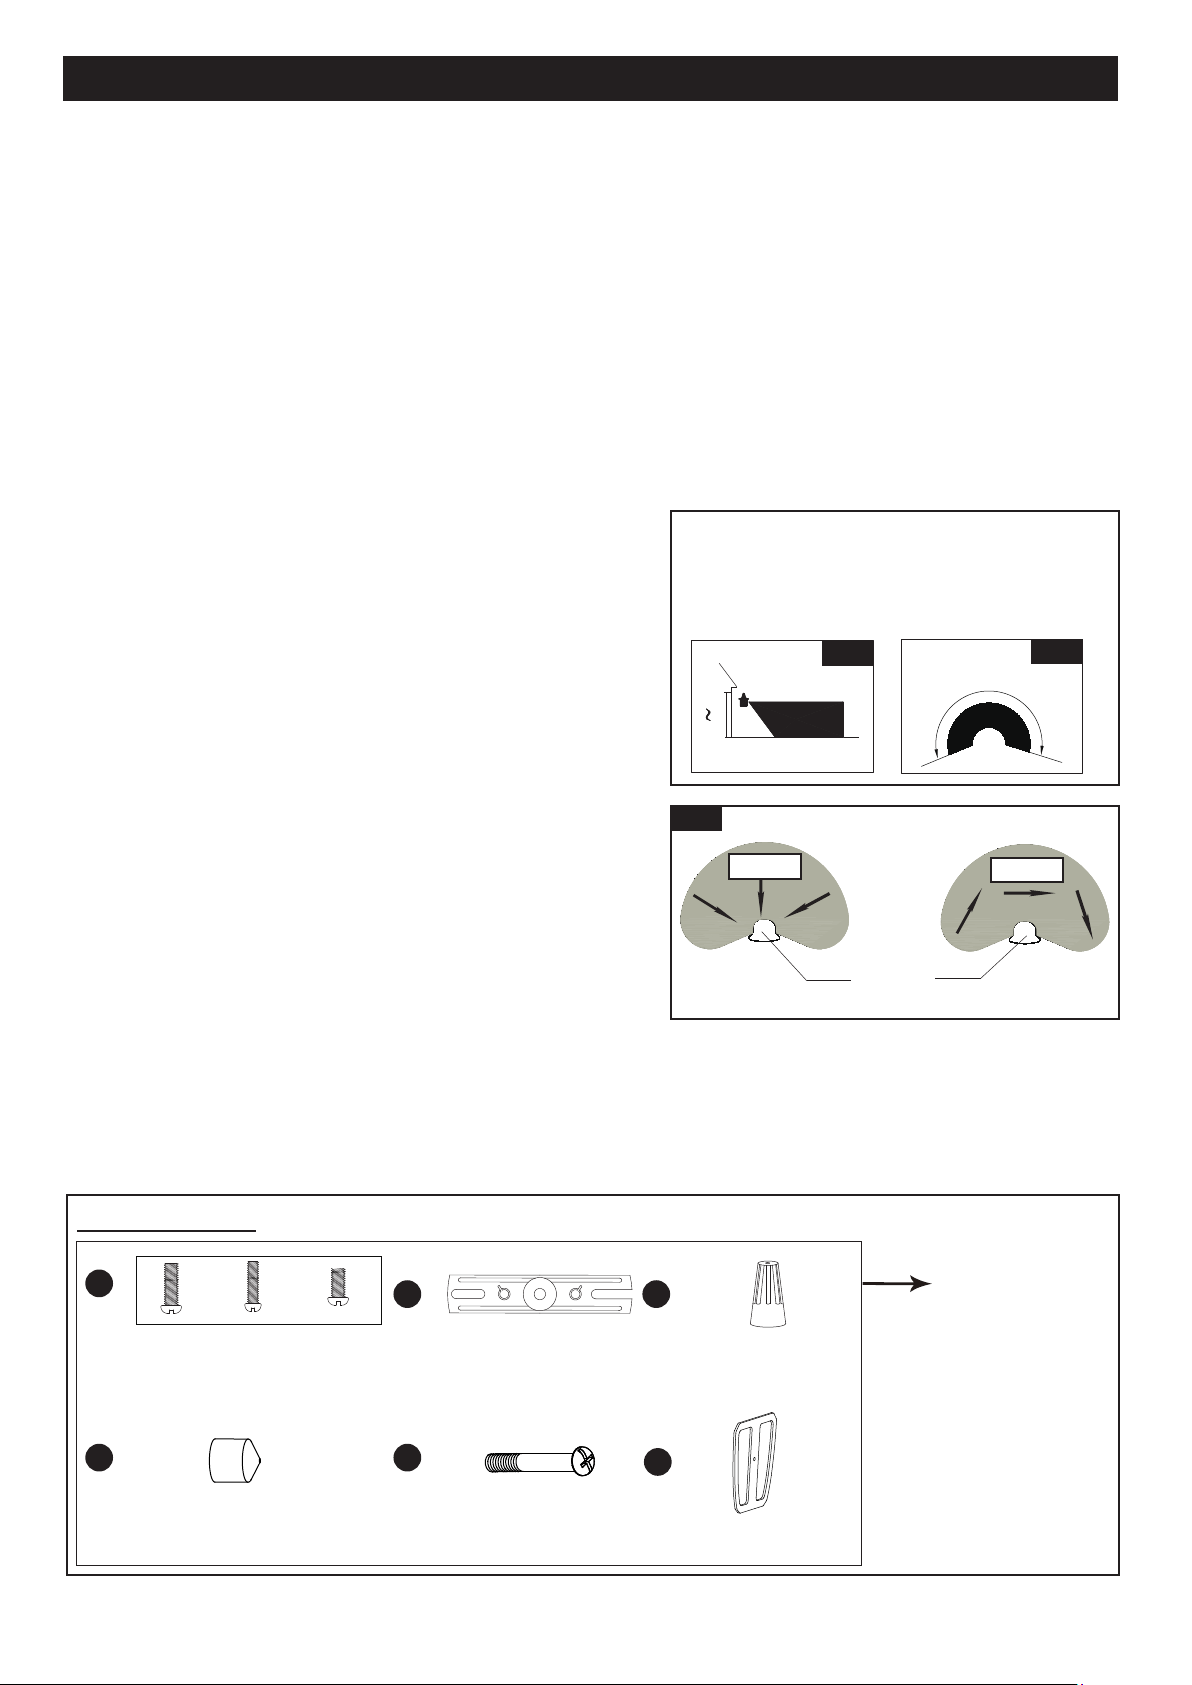
Spare Parts List:
The following parts are available for reorder if damaged or missing. Call our toll free at 1-800-887-6326.
Wire Connector
X3
AA
CCBB
DD EE
Decorative cover
X1
Mounting Screw
X2
Mounting Strap
X1
Fixture Mounting Screw
X1
Assembly Kit
6439MM (1 SET) for 356-9448
6440MM (1 SET) for 356-9449
Customization Options:
Shut-off Delay
● The shut-off delay is the length of time the light will stay at
brightness after motion is detected.
● You can set the shut-off delay by push the switch
so it points to the desired time setting (30s/1min/3min).
Notes:
1. The sensitivity of the motion sensor will increase as the
environmental temperature gets cooler. For best performance,
gently clean the lens with a soft cloth every 1 or 2 months to
ensure maximum sensitivity.
2. For best performance, install fixture at least 8 feet above the
ground. At such a height, the fixture will provide a detection
distance of up to 70 feet at 77 degrees Fahrenheit. (See Fig.8)
3. The sensor detects movement across a detection range of 240
degrees. (See Fig.9)
4. The sensor will be more sensitive to motion across its detection path than motion directly towards it. (See Fig.10)
5. To reduce possible nuisances, do not mount the fixture near a heat source like an air conditioner, vent or furnace
exhaust, or in a direction facing any reflective object or other nearby light source.
Fig.8
Fig.9
10'
8.0'
12.0'
70'
Where you install your fixture is important:
Be sure the light is mounted straight on the wall
or eave; otherwise, the detection distance may
be limited.
240˚
Fig.10
Motion
Least sensitive
Motion
Most sensitive
Sensor
Unlink the unit from the Link Group
Press and hold the Link button on the sensor head for 3 seconds, the light will flash 3 times to confirm reset and remove
from the Link Group.
All lights will need to be reset before setup the Link Group.
Strongly recommended to set all the linked lights to the same MODE to avoid any confusion of function error.
7. Manual Override (nighttime operation only)
● To temporarily override the settings in “AUTO” or “3H” mode for on-demand continuous high-level brightness at
night, turn the wall switch “OFF” then turn it “ON” twice within 3 seconds, the light remains on all night long.
To shift back to “AUTO” or “3H” mode, turn the wall switch “OFF” then turn it “ON” twice within 3 seconds again.
(See Fig.7)
● The light turns off automatically at dawn.
Note: When light units are linked, the Manual Override action is also linked when MODE settings are in
Auto or 3H.
Page 6 of 8
211019
Loading ...
Loading ...